Behind the Scenes: 70’s Manga Shader
INTRODUCTION
Hi, my name is Pierre Schiller. I’m a 3D animator and VFX compositor with 20+ years of experience in commercial advertising, games, and VFX for cinema. I graduated with a master’s degree in 3D animation in the year 2001 in Barcelona, Spain. Reelworks:
I was a former Softimage user, but I became a Blender Foundation Certified Trainer (2018-2019). Since then, I’ve helped a lot of 3D artists to integrate Blender into their workflows for animation and VFX in live workshops. I share online training videos on my YouTube channel and I’ve developed a specialized course for anime shading.
I also do technical reviews and consultation concerning third-party 3DCC integrations with Blender. This expertise is built upon an extensive software background developed over years of involvement directly with publicity agencies, TV commercials, and cinematic production.
INSPIRATION
Mazinger Z is a 70’s anime and manga created by Go Nagai. In the U.S, the series was called “Tranzor Z” but in the rest of the world, it continued with its original name. Go Nagai was writing stories of multi-verses with different robot heroes defending earth from kaiju monsters way before it was even a thing.
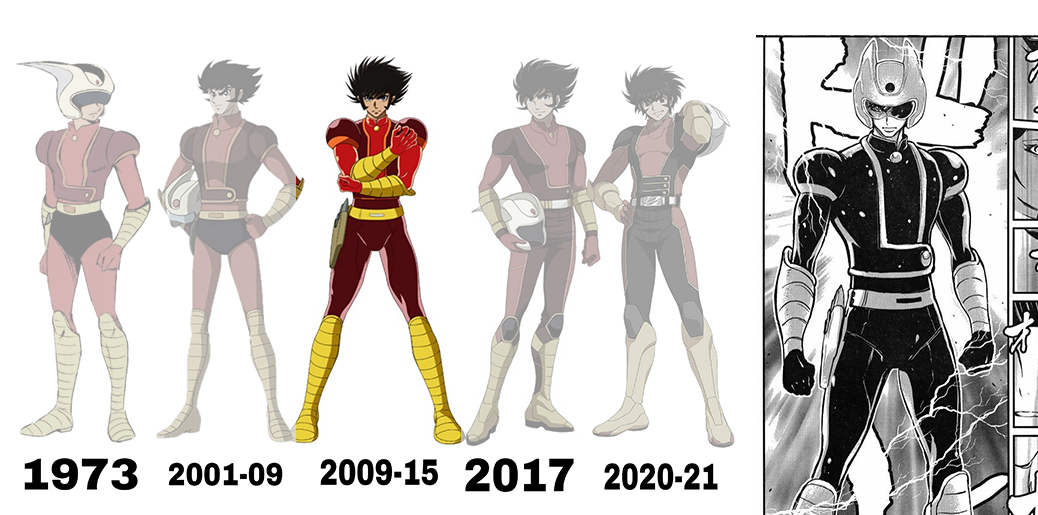
I was watching the Mazinger Z Infinity trailer and I thought: “Wouldn’t it be cool if we had the very first Mecha pilot done in a 70’s Stylized Manga shader”? So I came across the “Shin Mazinger Zero” manga, drawn by Yuuki Yugo who also wrote a much darker version of the Mazinger we are accustomed to. His drawing style was a serious challenge to take.
PROCESS
Referencing
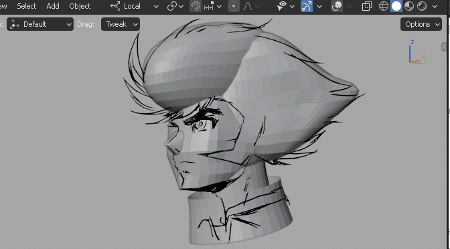
I started collecting different references for the character. I used the image viewer directly in Blender for convenience. I knew the most difficult part was to translate a 2D concept into 3D design, and on top of that I had to figure out how to rig Koji Kabuto’s hair in reference to the camera. As you may see, this is a “classic angle pose” from the 60’s-70’s where a character will have asymmetric hair depending on which angle it is drawn.
Sketching
I used to do all my 3D modeling directly out of my “proportional imagination” but not anymore. Blender’s Grease Pencil sketching in 3D volumes is the most proficient 1-to-1 stylization you can get out of your 2D character. I made a video about it as well.
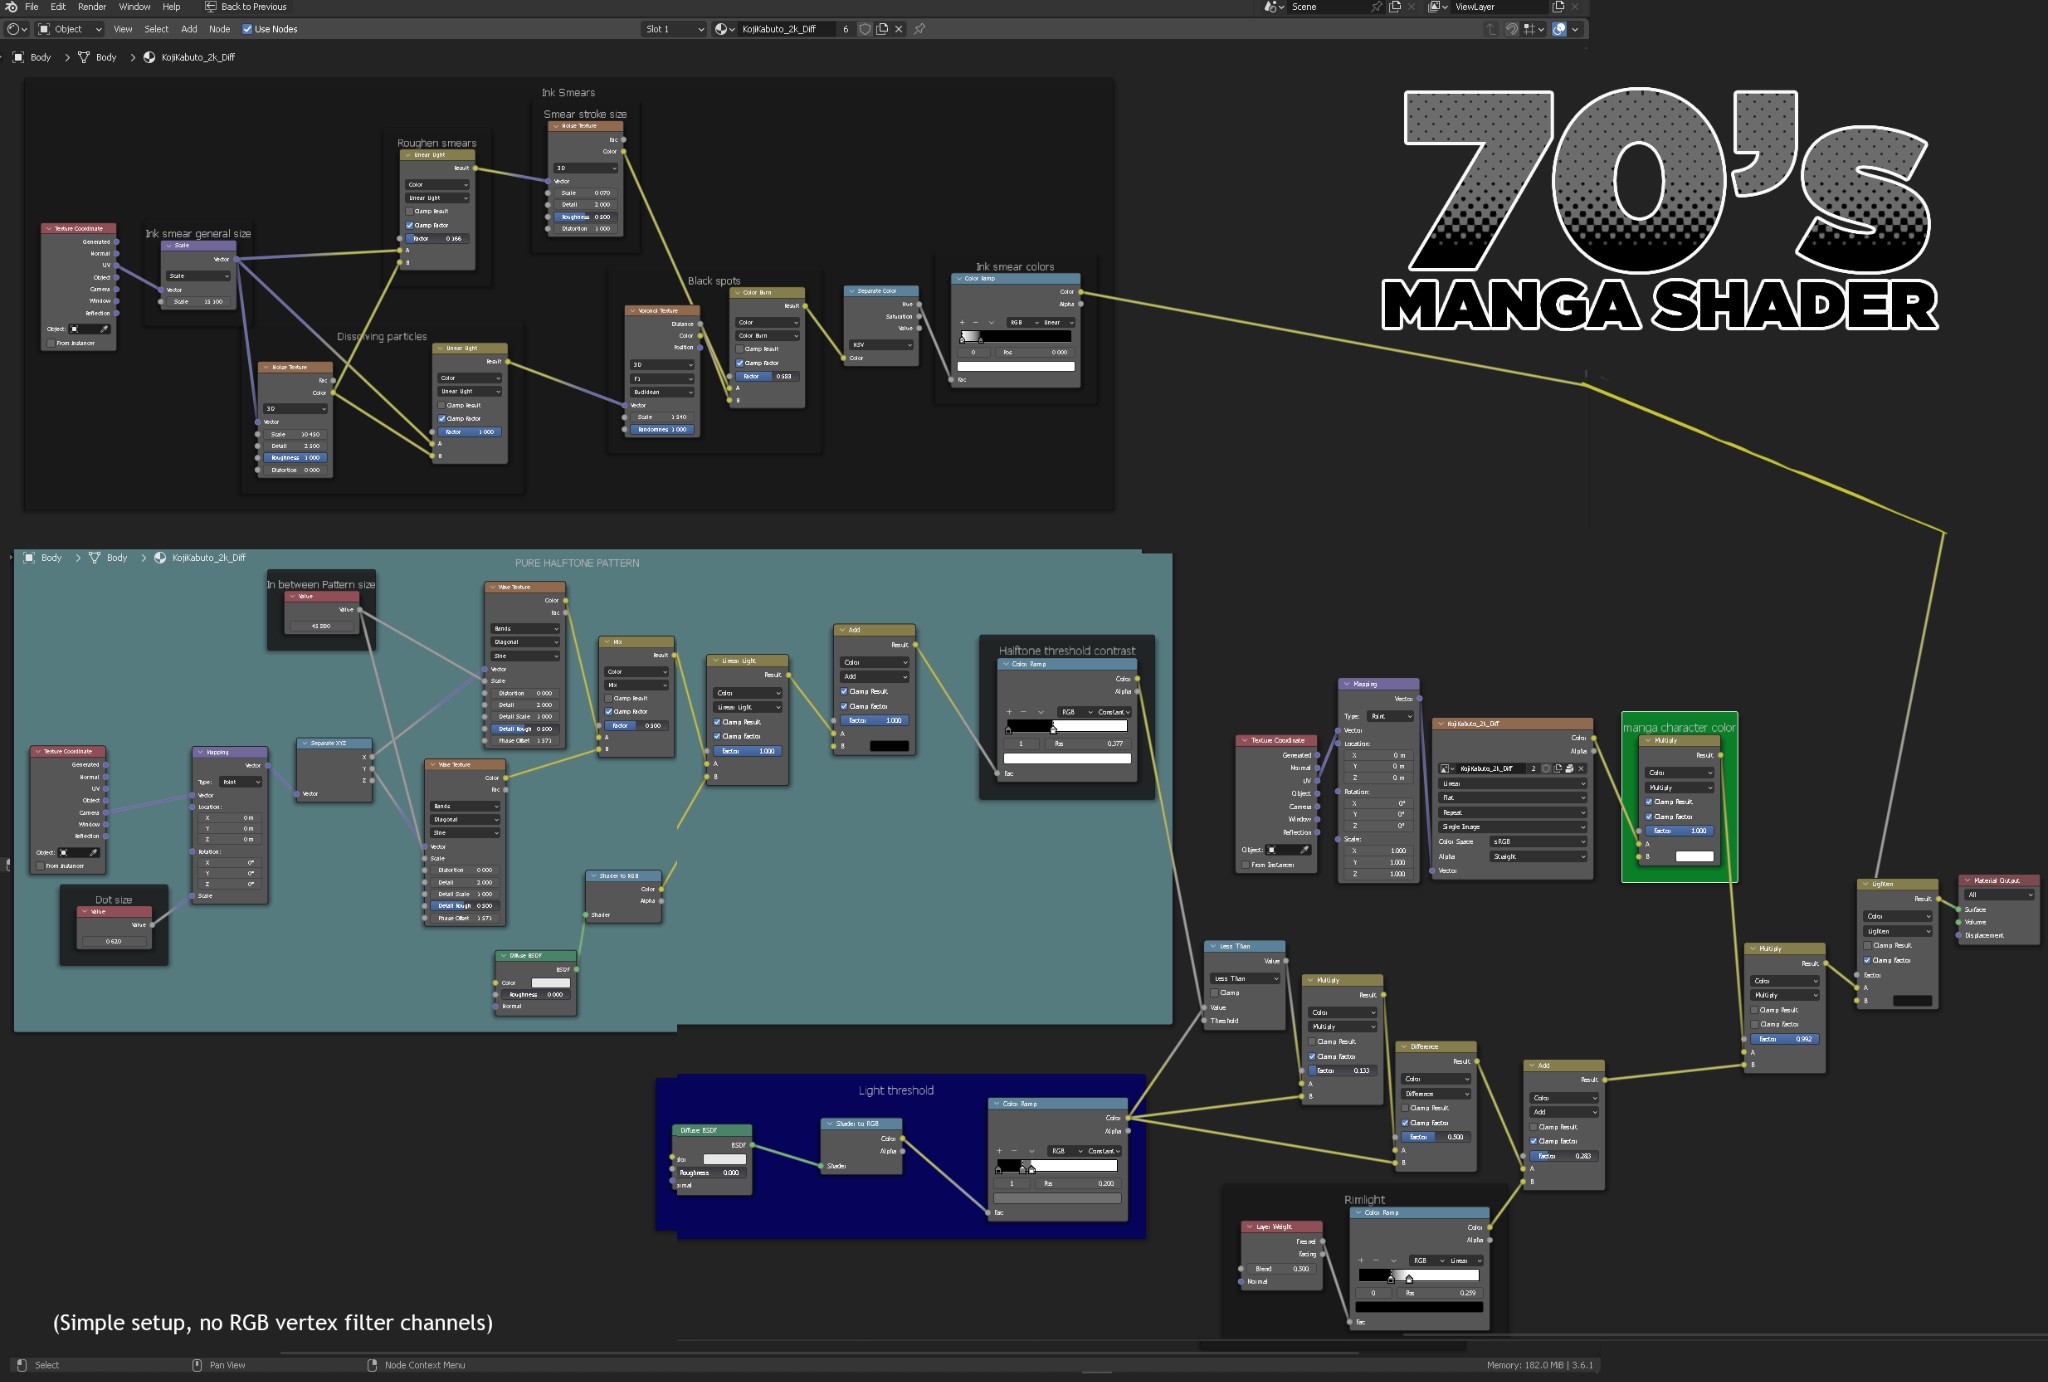
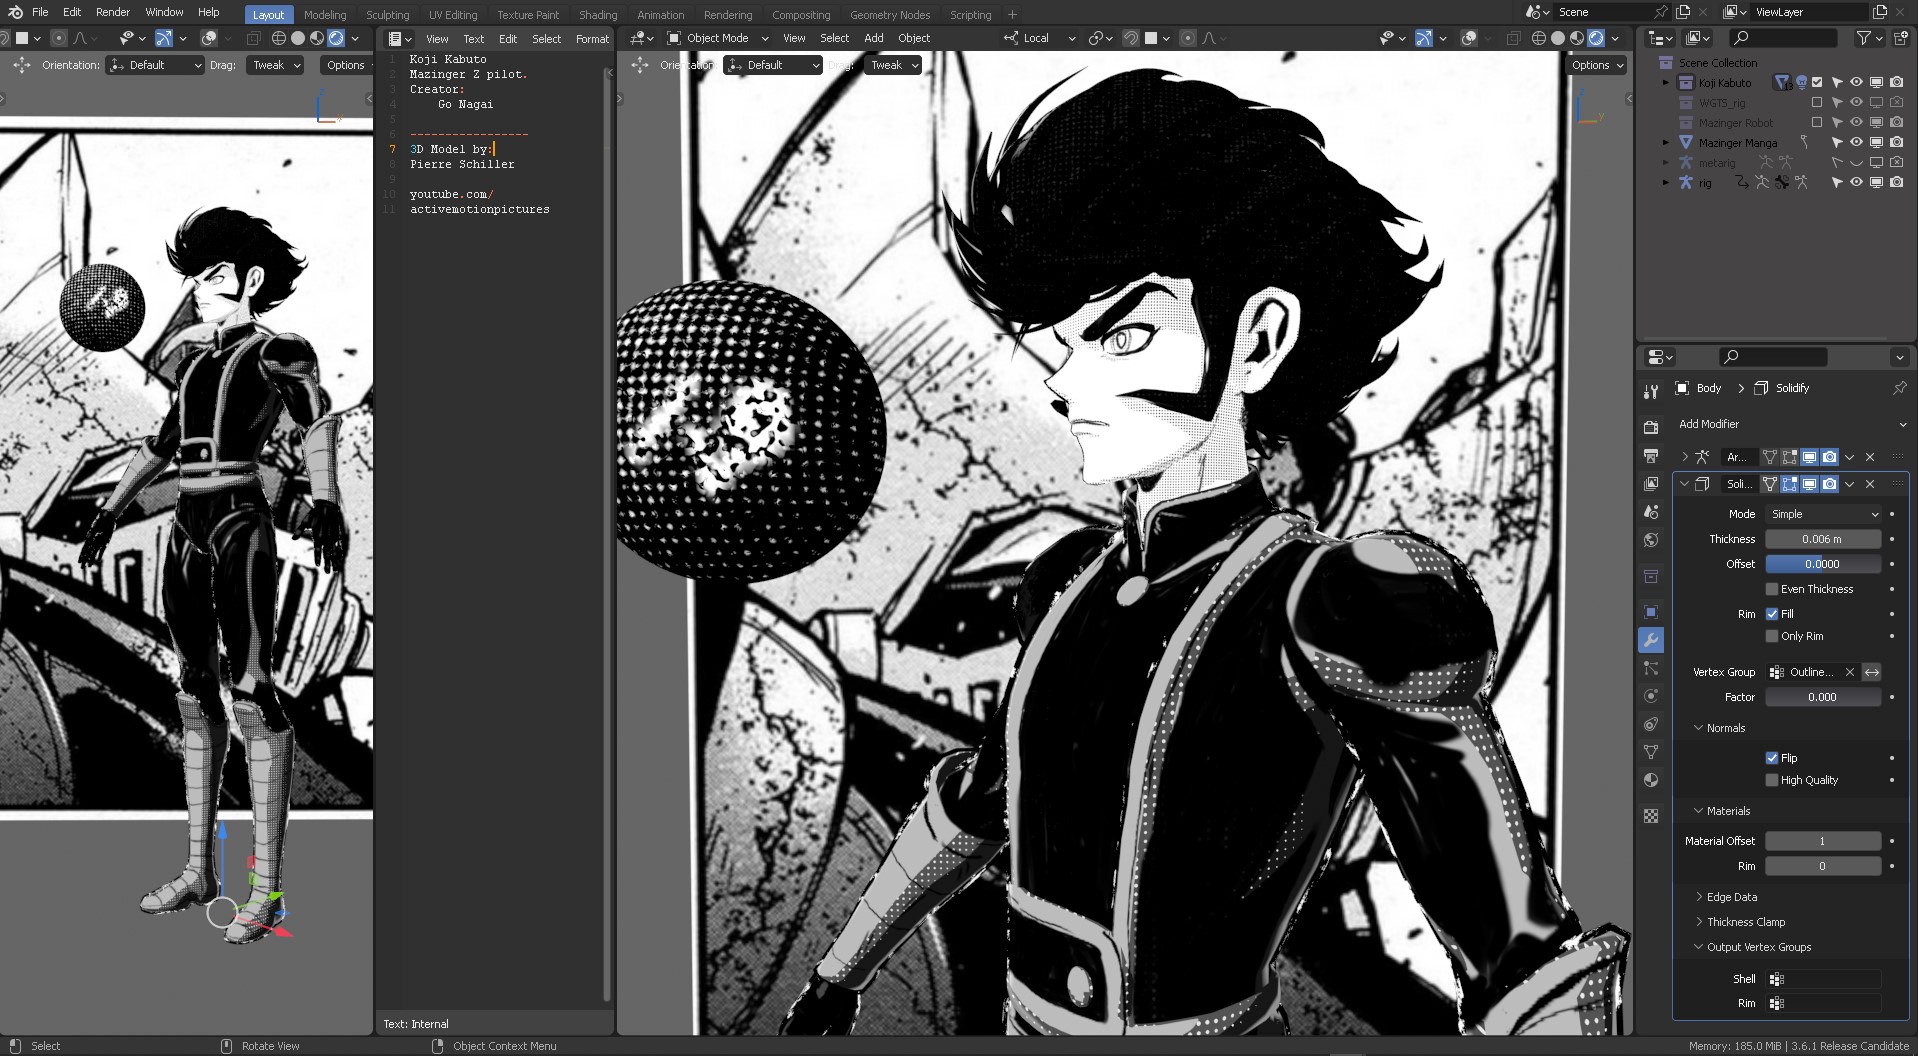
After the sketching was done, I started to work on the shader. It might sound pretentious, but the models are just an excuse to explore and develop new shaders with certain properties which can be used in real-world productions. The challenge for this one was that it had to involve intentional smears, vertex color ink dots (red channel), and scratches (green channel) as well as having a custom light vector. If you want good stylized shaders, don’t obey the light direction in the scene. Instead, create your own.
Ultimately, I only had 20 days to create a character + shader between family matters and work. I usually meet the deadline to deliver a project completed for Patrons who like to study these models and shaders, make the YouTube video, and still meet the goal for presentation.

Hair
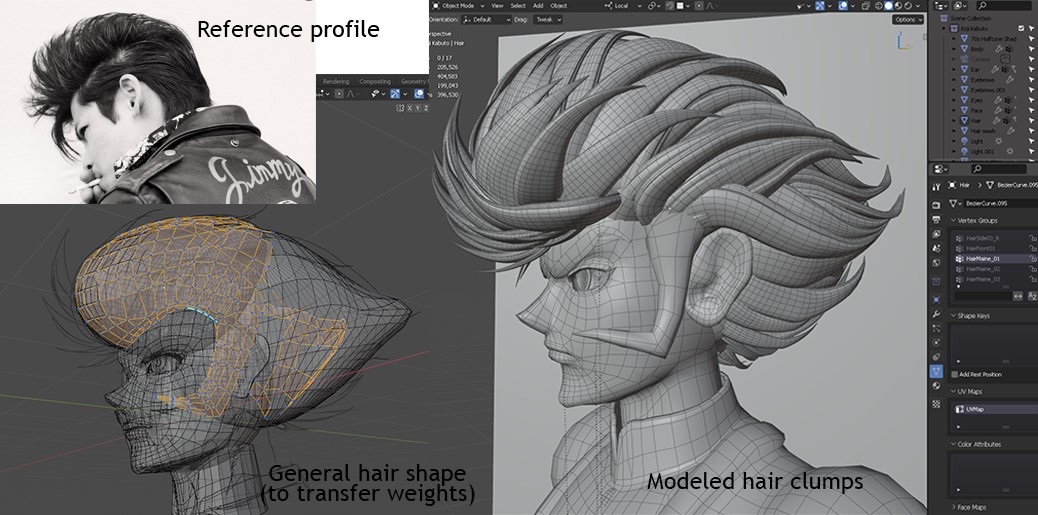
Next step was tackling the hair. I saw different retro cartoon hero hairstyles from the 70’s to understand how to make a 3D volume hair work with a flat 2D look. Grooming Koji’s hair was a challenge since no single hair clump group was placed randomly on his head. It had to match his iconic look from every camera angle. I struggled with this for 5 days, until someone on Facebook pointed out his hairstyle to be a “Rock-a-billie” one. This was useful, since someone who lived in that era would have pointed this so accurately, hence I’m sharing this screenshot:
Body
The body was sculpted and retopologized in 5 days. The hair took another 5 days to get it asymmetrically “right” from all camera angles. I used Grease Pencil to align the strokes first, and then placed the 3D mesh strand over it. It was a process of sketching, moving the camera view, aligning the 3D mesh, and clumping it into groups to cover the overall hair shape.

Rigging
I used Rigify to create the controls for the face, body, and hair.
I transferred the weights from the simple hair shape into the (300+) hair strands modeled by:
- Assigning the basic hair shape with the armature modifier (Ctrl+P: Armature deform, Automatic weights).
- Making all hair strands 1 single mesh. Problem: If you try to CTRL+P to the armature, it will give you errors as there are a lot of intersecting geometry. Solution: Use transfer weights!
- Select all the hair strands, Ctrl+P (Armature deform, only).
- Deselect all. Select basic hair shape first, then SHIFT+click the modeled hair strands, go to WEIGHT PAINT MODE and from the top menu “Weights,” select transfer weights.
- A Pop up will appear. Use these settings:

With these settings, the original basic hair shape weights were transferred to the hair strand clumps. There was little to adjust after that, but now we can control hair with the bone controls.

I rigged Koji Kabuto’s hair using extra controllers native to Rigify (properties for those bones are assigned in the POSE mode). If you want a deep understanding on every rig control type, I’d recommend checking out “Rig anything with Rigify” from CGDive which can take you from zero to hero in about a week.

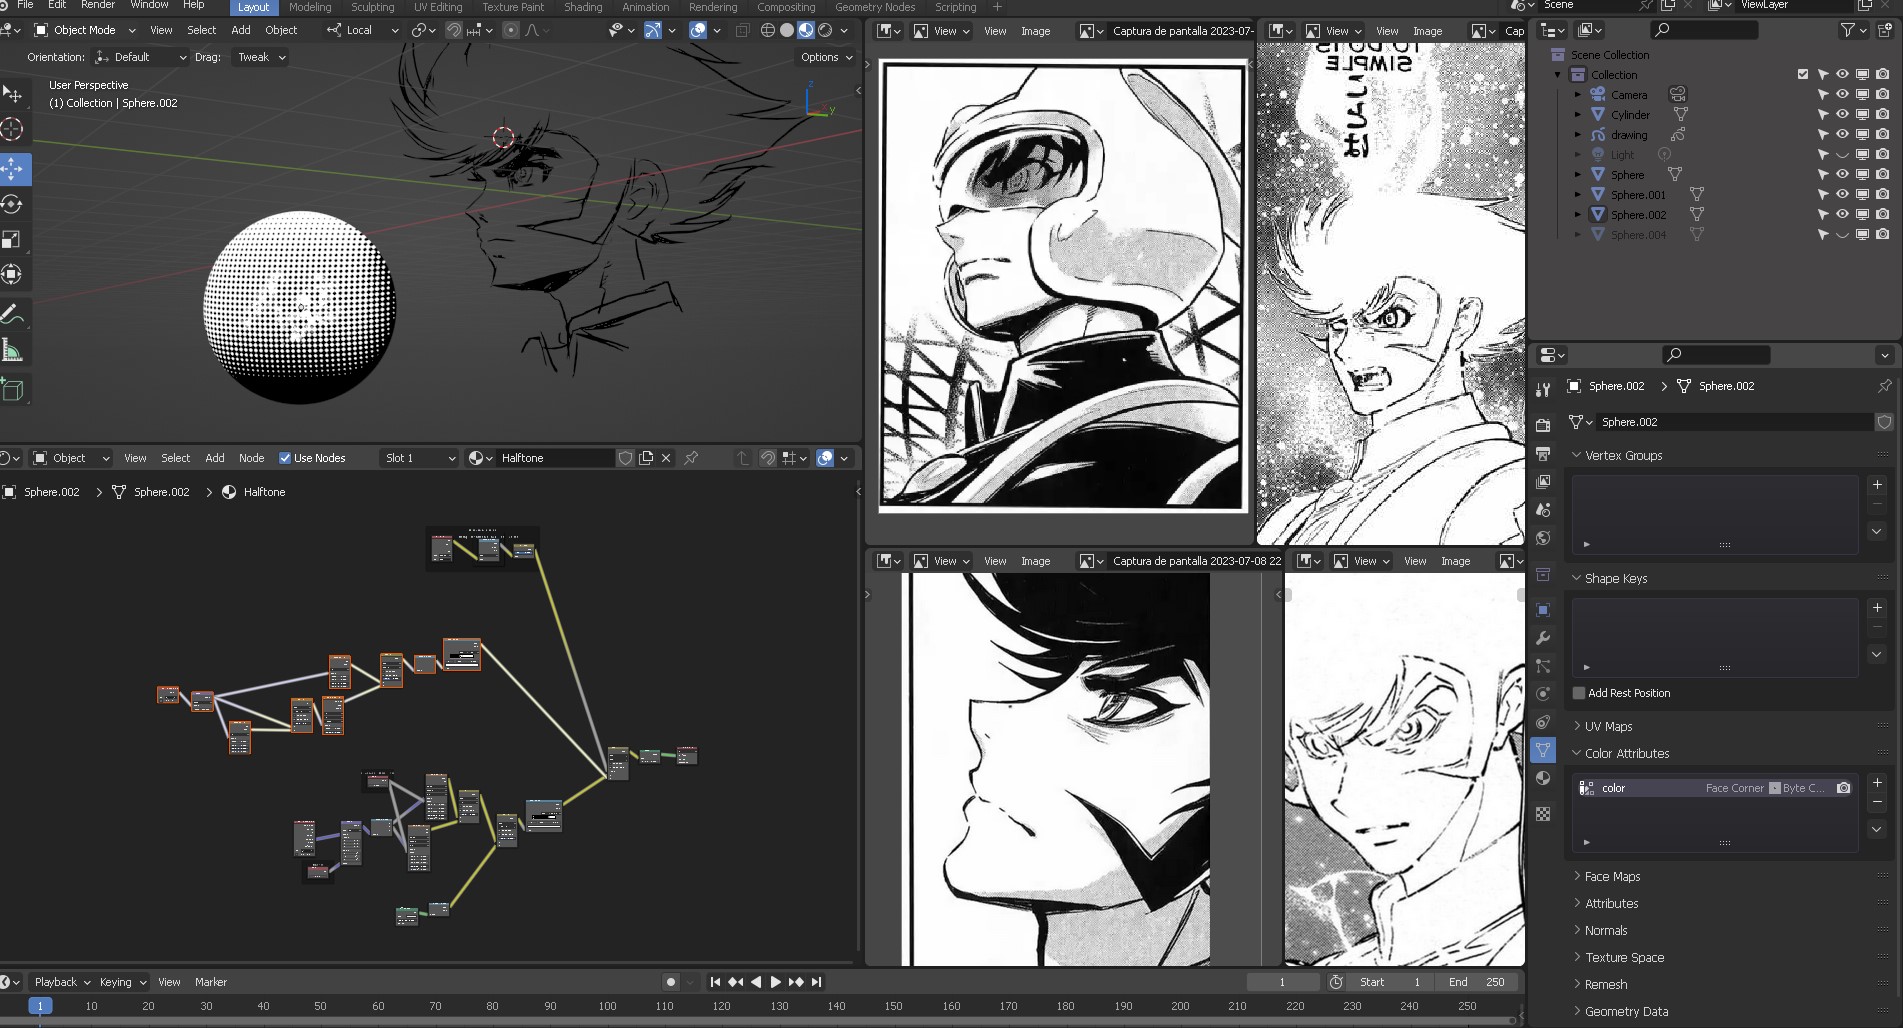
Here is my 70’s SIMPLE manga shader:
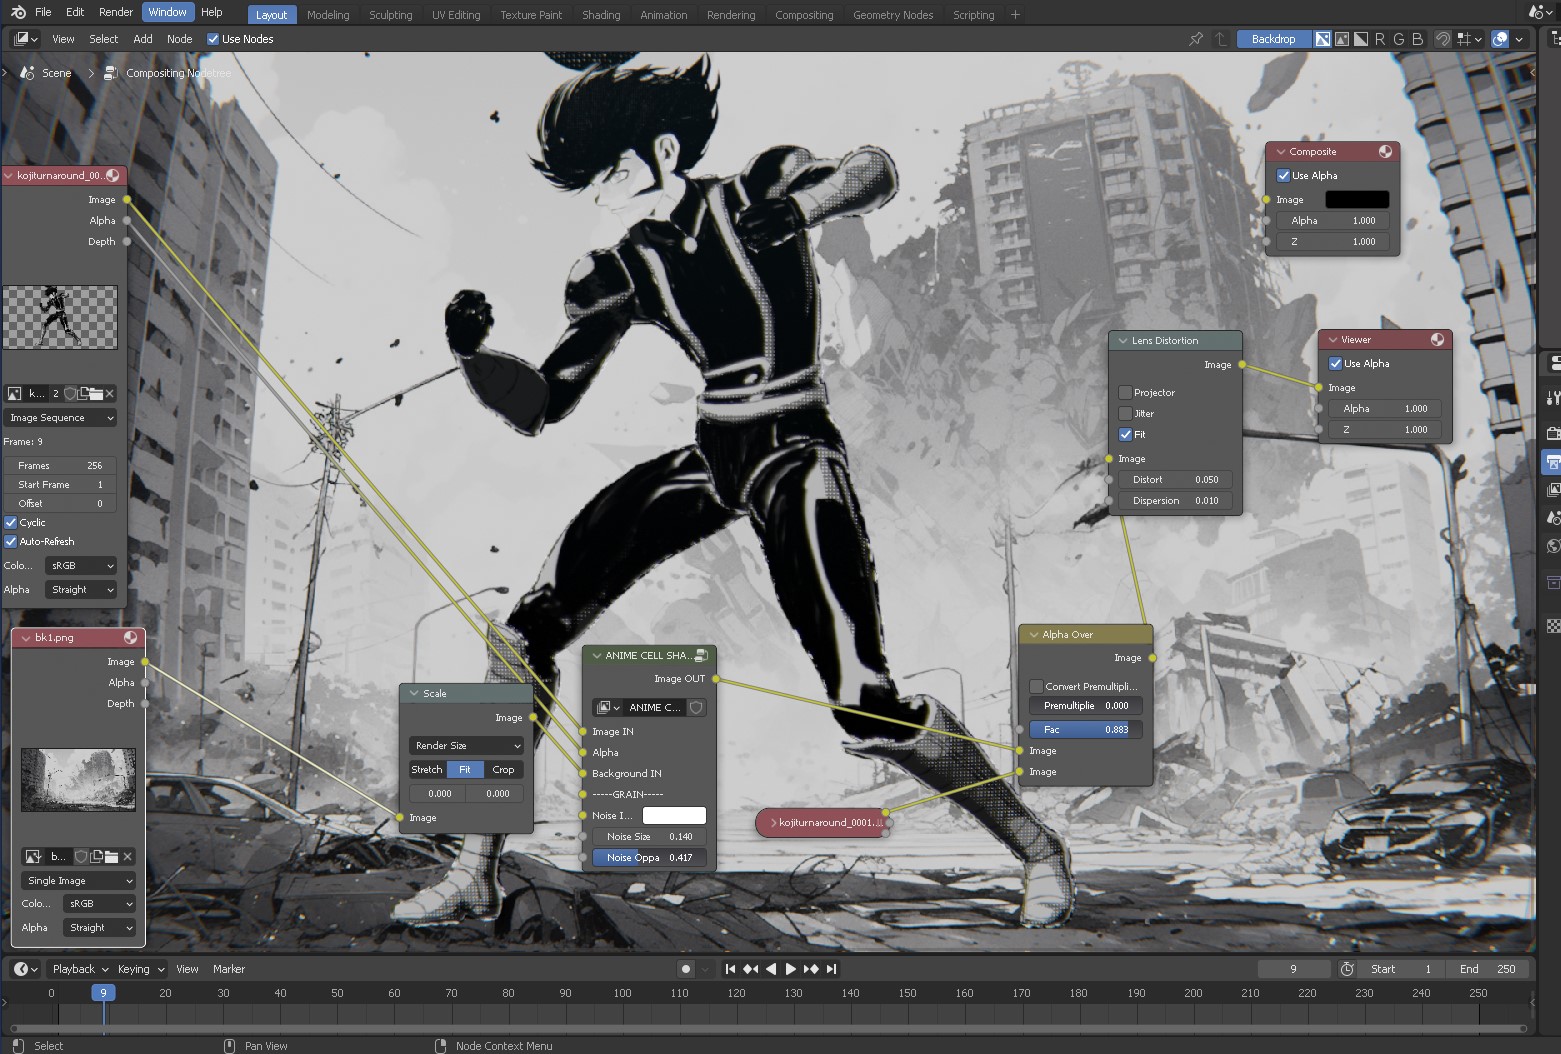
Compositing
I wanted to give the model a very old crumpled-newspaper look “in-shader” to make it look even more like a retro 70’s manga, but time was of the essence and I added post-effects using Blender’s compositor.
Using Blender’s real-time compositor, I included the background element to add additional effects like lens distortion, chromatic aberration, and my very own custom “anime cell shading” which you can check out here.
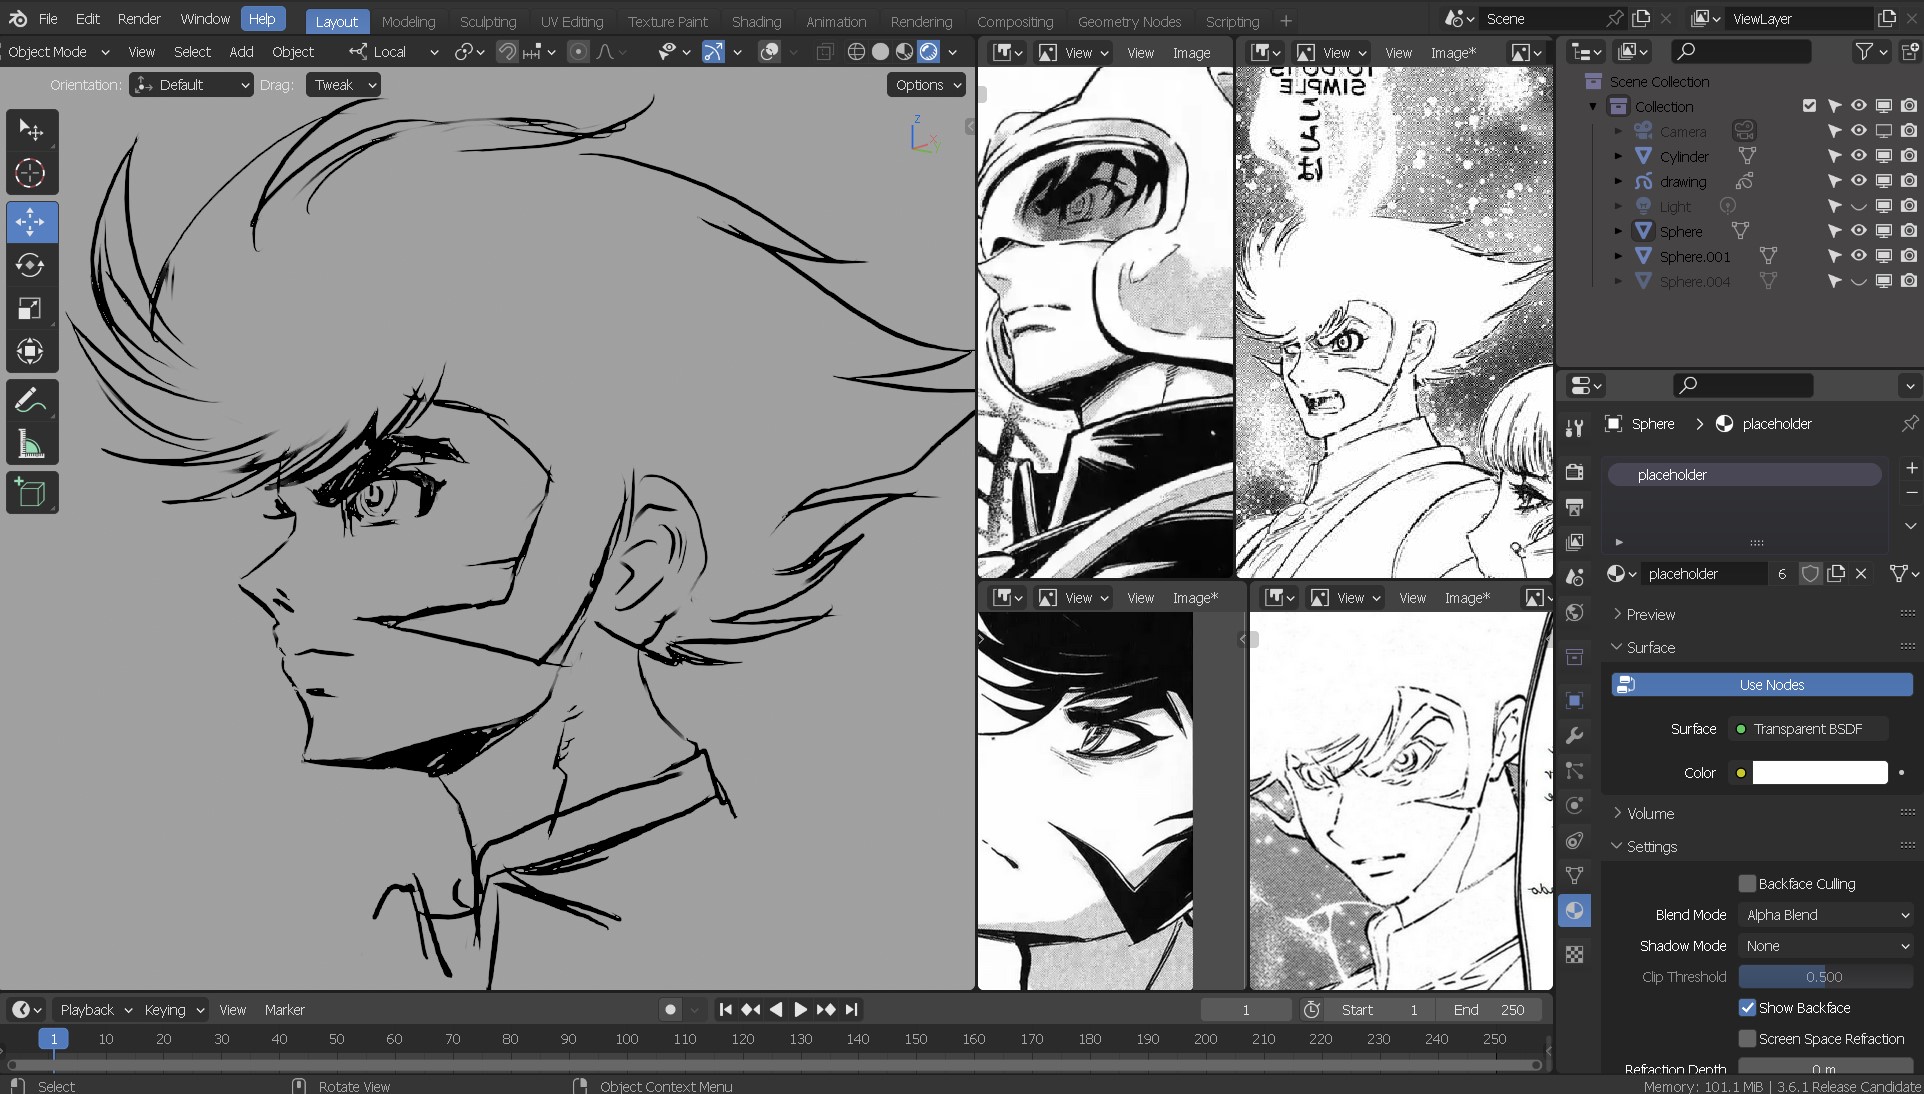
PROBLEM: This screenshot shows how the face receives shadows from the hair which we don’t want.
SOLUTION: The face has a separate light vector from the general scene. This was done with Blender’s native nodes. No modding of any sorts. Cascading shadows were adjusted for the scene only (not the light) to 256. I like sharp shadows for anime models.
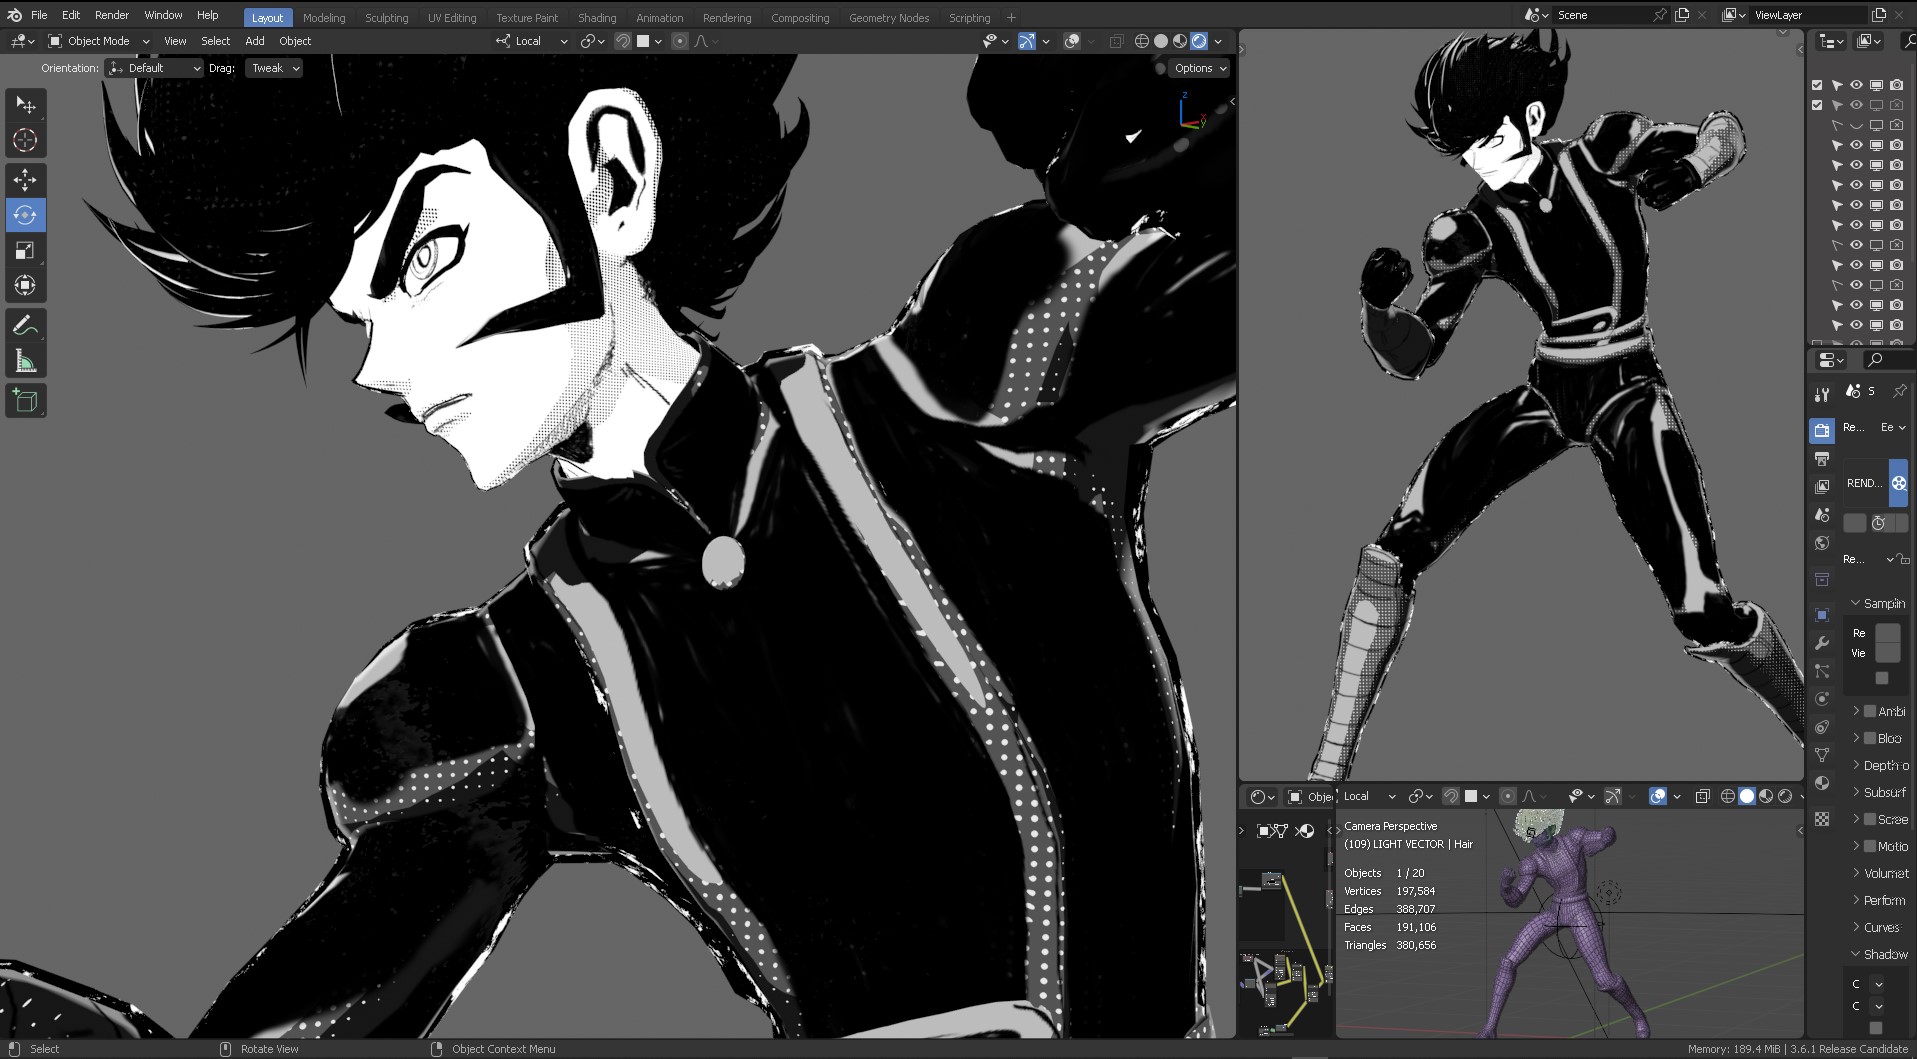
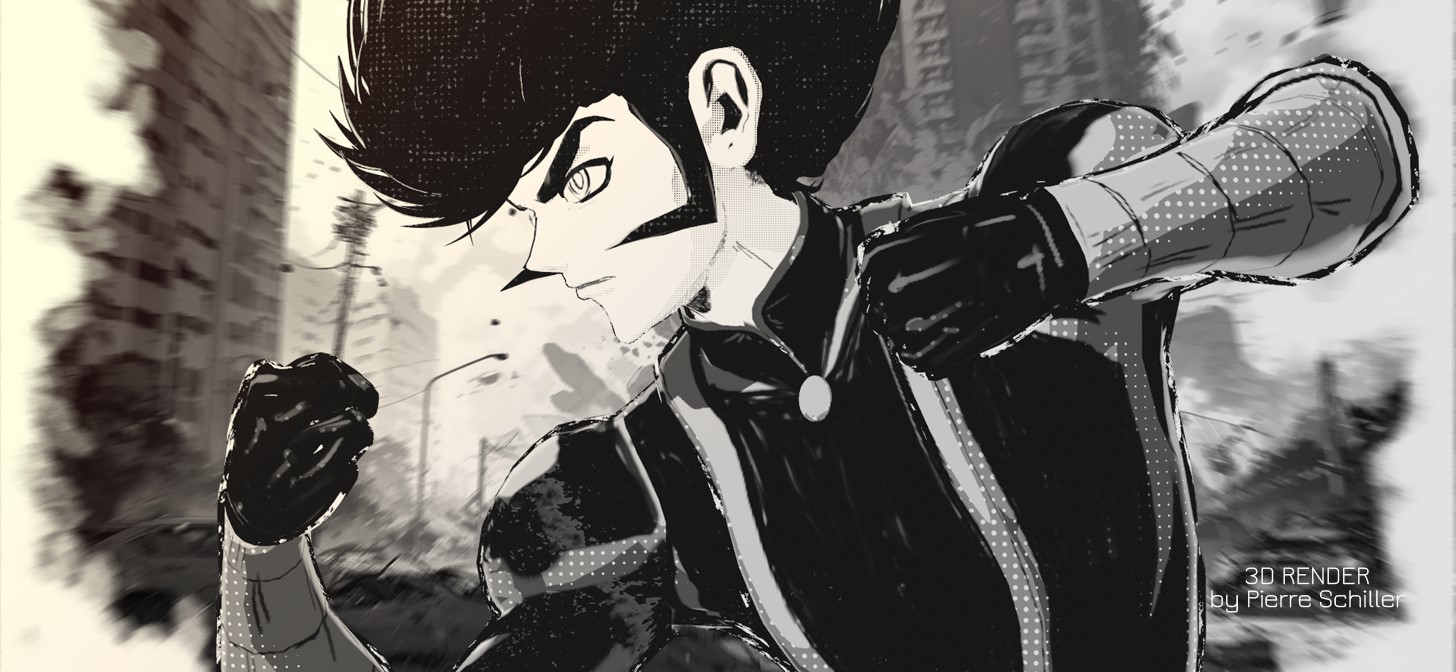
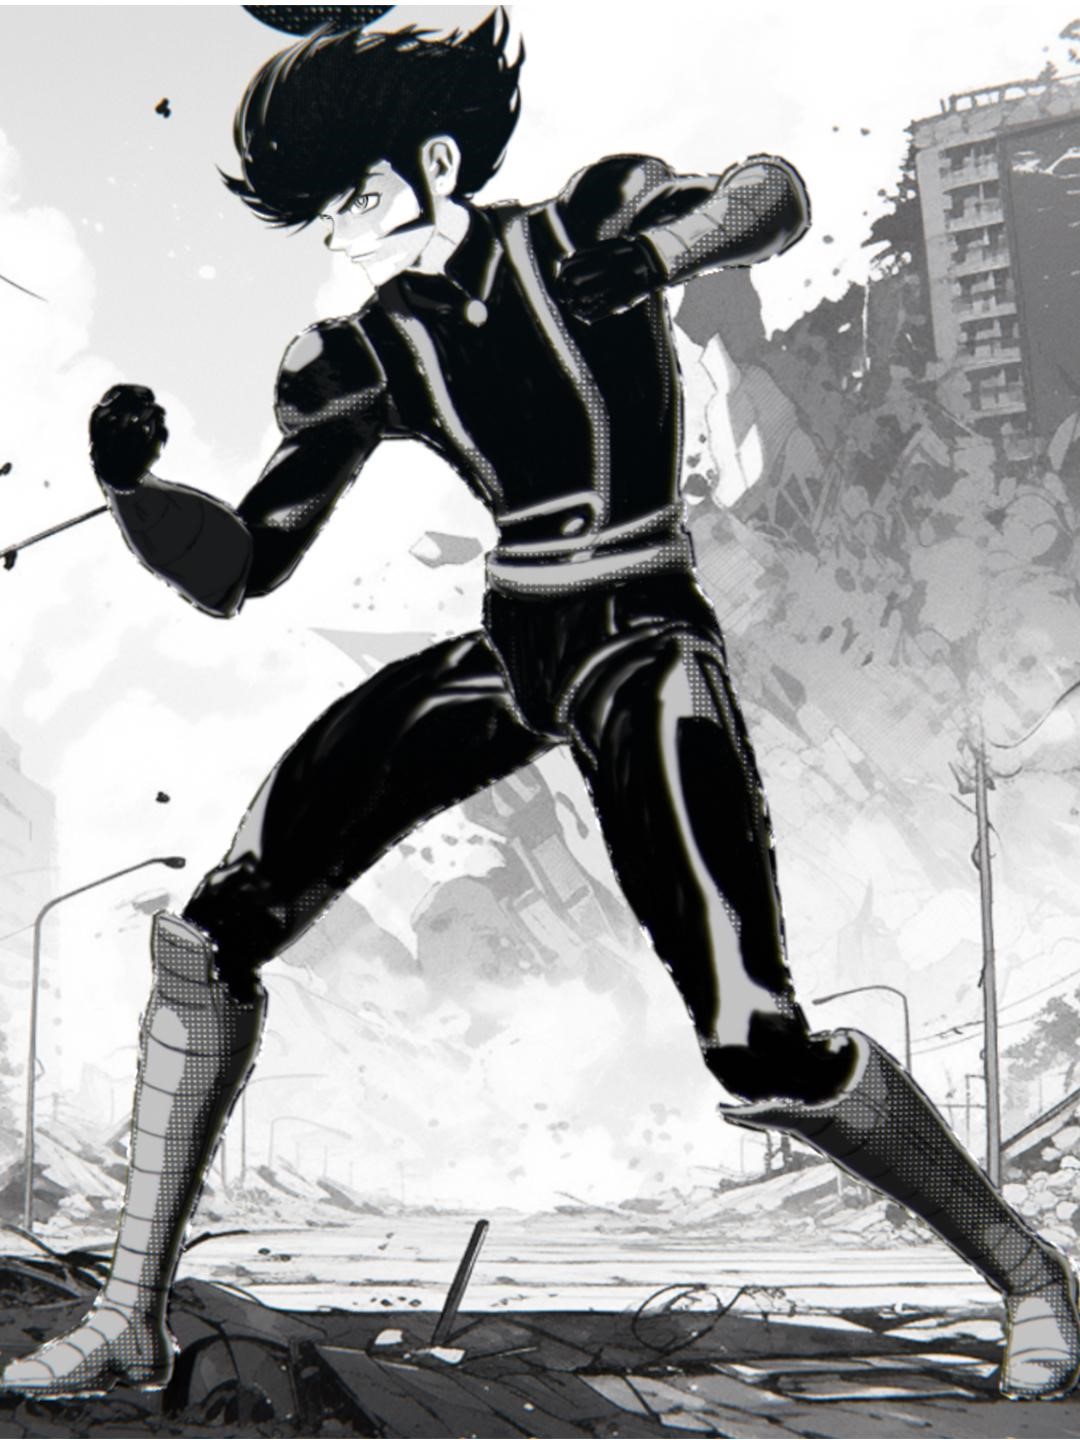
Below is the final closeup detail of Koji Kabuto’s 2D stylized model from the 3D viewport.
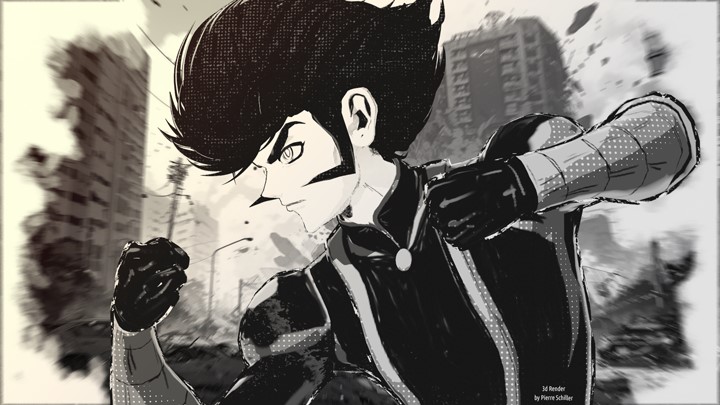
RENDER – 70’s Manga Shader

The project is available on my Patreon so you may study the setup, light, controls, and shaders. You can watch the complete 2 weeks of work summarized in two minutes in the following video:
If you have further questions, please comment in the text box below, or reach me through my socials. I’d be really happy to know this story inspired you to create your own anime character in Blender.
Cheers!
About the Artist
Pierre Schiller is a 3D animator and VFX compositor. He has participated in international product development for TV advertising, educational video games, AI exploration, and he assists other artists by training them in Blender.


