Behind the Scenes: Ballad of the Night Prince

INTRODUCTION
Hello! My name is Joe McDowall and I’m based in Edinburgh, Scotland. My interest in 3D art was honestly born out of frustration with sourcing assets for my Unity projects. I decided to give Blender a try and learn the basics to see if I could make small amends to the assets I was purchasing. Eight years later, after much self-learning, 3D modeling and animation have become my primary passions.
I would describe myself as a 3D generalist, though I frequently gravitate towards creating stylized characters and environments.
INSPIRATION
When I was very young, my sister and I would watch Rupert and the Frog Song on VHS religiously. It must have nestled itself within my unconscious mind, as I was captivated by the idea of musical frogs.

Another source of inspiration was the fabulous five froggish tenors which are a group of singing frogs in The Legend of Zelda: Ocarina of Time. It is a small gaming memory that I still cherish as an adult.
PROCESS
References
The first step is always gathering references. I use a tool called Pureref extensively as it allows me to gather all my images in a single zoomable view. The amount of time I spend in this phase largely depends on my familiarity with the concept. It can vary from a few hours to days in some cases, and I continually add more images as I go along.

Modeling
Depending on the project, my next step is either to do a sketch in Krita or to do a small 3D block out to explore my idea in Blender.
The goal is to explore the idea while minimizing time and effort spent on individual models in the scene. Models are kept simple, using basic shapes or low-poly stand-ins.

Now is the ideal moment to experiment with composition, colors, and lighting to get a sense of the final image without dedicating too much time. In this stage I tend to create a lot of test renders and view them at distance, flipped and without color to test how well the concept reads.
Once I am happy with how the scene is shaping up in the test renders, I then move on to refining each individual element.

I make use of various modeling techniques throughout the scene, adapting each approach to suit different types of objects. For many environmental assets like rocks, plants, and fireflies, I utilized basic primitives, box modeling, and curves.
When working on characters and organic forms, I favor Blender’s sculpting tools. This workflow allows me to be expressive and experiment freely with ideas, setting aside some of the technical considerations, like topology, for later stages.

For the background trees, water ripples, and scattered vegetation, I exported hand-painted assets from Krita and imported them as alpha cards in Blender to place around the scene.

Texturing
When it comes to texturing and materials, I rely heavily on Blender’s procedural texturing nodes. If I can achieve a satisfying result using a combination of Noise, Musgrave, and Voronoi textures, then I’m really pleased, and often these materials will be used in the final render.
In the early phases of the project, I frequently utilize color channels stored in vertex color attributes to blend various textures together using a Separate RGB node. This helps when the topology changes often as repainting solid RGB colors is fairly quick and easy. As the project progresses, I usually opt to bake or hand-paint these blends into textures for more precise control.

An example of this can be seen on the little frogs; they have a combination of procedural textures and hand-painted maps. I can then bake those into a single texture for display in other tools like Sketchfab.

Most of the textures in the scene are fairly simple or hand painted. On occasion, I will seek out external textures such as the tweed texture on the princes waistcoat from textures.com
Lighting
For the lighting, I started with an environment texture from polyhaven, reduced the ambient lighting with a touch, and then added a warm directional light.

One lighting trick I employed was using the Shader to RGB node with a color ramp to control the overall coloring of specific objects. For instance, the directional light was causing harsh, distracting shadows in plants around the focal point. By using the color ramp, I reduced the contrast in both color and shadow, deviating slightly from realism to enhance the clarity of the render.

Rigging
From the beginning, I knew that music and animation would play a significant role in this project. I had experienced some synergy between sound and motion in my previous project (Happy Birthday Finlay), and I wanted to explore that further. After searching through various audio providers, I finally found a background track called “Waltzing in Fantasy Land” on pond5, which perfectly matched the vibe I was going for.
What attracts me most to a piece of music is when I can instantly picture interesting character motions that sync perfectly with the sound. When I heard the “Whuuum Whaaa” noises in this track, I knew they would be ideal timing points for animating the little frogs. Having the music upfront before animating makes the process much smoother compared to trying to fit motion to sound as an afterthought.
For rigging the prince, I utilized Blender’s Human (Meta-rig) armature and removed unnecessary bones. Since his animations were relatively simple, I mainly relied on manual keyframing, with the addition of an inverse kinematic constraint on his feet.
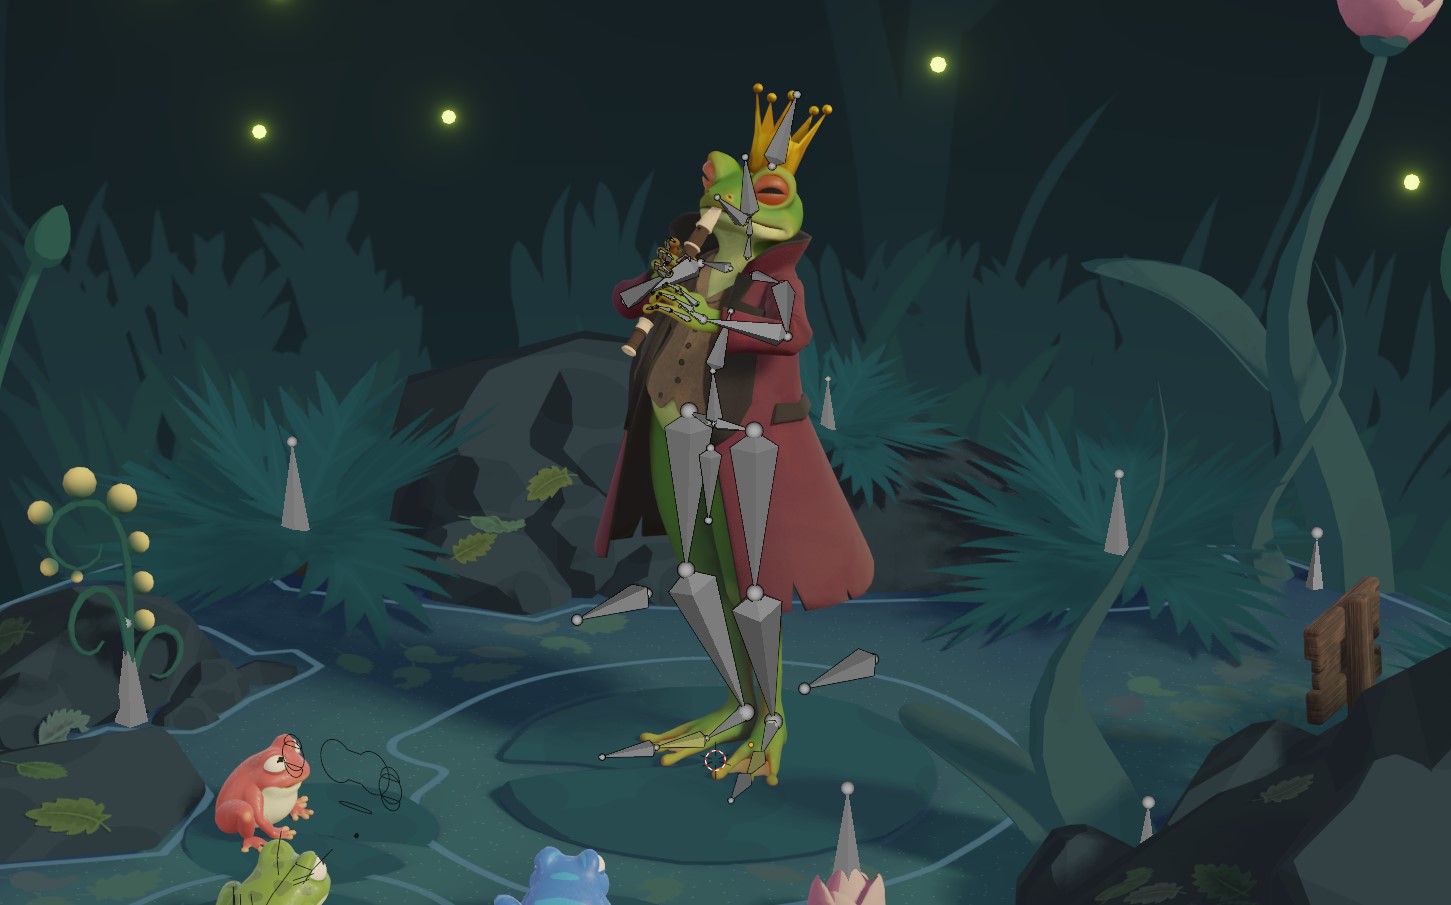
I created a custom rig for the froglings, enabling control over their eyes, blinking, ribbets (chest swells), and mouth. The bones were set to custom shapes, and bone constraints were applied to simplify their movements.

Animation
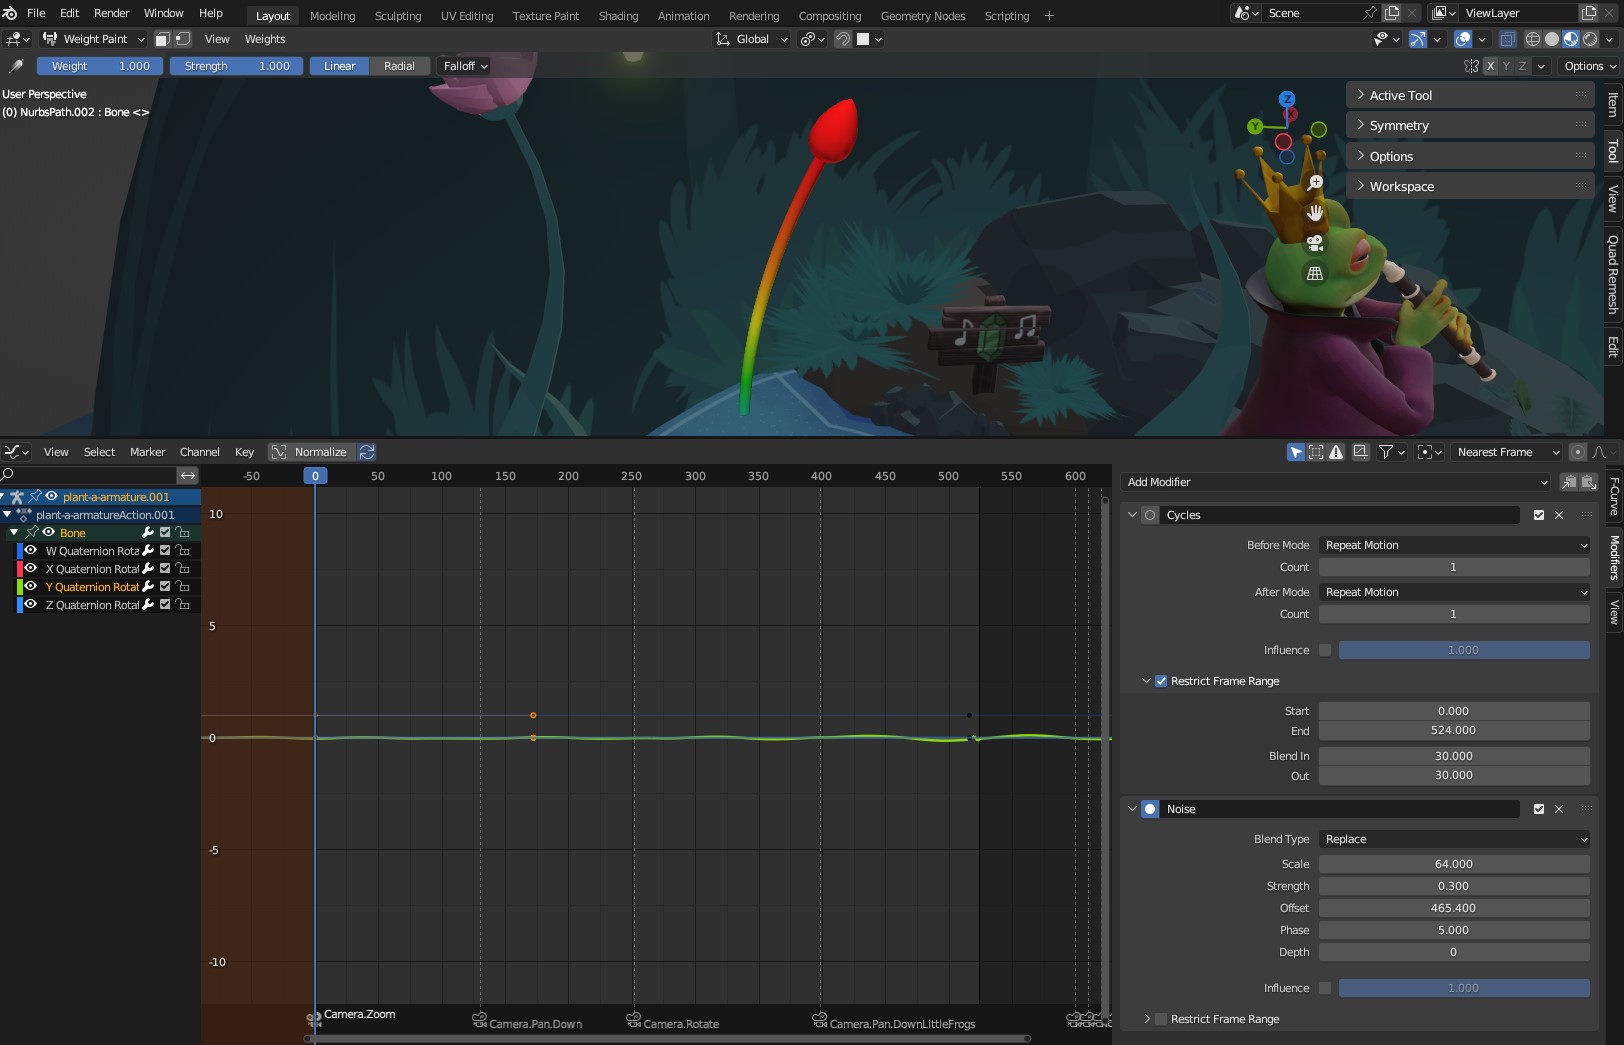
To animate the surrounding foliage and make it sway in the wind, I used Blender’s graph editor and applied modifiers to a single bone per plant.
First, I used the gradient weight paint tool to control the bone’s influence on the mesh rotation. Then, I applied cycle and noise modifiers to the bone’s rotation to make it sway randomly over time. Each plant had slightly different scale and offset values. I used the same technique to control the location of the fireflies, giving the illusion of them flying around the scene.
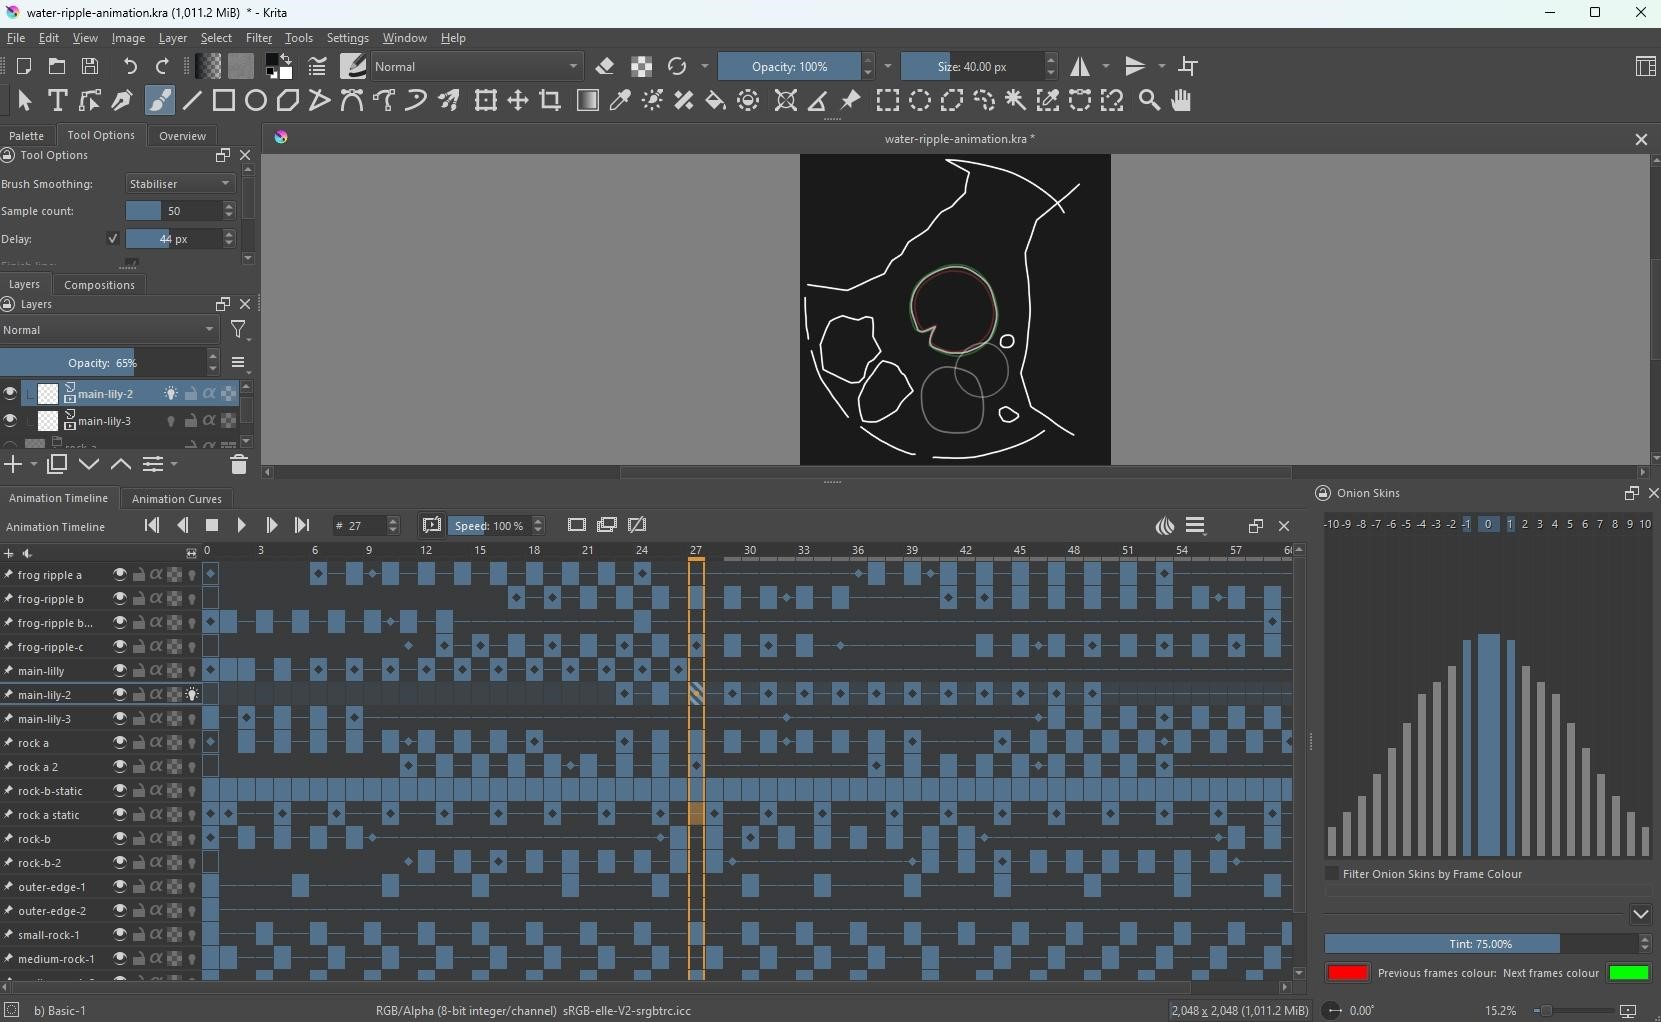
Lastly, I worked on the 2D elements of the scene. To create the ripples, I used Krita for frame-by-frame animation and then imported the image sequence into Blender. It was quite time-consuming. Looking back, I think I could have achieved better results using Grease Pencil, which I’ll definitely explore in future projects.
One helpful tip for creating various camera movements in my final animation is using a shortcut in Blender. Just select any camera and hover your mouse over the dope sheet, then press [CTRL + B]. This will insert the camera at that keyframe, which you can drag from the bottom.

It’s a great way to plan and test different camera motions and preview the whole sequence before rendering. This saves a lot of time compared to rendering full sequences and splicing them together in the sequencer, especially when you need to fix mistakes.
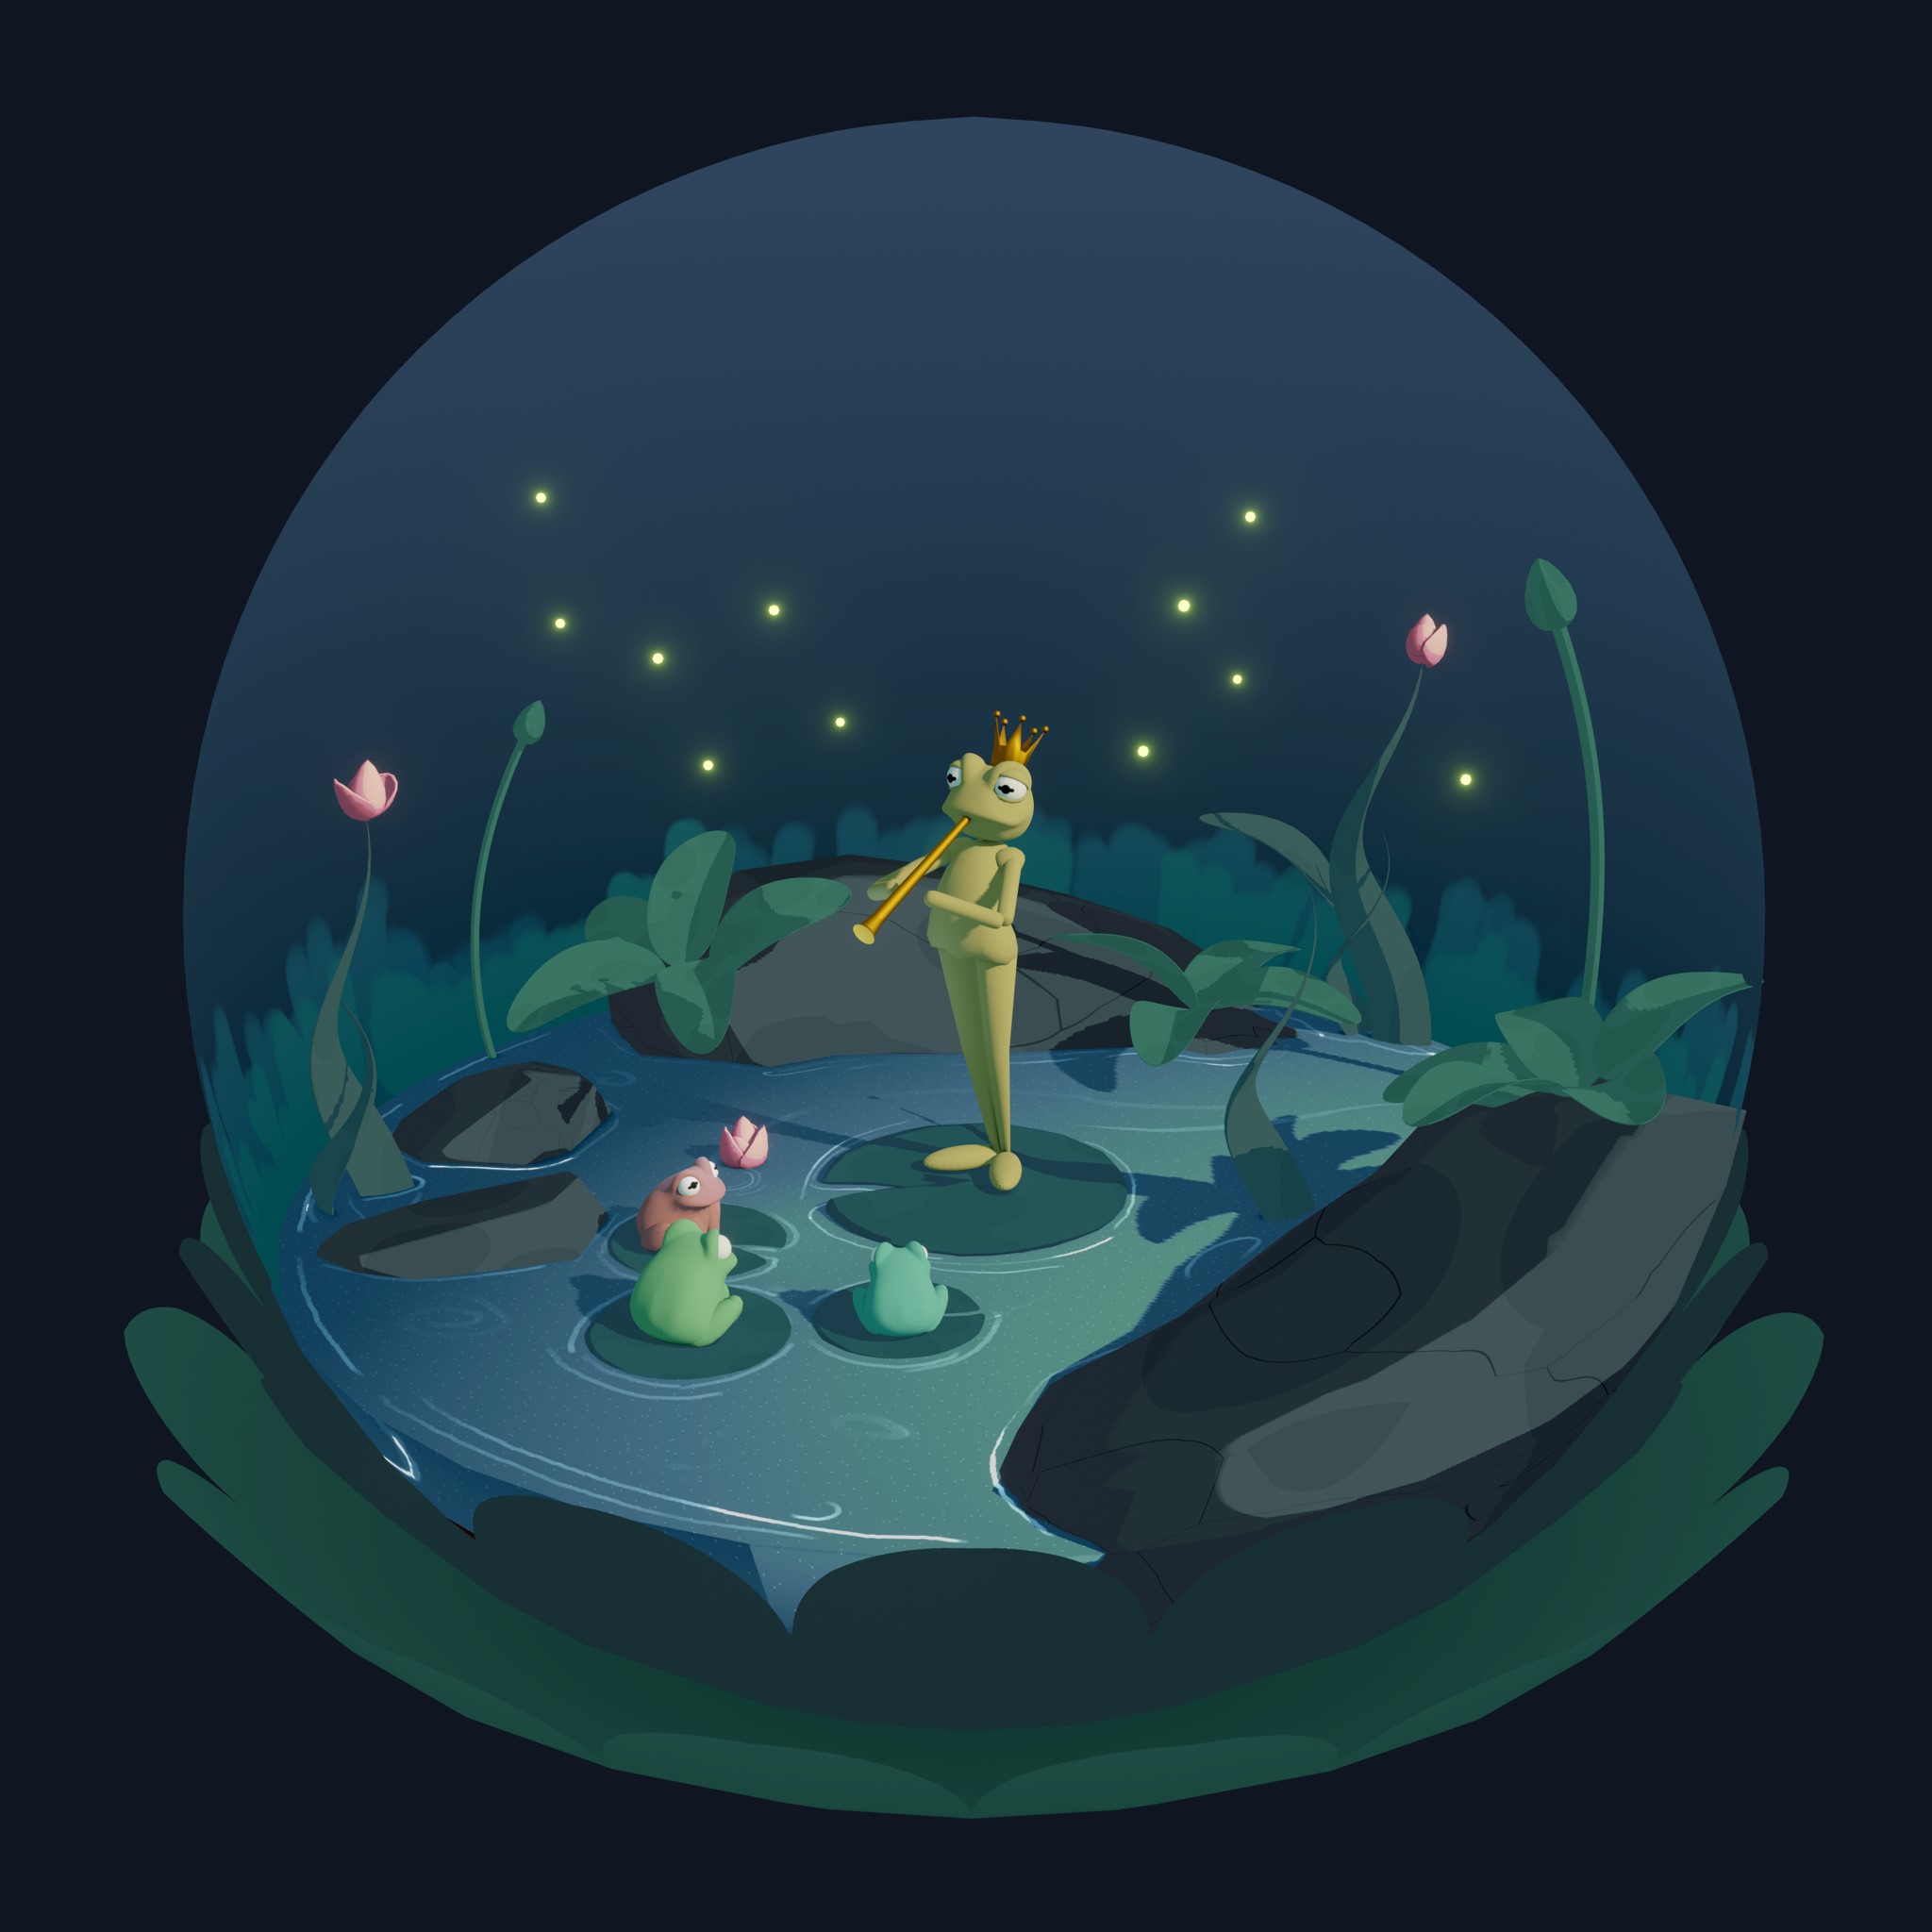
And that was all! Below is the final animation along with the renders.
RENDER – Ballad of the Night Prince


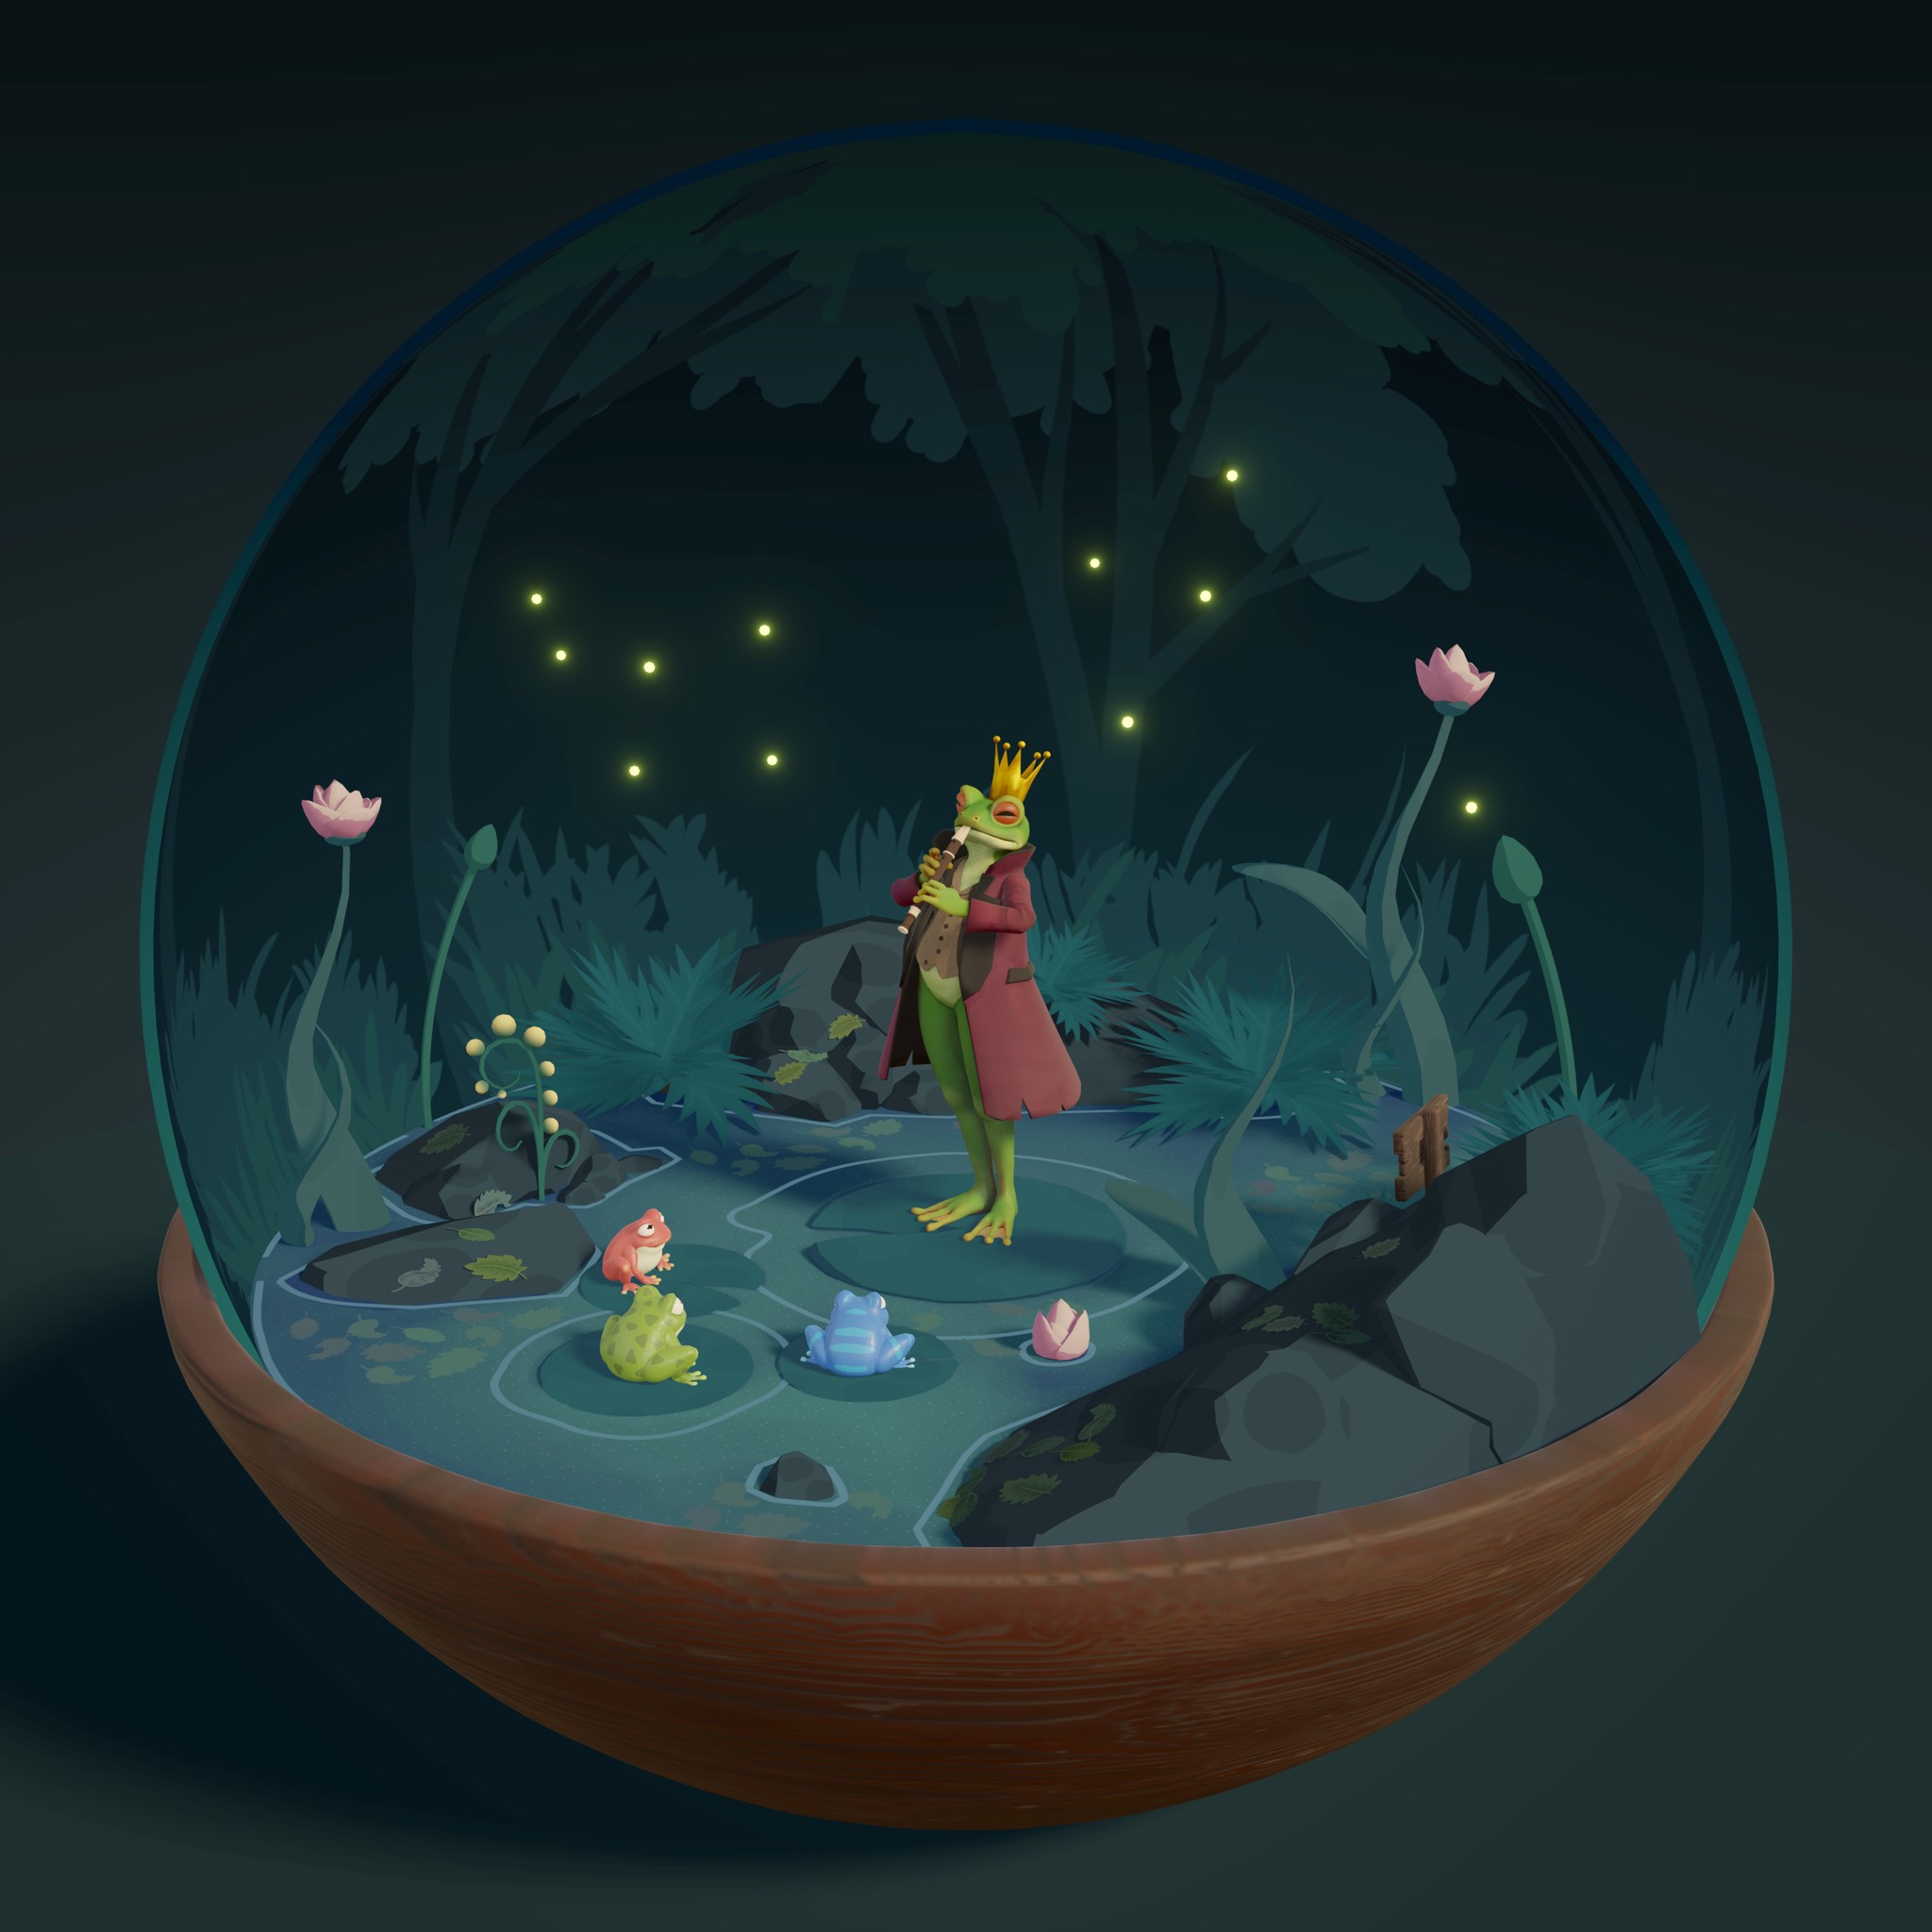


Thank you for all the support. Feel free to ask any questions, and if you like my work, follow me on social media. Have a good day!
About the Artist
Joe McDowall is a self taught 3D artist from Edinburgh, Scotland. He is currently working as a freelancer.


This was an awesome read!
I particularly like your Instagram seeing the different stages of your work! Immediate follow!
Keep up the great work!
Truly inspirational !