Behind the Scenes: Wander – Shadow of the Colossus
INTRODUCTION
Hello everyone! My name is Elder Barreto, and I’m from Brazil. Art has always been a part of my life, and since my Dad is a traditional artist, a big part of my artistic formation comes from him. I started learning Blender during quarantine as a way to distract and challenge myself, watching tutorials on Youtube and trying to create assets for a small game project with my brother. Since then, I’ve dedicated myself to honing my skills as a 3D artist.
INSPIRATION
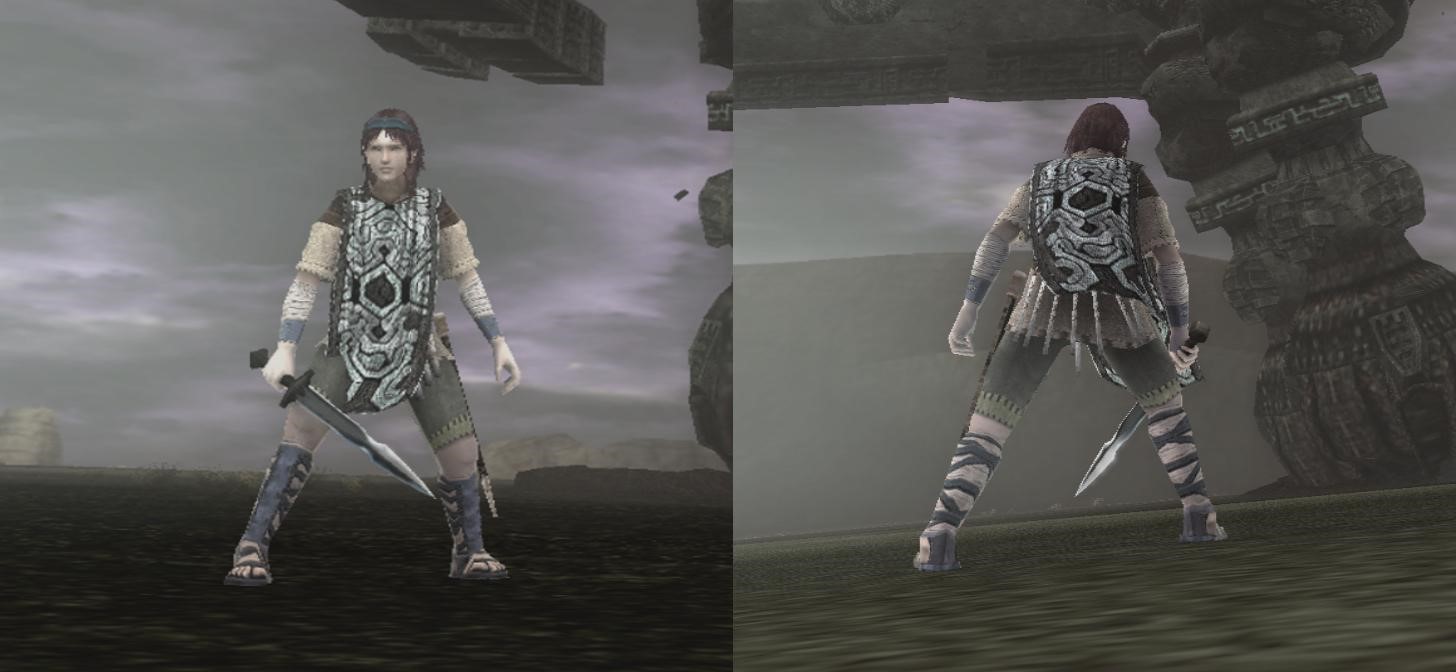
The project was inspired by the PlayStation 2 classic Shadow of the Colossus, a game that stands out for its immersive atmosphere. The game features a fantasy setting with gigantic colossi that must be defeated by the protagonist, Wander. To capture the style and aesthetics of the game, several visual references were collected, such as screenshots, concept art and fan arts. In addition, the game was revisited to analyze design elements such as shapes, colors, textures, and lighting. From these references, I could visualize the way I wanted the model to look.
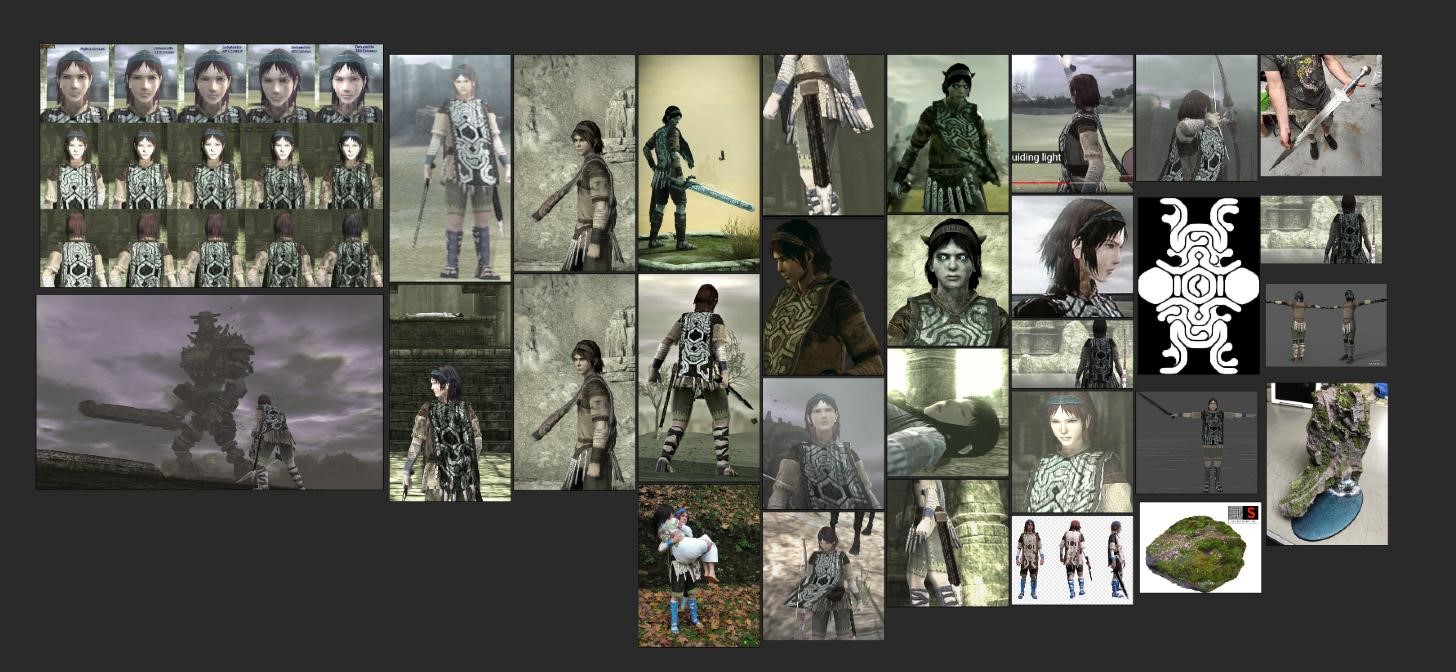
I organized all the references with a tool called PureRef.
SPECIFICATIONS
My computer hardware is as follows:
- RTX 3060 TI ASUS DUAL OC GDDR6X
- Ryzen 5-3600
- 2x8GB RAM HyperX Fury
- XPG Gammix M.2 SSD
- Wacom Intuos S
The software I used was:
- Blender
- Adobe Substance Painter
- GIMP
- PureRef
MODELING
Starting with Blender, I blocked the main character by starting from a sphere, using Dyntopo to quickly extrude and create the main shapes. This tool lets you create organic shapes from a sphere by dynamically adding or removing geometry.
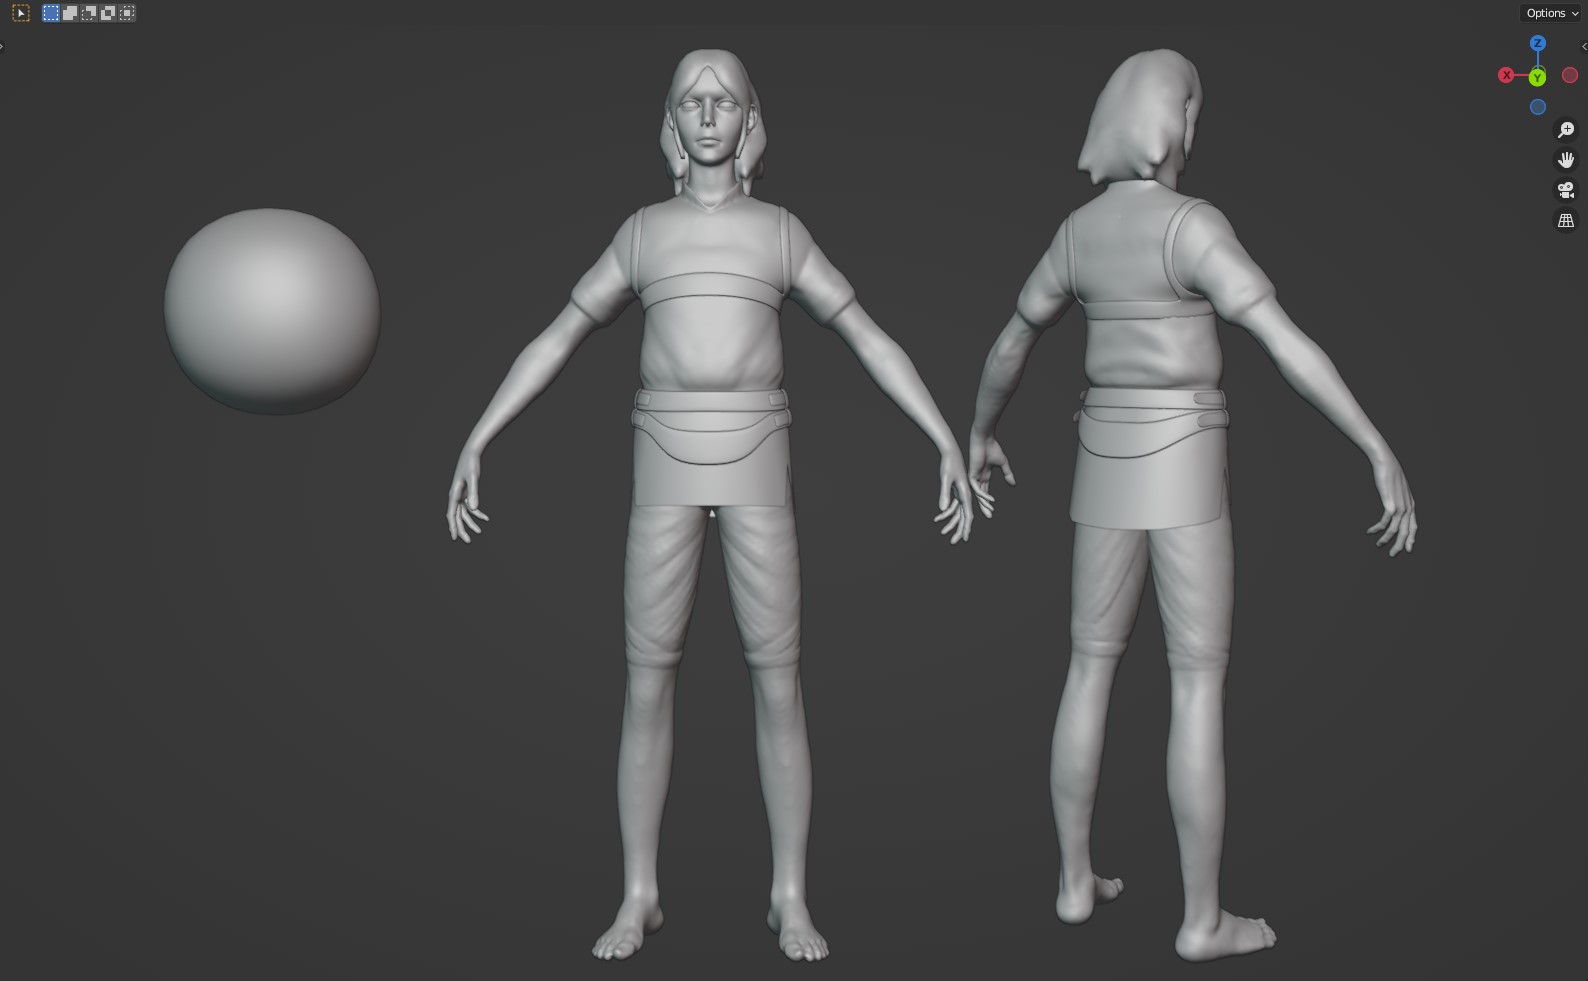
After the main sculpt was done, the model had to be reto-pologized in order to be rigged and UV-unwrapped. I used an addon to speed up the retopology part called Quadremesher, which gives a pretty decent topology result with one click.
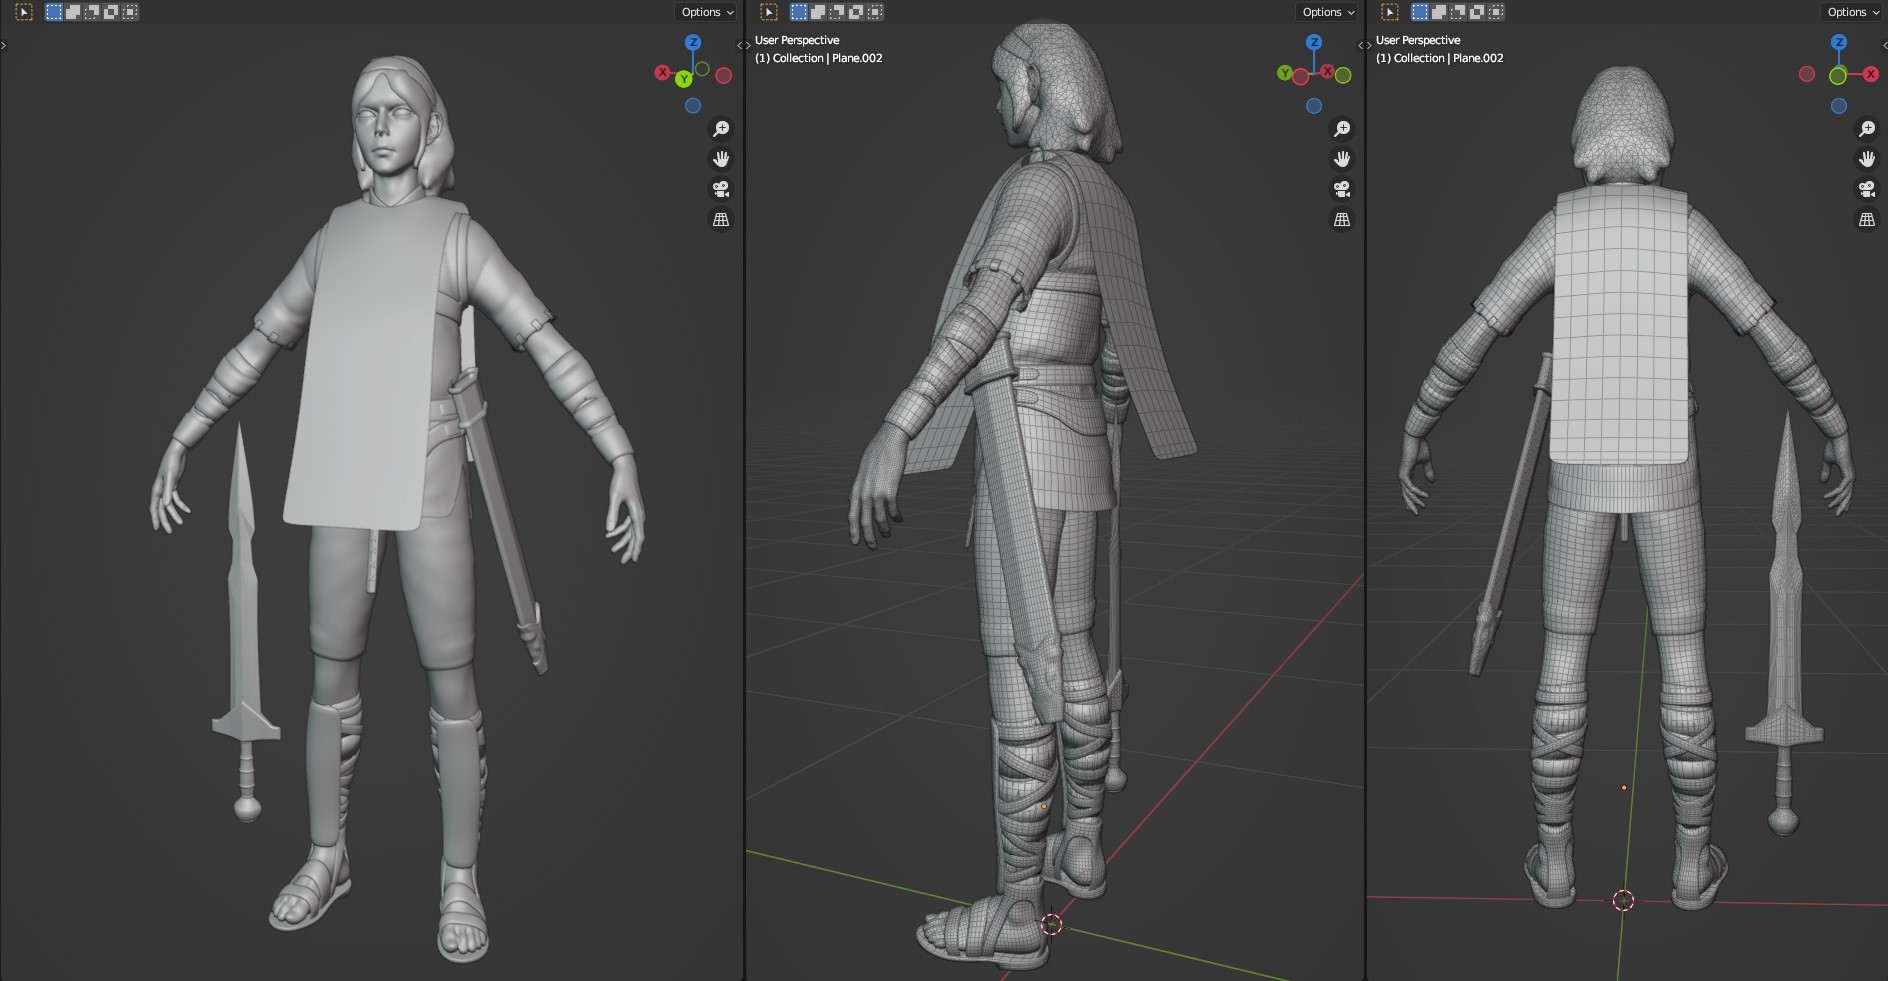
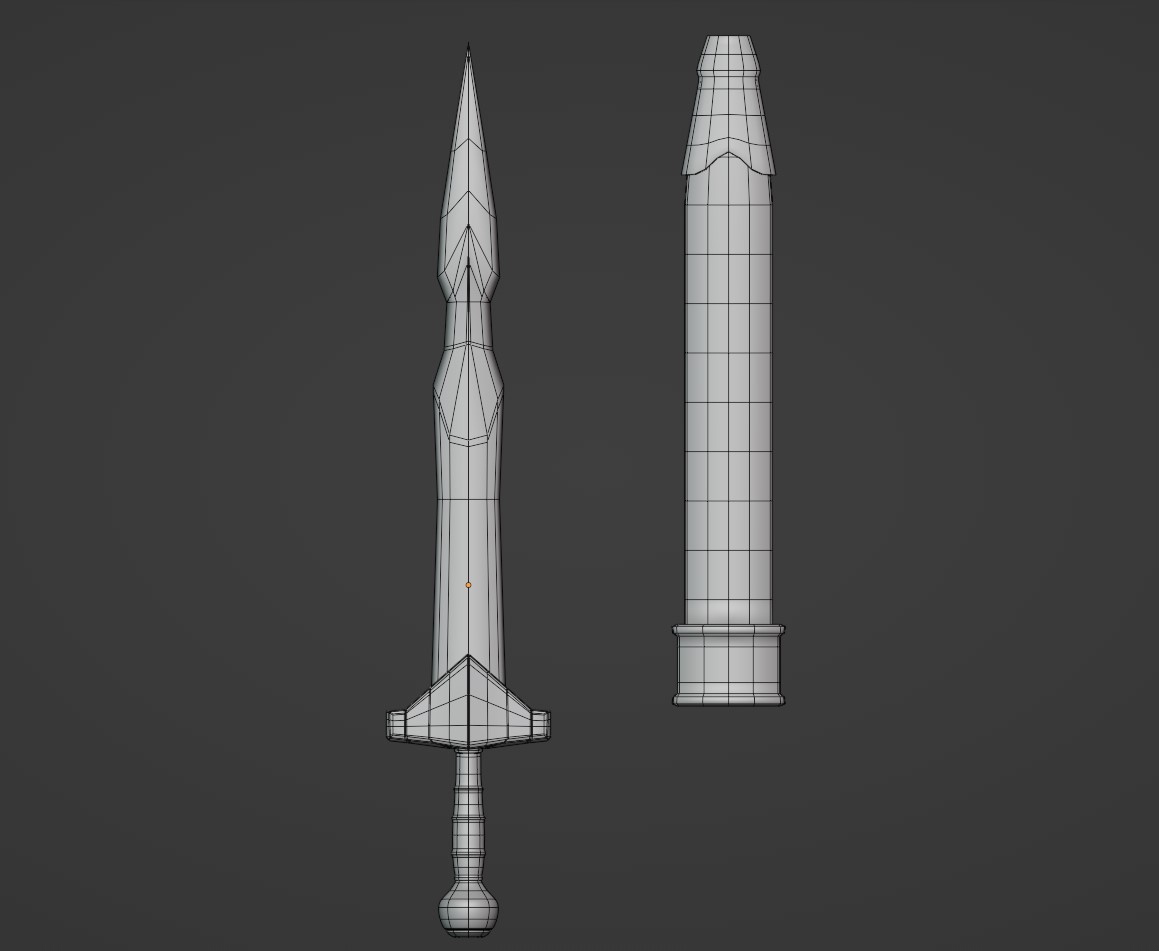
With basic poly modeling, I created the belts, sandals, sword, and case.
RIGGING
Once the main pieces were done, It was time to rig the character.

The pose comes from an instance of the game itself, where the protagonist stands in the presence of a threat.
MULTIRES MODIFIER
With the multires modifier, you can create layers of subdivisions to sculpt fine details that the base mesh wouldn’t allow you to. This helped me create folds and high-resolution details throughout the model, including the sword and belt runes, skin pores, and cloth folds.

It also allows you to bake all those extra layers of subdivisions into a normal or displacement map, keeping all the details and making the scene much lighter.

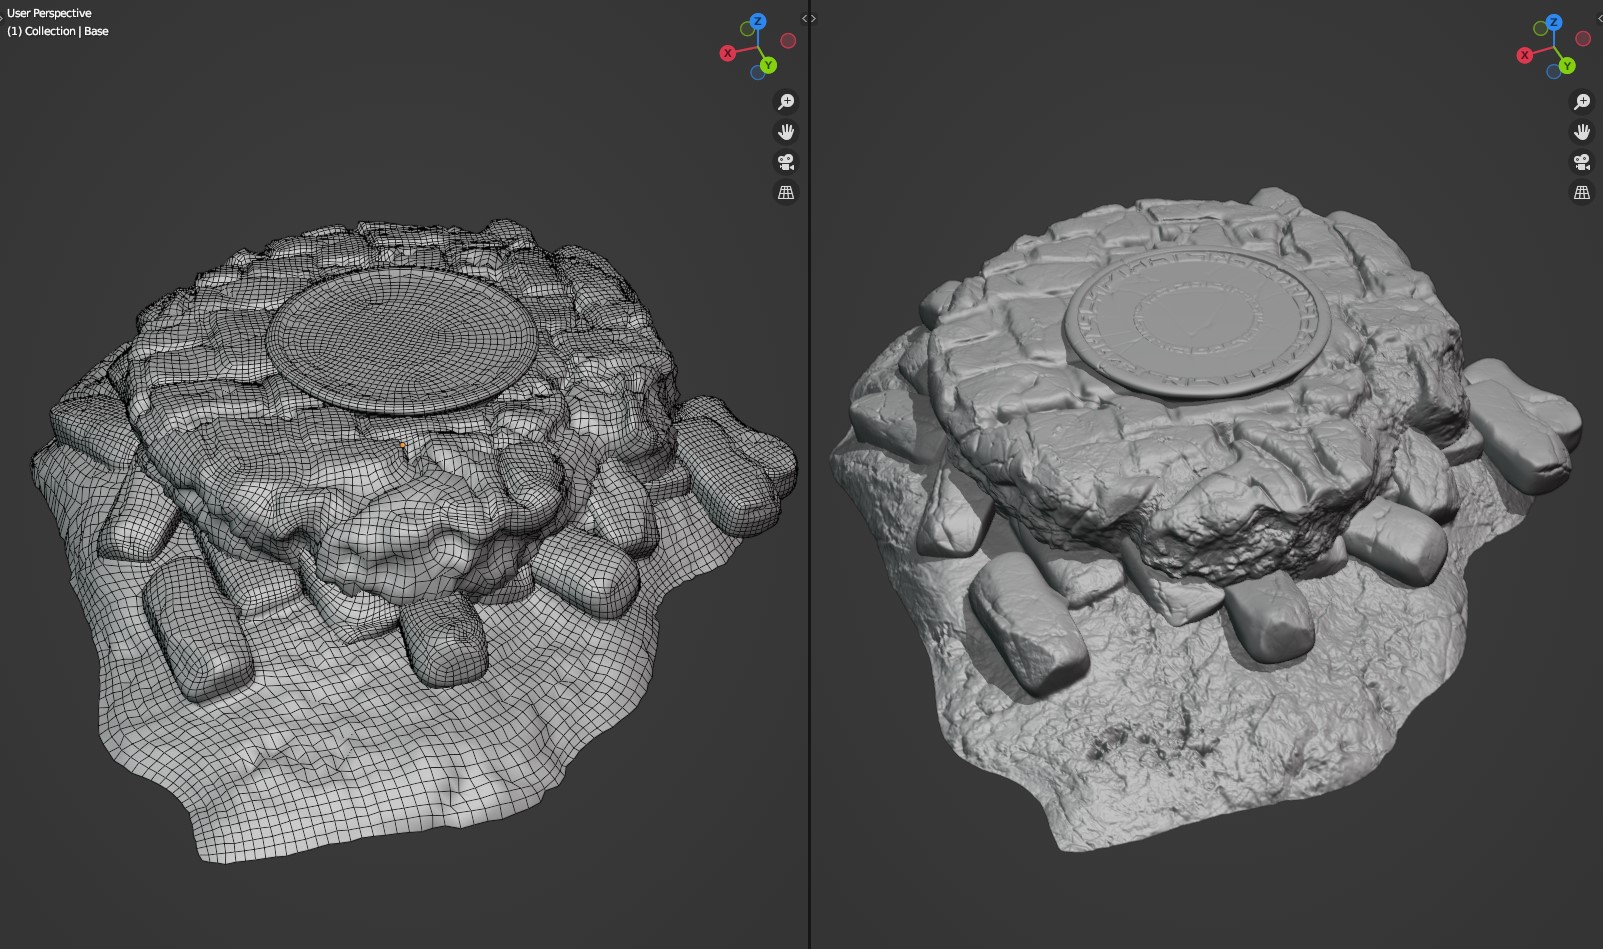
The base followed the same workflow: sculpting the base mesh, retopologizing, adding a multires modifier to sculpt fine details, and then baking it all to a normal map.
CLOTH SIMULATION
I used wind physics to simulate the cape’s movement, pinned the top vertices, and added a weight paint to the bottom where I wanted the wind to have more effect.
TEXTURING
I used Substance Painter to create PBR textures for the model and base, following a workflow based on layers and masks. I started with smart materials that already had realistic physical properties, and then added hand-painted variations to customize their appearance.

I also used some Substance Painter features like anchor points to create dynamic effects between layers, such as wear, dirt, and scratches.

I exported the textures in separate maps for each channel (base color, roughness, metallic, normal, etc.) and applied them in Blender using the principled shader BSDF.
HAIR
The hair was done using Blender’s particle system, creating guide hairs to later add interpolated children particles.

I added three different layers of hair to break some patterns and make the hair flow appear more naturally.

For the hair shading, I used a simple node setup that allowed me to tweak values easily. Using the curve info node helped me have better control of colors, adding randomness and color variation through the curve’s length.

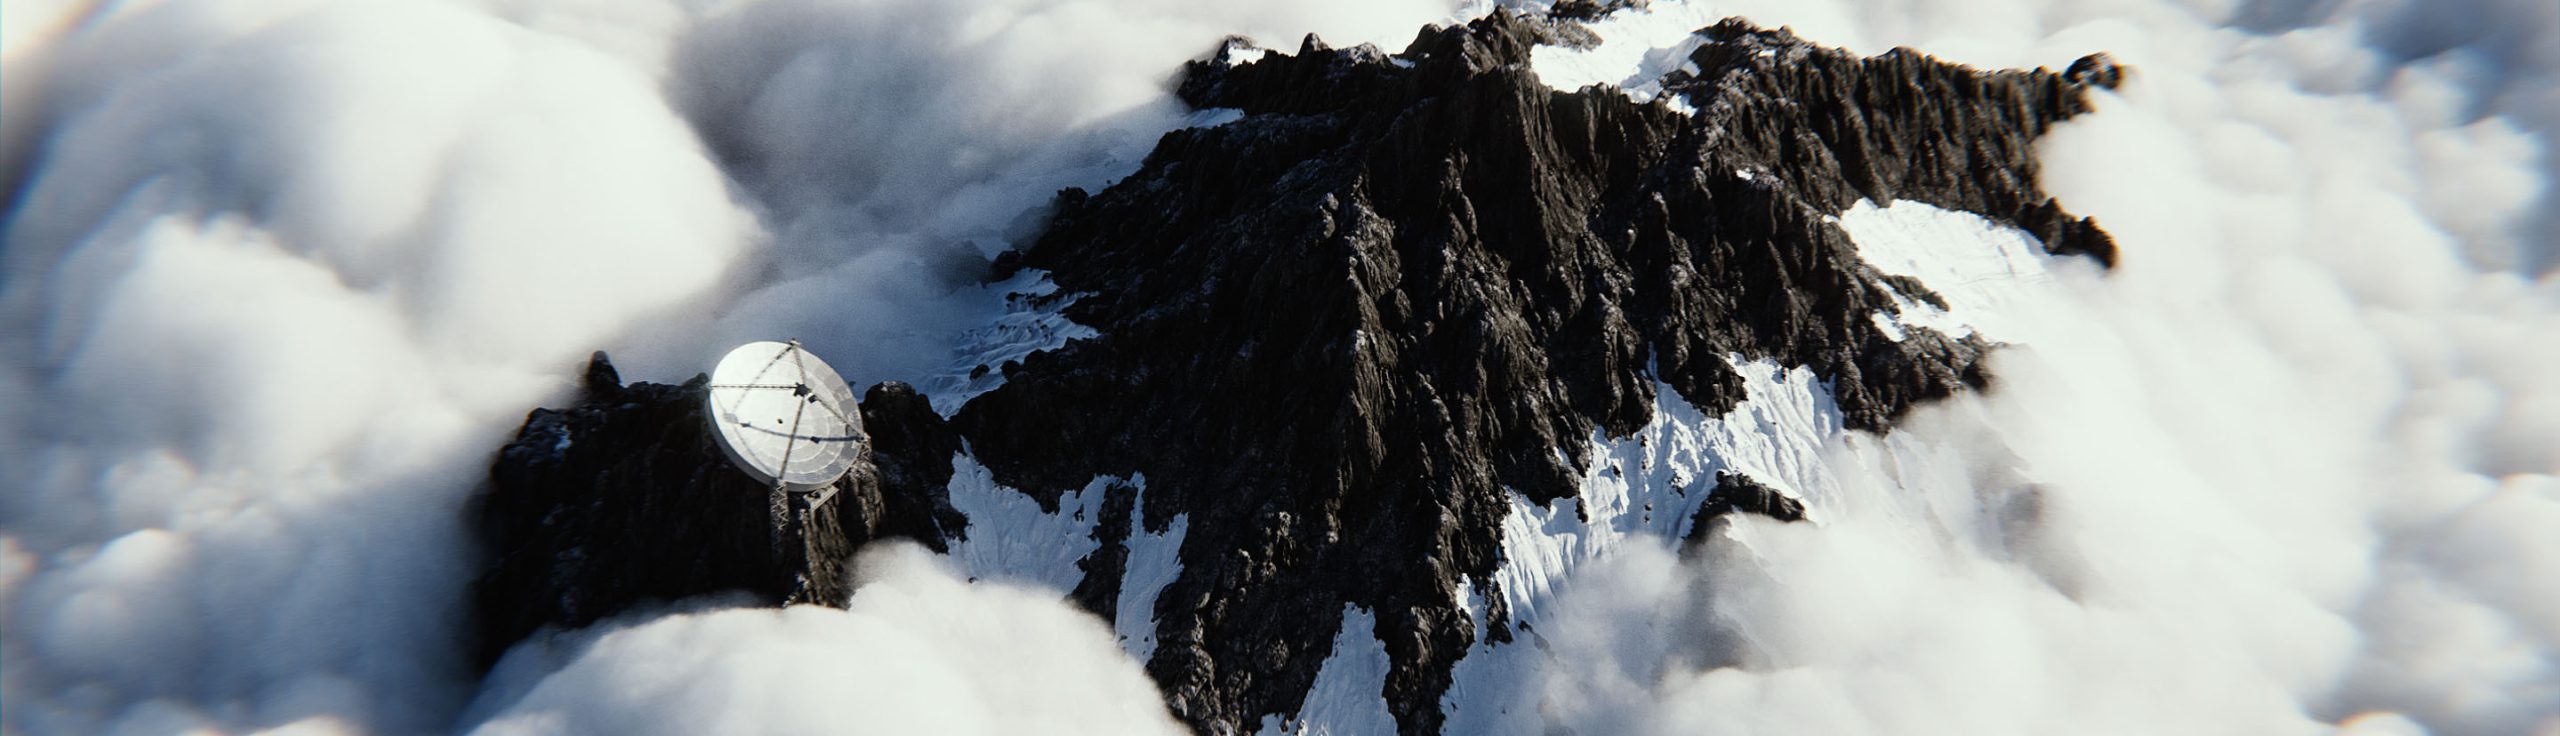
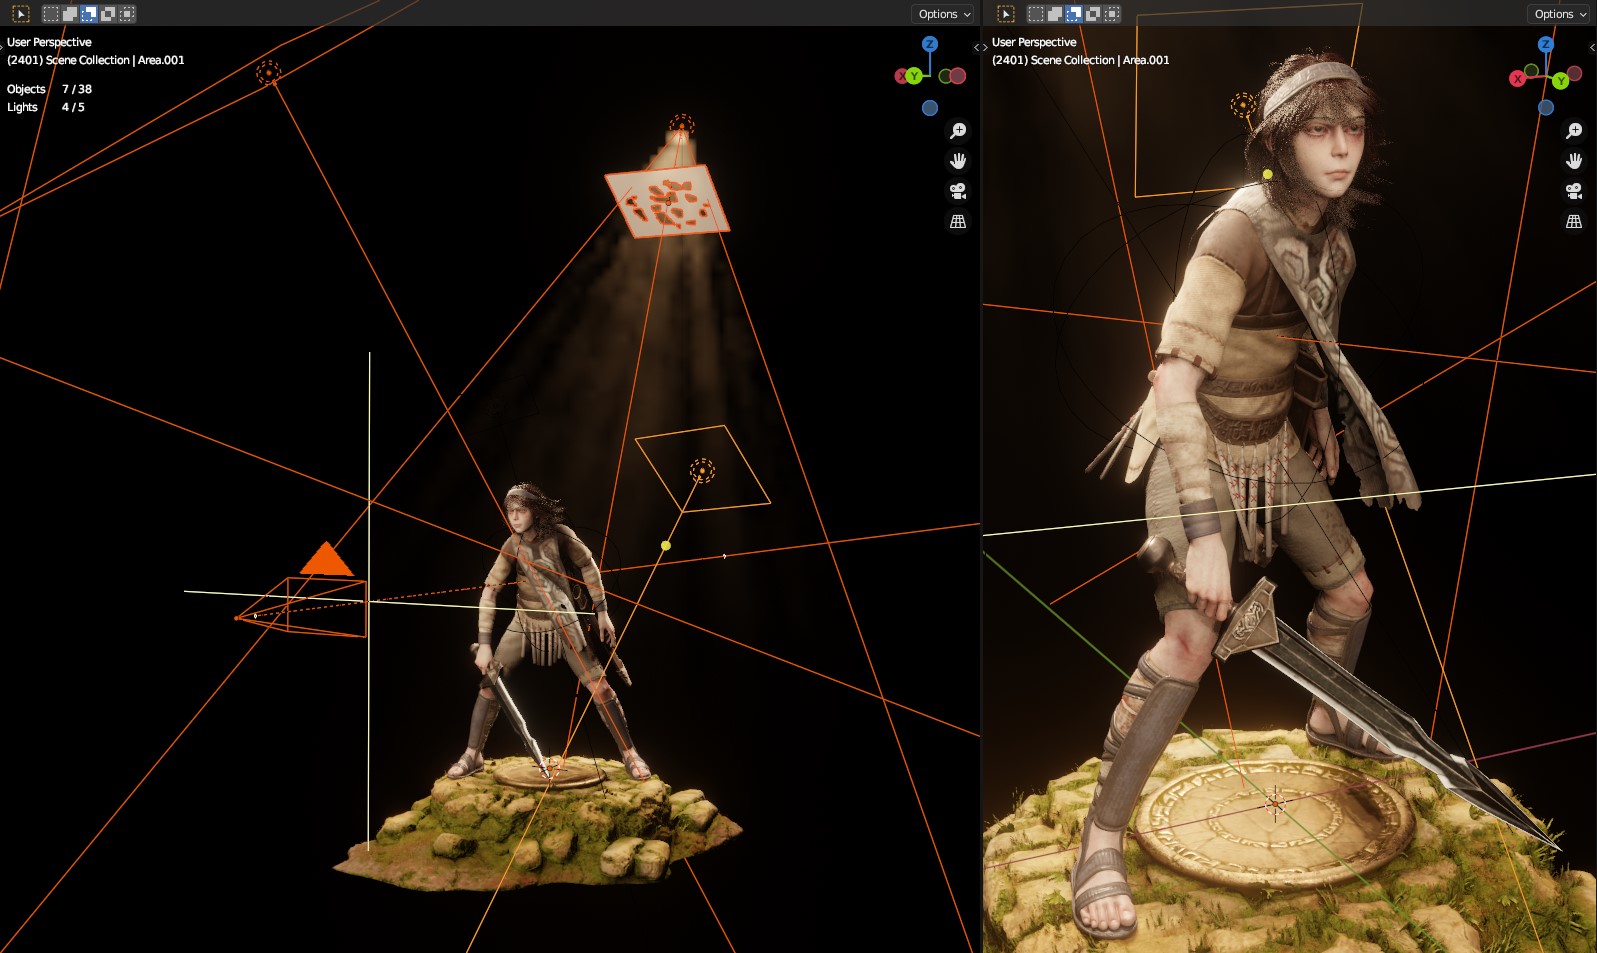
LIGHTING
To create a realistic and dramatic lighting effect, I used a combination of area lights and ambient lighting. I added a cube with a volume shader to create an effect of fog and light rays, which help to highlight elements in the scene and create depth.

I used ambient lighting to add more variation and realism to the scene, using an HDRI image as an indirect light source. The HDRI image has high exposure values, which allows you to capture the colors and shadows of the environment more accurately.
You can check out the full timelapse video of this model here named, RECREATING Wander (Shadow of the Colossus) in BLENDER – Full Timelapse.
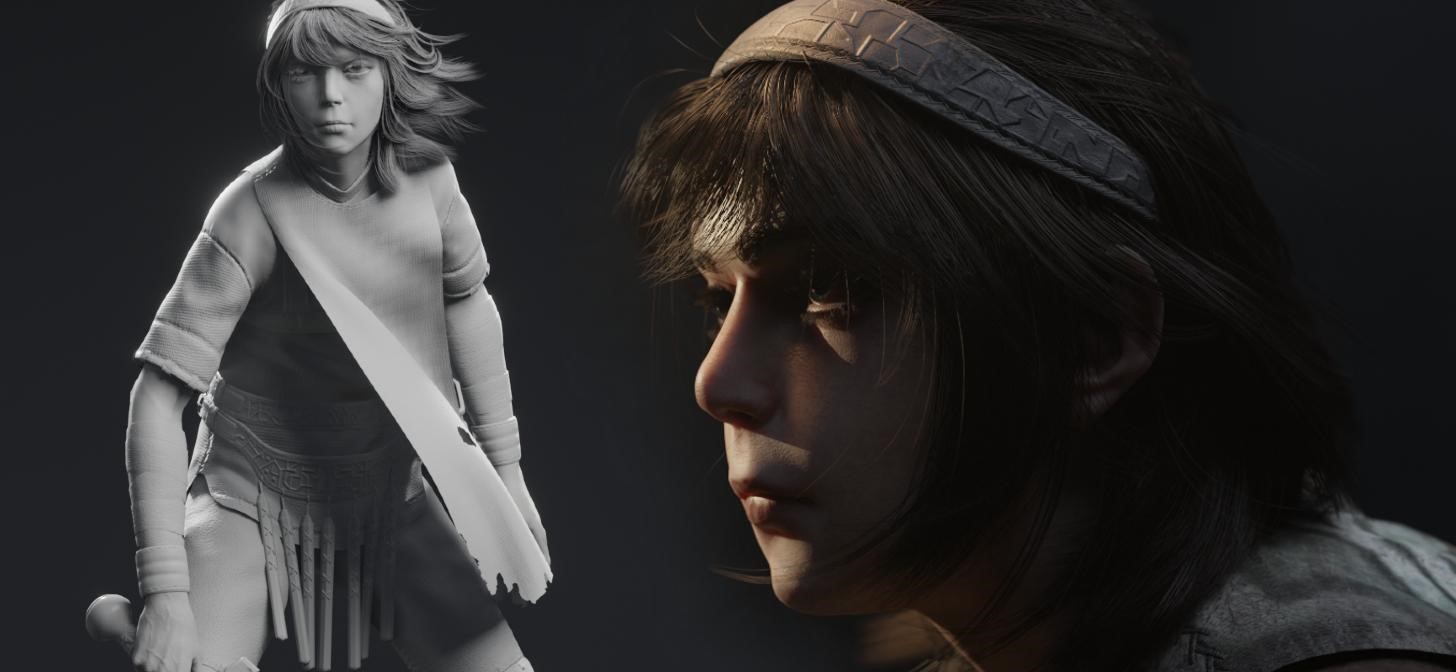
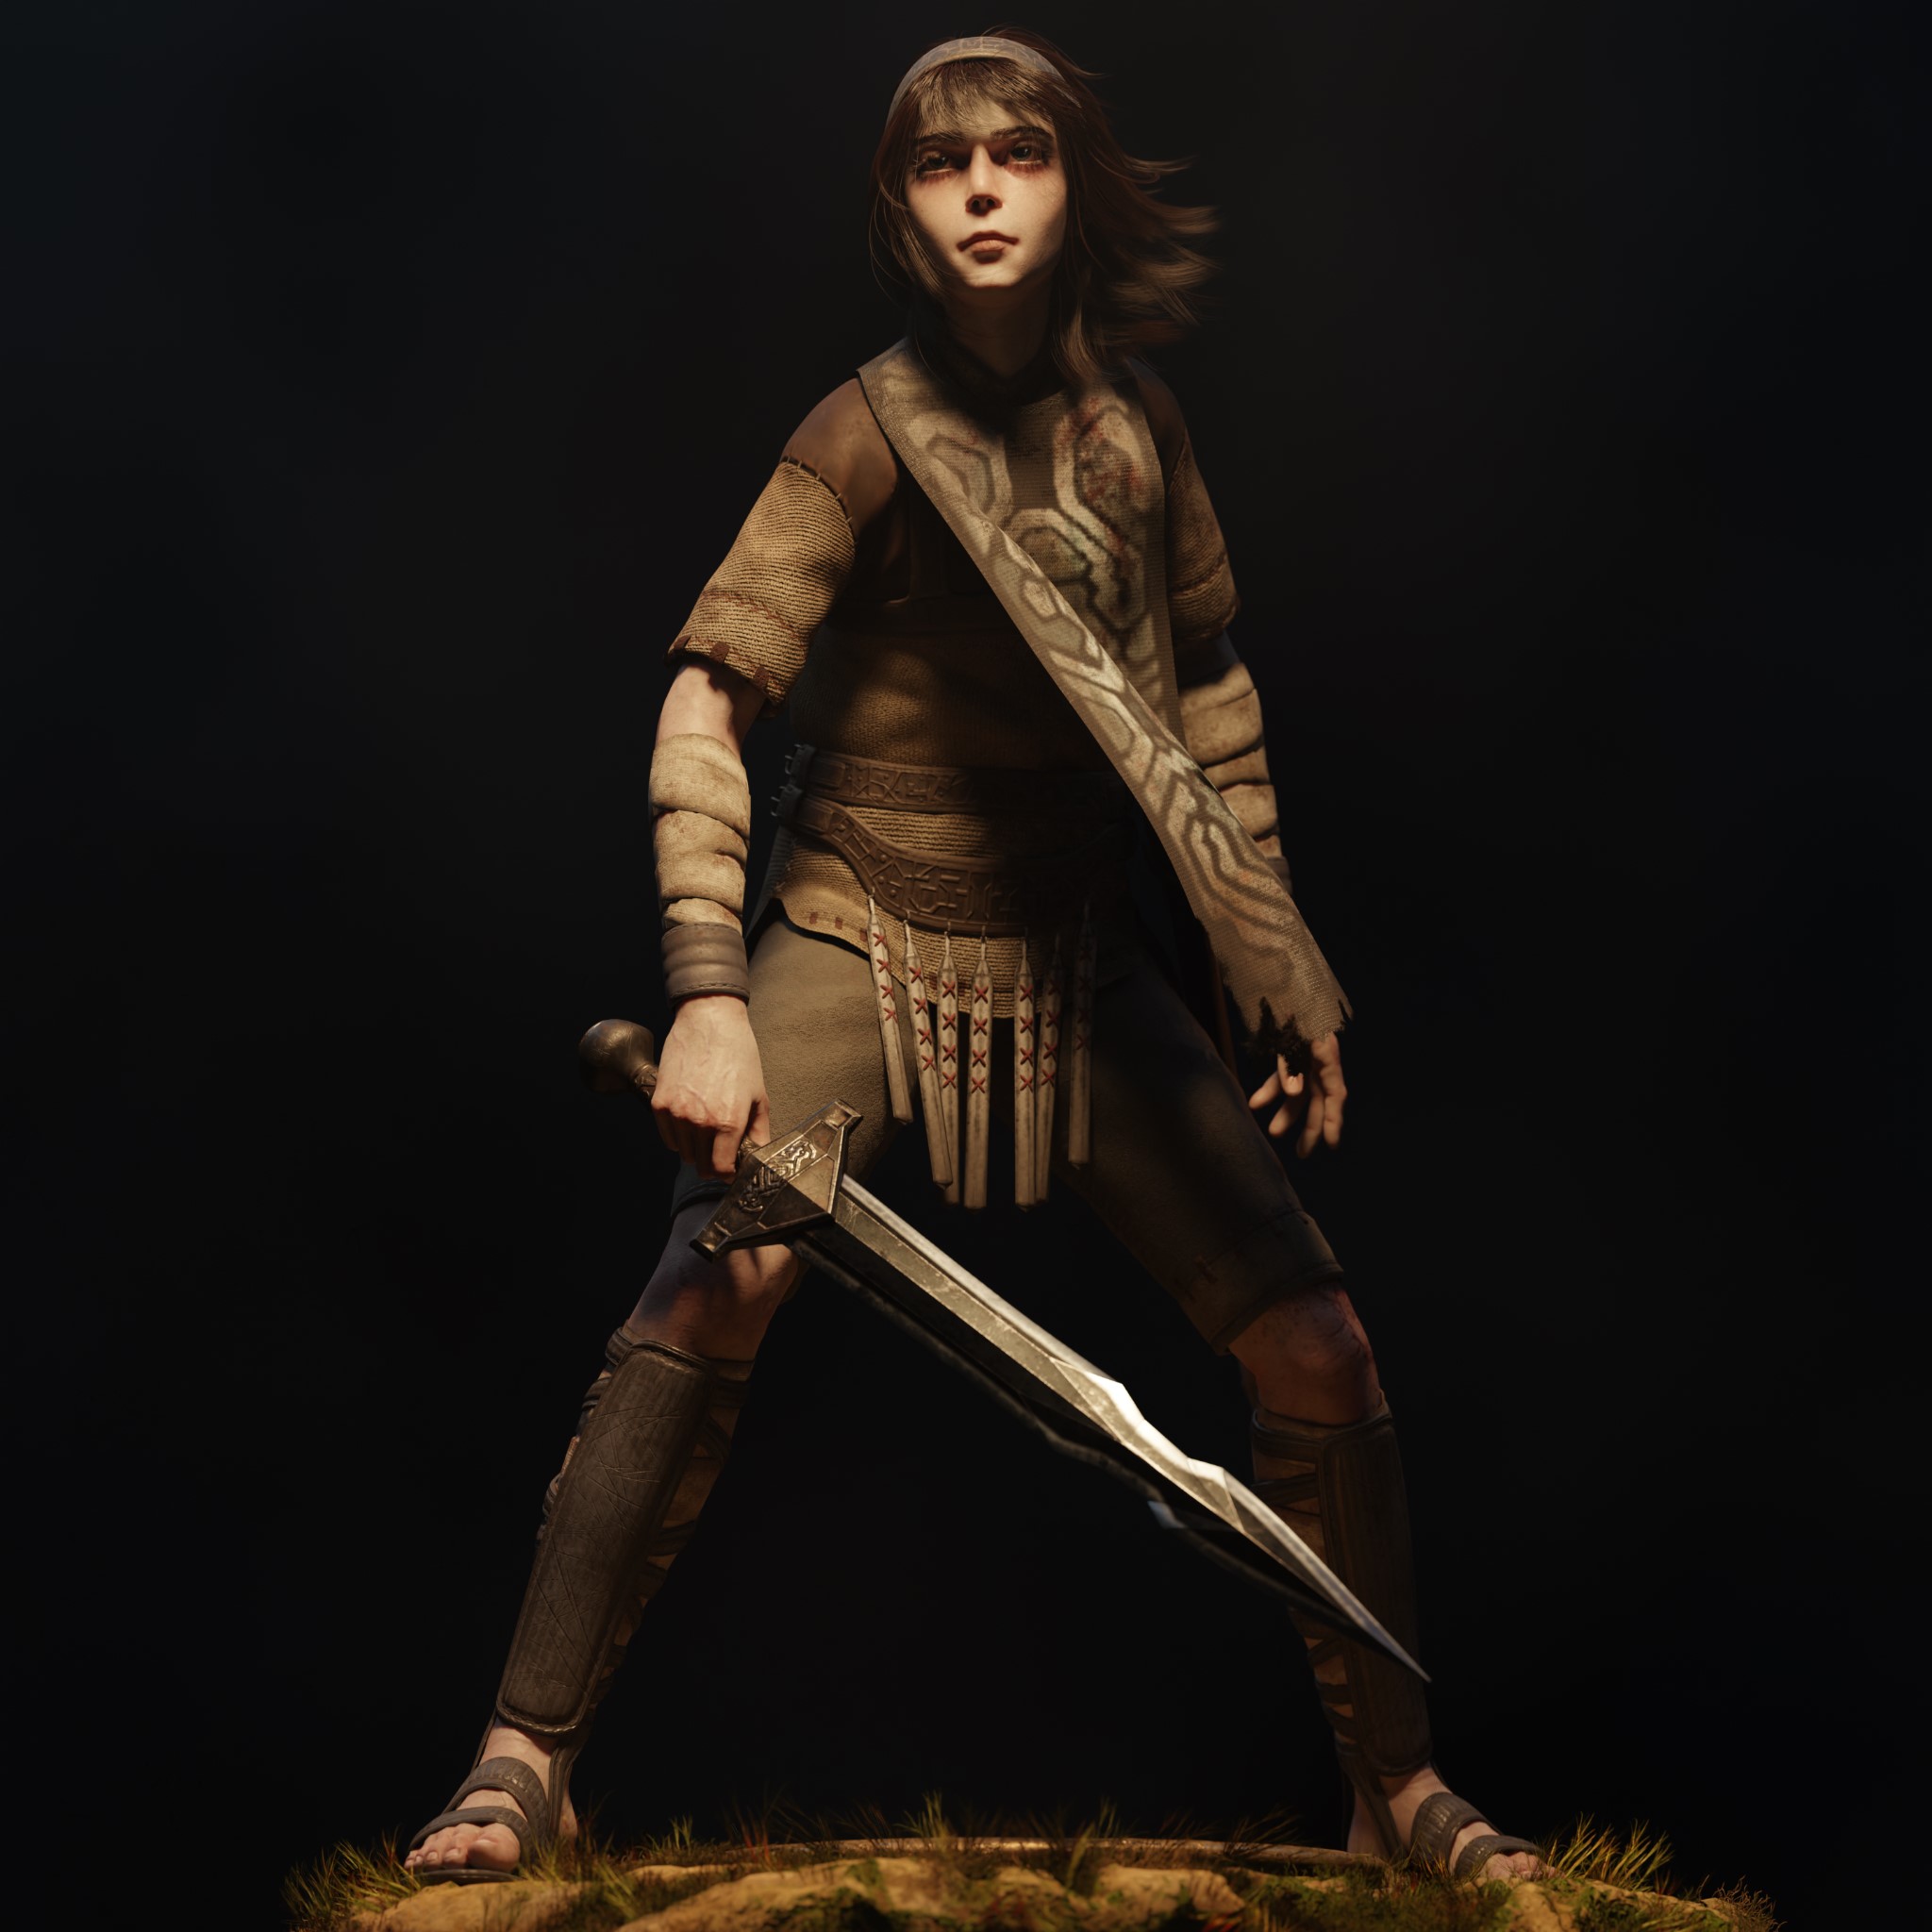
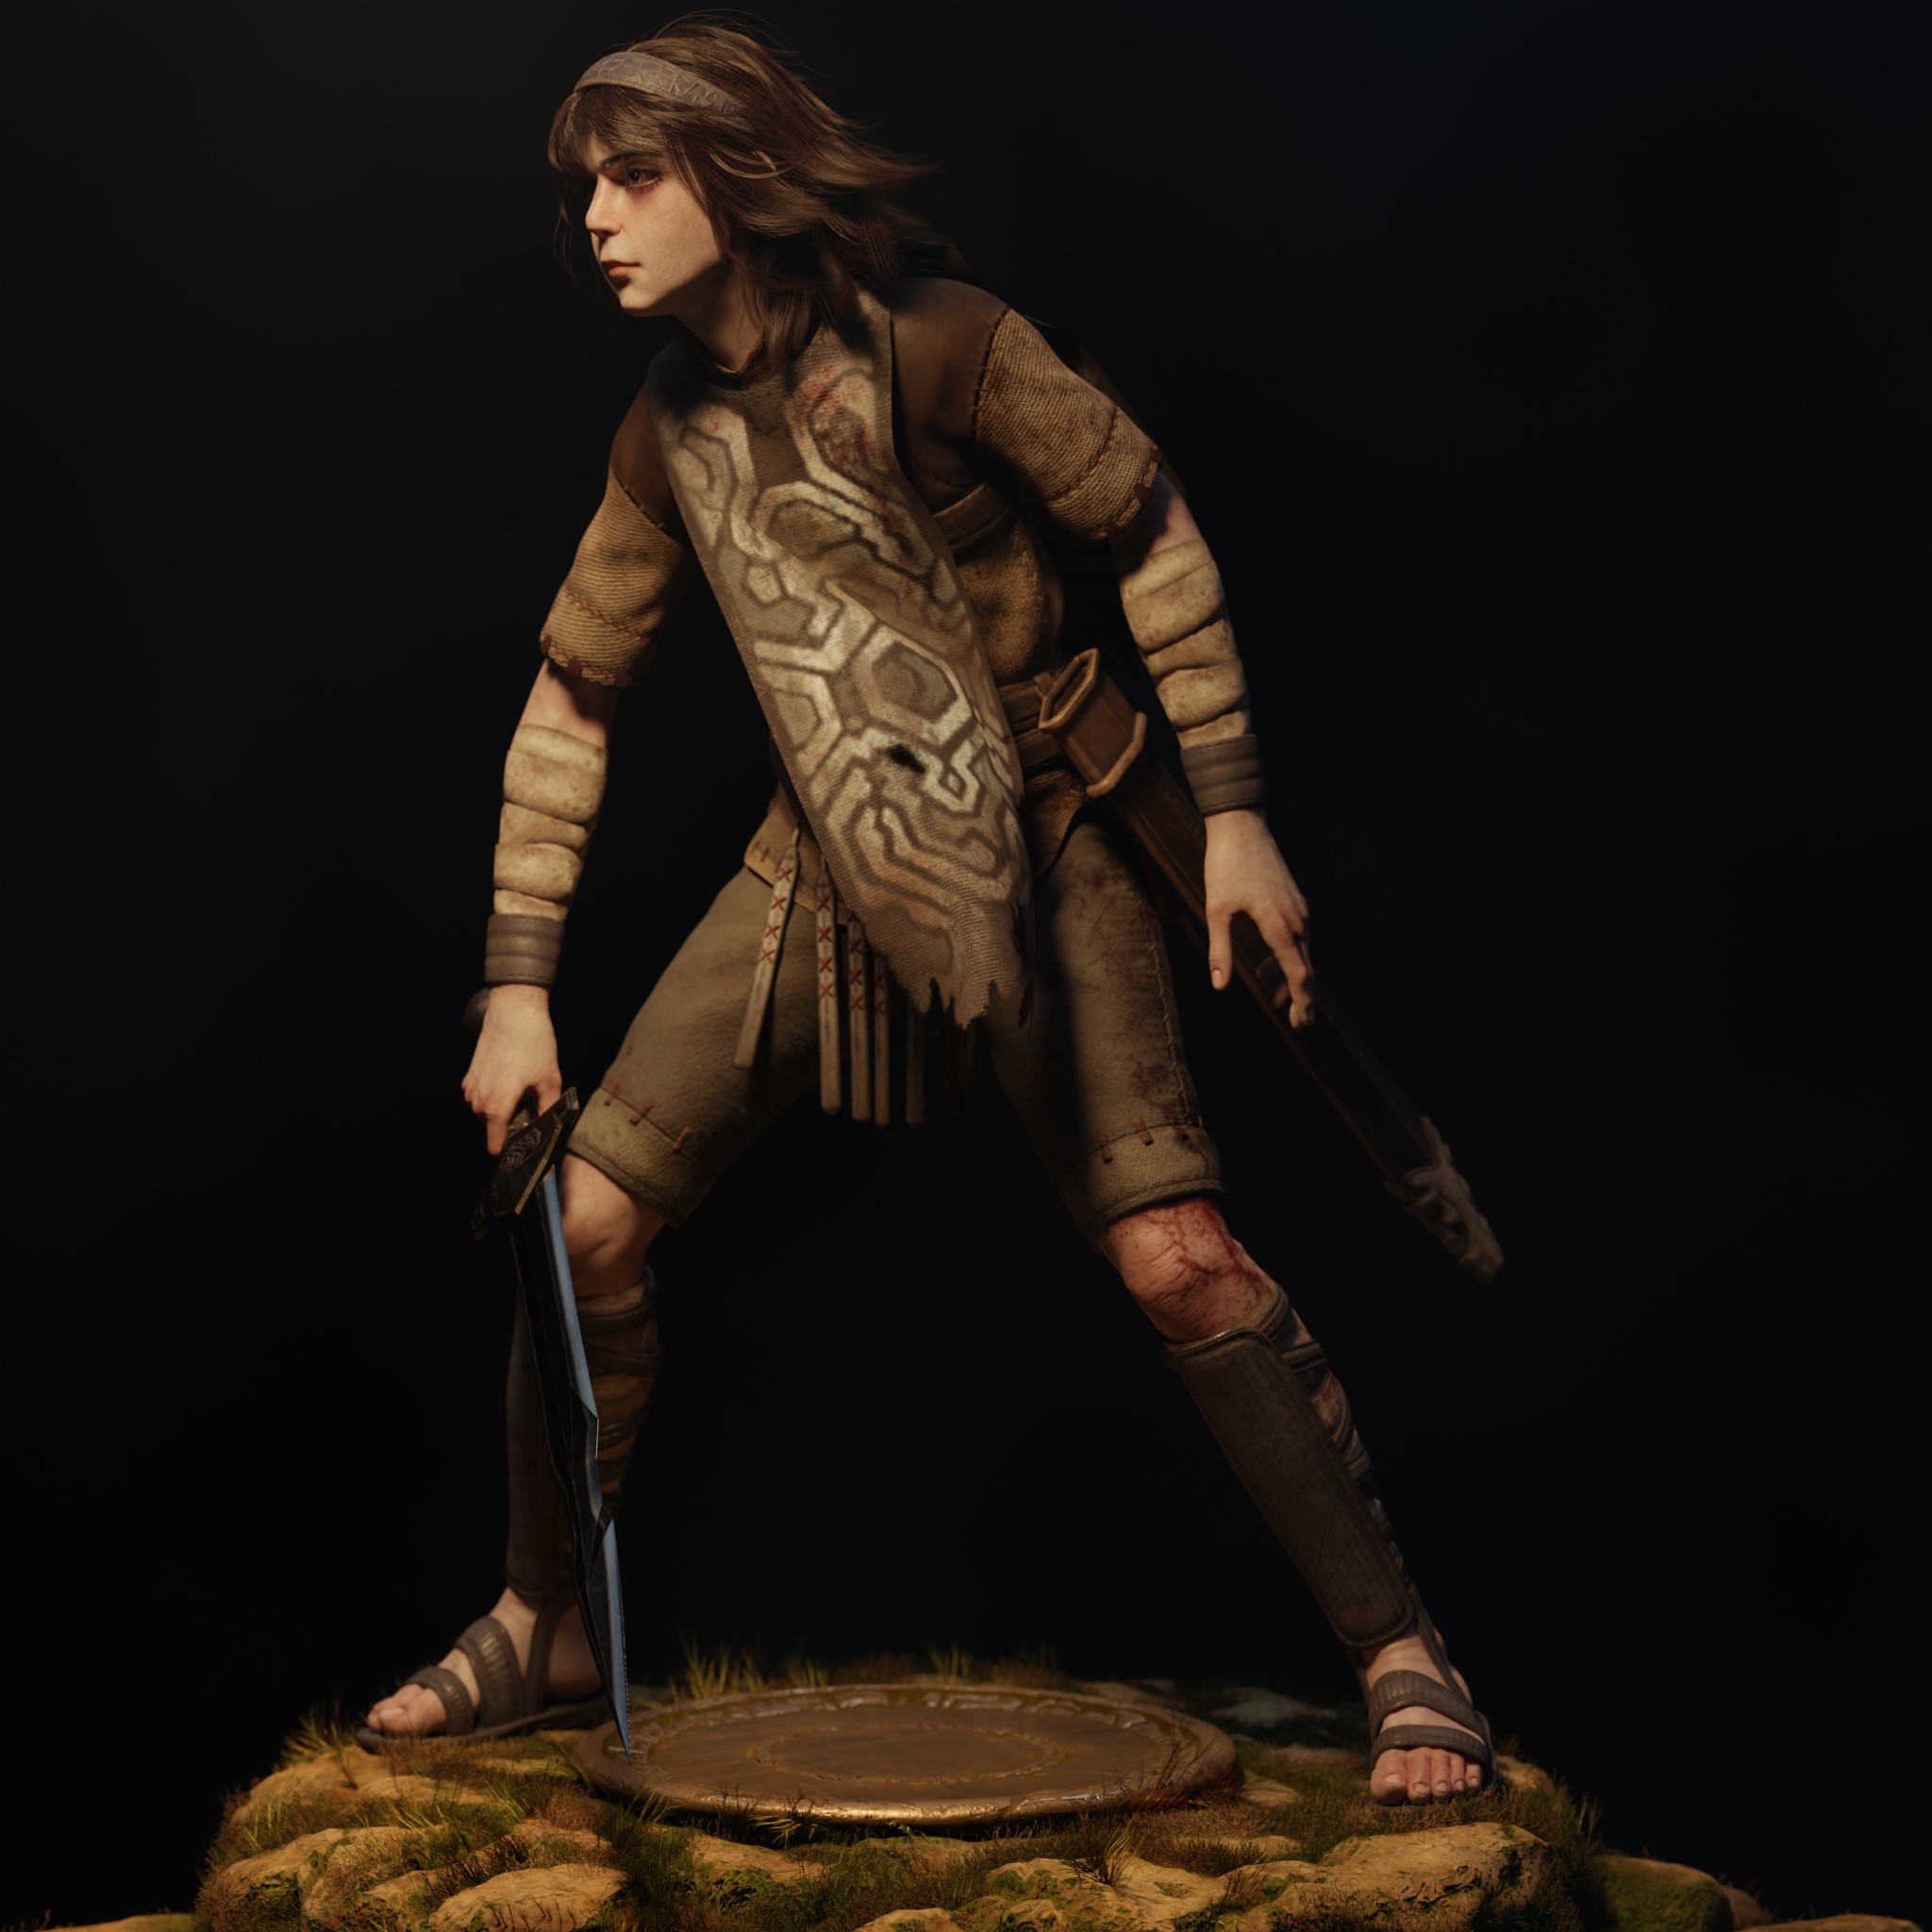
And that was the whole process of this project. Below are the final renders. I hope you like them!
RENDER : Wander – Shadow of the Colossus


Thank you for reading the article, I hope you found it useful. You can check out some of my work on my social media accounts. Have a wonderful day!
About the Artist
Elder Barreto is a 3D artist from Brazil, currently working as an indie game developer.


wow. amazing. good luck.