Behind the Scenes: Kitchen Visualisation
INTRODUCTION
Hey everyone, my name is Tomas Marcevicius, and I am a 3D artist from London. After working as a photo retoucher for over 10 years, I got my hands on Blender in 2020. It all started when I had to work on a project that required 3D elements. Although Photoshop provided such a tool, my PC was too weak to go beyond anything basic. Since then, I have been gradually studying Blender.
INSPIRATION
After completing my last project, Bathroom Visualisation, I decided to do a little one-view kitchen project. I started my search for “kitchen ideas” on Pinterest. At first, I had to decide what camera angle I was going to use in my visualisation, then what colour scheme and furniture layout.
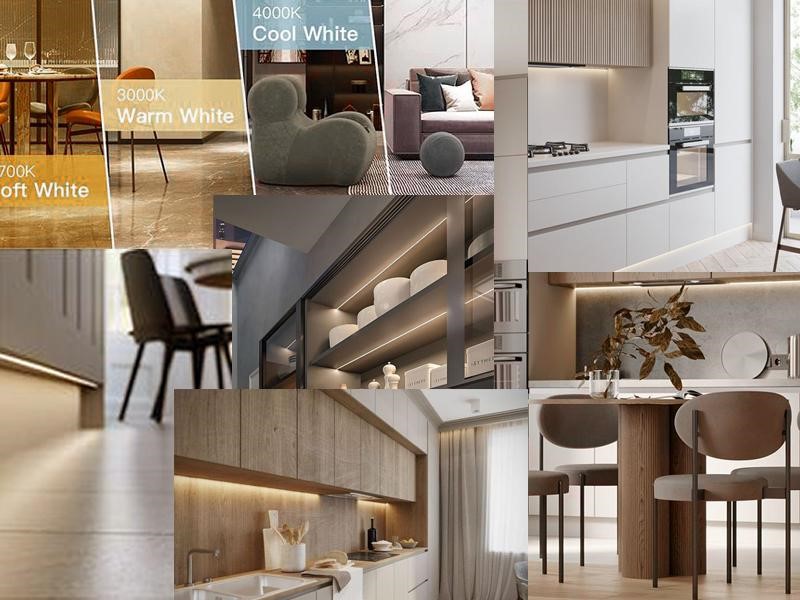
Pinterest can be overwhelming at times, due to the unlimited variety of photos, but narrowing down the criteria, I managed to shape my visualisation.
PROCESS
The entire modelling, texturing, lighting, and rendering process was completed in Blender. Within Blender, I used a few add-ons, such as GeoScatter for the garden outside, BlenderKit, and Wood Generator by Poliigon for texturing and creating various textures. I would like to thank Imeshh and Poliigon for providing some free assets for my project.
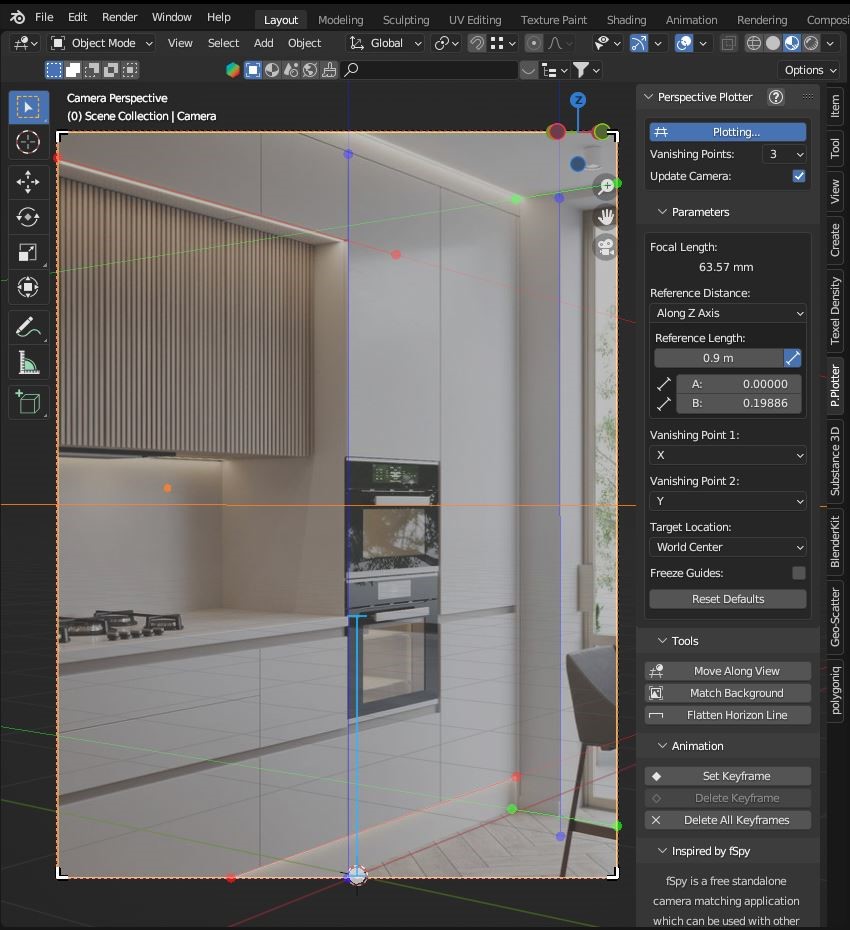
CAMERA SETUP
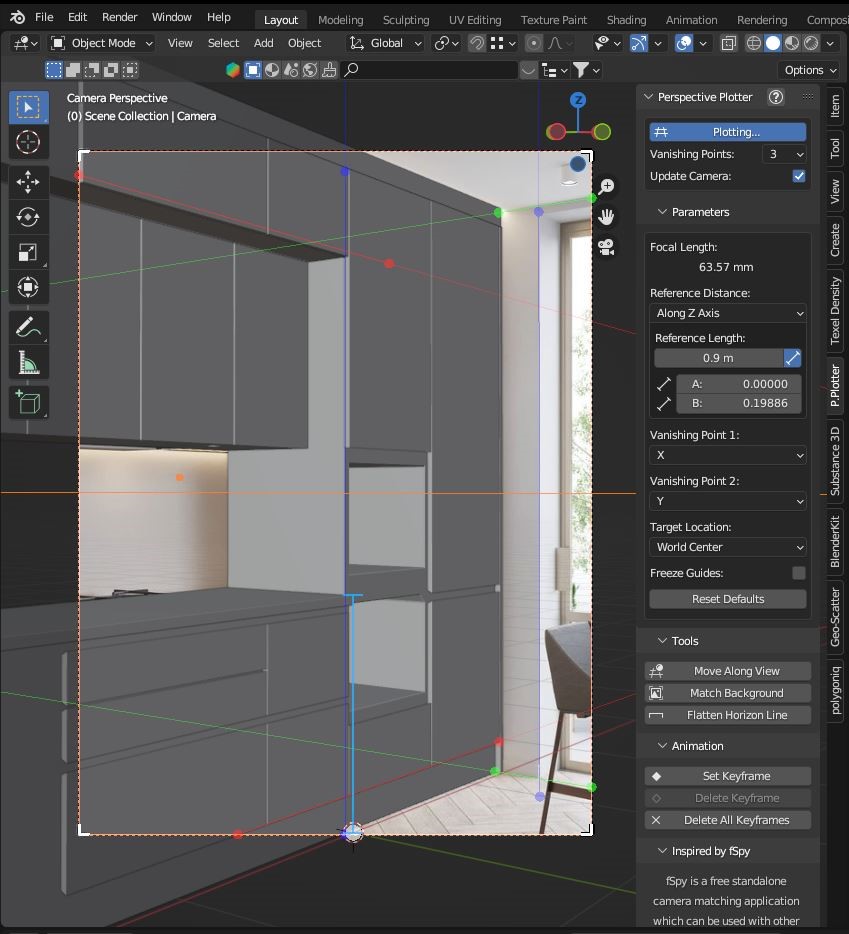
The P.Plotter add-on played a key role in aligning the Blender camera with the reference image before the modelling process began. Although, the free version of a similar tool called F.Spy could have been used, but it is not integrated within Blender, requiring the camera settings to be exported to Blender instead.
MODELLING
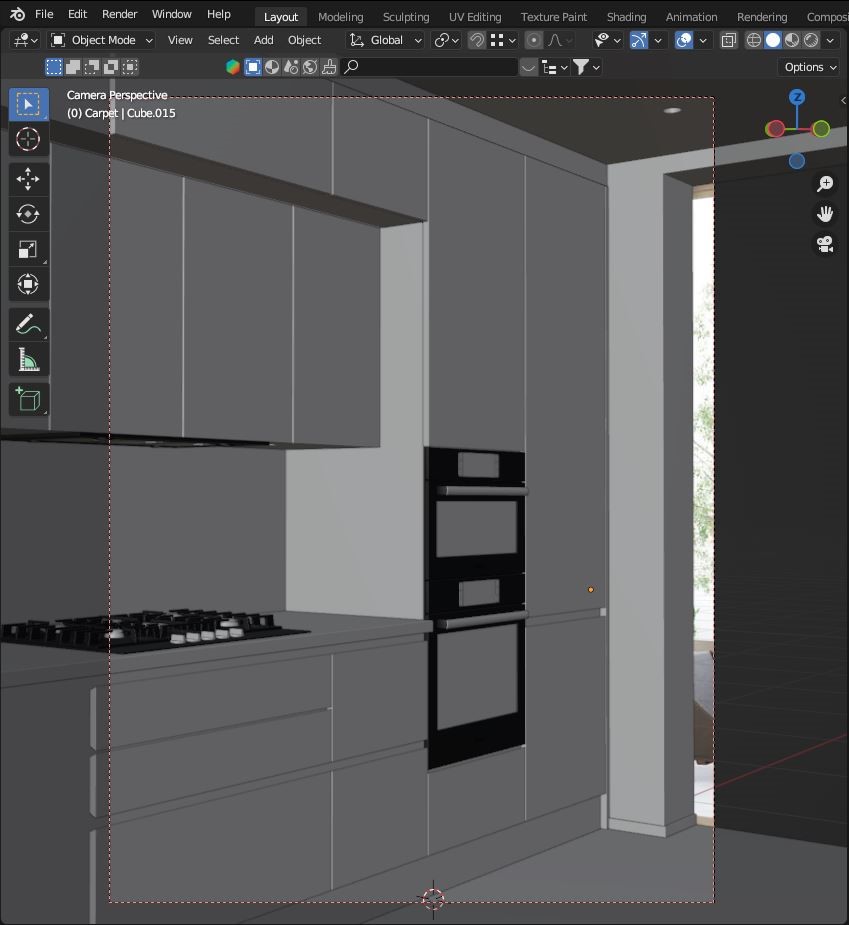
Once I had a reference image in front of me, I started modelling the kitchen furniture and room walls. The modelling process was relatively straightforward.
For this purpose, I used a cube to model any shape required for the kitchen cupboard, creating all the necessary space inside it to accommodate the grill, oven, gas hob, and the kitchen extractor fan, which I purchased from the 3D-Baza asset library shop.
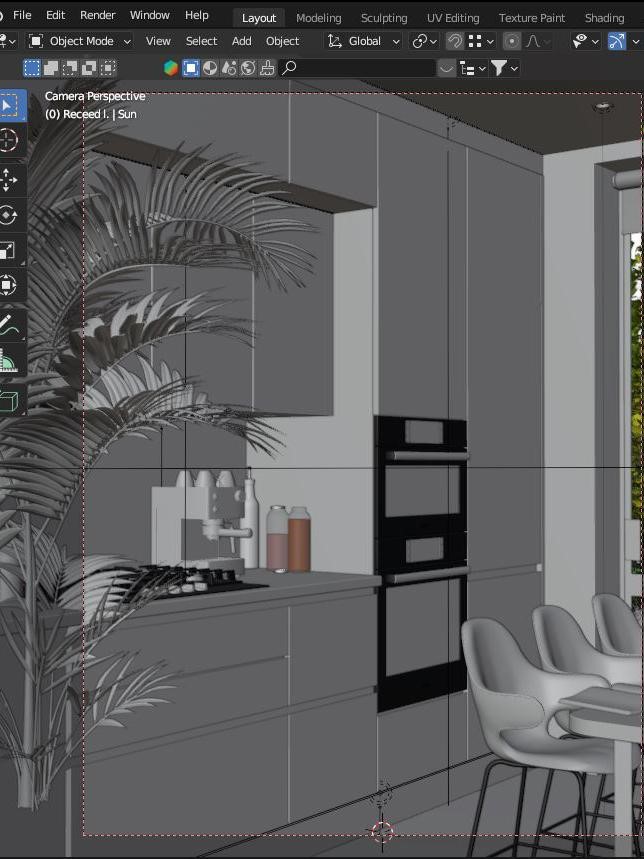
Next, I added a minimal amount of relevant furniture and kitchen accessories—just enough to make it look inhabitable and functional. I also included a plant and a magazine on the table.
LIGHTING
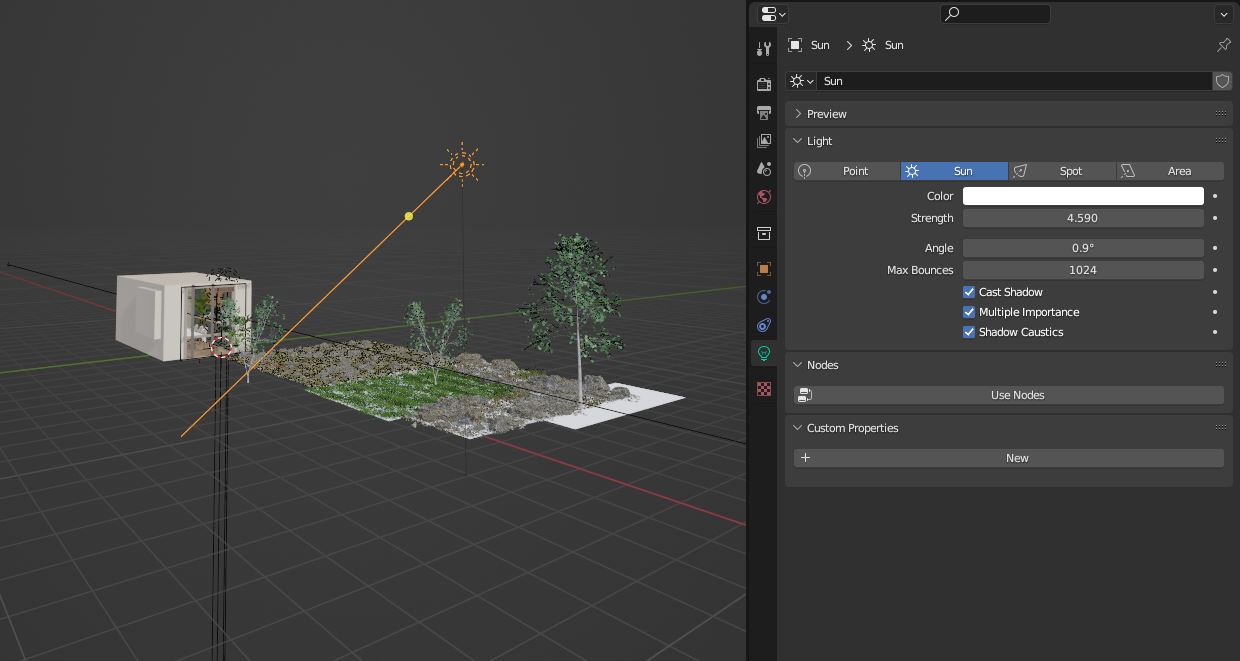
By now, I had built the majority of the room and moved on to adding textures. But before that, I had to introduce world light. For this purpose, I chose Sky Nishita, which I find simple yet flexible enough to suit my needs. In order to have a little more control over the light, I used the Light Path node to adjust the glossy and diffuse parts of the texture separately.

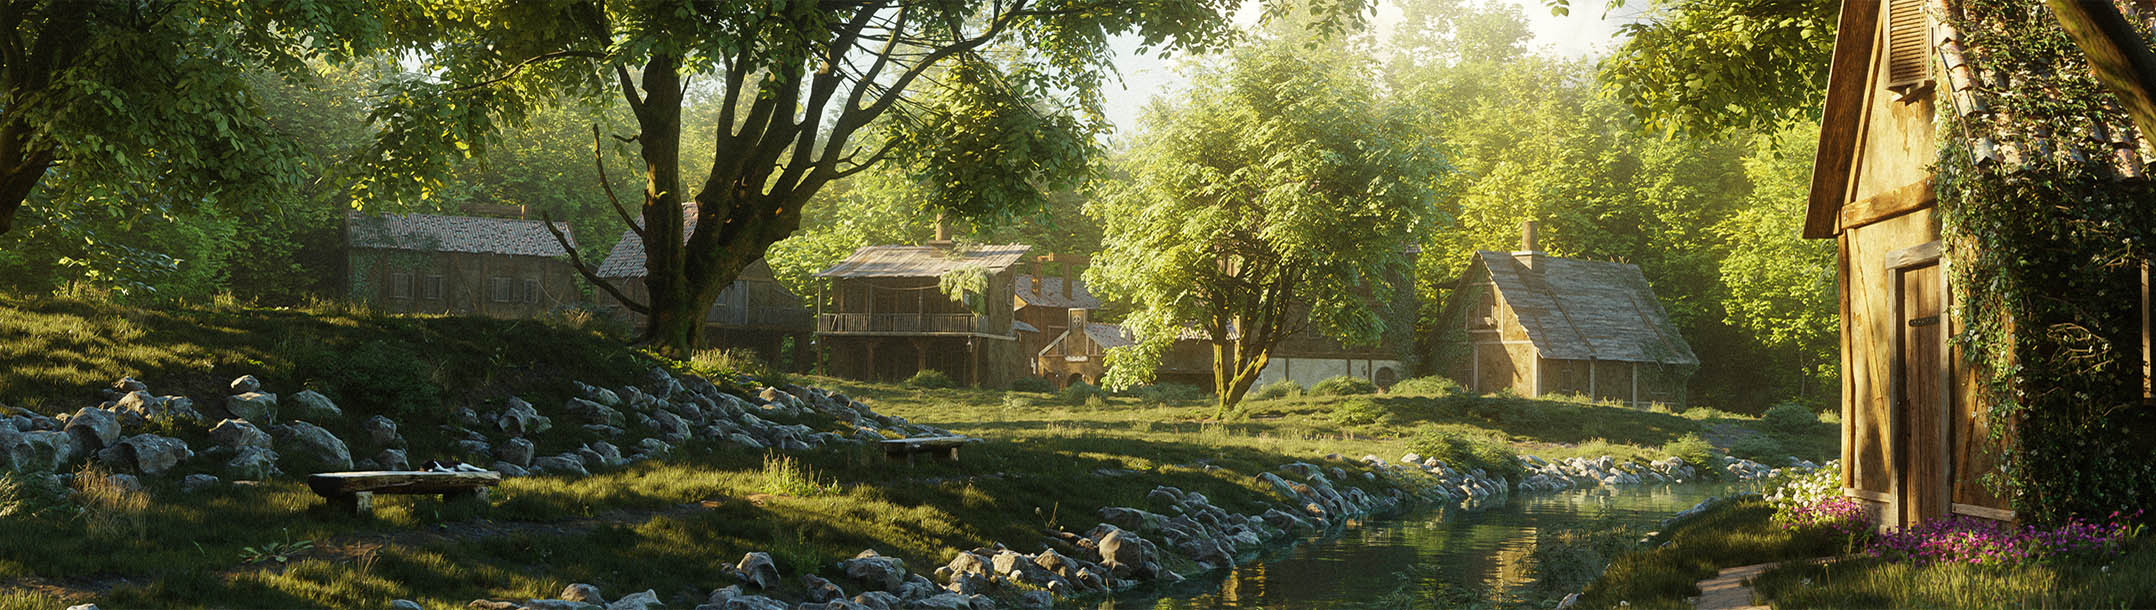
But before we jump to texturing, I wanted to quickly let you know that I added a few trees and grass outside so that the view through the garden door doesn’t look too empty.
TEXTURING
Initially, I thought the material setup would take a lot longer. However, this time, I decided to keep it very simple as long as it worked, and it turned out to be a time-saver. Although I had to work on material reflections and glossiness, it was an enjoyable task.
For example, the grey cupboard material reflected too much saturated colour from the wood floor. Instead of fixing it in Photoshop, I addressed it in Blender. The same grey tone of the cupboard material required the right balance of glossiness, roughness, and specular, so it reflected the appropriate amount of light.
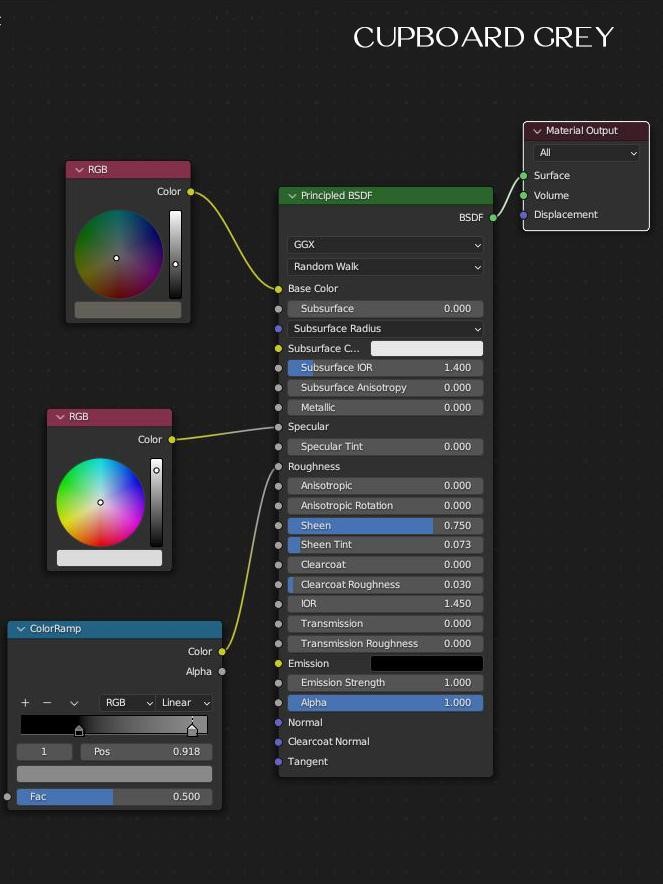
The same principle applied to the floor, wood cupboard, and other materials. Some required minor adjustments, while others took a bit more time.
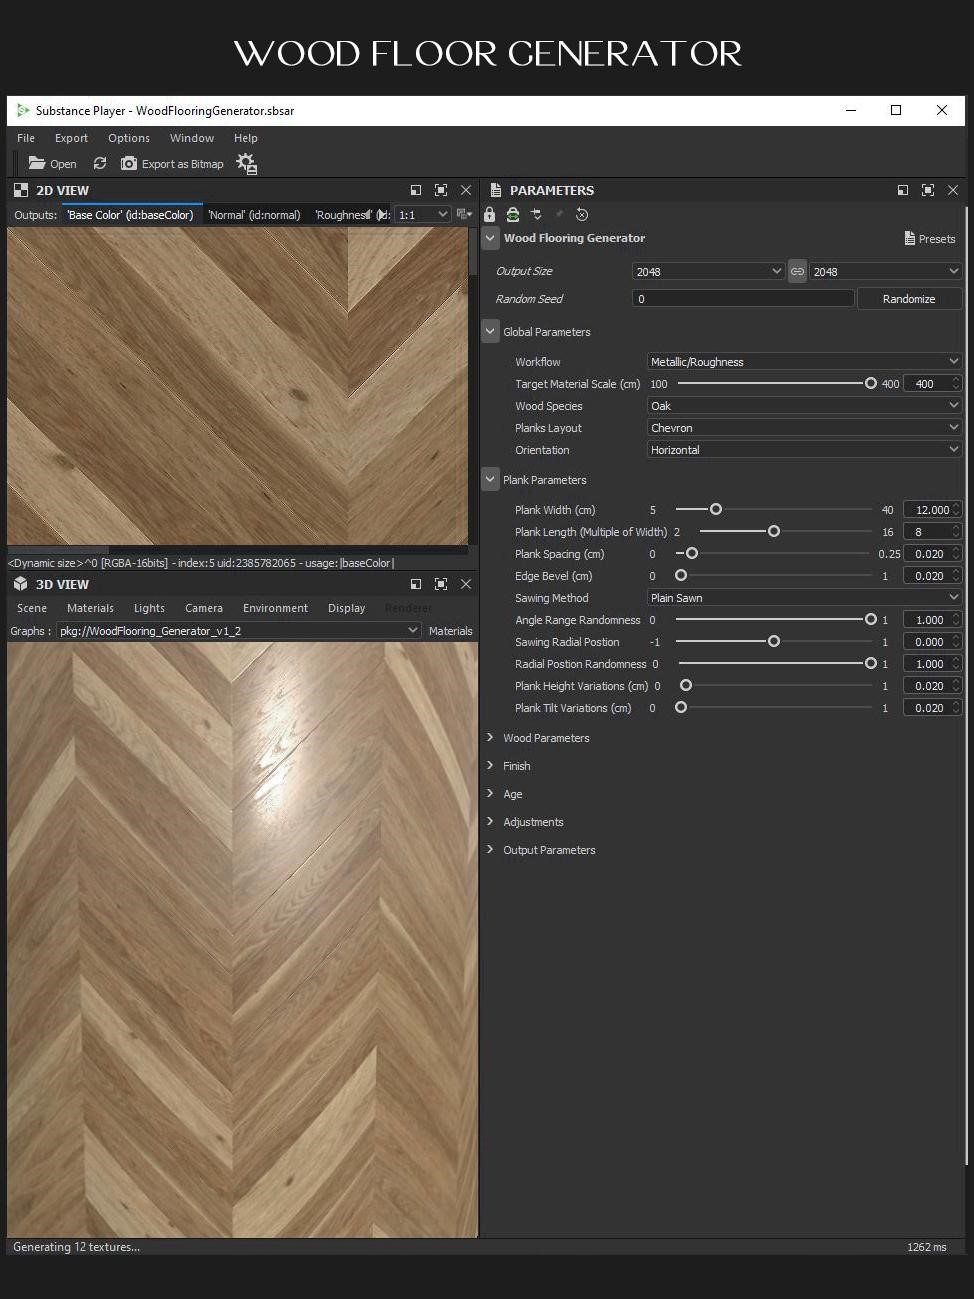
For the floor, I used Poliigon’s Wood Floor Generator, which is a very helpful tool. You can adjust the tile size, colour, grain effect, and floor design however you like to meet the requirements of your project.
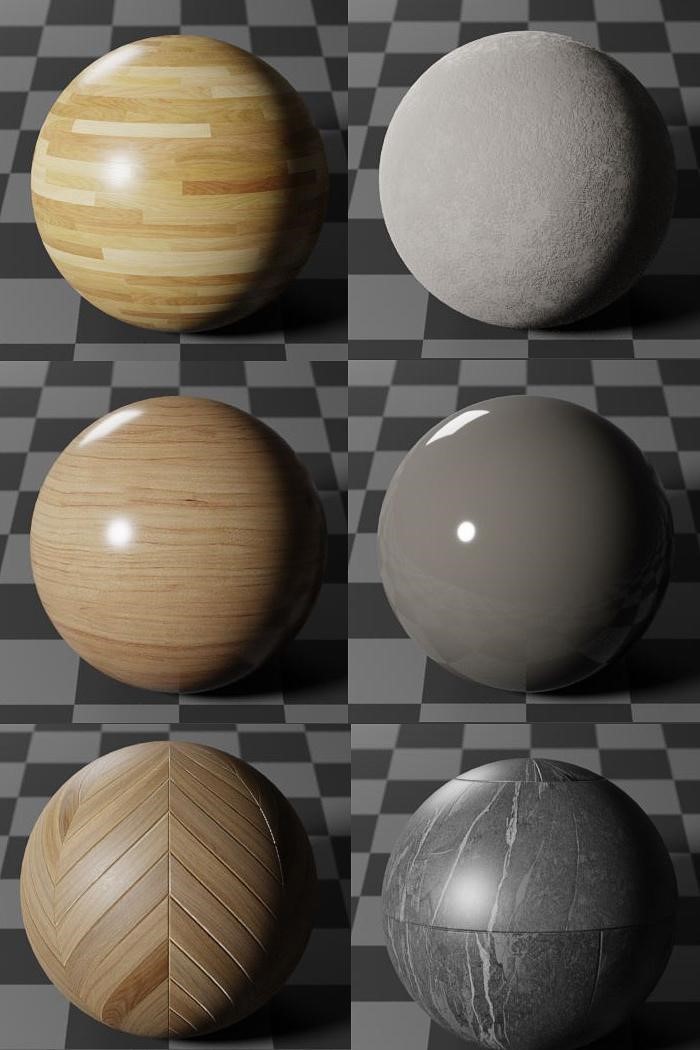
Here are some of the materials I used in this project,
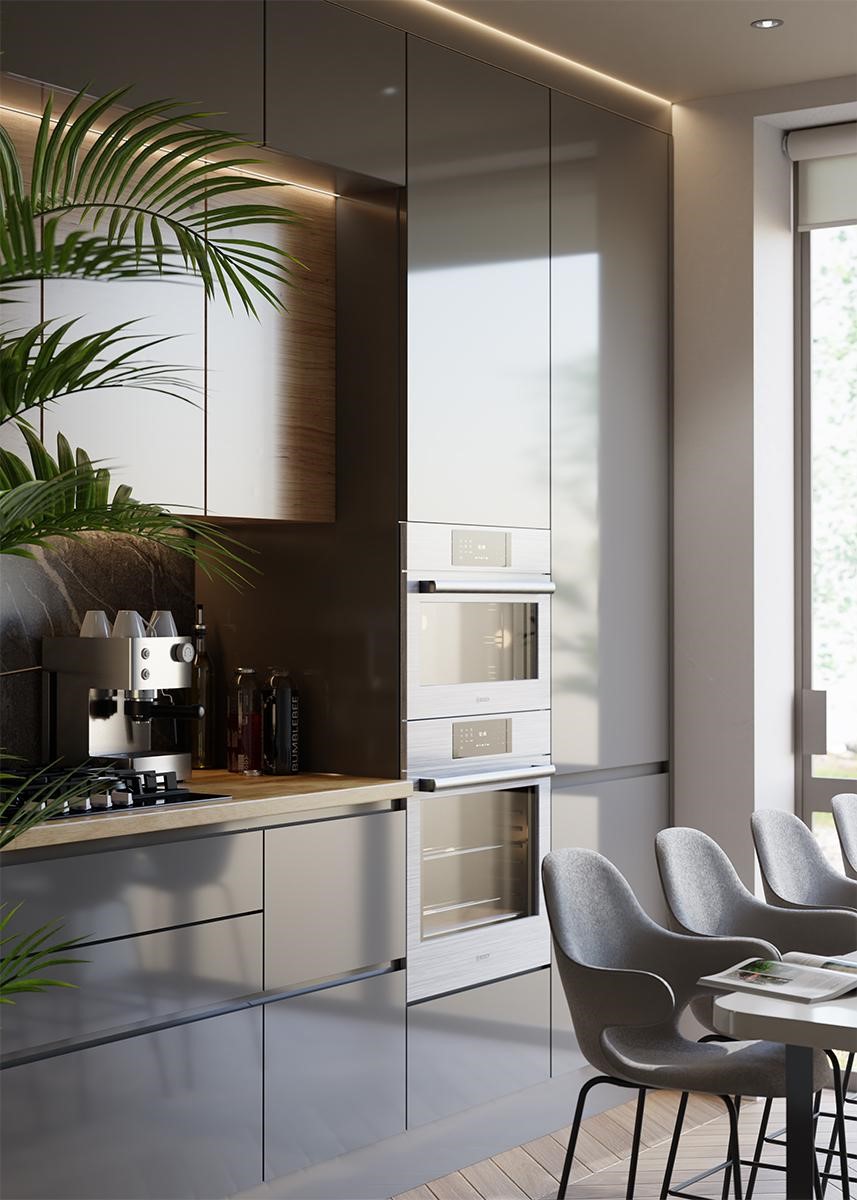
At this point in time, all materials were ready, and it was time to do a full-frame render to see the whole picture. I was quite happy with the result for now.
COMPOSITING
My next step was to introduce some artificial light using EIS profiles for area and point lighting. I find EIS light profiles super helpful. To achieve an LED-like lighting effect, I simply added an area square light and scaled it down to a tiny strip.
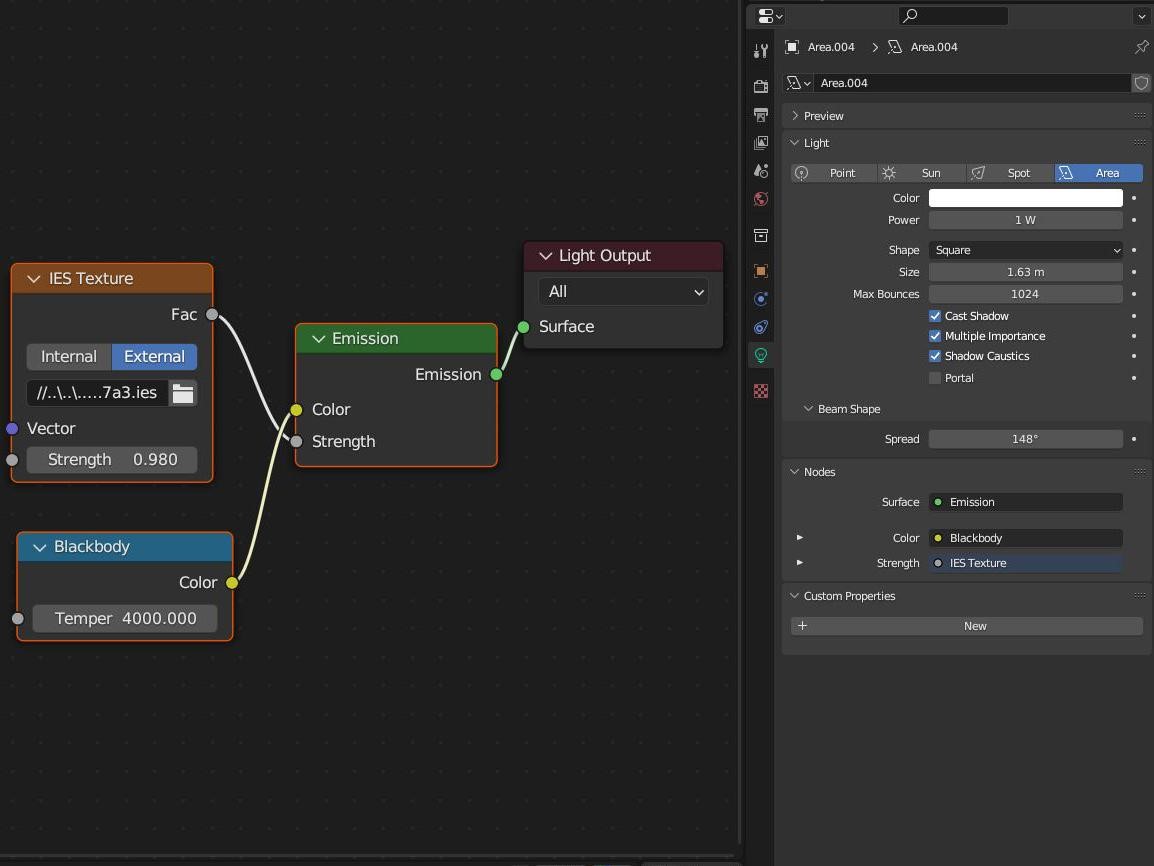
I added the EIS profile, and everything was set up and ready for another render.
In my opinion, it was almost ready to be considered the “Final Render,” but a few tweaks led me to Photoshop Camera Raw.
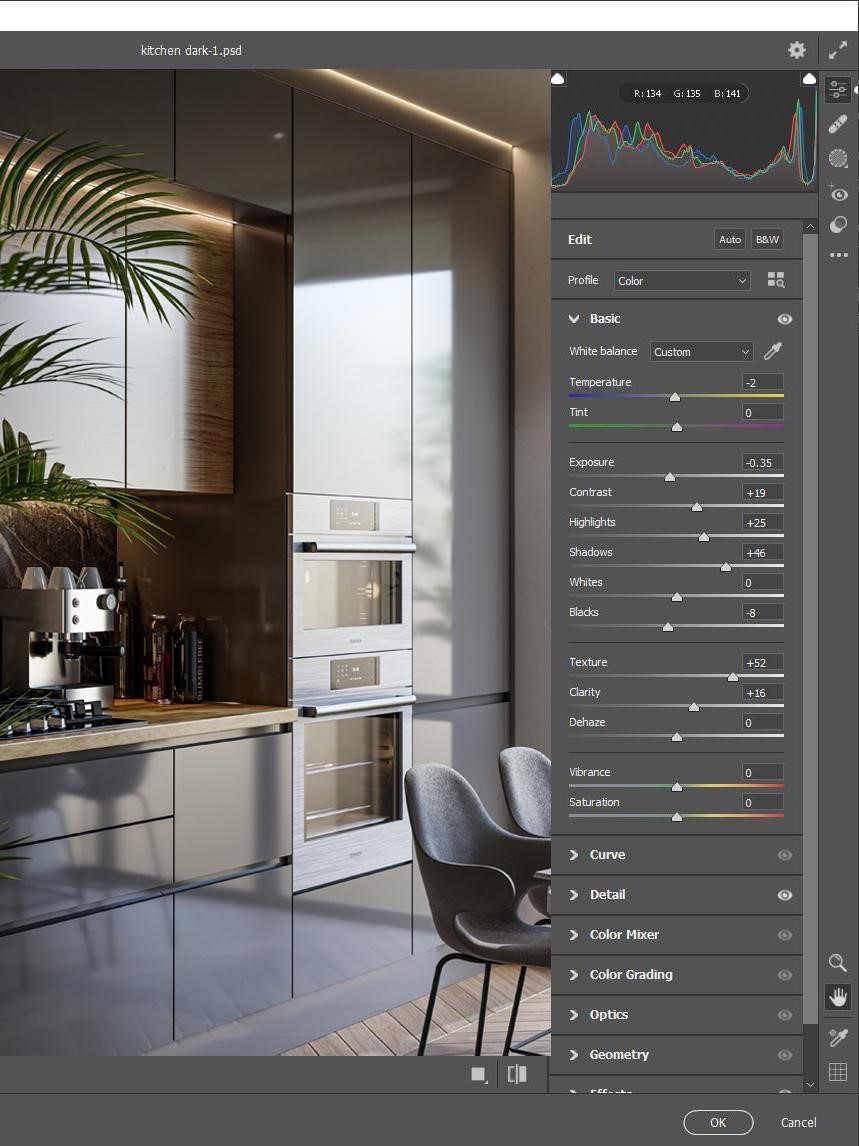
All that was left for me to do was some minor colour adjustments, sharpening, contrast enhancement, and a touch of noise. And that was it!
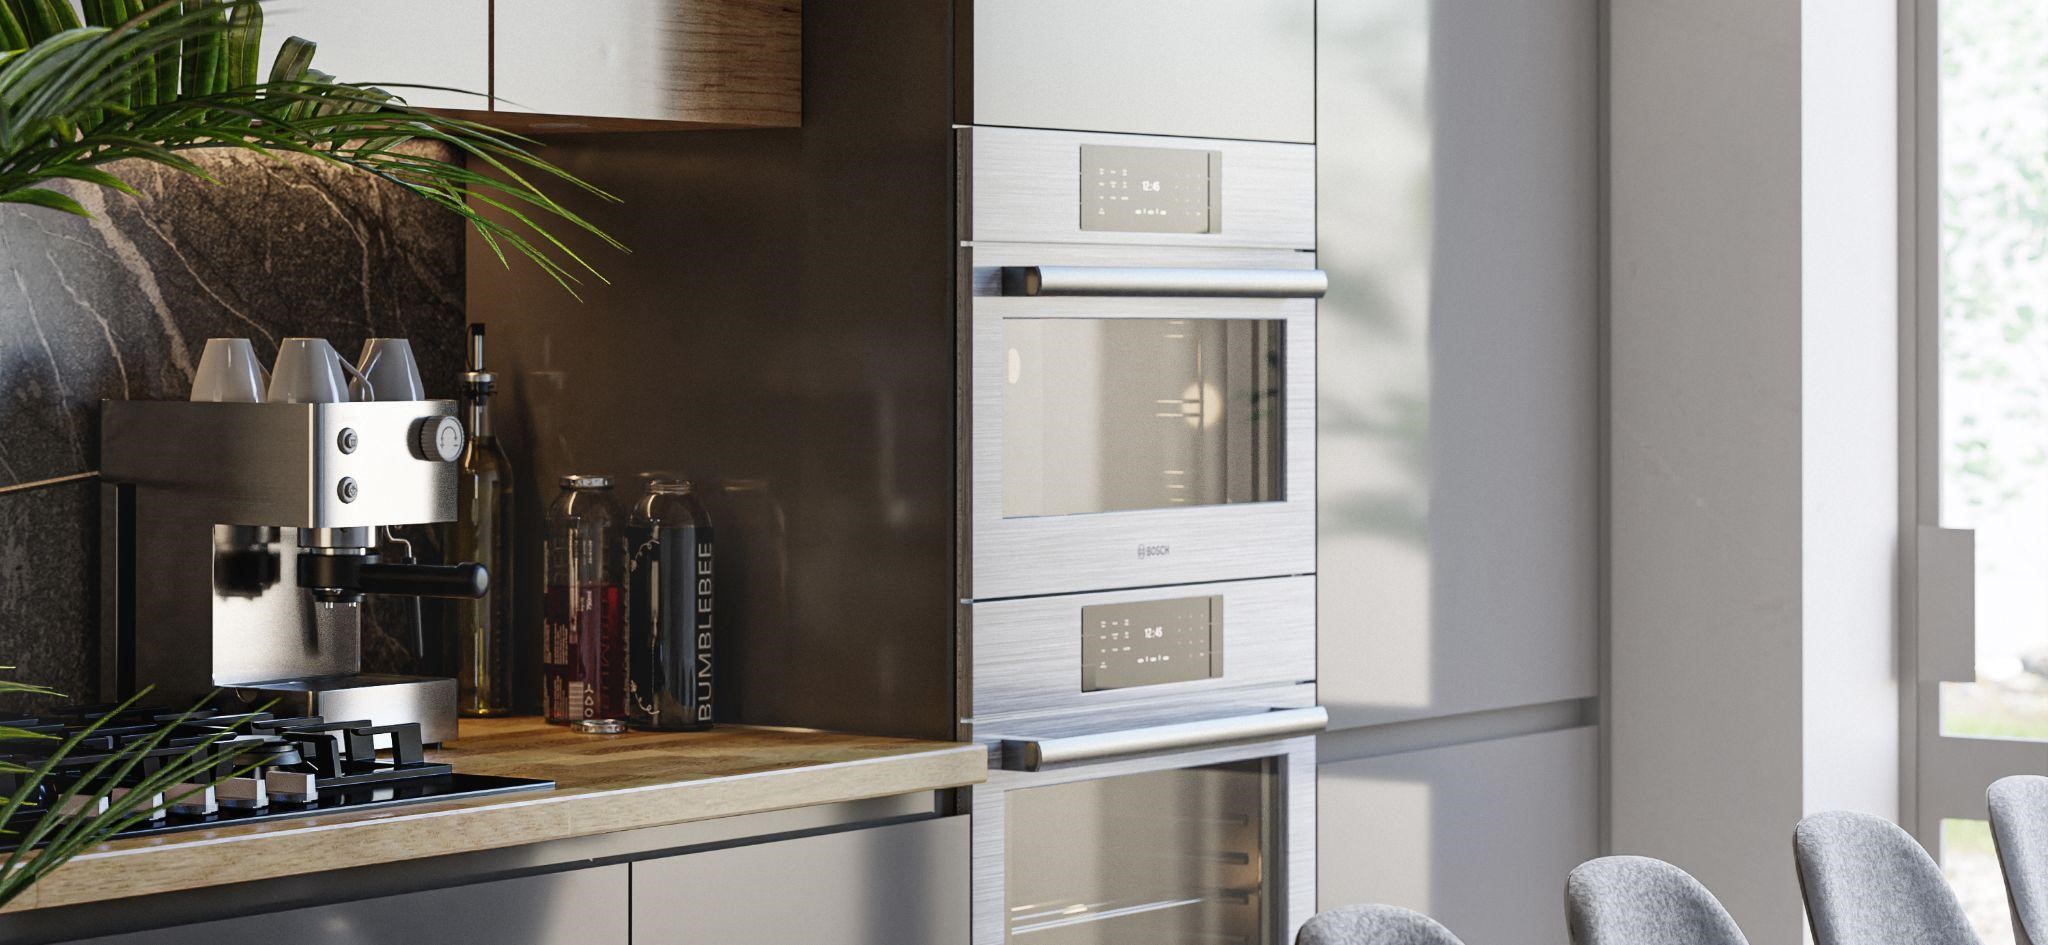
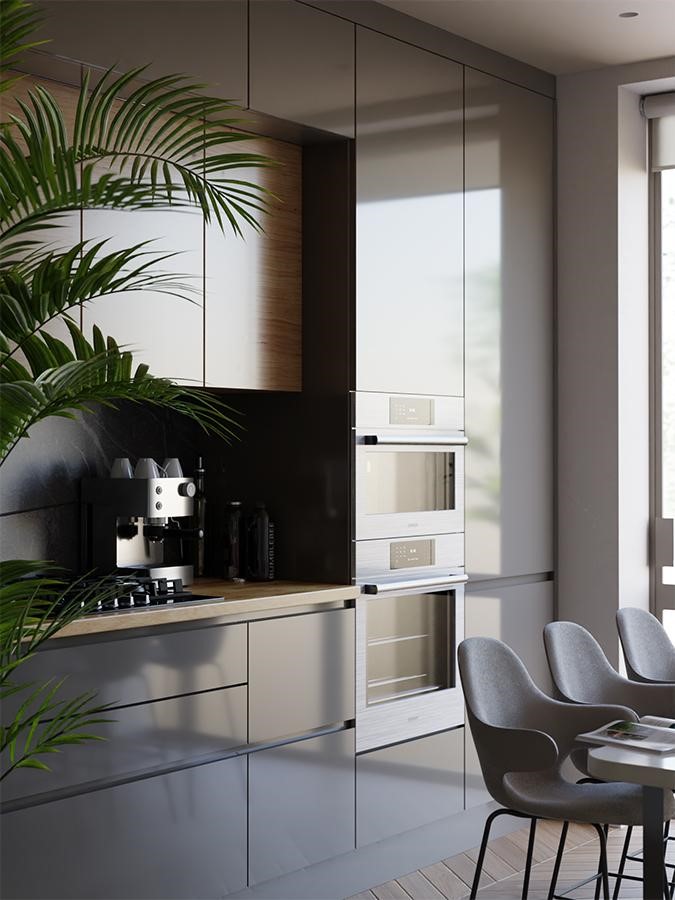
RENDER – Kitchen Visualisation


I made two versions for the kitchen worktop, as you can see above, because I thought both looked perfect in their own way.
Thank you so much for reading my article. I hope you learned something useful from it. Have a good day!
About the Artist
Tomas Marcevicius is a London-based 3D artist with a background in photo retouching who discovered Blender in 2020 and has since been honing his skills in the software.