
Behind the Scenes: Nintendo Gameboy
INTRODUCTION
Hello! My name is Willy Wijaya, and I’m from Indonesia. Currently, I’m working as a Jr. 3D Generalist at Onyx Studio with a main focus on character art. My first exposure to Blender was in 2017, but I started doing 3D work professionally last year.
INSPIRATION
While browsing on LinkedIn, I came across a captivating artwork of a Control device created by Shangyu Wang, which truly inspired me.

The inspiration reminded me a lot of the Nintendo Gameboy, so I decided to go with a really old-dirty Nintendo theme and started doing my research. Here’s my reference board:

Additionally, I started to get hard-surface related work in my studio and have been thinking of improving my texturing skills, so I thought this might be a good time to practice my modeling and texturing skills.
PROCESS
All stages were mainly done in Blender, including modeling the high-poly (subdivision) & low-poly, UV unwrapping, baking, lighting, and rendering. However, the texturing was done in Substance Painter. No compositing was done since this was supposed to be a real-time prop.
MODELING
There aren’t many highlights in this process as it was just simple modeling.
High-Poly
I just imported front, back, and ¾ view images into Blender, placed them accordingly, and started modeling with the subdivision modifier turned on. Here’s the final high-poly model of the Gameboy.

As highlighted in the image, I left out a part in the high-poly (HP) because it’s hard to model that in the HP. So, I planned to create it during the texturing stage with height data.
Low-Poly
For the low-poly, I used the HP model and applied the subdivision modifier. I also added a shrinkwrap modifier, dissolved unnecessary edges that don’t define the silhouette and made some cuts to reduce the poly-count.

The total poly-count was about 10K tris. I could have saved more tris, but I decided to stick with this since my main focus was to practice texturing.
UV
For the UV, I kept every part in one material and split the back and the front part into 2 UDIM / UV Tiles.

Texel density was about 162px/cm, with the scale being around the real-world Nintendo Gameboy. There was some stretching in the earlier unwrap, so I had to manually make the UVs really straight. Here are the addons I used for the UV stage:
Both are my favorite tools that I’ve used extensively when doing UV work. So, definitely check them out.
BAKING
Before I jumped into Substance Painter (SP), I needed to do some preparation for baking, which involved adding a ‘_low’ suffix to all the parts, as you can see in the image.

You might also want to recheck if the lowpoly is good to go, which means:
- Make sure all face normals are facing outside.
- No n-gons or non-manifold geometry.
- Transformations are all set to 0.
- LP and HP match so we have a good bake.
- HP mesh all have the matching ‘_high’ suffix at the end (e.g., body_back_low = body_back_high).
- Materials are set accordingly (I only set 1 material, so I’m good to go).
- UV has minimal to no stretching, also no overlap or cross UV tiles.
- Set sharp edges to all UV seams.
- Add a weight normal modifier with ‘keep sharp’ checked.
If checking is done, then let’s jump to baking in Substance Painter.

Here are my settings for baking:
- Set the map size that you want to bake (I’m doing 4K maps because that’s what I set for my texel density).
- Load all necessary HP files.
- Check all the maps that I need to bake. I don’t use an ID map because all my parts are separated, so I can select them separately.
- Adjust the Max Frontal Distance and Max Rear Distance. I will just put a link that explains this thoroughly.
- I set my anti-alias to 16x and switched the ‘match’ to “by mesh name”. This is where all the ‘_low’ and ‘_high’ suffixes play important roles, as SP will bake the corresponding HP part to the matching LP part. The link above also explains this.
Here’s my baking result. Overall, I got them very clean, since they are separated. So, no need for any fixes.

TEXTURING
Finally, let’s get to the fun part.
Viewport Settings
From the start, I planned to render this inside Blender but with Unreal Engine (UE) color space. So, I set my viewport settings inside Substance Painter to match the colors of UE. That way, I don’t need to do any tuning of textures due to the difference in color settings between both programs.

You can also achieve this by downloading this ACES colorlut, which is free. Here’s a proper breakdown using the default SP Viewport vs. with ACES colorlut.
Decals
I also prepared a decal sheet that I used as a stencil to generate mostly height data. And, here’s a very cool link you can use to find what fonts the text is just from an image.

I started by setting a base plastic material at the very bottom layer and then added more to the texture from there, such as color variation and large dirt spots, defining more of the material type. At an early stage, it’s best to keep everything subtle so that when you start to add dirt and wear, it will not be too noisy.

The ‘decal’ folder labeled in blue is where I stored my layer containing height and color data generated from the decal sheet I created before. Below are the two models with decal and without decal.


Screen
For the screen, I created 2 separate meshes and added separate textures to them. One was for the glass, and the other was for the LCD display to give it more depth.

When I tried to add the game display on the glass, it looked very flat. So, I grabbed a glass crack texture from Google and used it as a stencil to get those crack height data.

Stickers
Regarding the stickers, it was not very complicated, but there were a lot of layers and anchor points. To start off, I searched for Pokemon stickers on Google and edited them inside Photoshop into 2 images.

The color will be plugged into the color input, while height data will be used as a mask to drive the height data and will also be reused as a mask with the anchor point system. To put it simply, it’s basically reusing the mask in another layer to have more control.
So, for example, I can add a height change like the wobbly effect that usually appears in stickers inside that mask, or add extra peel inside those masks.

I repeat this process for the other stickers. Except for the Bulsaurus sticker, I inverted the height data to get the inside scraped out.
Surface Imperfections
And then, for the final dirt & wear pass, I used these amazing surface imperfection maps to get all that crispy speckle and dust on the Gameboy.

After was satisfied with it, I exported all textures in 4K with the .tga format. I made sure to get the base color, normal, and roughness maps.
Well then, let’s move on to the next stage.
COMPOSITING
For the renders, since Blender has an sRGB colorspace, I had to switch it to ACES color space so I can get the same viewport from SP and UE. To do that, you can follow these tutorials:
BUT, instead of setting the colorspace to “Role matte paint” like in the tutorial for Albedo texture, I set it to “rec 709 display” because that’s what apparently UE is using for their colorspace. All the data textures (roughness, normal, metalness, etc.) can be set with “role data” colorspace just like in the tutorial.
This is the comparison of the viewport using HDRI lighting.

After the color profile matched, I added a 3-point lighting setup with the addon from Blender. This is supposed to be a real-time prop asset, so I rendered it in Eevee.

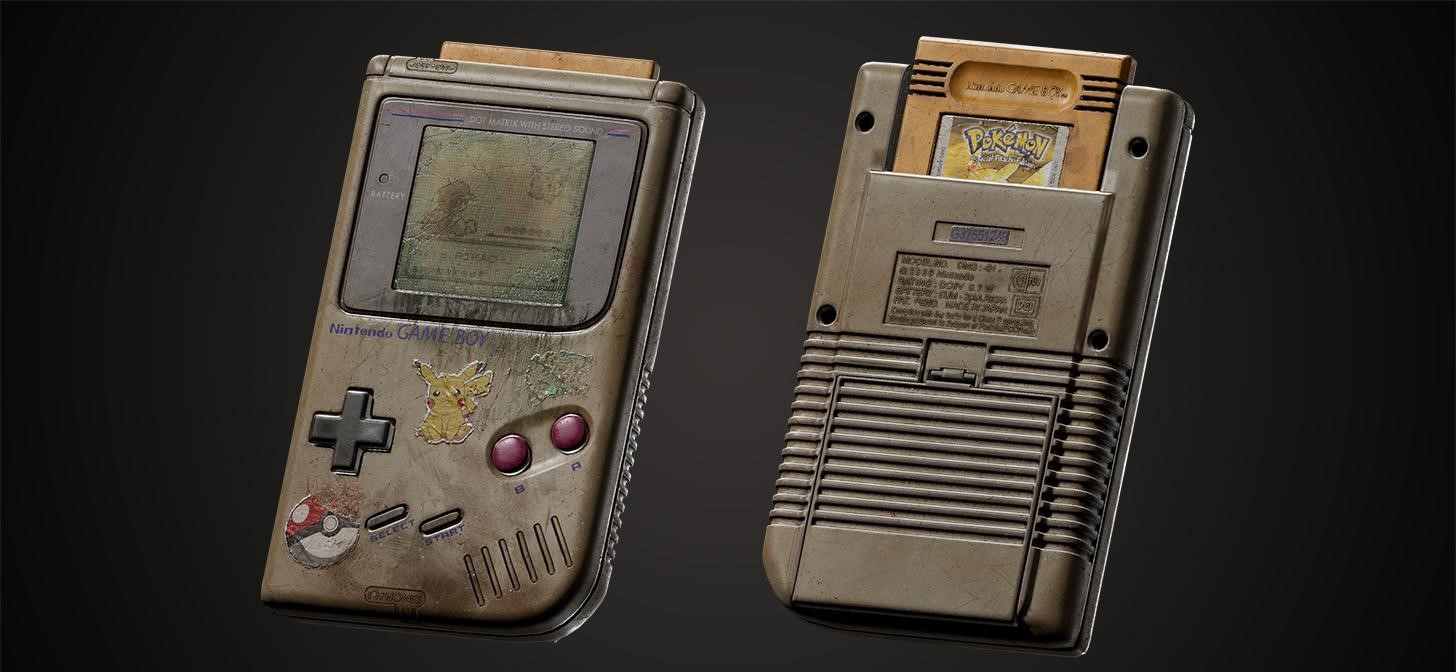
And that’s it! Below are the final renders.
RENDER – Nintendo Gameboy


P.S. Just to clarify, the color profile doesn’t necessarily change your texture’s color. The texture still stays in sRGB color; only the viewport color is calibrated to ACES colors.
Thank you for reading. Have a great day!
About the Artist
Willy Wijaya is a 3D Artist from Indonesia. He is currently working as a Jr. 3D Generalist at Onyx Studio.


This made for enjoyable reading even in 2025.
The kids wanted to learn more about Bake, and it saved me.
Amazing work, enjoyable reading, very helpful tutorial!
This old man and the kids thank you.