
Setting up UDIMs in Blender: Step-by-step

In a previous article, we had a look at texel density and how taking it into consideration can help us achieve a feeling of consistency and immersion in our 3D scenes. We learned that often, a render can feel strange because the objects have textures with resolution disproportionate to their size and visual importance, and that by maintaining that proportionality across the textures, we get optimised projects and better looking renders.
There are, however, exceptions that can and in many cases should be made. We see these exceptions mainly in assets that are likely to be viewed up close and often throughout a sequence, or a point of focus in a still image. Assets like these are typically granted much more texture resolution/texel density to allow their finer details to shine through a shot, and to remain crisp regardless of their distance from the camera.
Of course, this would mean that our “Hero” assets will need to have their UV shells or islands take more space in the UV grid, and larger Texture Map sizes, which can be a problem if the asset is relatively large and consists of a single mesh.
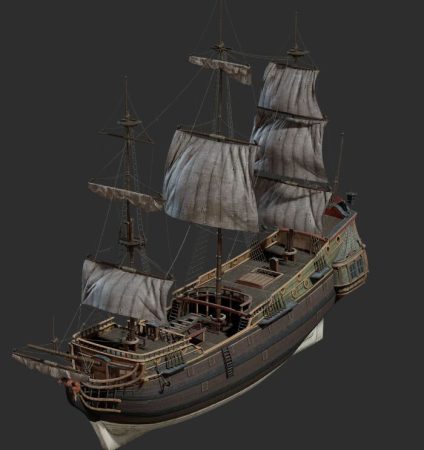
Source: “Ship Pinnace” by James Ray Cock, Nicolo Zubbini and Rico Cilliers, available at Poly Haven
A model like this, for example, could consist of many separate meshes. Depending on each mesh’s size in the scene, a single or group of meshes can occupy their own 0-1 UV grid (but this could mean more textures than we’re comfortable dealing with for one object).
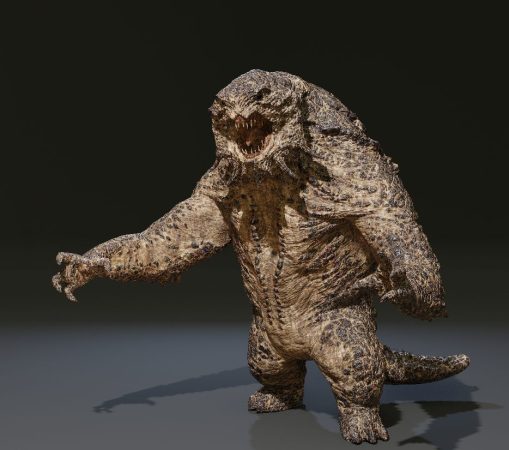
Credits:* Monster, designed and created by Daniel Bystedt. CC BY-SA 3.0 license
For a model like this, that approach may not be as feasible. This is where UDIMs come in. In this article, we’ll go over what UDIMs are, and how we can use them on our own assets.
What are UDIMS
UDIM tiling is a texture mapping technique used in 3D graphics to improve the efficiency and quality of texture mapping. UDIM stands for “U Dimension” and allows us to distribute UV islands across several textures, effectively affording the islands more space to work with than the 0-1 grid we’re used to. This can also allow for different resolutions for different parts of the mesh. The UDIM tile system assigns a unique index number to each tile, with the first being 1001 and subsequent tiles being placed to the right of the main tile or in a new row above it.
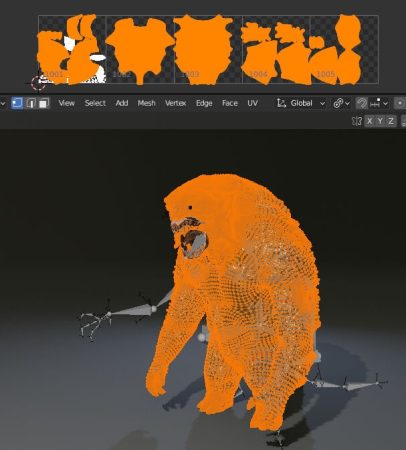
The panel above the creature model shows its UV islands distributed across 5 UDIMs, which makes each region of the model capable of having much more texel density using a single material. This also means it’s still possible to paint across the whole model when texturing.
UDIMs offer several advantages over traditional UV mapping techniques:
- Higher texture resolution: By dividing a texture into smaller tiles, each tile can have its own resolution. This allows for more detailed and higher resolution textures, especially for larger meshes with geometry of varying importance.
- Flexibility and efficiency: UDIMs provide greater flexibility and efficiency in texture creation and management. Artists can edit individual tiles without having to redo the entire texture, saving time and effort. Additionally, UDIMs simplify asset management by assigning unique identifiers to each tile.
- Industry standard: UDIMs have become an industry-standard for texture mapping in 3D graphics, making it a necessary skill for artists working in the film, gaming, and VFX industries.
- Improved quality and realism: The use of UDIMs allows for greater control over the final look of 3D models, leading to more realistic and higher quality textures.
Now that we have a general understanding of UDIMs, let’s see how we might apply them to the scene from the article on texel density:
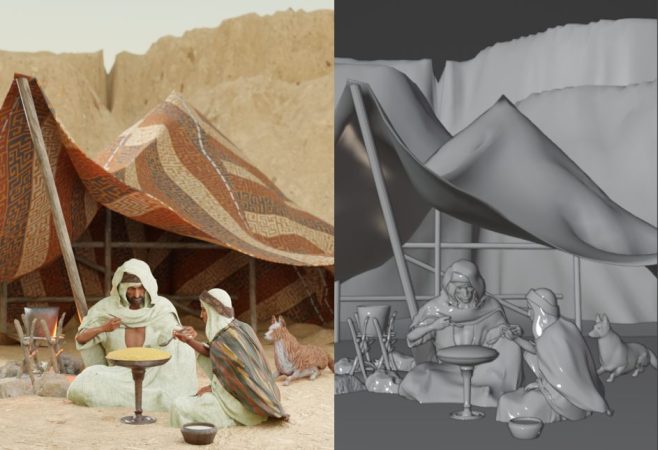
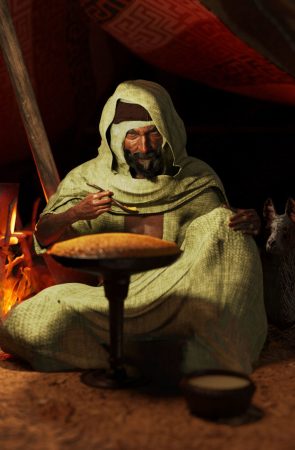
Let’s say we need a shot from this project that focuses on the male character with a more menacing tone, and that we’ll need the character’s body as a whole model, independent of the clothing to anticipate cloth simulation and changes in costume design. Let’s also say we want the head texture to have a size of 4096 x4096, and the rest of the body to have enough texel density proportional to the head.
To start, let’s take a look at the character’s UVs:
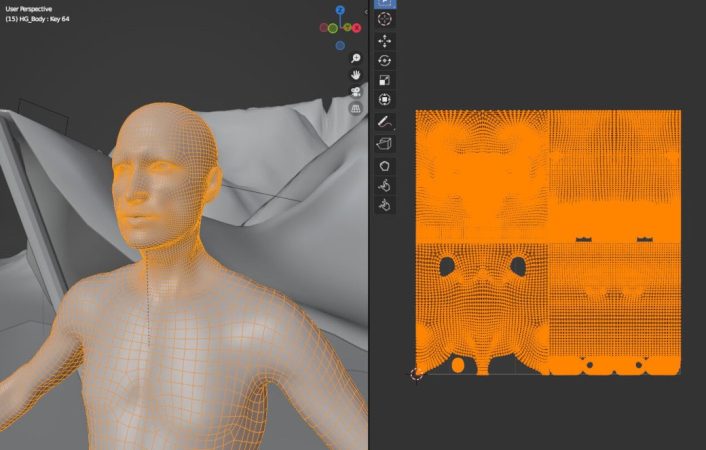
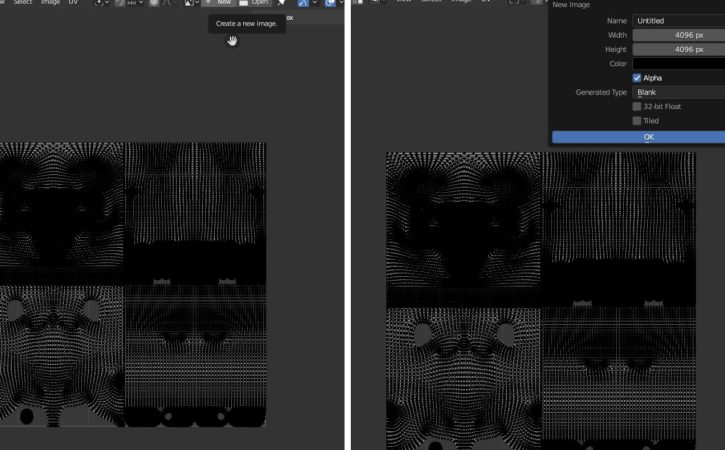
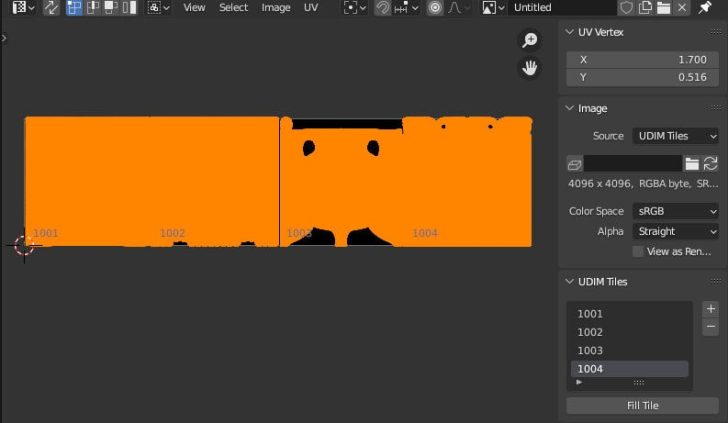
Presently, they are laid out efficiently on the 0-1 grid. The upper left island maps the head, the upper right maps the arms and hands, the lower left maps the torso and pelvis, and the lower right maps the legs and feet. We’ll take each island and assign it to its own UDIM tile. To do that, let’s create a new image inside of the UV editor and set the size to 4K.
The “Image” Panel in the UV Editor has a field called “Source”. Let’s change this from “Generated” to “UDIM Tiles”:
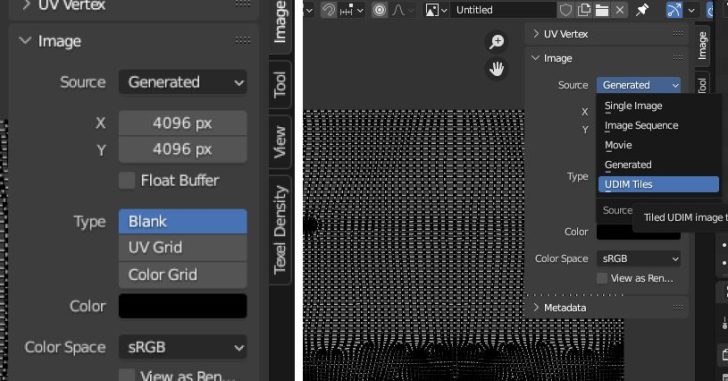
The UV grid we’re currently using is now the first tile of our UDIM array. To add more tiles, let’s hit the “+” icon to the right of the list and add 3 more tiles.
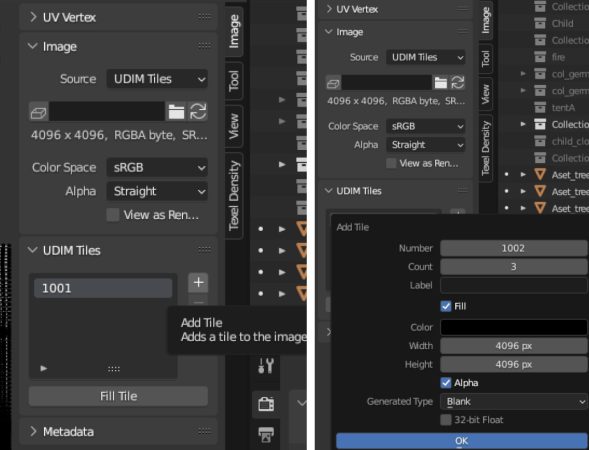
Once that’s done, we can now take each of our islands and pack them into their own tile:
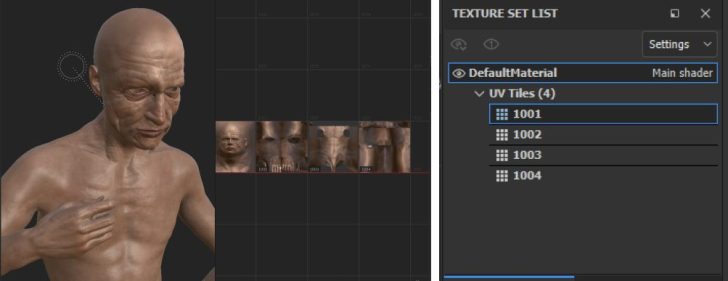
We now have our character ready for texturing! Let’s say we’ve run it through a multiresolution modifier, sculpted some additional detail and exported it out for Substance Painter (again, software like MARI or other alternatives will most likely have support for UDIMs).

In Painter, all we need to do is tick “Use UV Tile workflow”, and choose one of the 2 options available. In this case, we’ll choose the first.
Here is a glimpse of the character with some texture applied, and the Texture Set List panel, indicating that all UDIM tiles have been read and are active. As we can see on the tiles to the right, we can paint in details for the head with the full resolution of a 4K map AND seamlessly continue painting the rest of the body at a proportionally high resolution!
In the scene we’ll be rendering however, the legs and feet won’t be visible, so for now, we could change the resolution of UDIM Tile 1004 to a smaller map size. The torso (1003) will hardly be seen so we could change its map size to 2048.
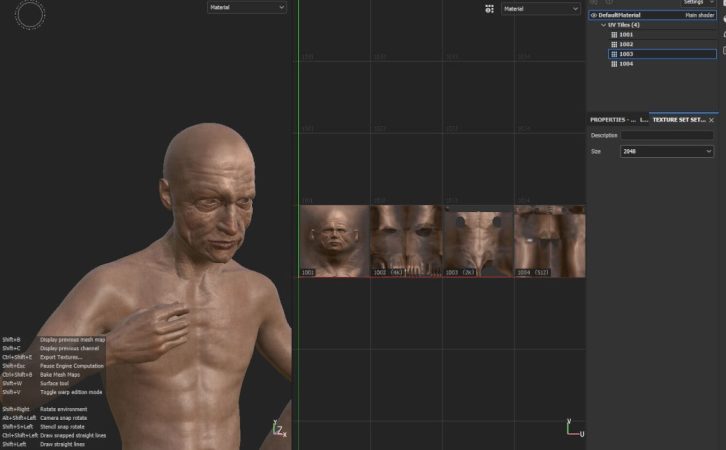
We see that the window on the right now indicates the map sizes of each UDIM Tile, and from the left we can see the updated model. This implies that with UDIMs, we also have the ability to quickly optimise our textures for whatever the situation calls for. Should this character decide to go streaking in the desert at some point, we can load our Painter file and adjust accordingly.
In Painter, the ID of the tile will be added as a suffix to each texture image that is exported.
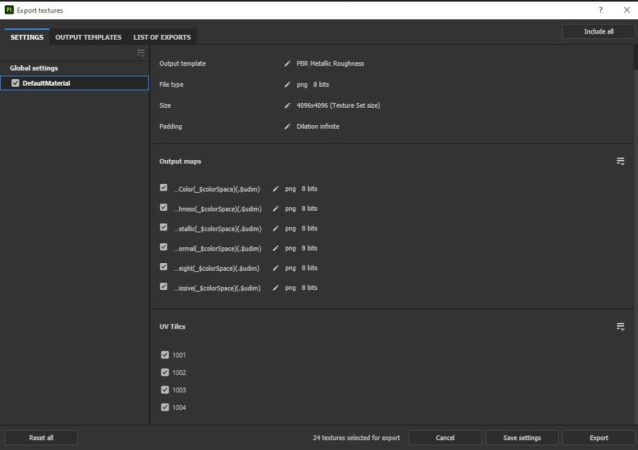
Back in Blender, when importing our new textures into our character, we’ll need to select the maps that end with the suffix “1001” and set the source of each imported image to “UDIM Tiles” to see our textures properly distributed across our UVs.
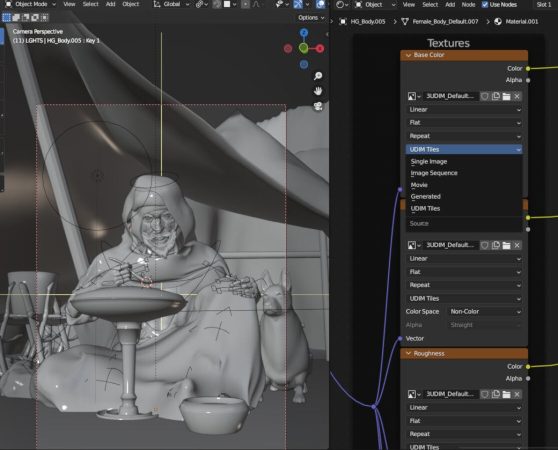
And that’s it! We’ve successfully created our first UDIM setup in Blender!
In summary, UDIMs, or “U-Dimension” texture mapping, can greatly benefit a 3D artist’s workflow by allowing for the creation of high-resolution textures that can be applied to a model without sacrificing detail or resolution. UDIMs are typically used in situations where a model requires high-resolution textures, such as in film and game production, where high-quality and detailed textures are essential for achieving realistic and immersive environments.
By dividing a texture into multiple tiles, UDIMs enable artists to work on different sections of a texture simultaneously, allowing for more efficient texturing workflows. They also provide greater flexibility for texture scaling and enable artists to reuse and repurpose textures for multiple models and scenes.
Overall, UDIMs have become an essential tool for 3D artists, providing the ability to create highly detailed and realistic textures for complex models, while also streamlining the texturing process and improving efficiency. As always, we hope this was helpful! Have fun experimenting with UDIMs, and Happy Rendering!
Need some rendering power on an upcoming project? Check out our Blender Render Farm and get $50 worth of free credits upon registering! P.S. we support scenes that use UDIMs ;)
The article was originally published at https://garagefarm.net.


i miss written tuturials so much :) thank
Like the previous article… Very good!!
Enjoyable read, very well explained.
Really these written articles are much better…
Thanks for sharing
thank you!!