
Behind the Scenes: A Cozy Dark Library
INTRODUCTION
Hi! My name is Filip Moták. I am from Ostrava, Czech Republic, and I am a programmer by day and a 3D artist by night. I have been doing 3D for two years now, so I am still pretty new to this, but I am happy to be able to show you my process behind this mysterious library scene!
INSPIRATION
Have you ever fallen asleep watching YouTube videos, only to wake up to whatever internet subculture video the auto-play algorithm decided was right for you? In my case, that was a series of ambient music videos with the Dark Academia aesthetics.
Not knowing what that was, I did a little research and instantly fell in love with the style. The dusty bookshelves lining the walls from the floor to the ceiling, the musty smell of old paper, and the dark nooks and crannies with moody lighting are all things that speak to me very much.
So, I started gathering references from the internet and found inspiration from Midjourney to get to work!

BLOCK-OUT
The very first step of every new project should be the block-out. This is probably my least favorite step as I always want to get straight to the action, but it is an important step nevertheless.
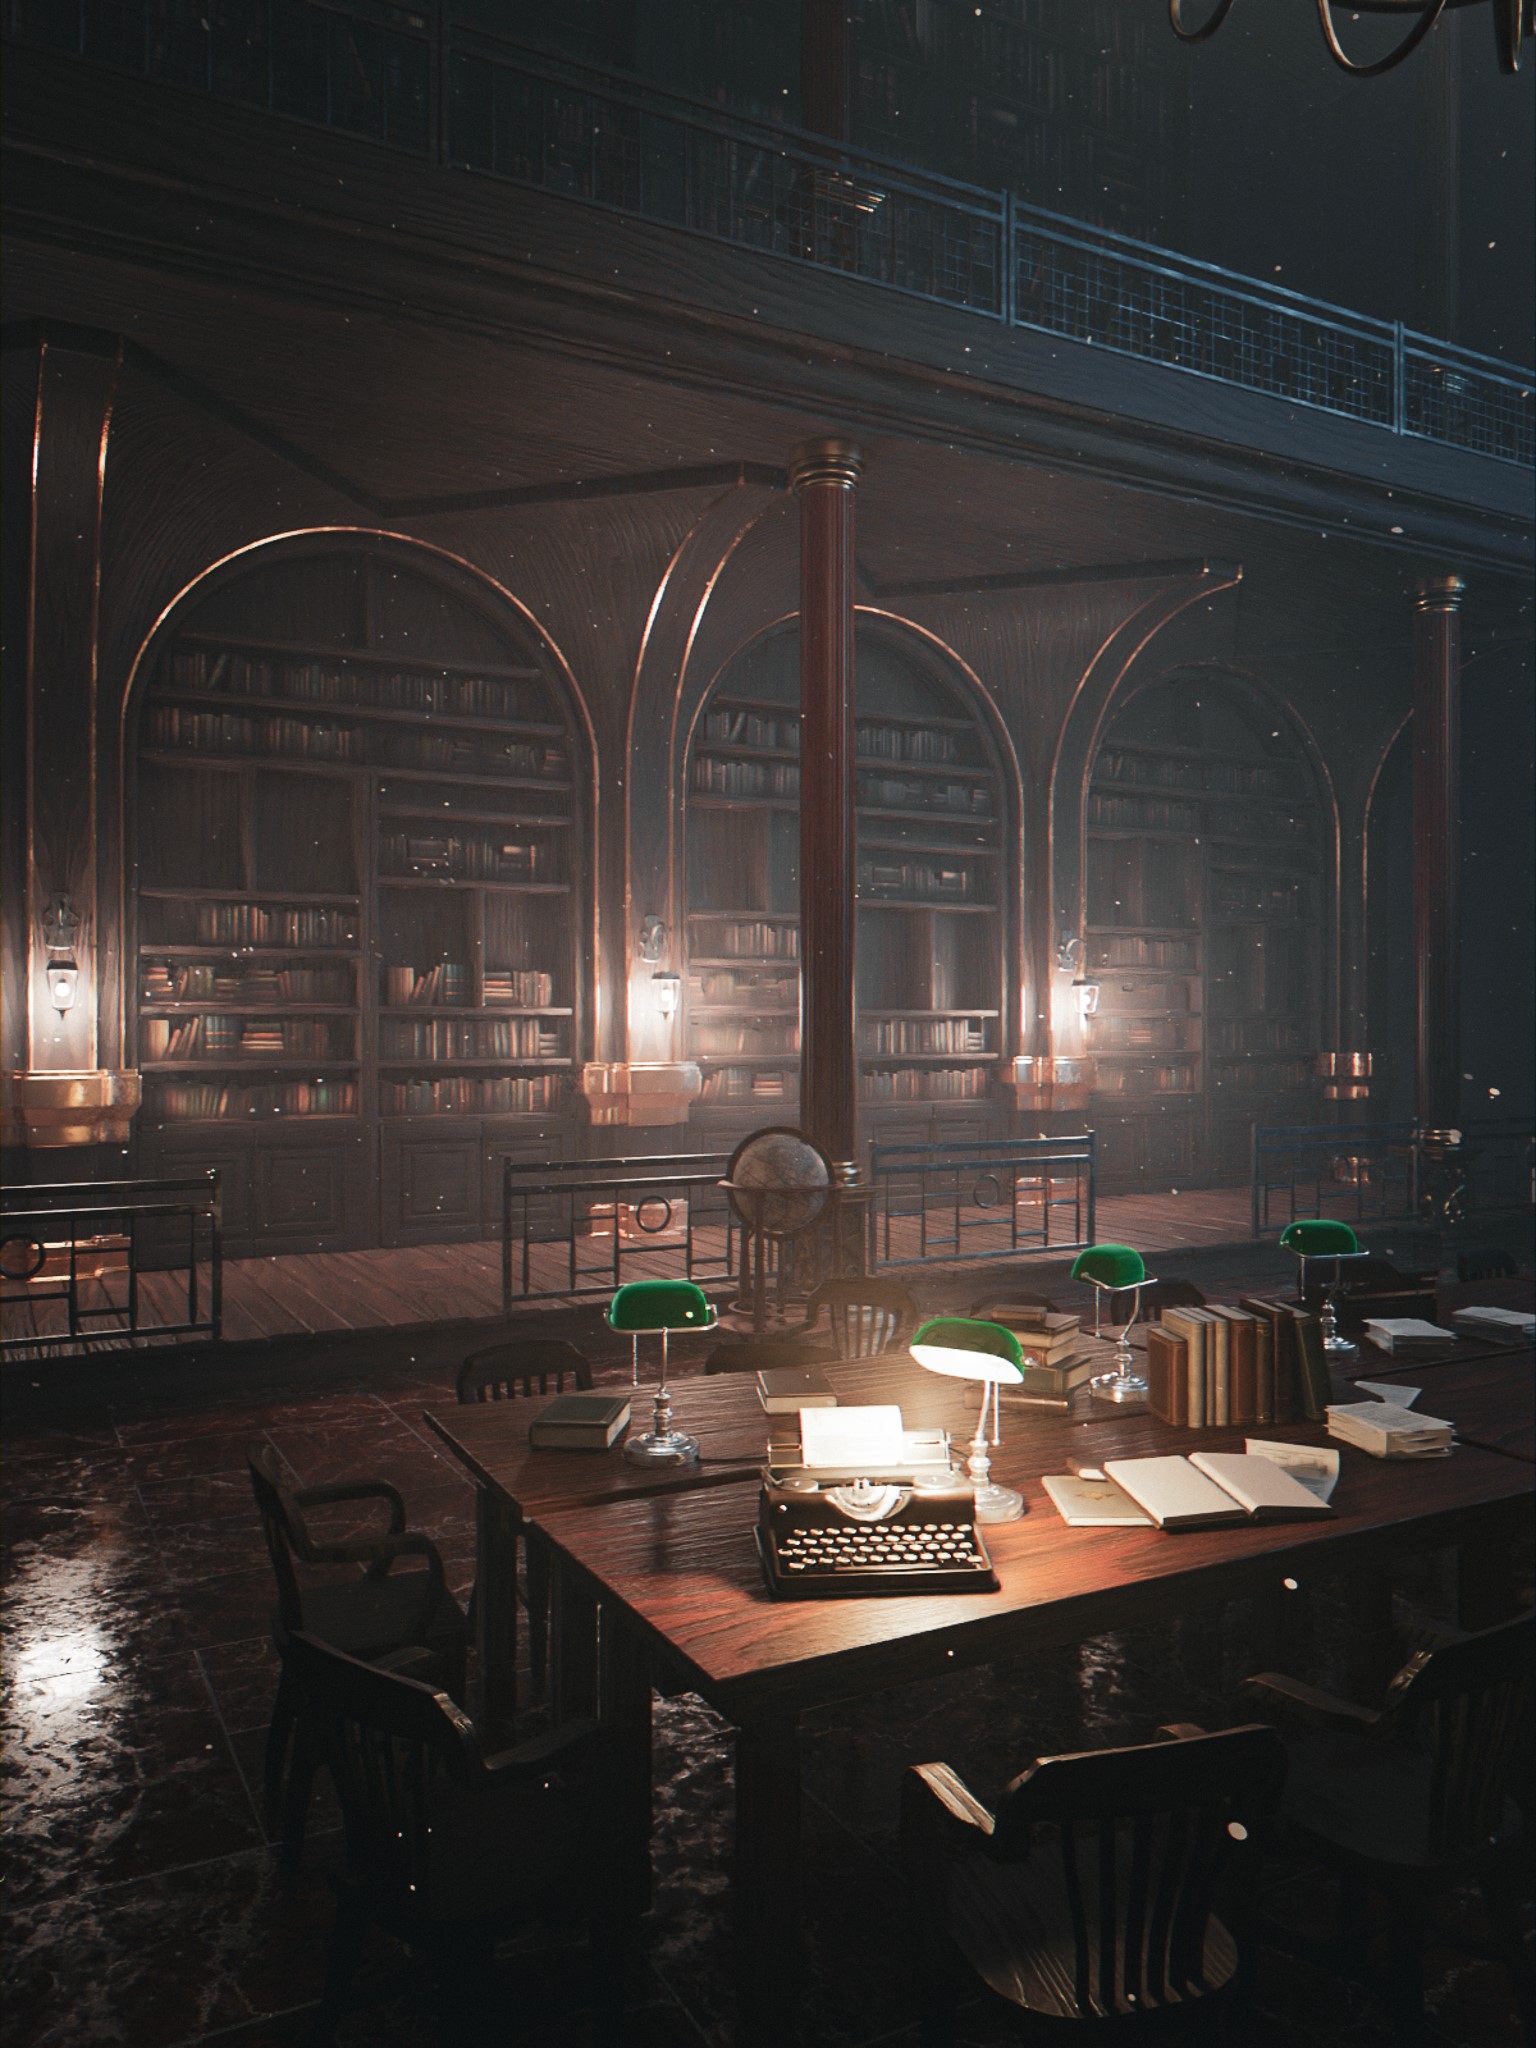
I decided to only show one wall and a window in my piece and mainly focused on that. I roughly modeled the shape of the pillars and support columns. I decided to position the columns tightly together, creating this arched alcove in which I put the bookcases.

Thinking it would be more interesting to separate the study section of this library from the shelves, I decided to make this section’s floor slightly elevated and added placeholders between the pillars where I would put the fencing when putting the scene together. I added a few placeholder fences to the second floor but kept it fairly simple as I knew that the final scene was going to be pretty dark, and not many details would be visible.
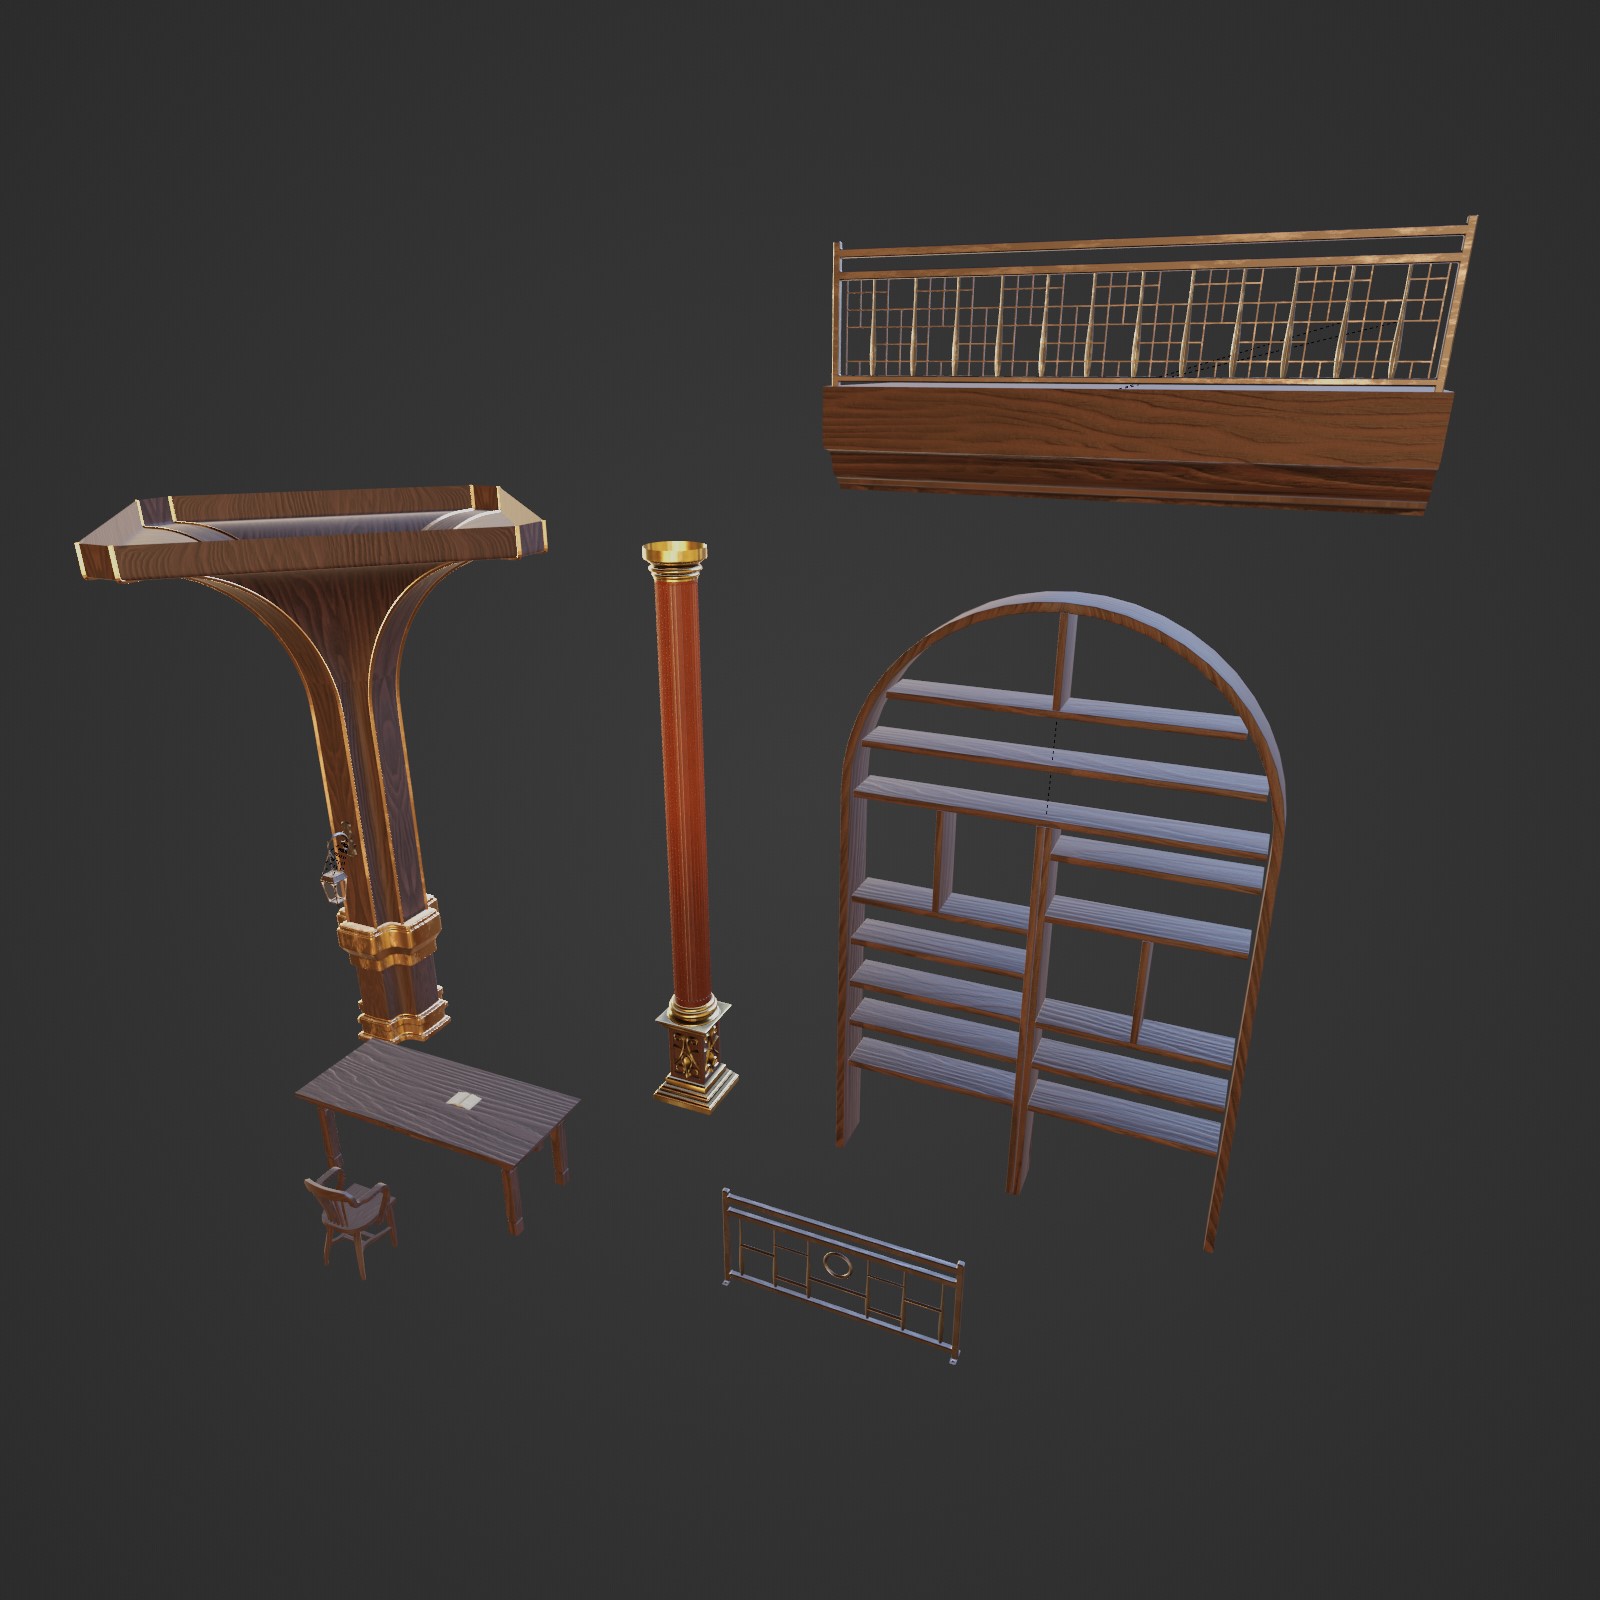
MODELING
Coming here from the block-out phase, I knew that I was going to need to model a few things: pillars, columns, bookcases, and two sets of metal railings/fences. I also decided to model a simple table and a chair for the study area.
Given that the majority of these models would either be in the background or covered by other assets, I decided to keep them simple. Elaborate designs would have been counterproductive.
TEXTURING
For the texturing stage, to make sure the pillars don’t blend in with the background too much and lose definition, I decided to add some golden metallic trimming, hoping for some shiny reflections when lit by the interior lights.
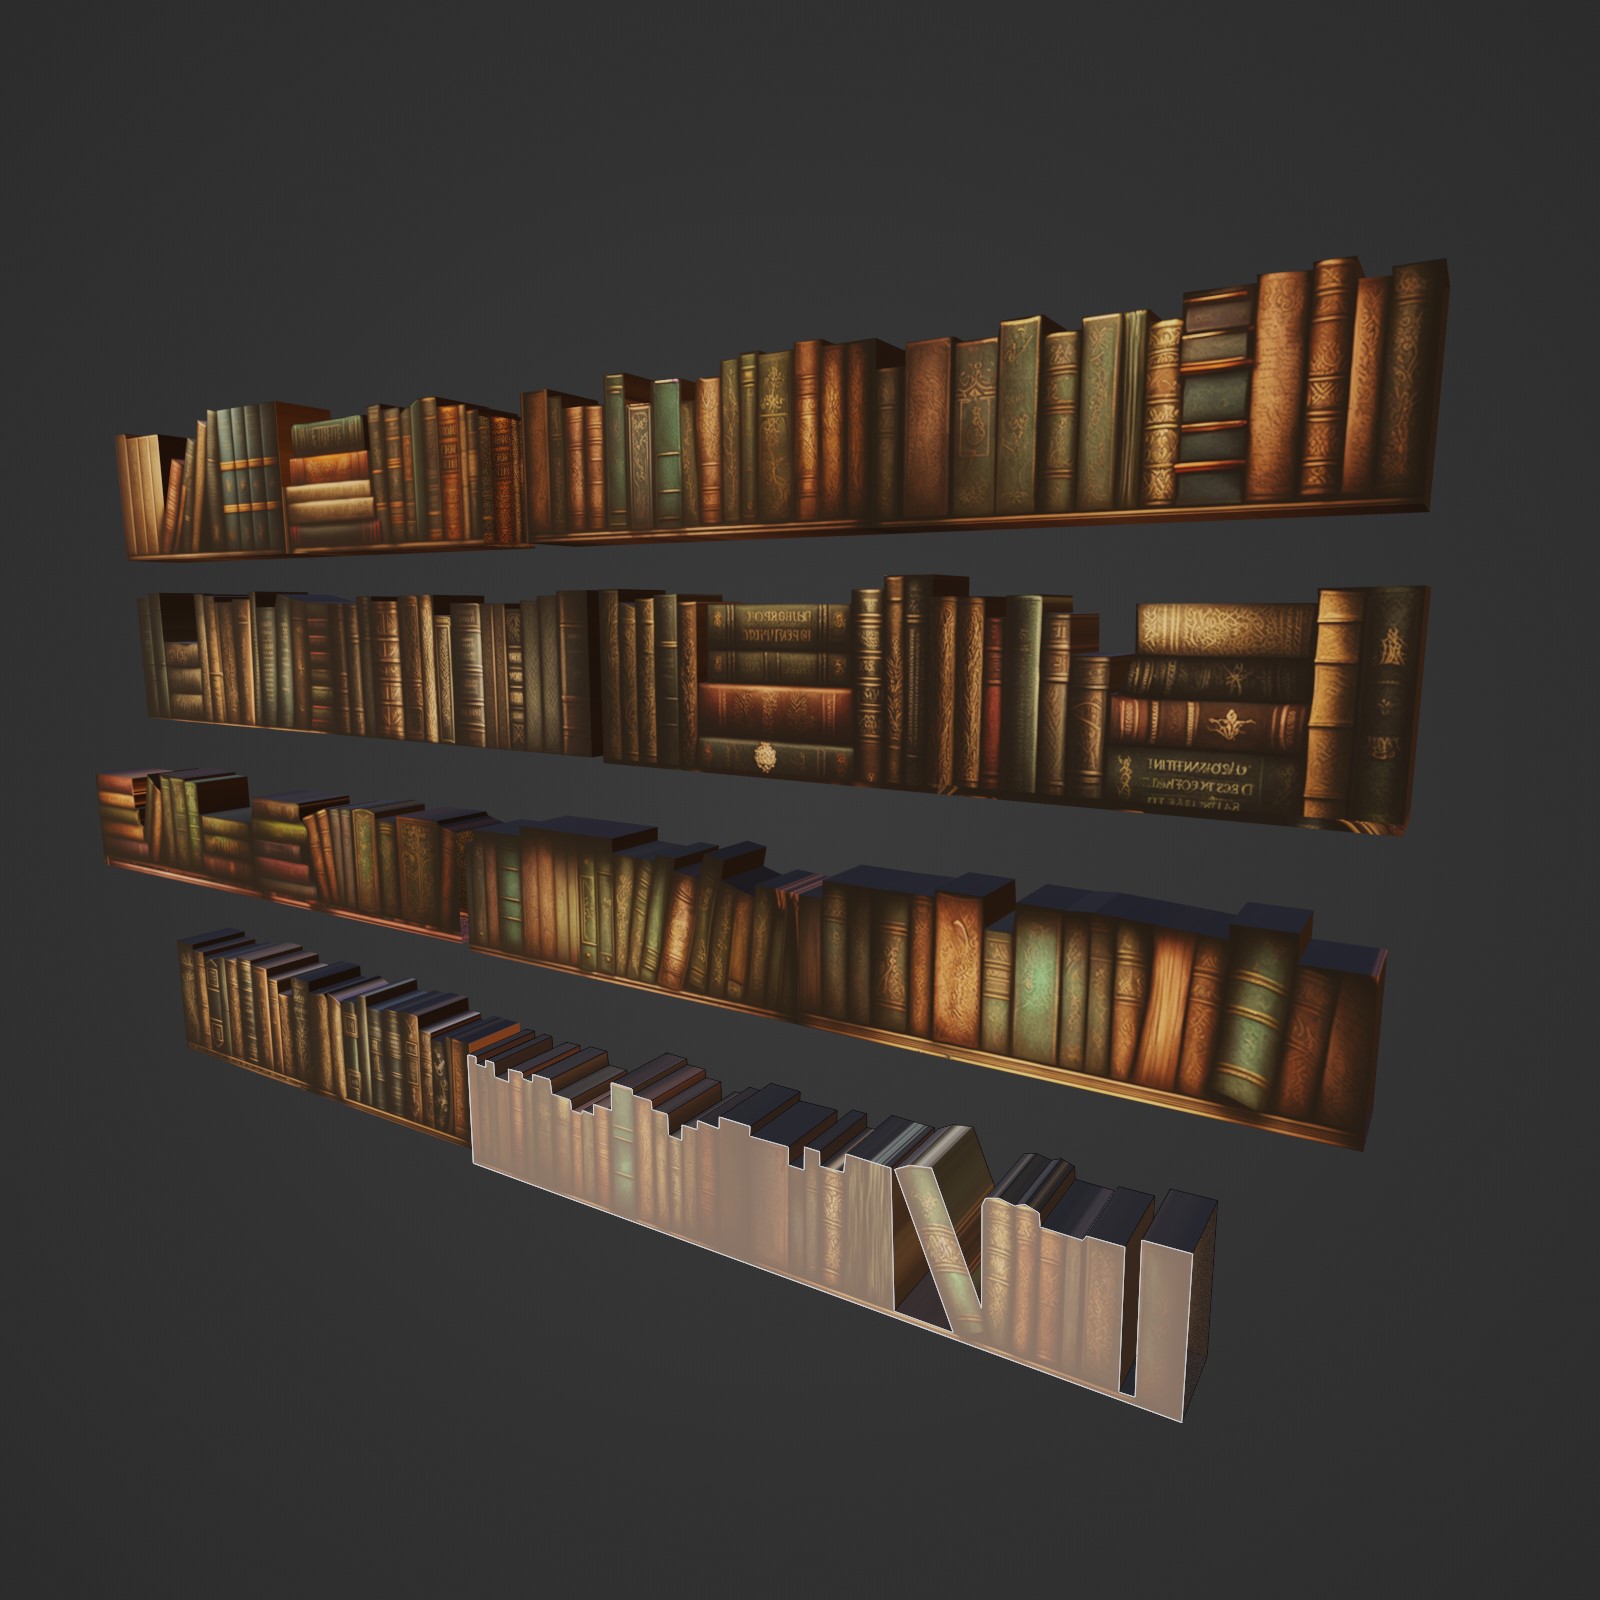
The next step was filling the bookshelves with books. I used MidJourney to create various frontal images of bookcases, some with neatly ordered books, and some less organized ones. I then used Photoshop to crop and splice them into one big texture.

I imported this texture to Blender as a plane and used the knife tool to cut out several different sets of books. A simple extrusion of this plane gave me a nice filler for the bookcases. It’s a quick and dirty solution, but I think it was pretty effective.
LIGHTING
After completing the modeling of all the essential components, I replaced the rough blocks with their more detailed counterparts. This was also the first time that I could see how the environment looked when illuminated. I realized that the single window might not provide sufficient light to illuminate the entire scene, so I added several smaller lamps to the large pillars to highlight some of the details.
ASSETS USED
Below are the assets used in this artwork:
- “1930s style typewriter – w/o branding” by Kuba “Volant” Wójcik is licensed under Creative Commons Attribution.
- “Bankers Lamp” by Scar56 is licensed under Creative Commons Attribution.
- “Antique Chandelier” by Amatsukast is licensed under CC Attribution-Non-Commercial-Share-Alike.
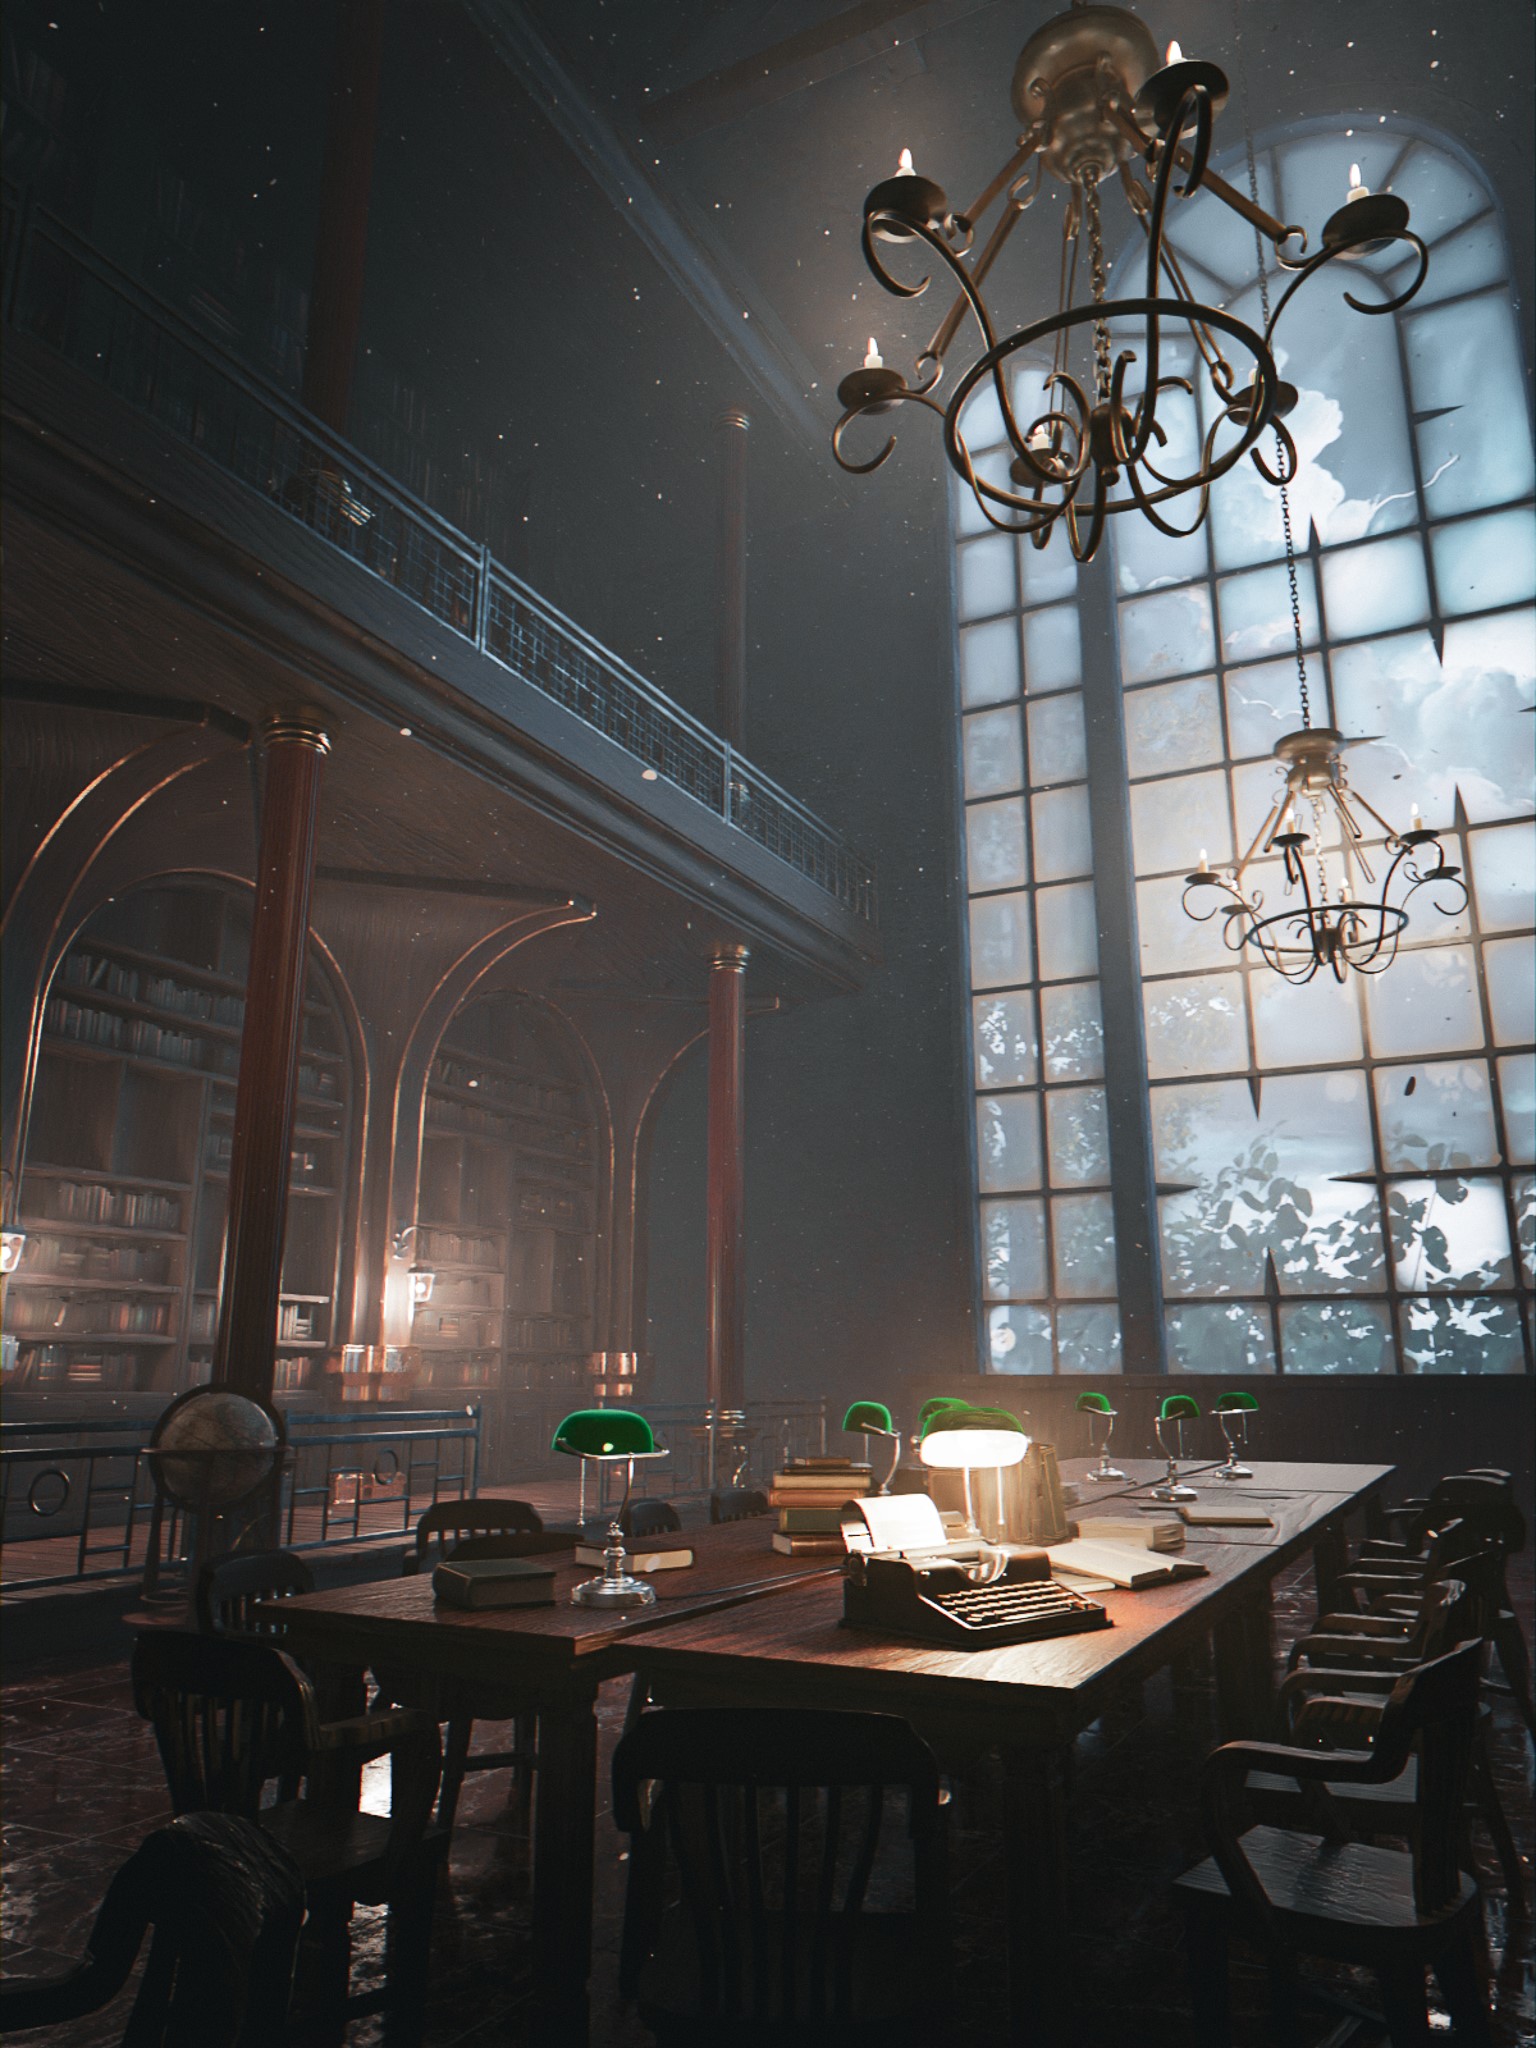
To enhance the realism of the scene and create a sense of an environment that looks lived-in, I incorporated several assets from Sketchfab, including lamps, books, papers, chandeliers, and a globe. I thought the scene needed a focal element, so I placed a very nice typewriter asset on the table close to the camera and lit it with one of the lamps to make it stand out more.

VOLUMETRICS
To give the room an older, darker, and dustier appearance and to accentuate its mysteriousness, I added volumetric fog and a particle system.
POST-PROCESSING
In the post-processing phase, which can also be the most challenging, I imported the raw render into Lightroom and experimented with various presets. Typically, I create 8-10 different versions, which I then narrow down to 1-3 preliminary results.
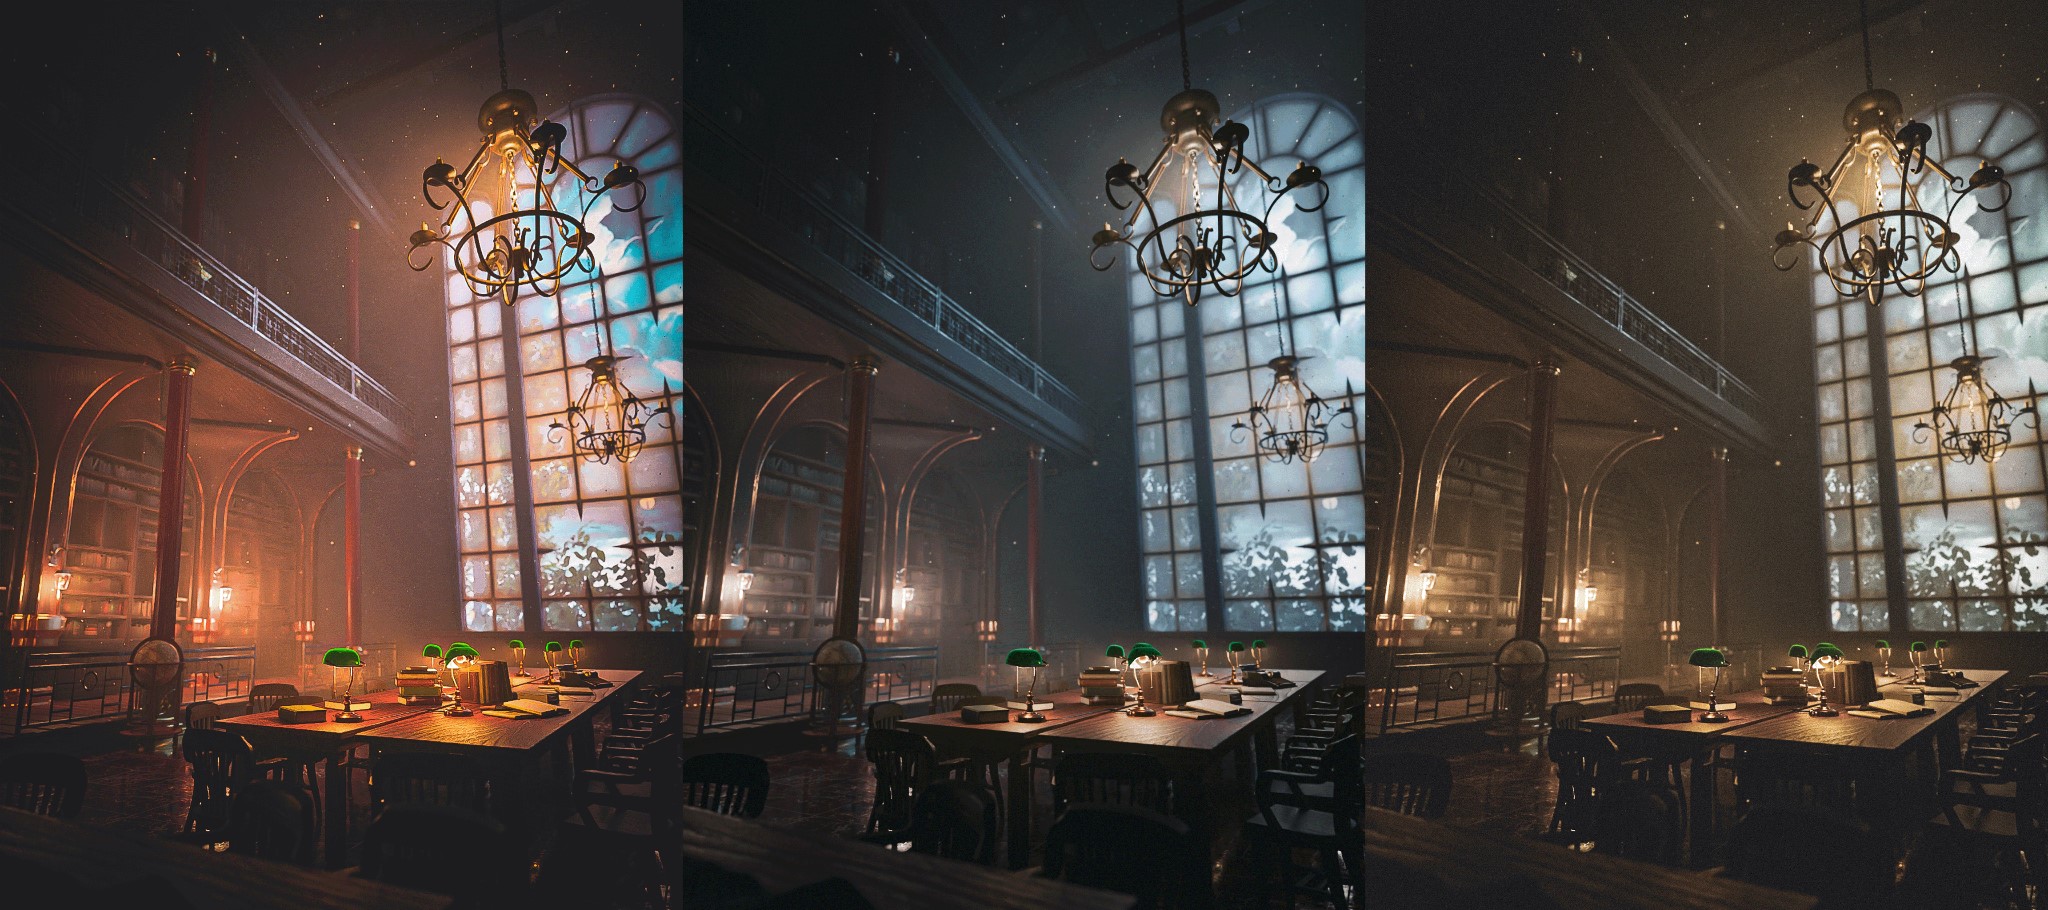
Next, I adjust the different values to achieve the most visually appealing outcome. After much deliberation, I finally chose the bluish, moody version from the three results that I found to be the most satisfying.

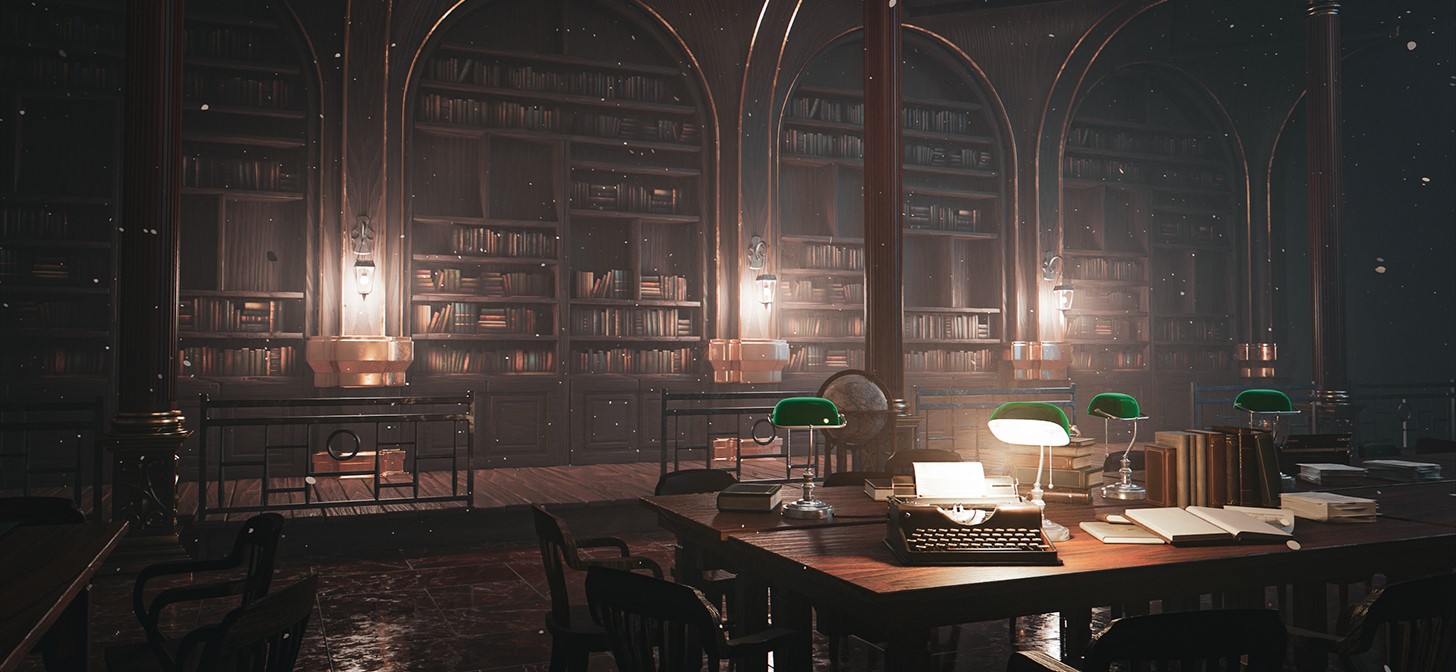
RENDER – A Cozy Dark Library
Thank you for reading. Feel free to ask any questions, and if you like my work, follow me on social media.
Have a good day!
About the Artist
Filip Moták, an amateur 3D artist from the Czech republic.


Really nice to read your full workflow. Thanks.
Has this air of mystery for sure. Good job.
Hey, thanks for sharing this. This is amazing! Love also that you shared the process.