Behind the Scenes: Bunkers
INTRODUCTION
Hello, my name is Jukka and I am from Finland. Before using Blender, I used Wings 3D, Maya, and 3DS Max. I started getting into 3D by modding different games like Homeworld and Command & Conquer Generals.
INSPIRATION
My inspiration came mostly from Norway, Halo (game), and Paul Chadeisson’s mega city/ruins artworks. I also wanted to see how large of a scene I could create in Blender before running out of memory.
Paul Chadeisson’s mega city/ruins:

PROCESS
There is a lot to explain, but I will try to keep it short and simple. Here are the links to the addons and software used in this project.
Addons for blender
TERRAIN
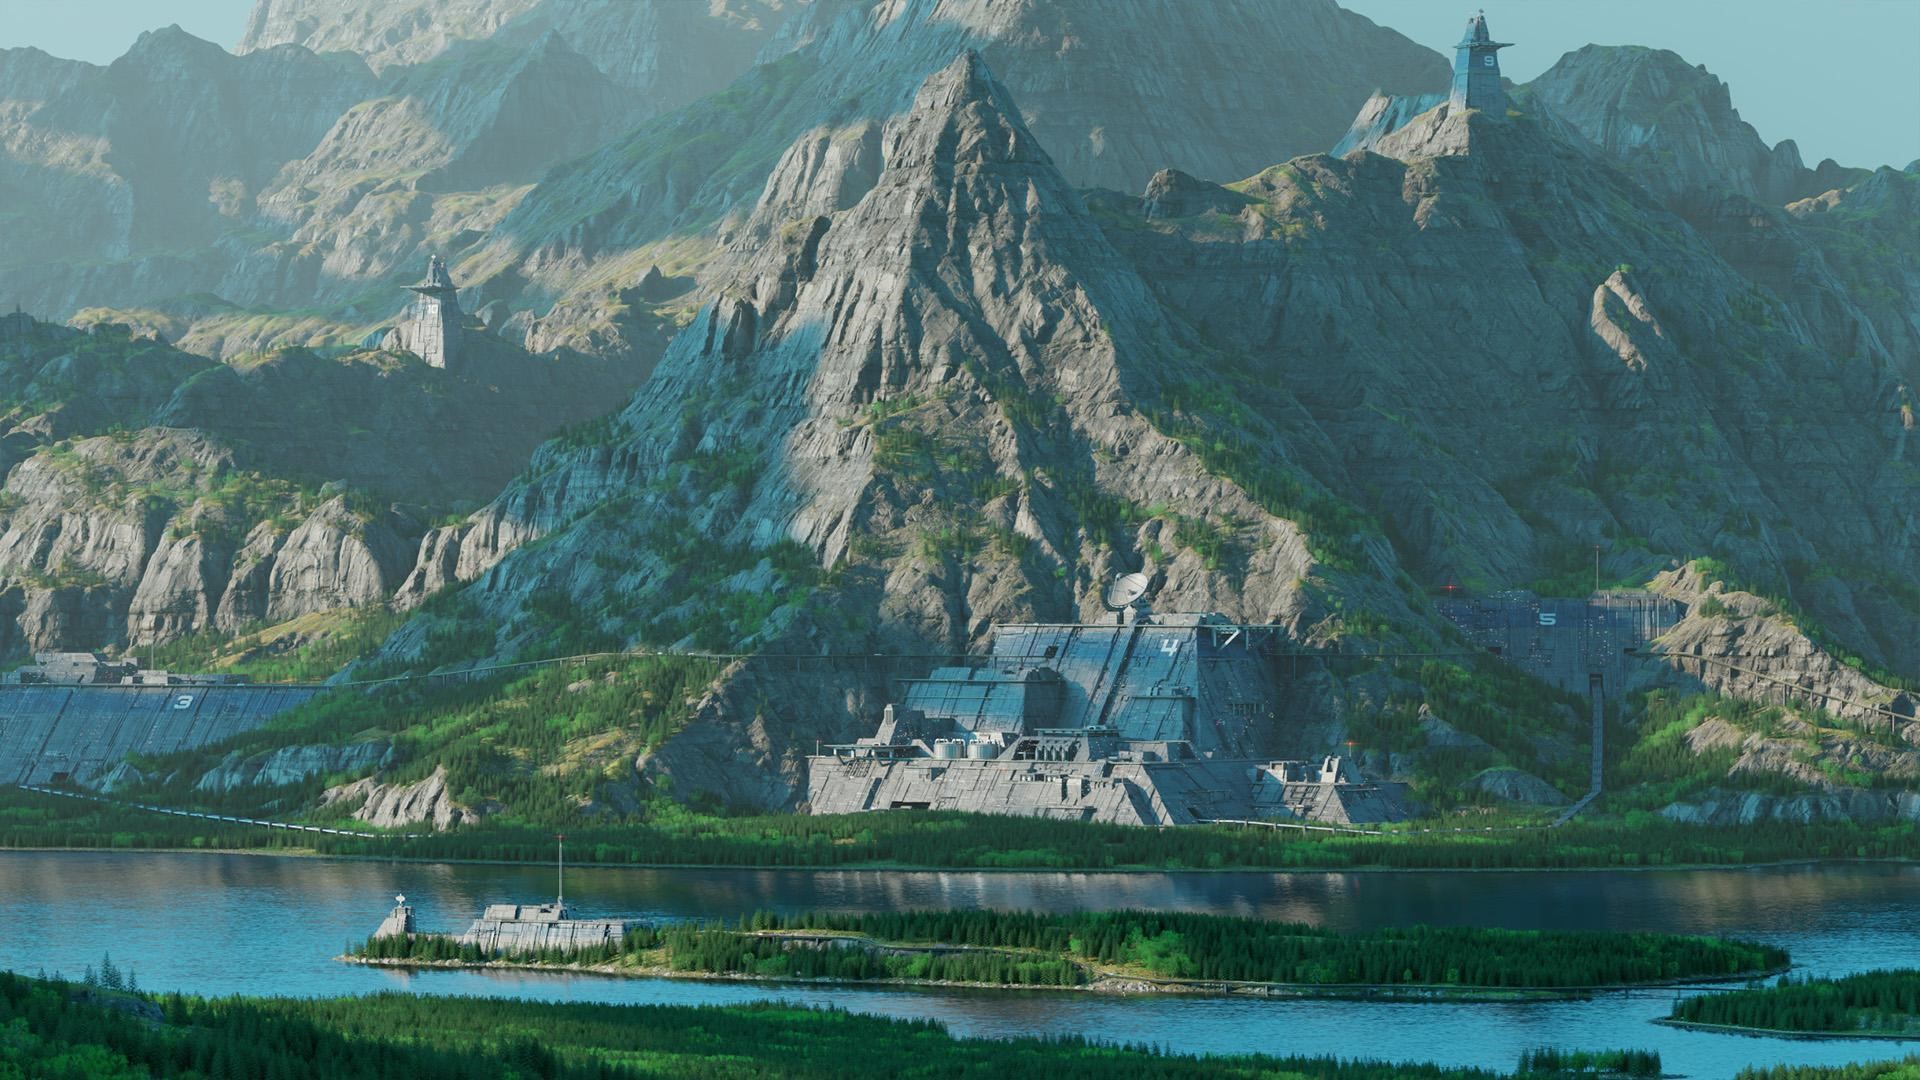
The terrain was probably the biggest issue as I wanted a lot of detail for cliffs and rocky areas. The terrain base was made in Gaea.
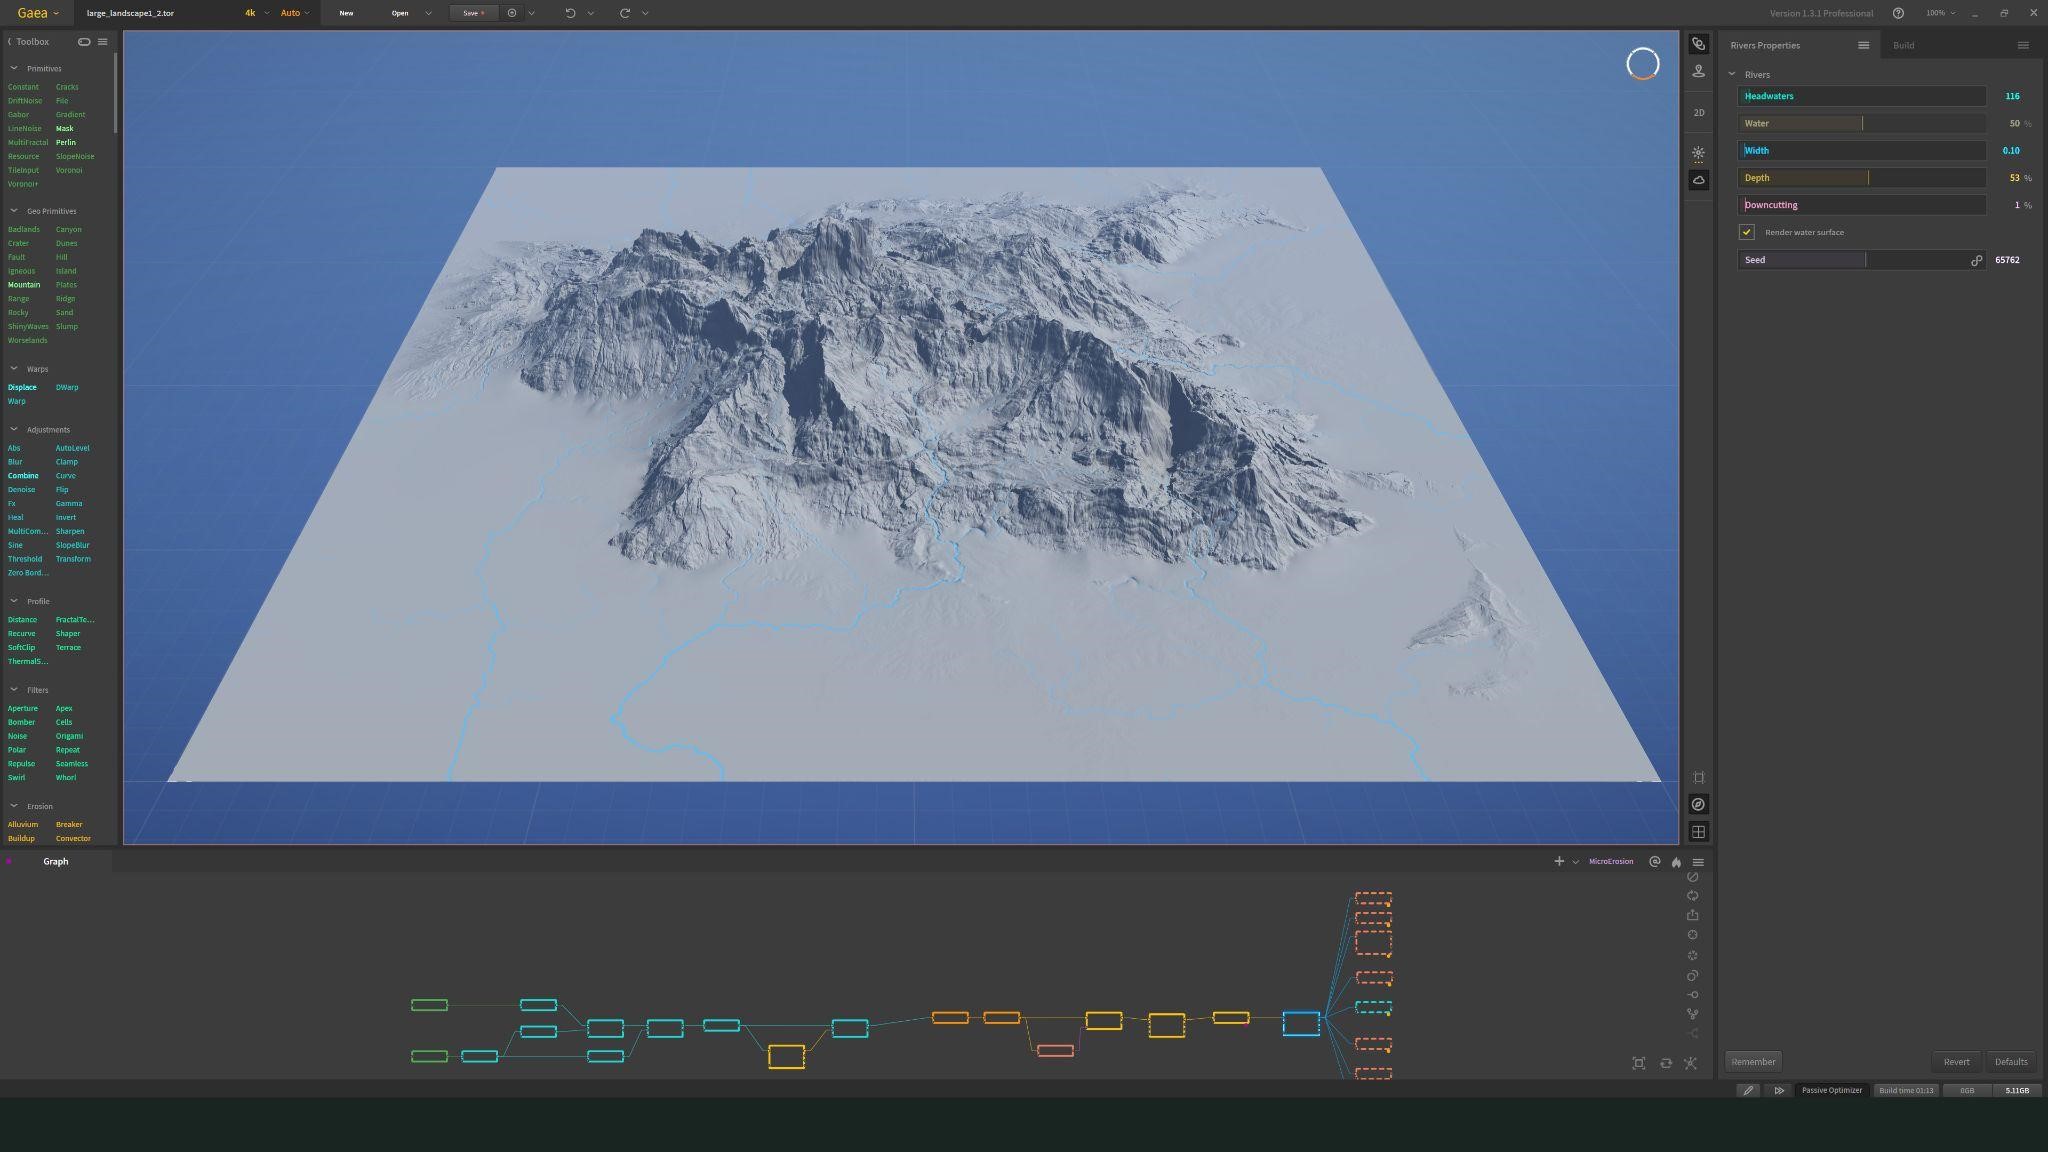
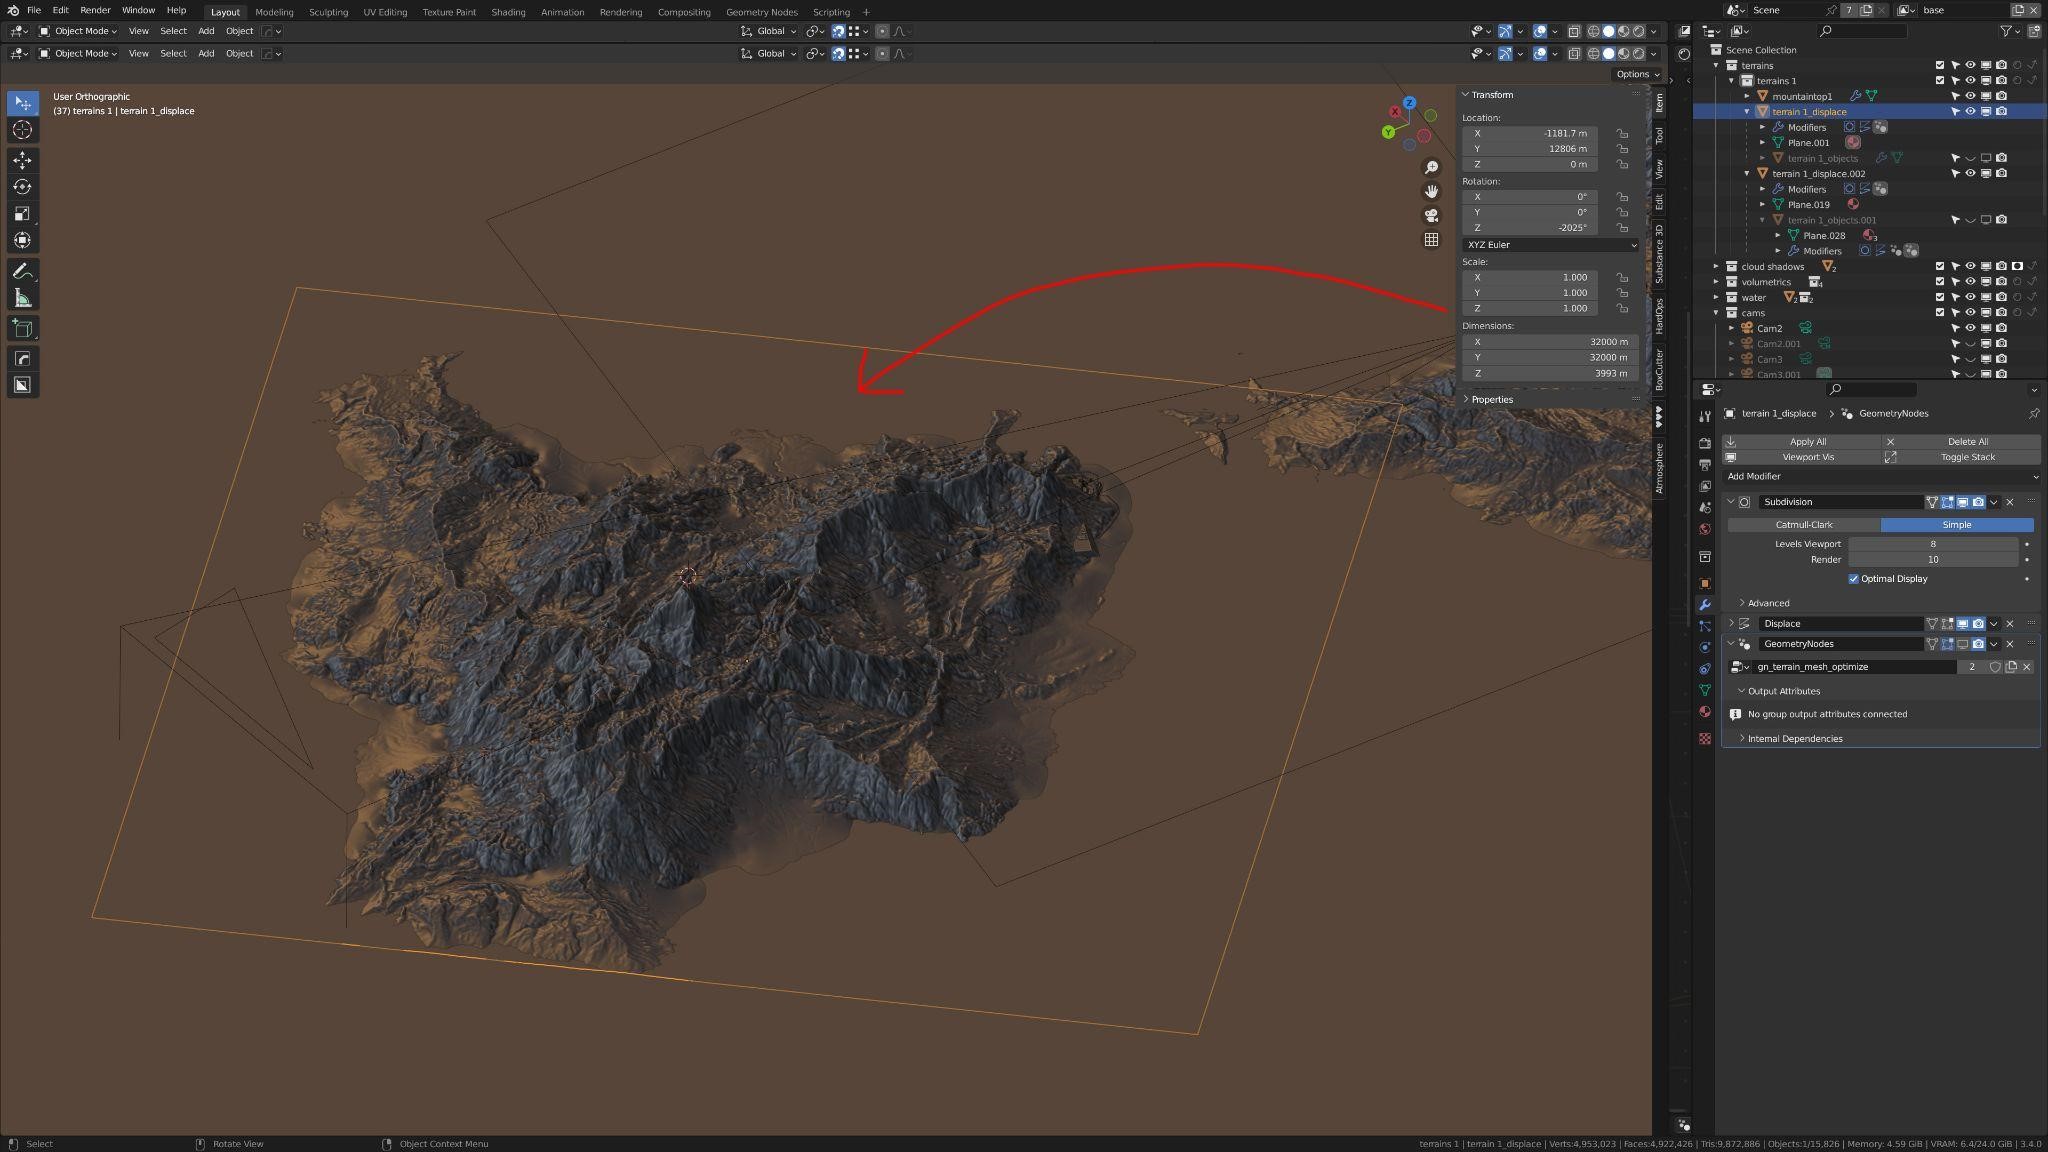
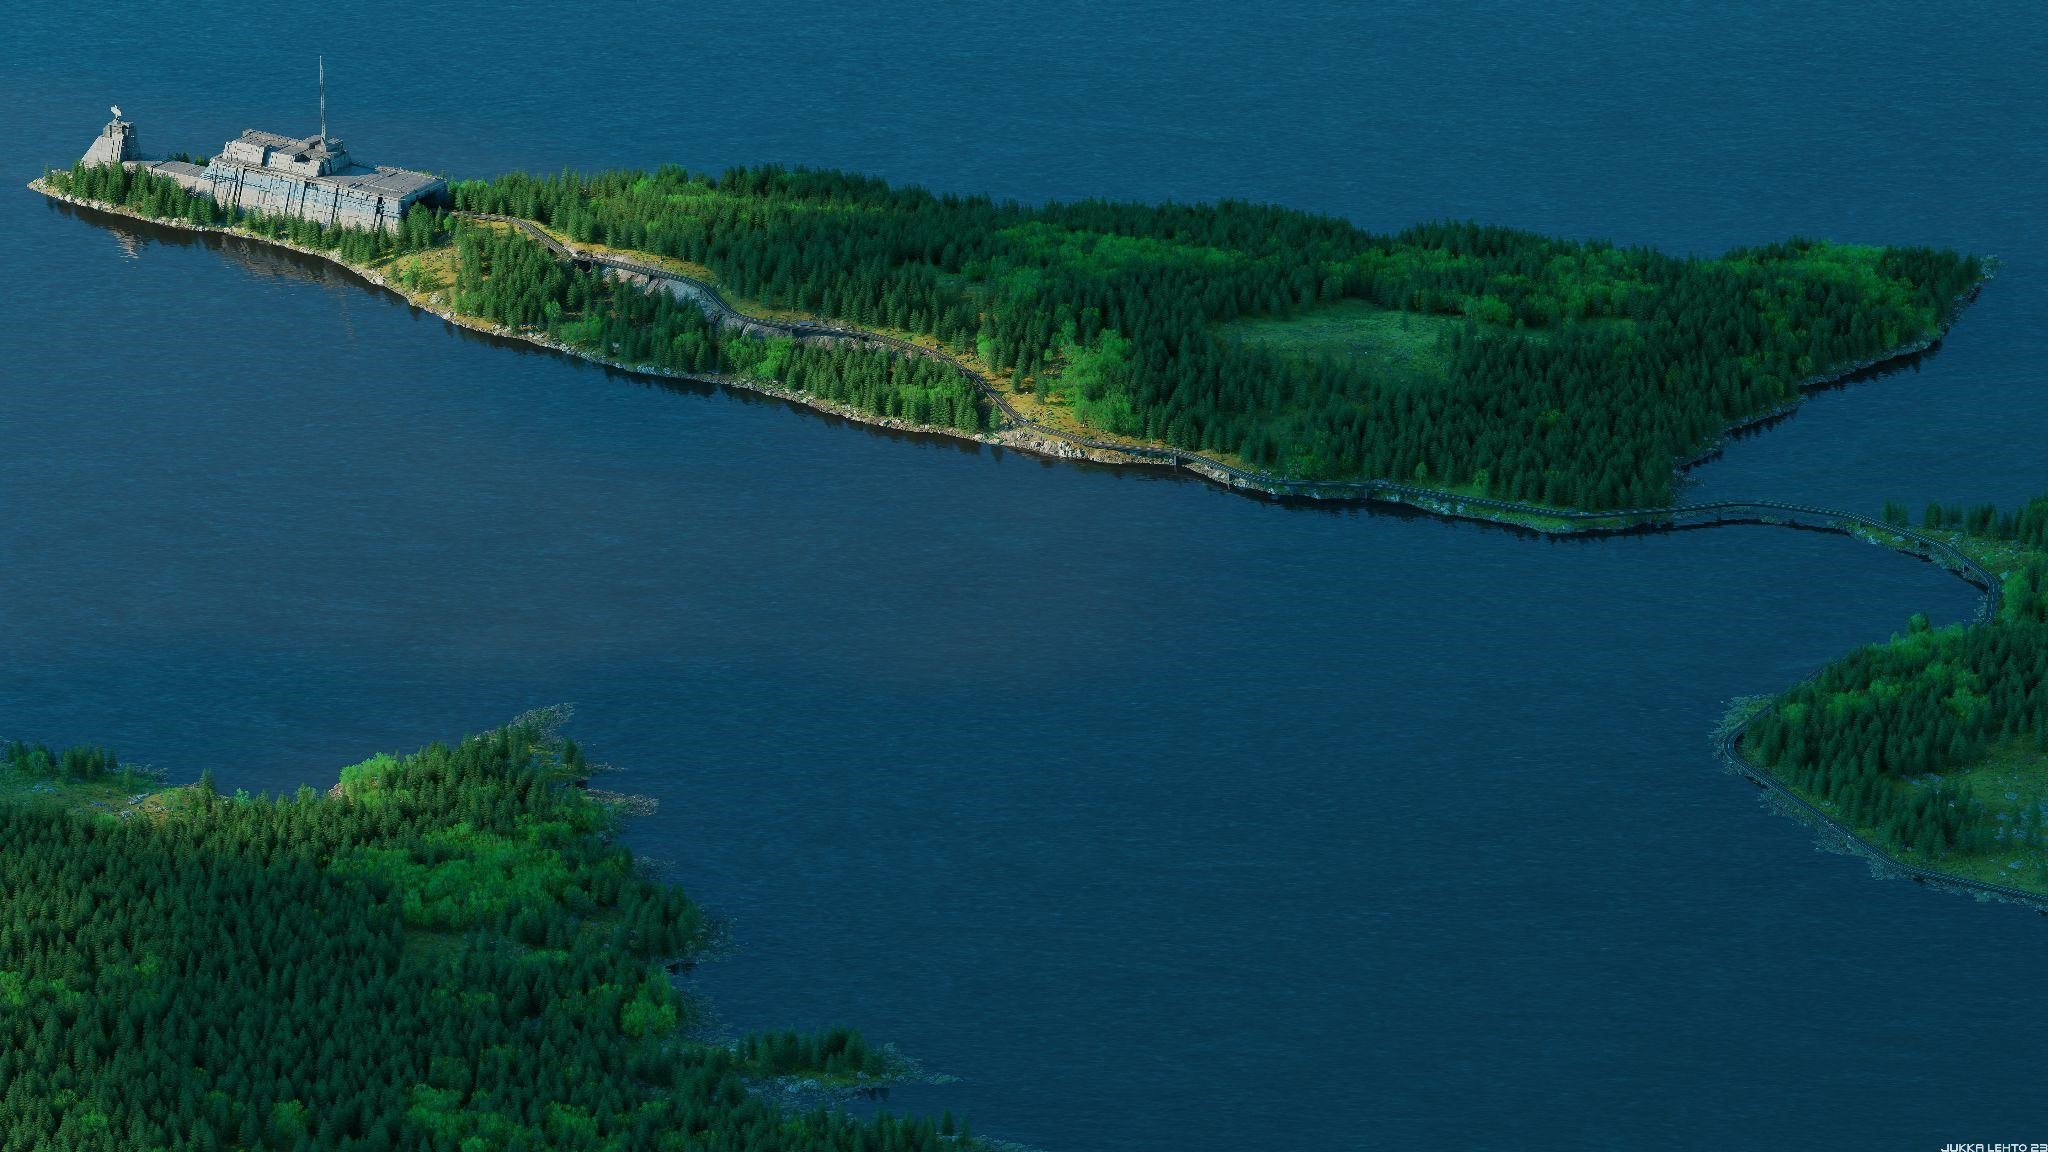
After I was happy with the results in Gaea, I started experimenting with scale. I decided to use real-world scale values inside Blender to make scaling stuff easier for me. After a few days of experimenting, the mountain was scaled to be as high as 4000m and 32km wide.
DISPLACEMENT AND MATERIALS
There are basically two different displacement passes: one for the base terrain and another one for the cliff/rock/detail. The terrain base displacement is in a modifier, and the cliff/rock extra detail is controlled by the material. Most of the material textures are from Megascans.
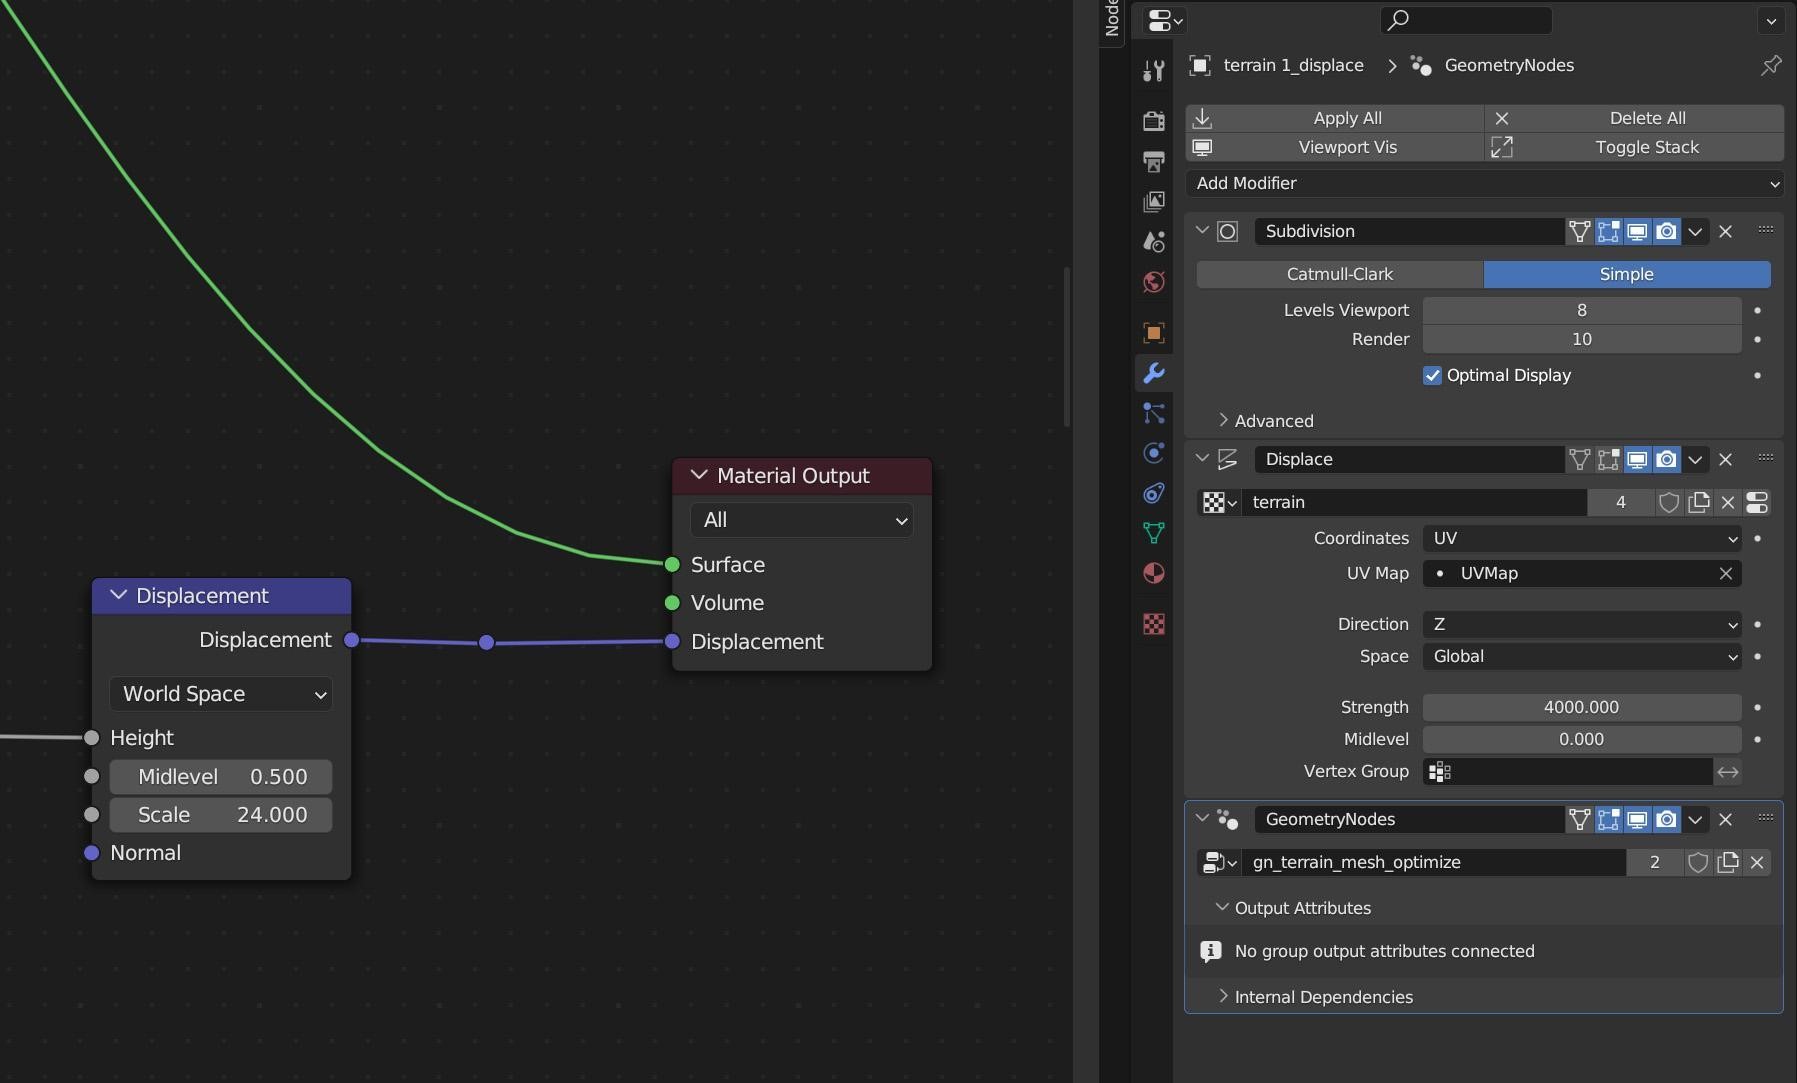
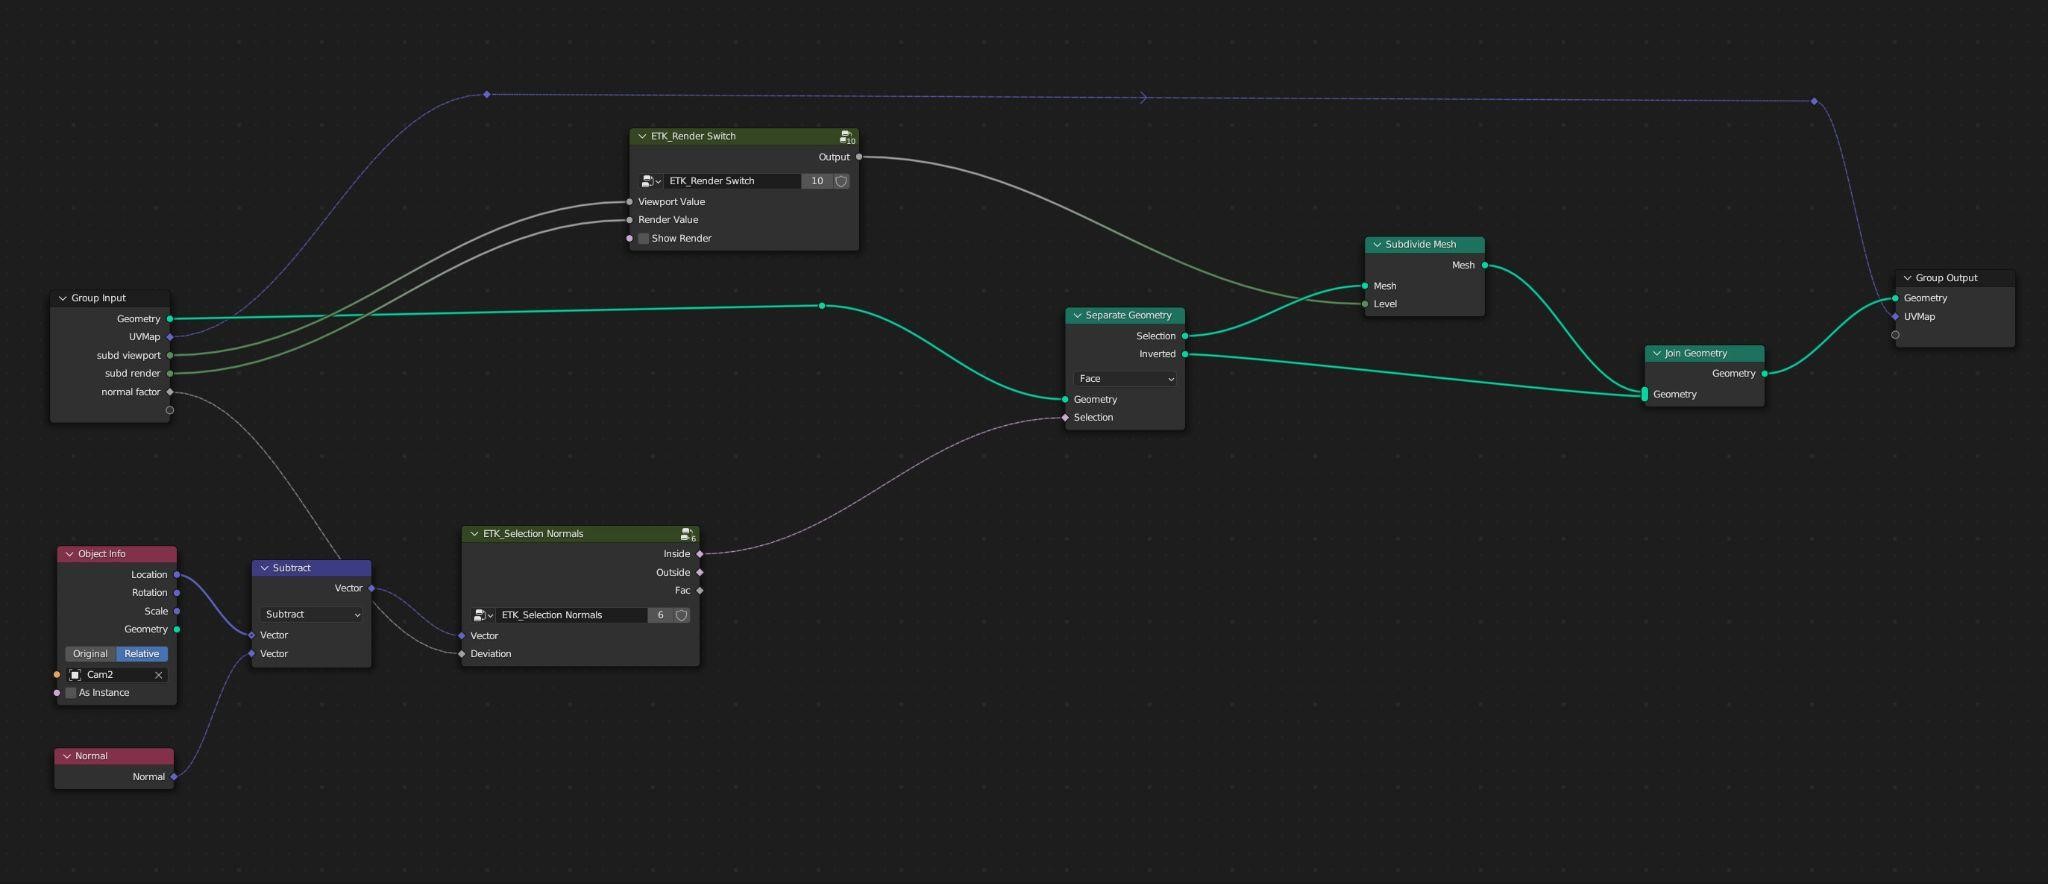
After the base terrain displacement pass, there is some geometry node optimization where I used some GN nodes from the Erindale Toolkit. Optimizations like camera culling, subdivision based on distance, and geometry deletion if it is below a specific height.
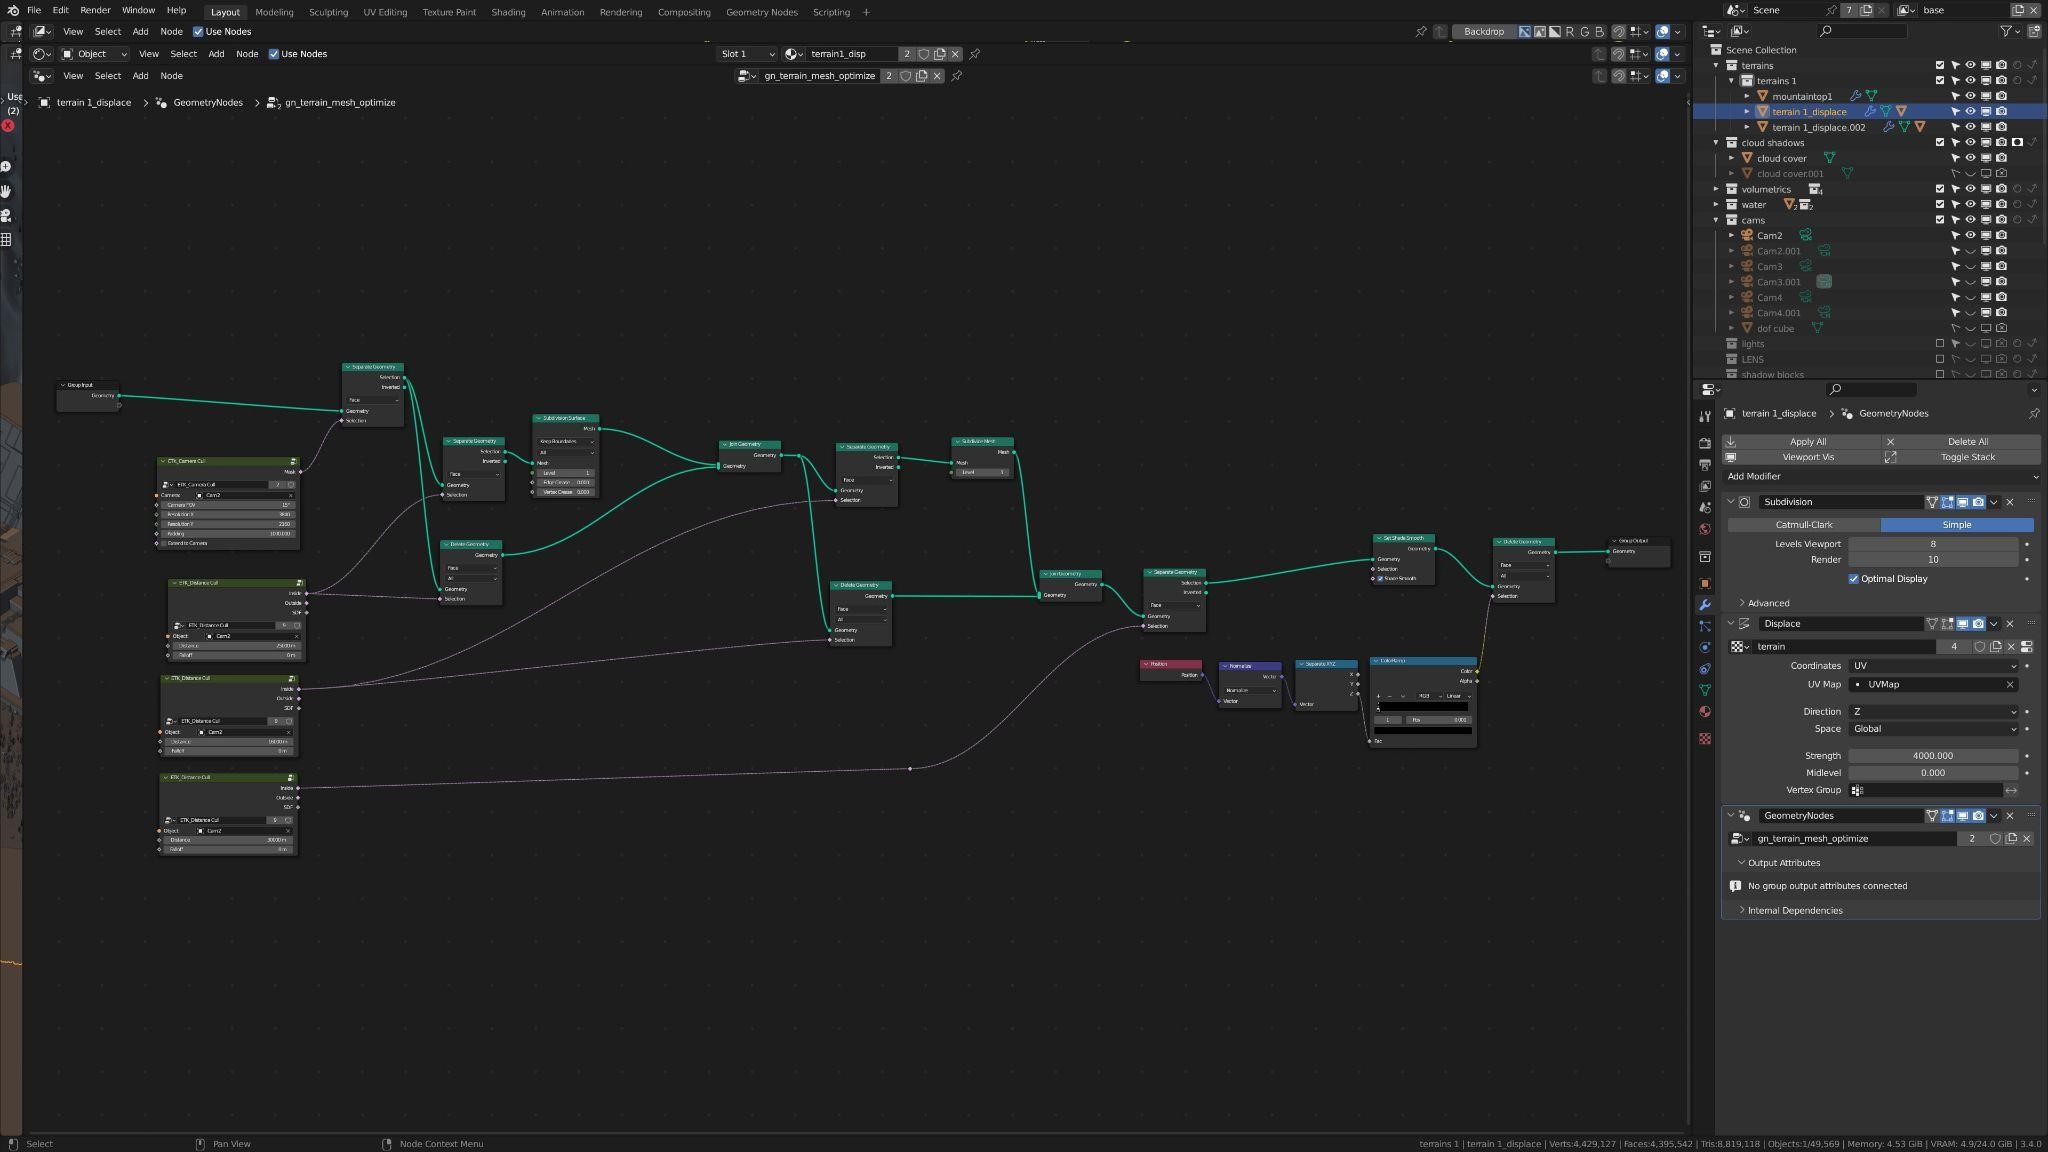
I know there is adaptive subdivision also, but I found it to be not predictable/controllable enough this time. This gets my terrain to have enough polygons so cliffs look good enough from a distance.
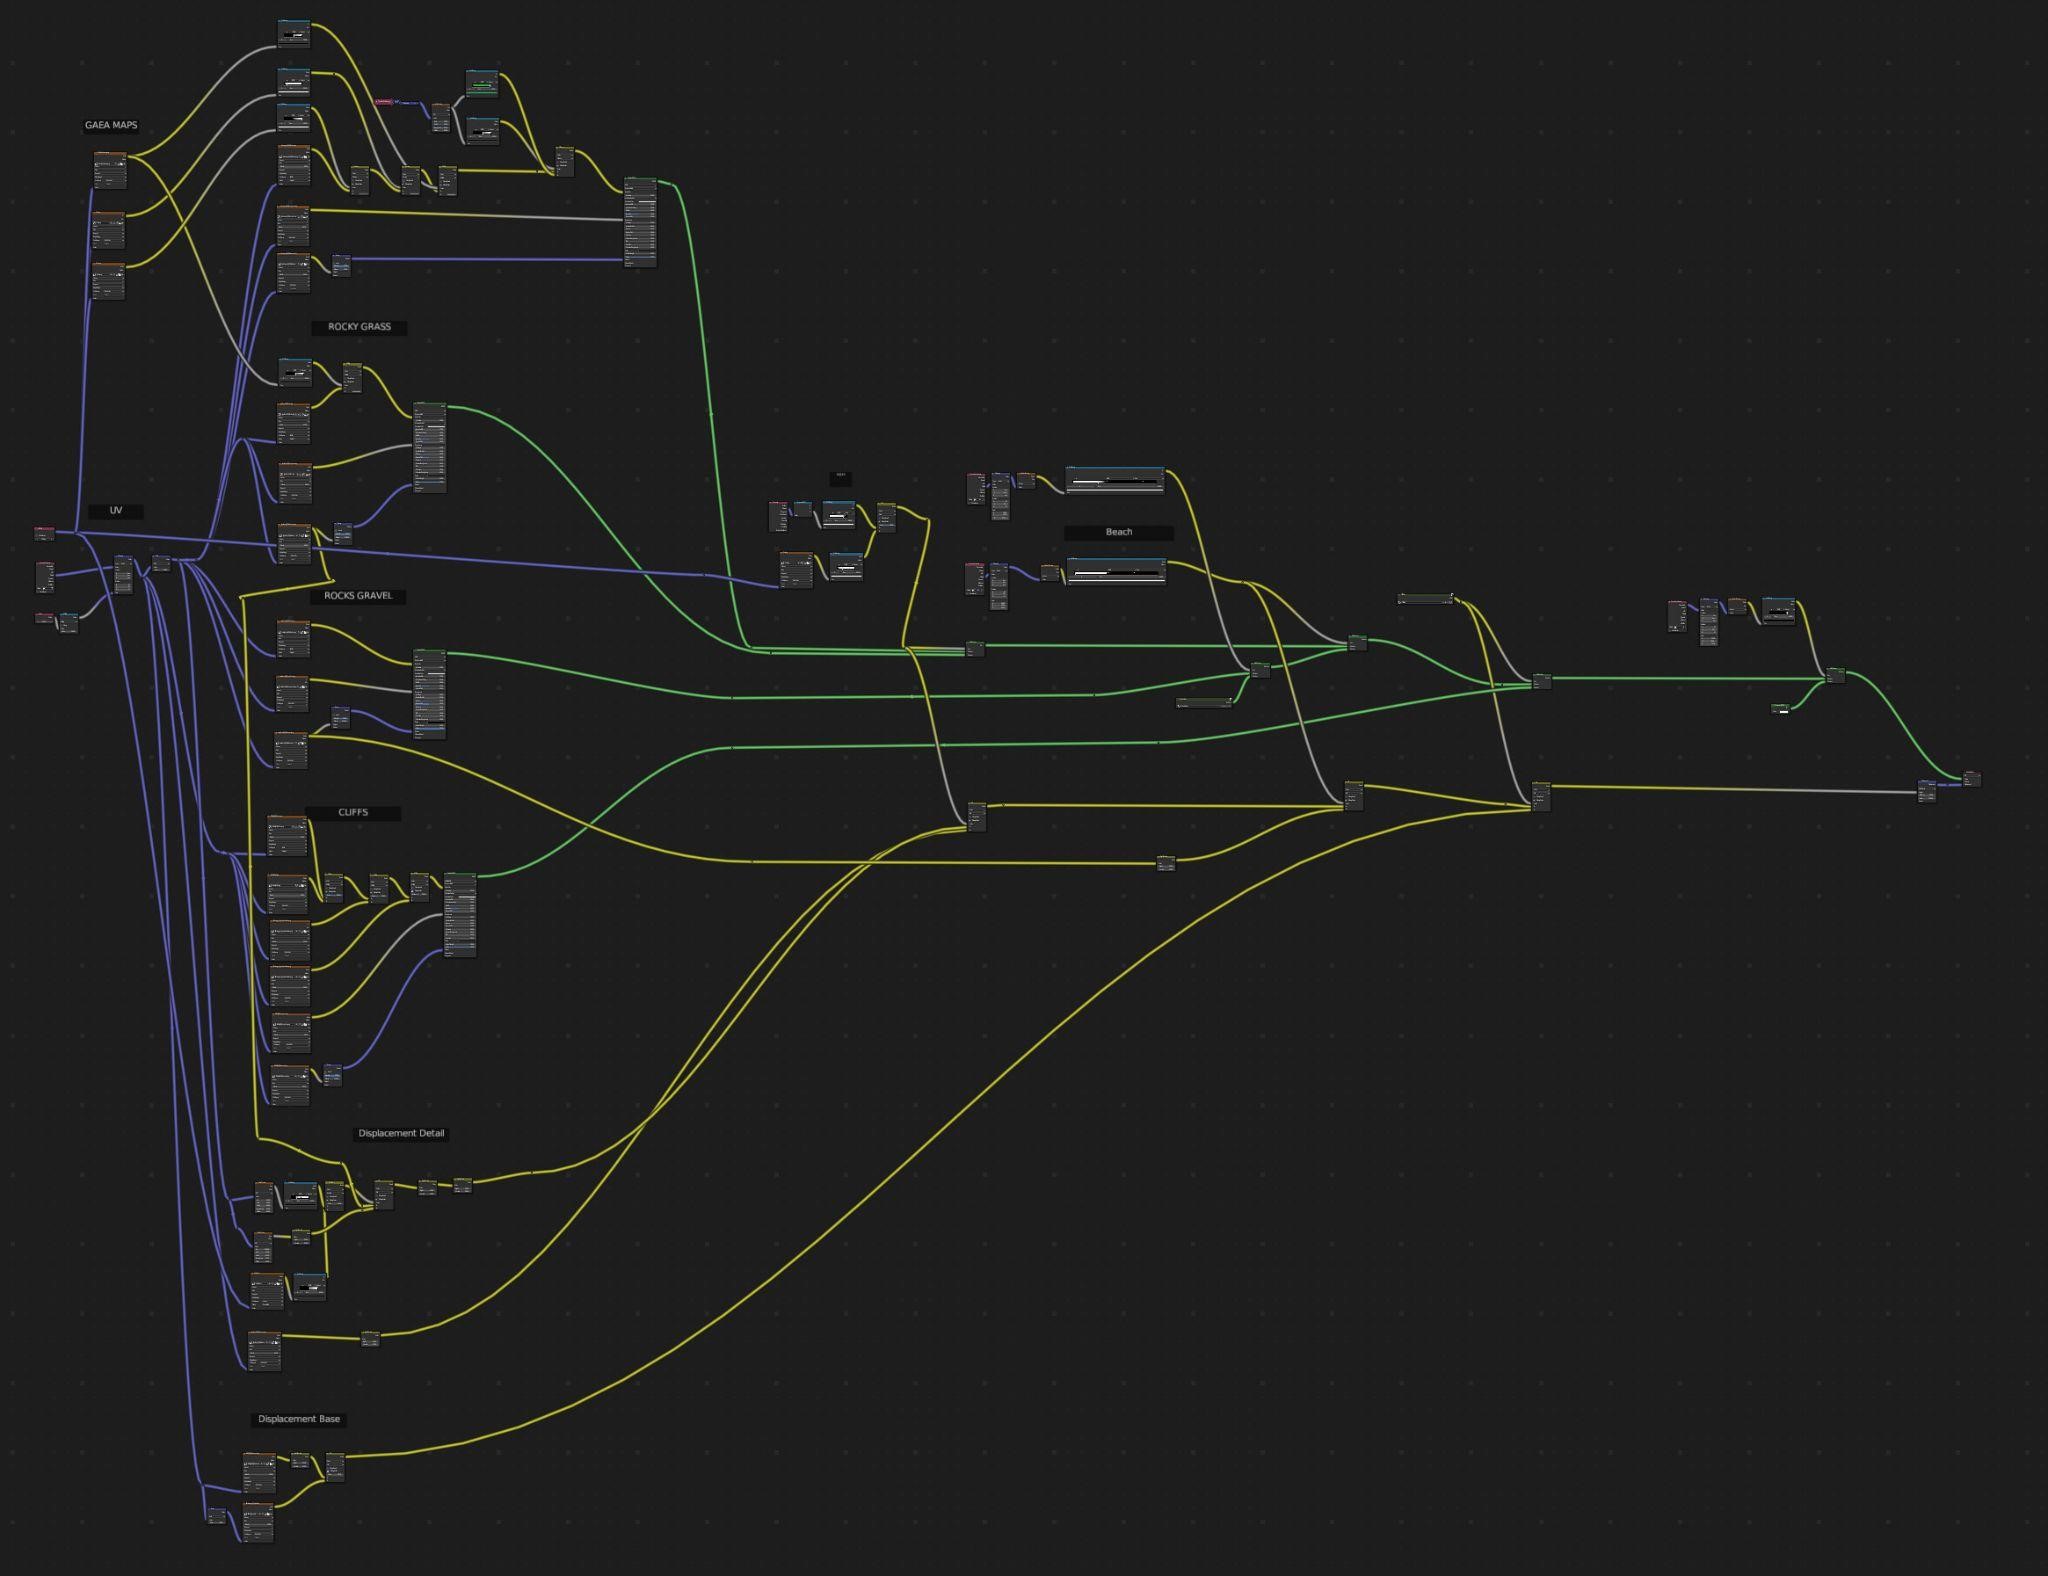
The main material is basically divided into a couple of different materials: flat ground/rocky slopes/cliffs/beaches/sea bottom.
OBJECTS
For object scattering, I used geometry nodes. Thanks again to the Erindale Toolkit for awesome premade nodes that help with specific functions.
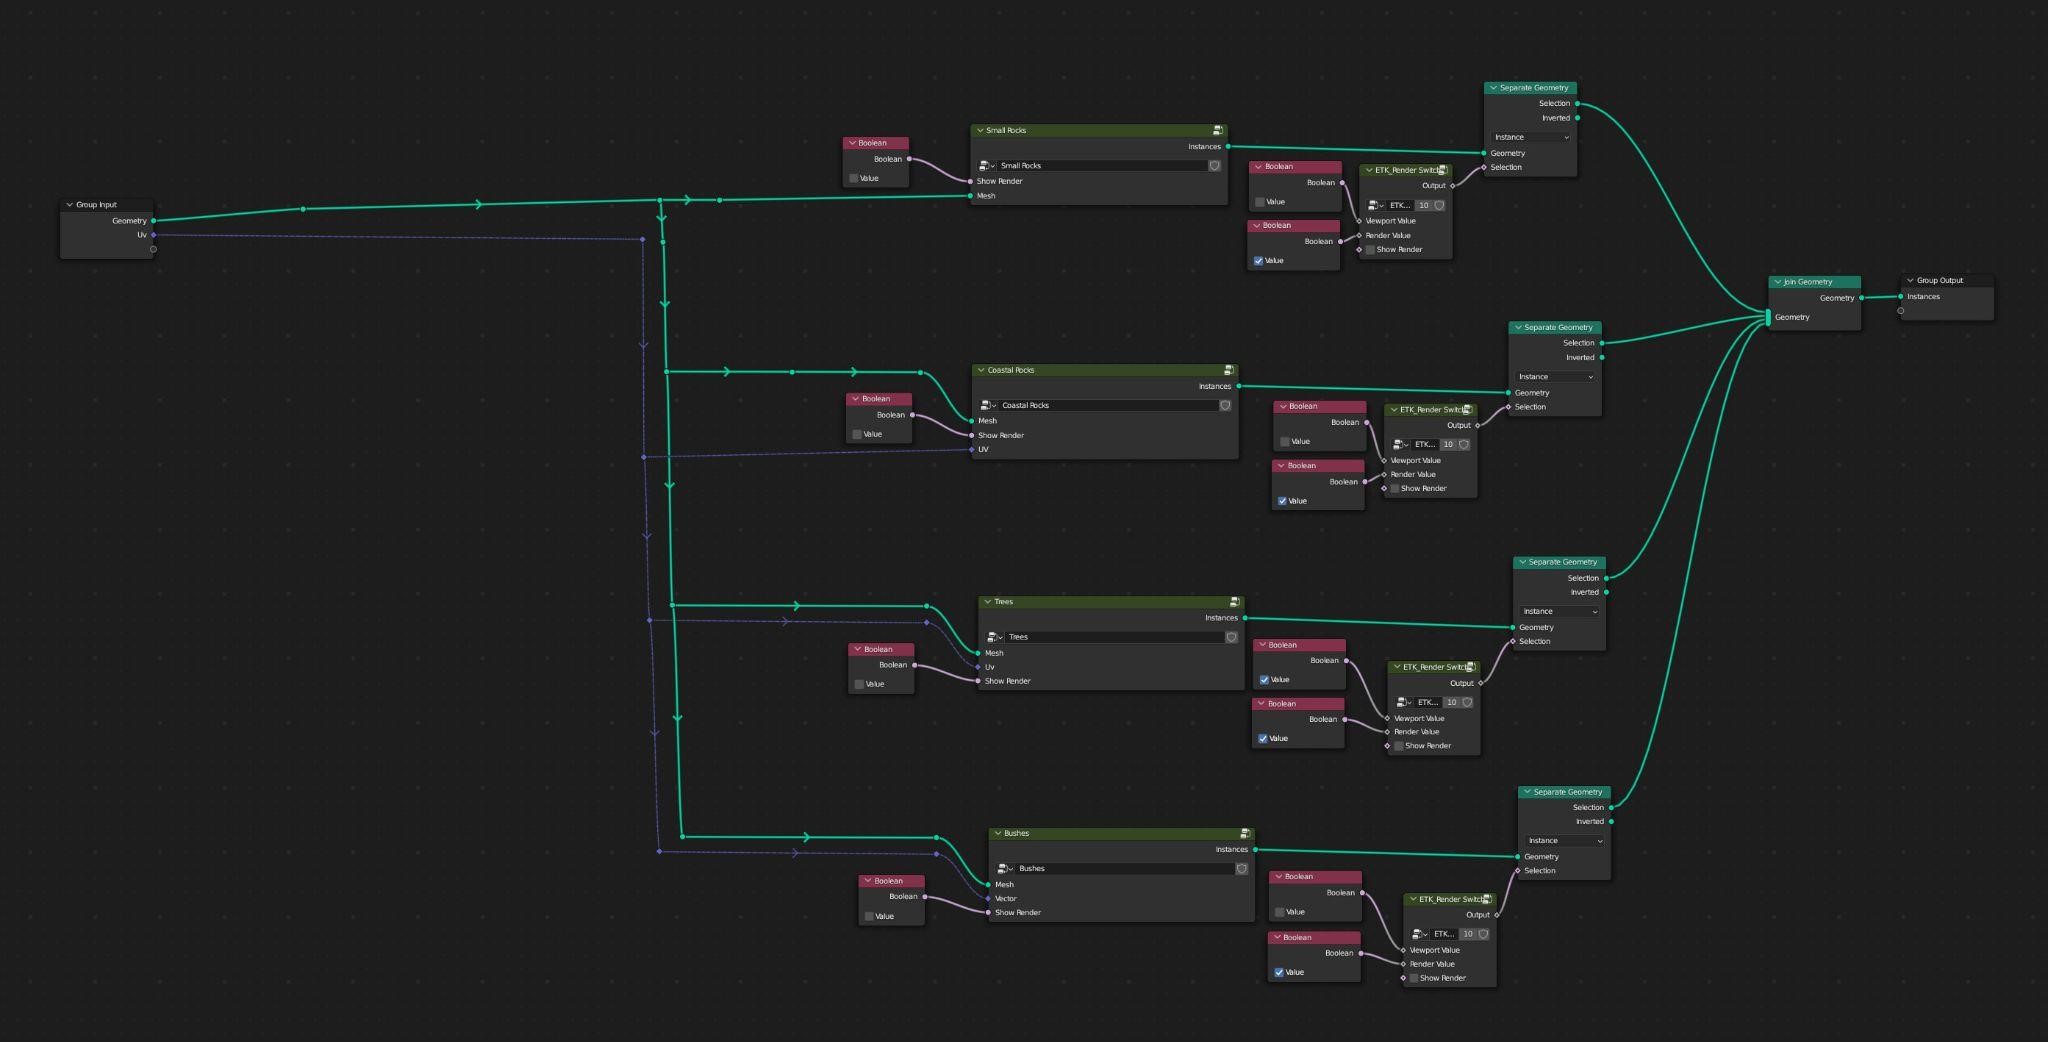
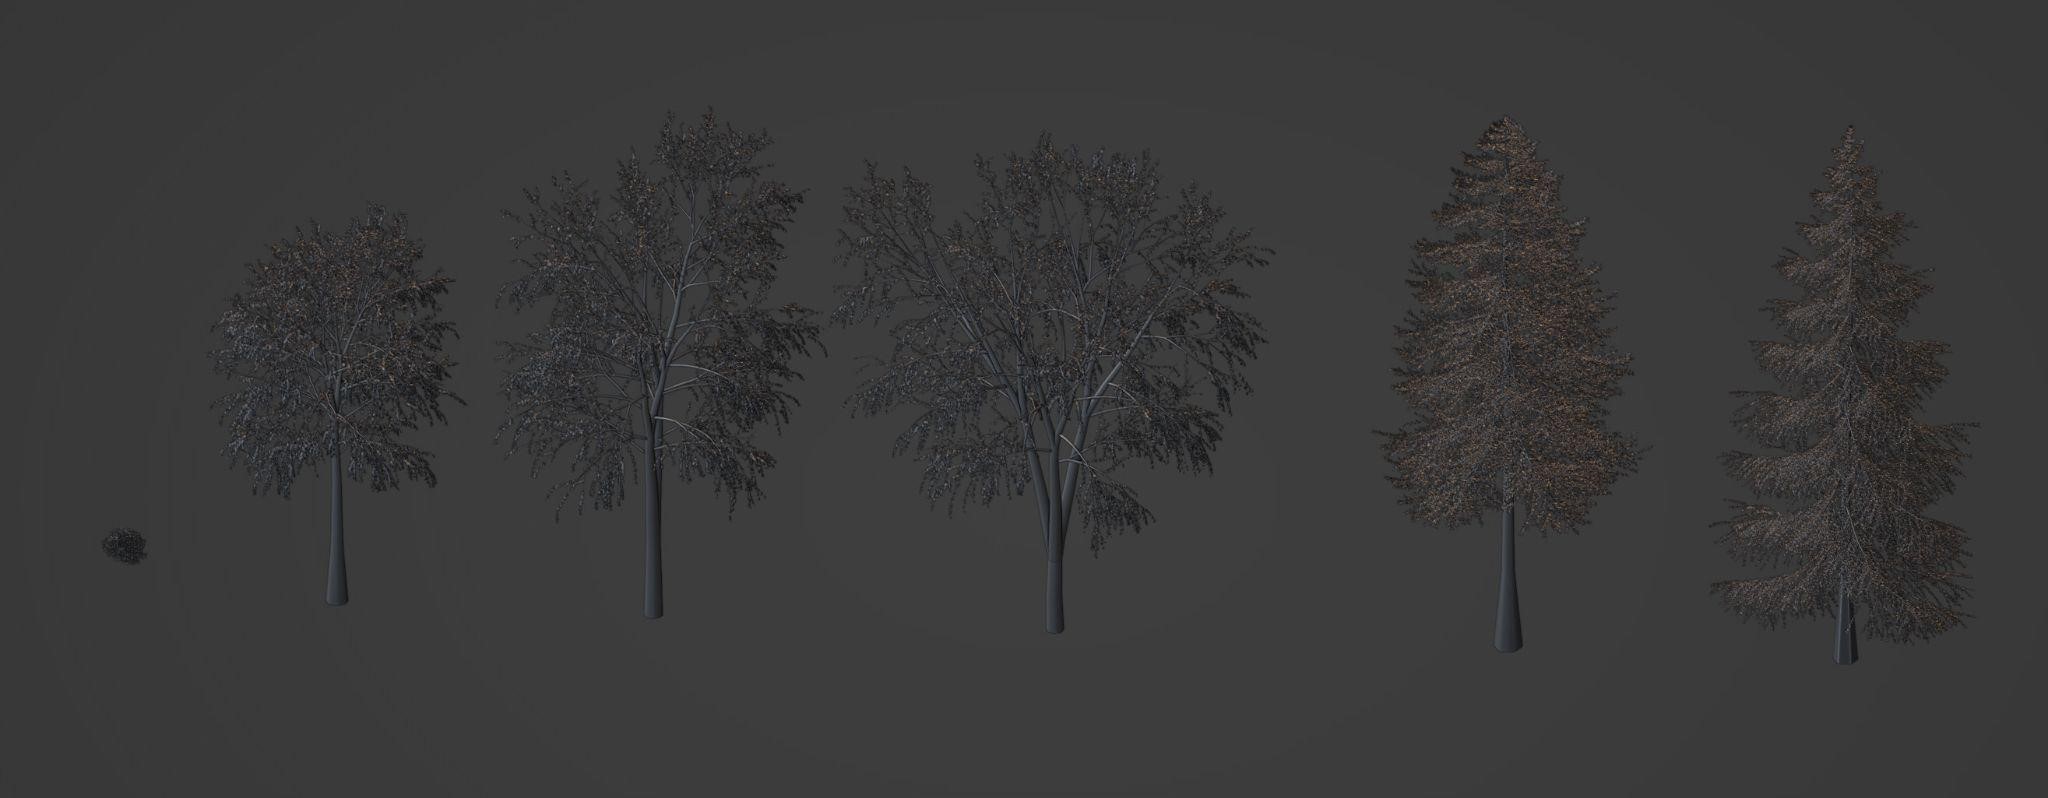
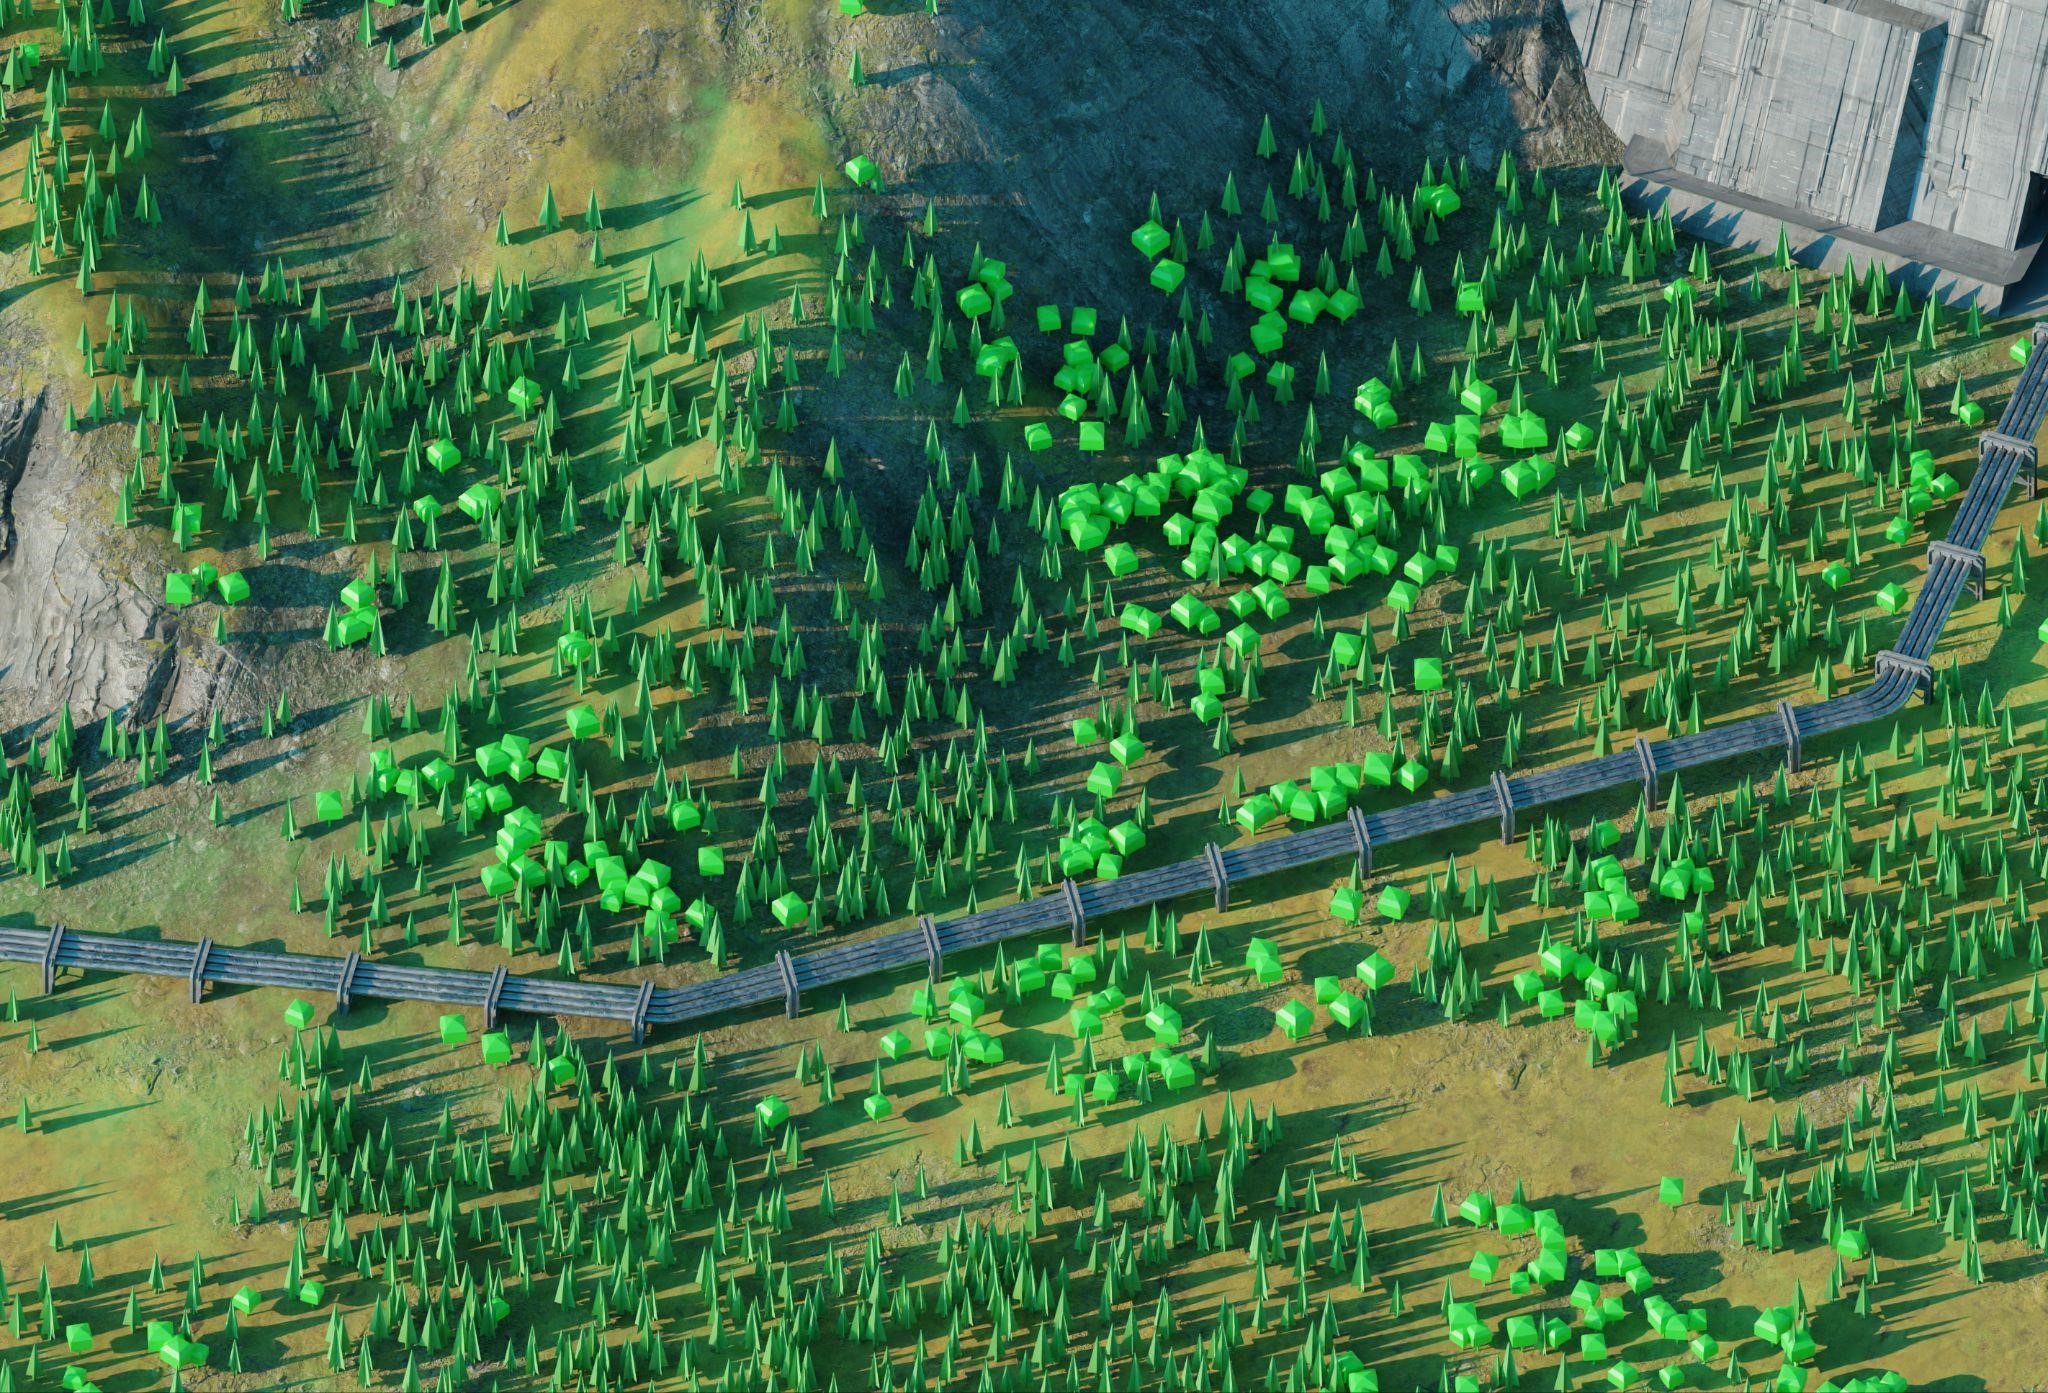
For trees, I used the Sapling Tree Generator. There are only a couple of models used here, but it’s enough when we add random rotation and scale to them.
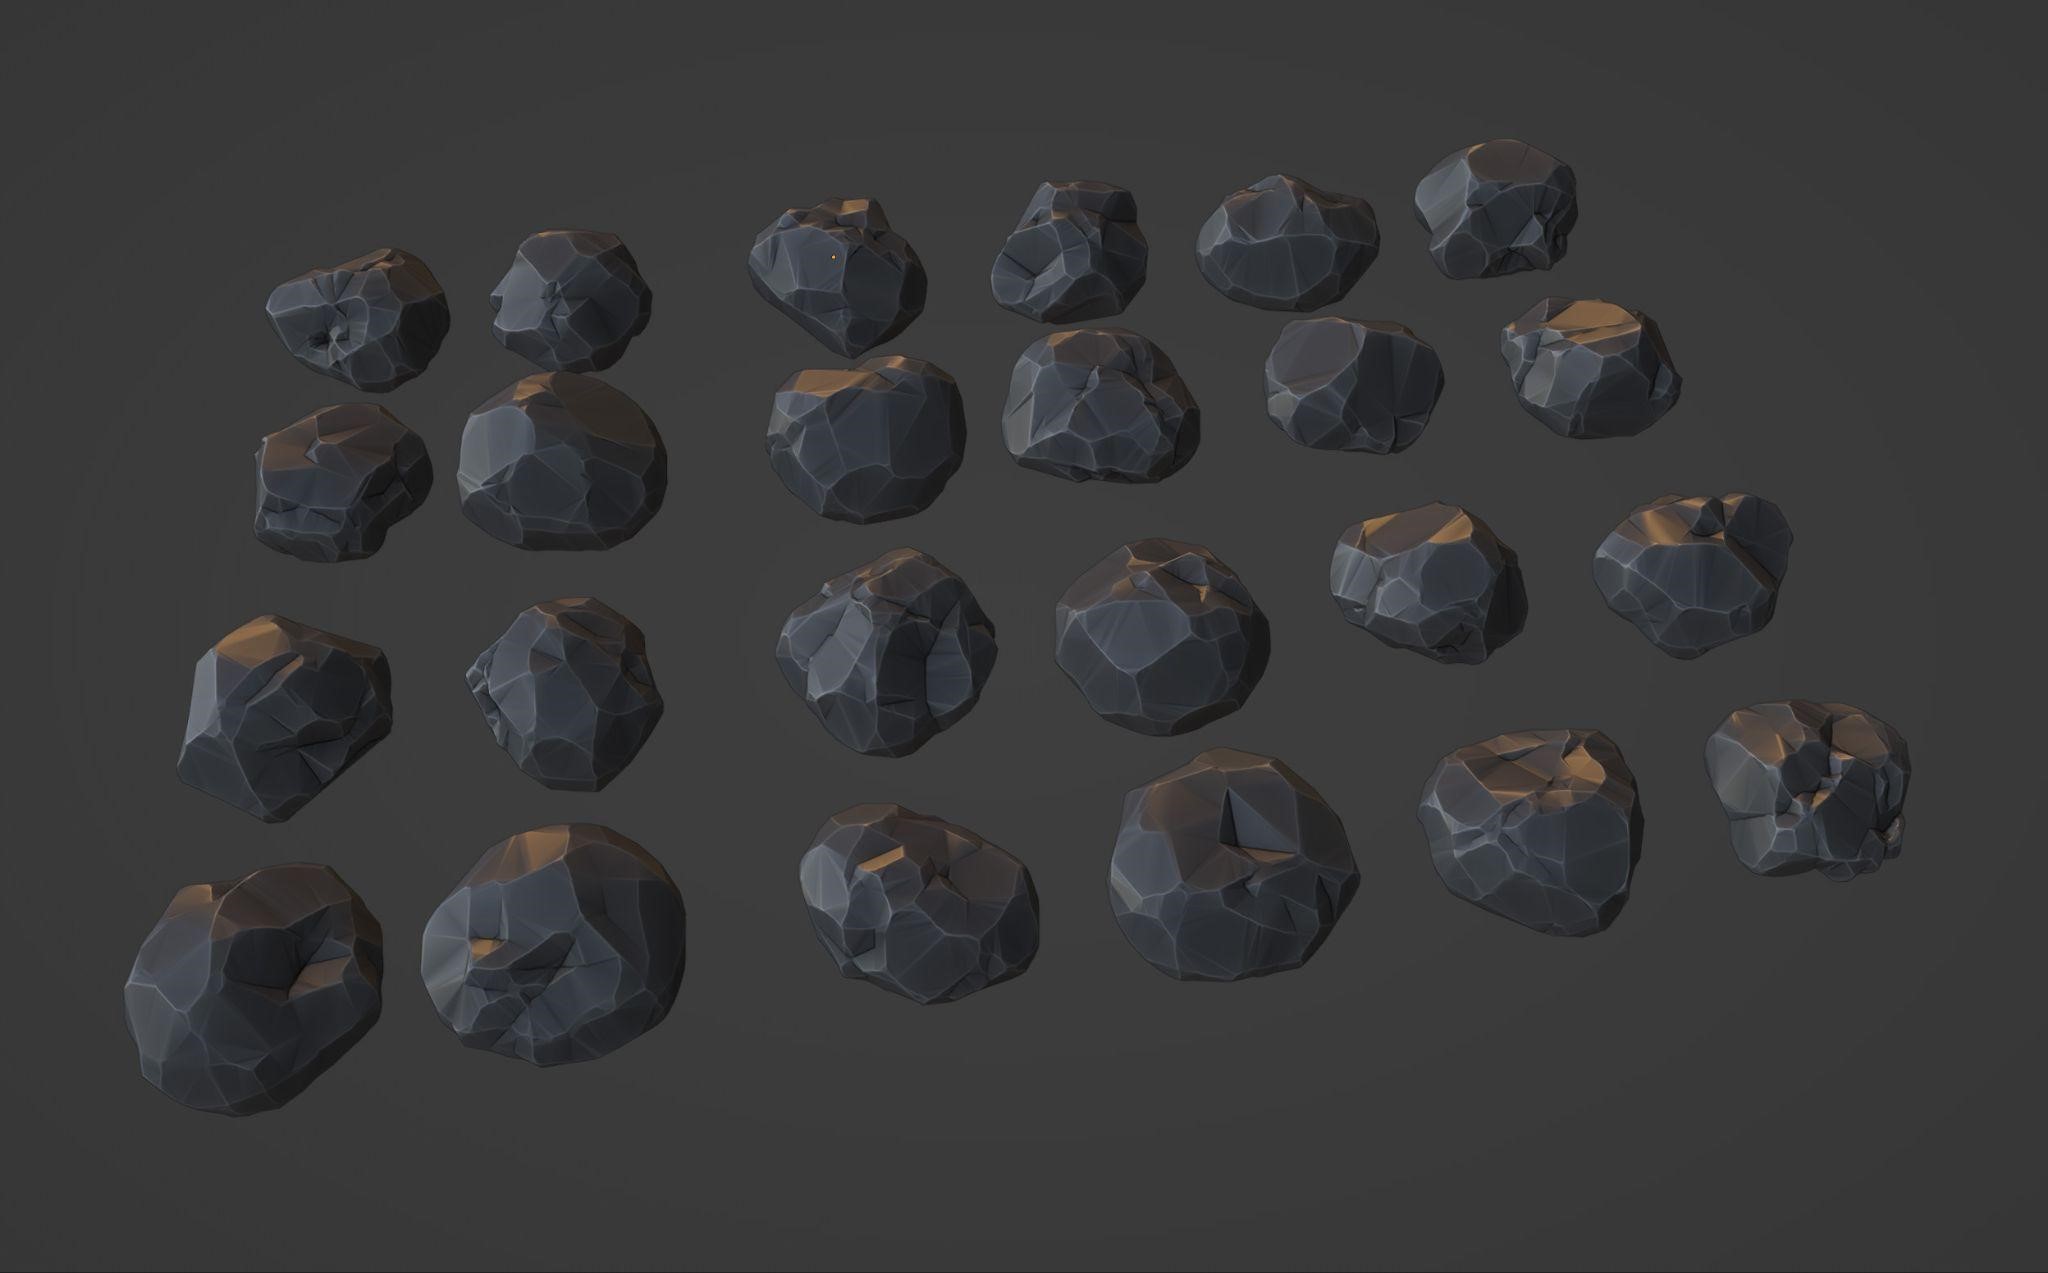
I took the rocks from my other project.
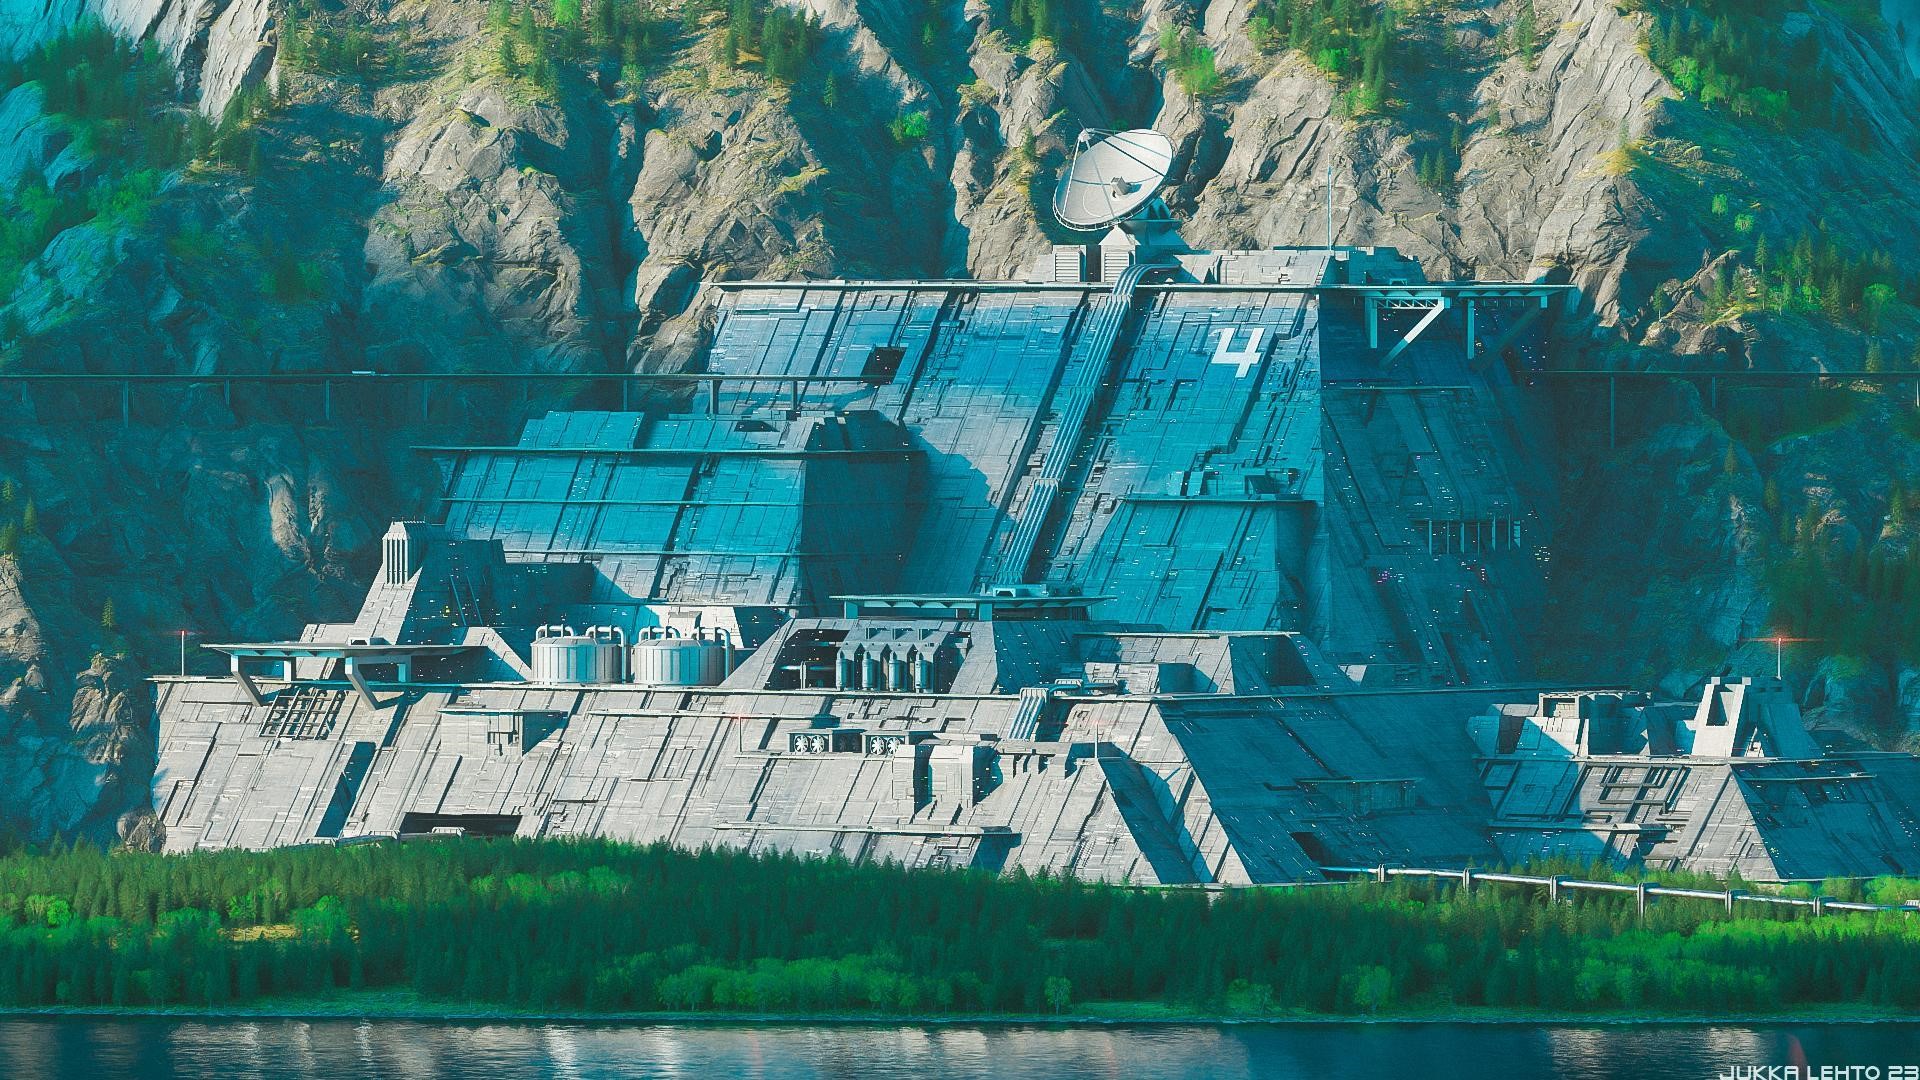
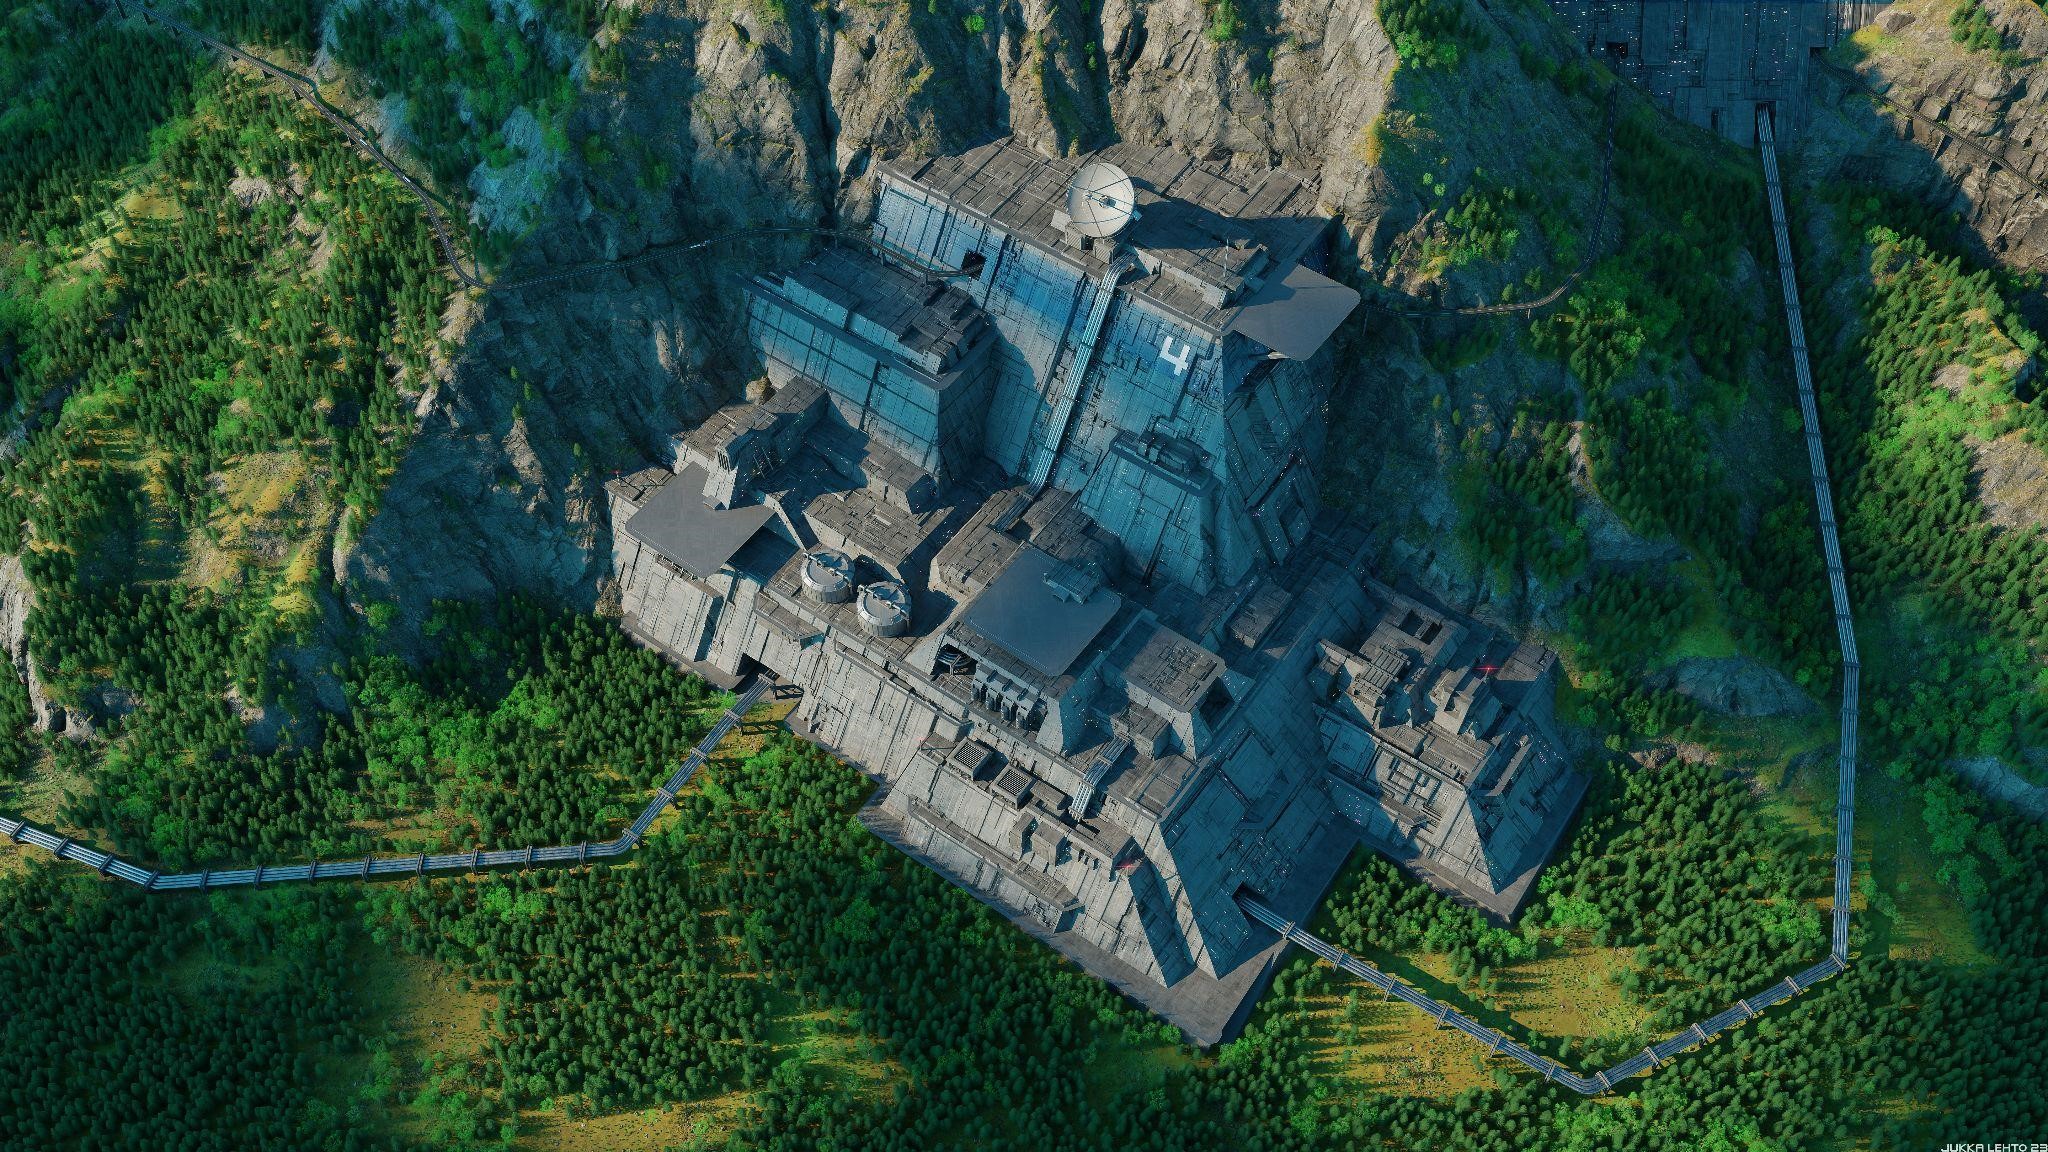
Bunkers and other structures use my custom displacement maps made in Adobe Designer. These structures also use some simple GN node logic when subdivisions are created. For example, if the face normal is directly facing away from the camera, it won’t do subdivisions as you can’t see them anyway, saving some memory.
For the first time, I tried GN ray-casting for deleting trees or rocks where I have roads, pipes, or structures. This worked better than I expected.
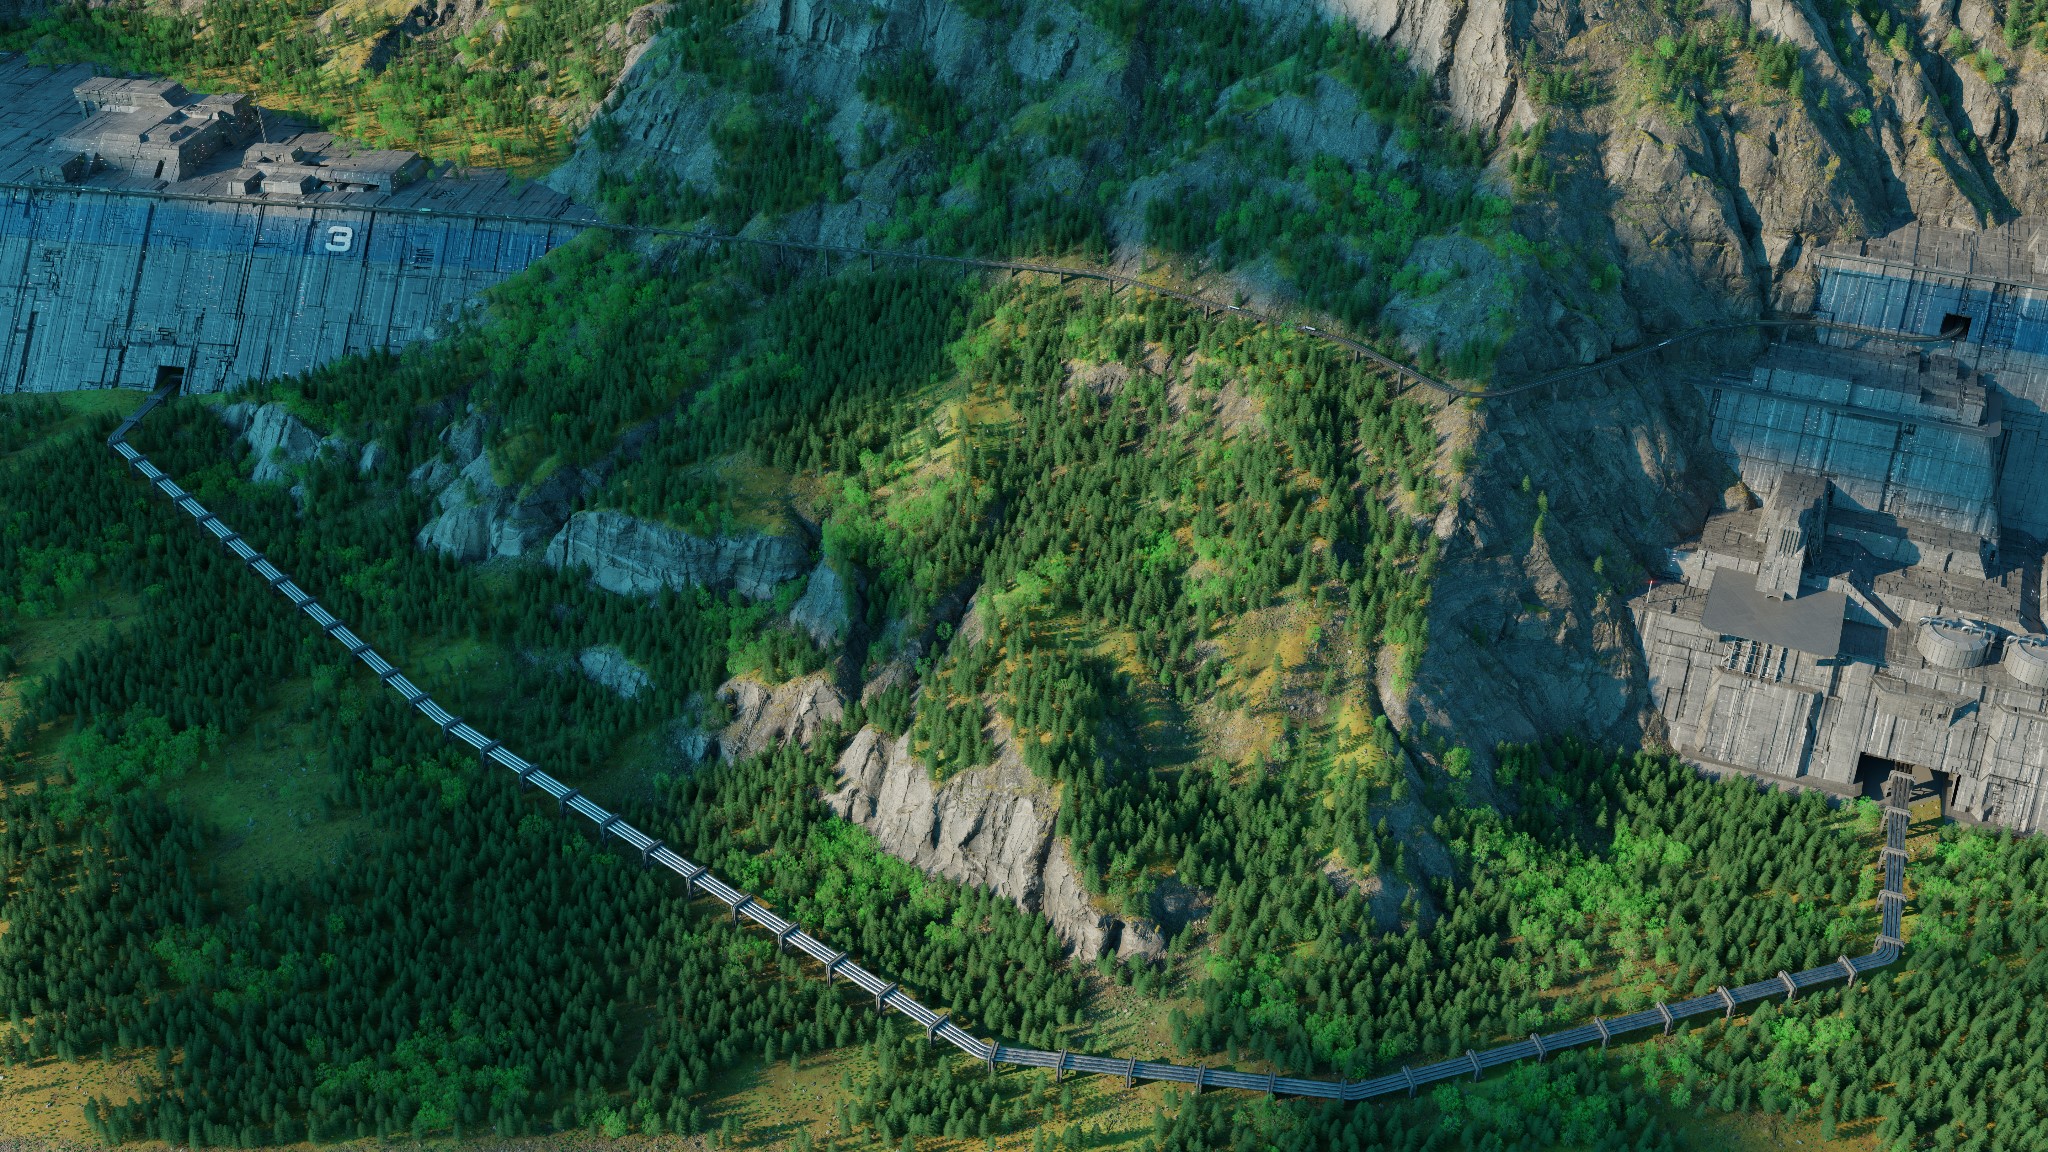
Roads and pipes are generated with curve geometry nodes. They are pretty simple, but in this artwork, it’s more than enough.

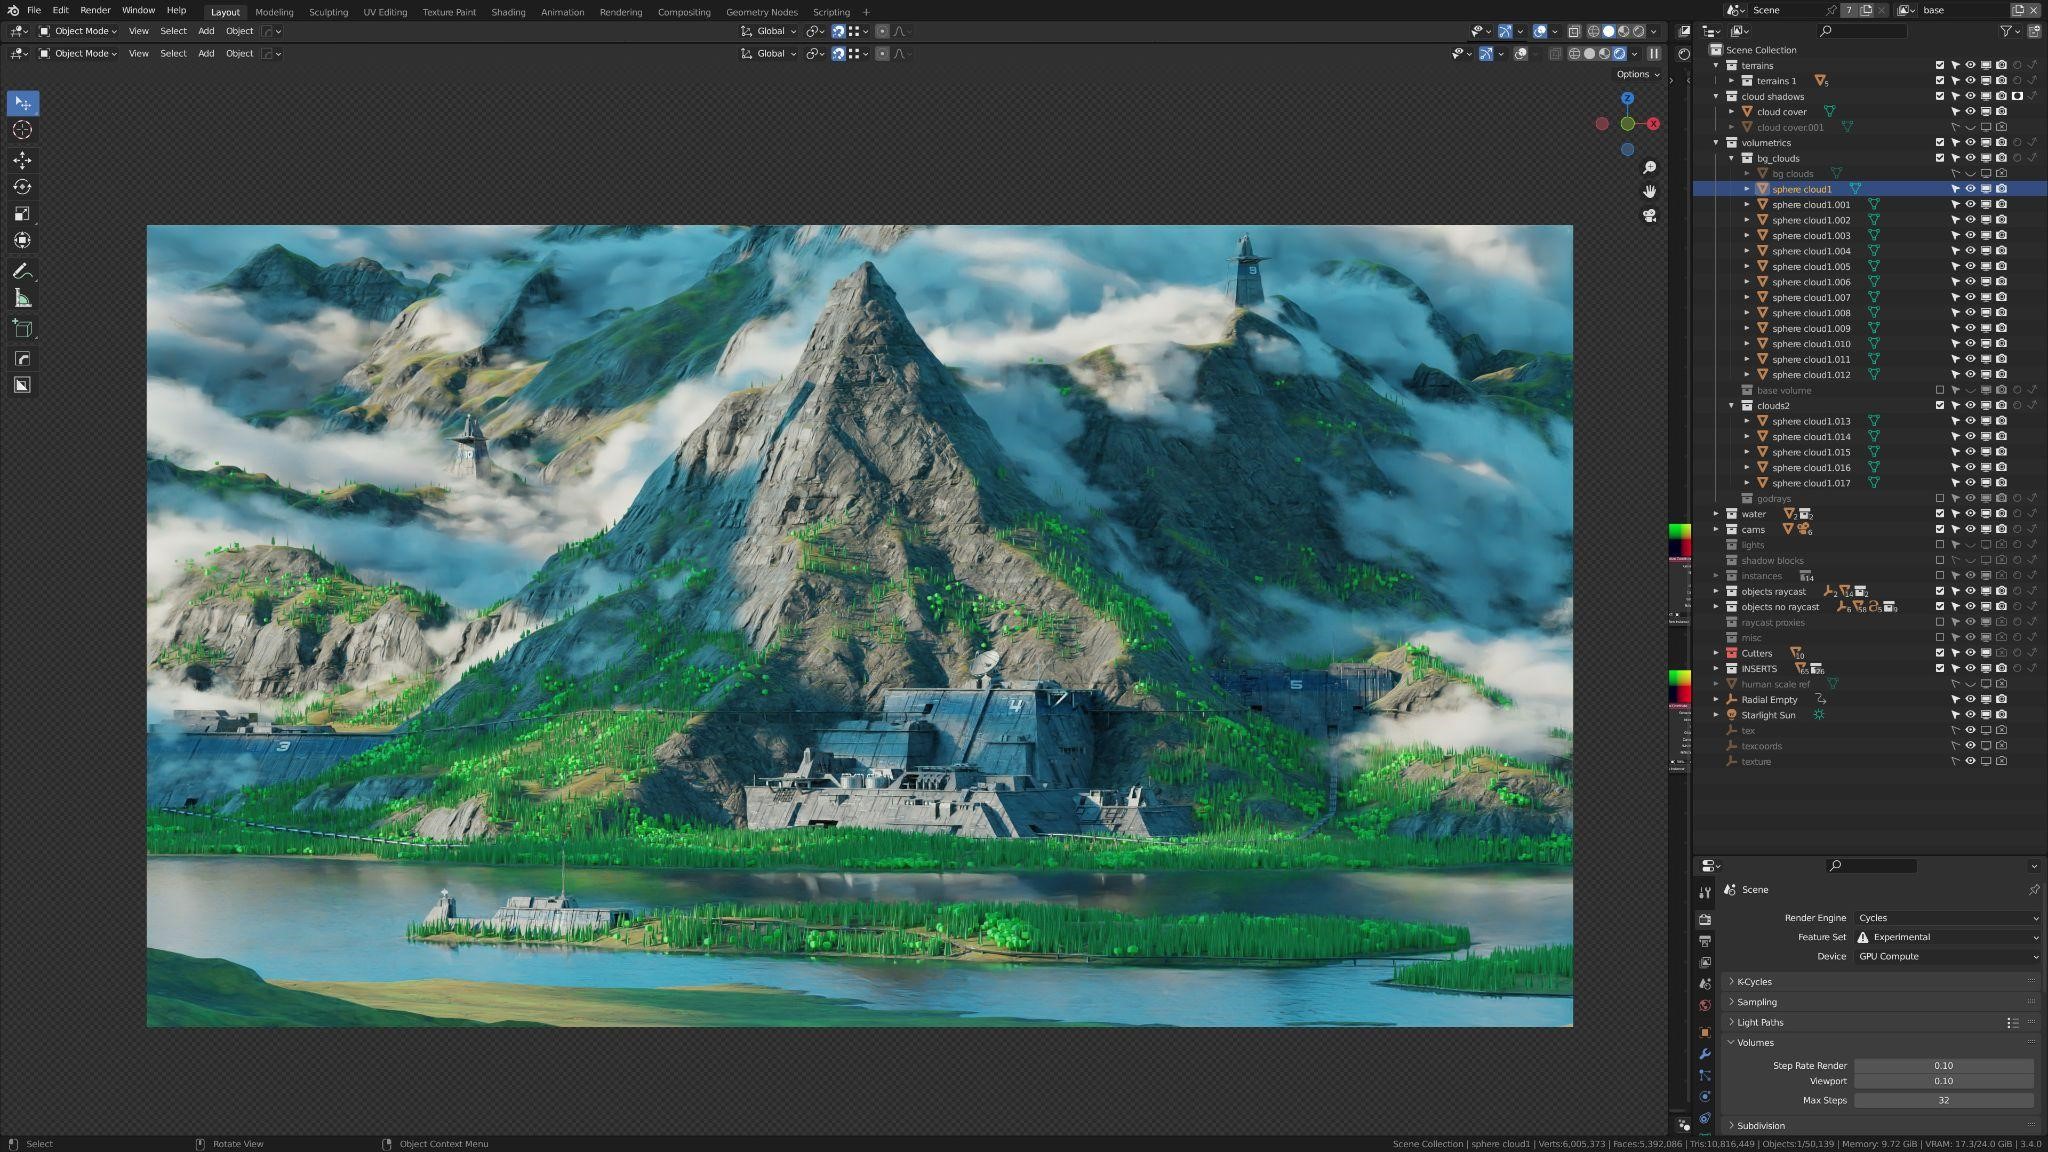
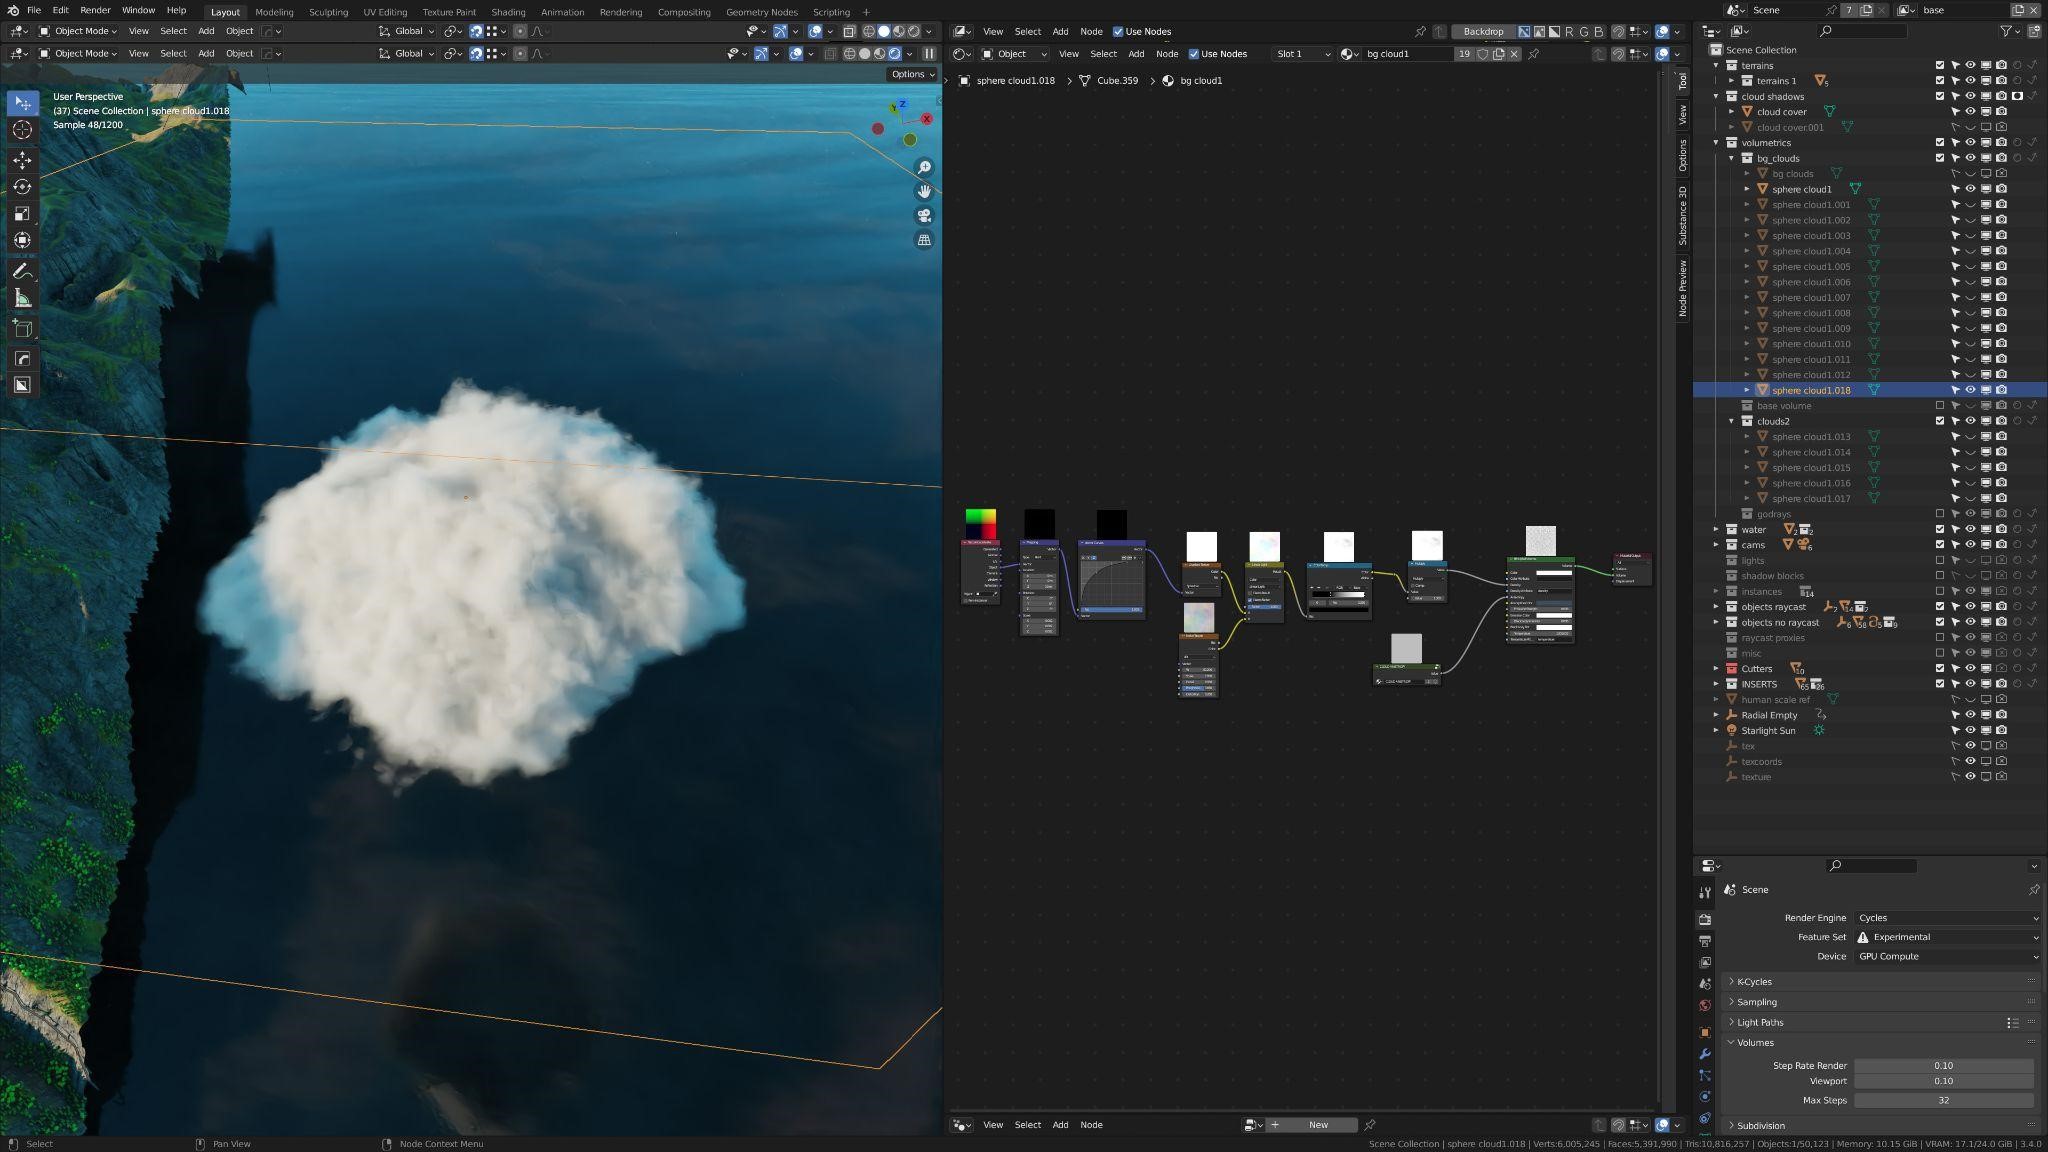
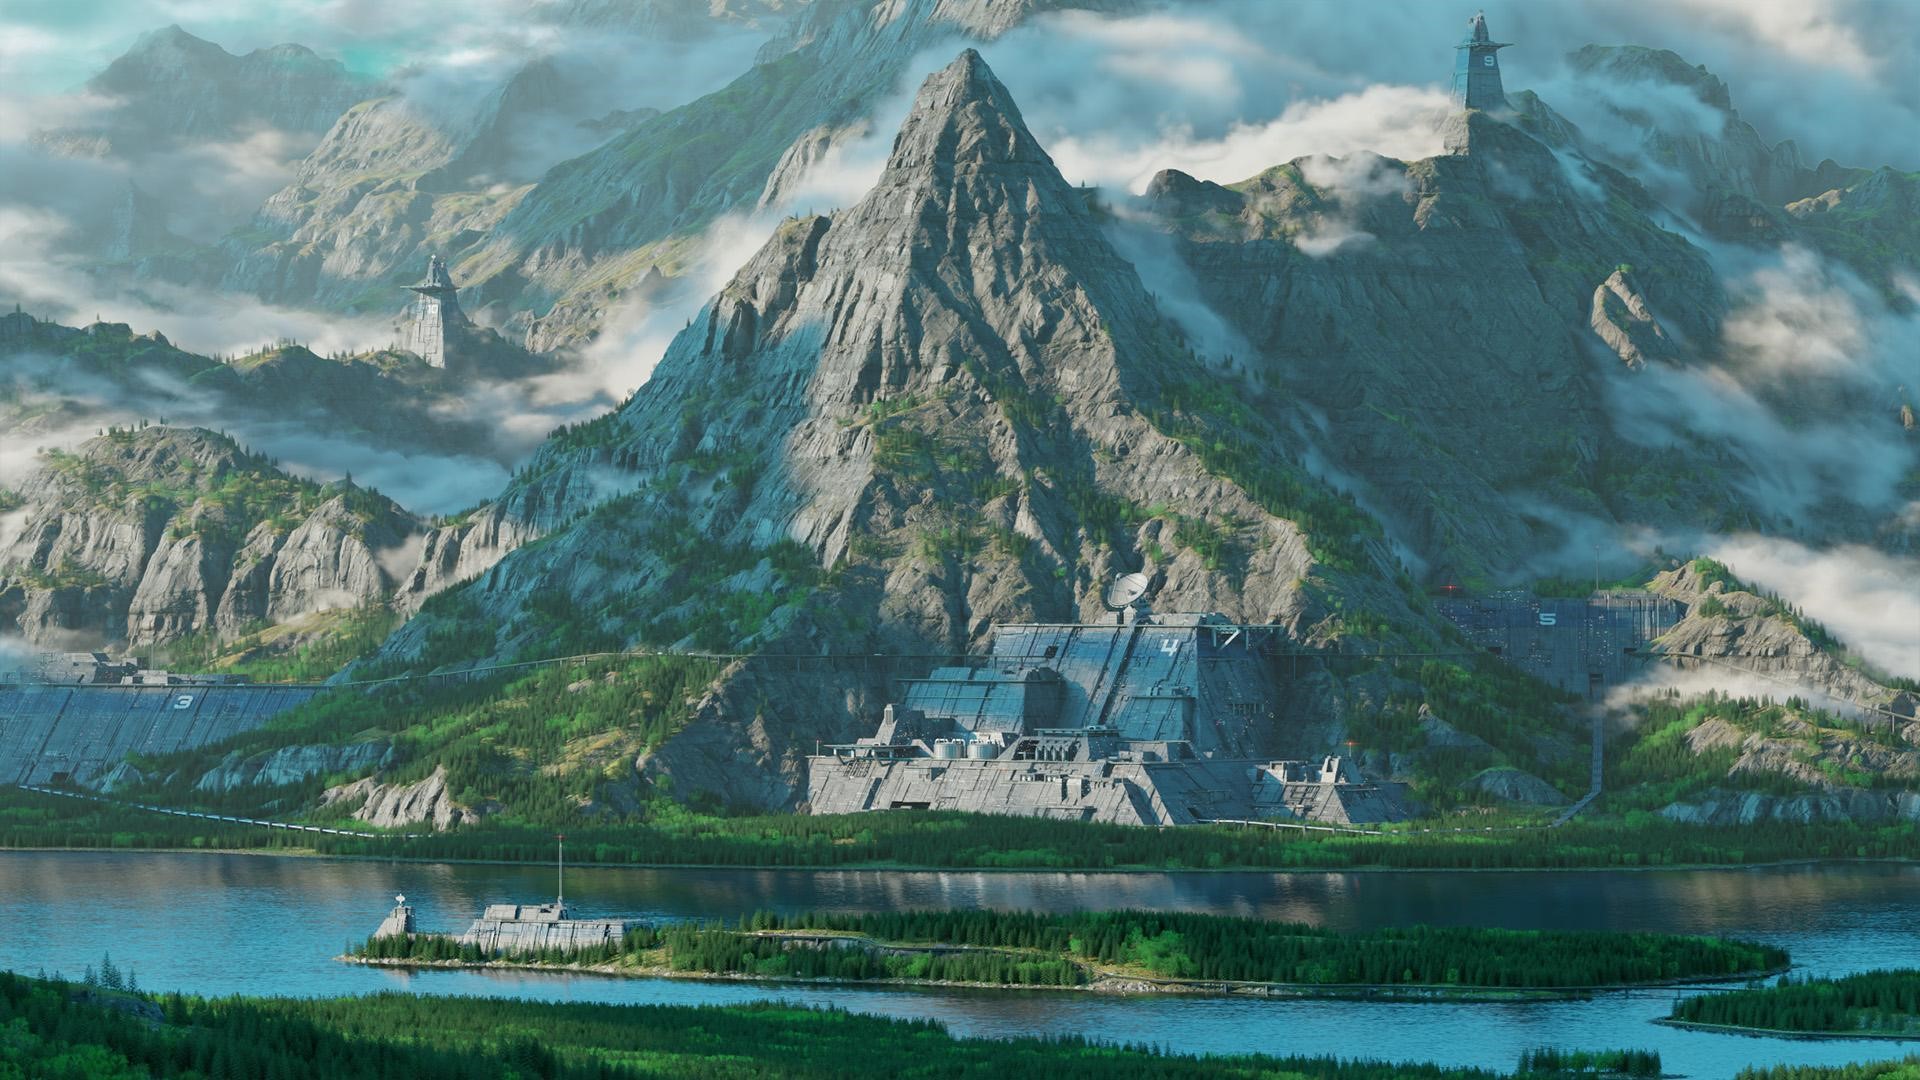
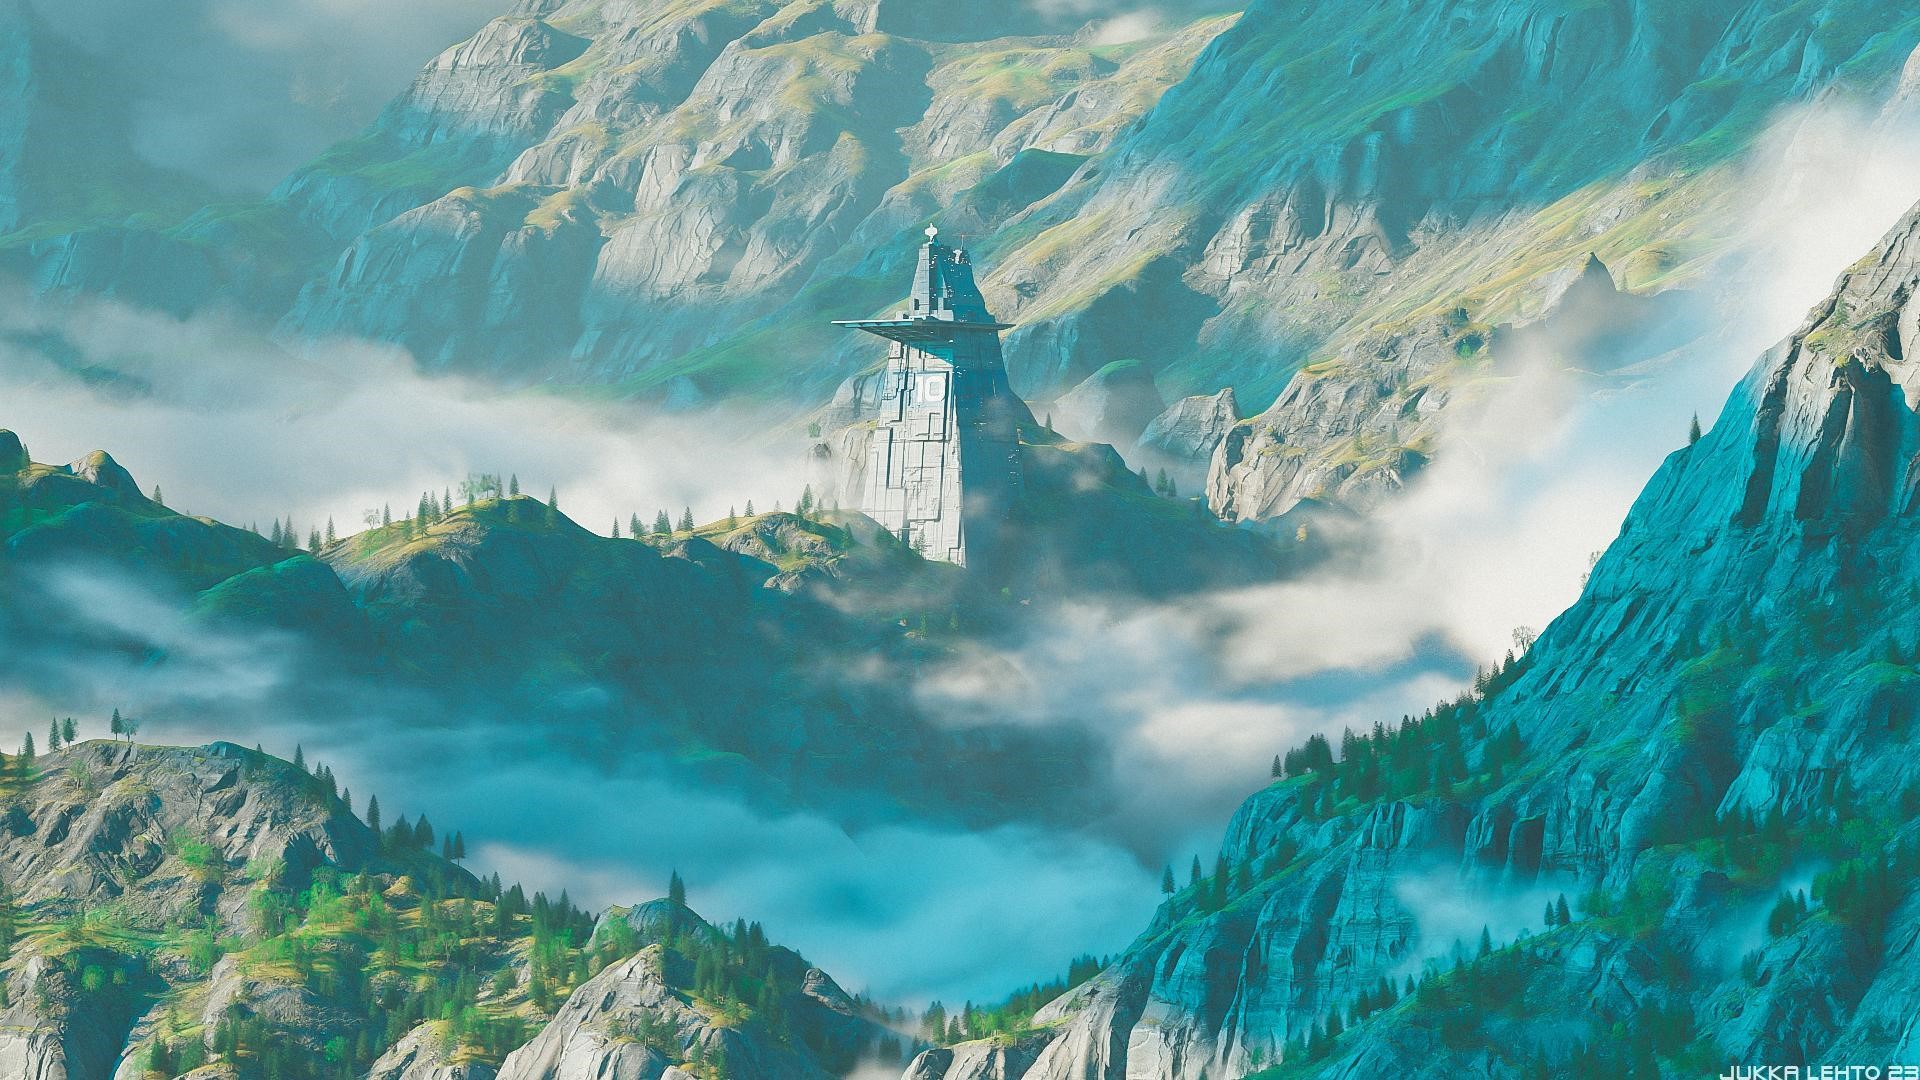
Clouds are volumetric. I used noise and sphere gradient for them, which pretty much did the job. Then I copy-pasted and moved them around until I was happy with them. Rendering them took quite a long time and was made in a different view layer that only had clouds. Final adjustments were made in Affinity Photo.
LIGHTING
The lighting is mostly generated with the Physical Starlight and Atmosphere addon. Additionally, there is fake cloud cover off camera which provides some variation to shadows and highlights.
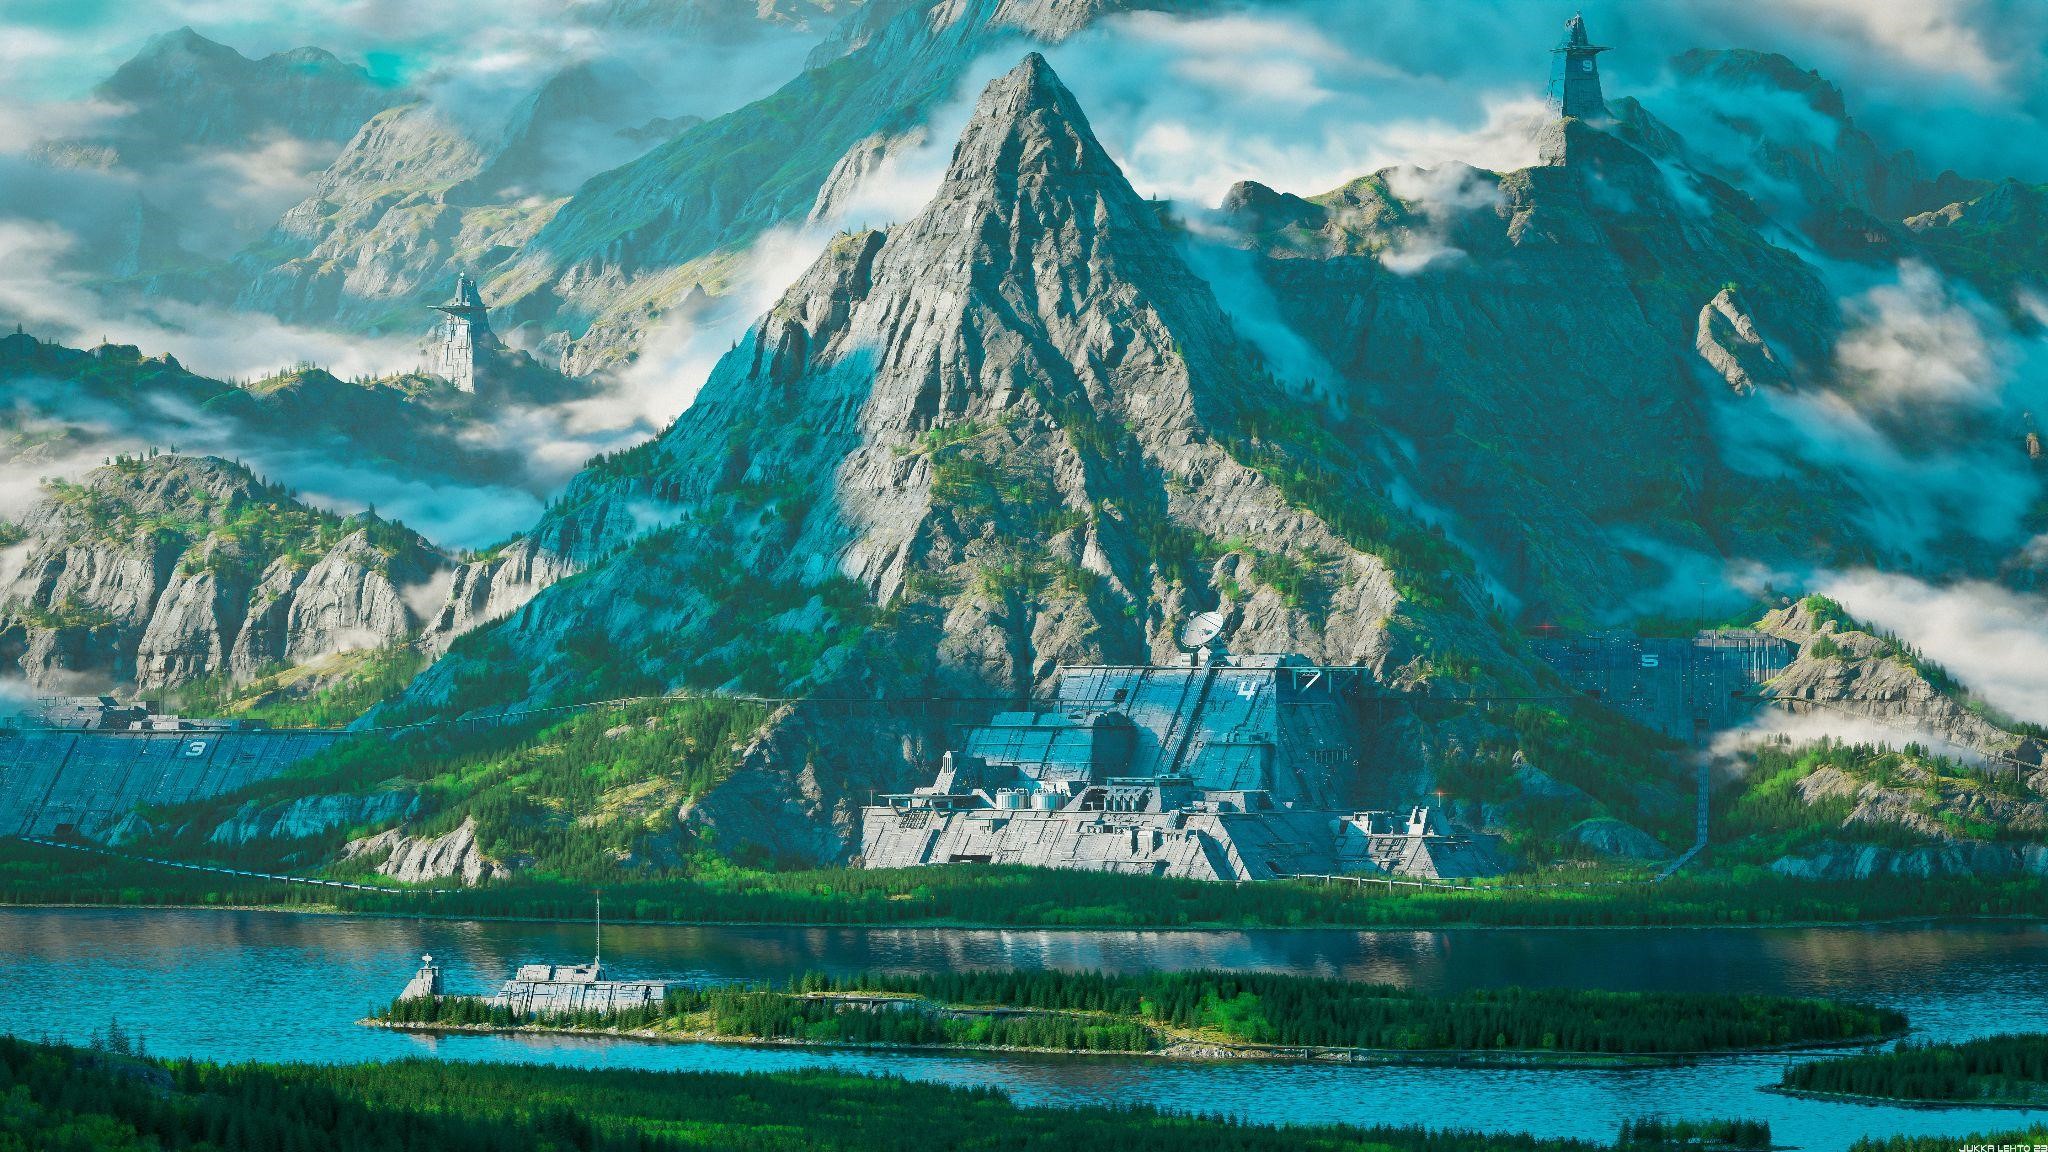
Atmospheric haze was added in post-production using the Blender mist pass as a mask.
COMPOSITING
The compositing was done in three programs. In Blender, I added some glows to the lights.
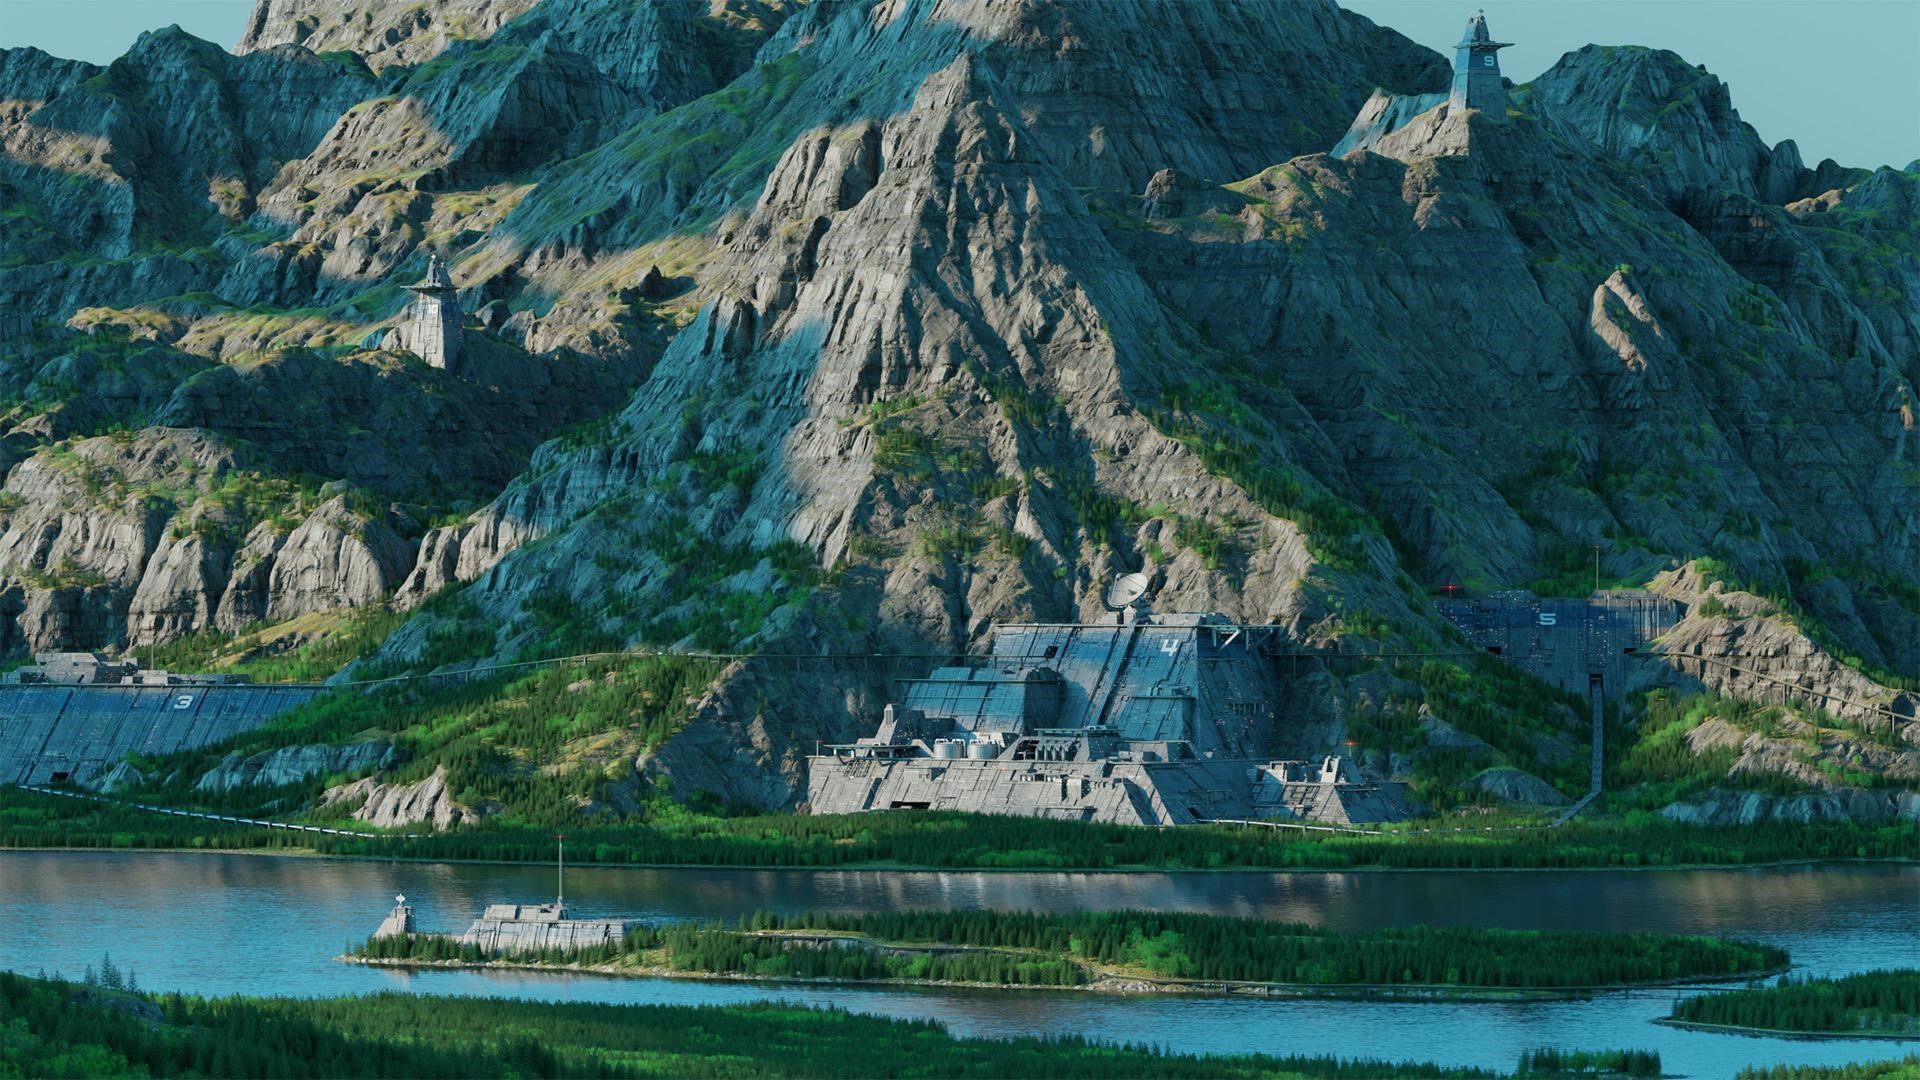
Base Clouds Haze
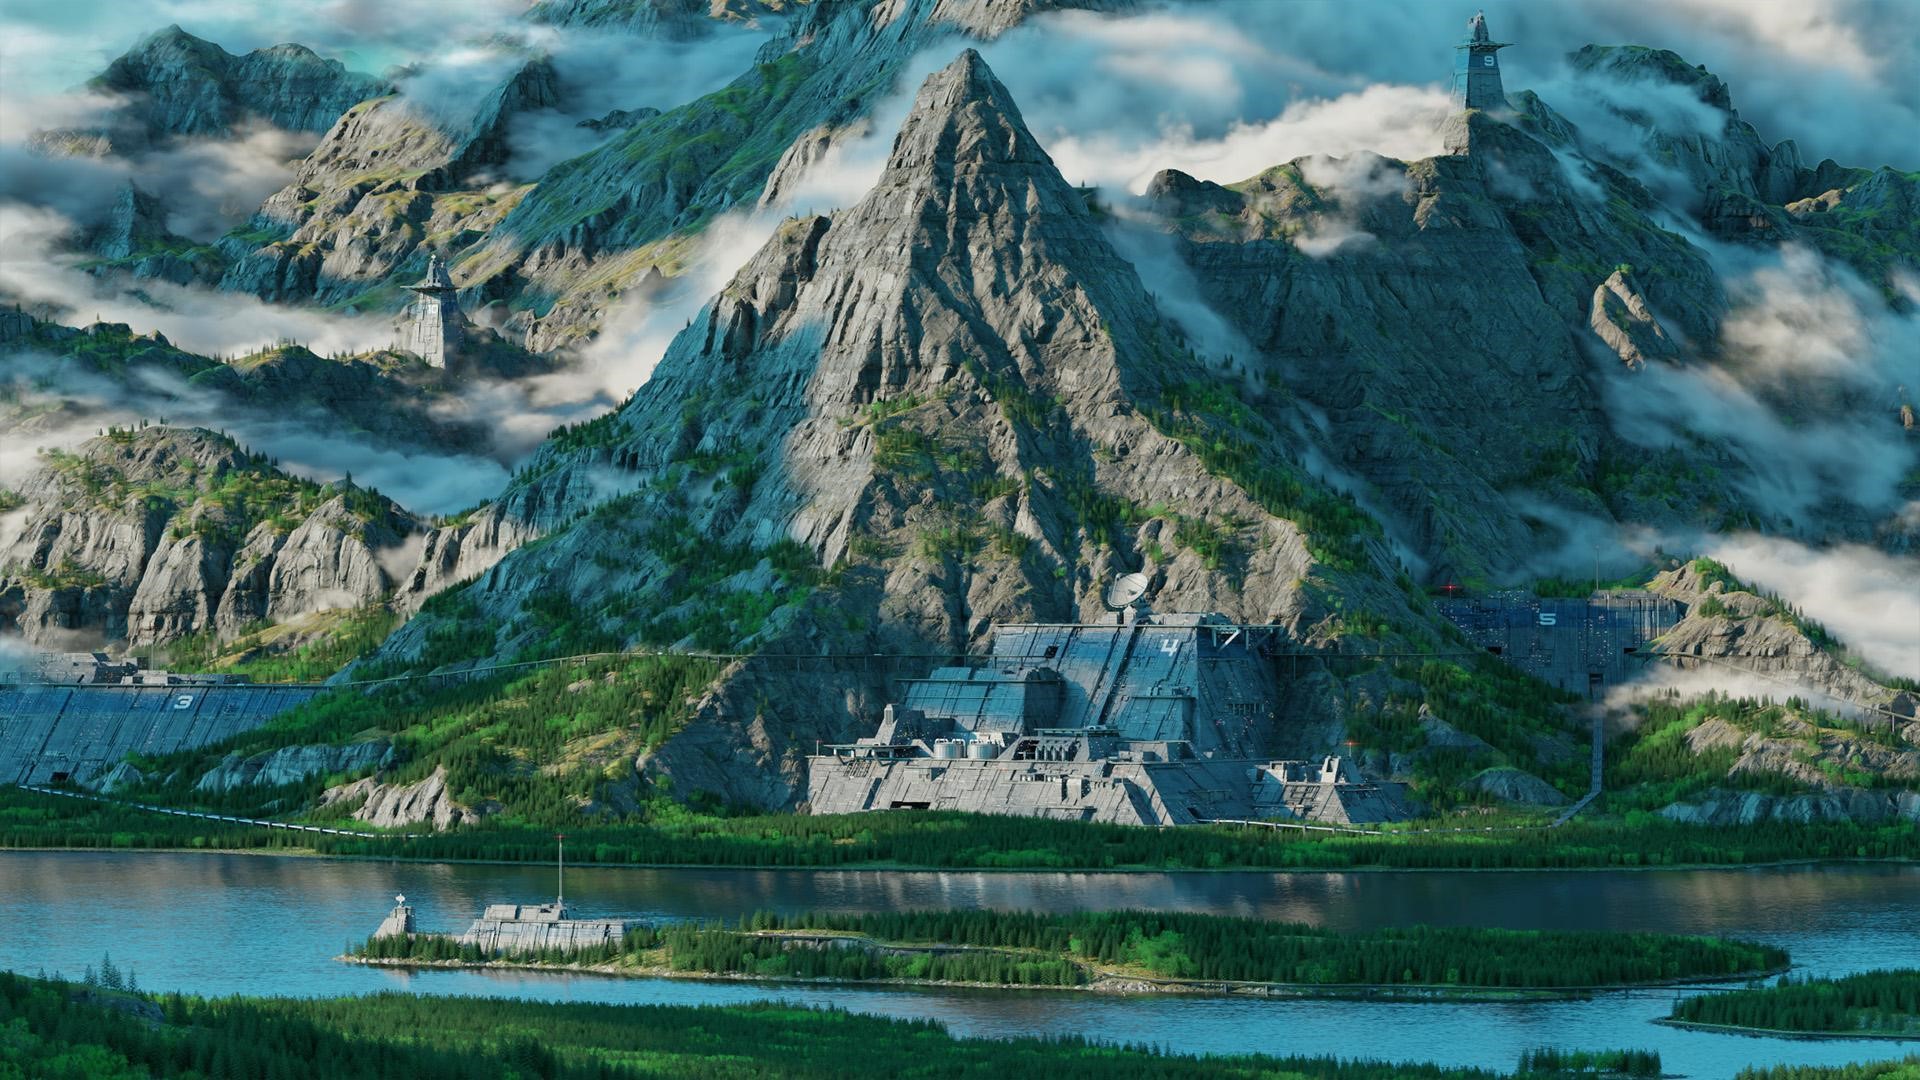
I exported my renders as multilayer EXR files to Affinity Photo, where most of the adjustments to clouds were made and atmospheric haze was added.
Then, I used Photoshop to make some final adjustments.
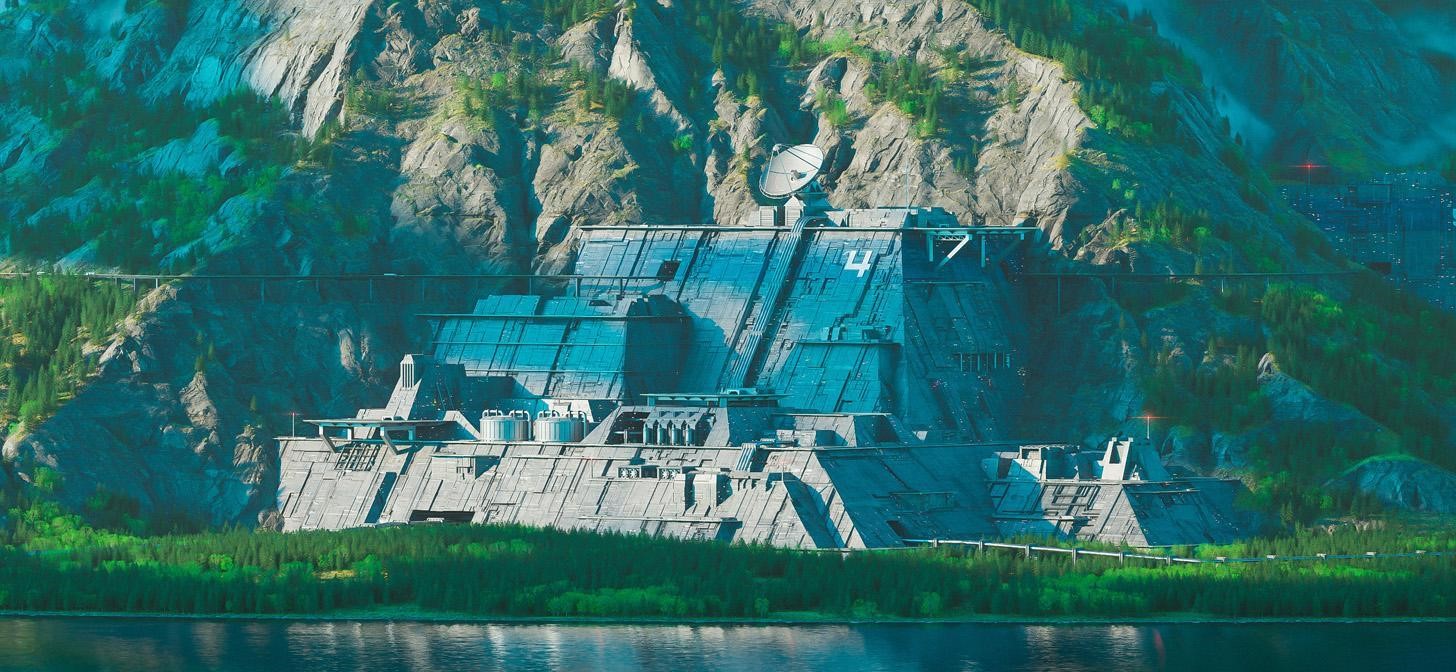
BUNKERS
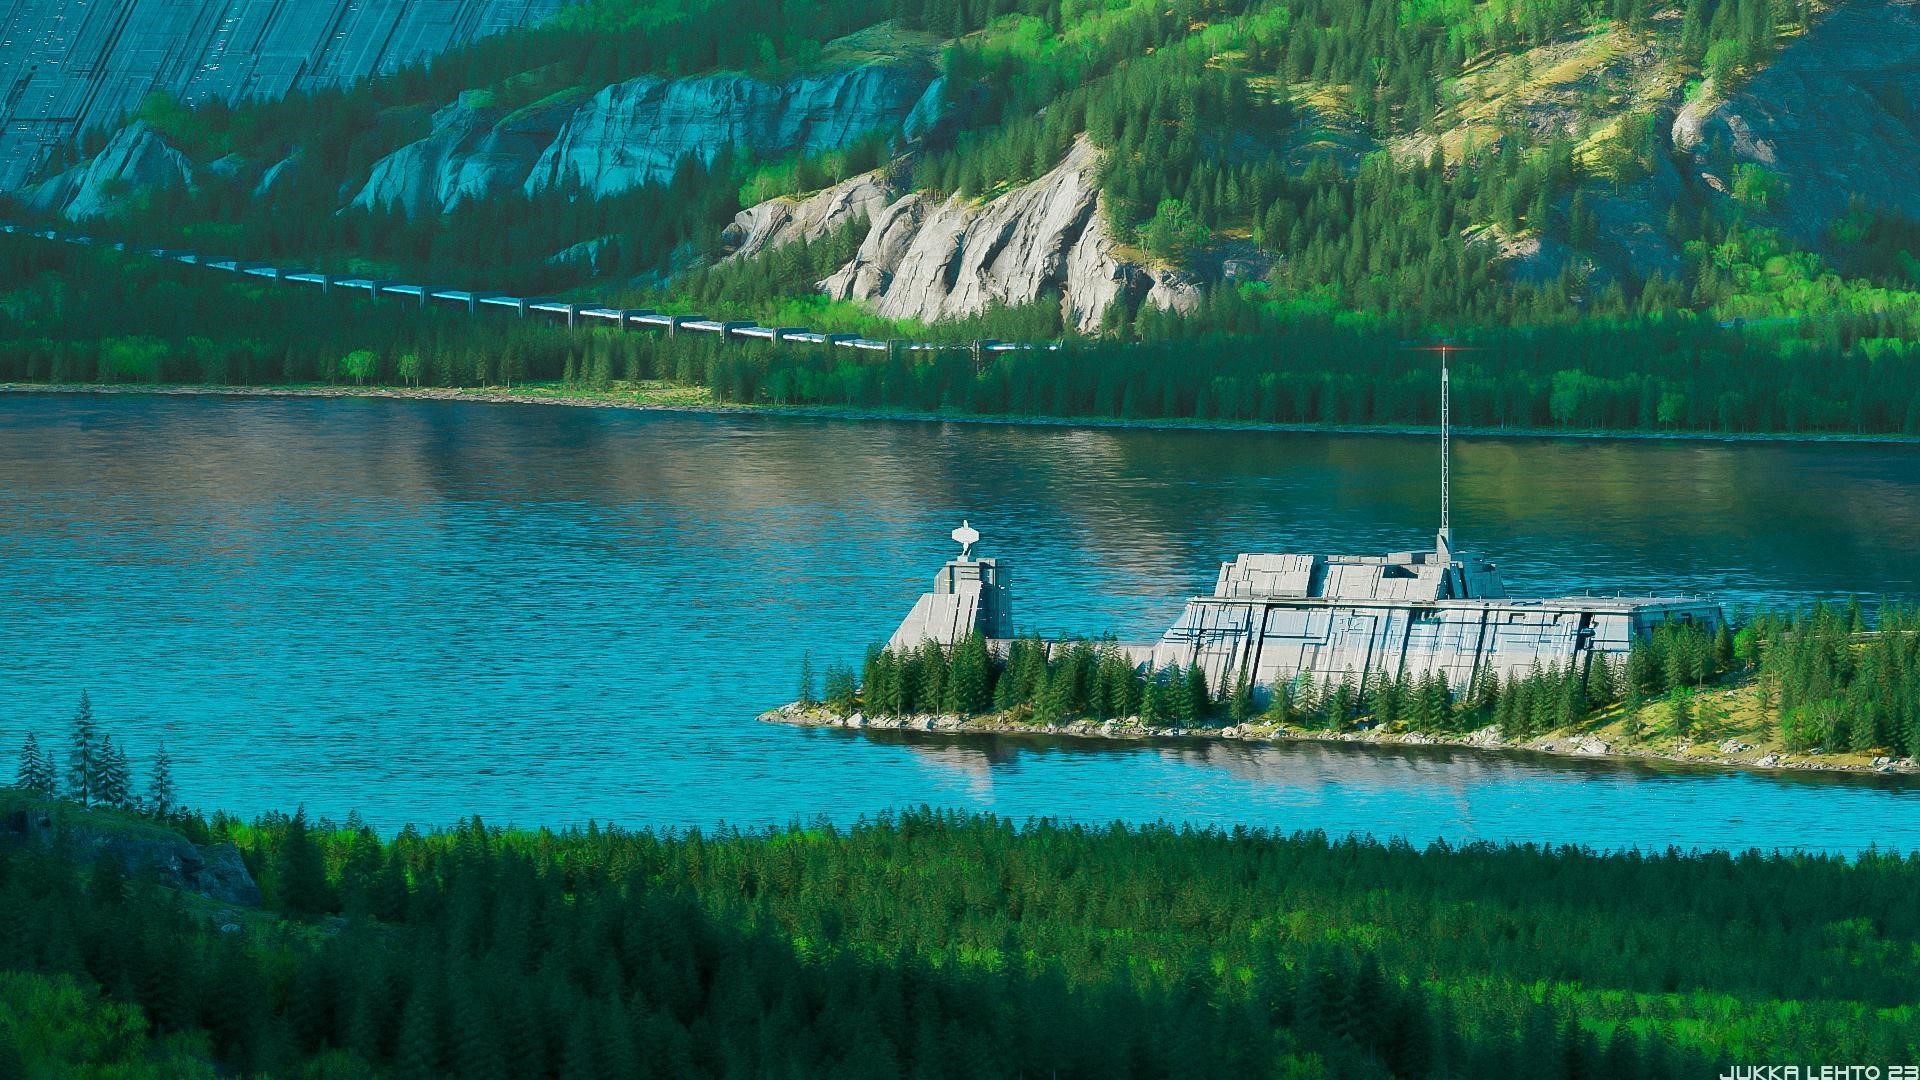


That should cover most of it!
Thank you for your time, I hope you enjoyed reading this article and learned something useful from it. Have a nice day!
About the Artist
Jukka Lehto, an environment artist from Finland. Currently working in Cloud Imperium Games.