Pastorross writes:
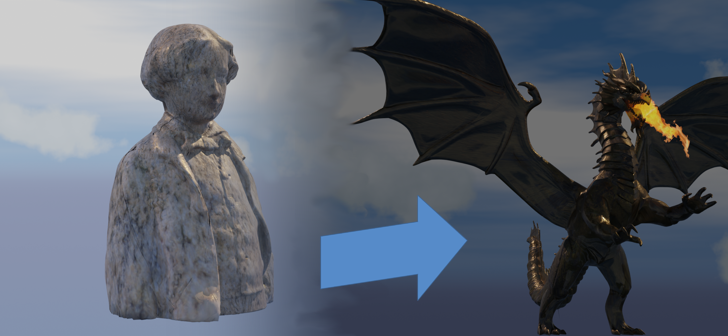
I have been further experimenting with Morphing more complex objects than I have achieved in previous posts.
As I said in my last post, I discovered the amazing Mesh Data Transfer addon by Maurizio Memoli. It was not intended for Morphing but works so well in doing so. It’s incredible, as raved about in previous post.
As you can see it is capable of some very complex morphs.
Here I have morphed a statue into a Dragon. The dragon is from a free 3D models website,
https://creazilla.com/ author Miguel Zavala. The statue is from Sketchfab, of Francois by Fablab.In case you haven't seen my last post, here is a rundown on the process...
- The Source Mesh is the model of the statue of Francois. For this you must have a very well unwrapped mesh that covers a lot of the square in the UV window, no overlaps.
- The Transferee Object, in my case the Dragon, must share the same UV texture.
- Go to Shader Editor and make the source texture the same as the Dragon texture using Image Texture node.
- Unwrap the Dragon using Spherical Unwrap. Turn your object to where you want the Dragon to appear from the source mesh before unwrapping. I used Orthographic mode to unwrap. I don’t think it matters.Using Spherical Unwrap you should find that it fills up the UV square. This is what you want.I used Scale (S + X or Y + 0 and then G to adjust those parts of the mesh outside the square). Mesh should be right on or slightly overlap. The Dragon should look weird at this point with the wrong texture.
- Shift click on Source Statue and then the Dragon.
- Go to Mesh Data Transfer in Object Data Properties. Choose Active UV, Closest, choose Source with eye dropper. Press little square on right to create shape keys. Press Transfer Shape.
- It will take a moment to work but you should get a pretty accurate and complex mesh without too much distortion. It will be of the Source mesh (Statue in my case).
- Go to Shape keys, turn Relative off, and use the Evaluation Time to watch transformation.
- In Object Mode, add more Shape Keys by using larger arrow on side and press New Shape from Mix.
- Create your animation. Use Shader Editor to mix textures.
I added the sky from Ultimate Sky pro and played with the key frames setting to change the colours as the dragon appeared. I then made the video and edited it with free music.
The fire is an image plane with a movie of a flame thrower with some alpha settings. I have used it with emission for more drama.


