Behind the Scenes: Simple Joys
INTRODUCTION
Hi, my name is Sonja Christoph, and I’m a Lead/Senior 3D Generalist and a Schoolism instructor. I’m originally from Germany, but my family emigrated to the United States when I was sixteen. I spent the majority of my life there until we decided to return to Europe a few years ago.
I went to Gnomon School of VFX in Los Angeles to learn about 3D. This was before Gnomon became a fully accredited school, and I was enrolled in their two-year certificate program, choosing the generalist track.
INSPIRATION
We currently live in Sweden, and it is a beautiful country, but the winters are generally long, dark, cold, and rainy. Every year, come January (and especially February), I start dreaming about traveling to warm, tropical locations and swimming in turquoise waters, which is where my initial inspiration for this piece came from.
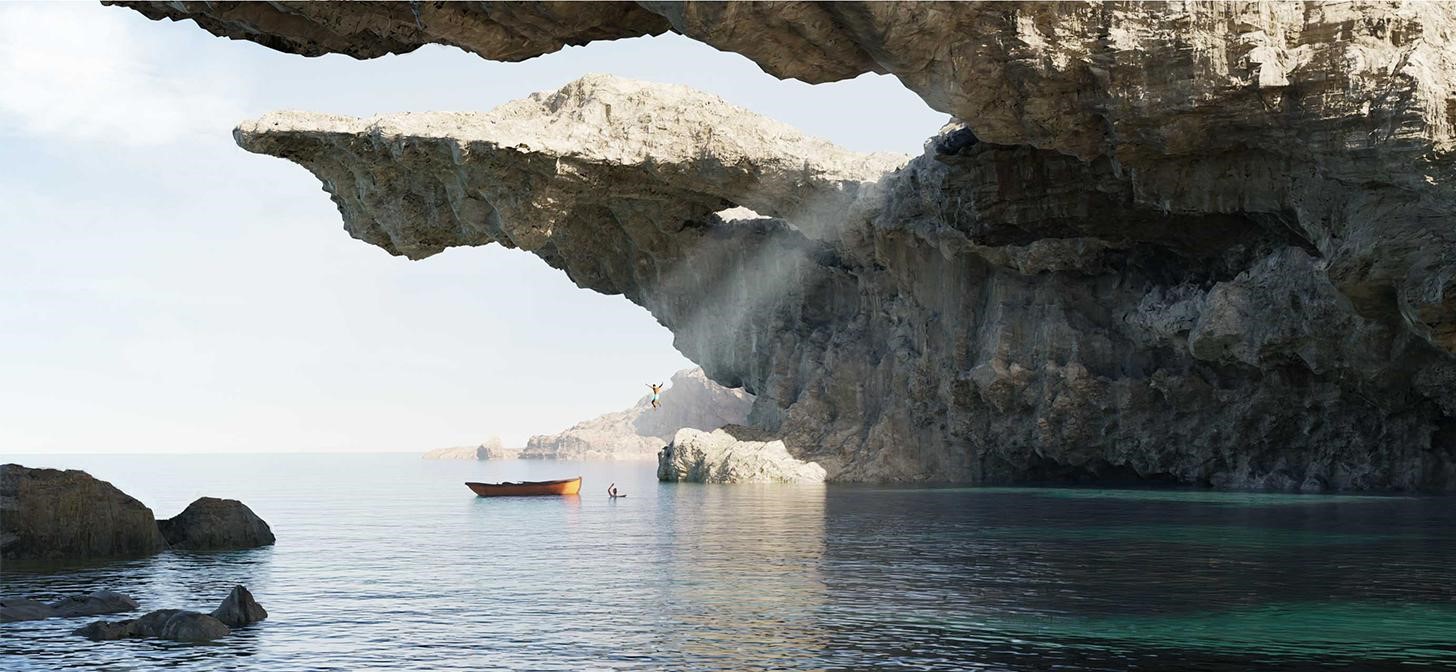
I wanted to create a piece that captured a sense of adventure and the fearlessness and carefree nature I felt as a kid and teenager. Looking at these giant cliff structures now, my instincts tell me to keep a safe distance. You never know what could be hiding in those caves. But not those two teenagers in my image. They have no worries in the world, and trying to imagine how they would experience the world around them is what inspired me.
PROCESS
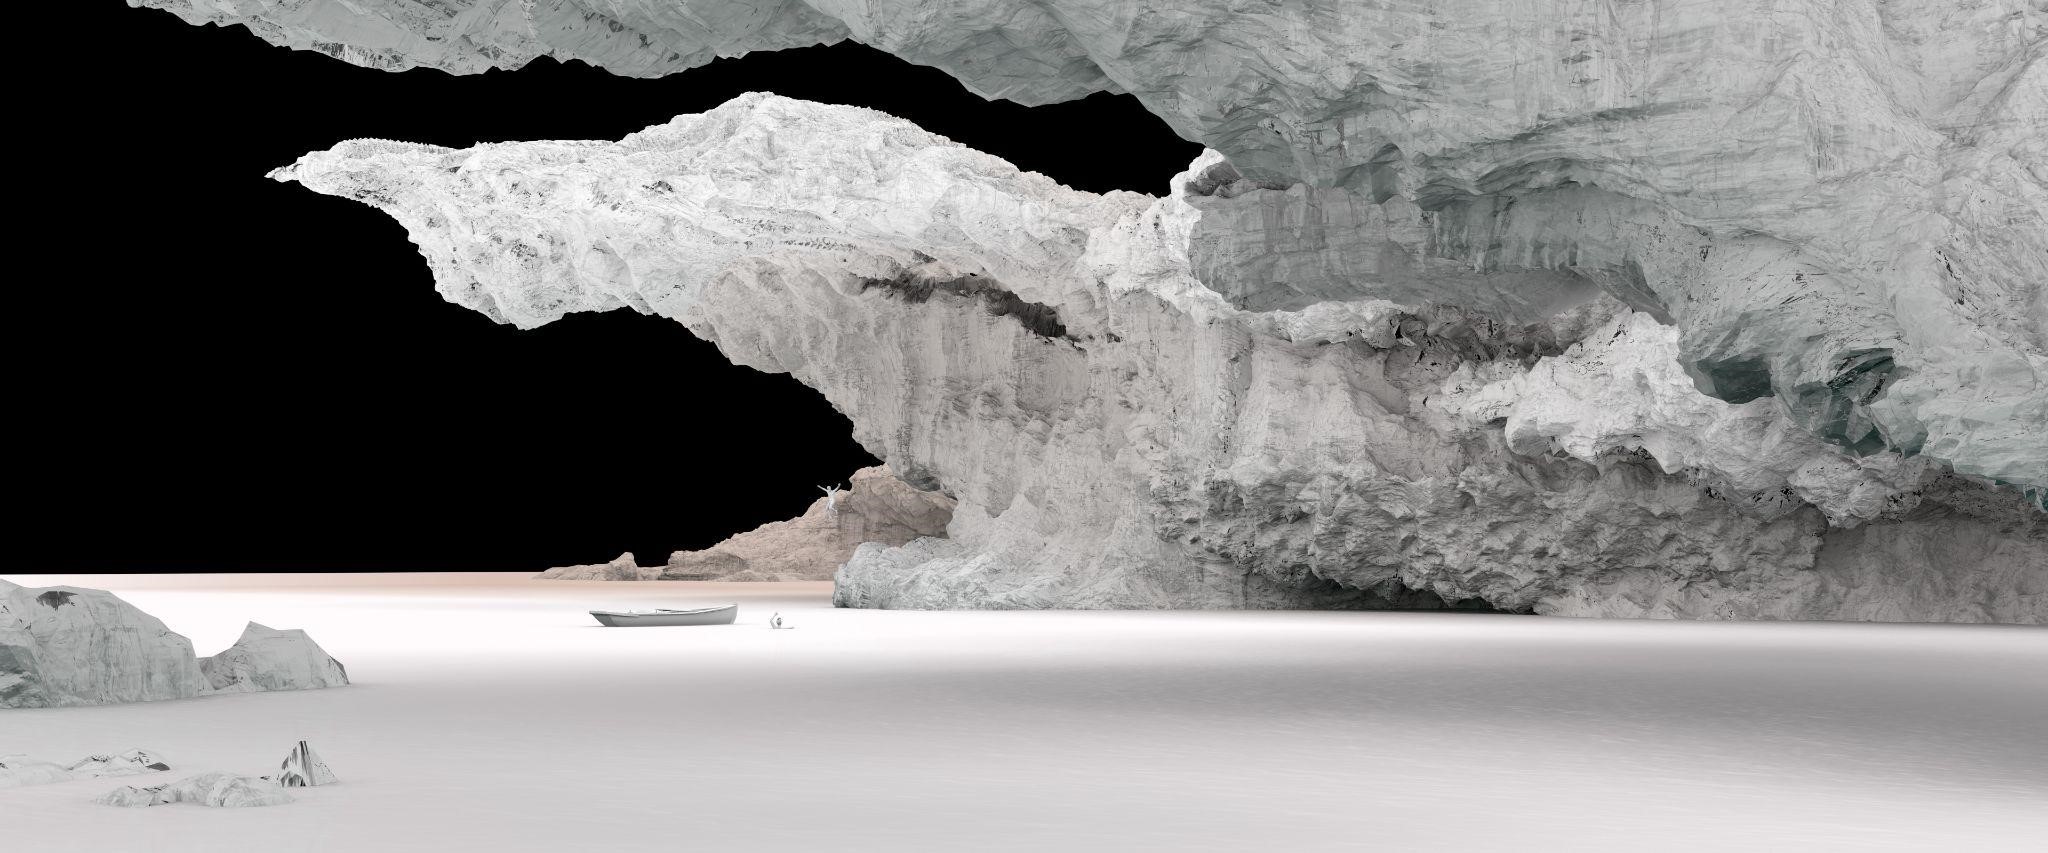
The creation of this piece was rather simple, really. I started by blocking out my basic cliff/cave shape with cubes. I scaled, rotated, and moved the cubes around until I arrived at a shape I liked. Then I joined all the cubes together and remeshed them before doing a bit of sculpting on them. I only focused on adjusting the larger shapes during my sculpting since I knew I was going to use a rock texture and displacement for the smaller details.
Once I was happy with the refinements I had made, I started to assemble my scene. I like to set up my cameras and figure out my composition first.
I used a basic camera and aligned it so my cliff model took up about two-thirds of the frame. Next, I added a plane to represent the water. Then I needed to add more rocks to my scene, so I duplicated my initial cliff model, rotated, scaled, and moved it around until the shapes started to come together and create an interesting composition.
LIGHTING
Now that my basic environment was set up, it was time to add some lighting to my scene. For my lighting, I used the Nishita model in the Sky texture that comes natively with Blender. I think it gives a really nice, realistic result and look. It’s worth noting that the Nishita model only works with Cycles, not with Eevee. I knew I wanted to use Cycles for this piece, so this was not an issue for me.
I wanted the light to shine through the openings of the cliffs onto the water. I tried a few different lighting directions and finally settled on a high three-quarters front lighting setup for this scene. To create some subtle god rays, I simply used a cube with a Volume scatter material.
MODELS
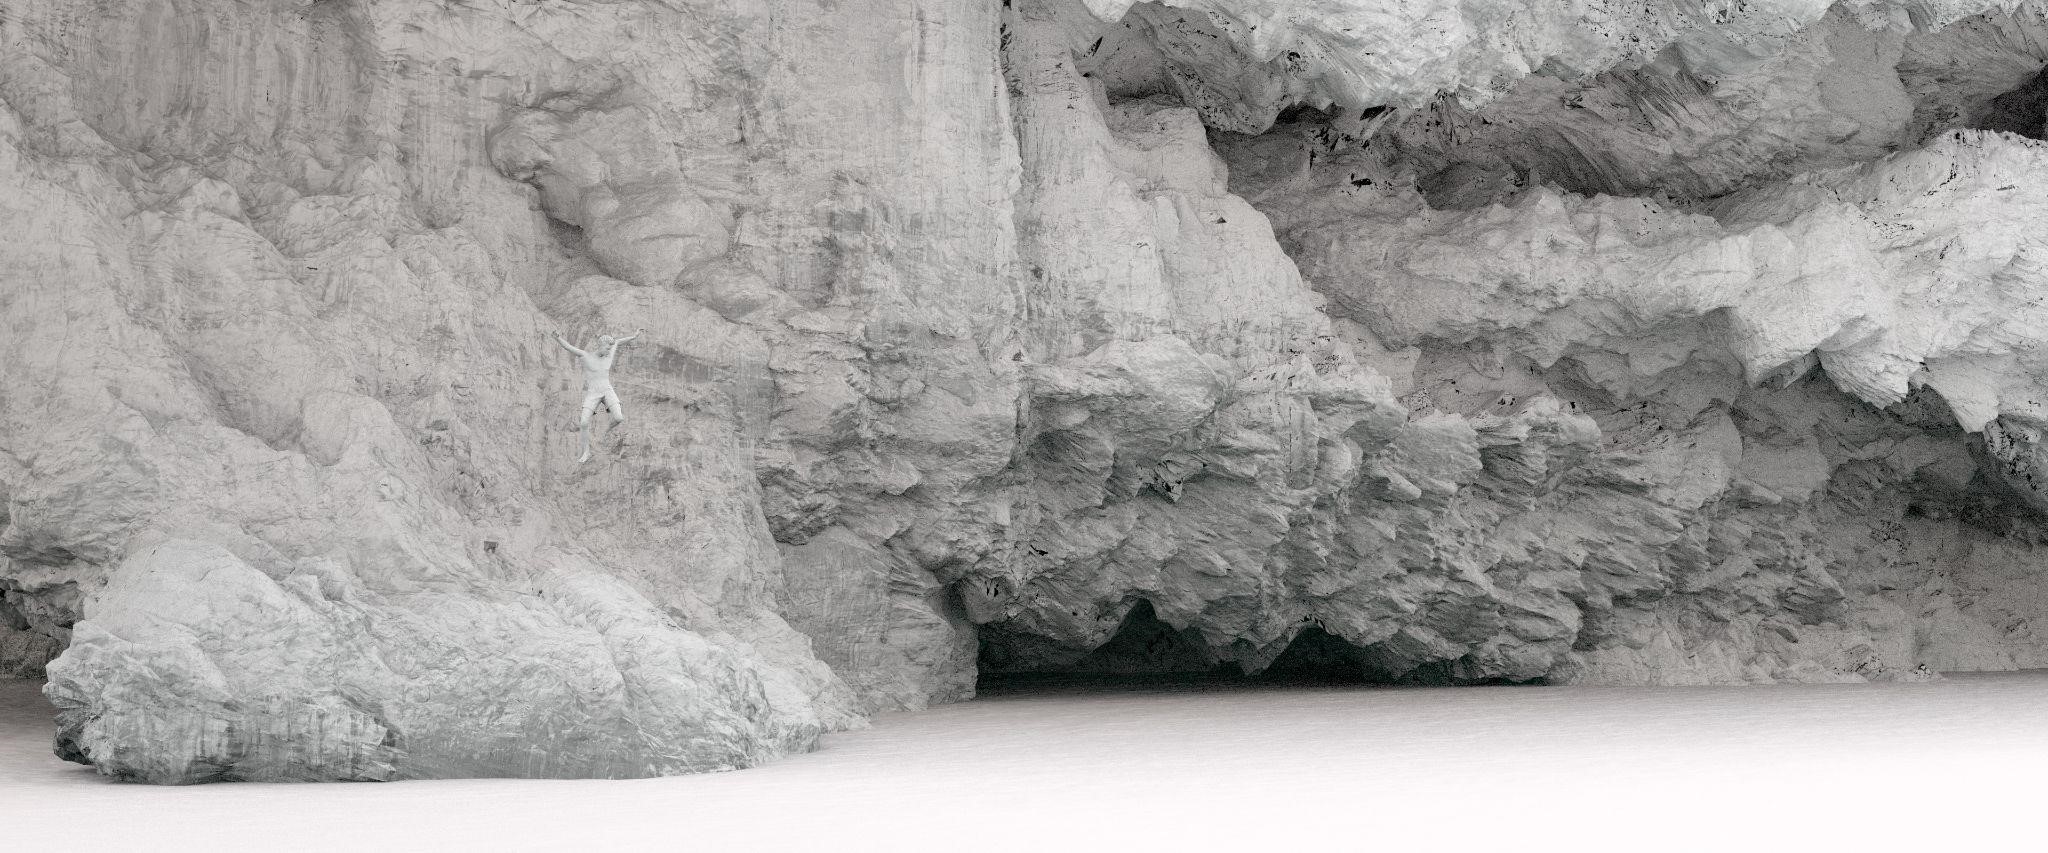
With my lighting set up and the god rays pointing directly at my focal point, I just needed to add the two teens and their boat. I used Daz3D to create and pose the two teenagers. I then exported them and placed them in Blender. I downloaded the boat model from Sketchfab, modeled by J.J.West.
TEXTURE
The boat and characters already had materials applied, so all that was left to texture were the cliffs and water. For the cliffs, I used rock textures from Quixel and set up the material to use triplanar mapping, eliminating the need for UV mapping. I also used displacement in the material to add smaller crevices and details to the rock surface.
To create the water material, I mixed a Glass BSDF material with a Transparent BSDF material. Then, I used a noise and wave texture, multiplied each of them, and mixed them together to drive the displacement of the water material. Finally, I added a light sand-colored plane underneath the water plane to create pockets of light turquoise water.
After completing the scene, I rendered everything and made final adjustments in Photoshop. I painted in clouds, added edge breakup, and darkened the teenagers to ensure visibility from a distance.
SIMPLE JOYS


That concludes the project. I hope you enjoyed it and thank you for reading this article.
About the Artist

Sonja Christoph, a Lead/Senior 3D Generalist based in Sweden. She is currently working as a freelance artist and a Schoolism instructor where she teaches an Introduction to Blender course.


wow, looks awesome