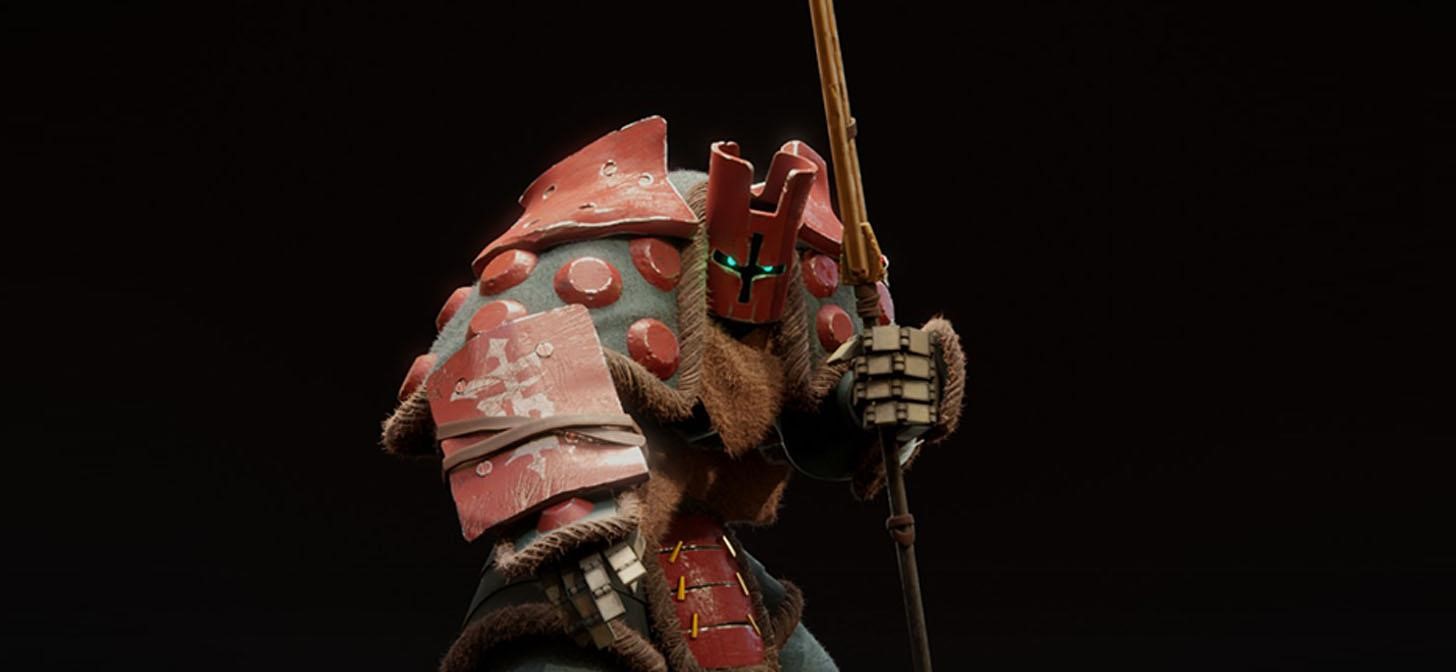
Behind the Scenes: 3D Samurai Chess, Bishop
INTRODUCTION
Hi! My name is Aymeric Rondol, and I’m a 3D generalist artist from France. I never had a preference between modeling, surfacing, lighting, etc. I have always found all aspects of 3D to be very interesting, which has allowed me to work on many different styles and types of productions, such as games, movies, and TV series. I’ve been lucky enough to work for a wide range of companies, and thanks to all those years of work, I’ve gained solid professional 3D art skills.
I started learning Blender after a friend told me that some limitations with Maya could be overcome with Blender. After completing multiple projects with it, I can say that Blender is indeed a software with great potential. I’ve been using Maya for a long time, but Blender gives me the feeling that anything is possible. The shading system is so developed that I can make materials like Substance Painter or Designer directly in Blender, and the same goes for procedural modeling, whether with the “Modifiers” system or the Geometry node. Blender is a great tool for all kinds of procedural projects.
INSPIRATION
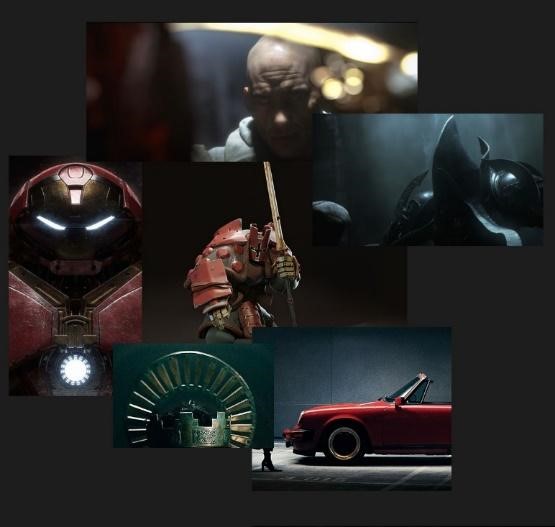
I really liked the concepts of Thaigraff Nat. This mix of street art, mecha, and Japanese style was fantastic. It has been a while since the “samurai chess” concepts caught my attention. However, after working on several projects in Blender, I finally felt ready to embark on this big project.
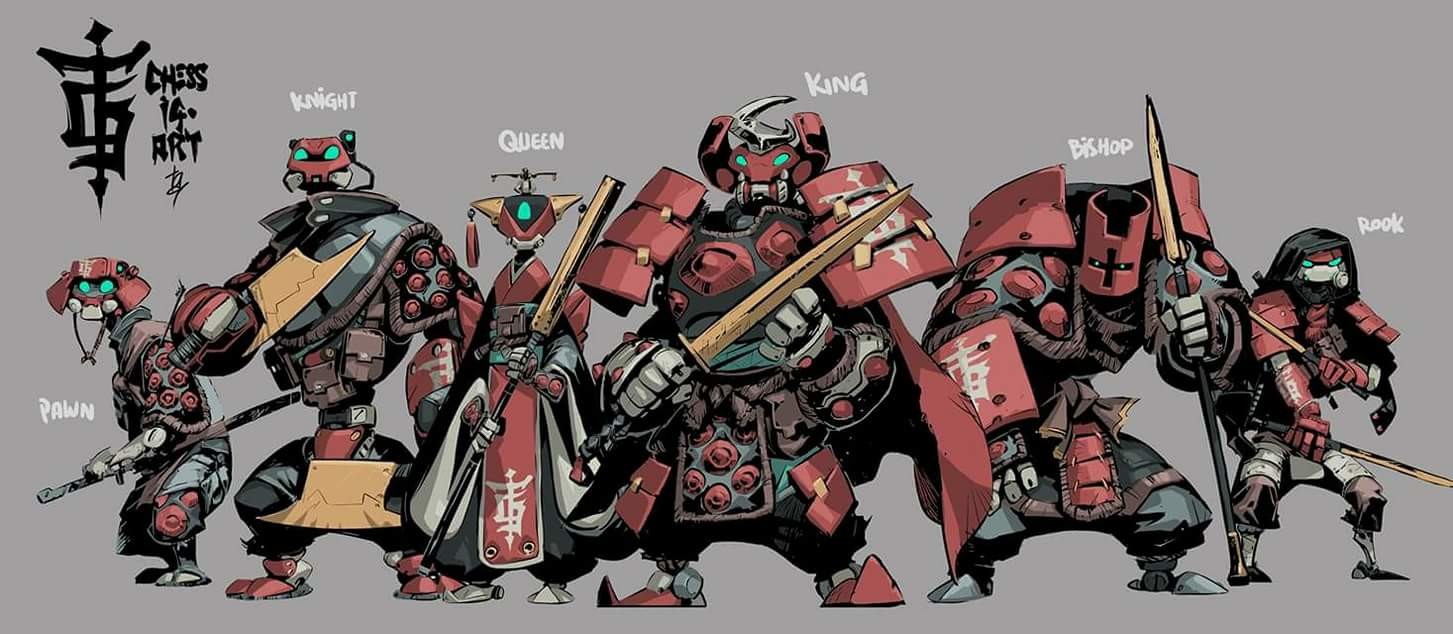
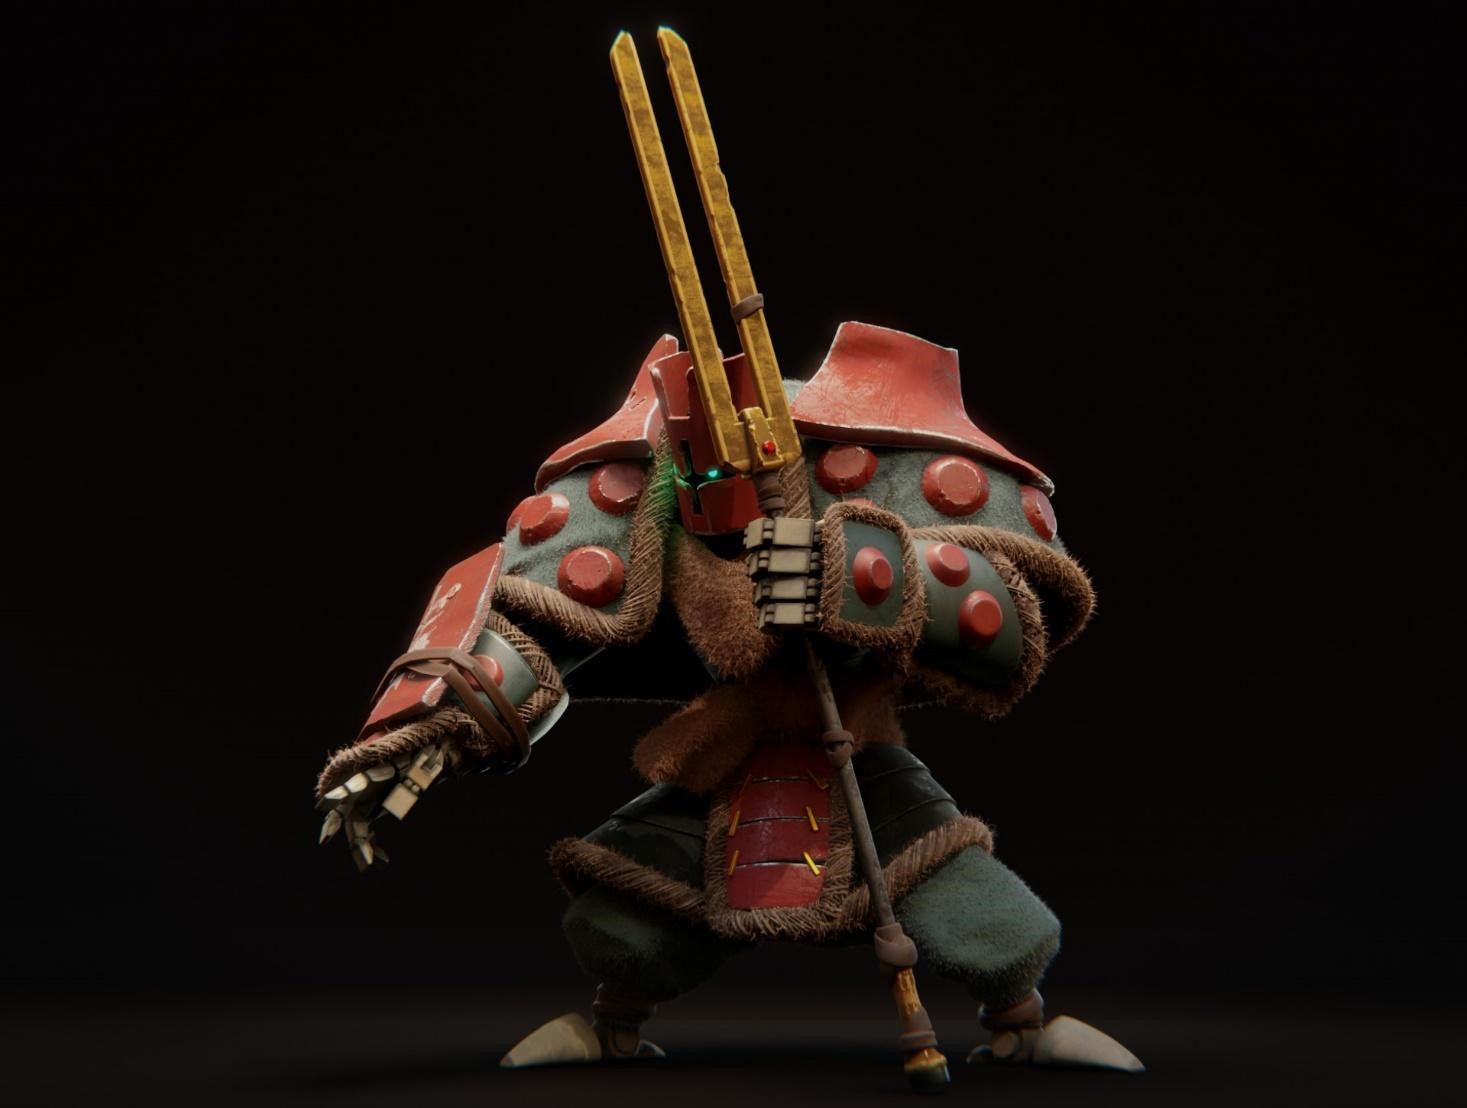
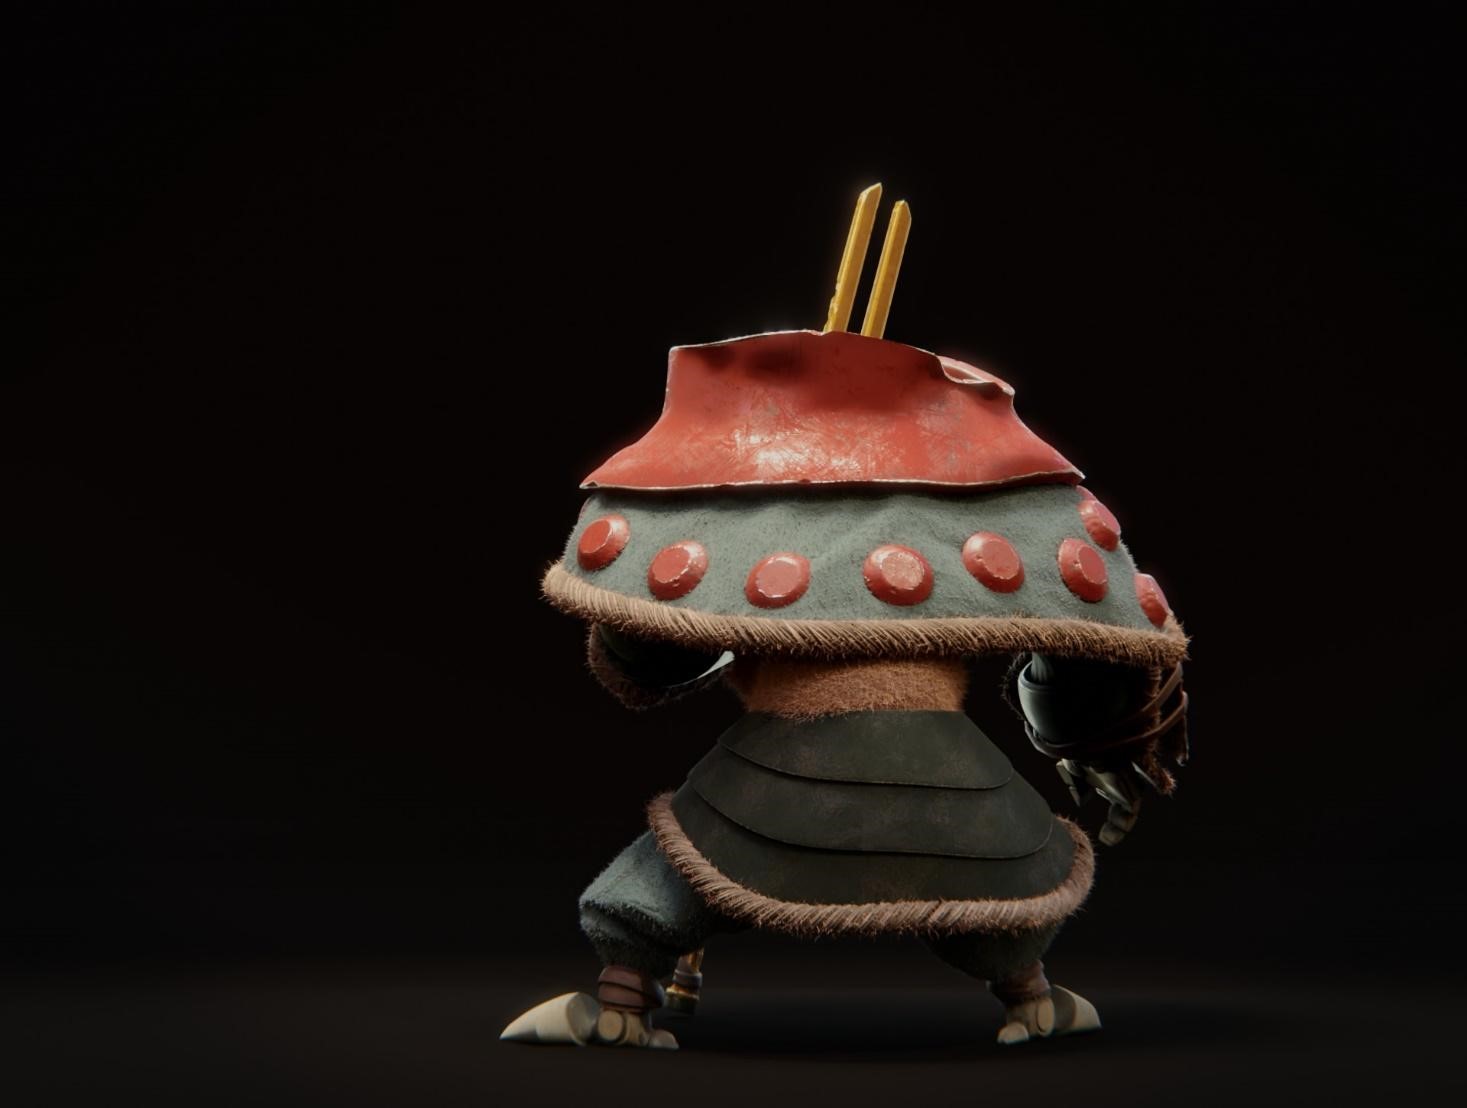
I chose Bishop because I was drawn to his super shield and armor.

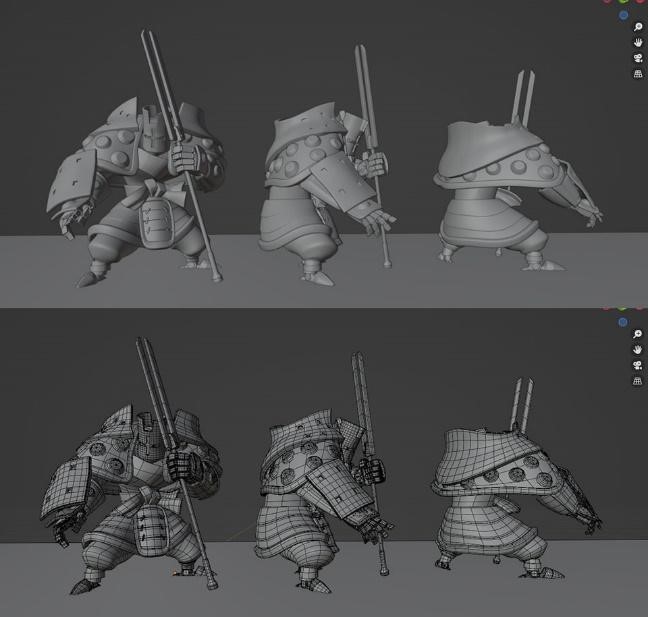
BASE MESH
After making my choice, I had to first learn how to turn the concept into a 3D model. This involved finding a pose that respected the 2D concept and functioned well in 3D, as well as determining how to interpret the character and selecting the appropriate materials to give it a believable appearance.

To translate a 2D pose into 3D, I use the same method as if I were making a prop or environment. I like to start by blocking out my model. For the armor part, I use a slightly different method that suits me well. I like to use the “crease” function. The modeling remains very low-def and can be easily manipulated, allowing for complex shapes to be created with ease.
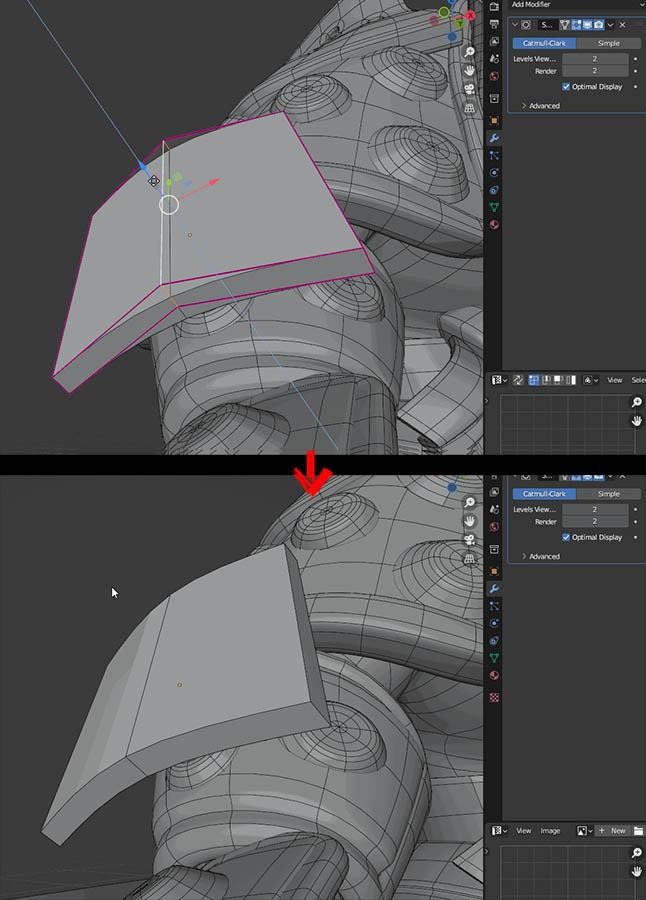
Thanks to the crease function, our 3D model retains a nice modeling curve. The crease function offers a fast and effective method for controlling and conceptualizing armor, complex models, or other objects.
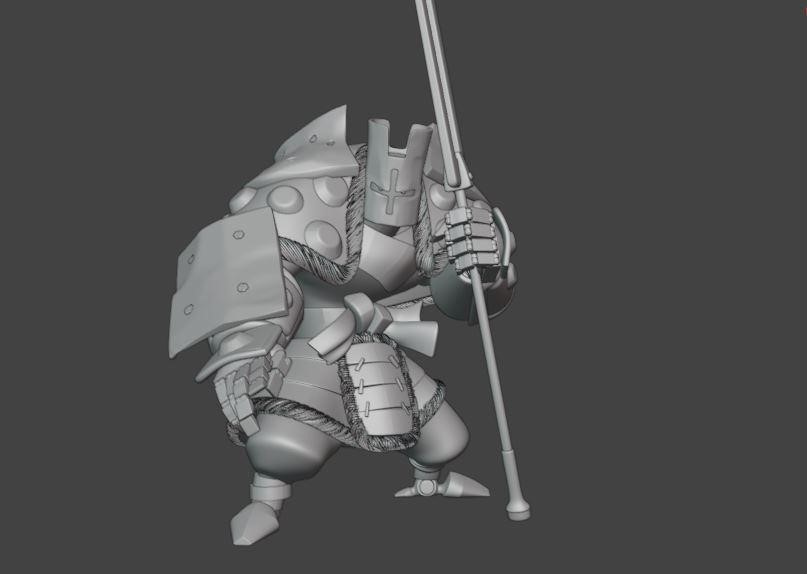
CLOTHING
Rope-like edging was the biggest challenge of the model. The trick I found was to apply the “Screw” modifier to a simple circle, apply that to a curve, and with the right settings, the result worked properly.

The Blender cloth tool was a very nice discovery for me. I didn’t think it would be so easy to sculpt cloth, and it turned out to be surprisingly fun.

After working on the cloth, I returned to the metal modeling aspect. I wanted to achieve an obscure lighting effect to give the character a menacing and damaged appearance, enhancing its cool and combative look.
TEMPORARY LIGHTING
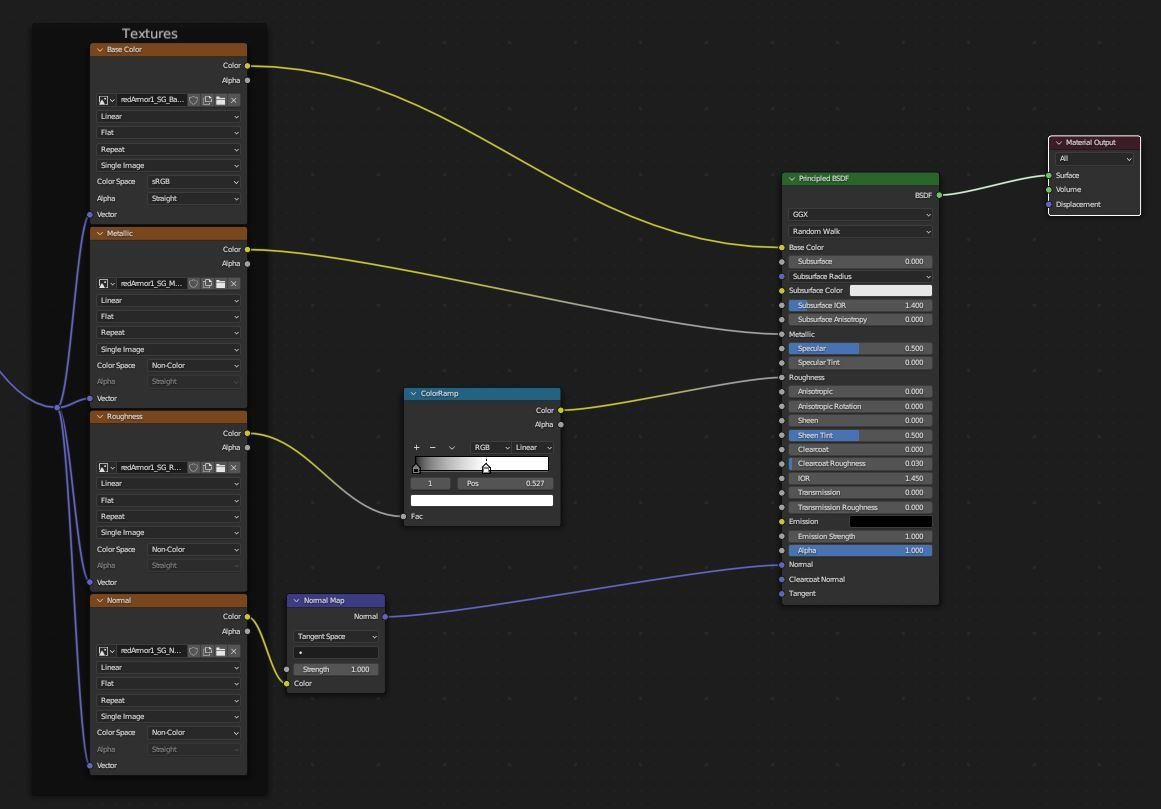
When I have a model that works properly, I like to quickly set up lighting to solidify my vision. For this project, I had a clear idea of the desired lighting from the start. I rendered using the powerful and efficient Cycles rendering engine. After setting up the temporary lighting, I added procedural materials created in Blender. This allowed me to get a general idea of the final result and helped me make color decisions in Substance 3D Painter.
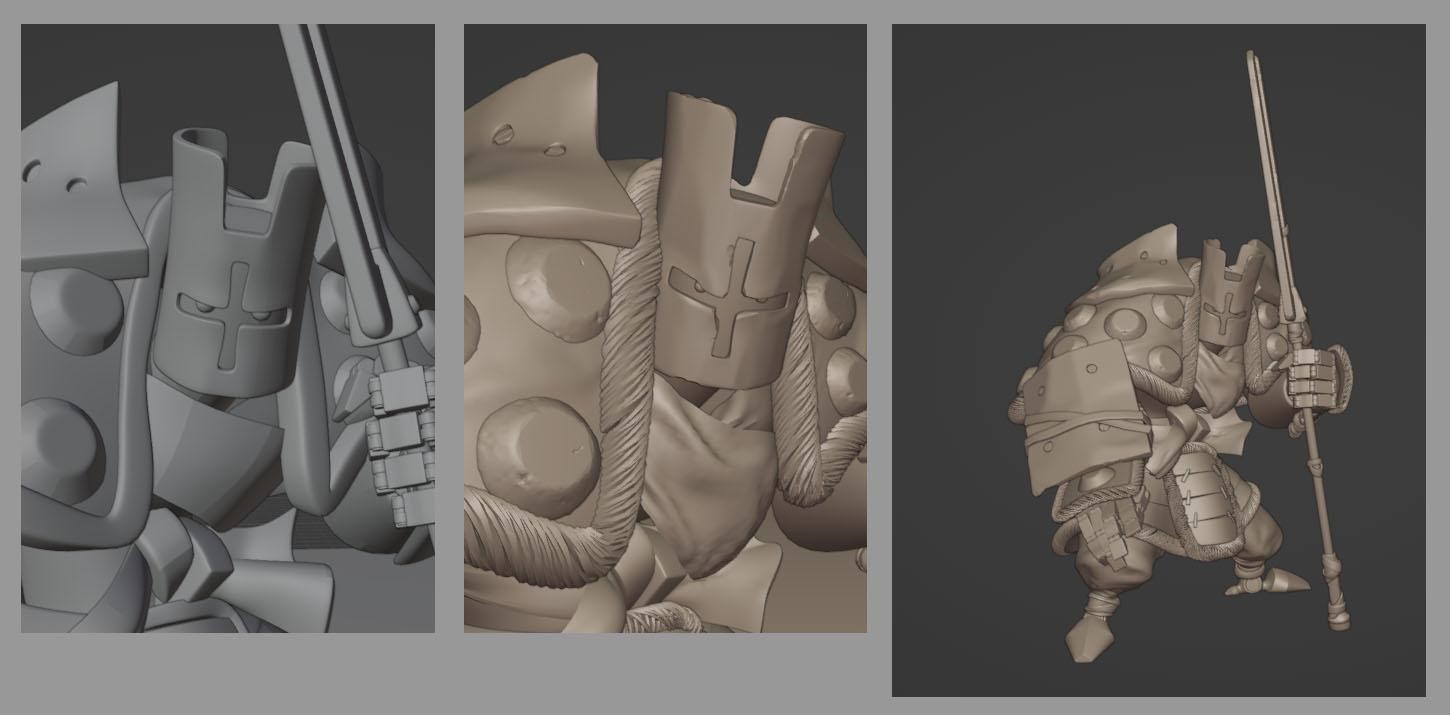
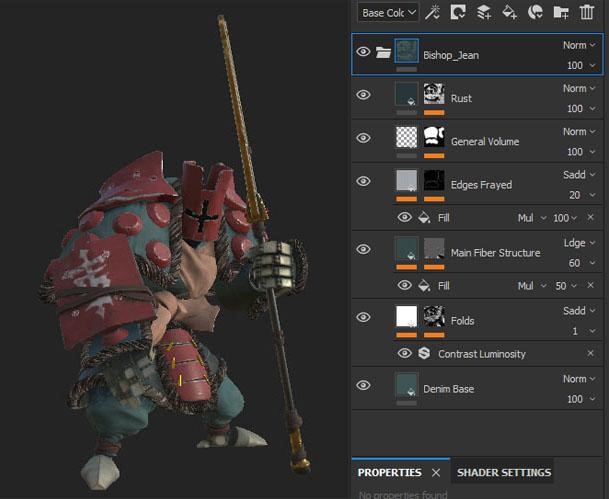
SUBSTANCE PAINTER
With the temporary lighting and shaders set up, I knew exactly what the main colors would be. Now my goal was to create a believable metal and fabric sensation.
In Substance 3D Painter, I began by applying an old metal material to give the character a damaged appearance. Then, I added a layer of color that I refined to achieve a metallic look.
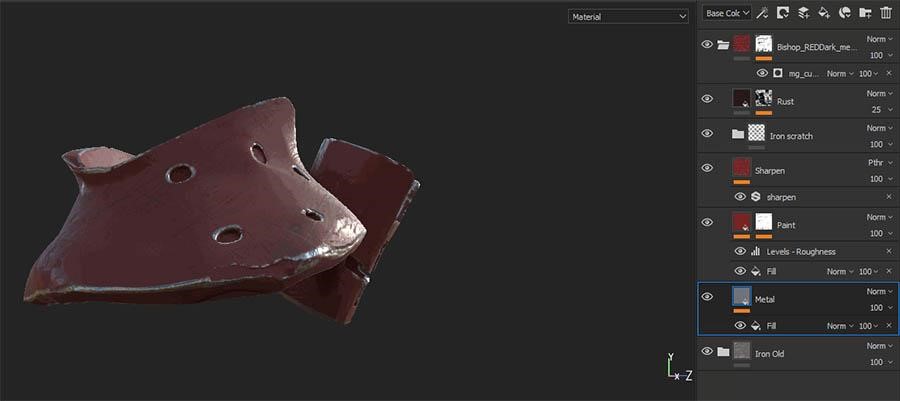
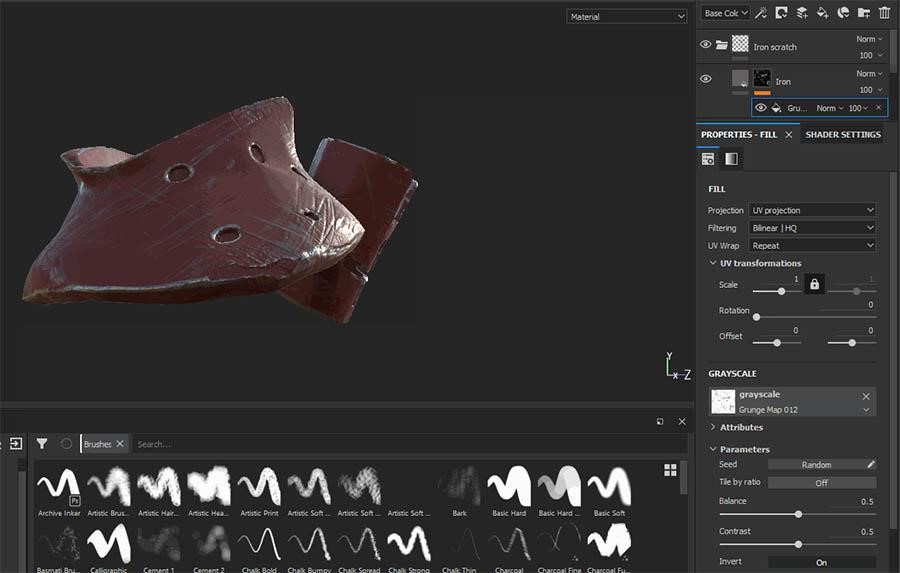
Substance 3D Painter has an excellent layer, mask, and procedural generation system that allows for fast results. For example, to create the scratches, I built upon the old metal shader and added a black mask with a “Fill” using a grayscale Grunge Map.
By playing with the masks and grayscale settings in color, roughness, and metallic, I was able to achieve the desired metal look. For the fabric part, I applied a base denim material that I modified. I didn’t spend too much time on it because I planned to add some fur to maintain a worn-out feel.
FURRY PARTS
In Blender, one of the tools I like the most is Geometry Nodes, which was clearly inspired by Houdini. With this tool, you can perform many actions on meshes, curves, etc.
It’s worth noting that each geometry node created can be assigned to different objects with custom settings and can be less expensive than actual fur. That’s why I chose this solution for the furry parts. The aim was to distribute the curves I created on the whole mesh. The advantage of this method is that I can create output parameters that can be customized (density, scale, color, etc.), which allows me to apply it to other meshes and save a lot of time.
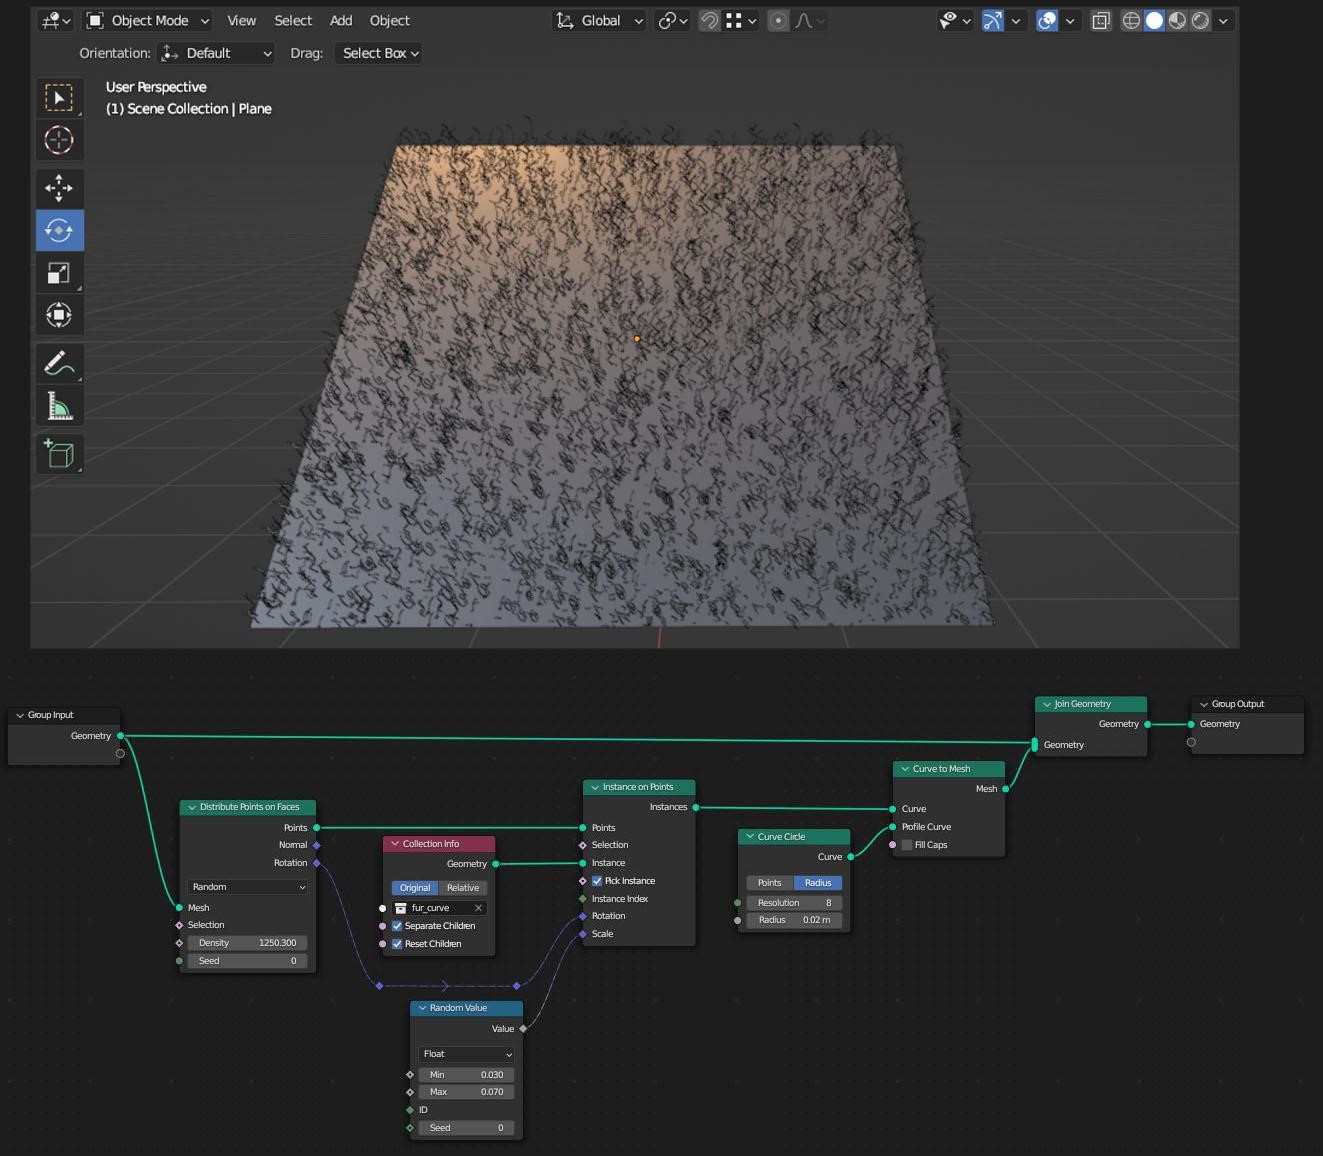
After conducting some tests, I realized that some curves were disappearing during the animation. After doing some research, I found the cause and solution thanks to a video by Joey Carlino titled “The Softest Fuzz You Can’t Touch: Geometry Nodes in Blender.”
The Blender community is very active and helpful. After further testing and improvement, I was able to successfully apply the geometry node to all parts.

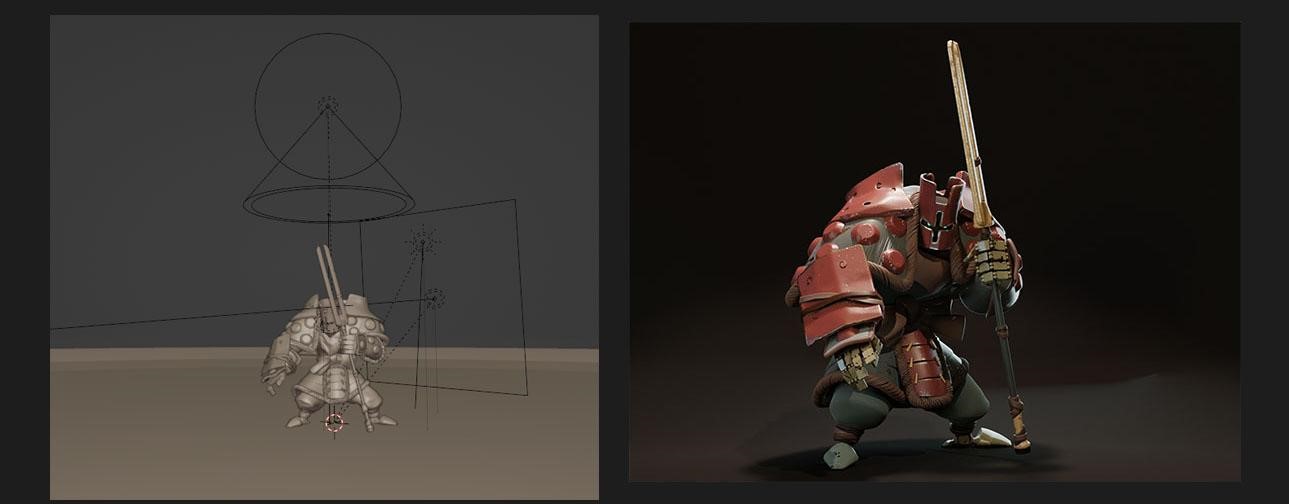
FINAL LIGHTING
I’ve always liked photography, which is why the lookdev and lighting part is often my favorite in my projects. The technical part is finally over, and I can relax by seeking the atmosphere and tone of the image.
What I like about lighting is how it guides the viewer. Although I’m not an expert in this area, I make an effort to do my best. To achieve this, I aim not to illuminate non-essential areas by adjusting the lights. Once that’s done, I like to add a ramp color to the roughness node, which gives me better control over the final material brightness in the rendering.
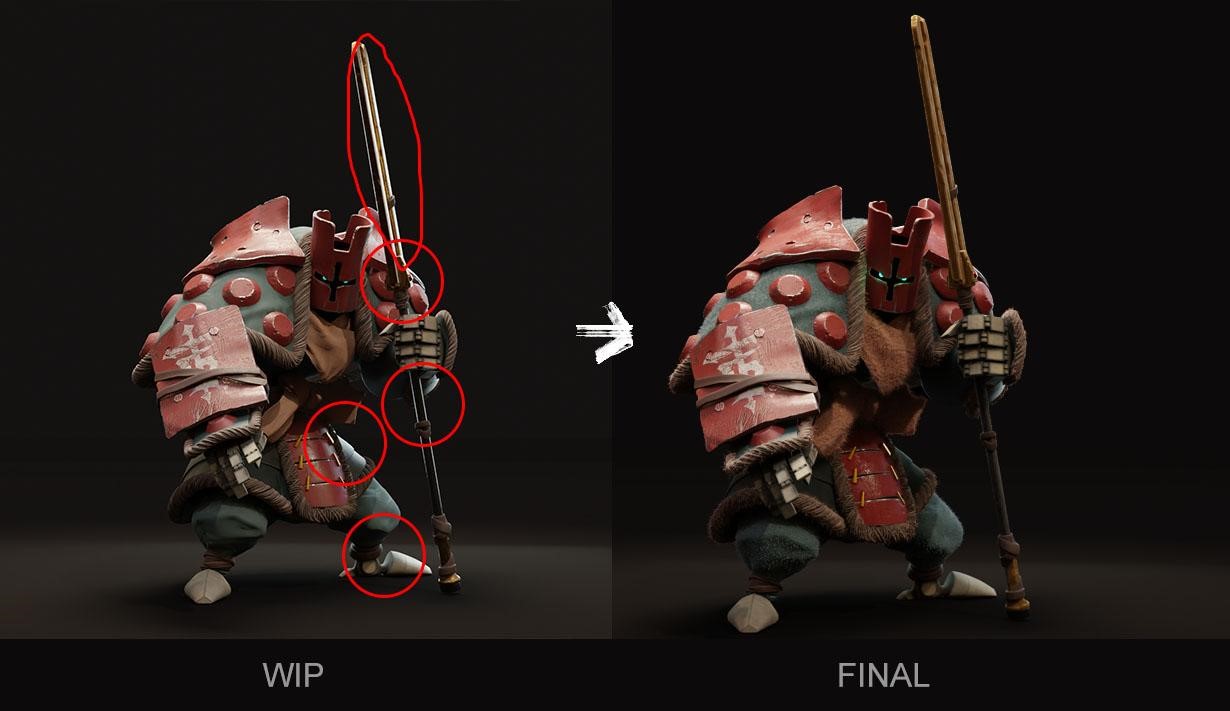
In my WIP image, we can see that the red areas prevent us from focusing on the narrative elements of the character. In the final image, the shield is much better highlighted, and its difference in intensity value with the helmet allows for better balance.
I always try to push my lighting as much as possible.
POST-PROCESSING
Once the lighting is finished, I try to give a cinematic side to my projects, which allows me to show what it would be like in a film or game. I mainly use Glare to create a bloom effect on glossy surfaces, Color Balance and Color Correction to adjust the colors and lighting of certain parts, Ellipse Mask for a vignette effect, and Lens Distortion to finalize the cinematic look. Depending on the project, some of these nodes may be used differently, but these are the ones I use most frequently.
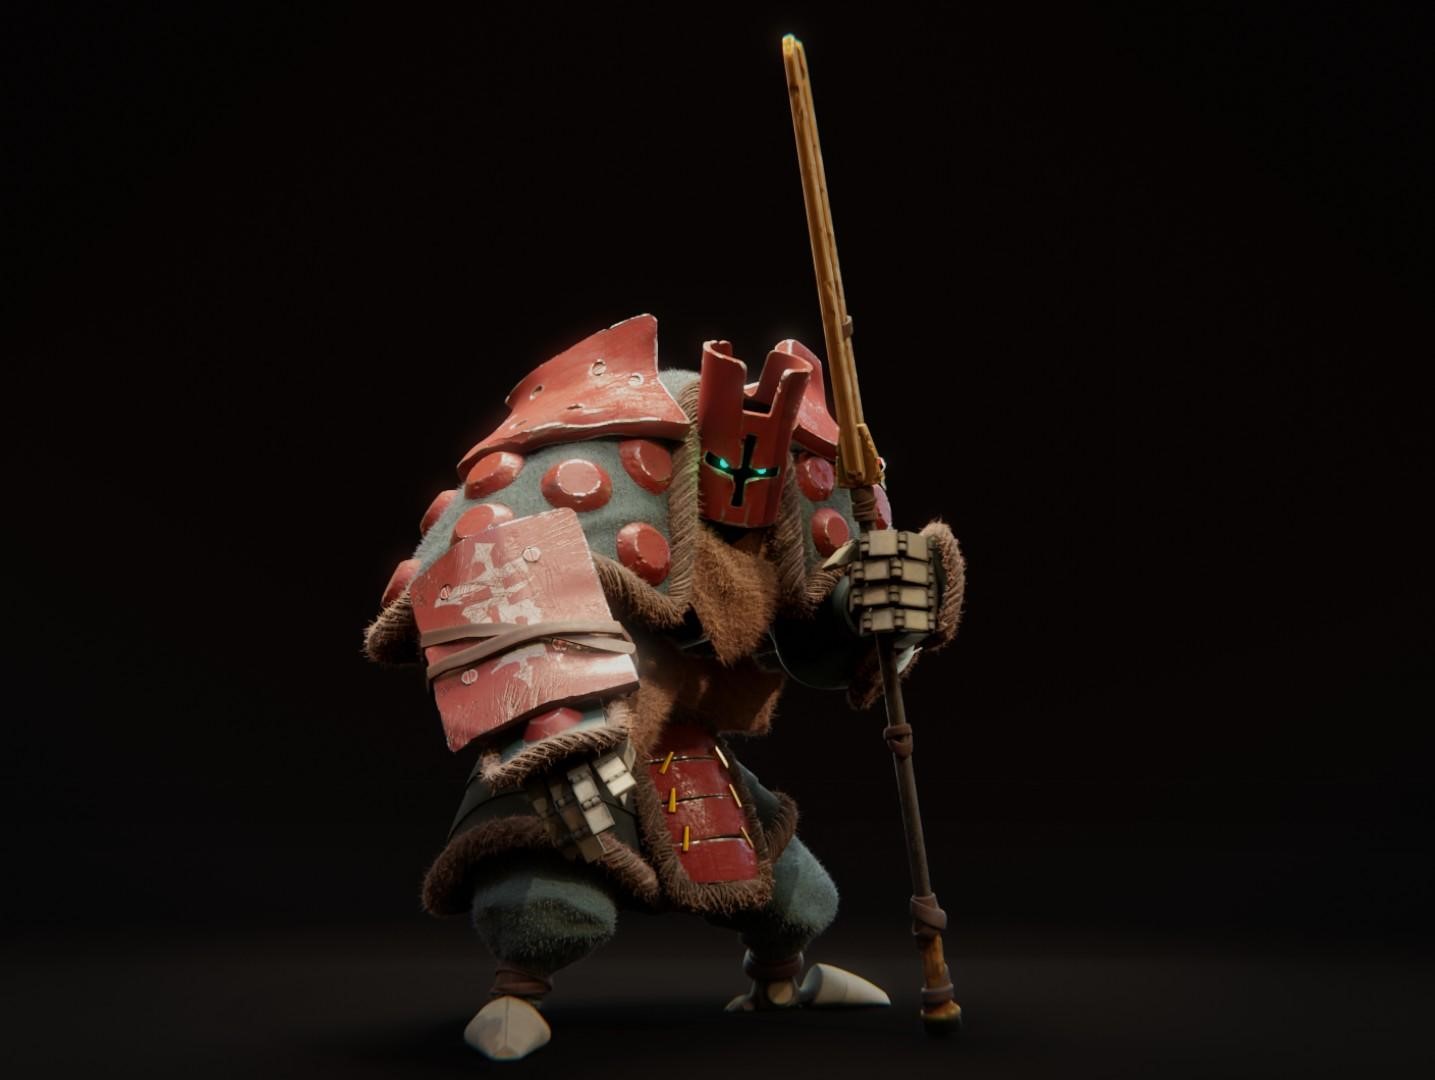
3D SAMURAI CHESS, BISHOP

And that’s it!
Thank you for reading my article. I hope you have a great day!
About the Artist
Aymeric Rondol, a 3D generalist artist from France.


