
Behind the Scenes: Deer Rider

INTRODUCTION
Hello everyone! My name is Andrew, and it’s not the first time I’ve had the chance to share my work process on Blender Nation. So, thank you again for this opportunity!
INSPIRATION
It’s hard to say what inspired this work, but I thought it would be fun to model Santa sitting on a reindeer like a tough biker. I had a clear vision in my head, and I just needed to bring it to life using the available graphic tools.
POSE
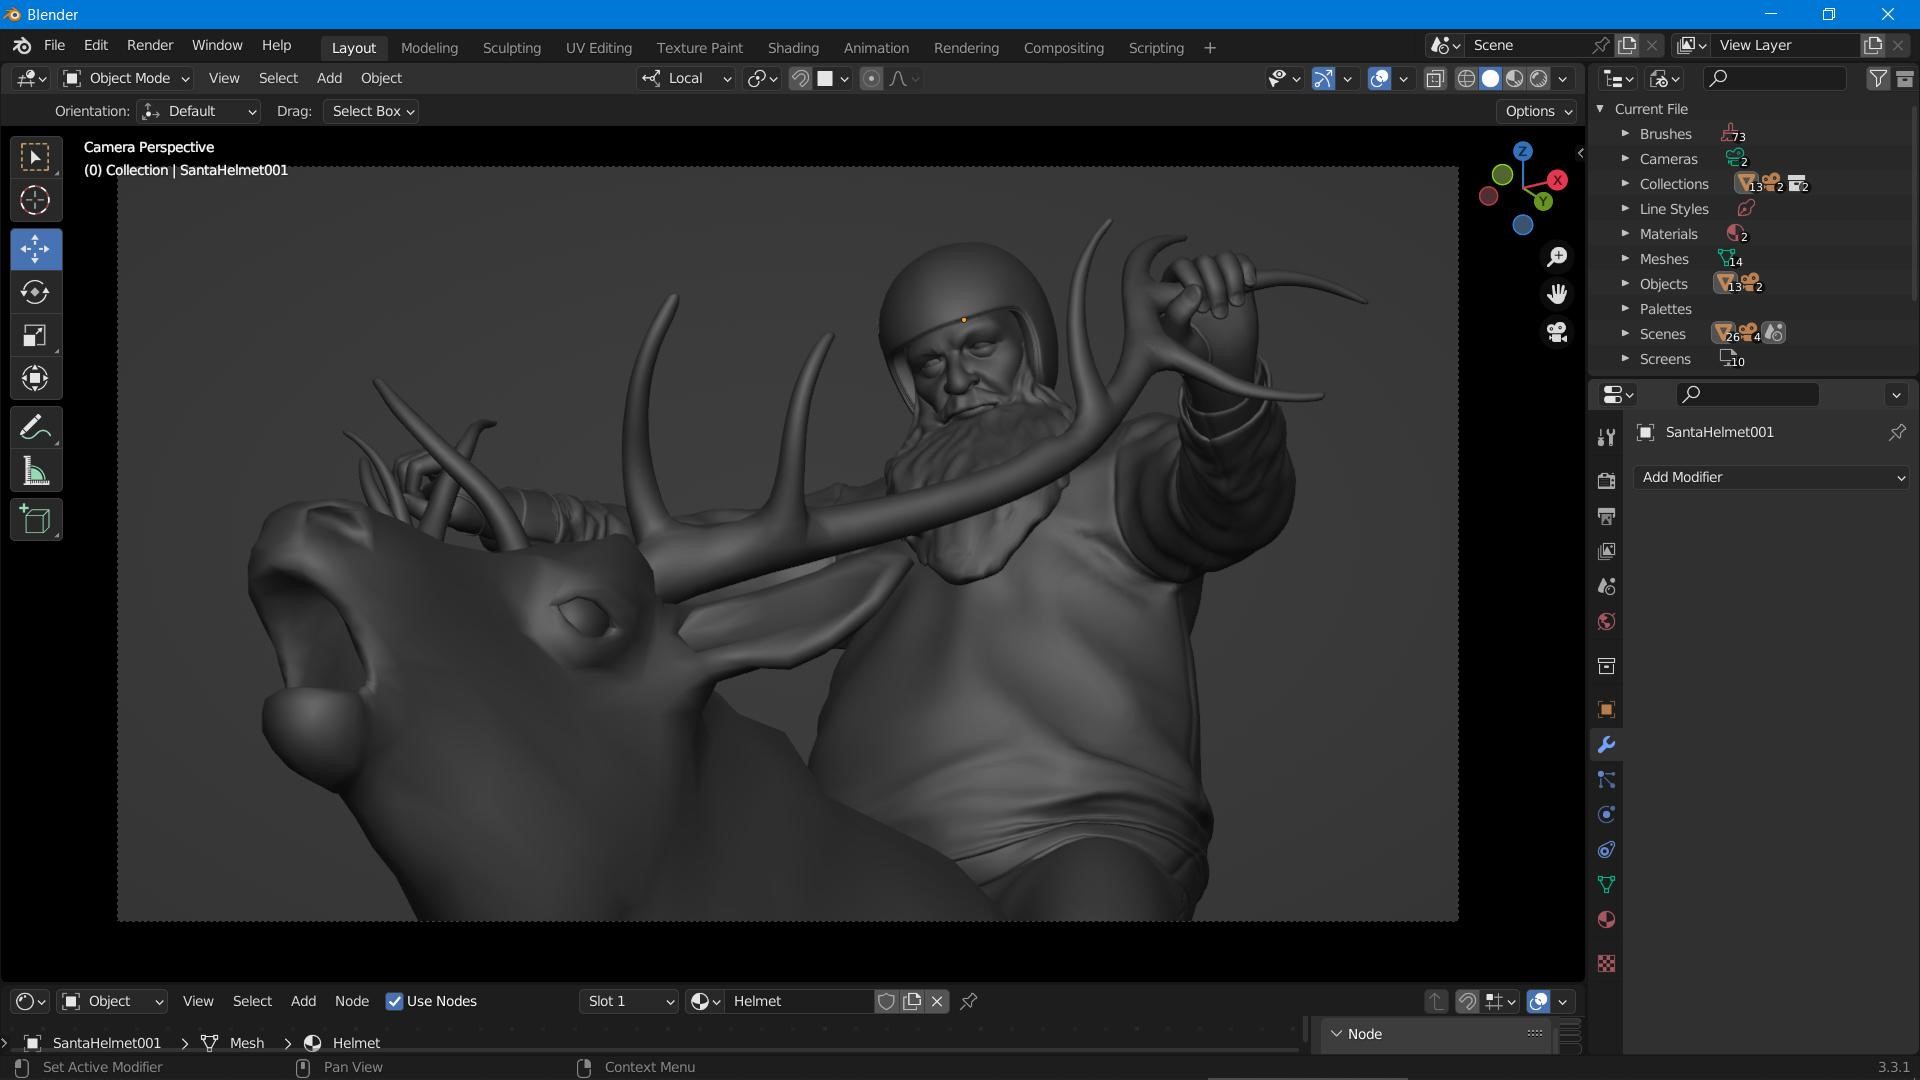
I needed a starting point, so I used one of my old models of a man in a helmet with a simple rig

This allowed me to approximate the pose of the rider. Then, I added a beard mesh, a low-poly deer, and my model looked like this.
Next, I started adding details to the model. Here are the main steps of the work.
HELMET
Everything is very simple here. I used the poly modeling tools and subdivision modifier to create a retro-style helmet with goggles. Here is the mesh and viewport render with simple materials.
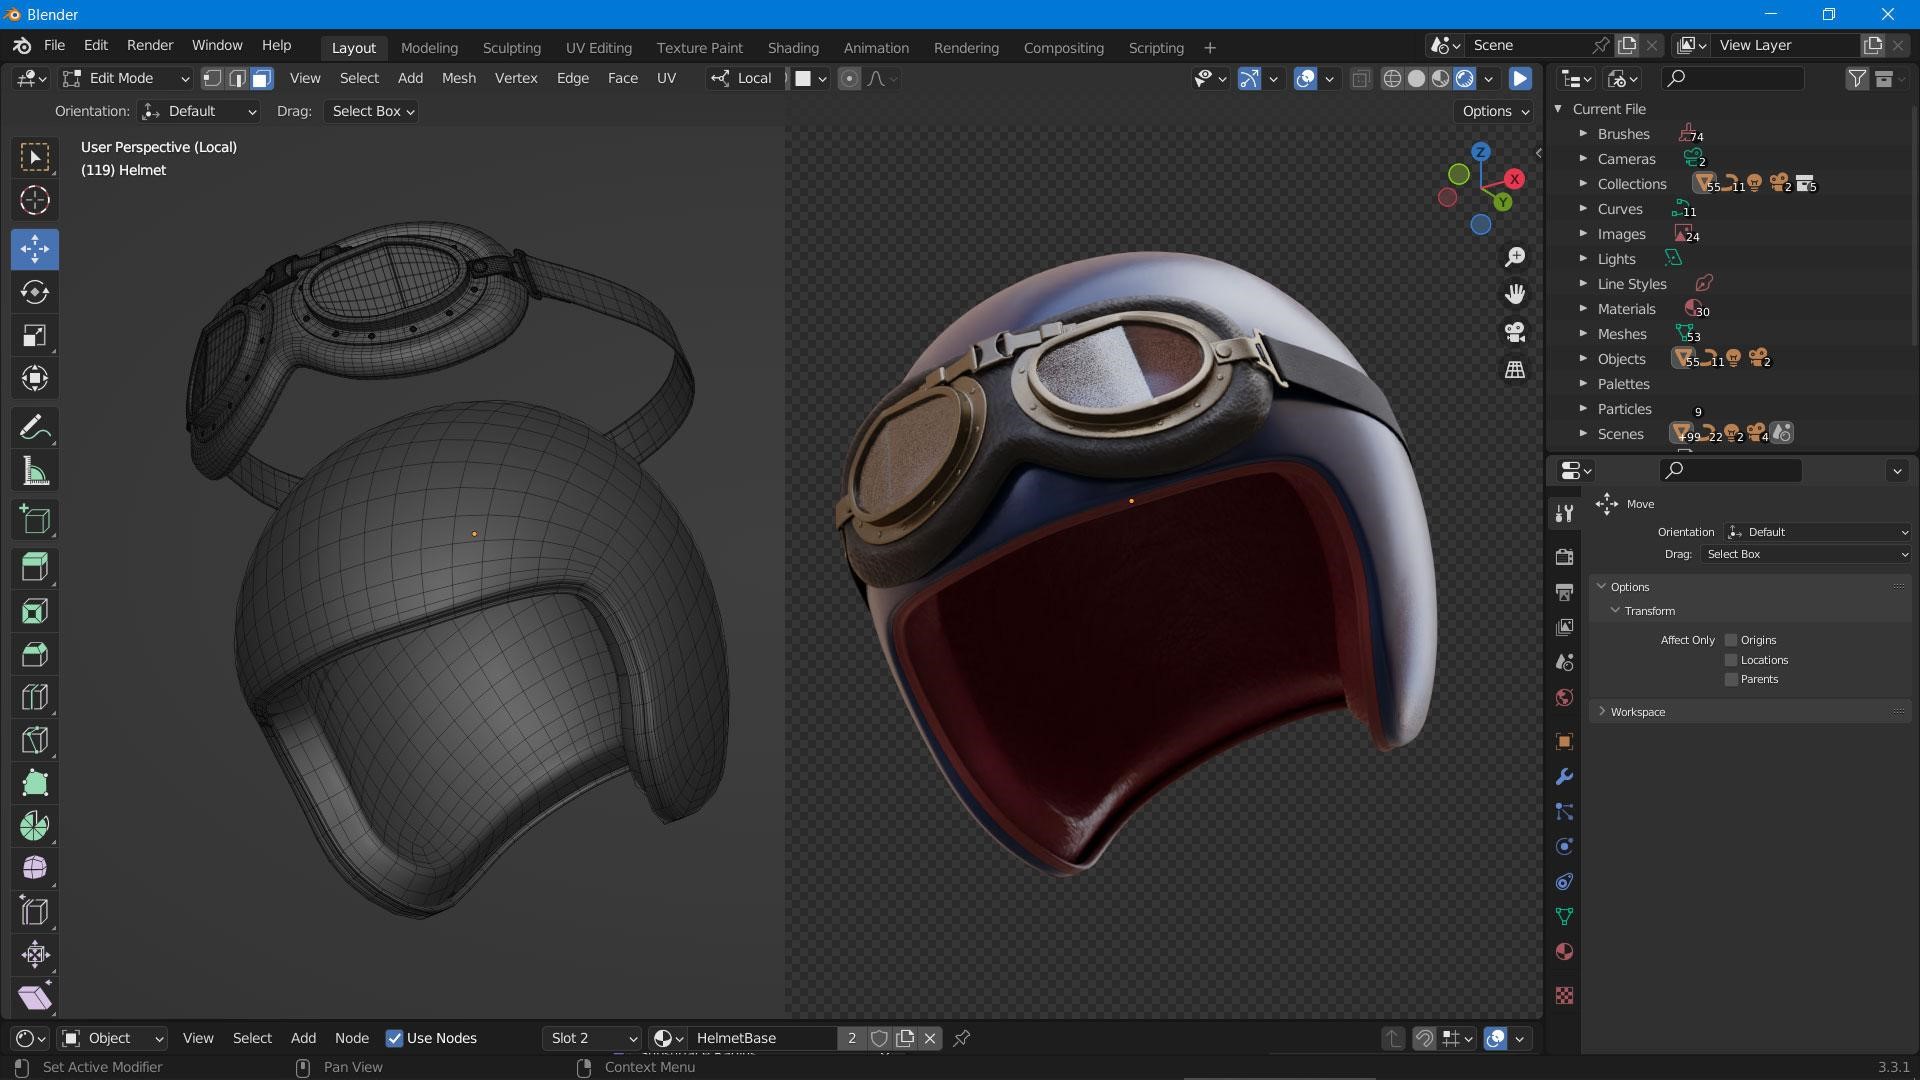
As you can see, I didn’t include a chin strap on the helmet since the beard would cover it. This applies to any small details in this project that aren’t visible to the camera directly. I was making an illustration, not a full 3D model.
JACKET
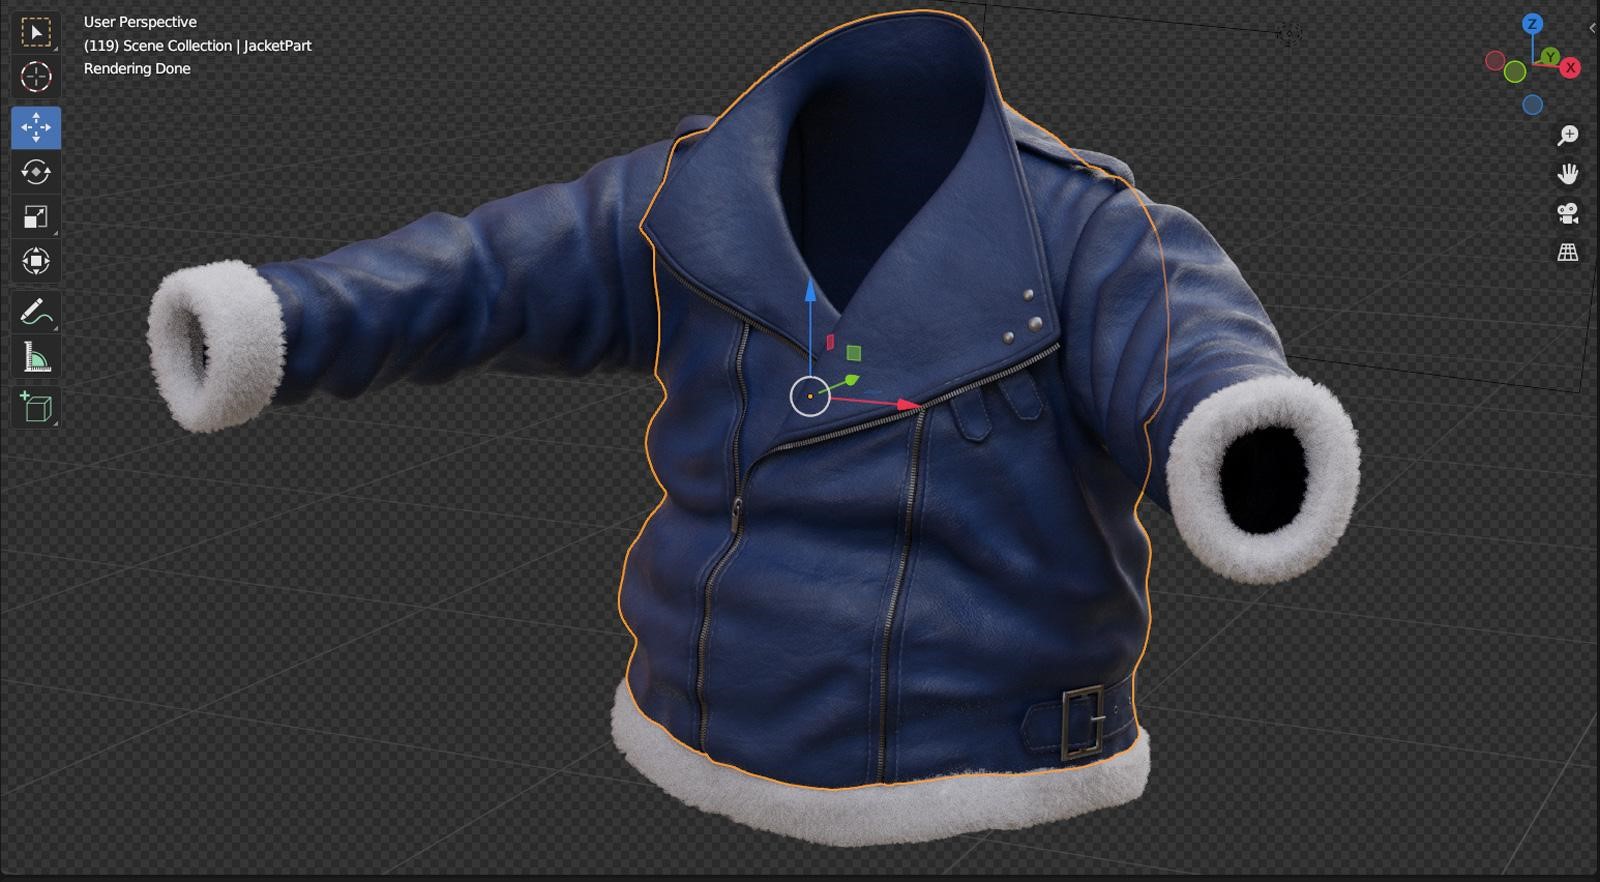
The jacket took most of my time. I made it with sculpting brushes from a simple basic mesh without any cloth simulation. In the picture below, you can see the main parts of the jacket. For instance, the sleeves are separate from the main part, and I didn’t merge them into one mesh until the end of the work.

The zipper parts were made with Array and Curve modifiers. I separated the edge loop from the jacket mesh and used it as a curve path.

In this screenshot, you can see the particle system settings that I used to create the white fur cuffs.

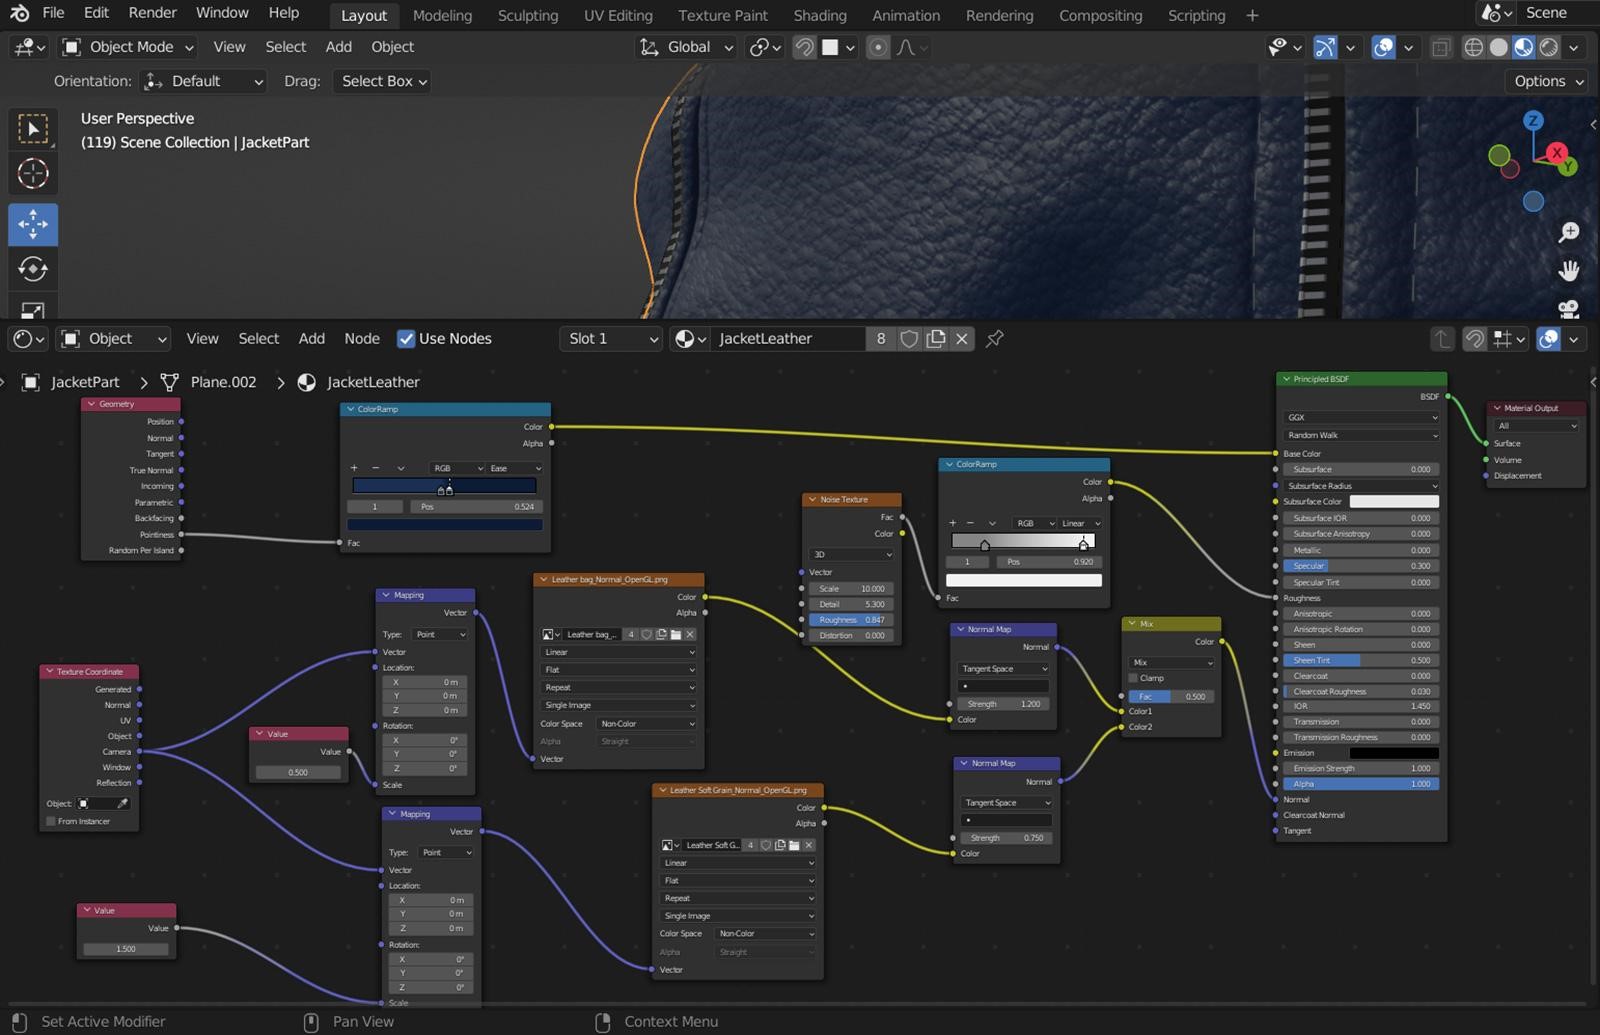
Here, you can check the leather shader settings. Note that I am using the Camera texture coordinates in this case. This type of mapping gives a good enough result and allows me not to worry about UVs. I’ve tried Generated and Object types too, but stopped at the Camera option.
At this point, the jacket was ready, and I moved on to the next object.
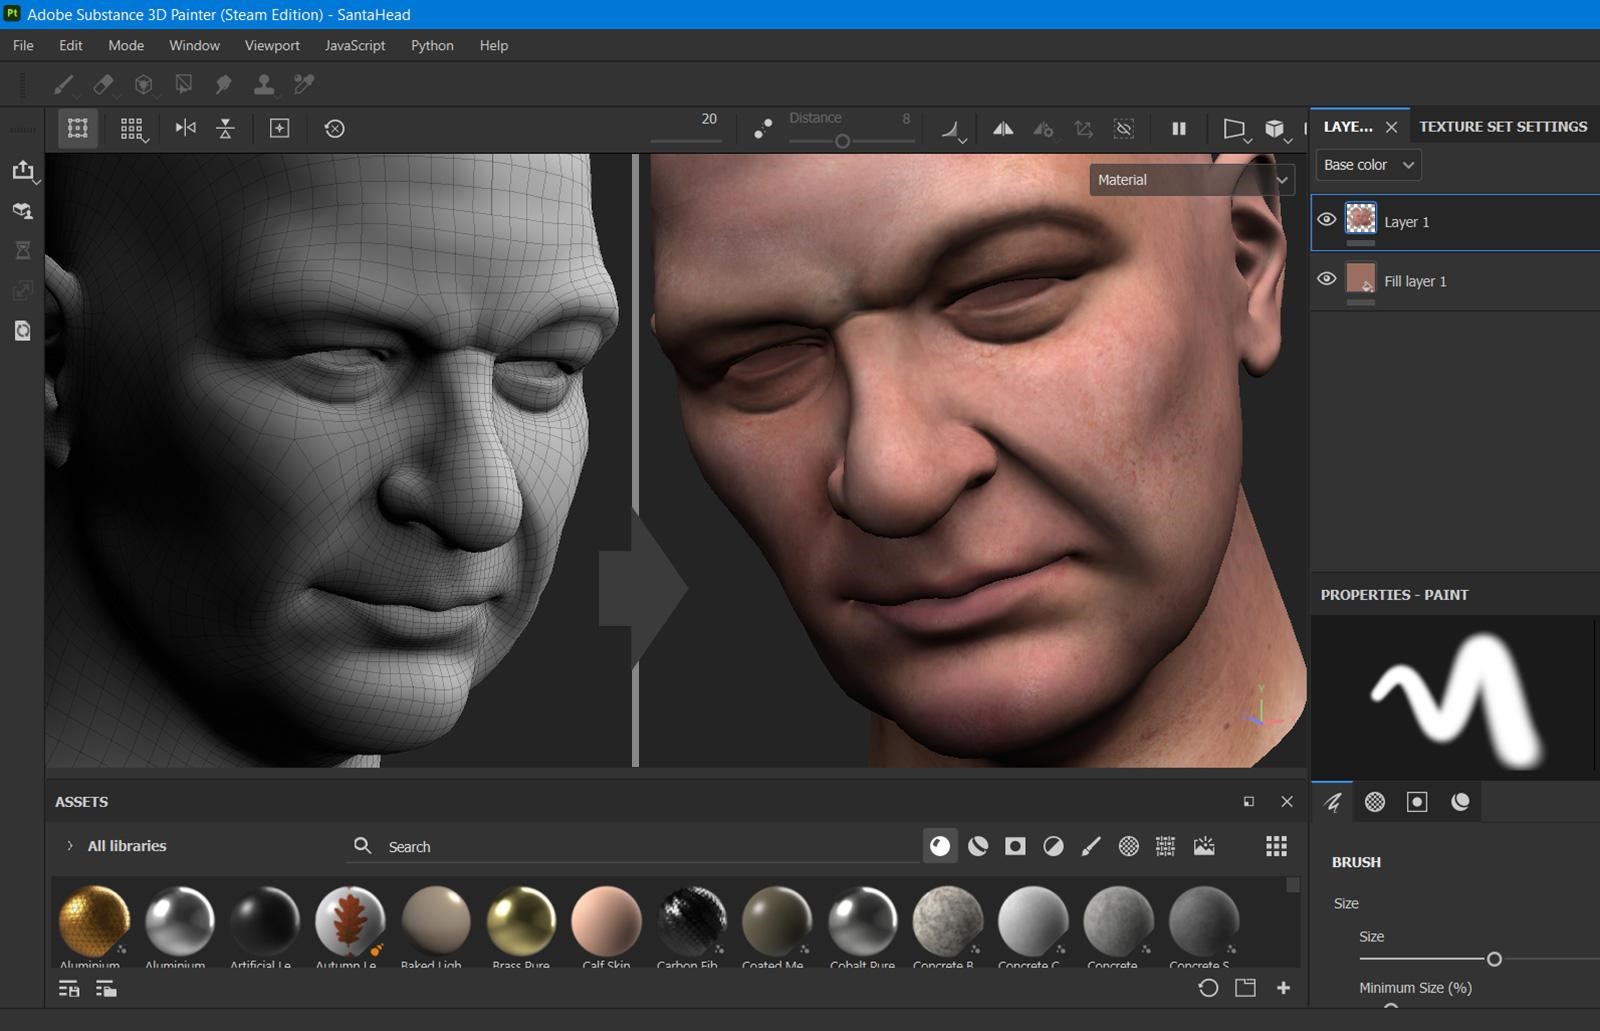
HEAD
After I made the head look more “aged” with sculpting tools, I drew a simple texture in Substance Painter. For the final render, I used only this color map and the face mesh geometry.
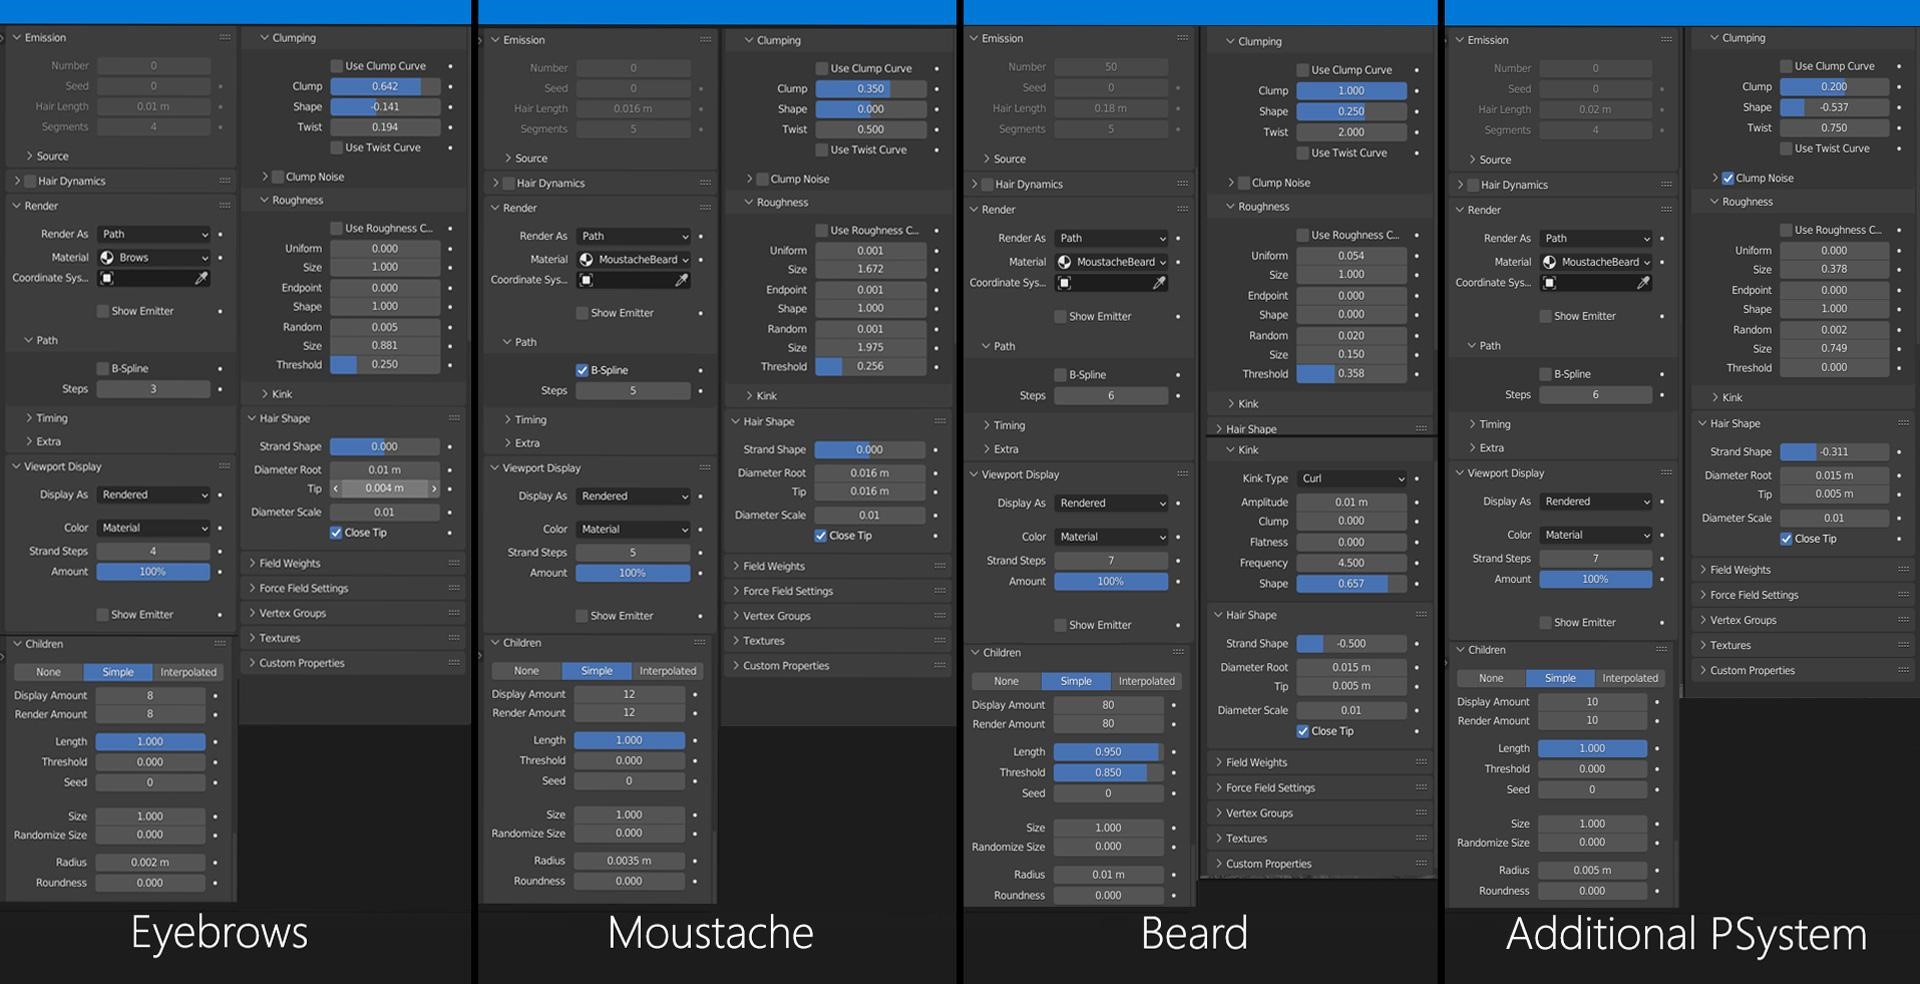
Facial hair is made up of four particle systems: eyebrows, mustache, beard, and additional beard hair.
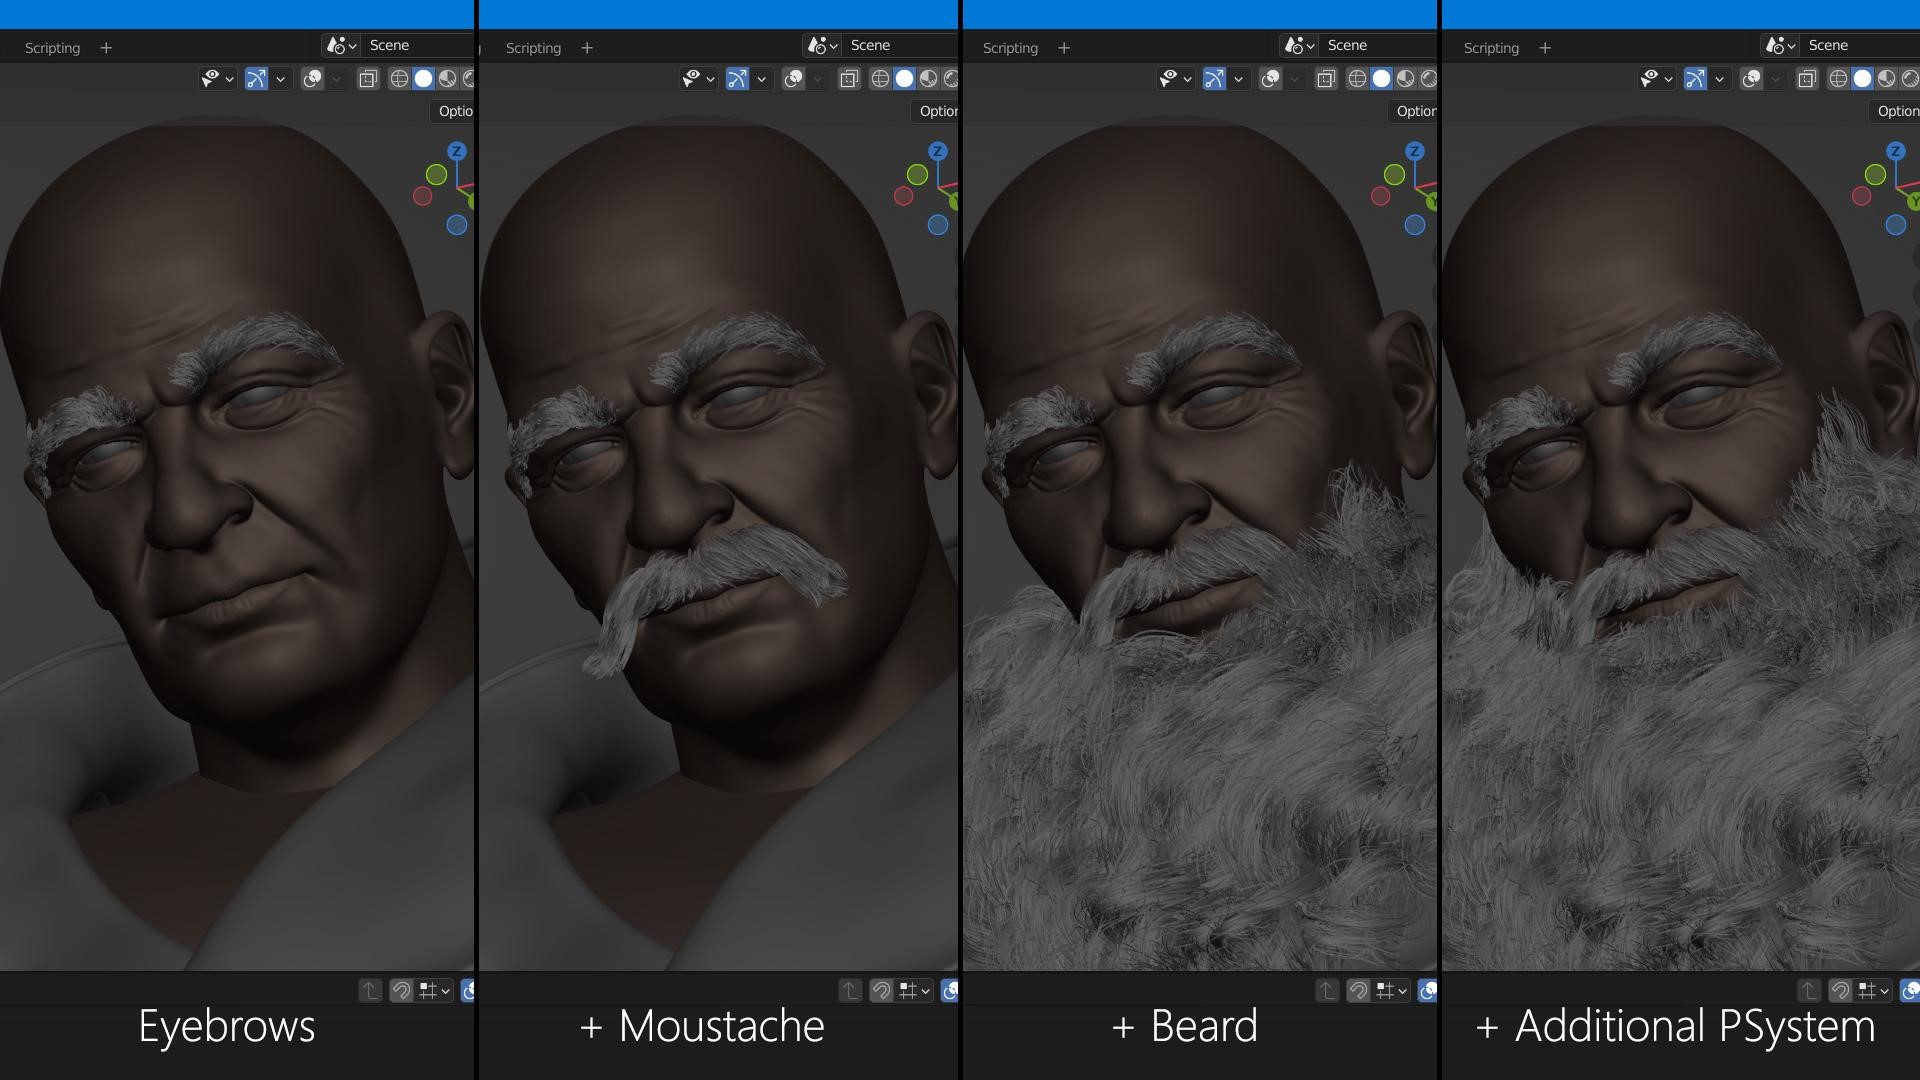
I used the legacy Blender particle system for all the hair in this project.
DEER
I created the antlers’ base mesh using a Curve object and a Skin modifier. Then, with mesh editing and sculpting tools, I achieved their final shape. I made the antlers’ material in Substance Painter by combining several wood materials, grunge and scratches textures.

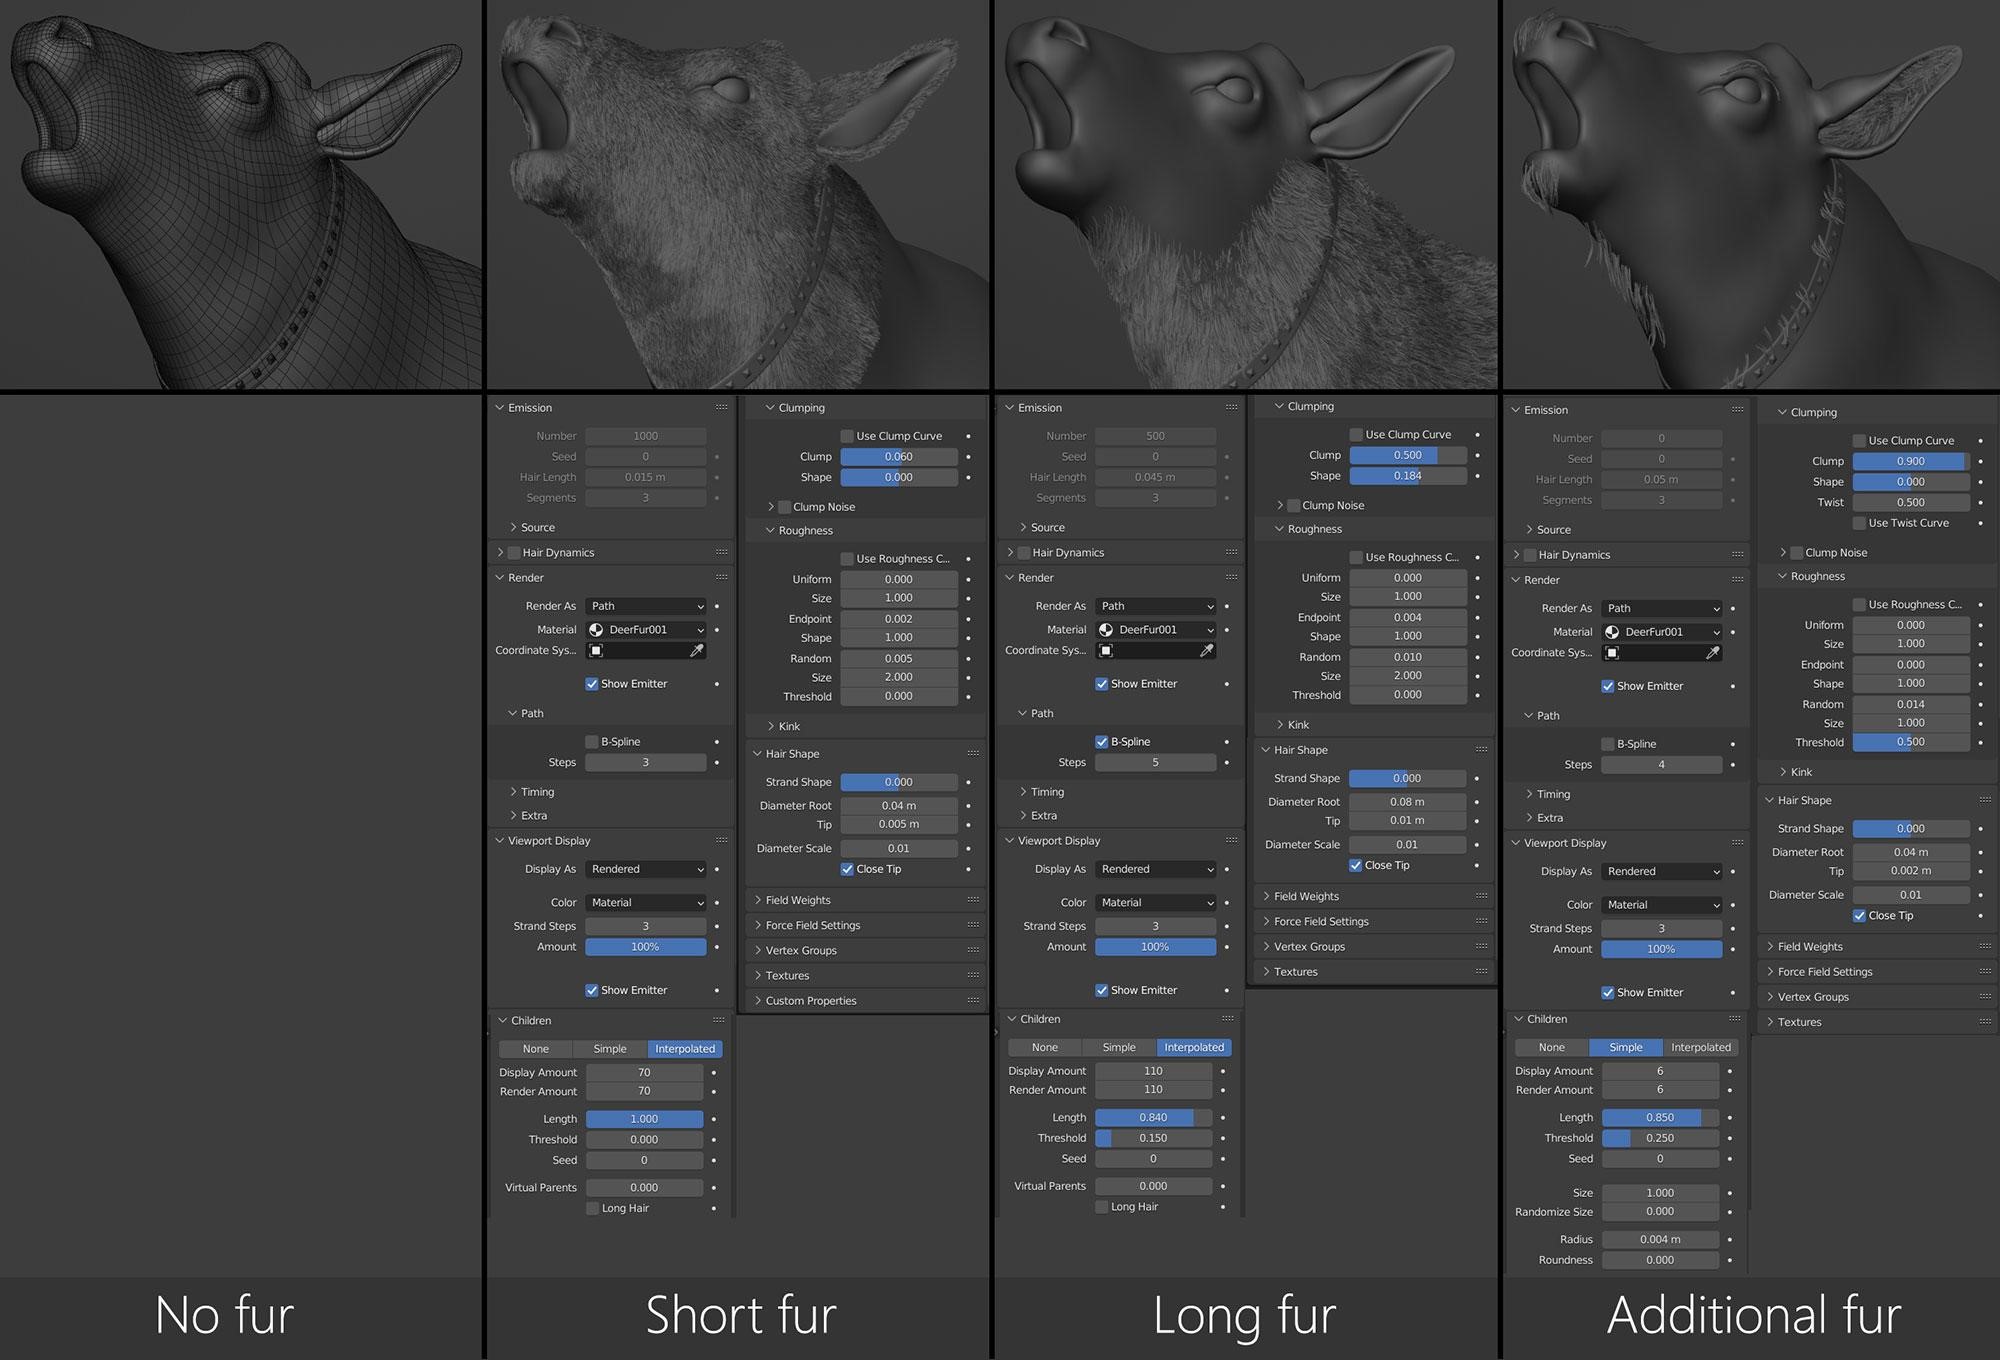
Deer fur was the most challenging part for me because I had never done anything like this before. First, I created several maps in Substance Painter: color and density maps for fur, and masks for SSS and roughness of the skin material.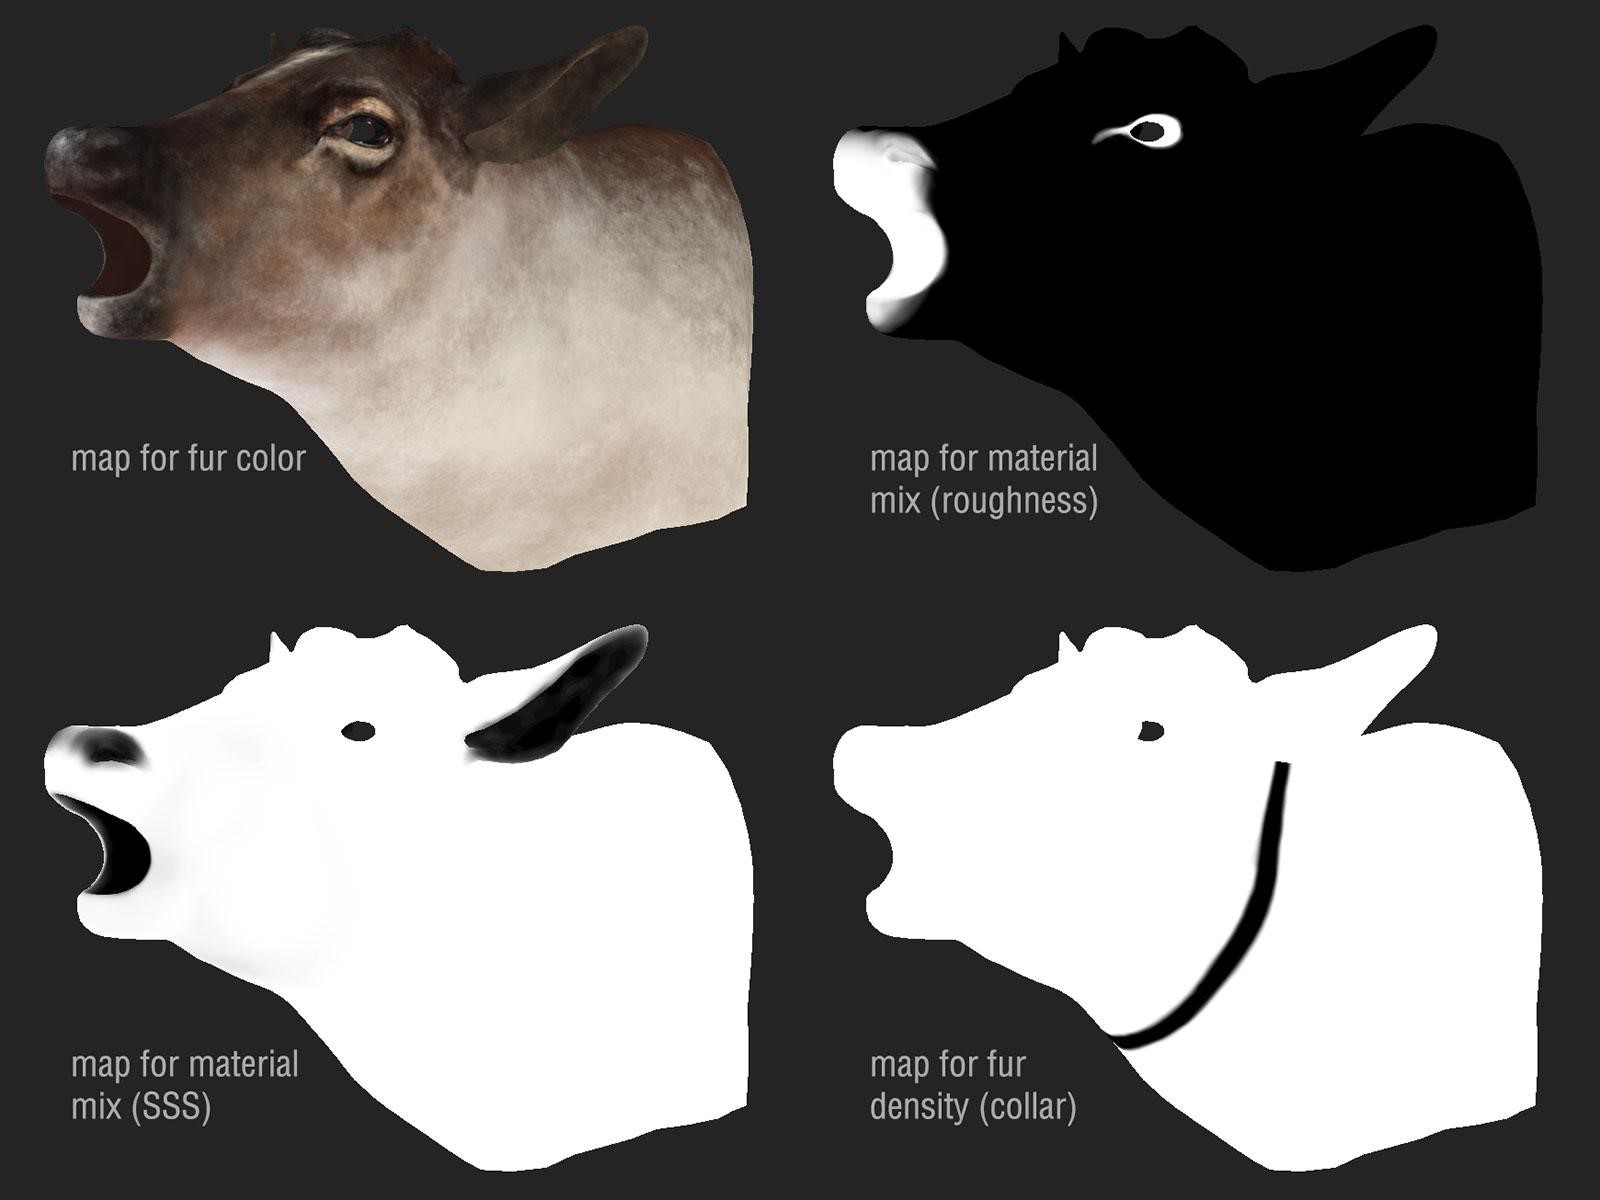
Next, I divided all the fur into several parts (as I did with the rider’s head): short fur, long fur, and additional fur. You can see the settings of all these particle systems in the picture below.
FINAL
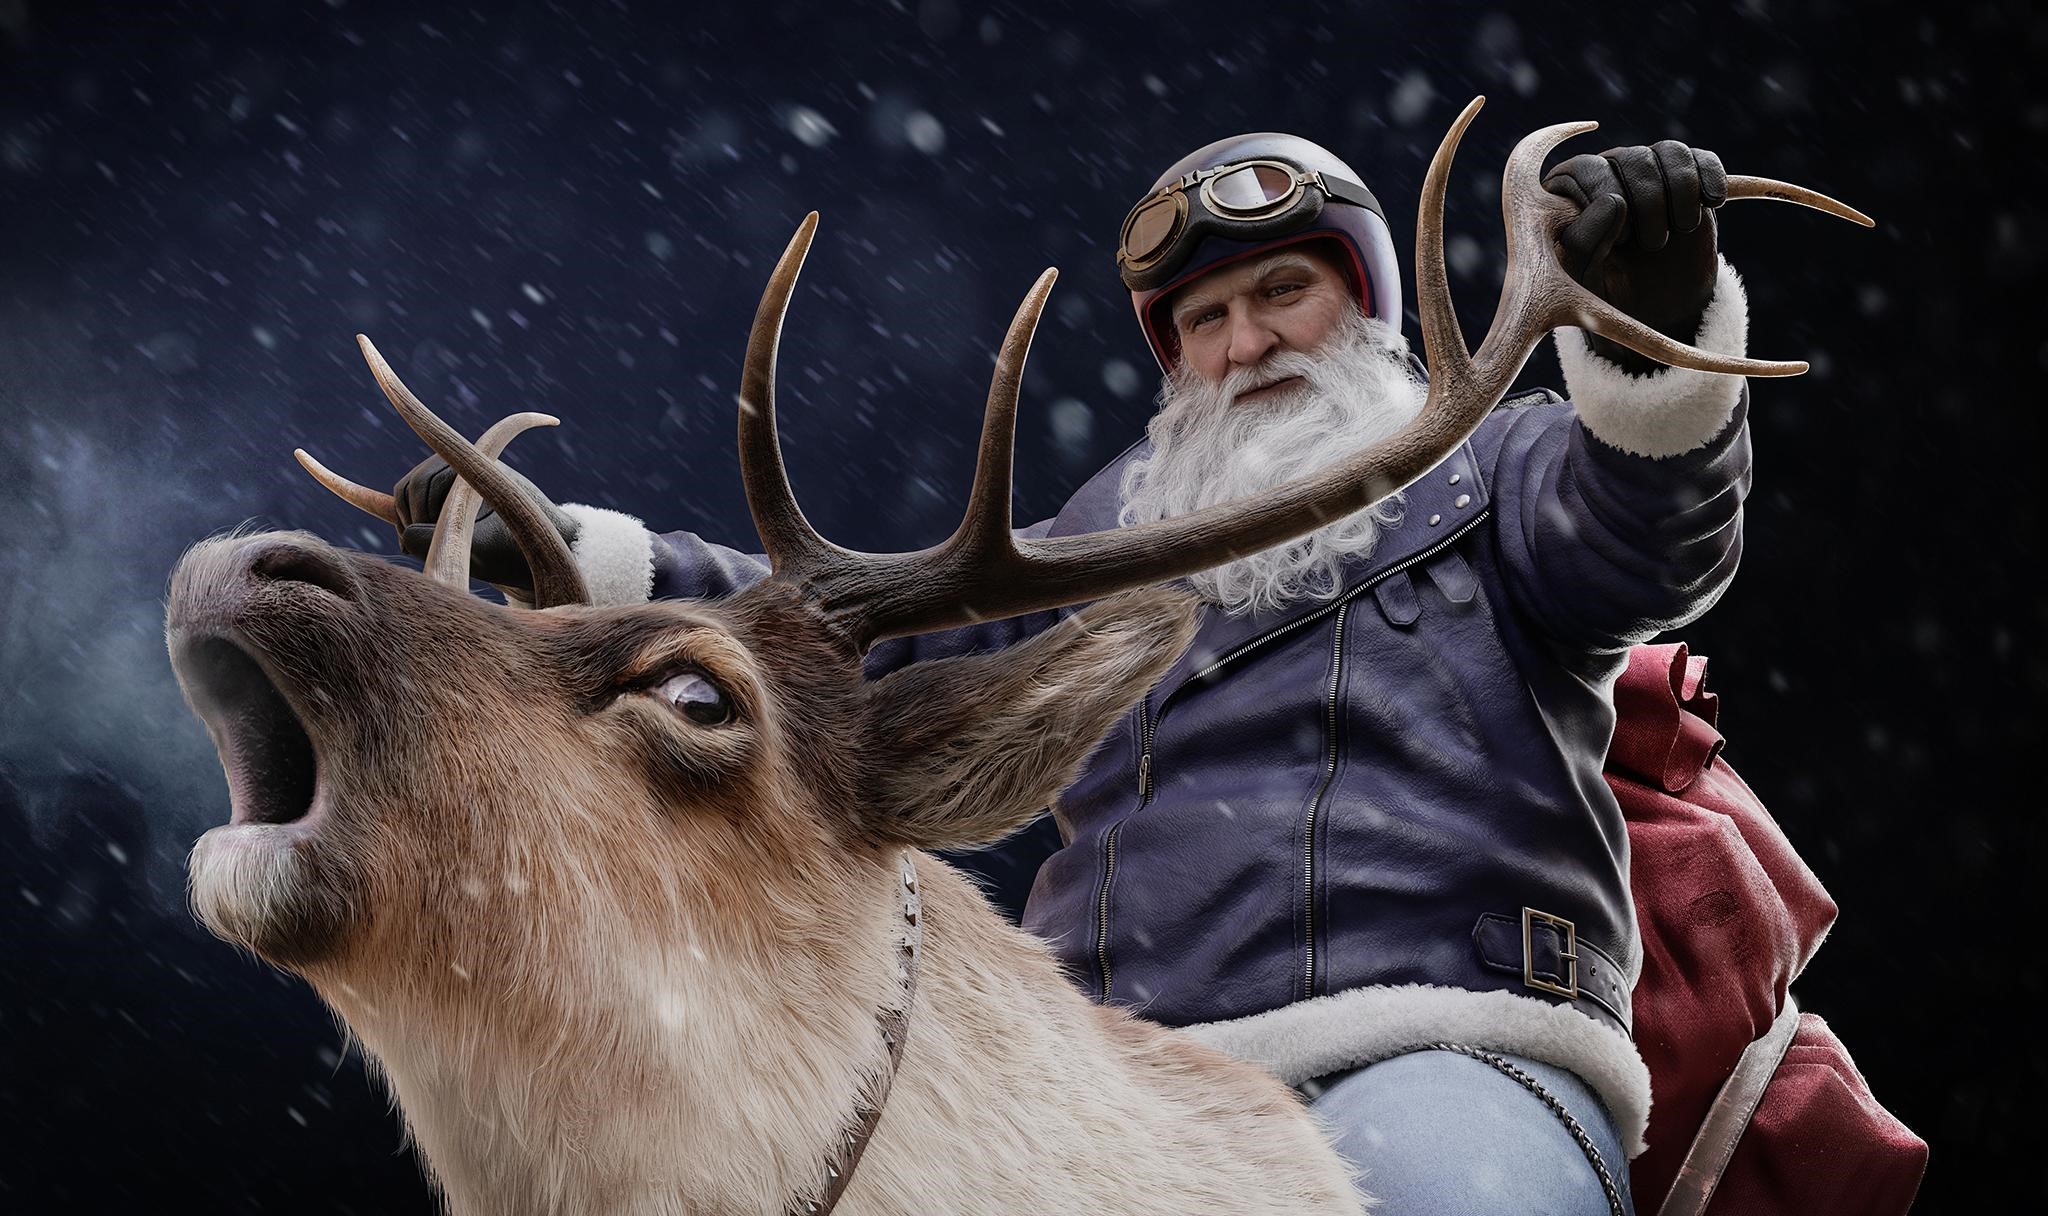
I finished a few more things (bag, gloves, chain, etc.) and made the final render. For lighting I used an HDRI map and one rectangular light source right behind the rider. In the pictures below you can see the difference between the raw render and the final image edited in Photoshop. I added more hair and fur (just drew the hairs with a small diameter brush), applied textures in different blending modes, used a Camera Raw filter, added snow layers with motion blur, etc.
DEER RIDER


That’s all! I hope this article was useful or at least interesting for you.
Have a nice day!
About the Artist

Andrew Dudka, a 2d and 3d artist from Saint Petersburg, Russia.


If it was useful?
It was amazing! Having put image of the settings raised the level of content.
Wonderful final result.
Thanks for sharing
Very nice.
Nicely done and very kindly explained. Top!