
Behind the Scenes: Ahri from League of Legends
INTRODUCTION
Hi, Blender community. I’m Takumi from Japan and I work as a software engineer in Tokyo.
Making 3D CG is just a hobby for me, but I have a strong passion for it.
INSPIRATION
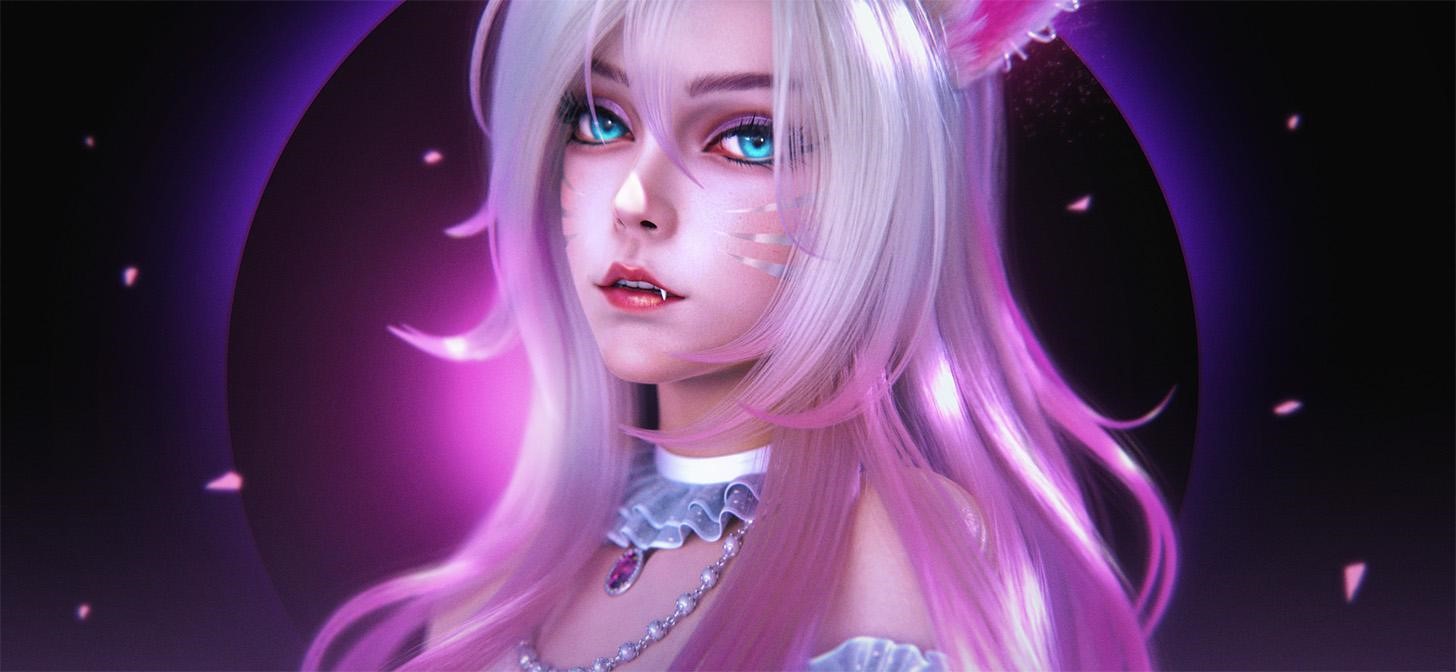
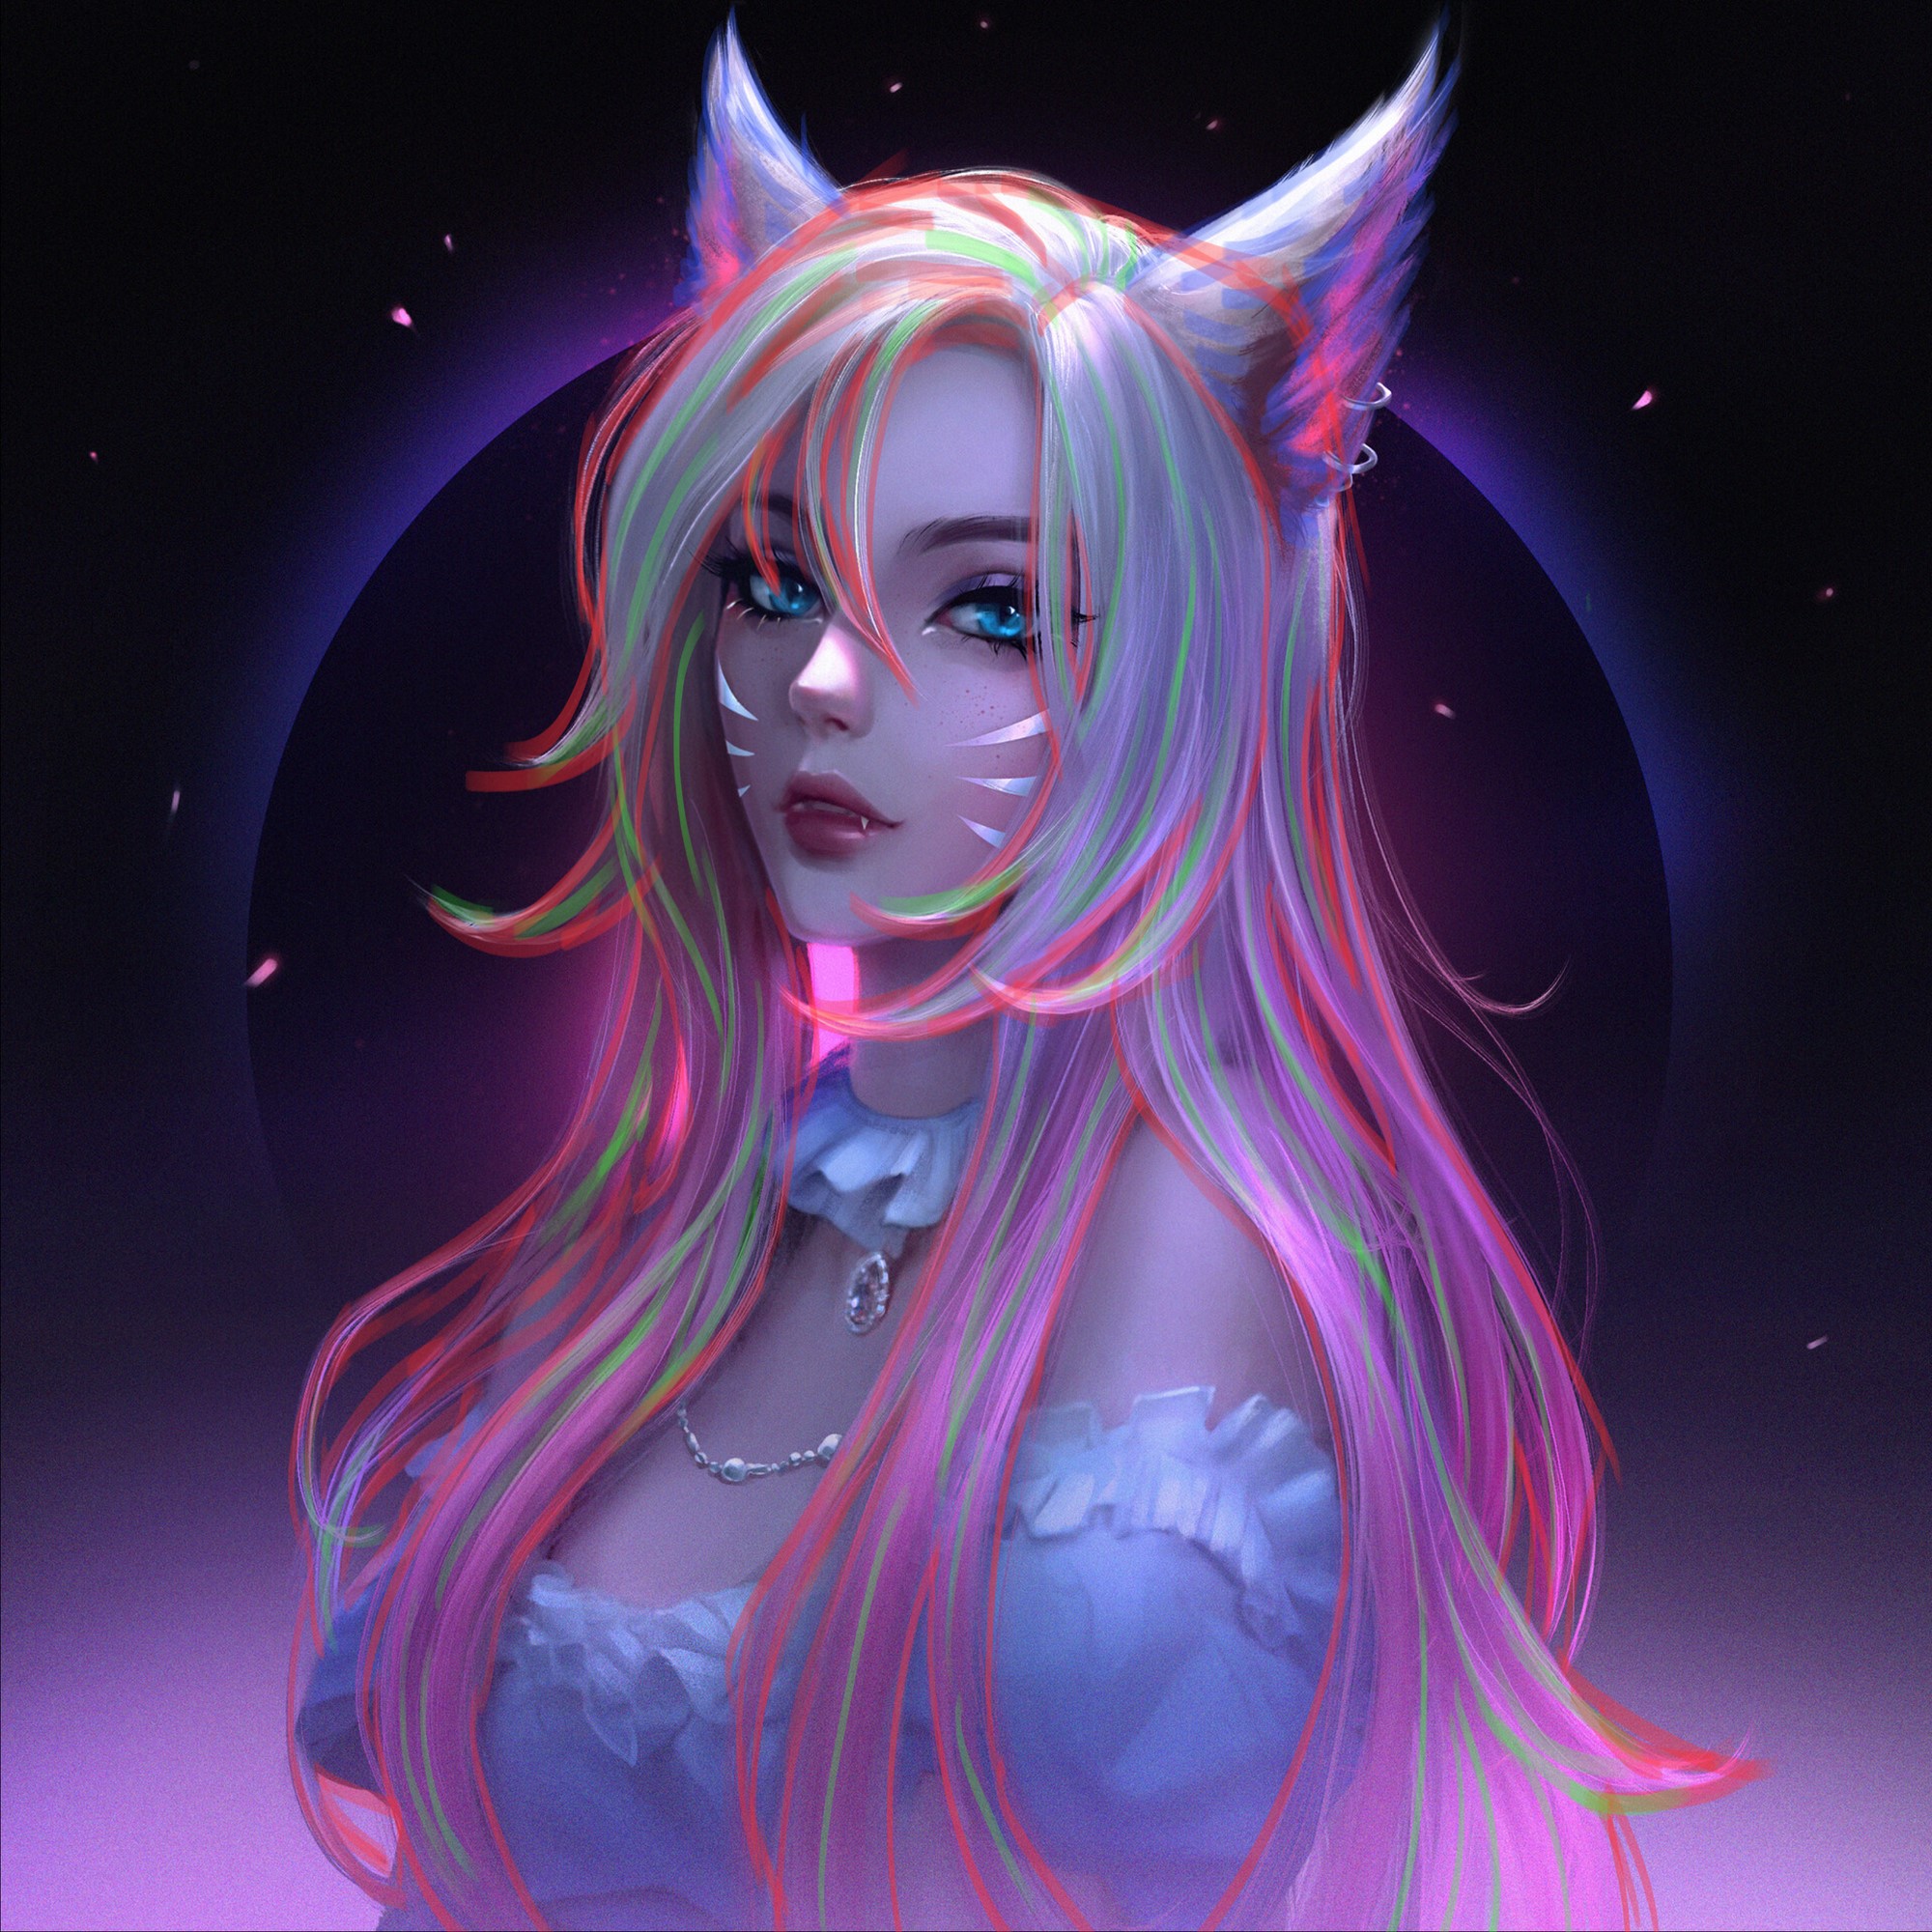
First of all, I really appreciate the original artwork by lisai.
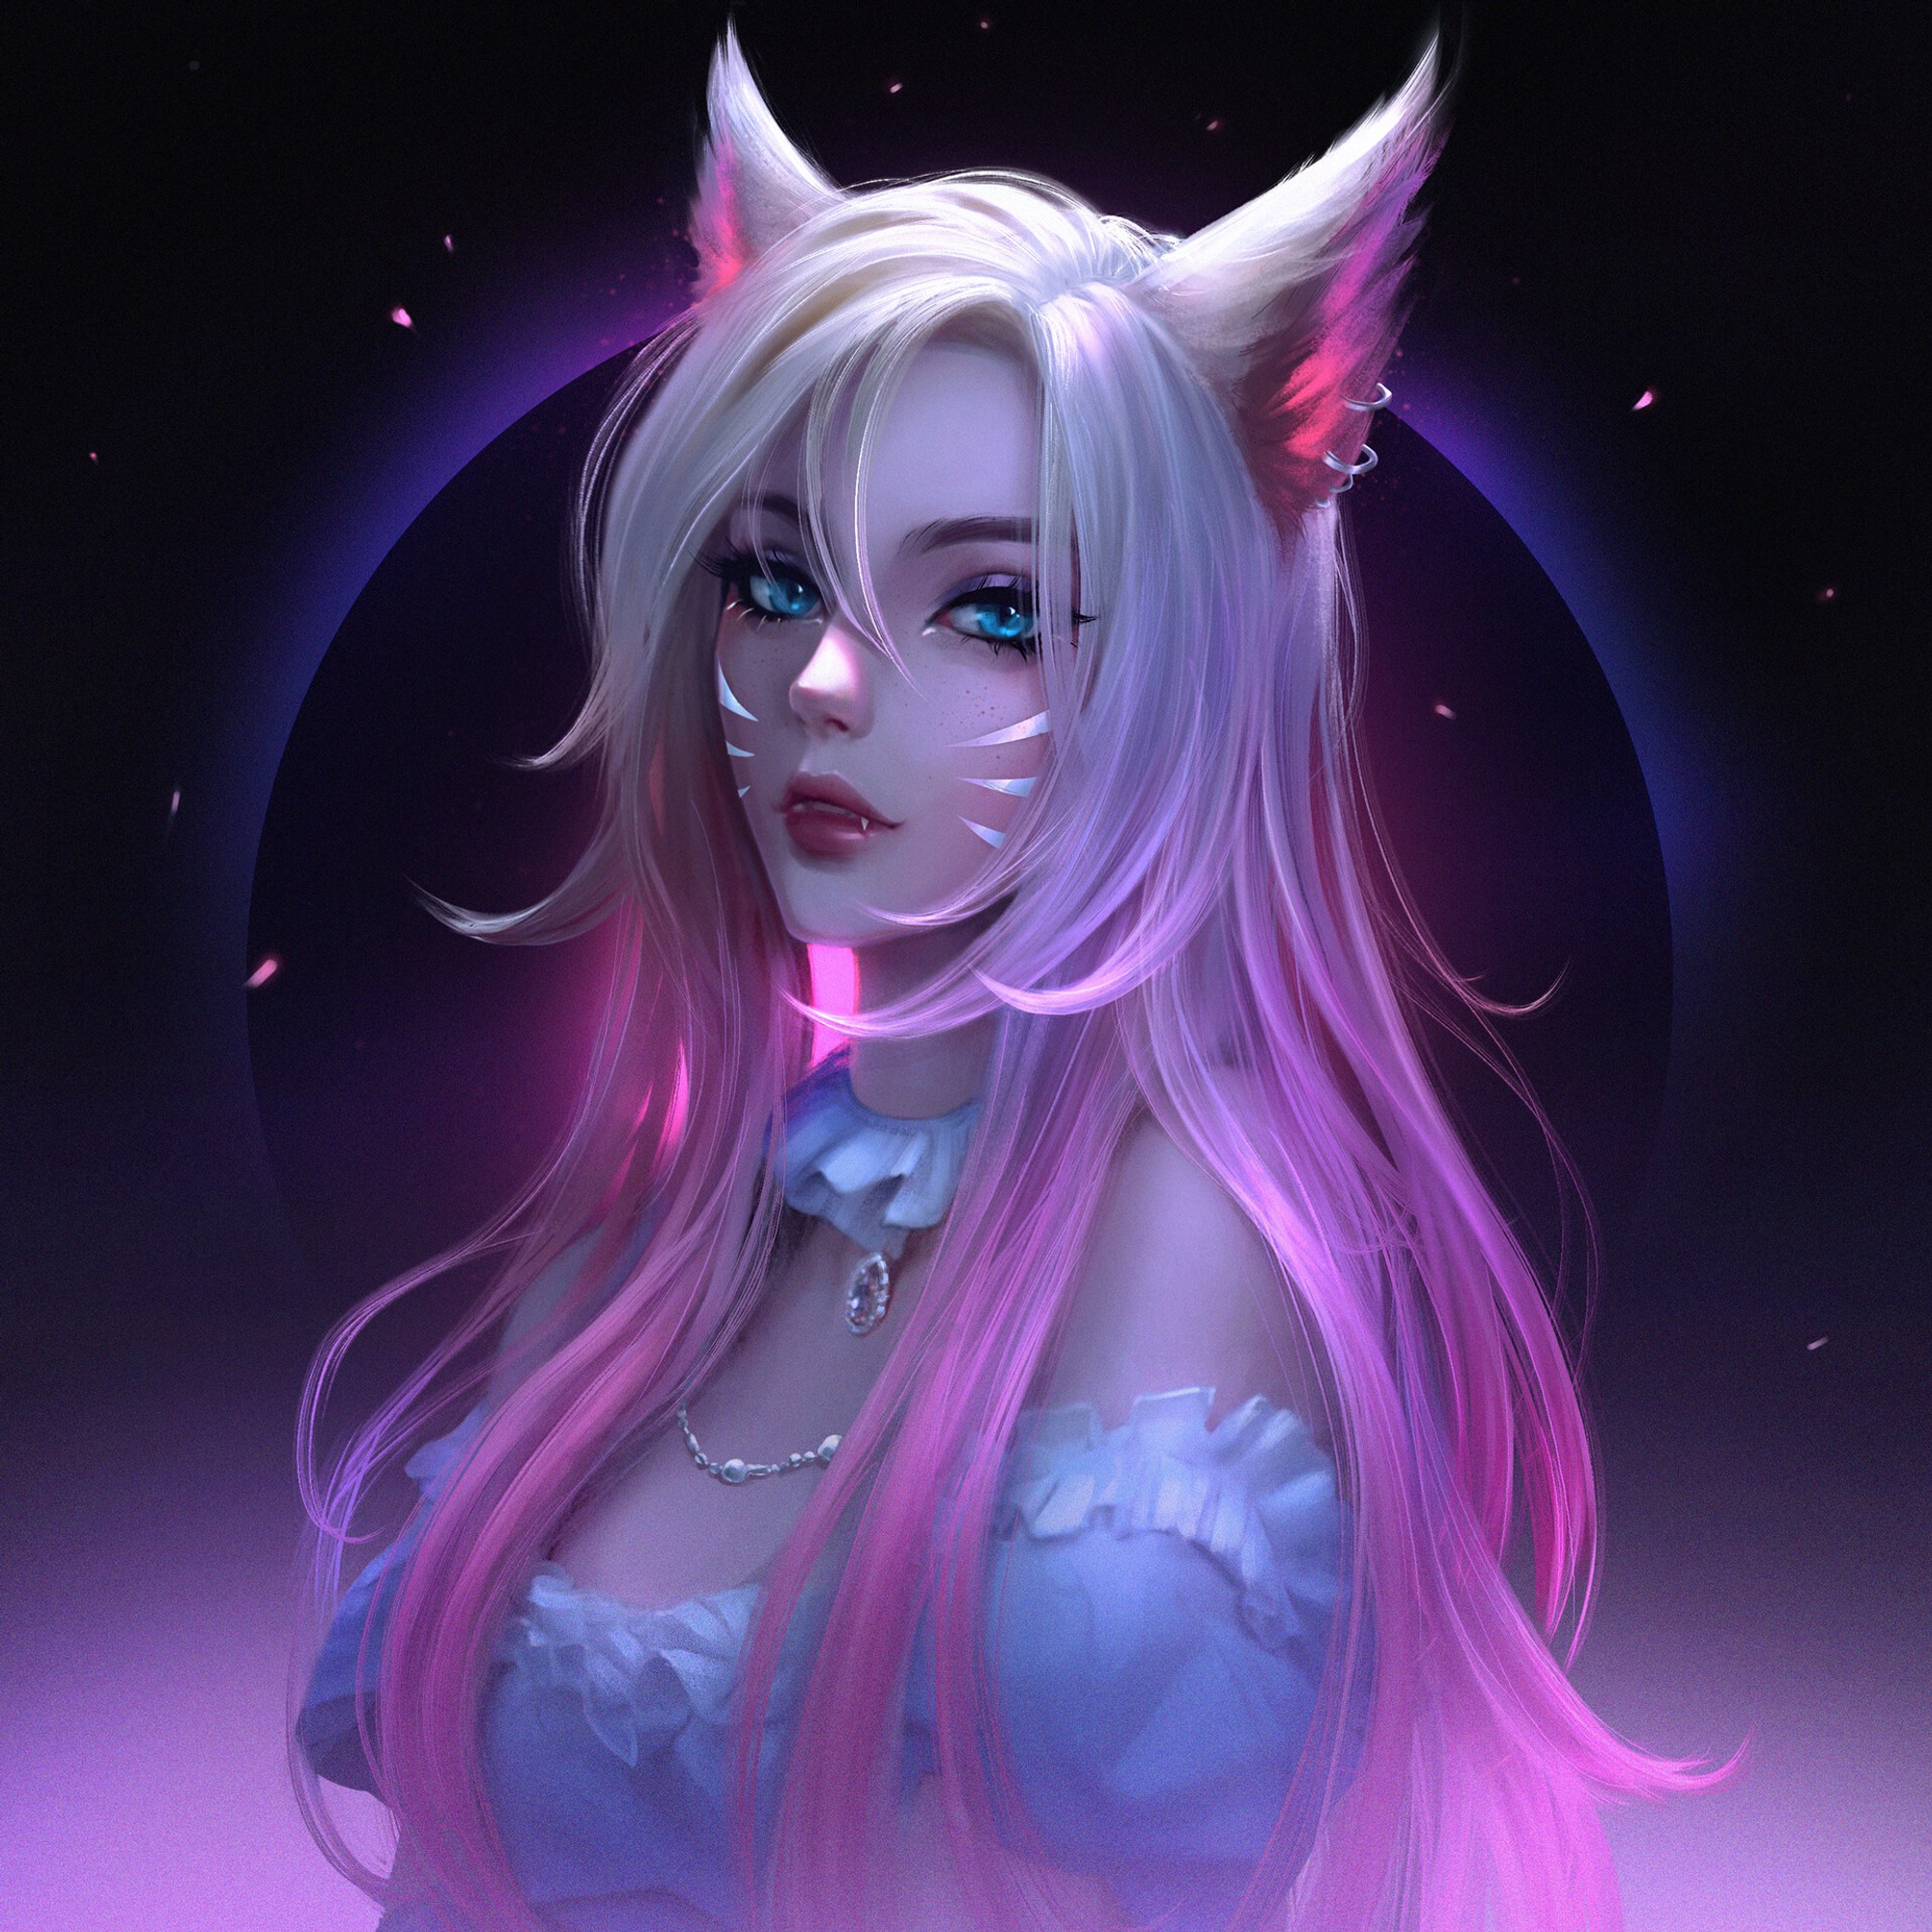
This chic fascination inspired me, and I wanted to recreate the delicate hair and seductive expression in Blender.
PROCESS
These are the software I used for this process:
- Daz Studio: Base Model
- ZBrush: Sculpting
- Substance Painter: Texturing
- Marvelous Designer: Clothing
- Blender: Hair, Rendering, Fabric Material
- Photoshop: Post-processing
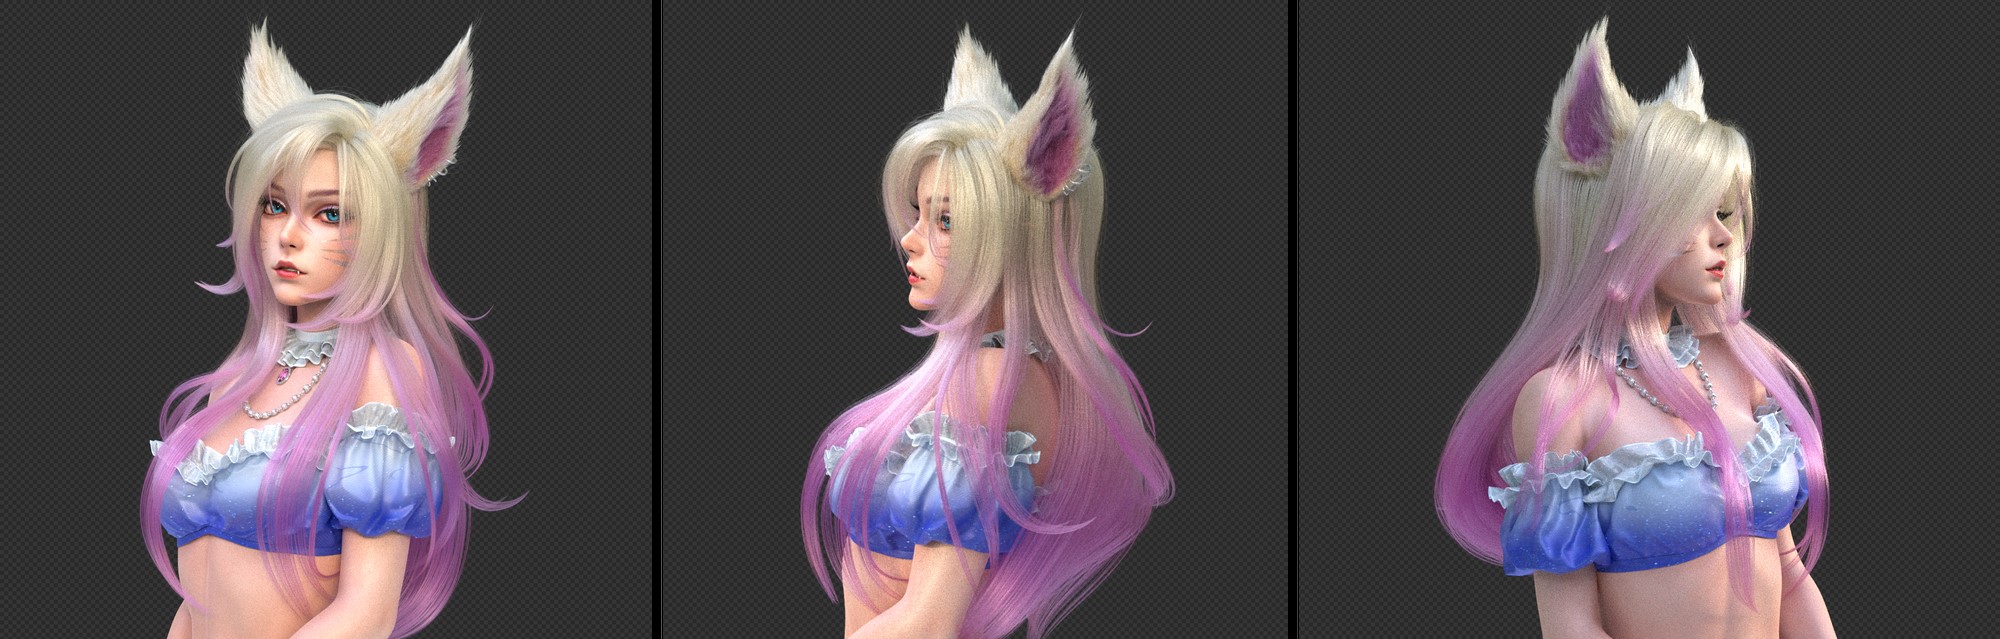
BASE BODY
I started by posing the base body in Daz Studio. I roughly aligned the whole body with the reference, and PowerPose was useful for this.

Since I use ZBrush to adjust the overall silhouette, I don’t worry too much about adjusting each morph individually.
FACE
I imported the figure from Daz Studio as an .obj file into ZBrush and started sculpting the body silhouette and face. I used an AI-generated face image from ArtBreeder as a reference.
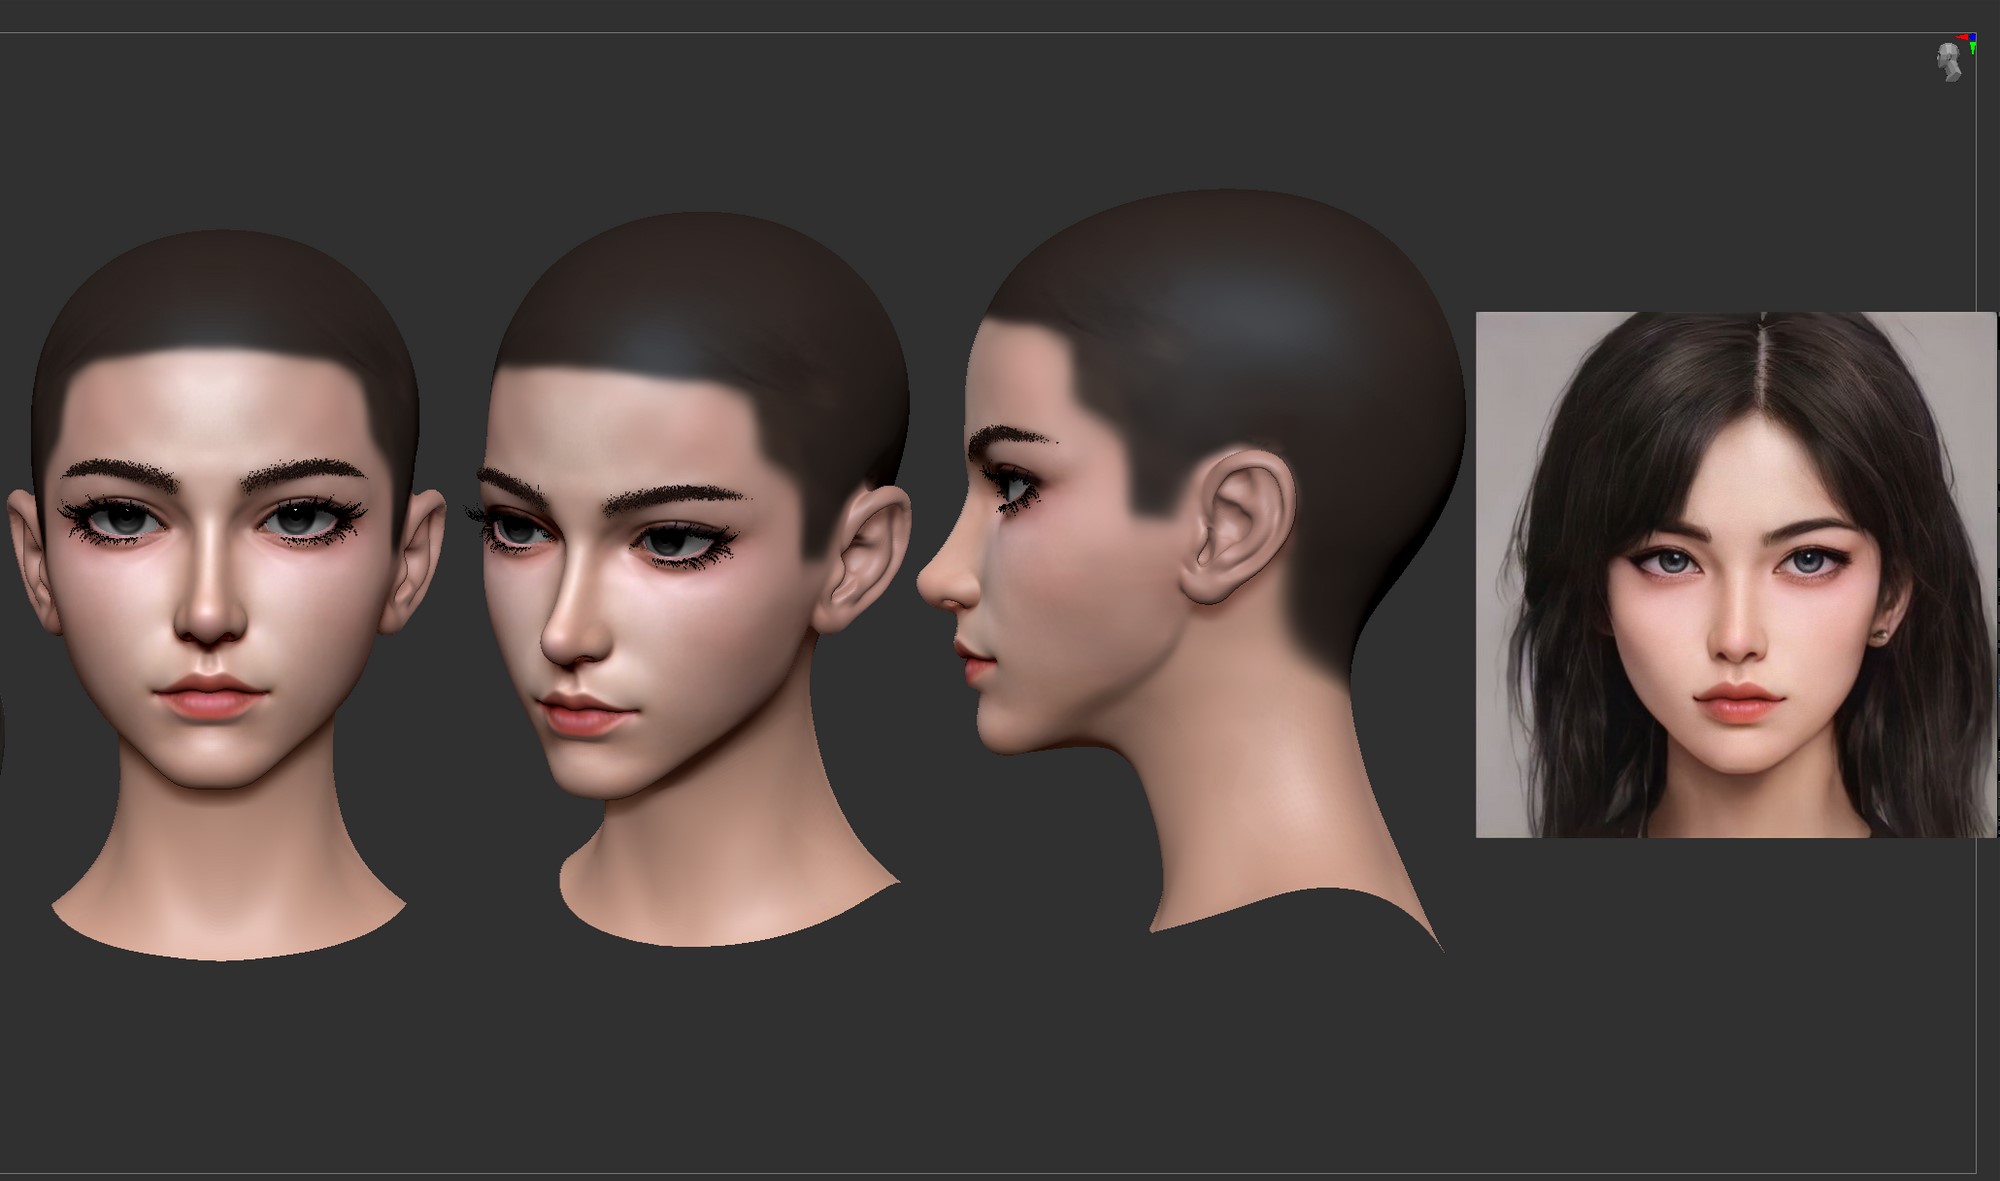
In addition to matching the face shape to the reference image, I used the face color projected from Spotlight as Polypaint for later use as a face texture.
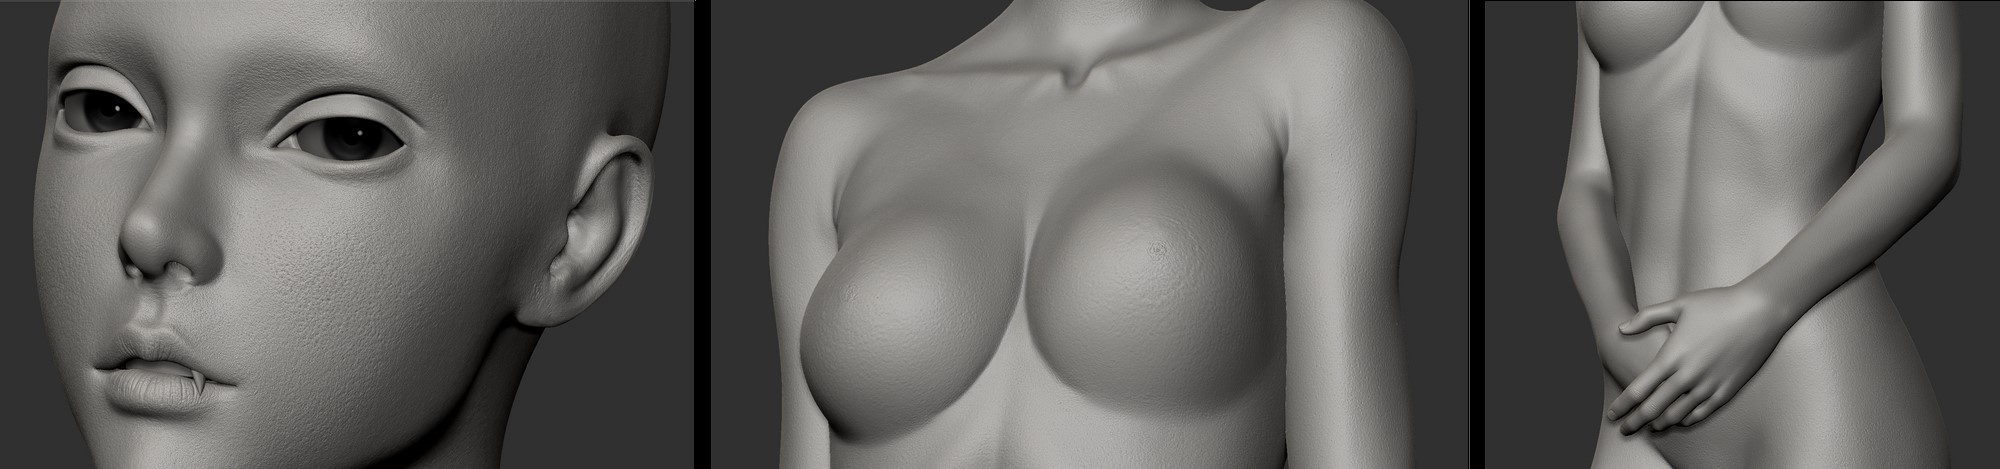
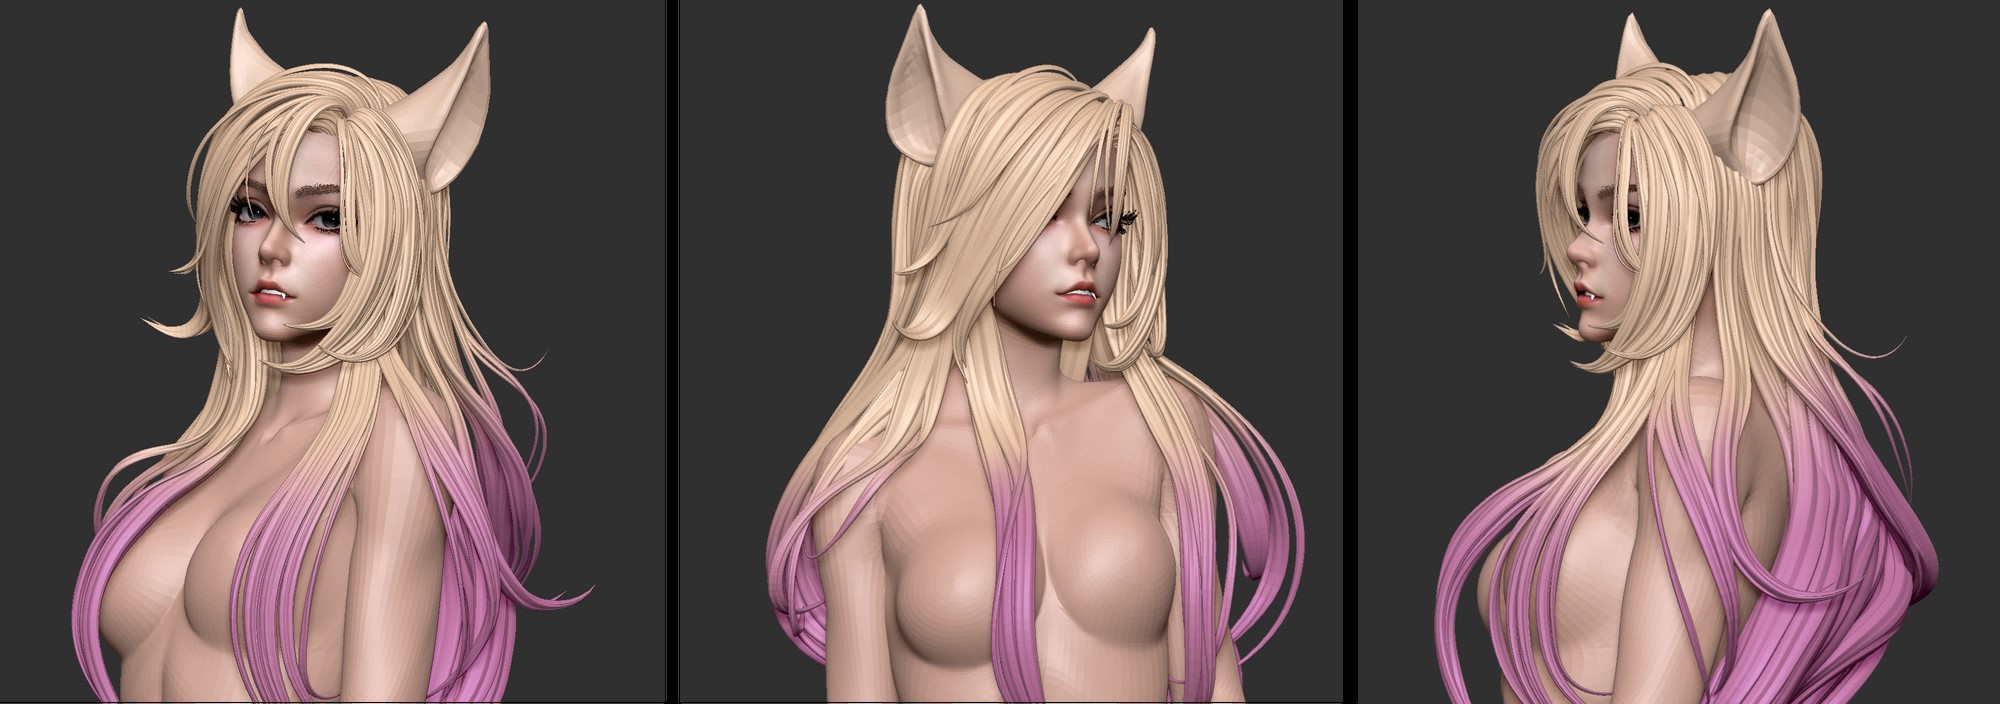
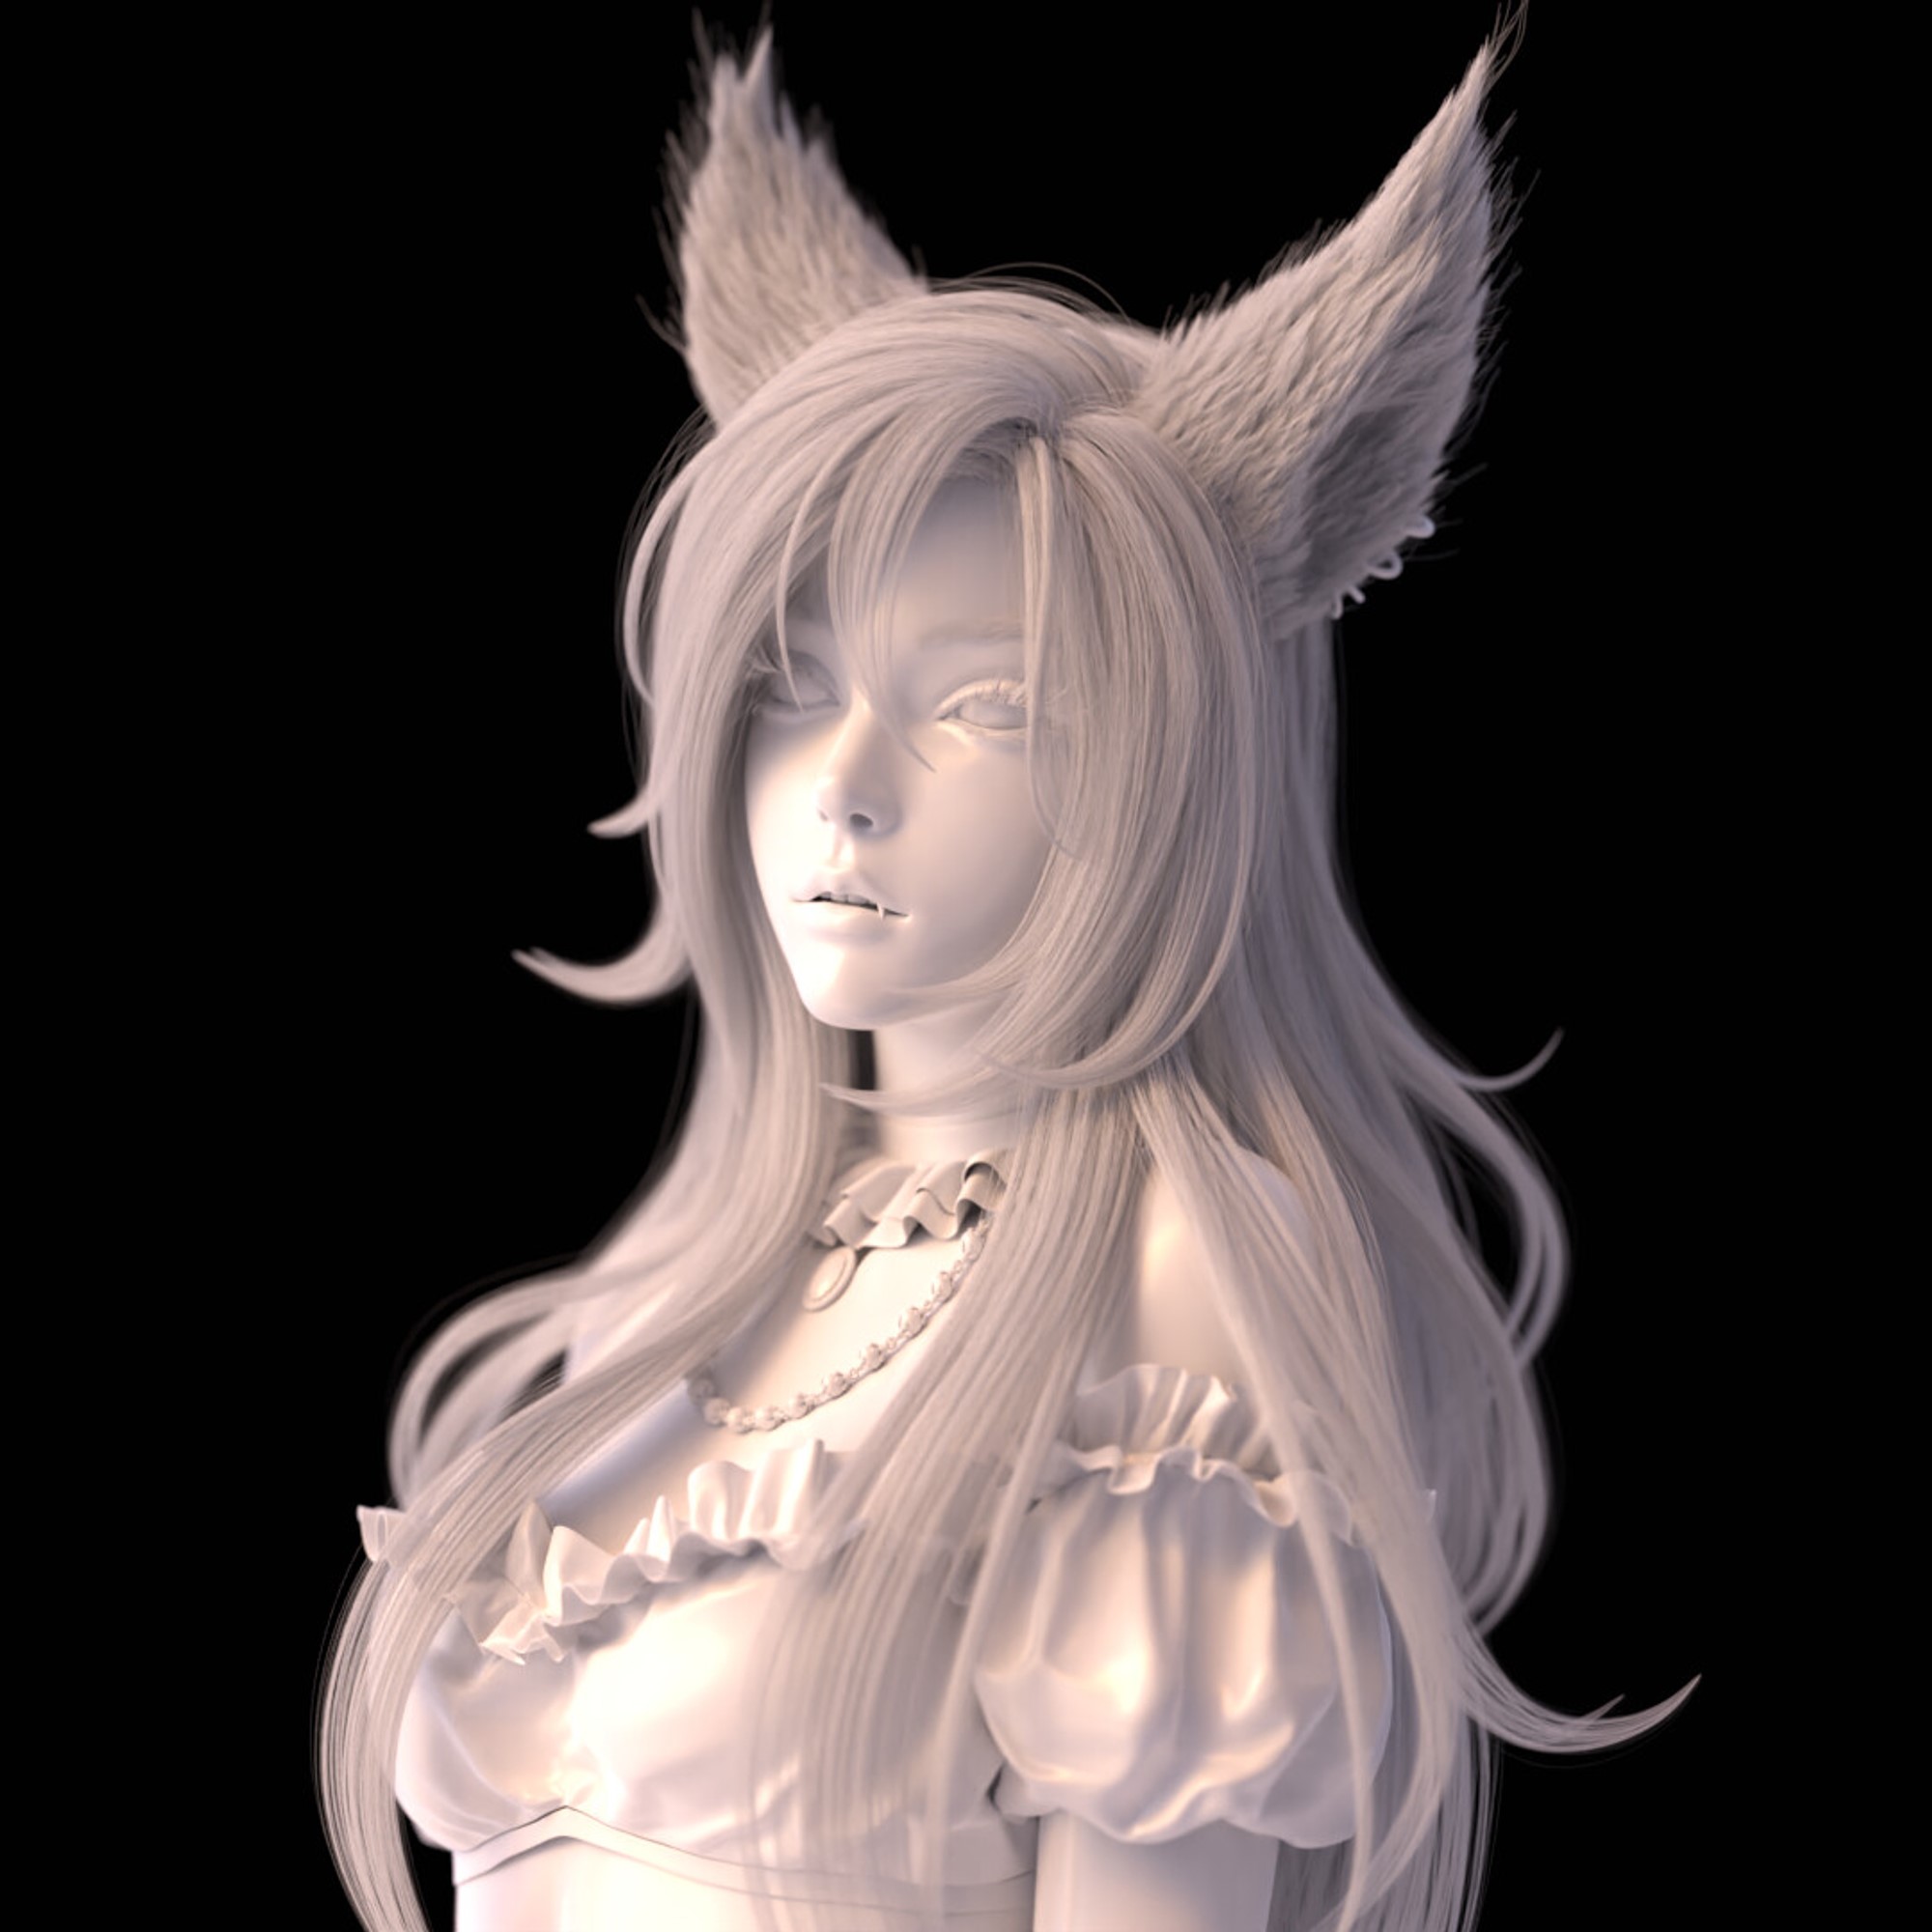
SKIN
Once the face and body shapes are finalized, the skin details are transferred from a scan model. To do this, import a scan model from the 3D Scan Store and use ZWrap to match the shape.

Increase the SubD level of the base model to 7, and then run Project All to transfer the skin details from the scan model.
Additionally, use ZWrap’s ZTexTransfer to transfer the color texture from the scan model.
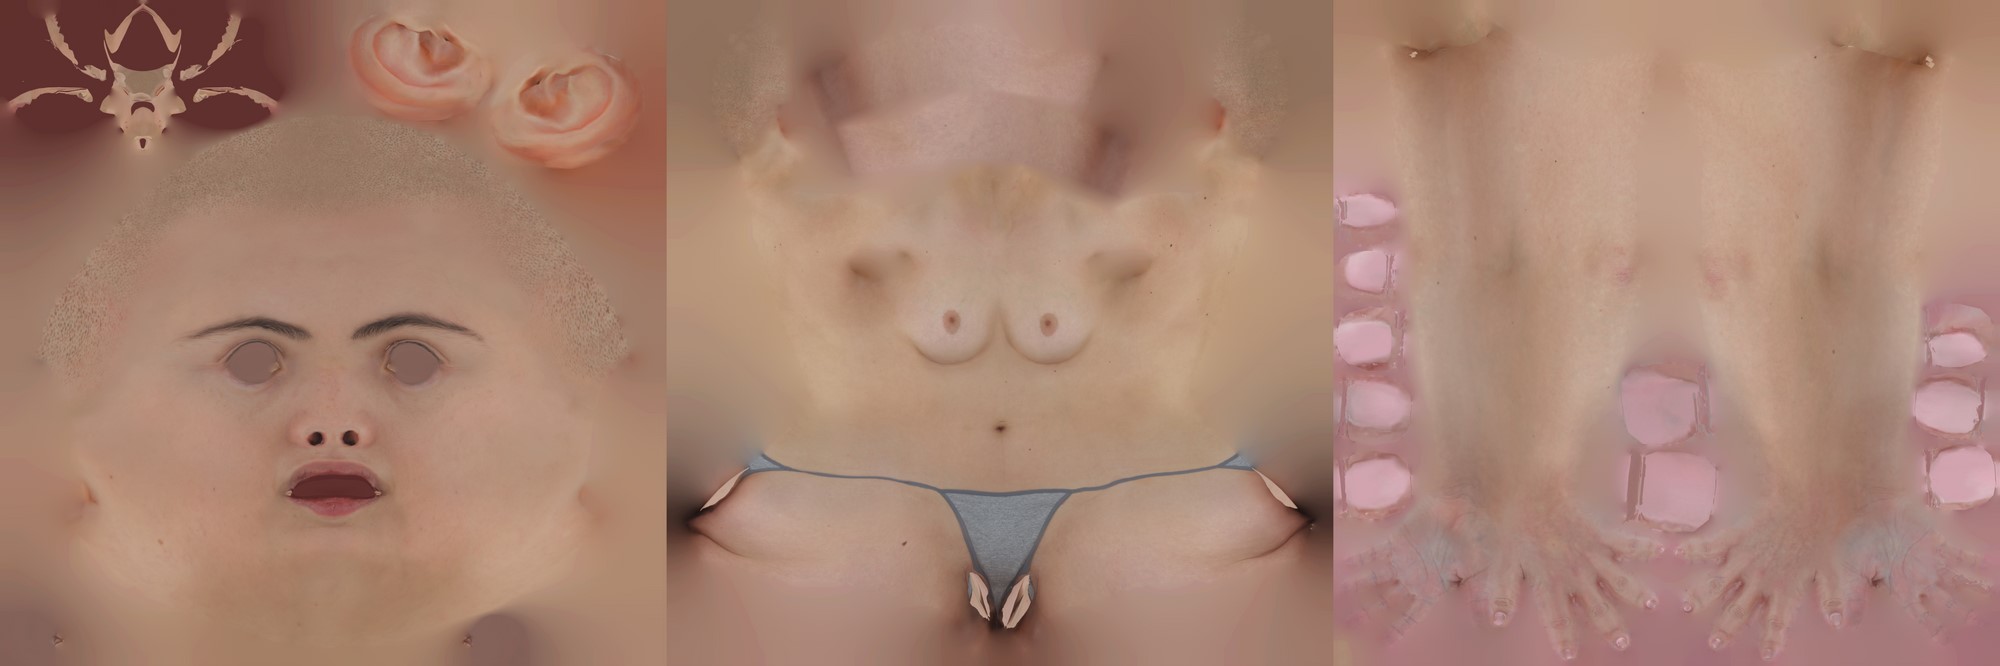
Finally, export the normal map and Polypaint using the Multimap Exporter.

Create a Substance Painter project and import the model, along with the color and normal textures that were exported from ZBrush, into the project. Insert the normal map into the Normal slot of the Texture Set to apply it. The color textures are then applied to the Fill layers.
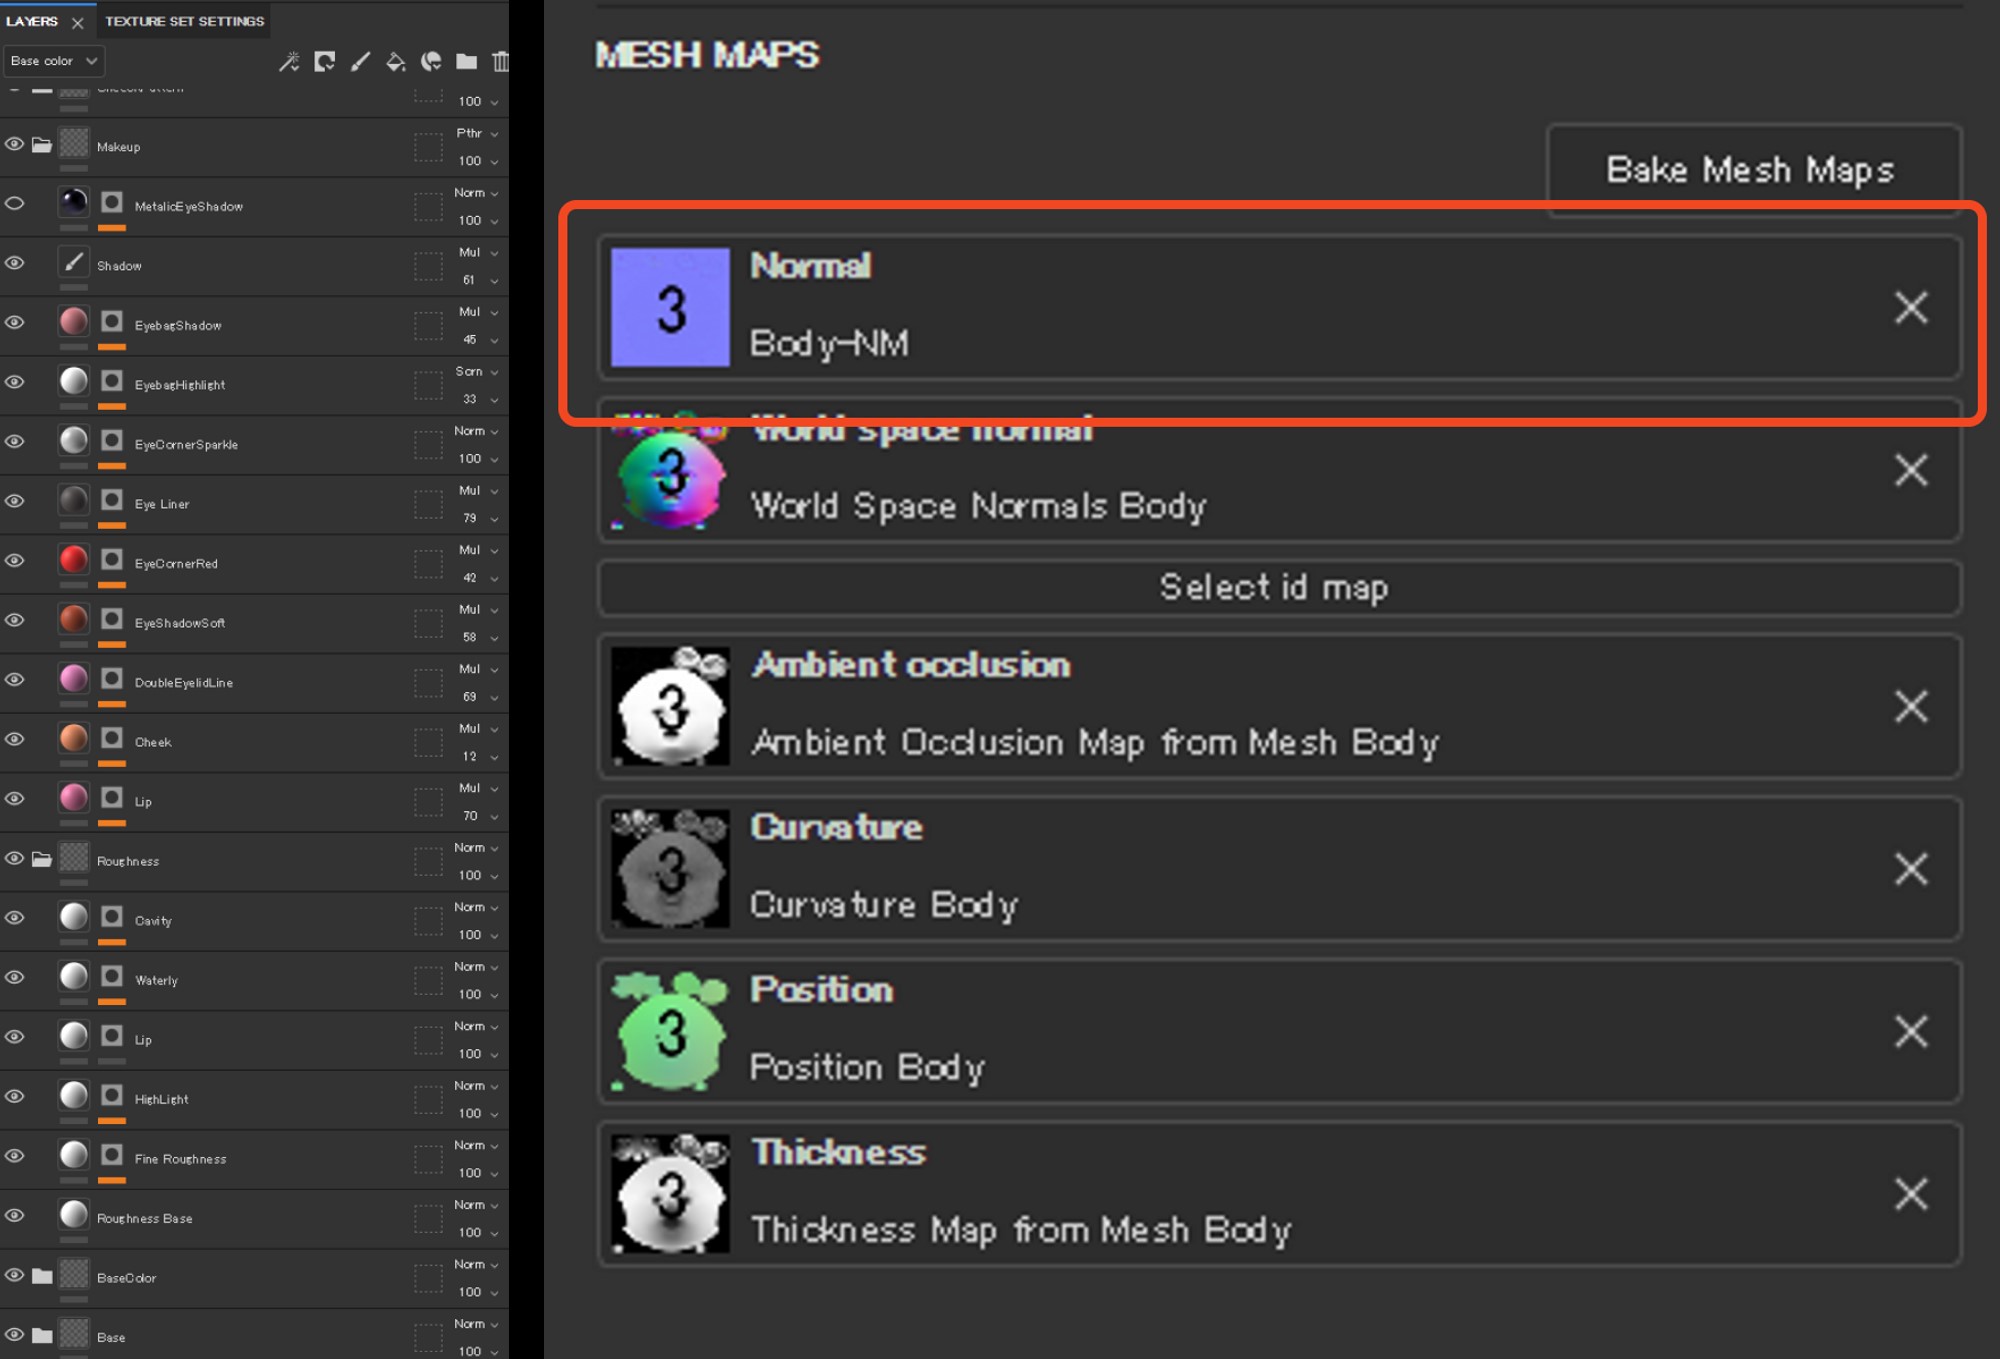
A mask is created to differentiate the color map on the lower portion under the neck, which is sourced from the scan model, from the upper portion, which is created using Polypaint from the reference image. Lastly, makeup is applied to the face.
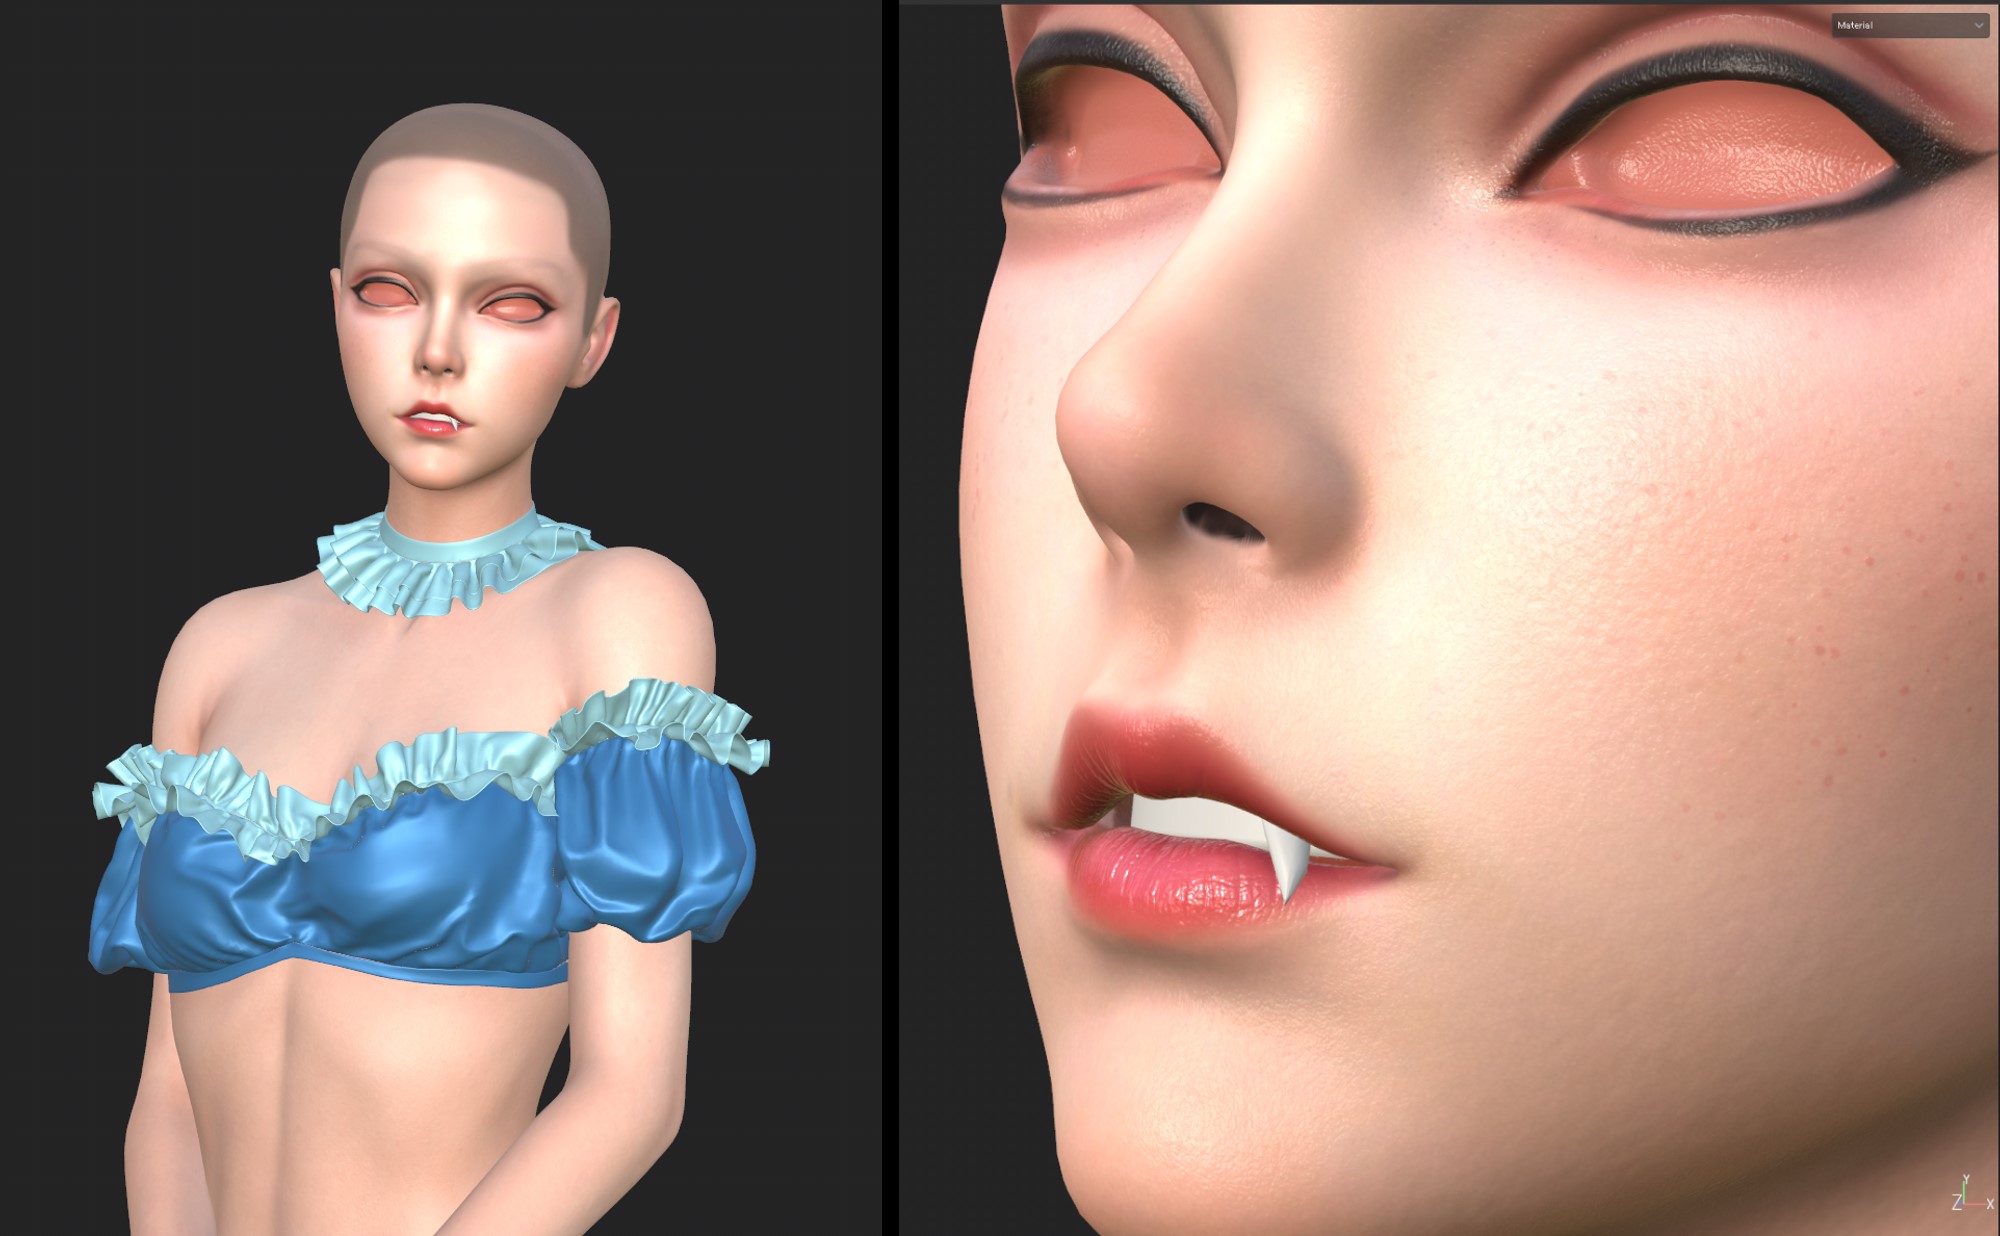
The Blender skin material is as follows.

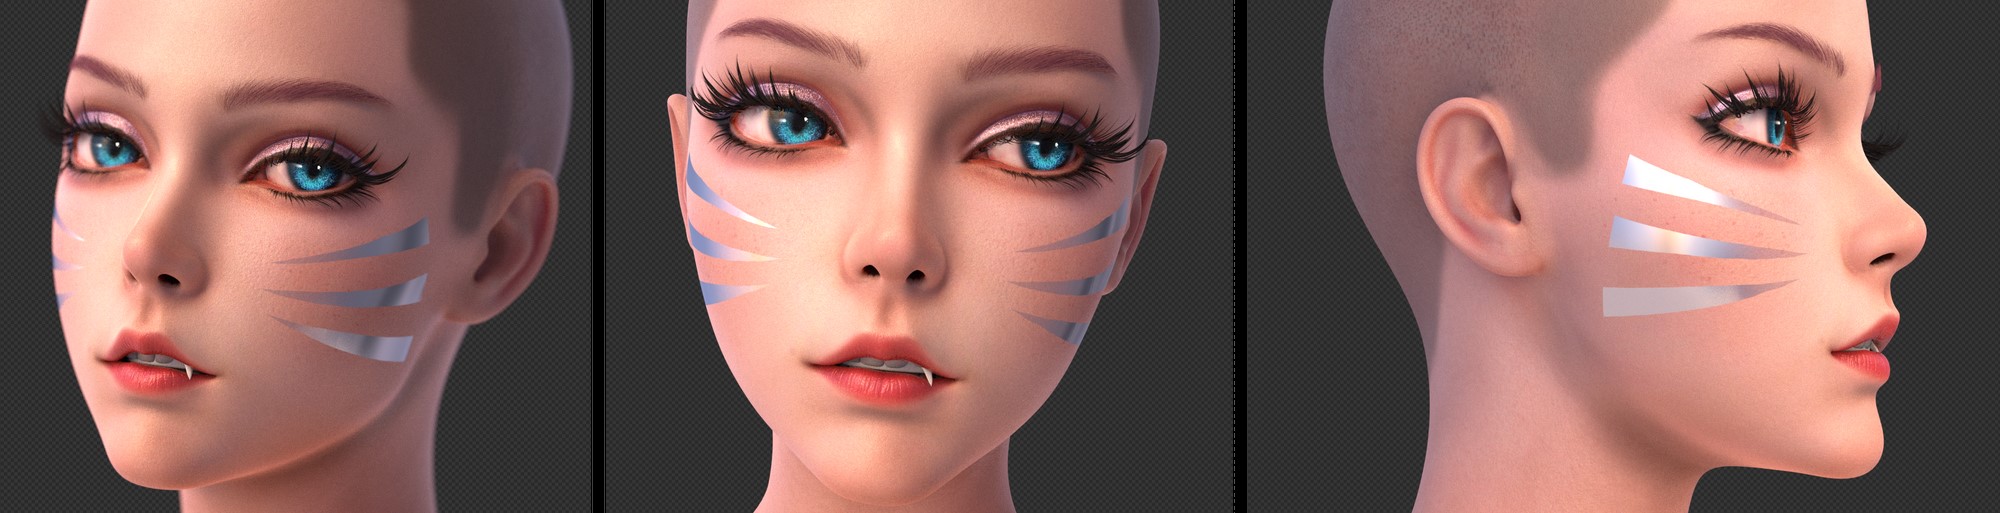
Here is the make-up of the characters.
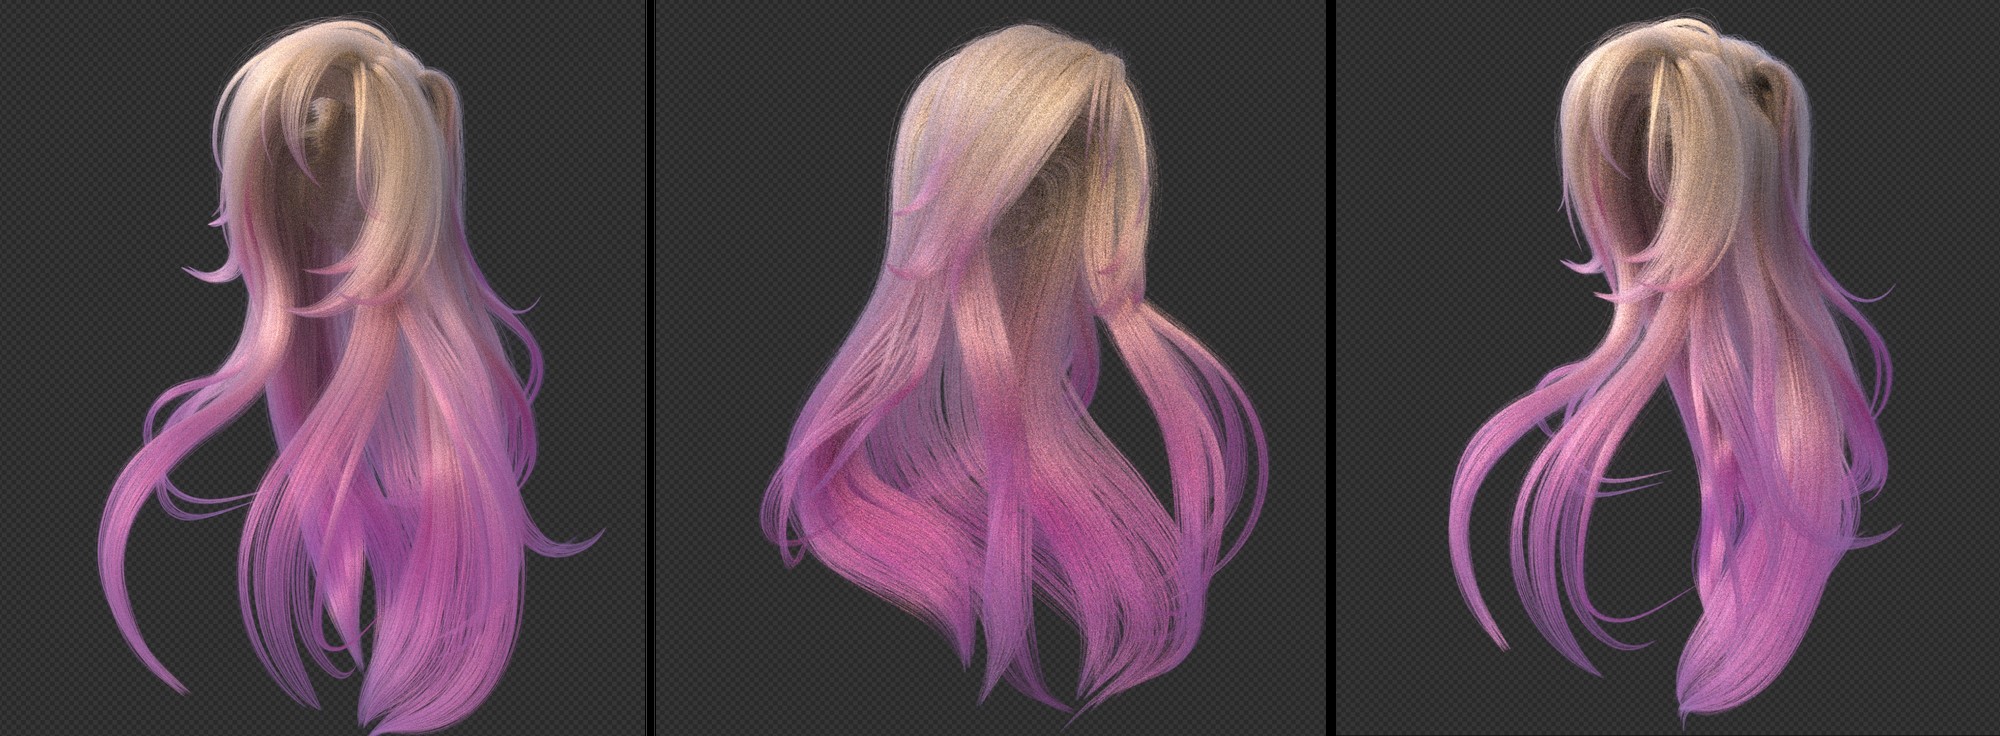
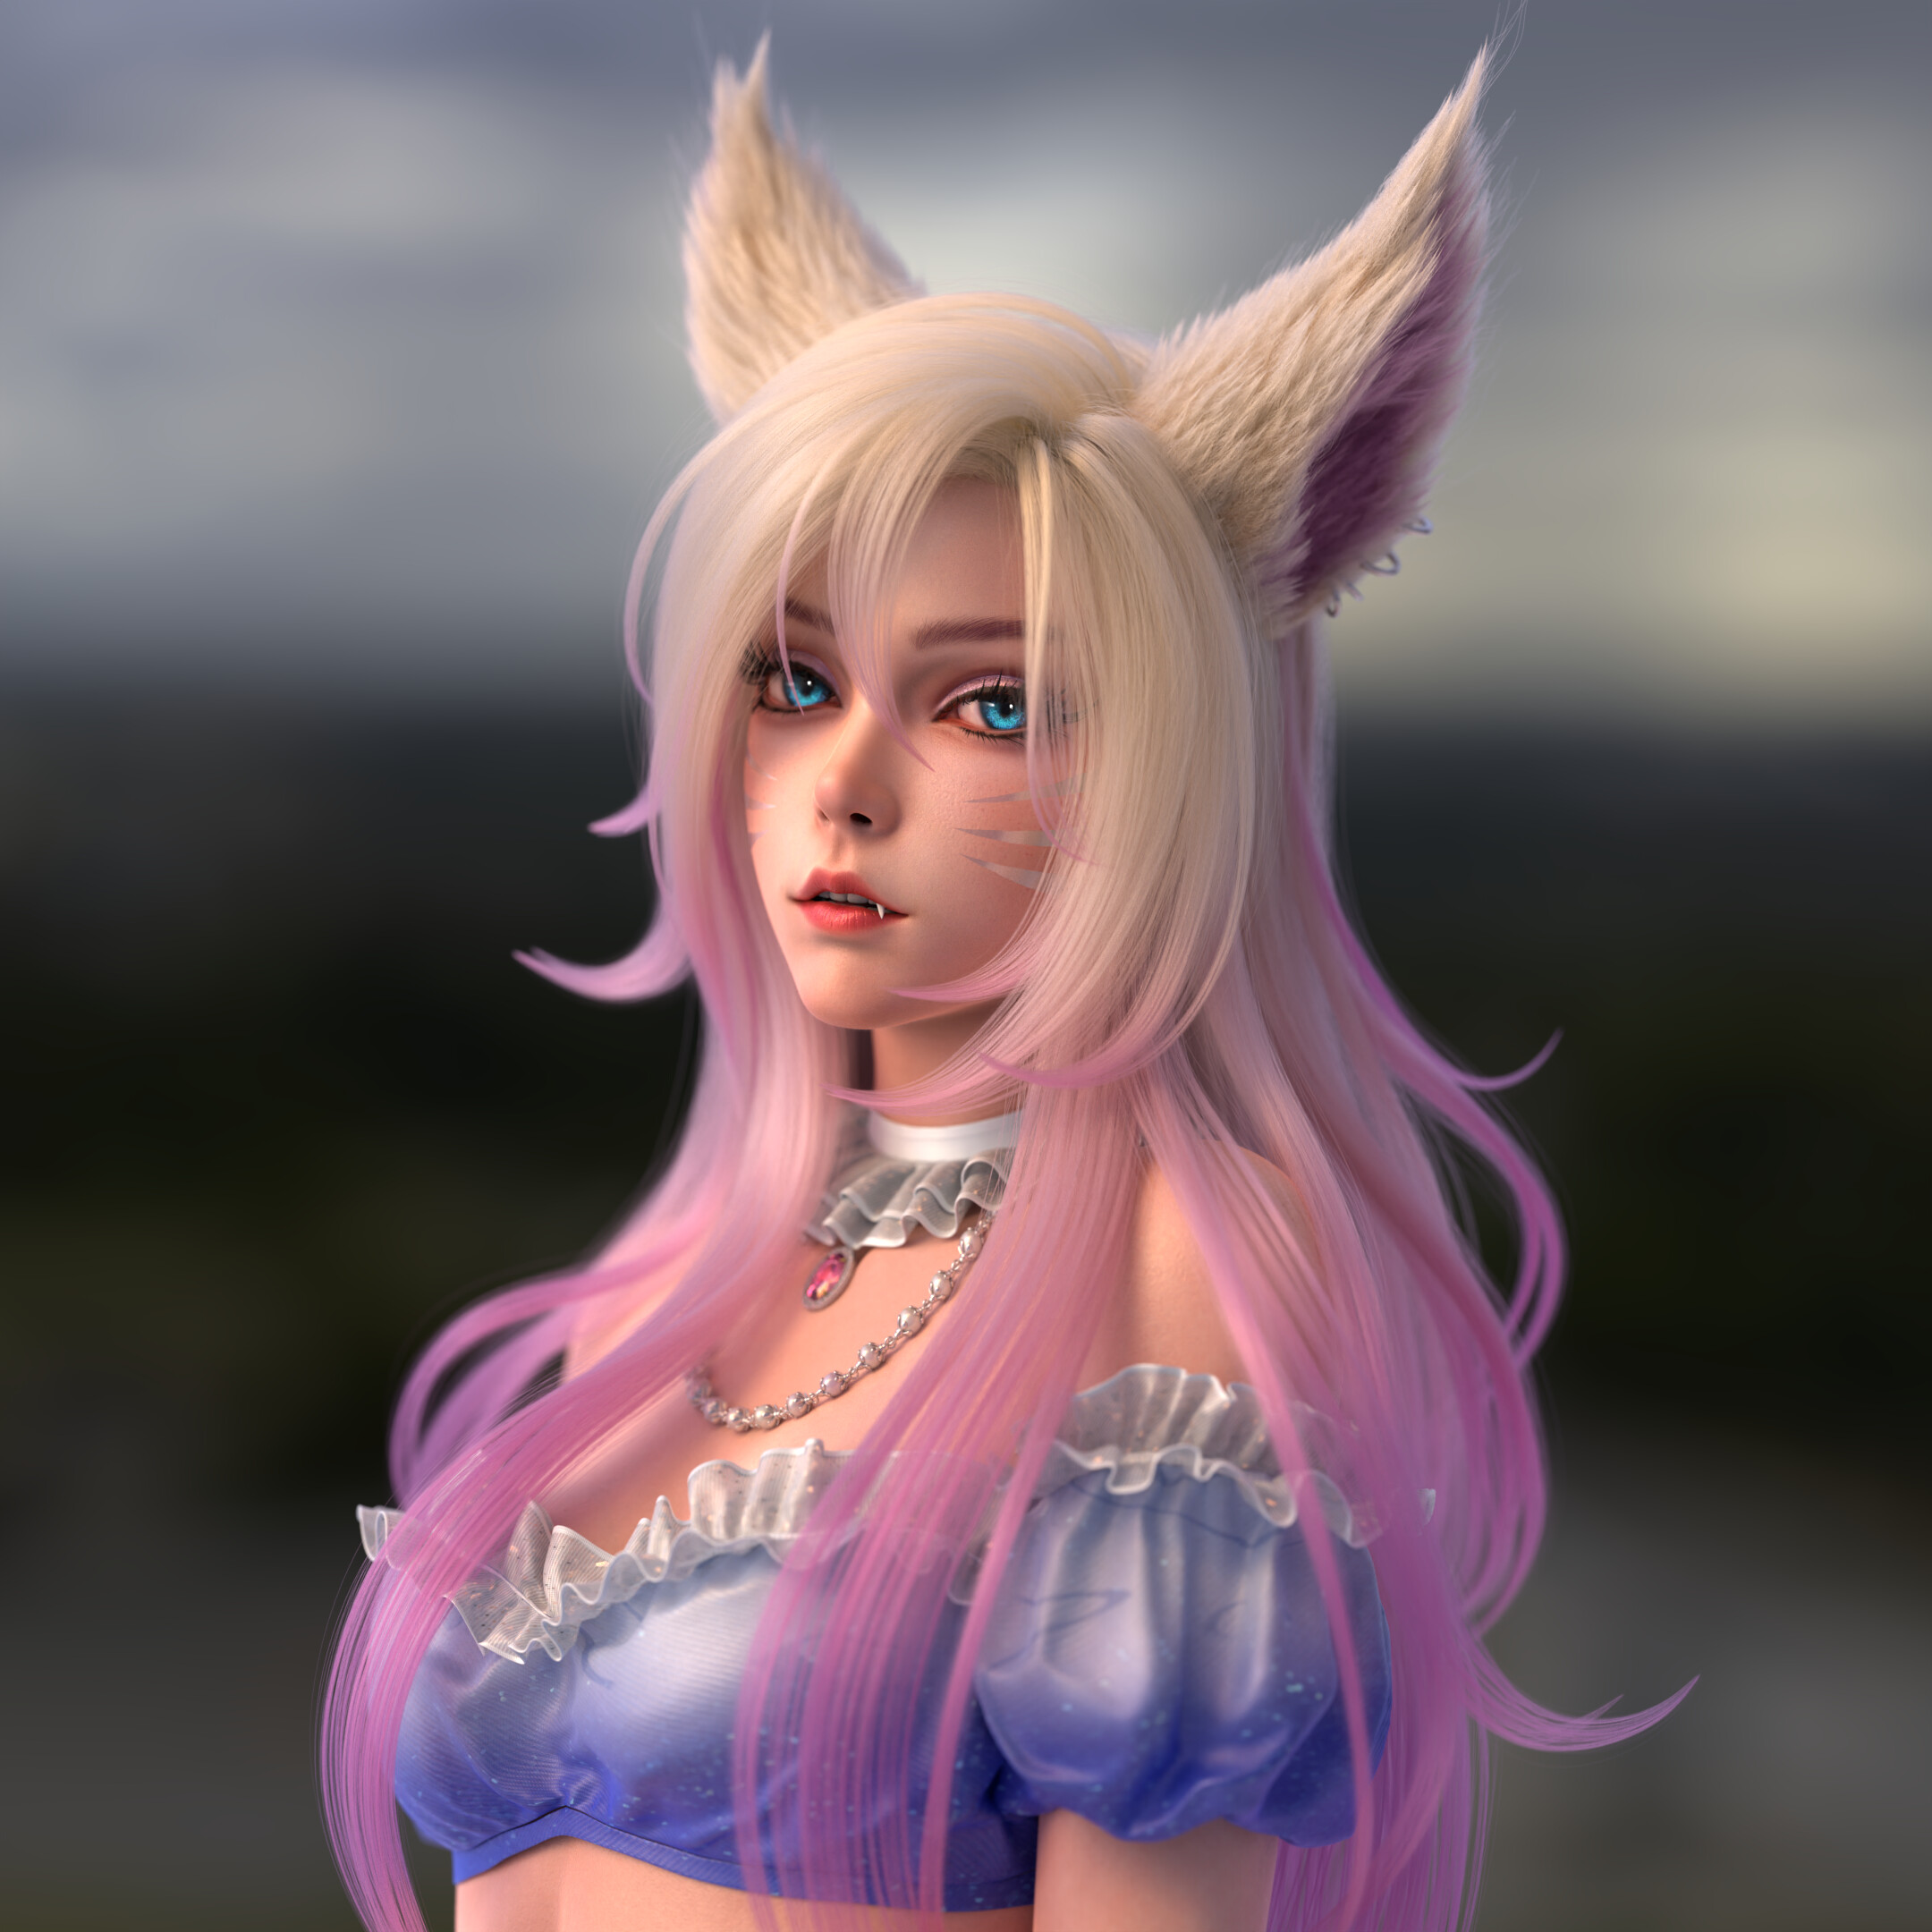
HAIR
The hair was created using Blender Curve as the base model.
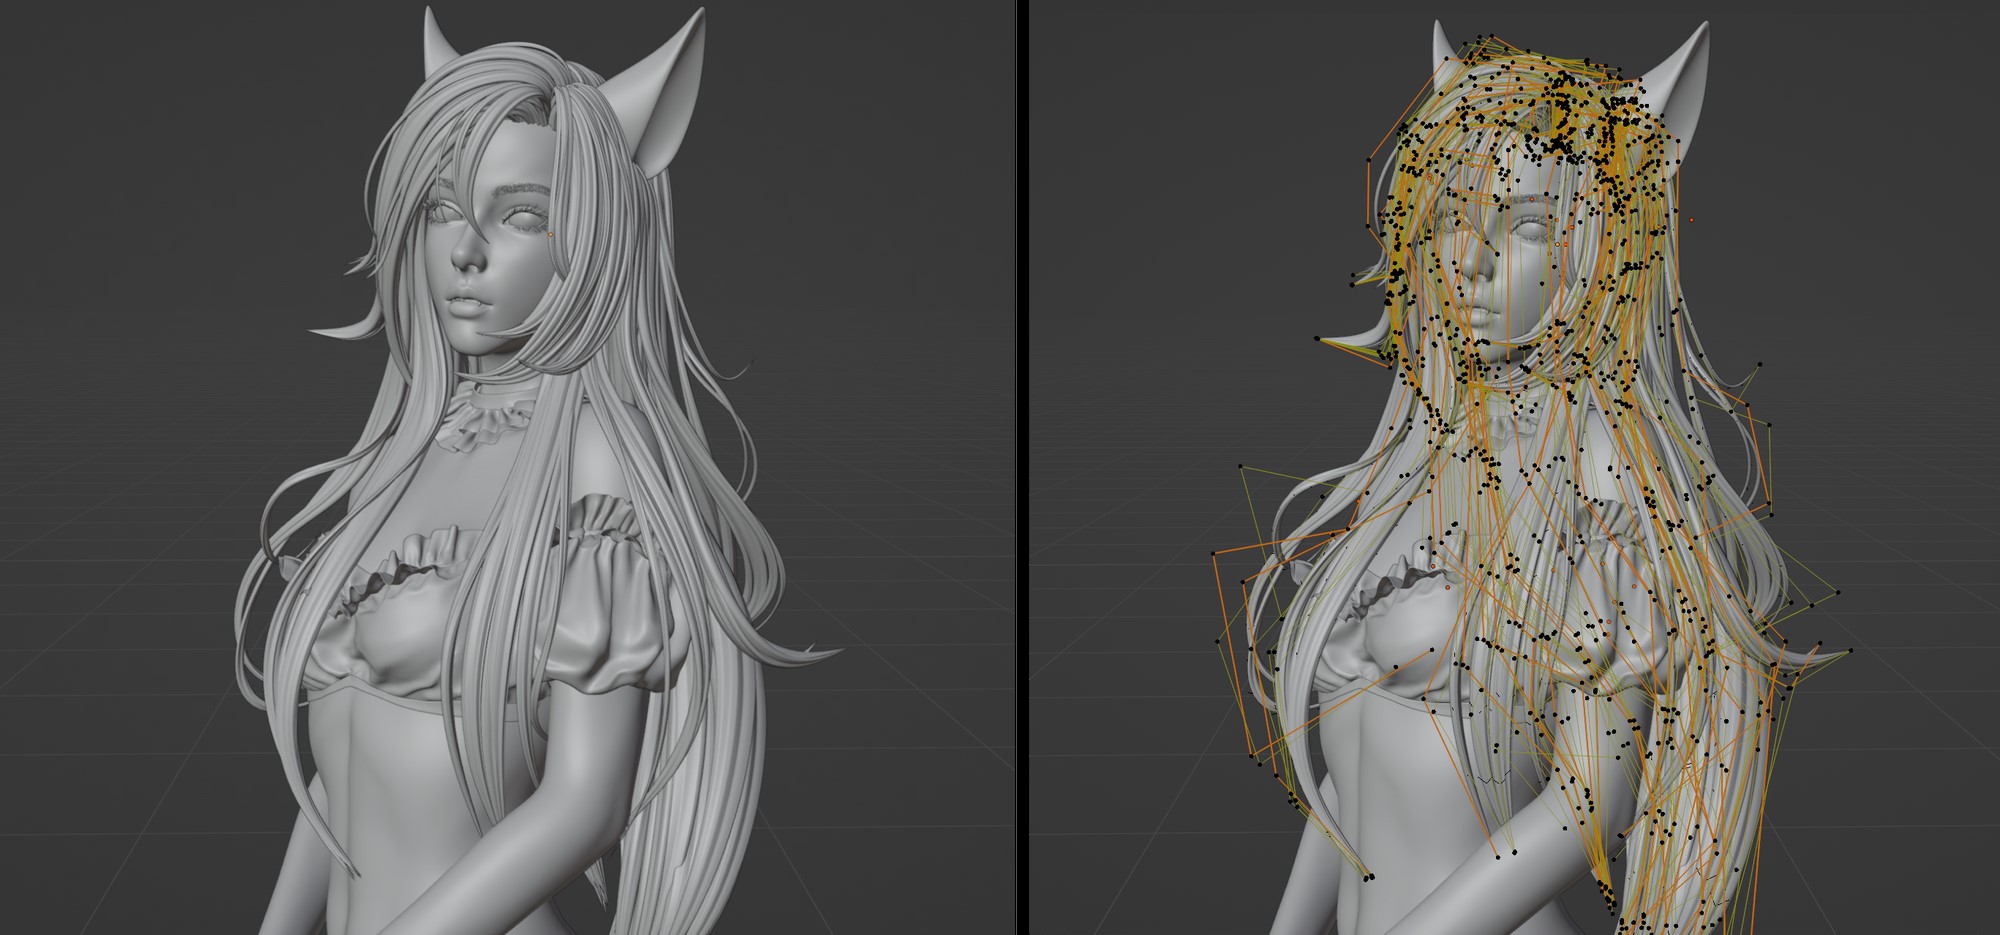
The bevel of the curve was given this shape.

When creating the hair, I make sure to check its flow and placement by painting over it. I also ensure that there is a clear contrast between the large and small scales of each strand of hair.
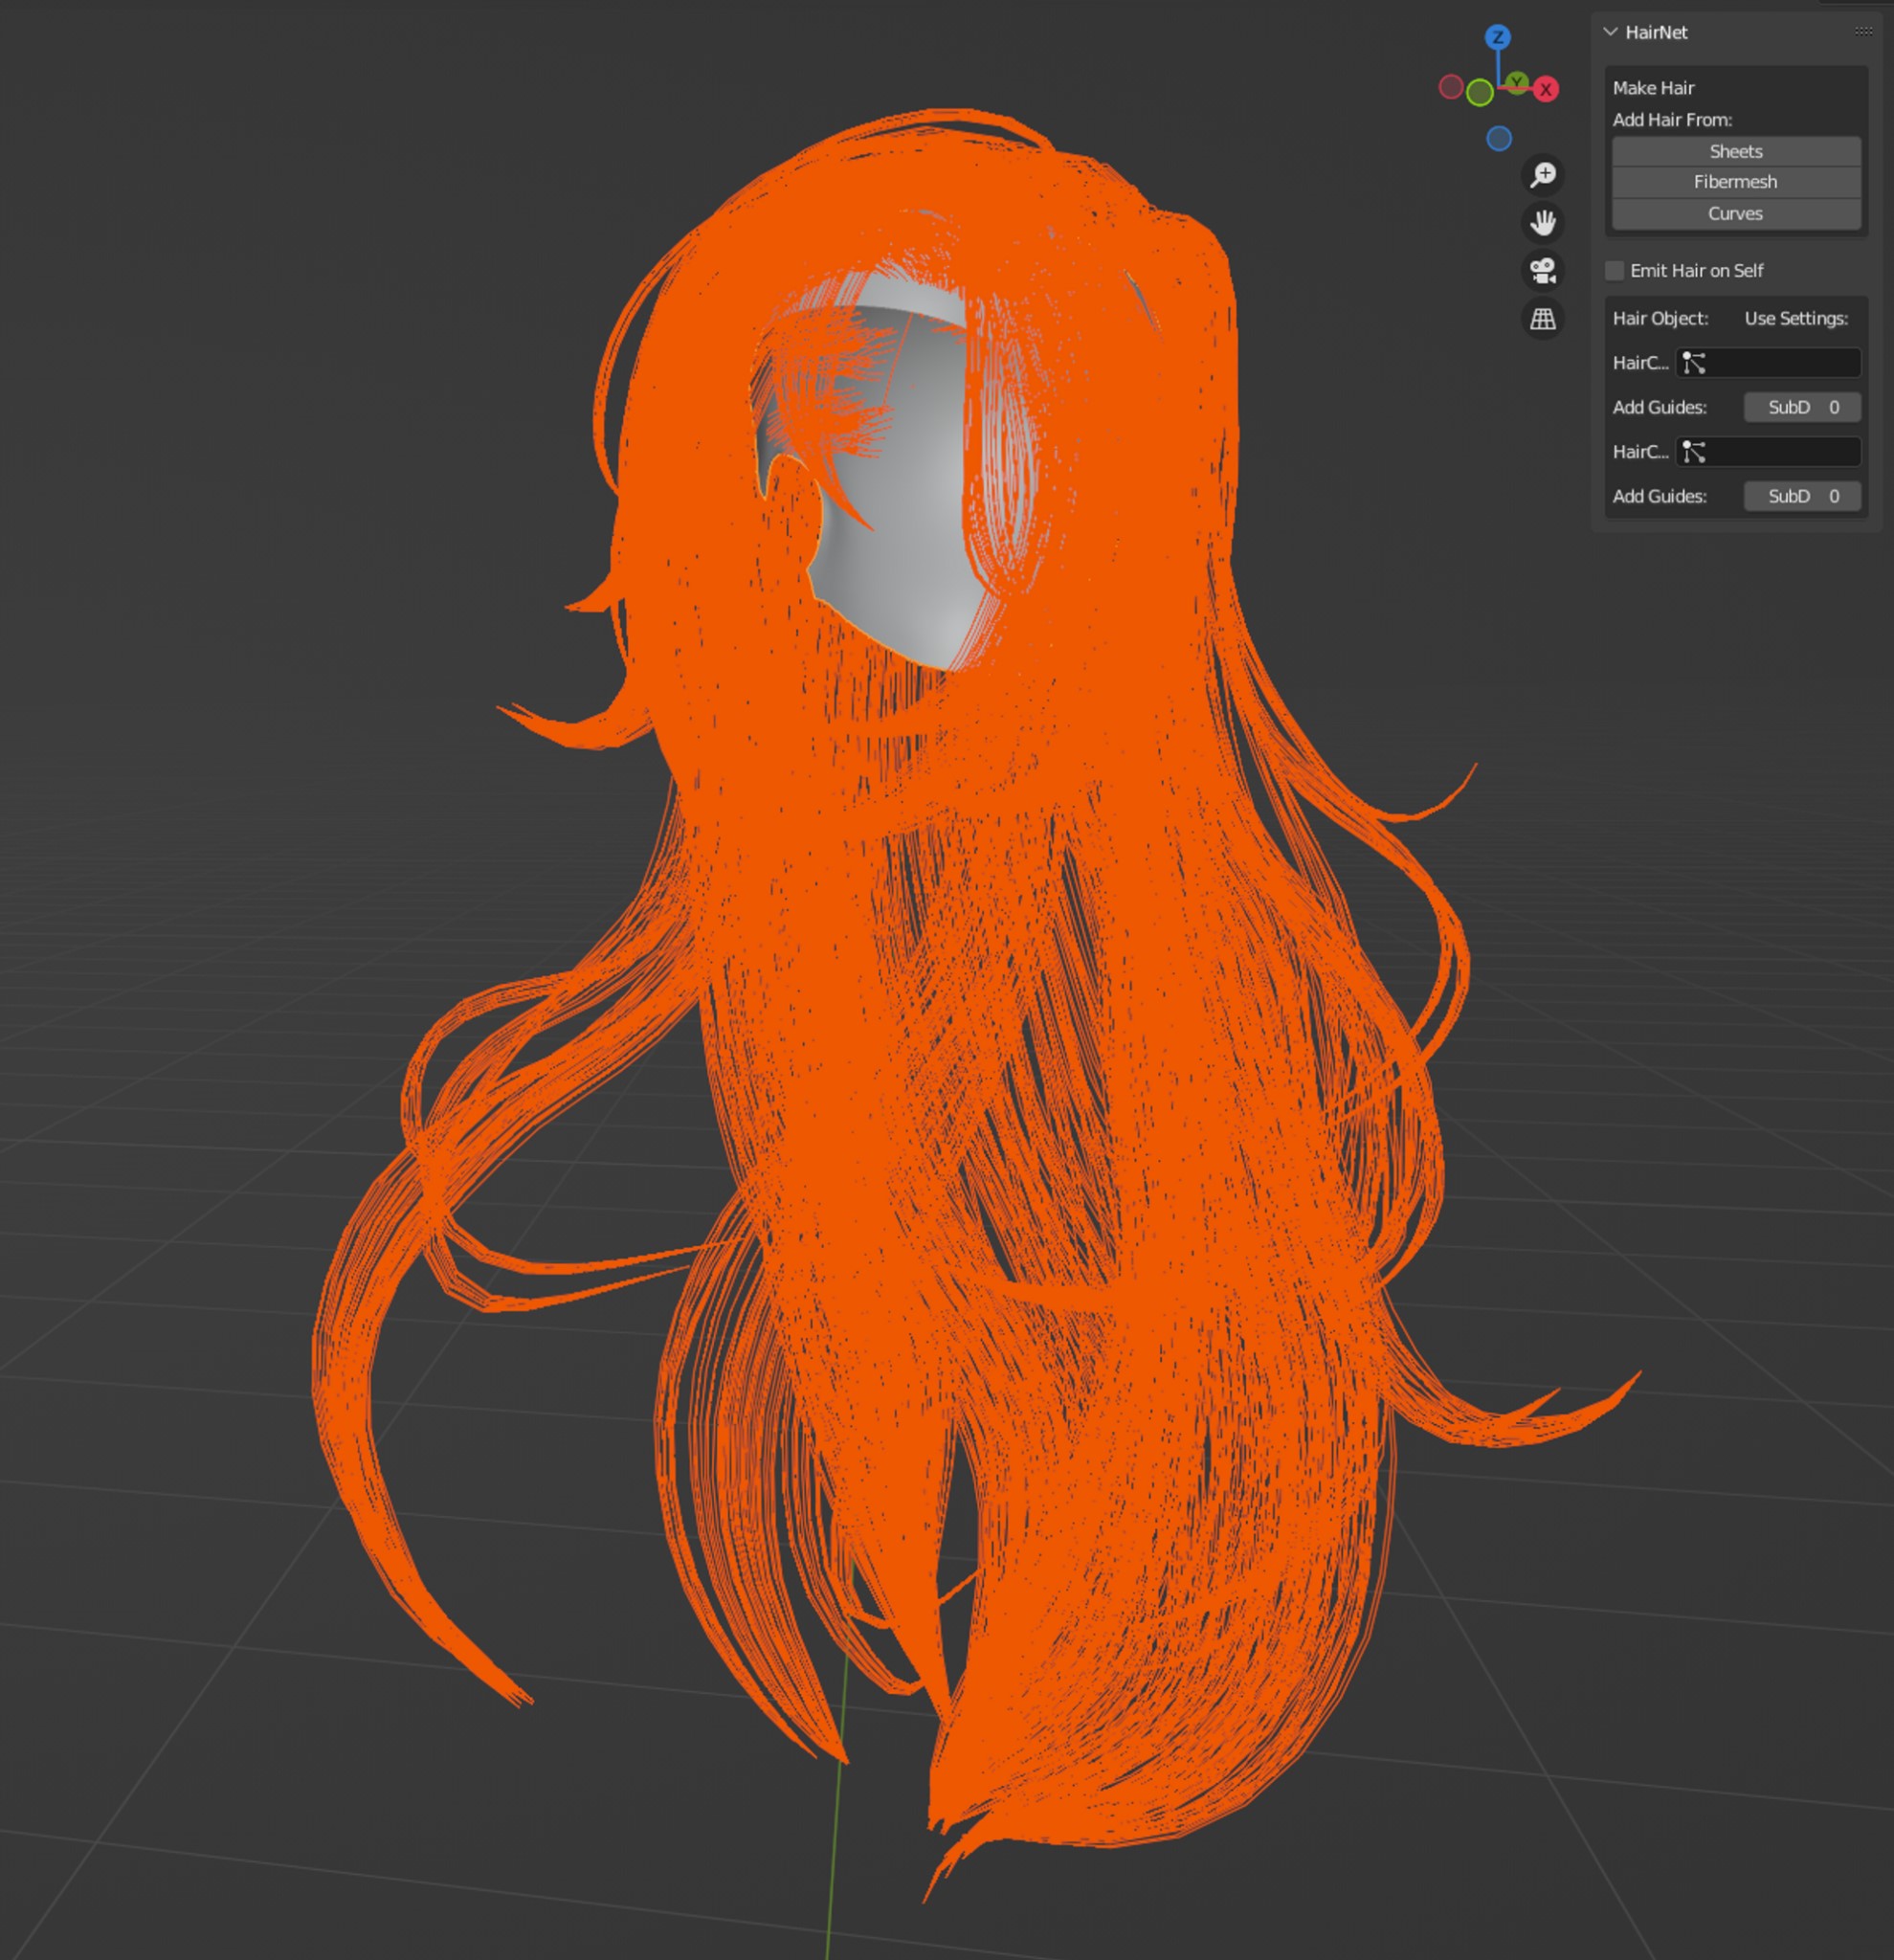
Once the curves were in place, I imported the adjusted hair model from ZBrush into Blender and converted it to Particle Hair.
I selected edge loops from the hair strands to separate the object, and it was convenient to do so in the UV editor as I could select edge loops for multiple hair strand meshes.

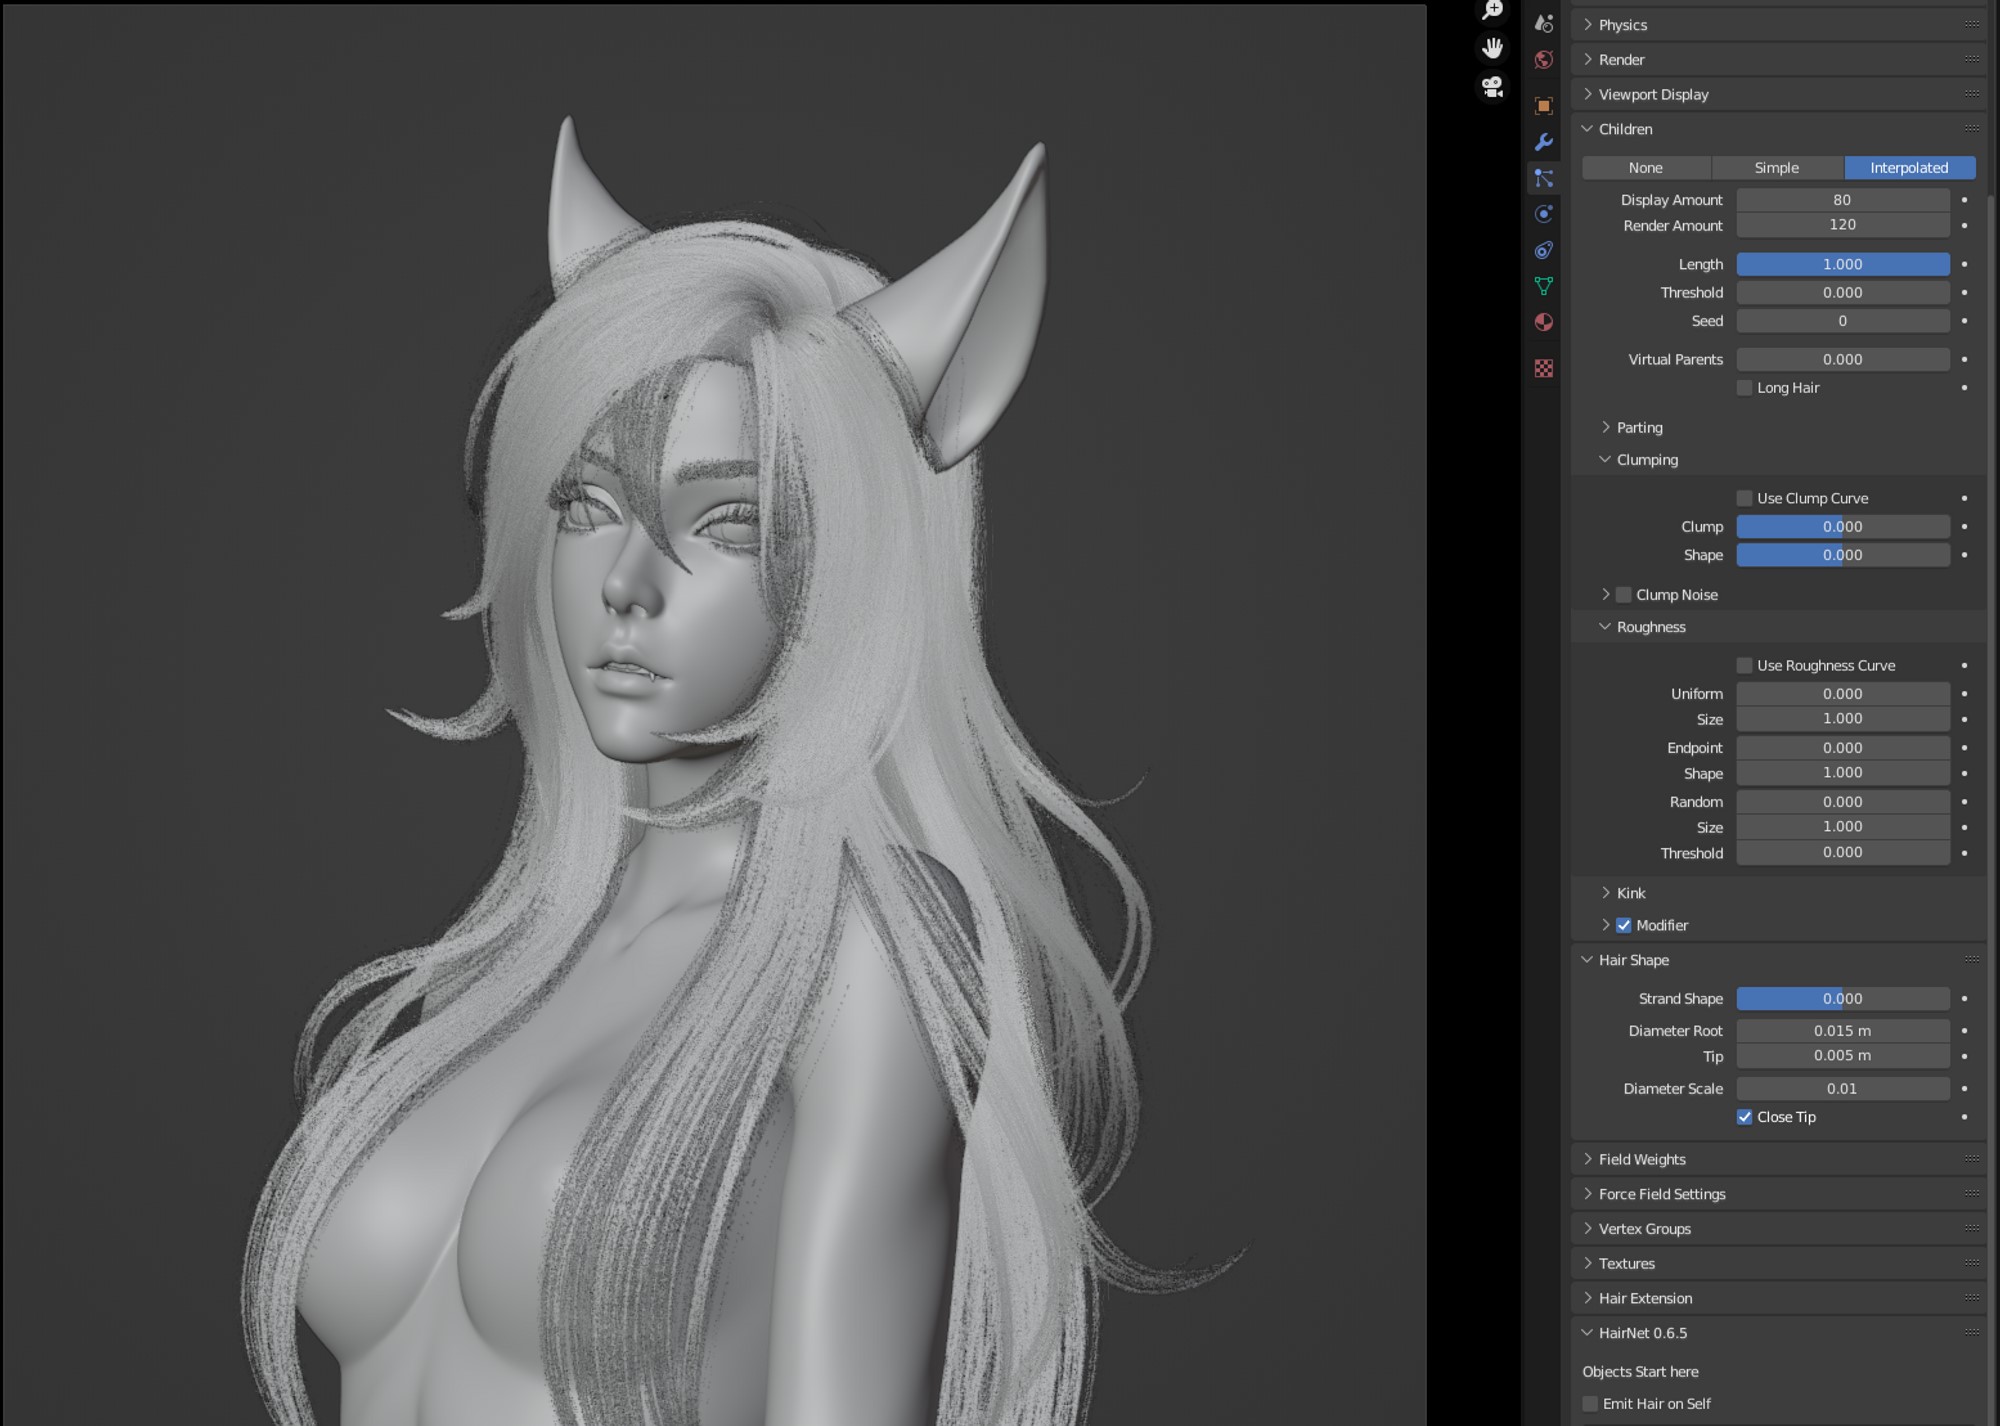
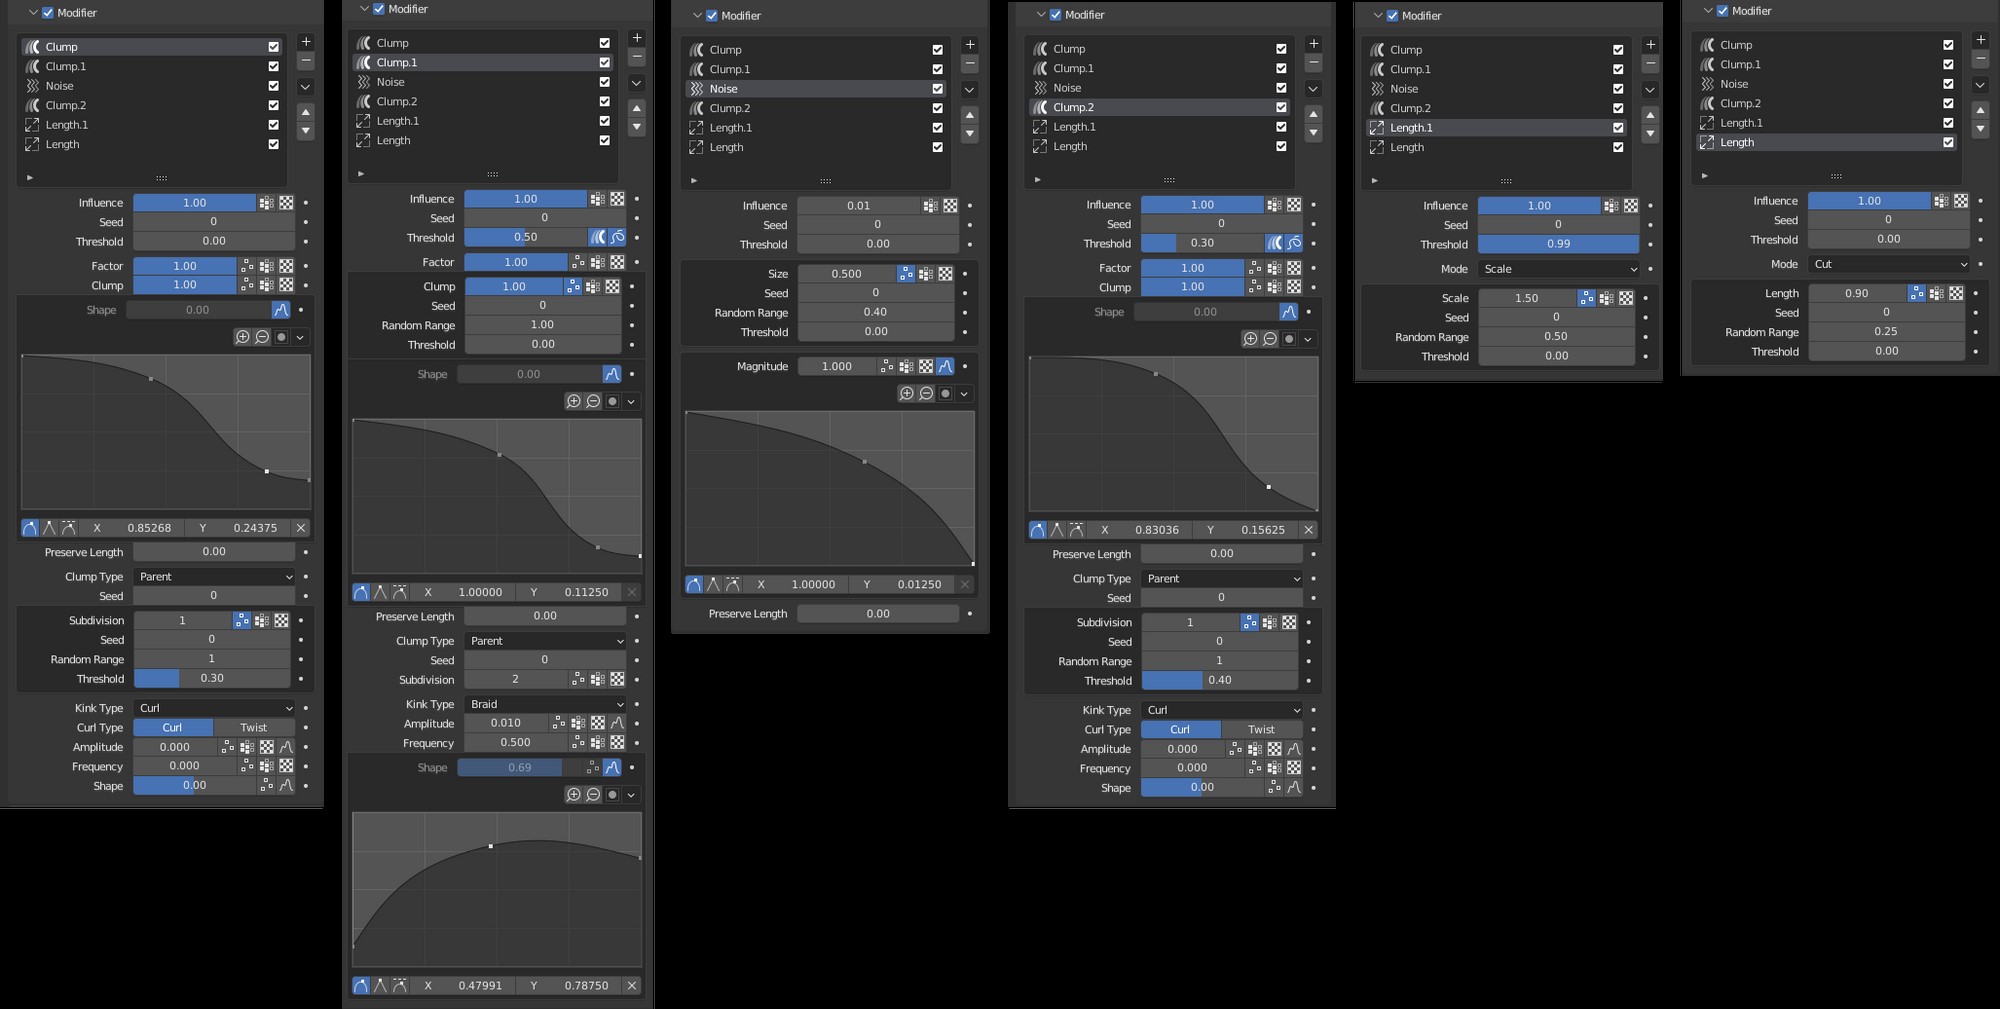
Then, I converted the extracted edge loops into a Hair Particle Guide using the HairNet addon.
I adjusted the Clump and Roughness values of the Hair Particles as desired.
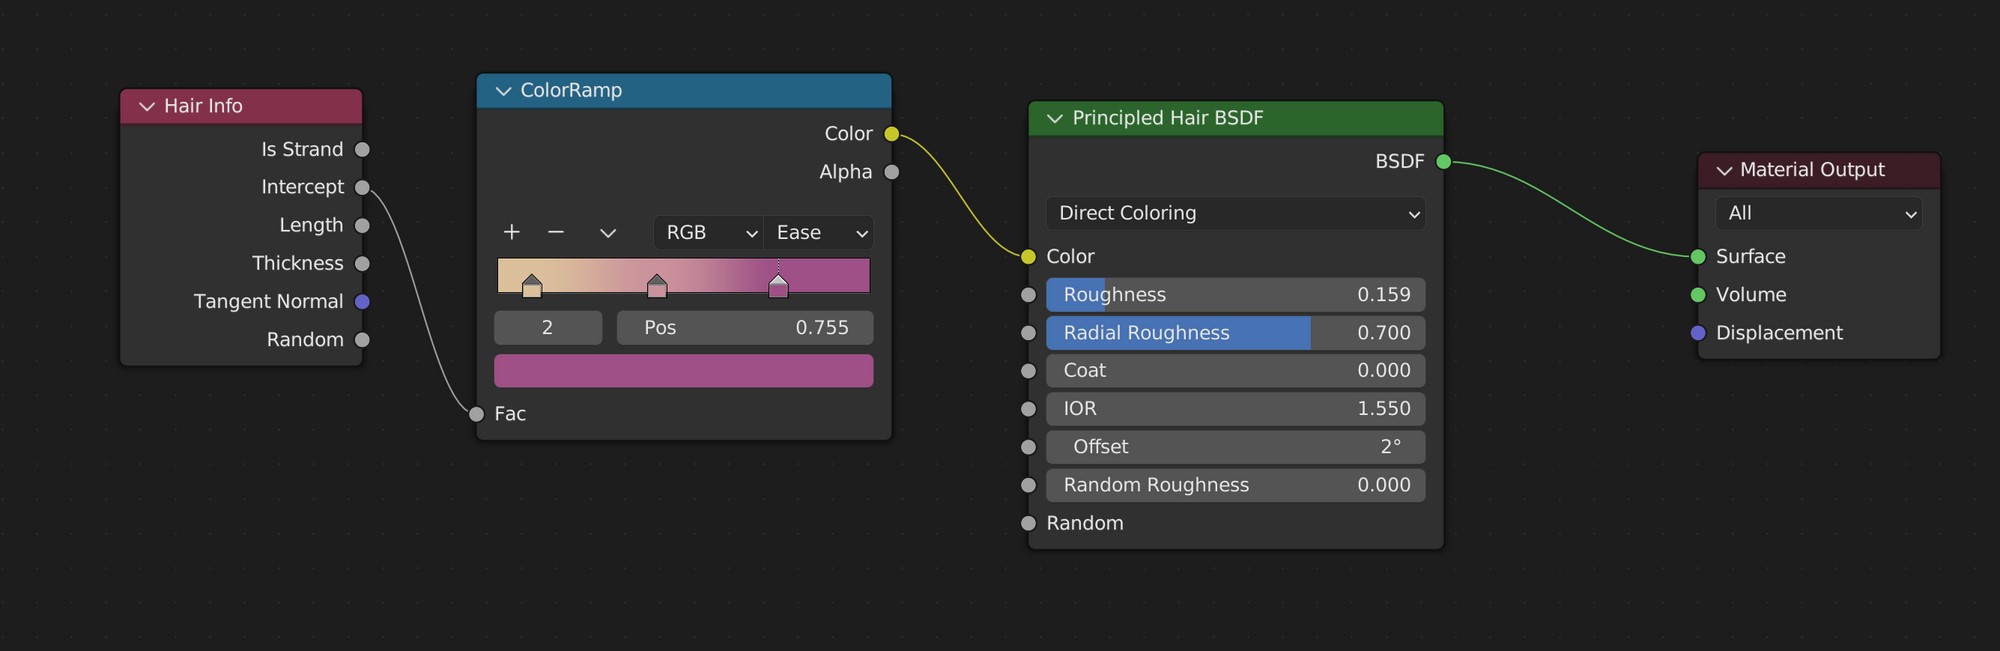
The Hair material applied a gradient effect to the tips of the hair using the Hair Info node. 5.
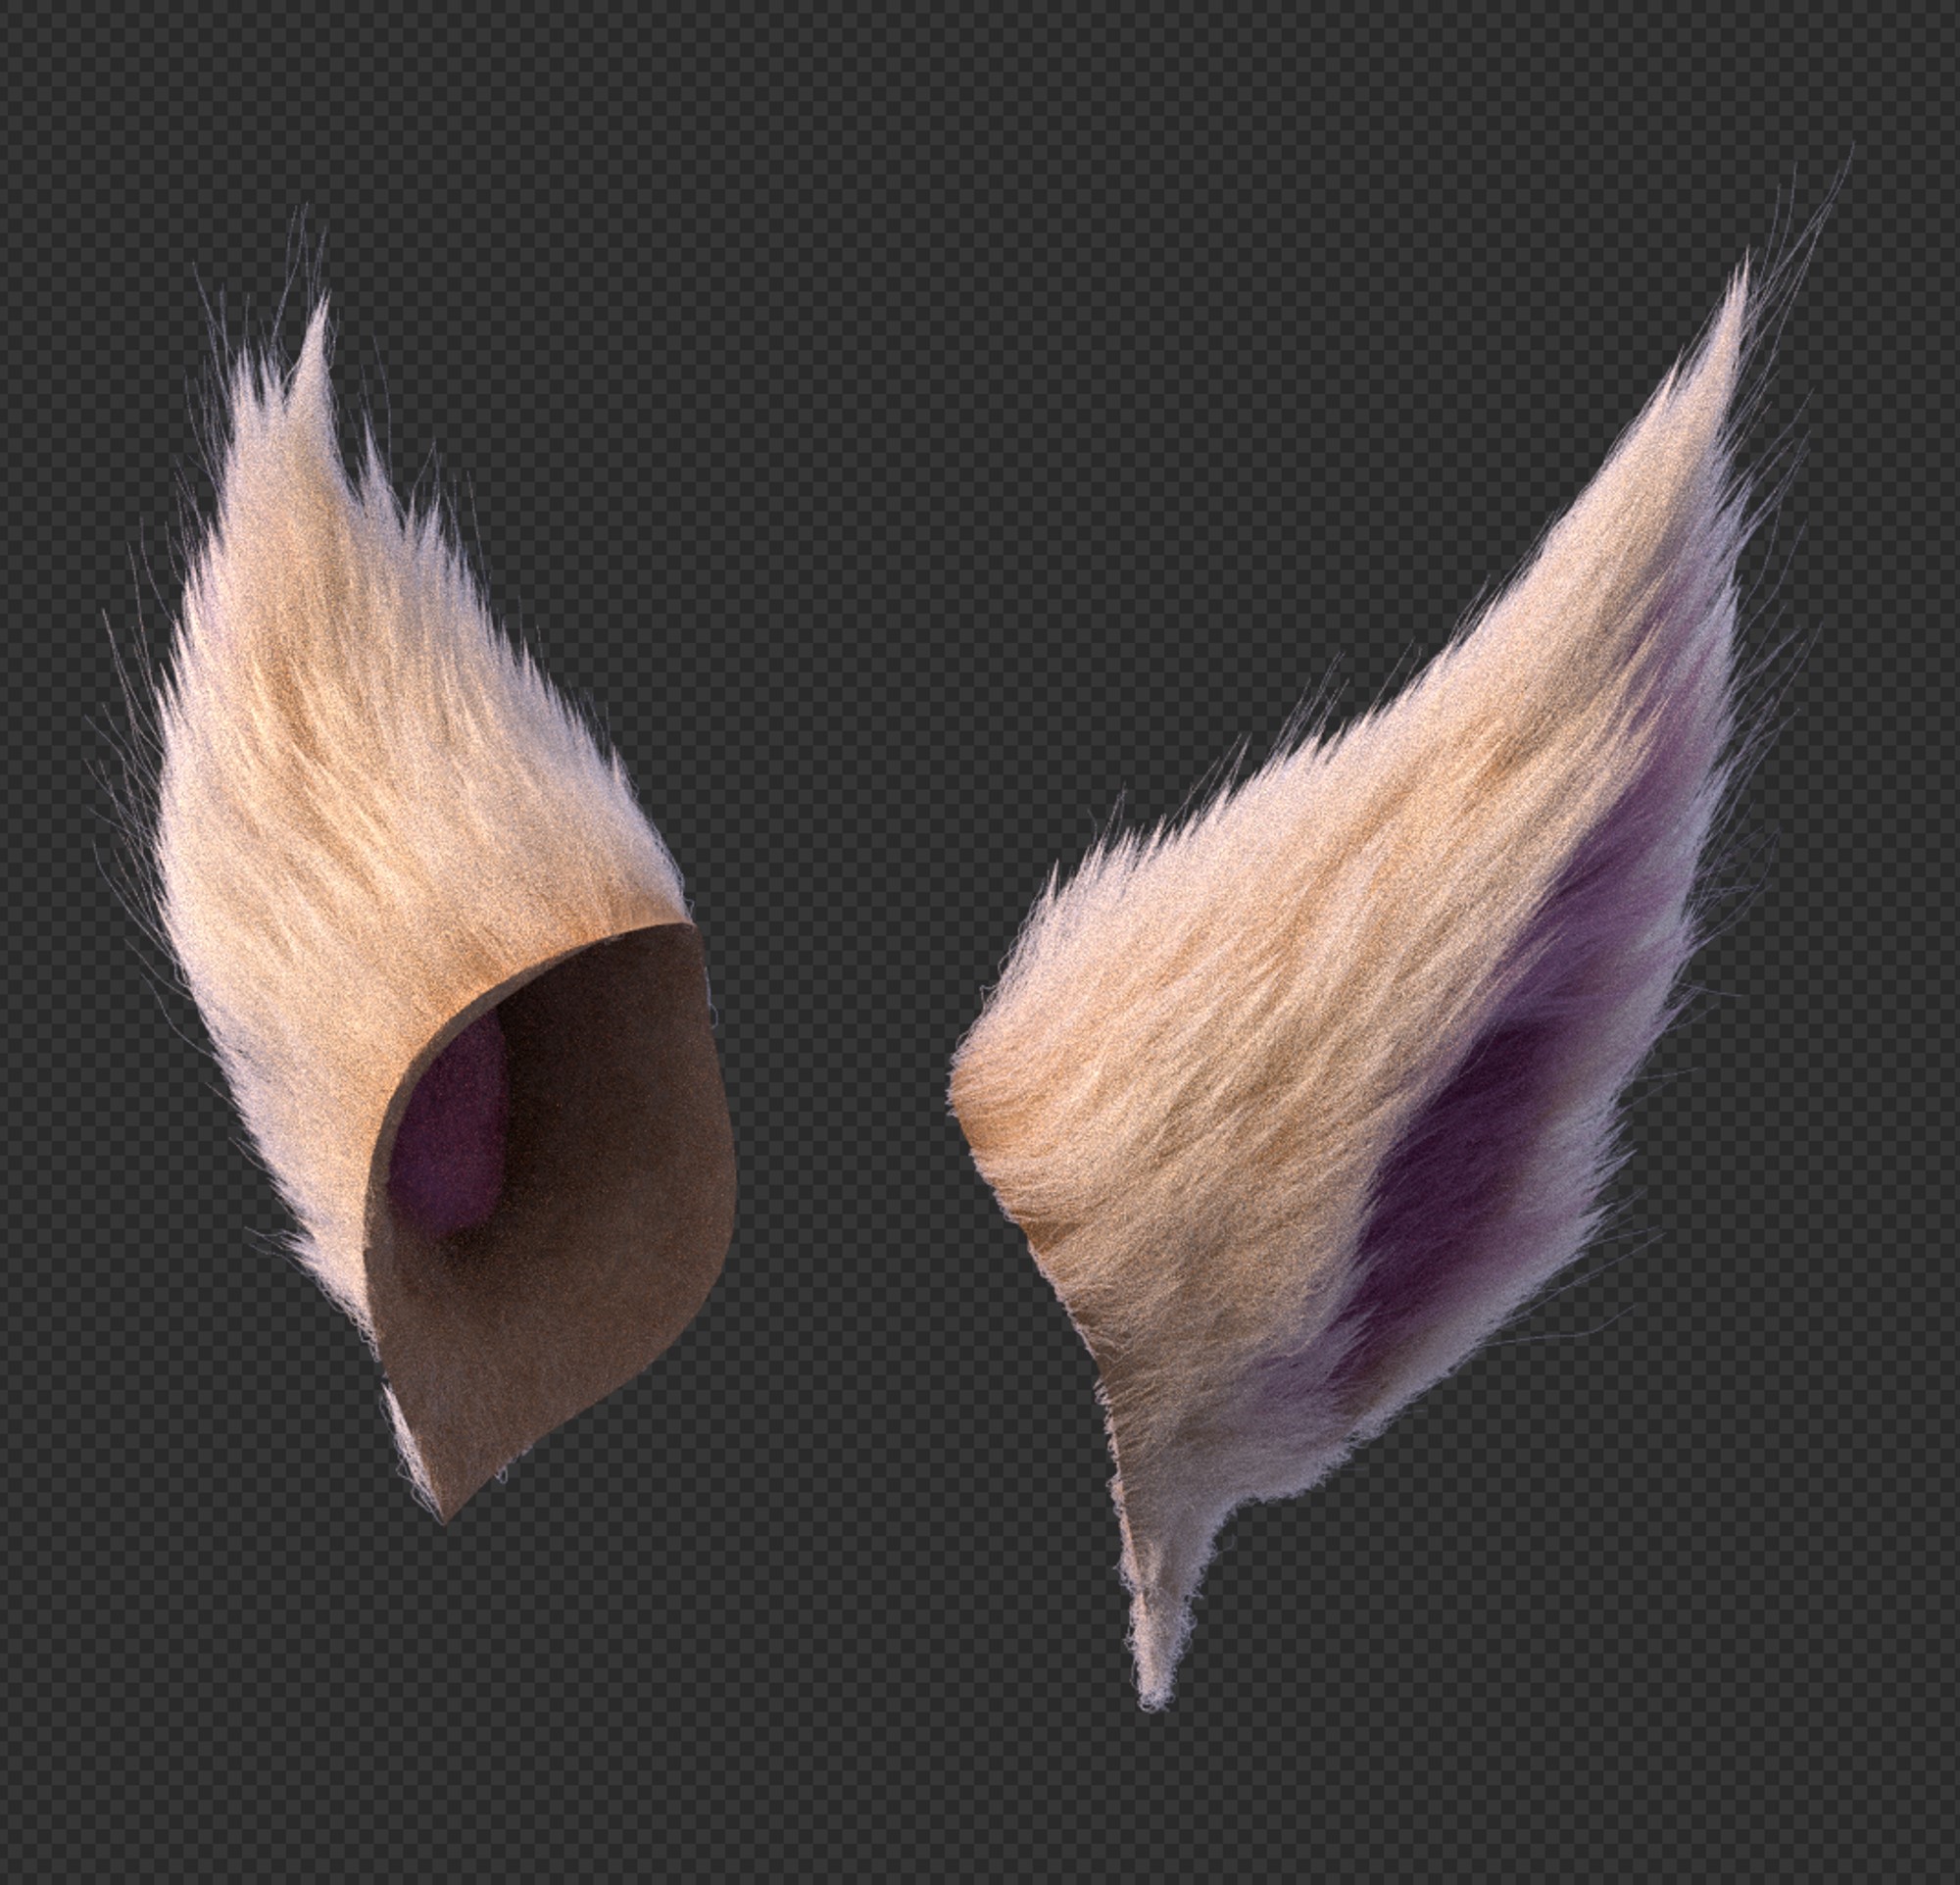
FUR
For the fur on the fox’s ears, I used the Hair Brush addon. First, place Hair Guides on the ear model and use the Comb Brush to create the flow.

From the Hair particle settings, apply the modifiers of the Hair Brush addon.
In particular, I used the Length modifier to make some of the hair longer to give the hair a fluffy appearance.
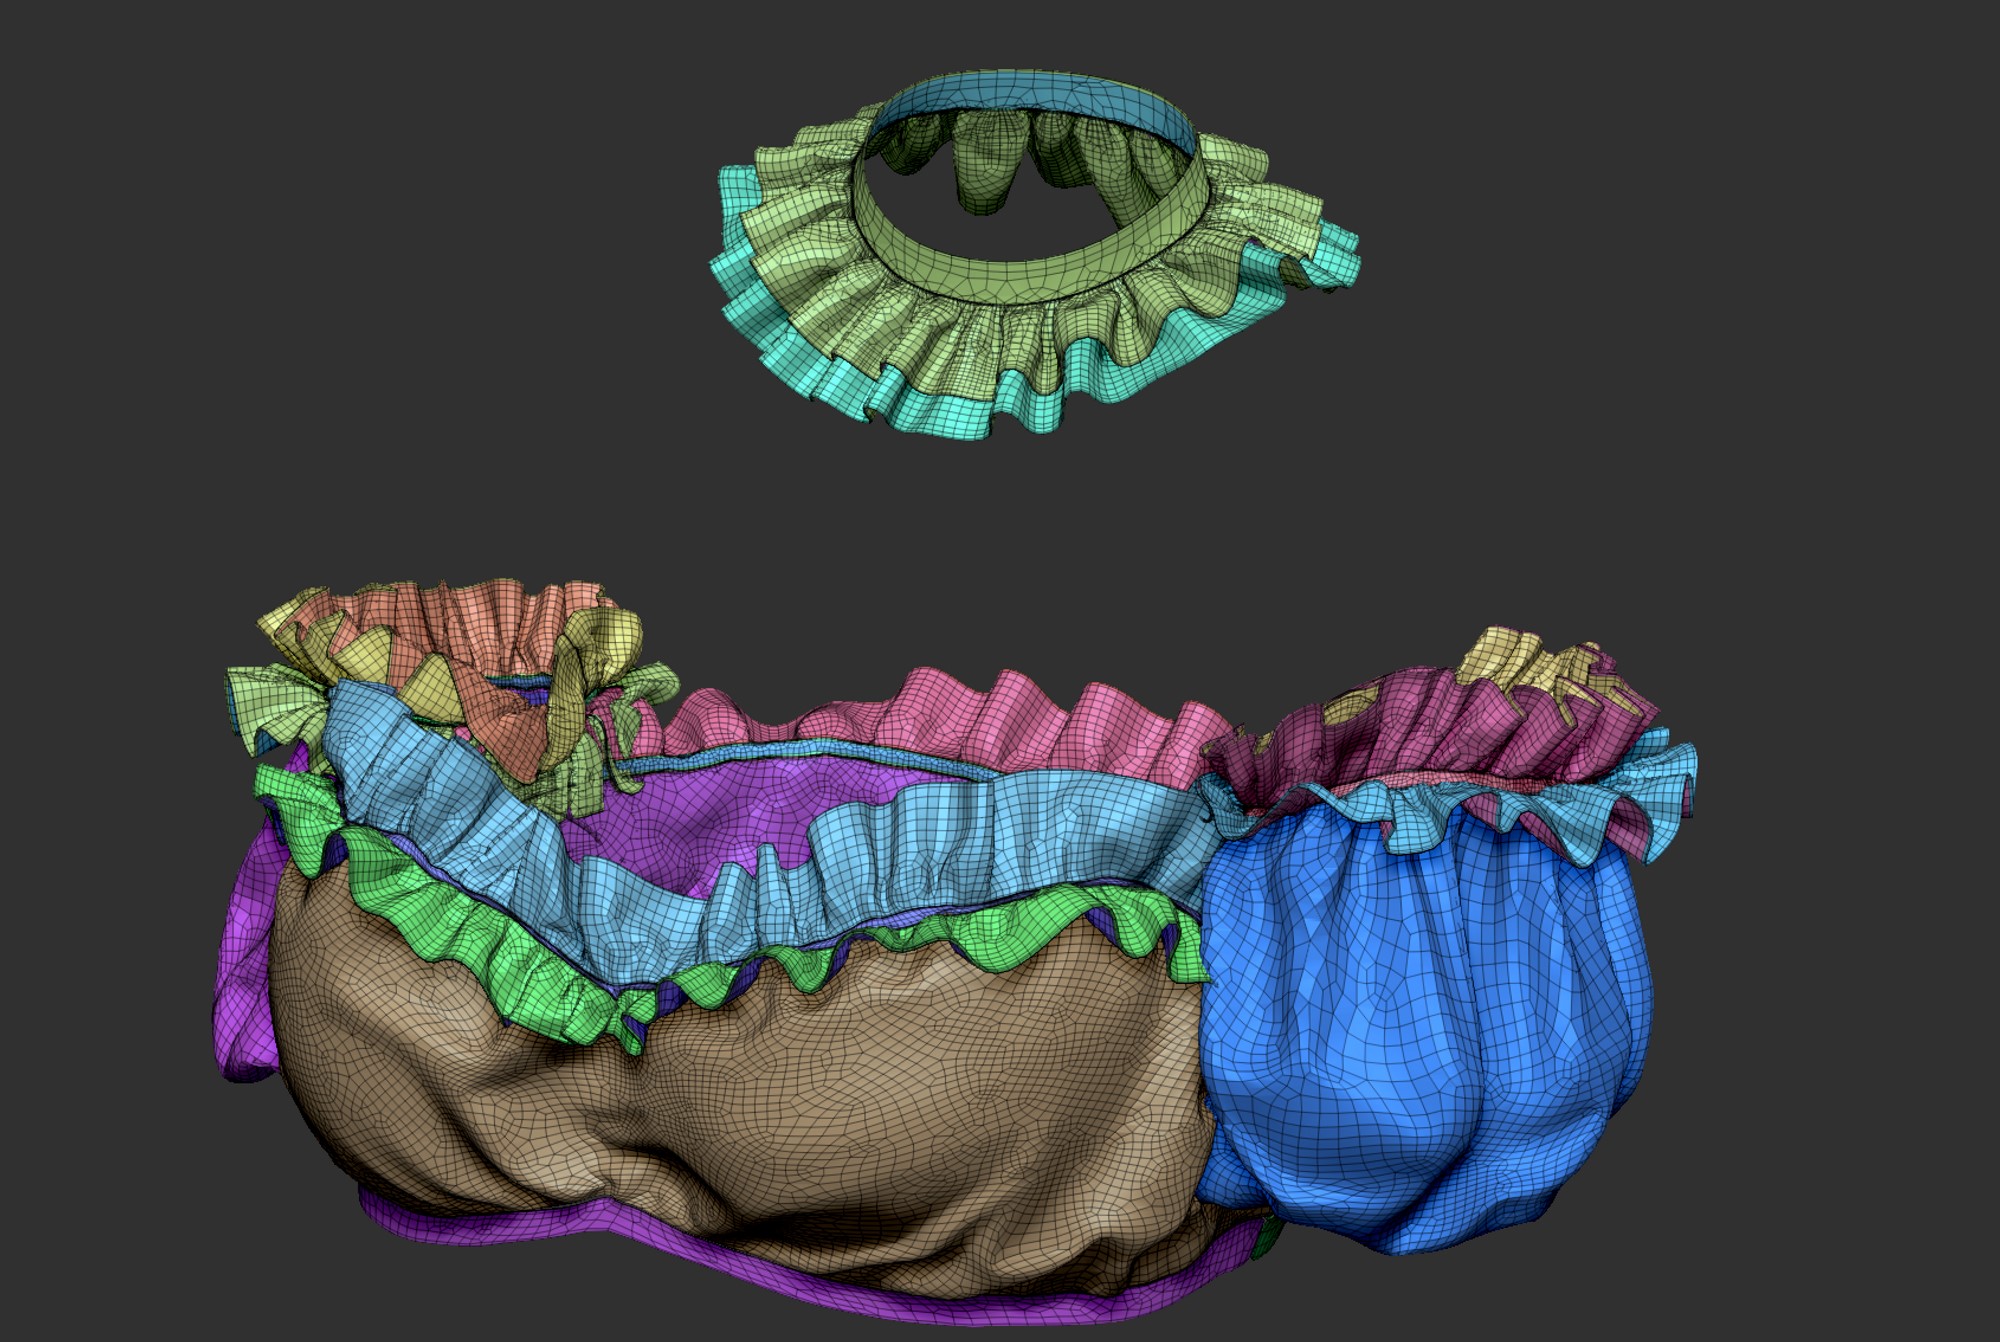
CLOTHES
The garment model was created in Marvelous Designer for the overall shape.
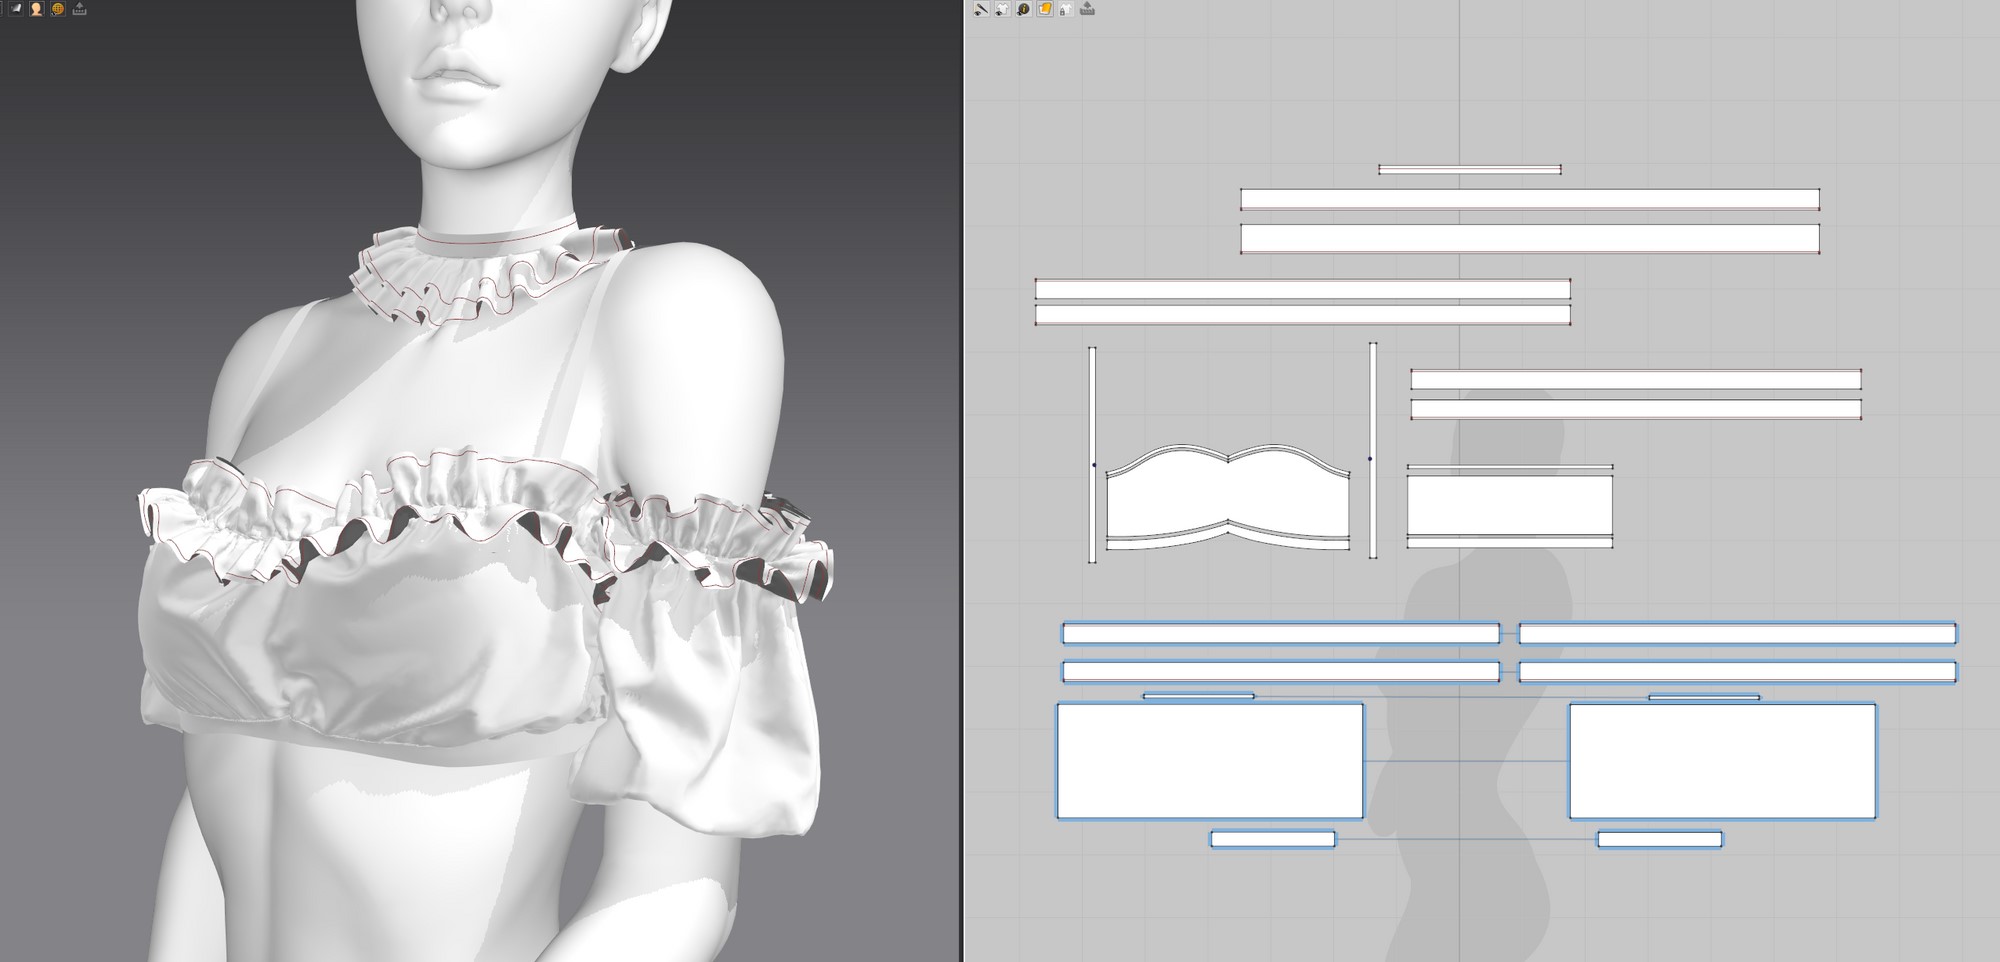
The model was then imported into ZBrush where Panel Loop was used to add thickness and adjust the shape.
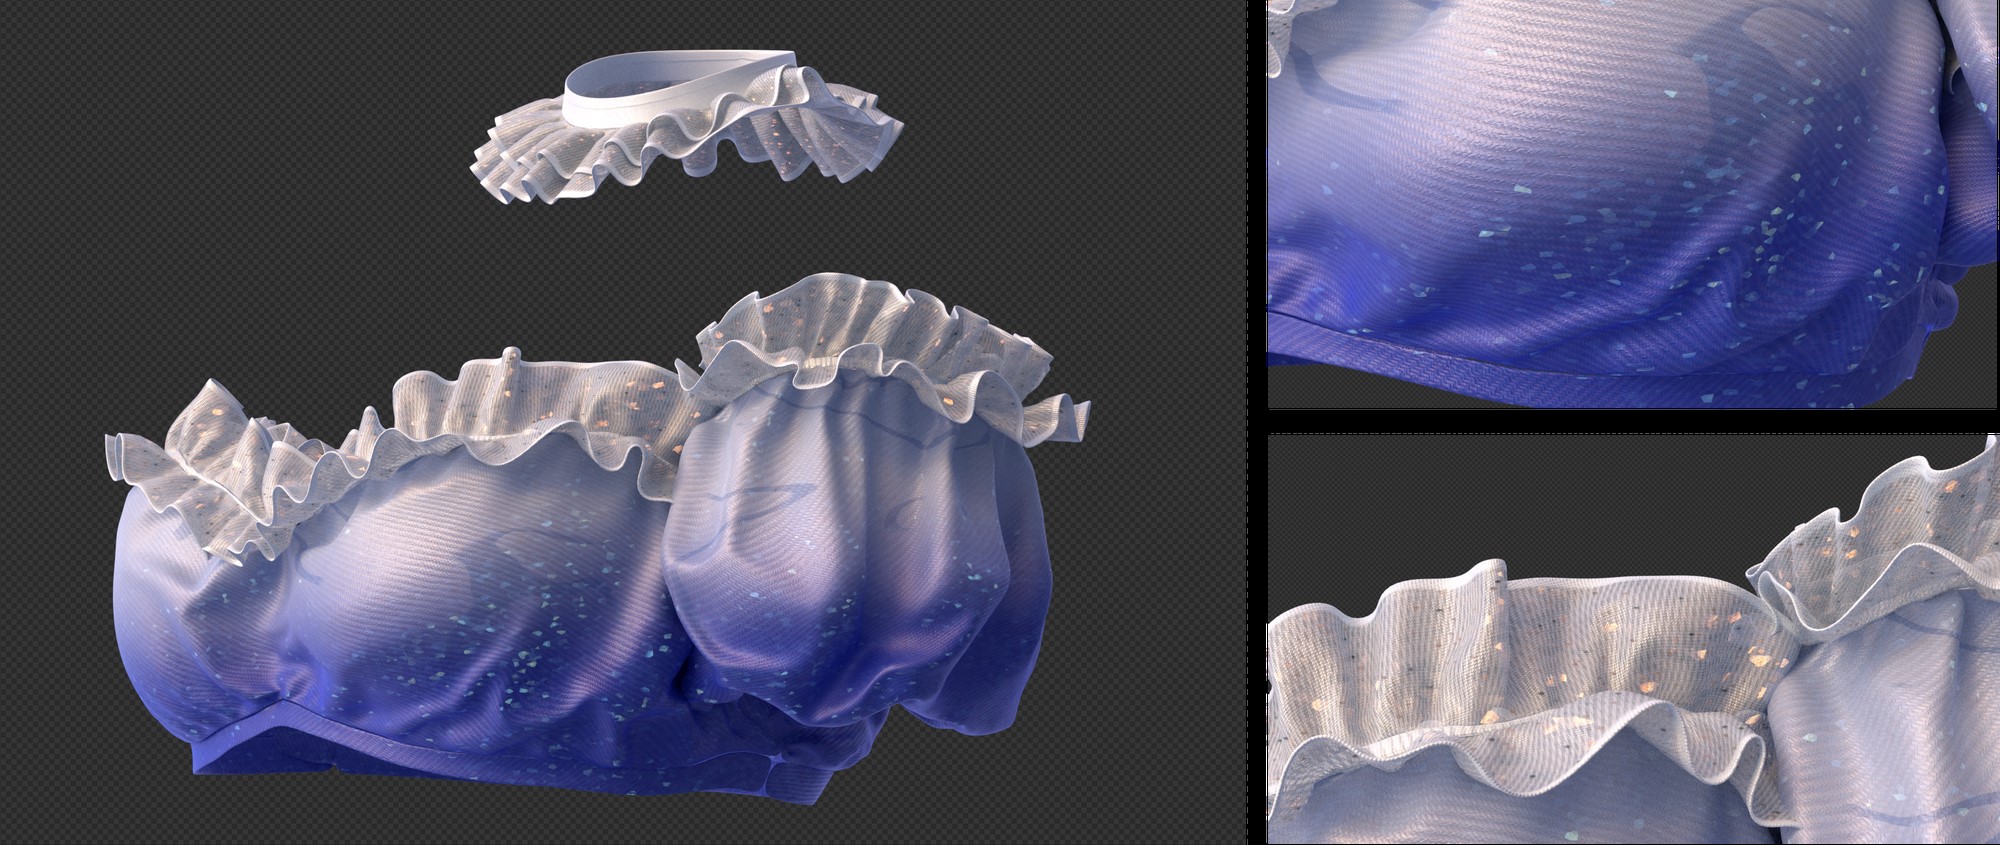
The fabric material was created in Blender by adding patterns using the Gradient and Noise nodes, and a tileable fabric texture was used to add a weave pattern.

The glitter was created using this tutorial as a reference.
POST-PROCESSING
The rendered image was post-processed using Photoshop. The eclipse background was created using this tutorial.

And finally, added the particles, the gradient, and color grading. And done!

AHRI FROM LEAGUE OF LEGENDS
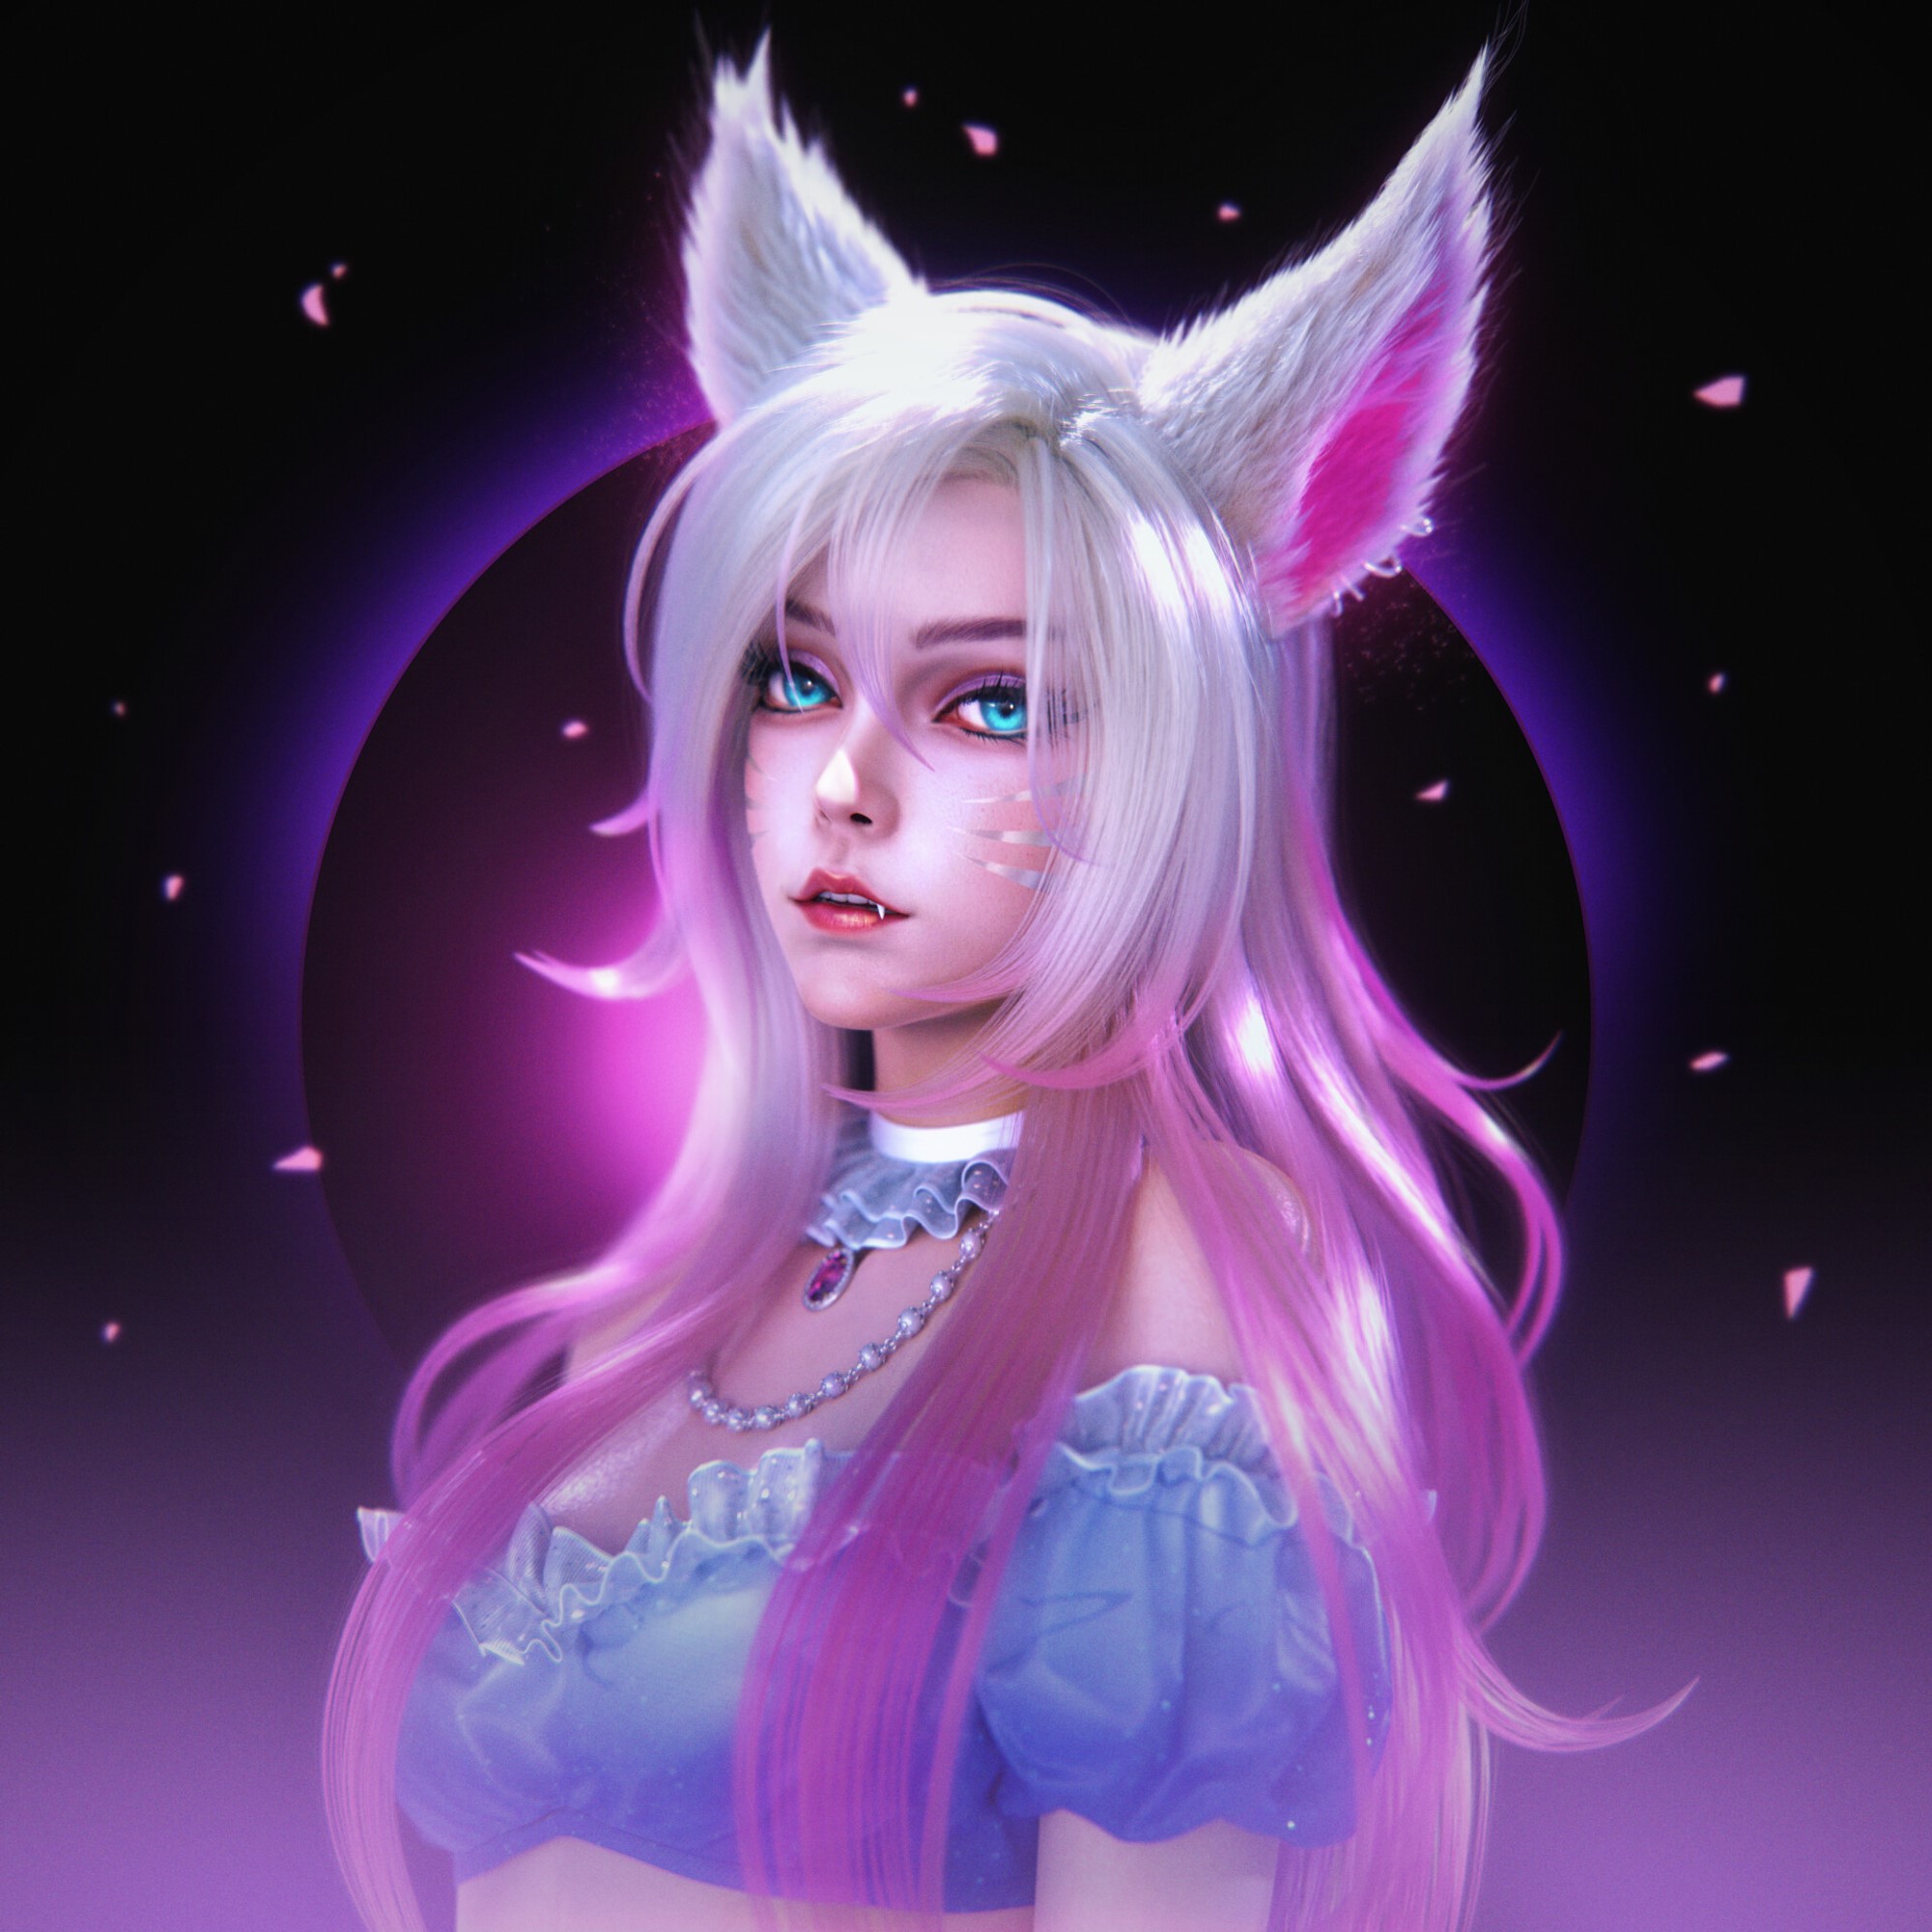
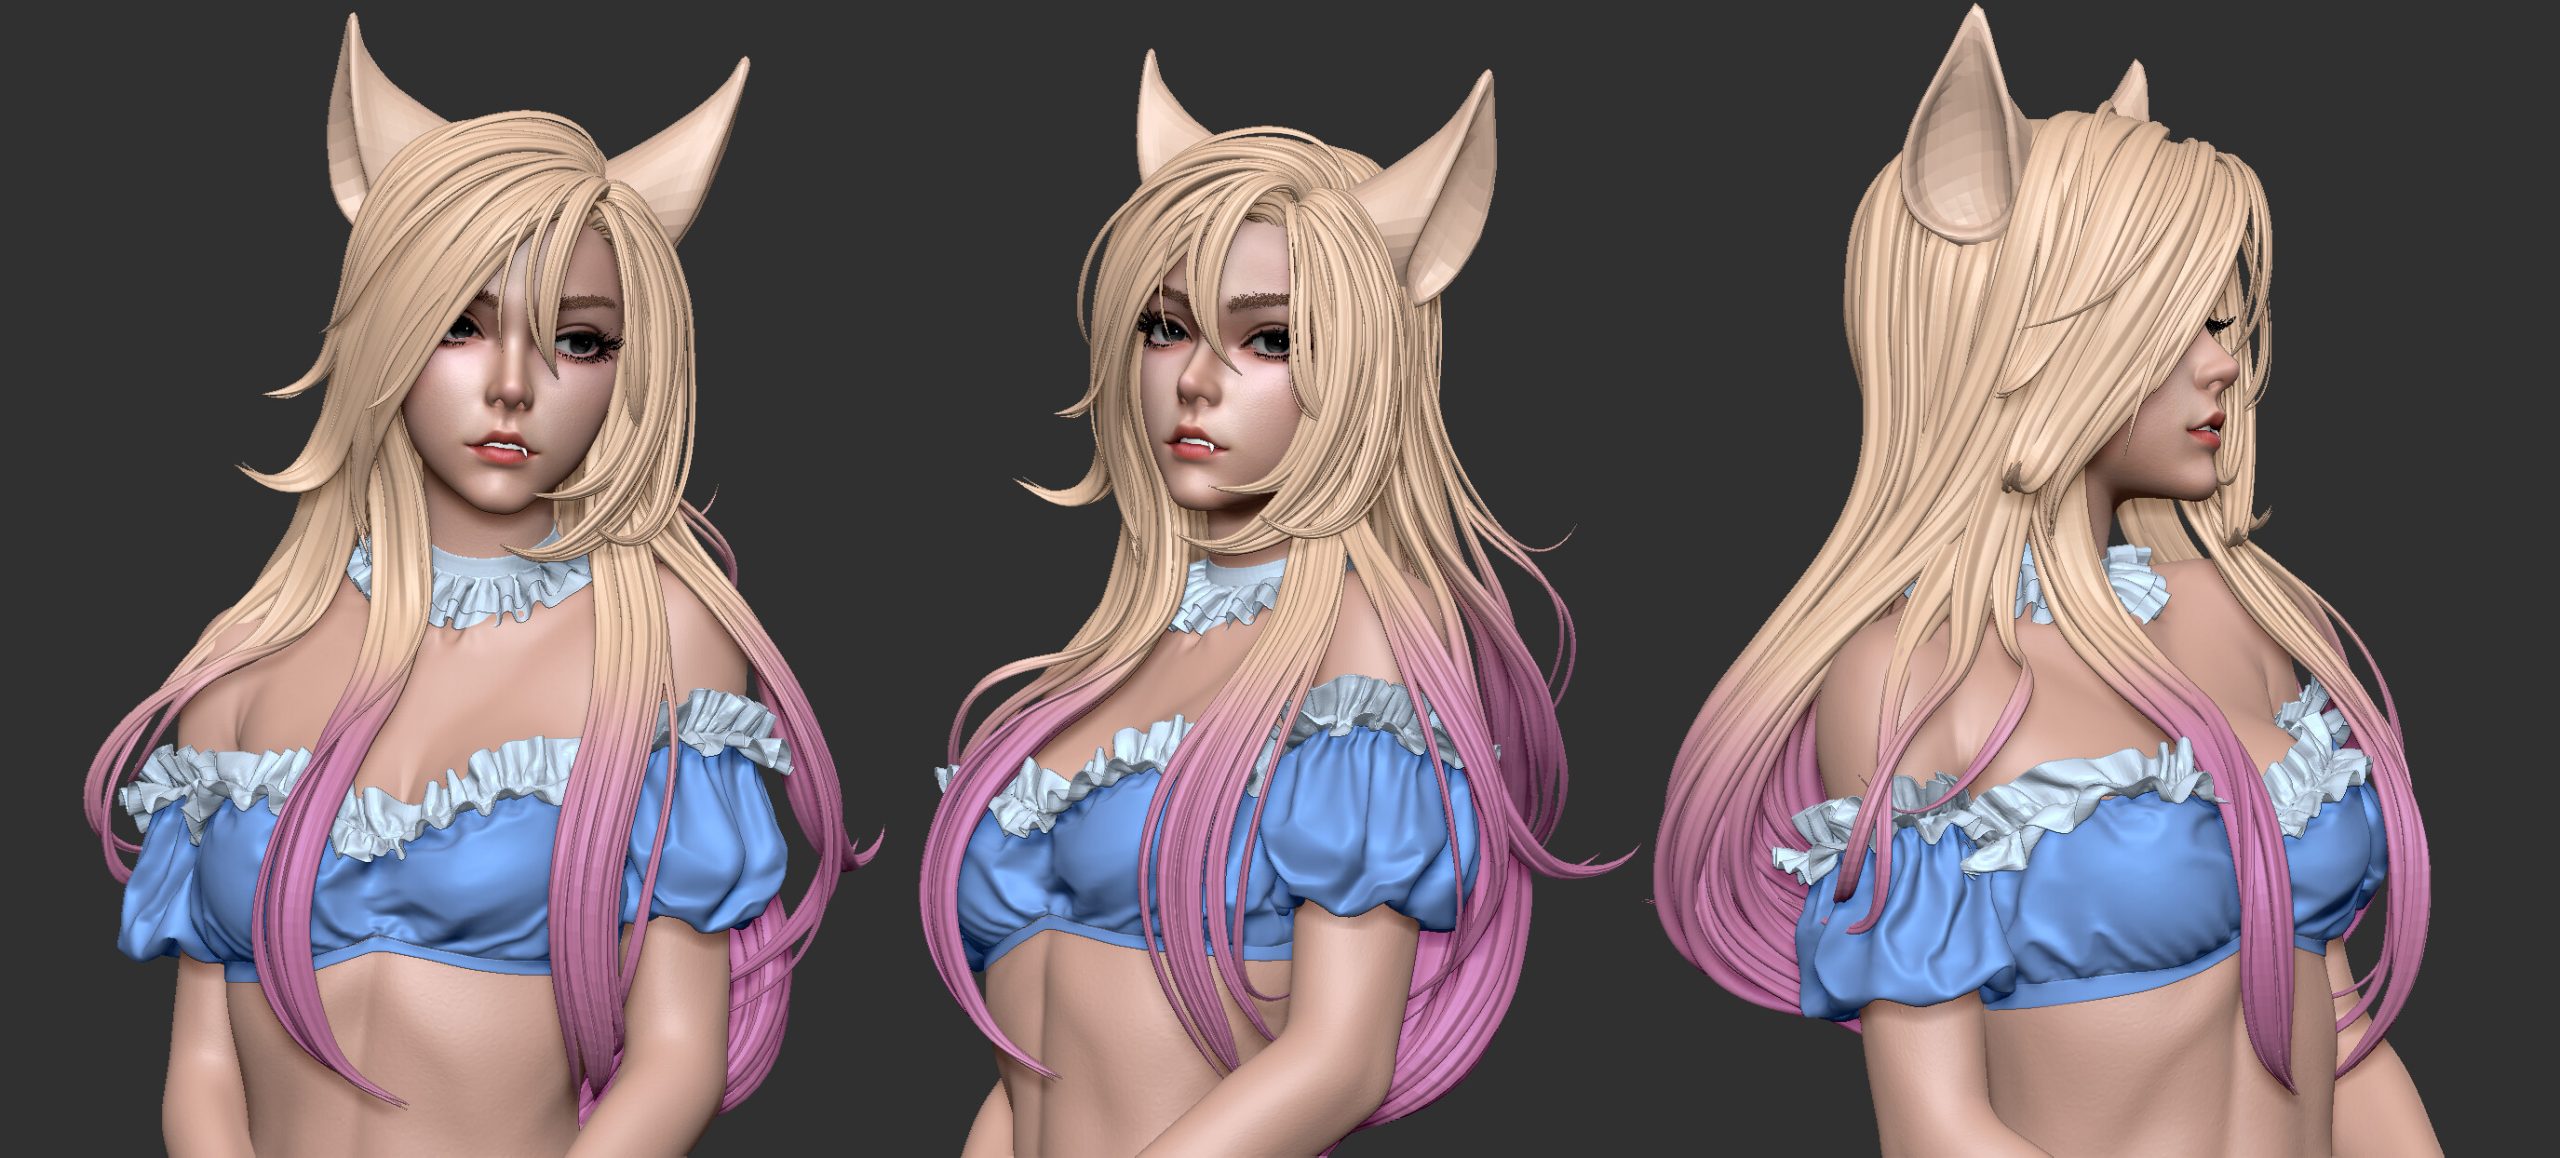
That’s it. I hope I’ve been able to reproduce her charm.
Finally, I would like to truly thank Mr.Fufu for his patient and insightful feedback.
About the Artist

Takumi Hayakawa, a software engineer by day and a 3DCG enthusiast by night, from Japan.


