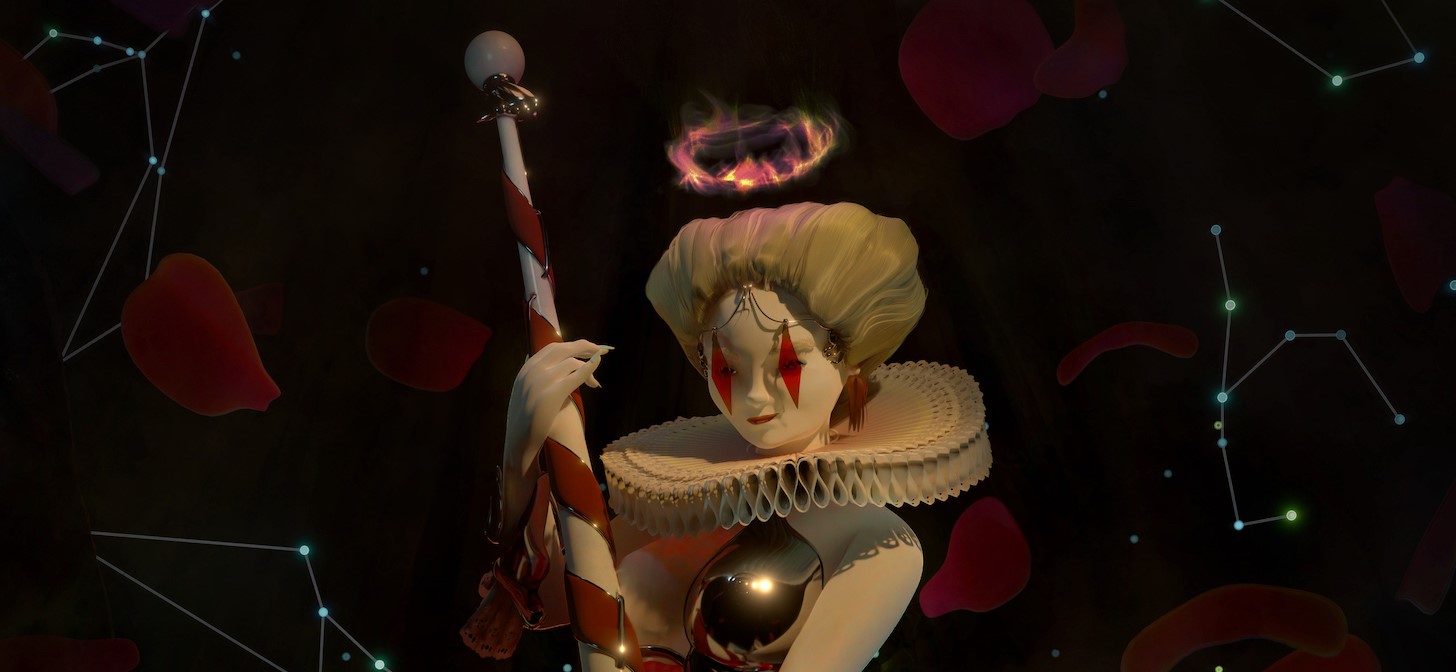
Behind the Scenes: LanSh-ar-lotte
INTRODUCTION
Hello everyone! I am C. Atalluc, a software engineer with no formal training/tutoring in either 3D or 2D traditional, etc. I like making things just for the sake of it, so I embarked on self-learning.
Over the years, everything I have learnt is through YouTube tutorials, seeing other people’s process breakdowns, small blog posts about how to do something simple, trying, experimenting, and playing around. In the past, I have viewed some self-taught Schoolism courses and free Artstation Learning.
Really glad that I get to add here, as behind-the-scenes articles helped me understand how magic happens, and that this isn’t something to fear or overcomplicate—all it takes is little steps… and render time?
Without further ado, let us begin the breakdown of Lansh-ar-lotte.
INSPIRATION
A couple of years ago, 2016 or so, I made this sketch and thought of trying 3D just to practice. Originally, I wanted it to be snowy/sugar and spread some sweets around. Felt I was overcrowding it so I focused on the knight instead.

HARDWARE
I’ve got to be honest here—a couple of years ago, in the days of Blender 2.7, I fell in the trap of getting my first Mac: Mac (Retina 5K, 27-inch, 2017), 4.2 GHz Quad-Core Intel Core i7, 40 GB 2400 MHz DDR4, and Radeon Pro 580 8 GB. Yup, you guessed it right, apart from the first few months, the last couple of years until recently with the introduction of Metal, it was all CPU only for me. I still get occasional issues with using the GPU. This seriously inhibited my process for years… but never again. I am planning on a proper PC setup once top-end GPU prices come down to earth again, but at least things are quite bearable now thanks to the developers’ work.
Huion KAMVAS GT-221 PRO HD IPS Pen Display. Great, I still need to play around color calibration with the main monitor, nothing show-stopping.
iPad Pro 2018: Not the slightest complaint here so far, I really trust this tool.
SOFTWARE
- Blender 3.2 – 3.3 : No introductions needed.
- Procreate : Any photo editing software will do really. I am not bound to a tool here.
- PureRef : Brilliant. Either as a reference board or for process overview.
PureRef is usually open on the main screen. I have references open with my progress so far. Regularly, I will render something then take it to Procreate just to draft on.
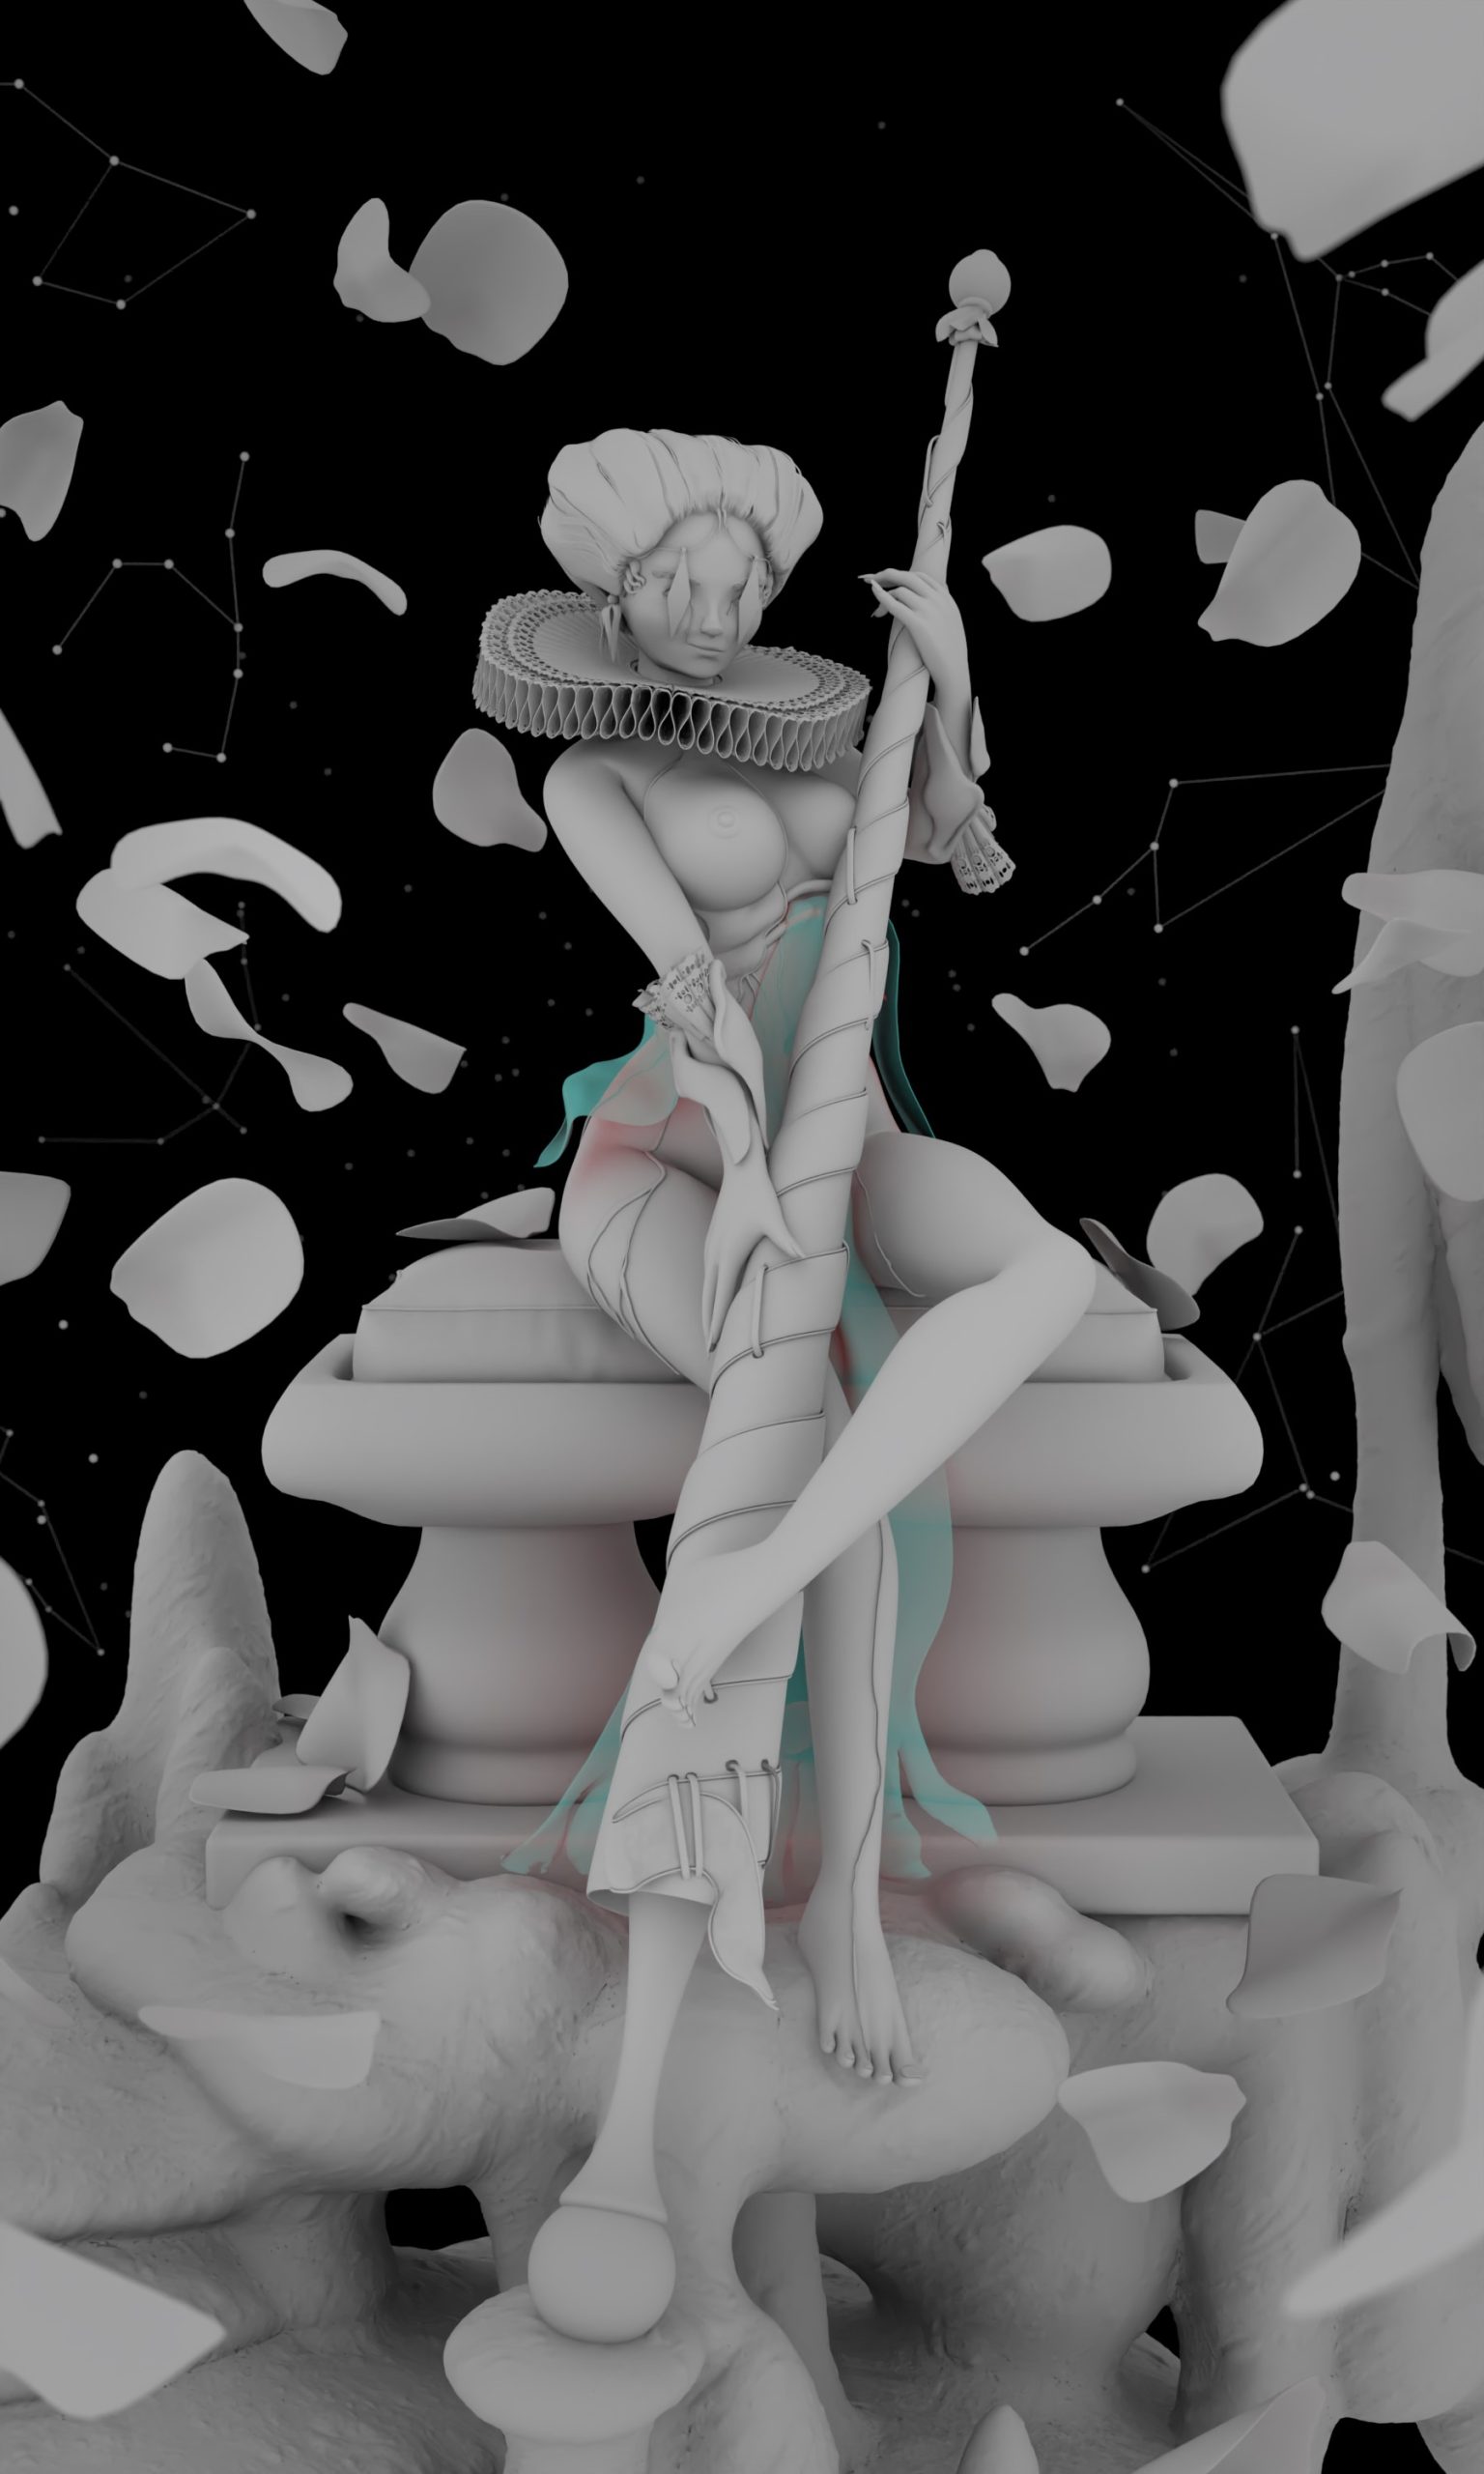
MODELING
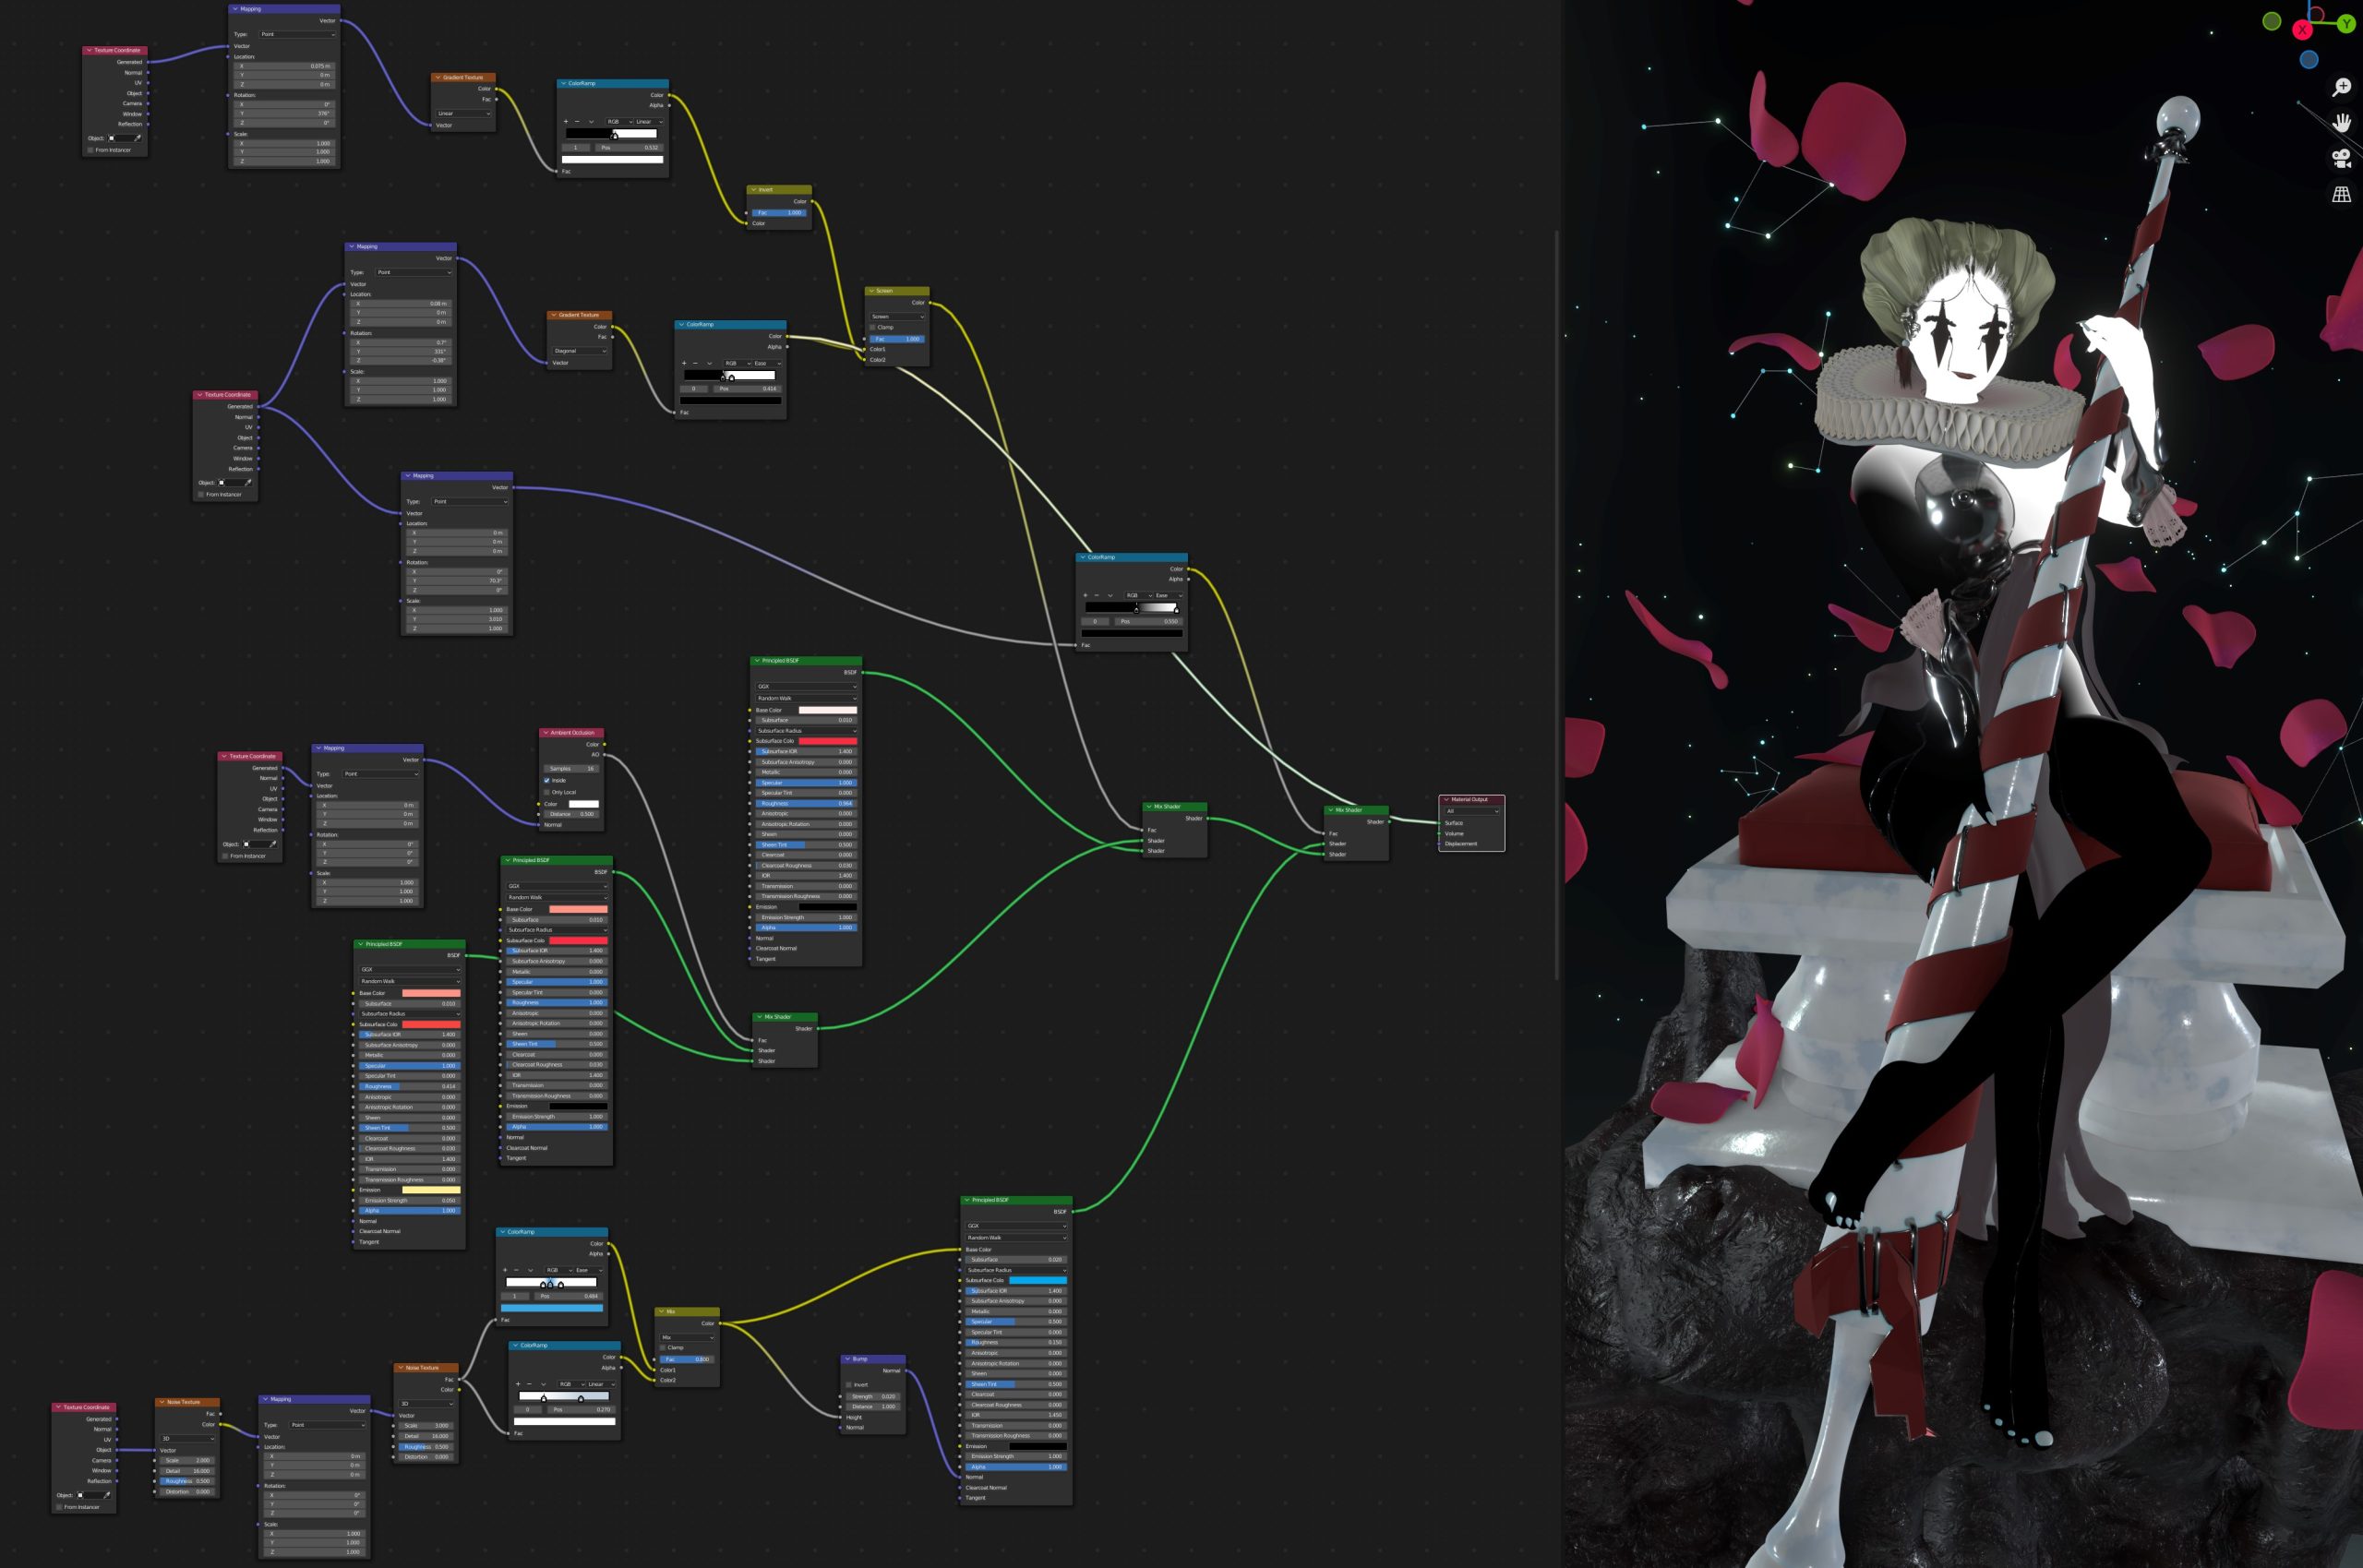
The body is just a base female mesh I refined and posed with a simple metarig. The clothes around are just a plane with a solidify and subdivide, and the metal bits of armor are just sculpted. I duplicated parts of the body mesh that I wanted for the breastplate, separated, solidified, sculpted. This was then parented to the same metarig. And now, breaking down the bits could be more interesting in modeling.
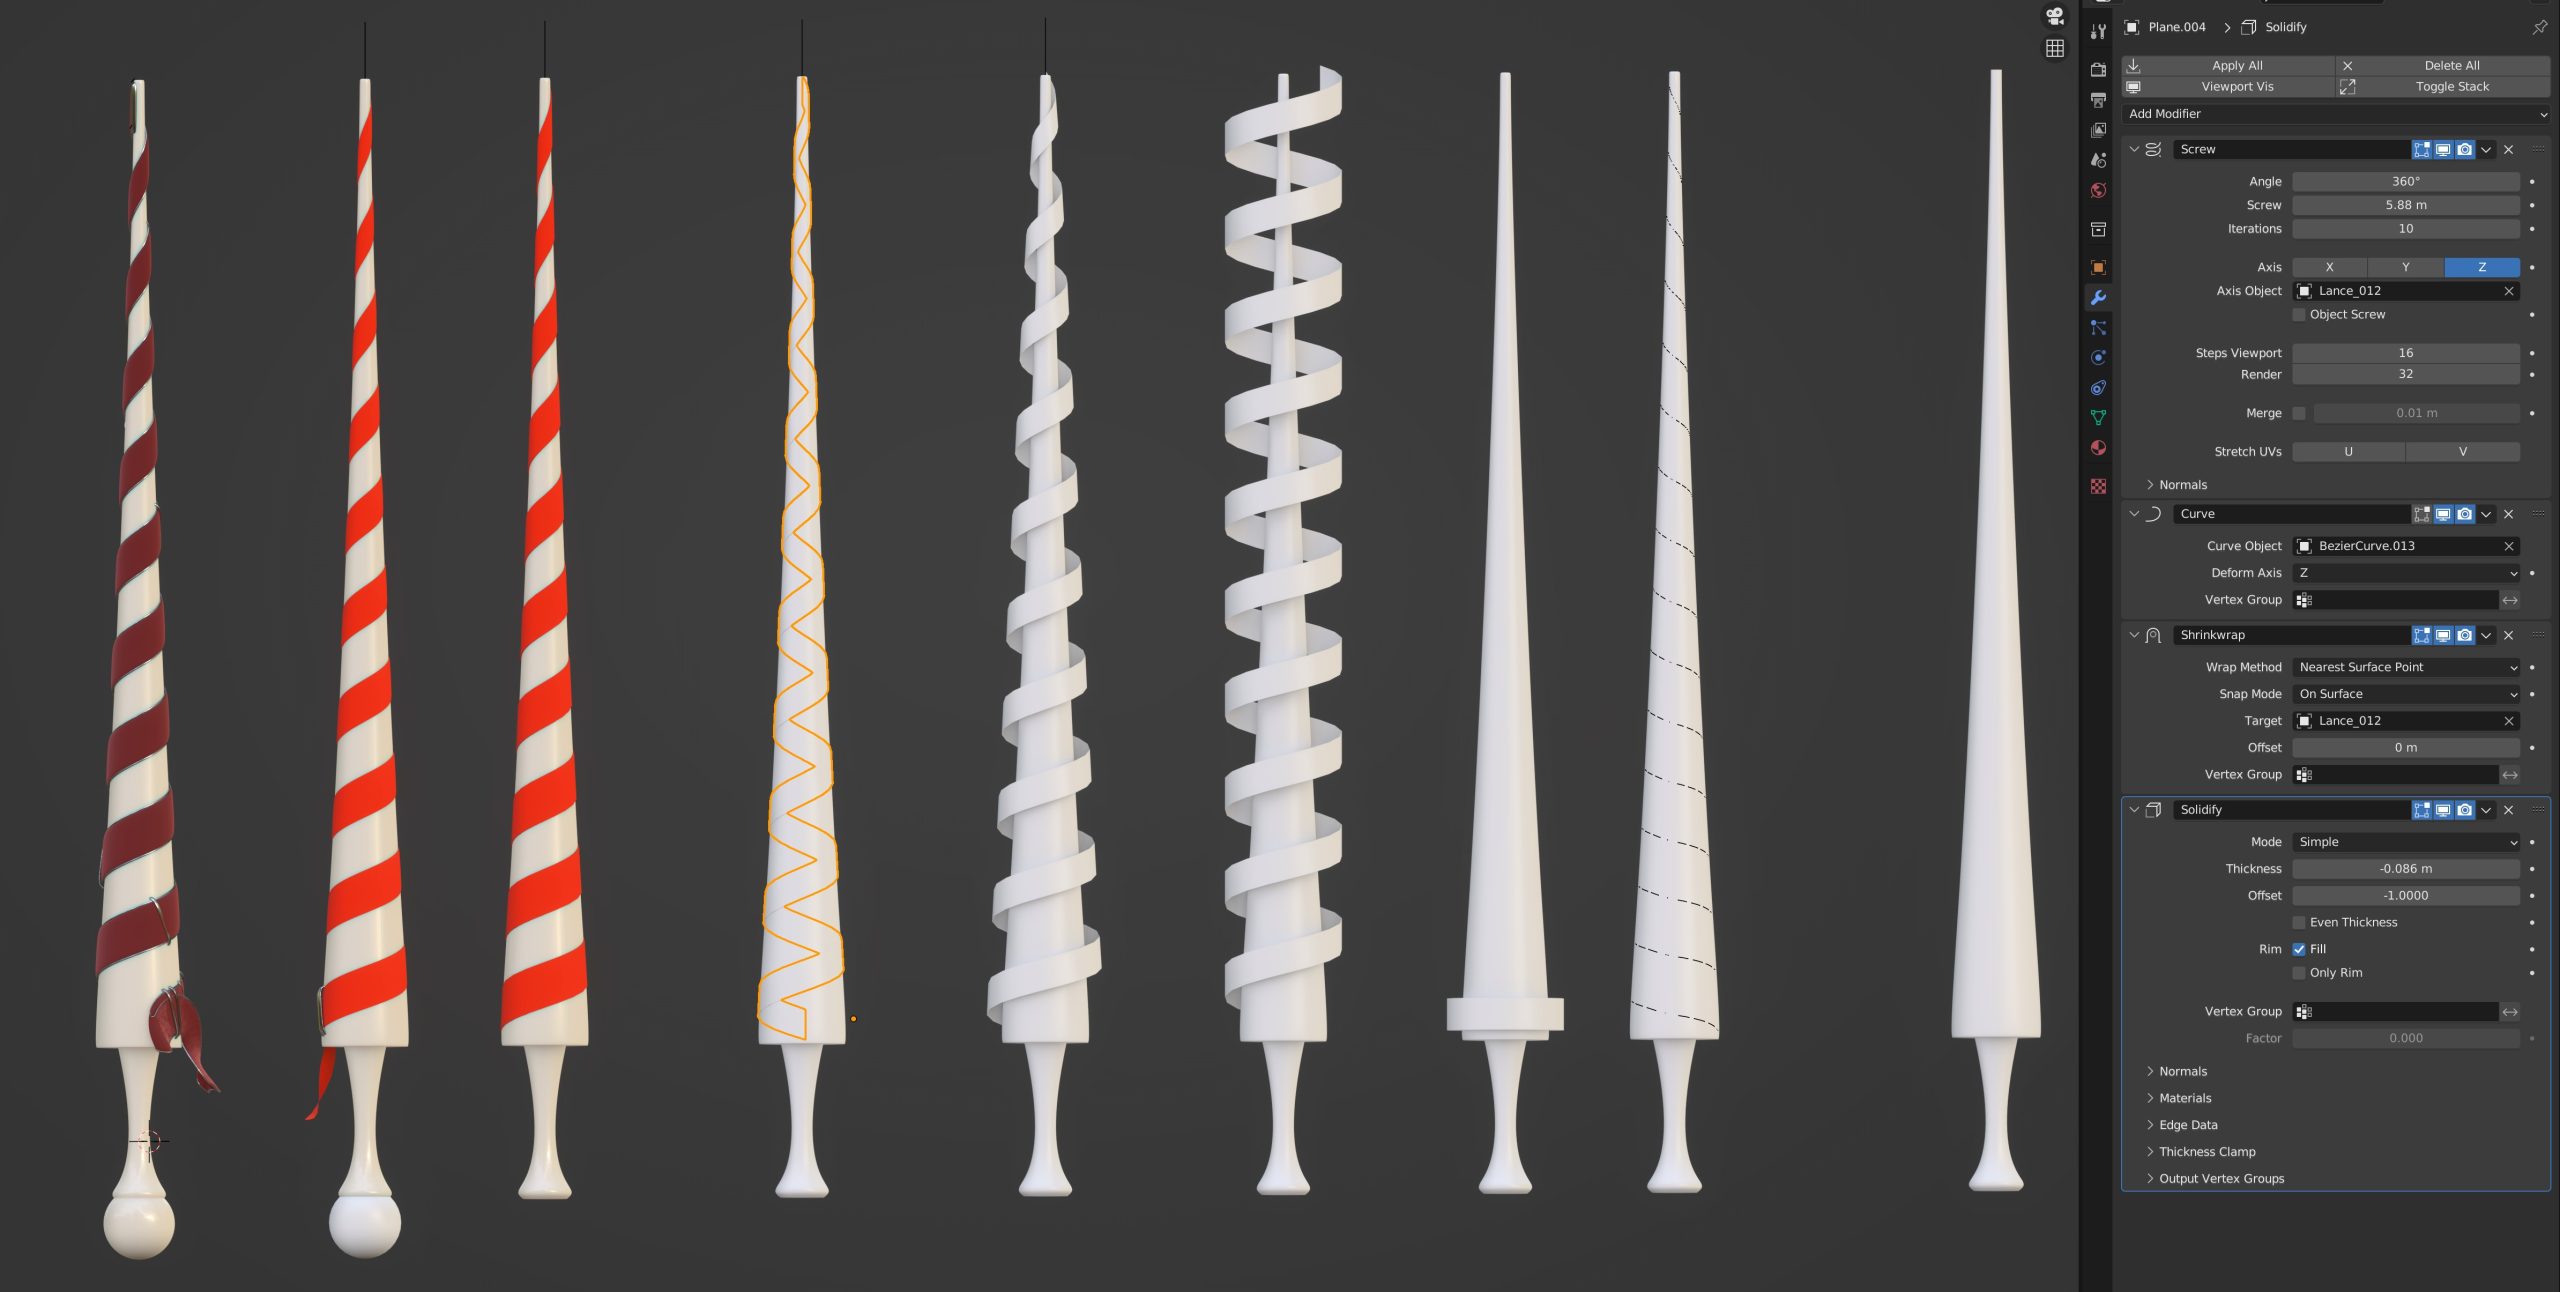
LANCE
The lance itself is just a curve with a screw modifier. For the ribbon, spirofit wouldn’t do it for this one (second from right). I used just an edge with a screw modifier (3rd from right). The curve modifier was used on the previous step on its right before the shrink-wrap, to bring it closer (ALT + S on one end of that curve to tighten the ribbon). I converted it to mesh, some extrudes to make the last folding bit. For the two silver parts on the side of the ribbon, I duplicated it and kept only the outer edges, converted these to curves, and added a bit of bevel to them.
CONSTELLATIONS
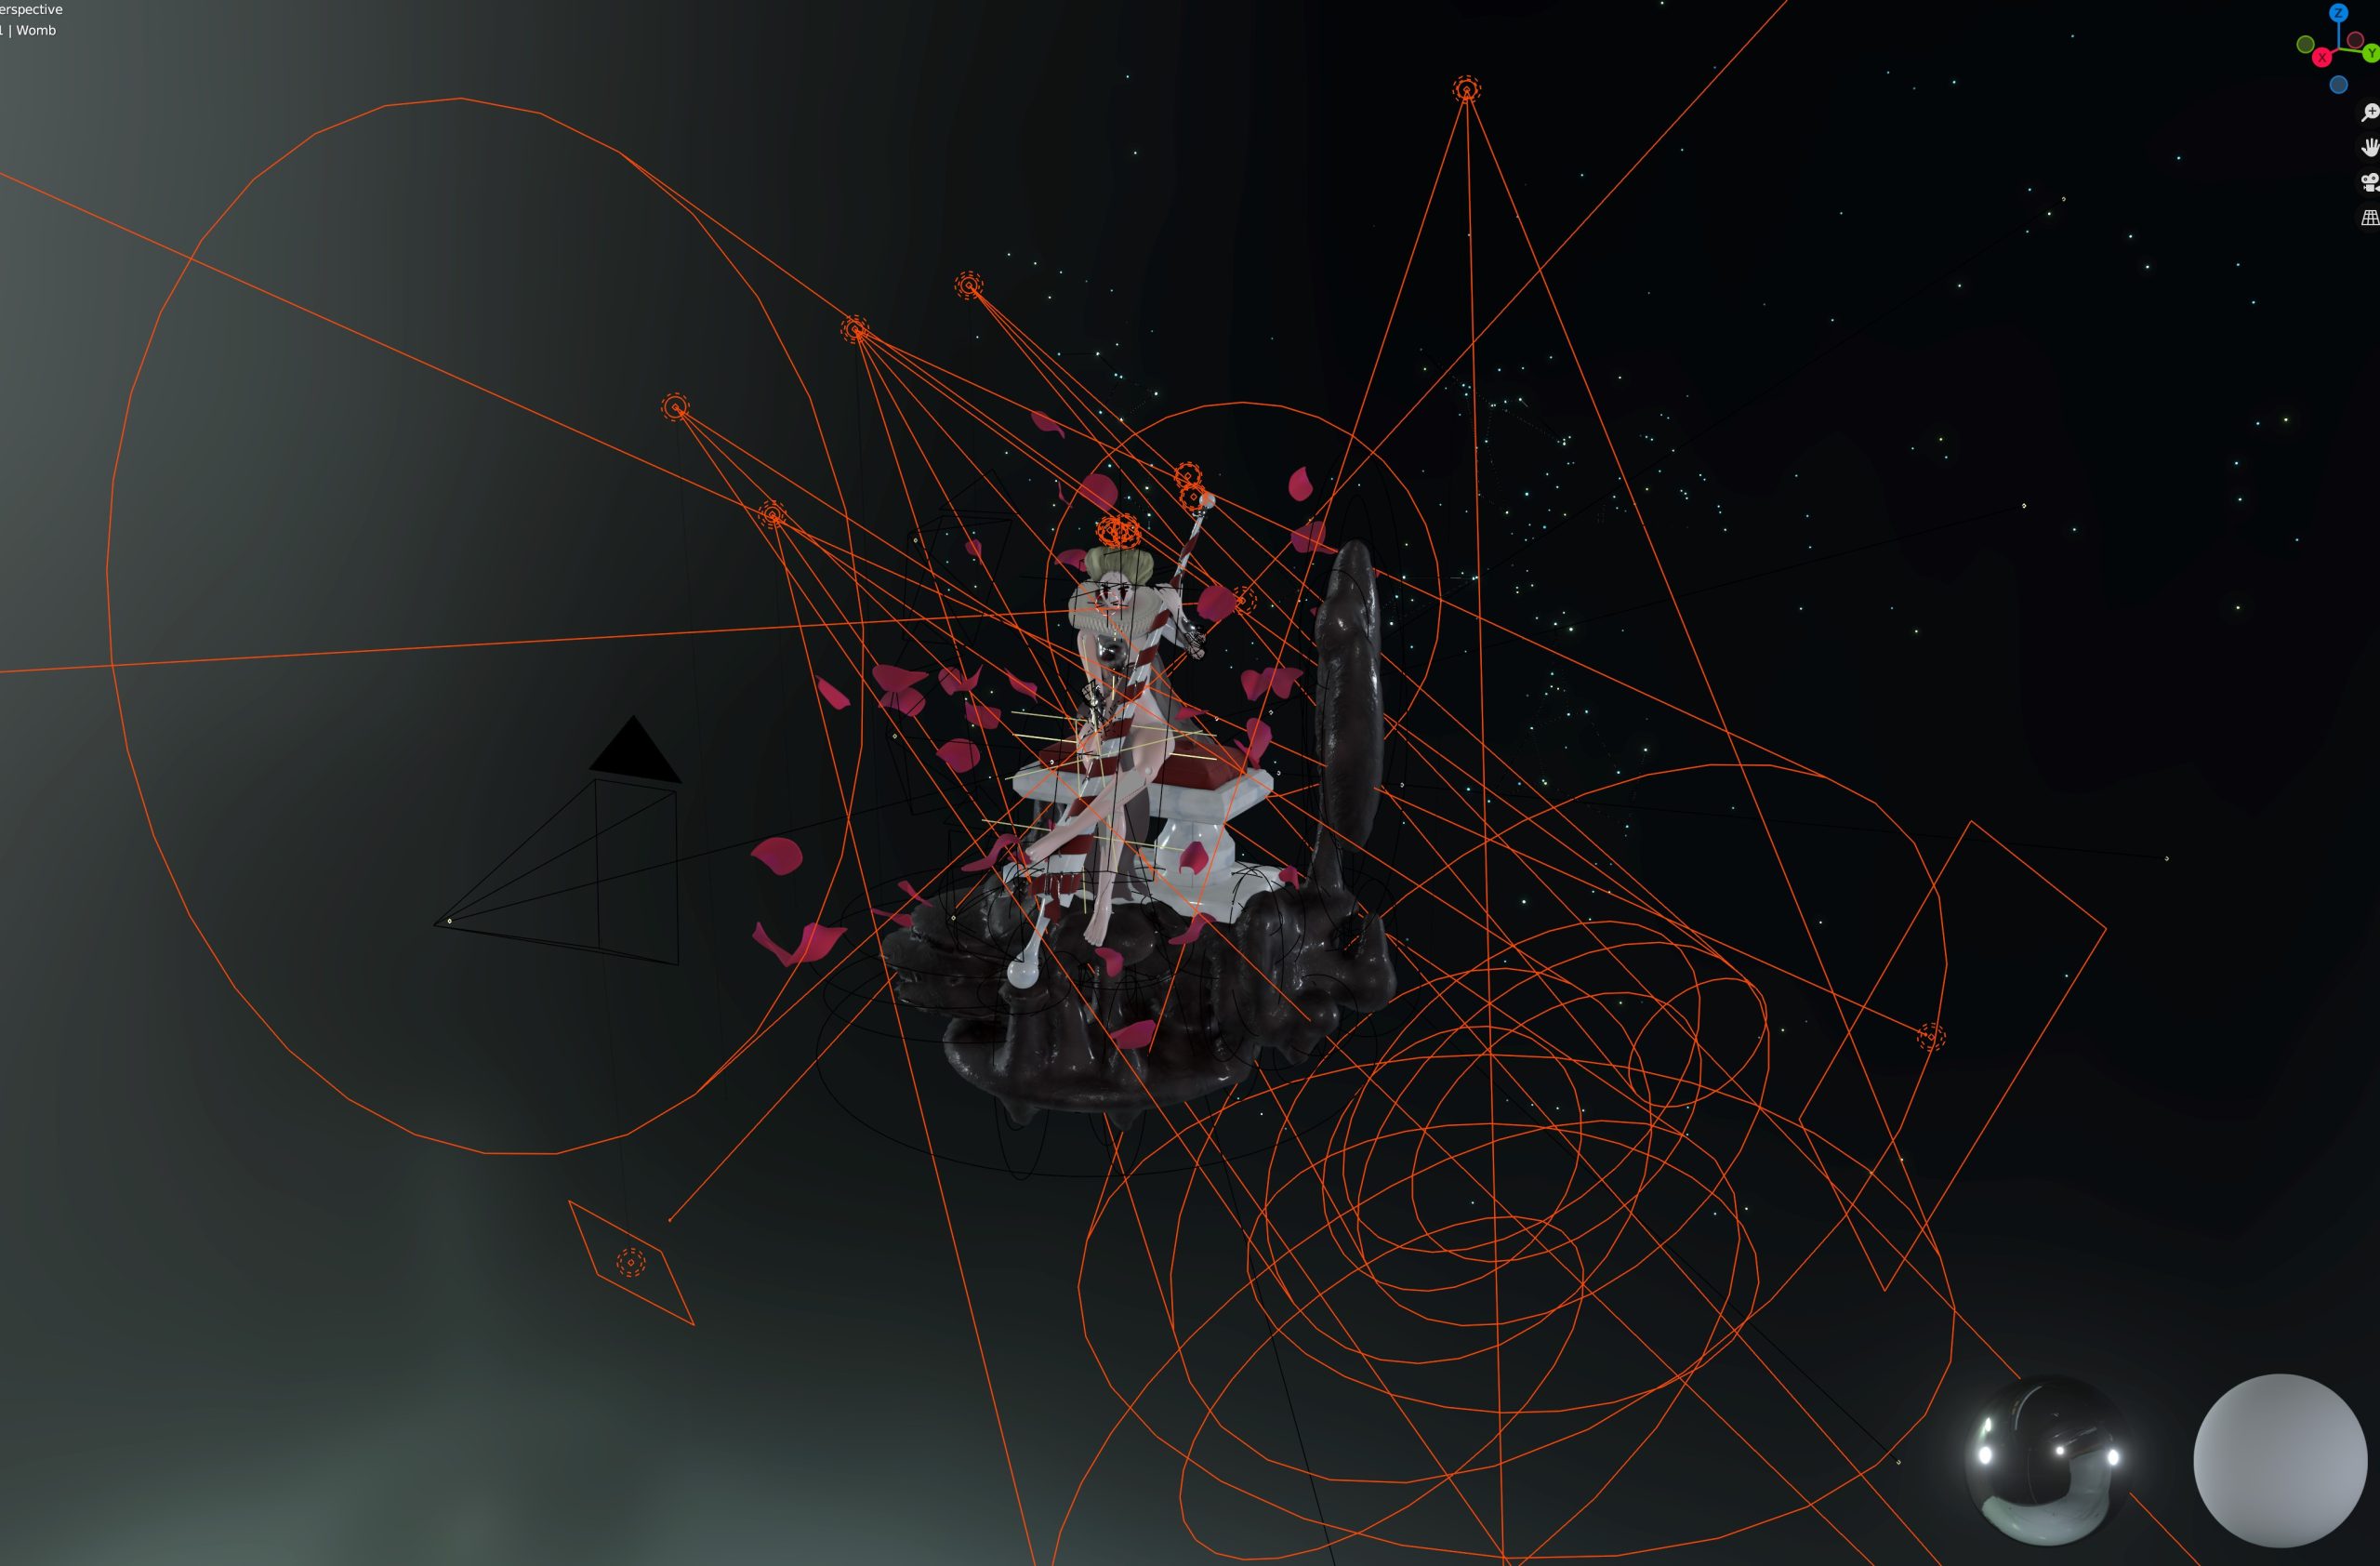
For the sparse stars, I used half a sphere, randomly deleted vertices, and then instanced a very low poly icosphere on the remaining ones with an emission shader.

The constellations are the same really, but then I duplicated each shape, converted to curve, and added some bevel, using another emission shader.
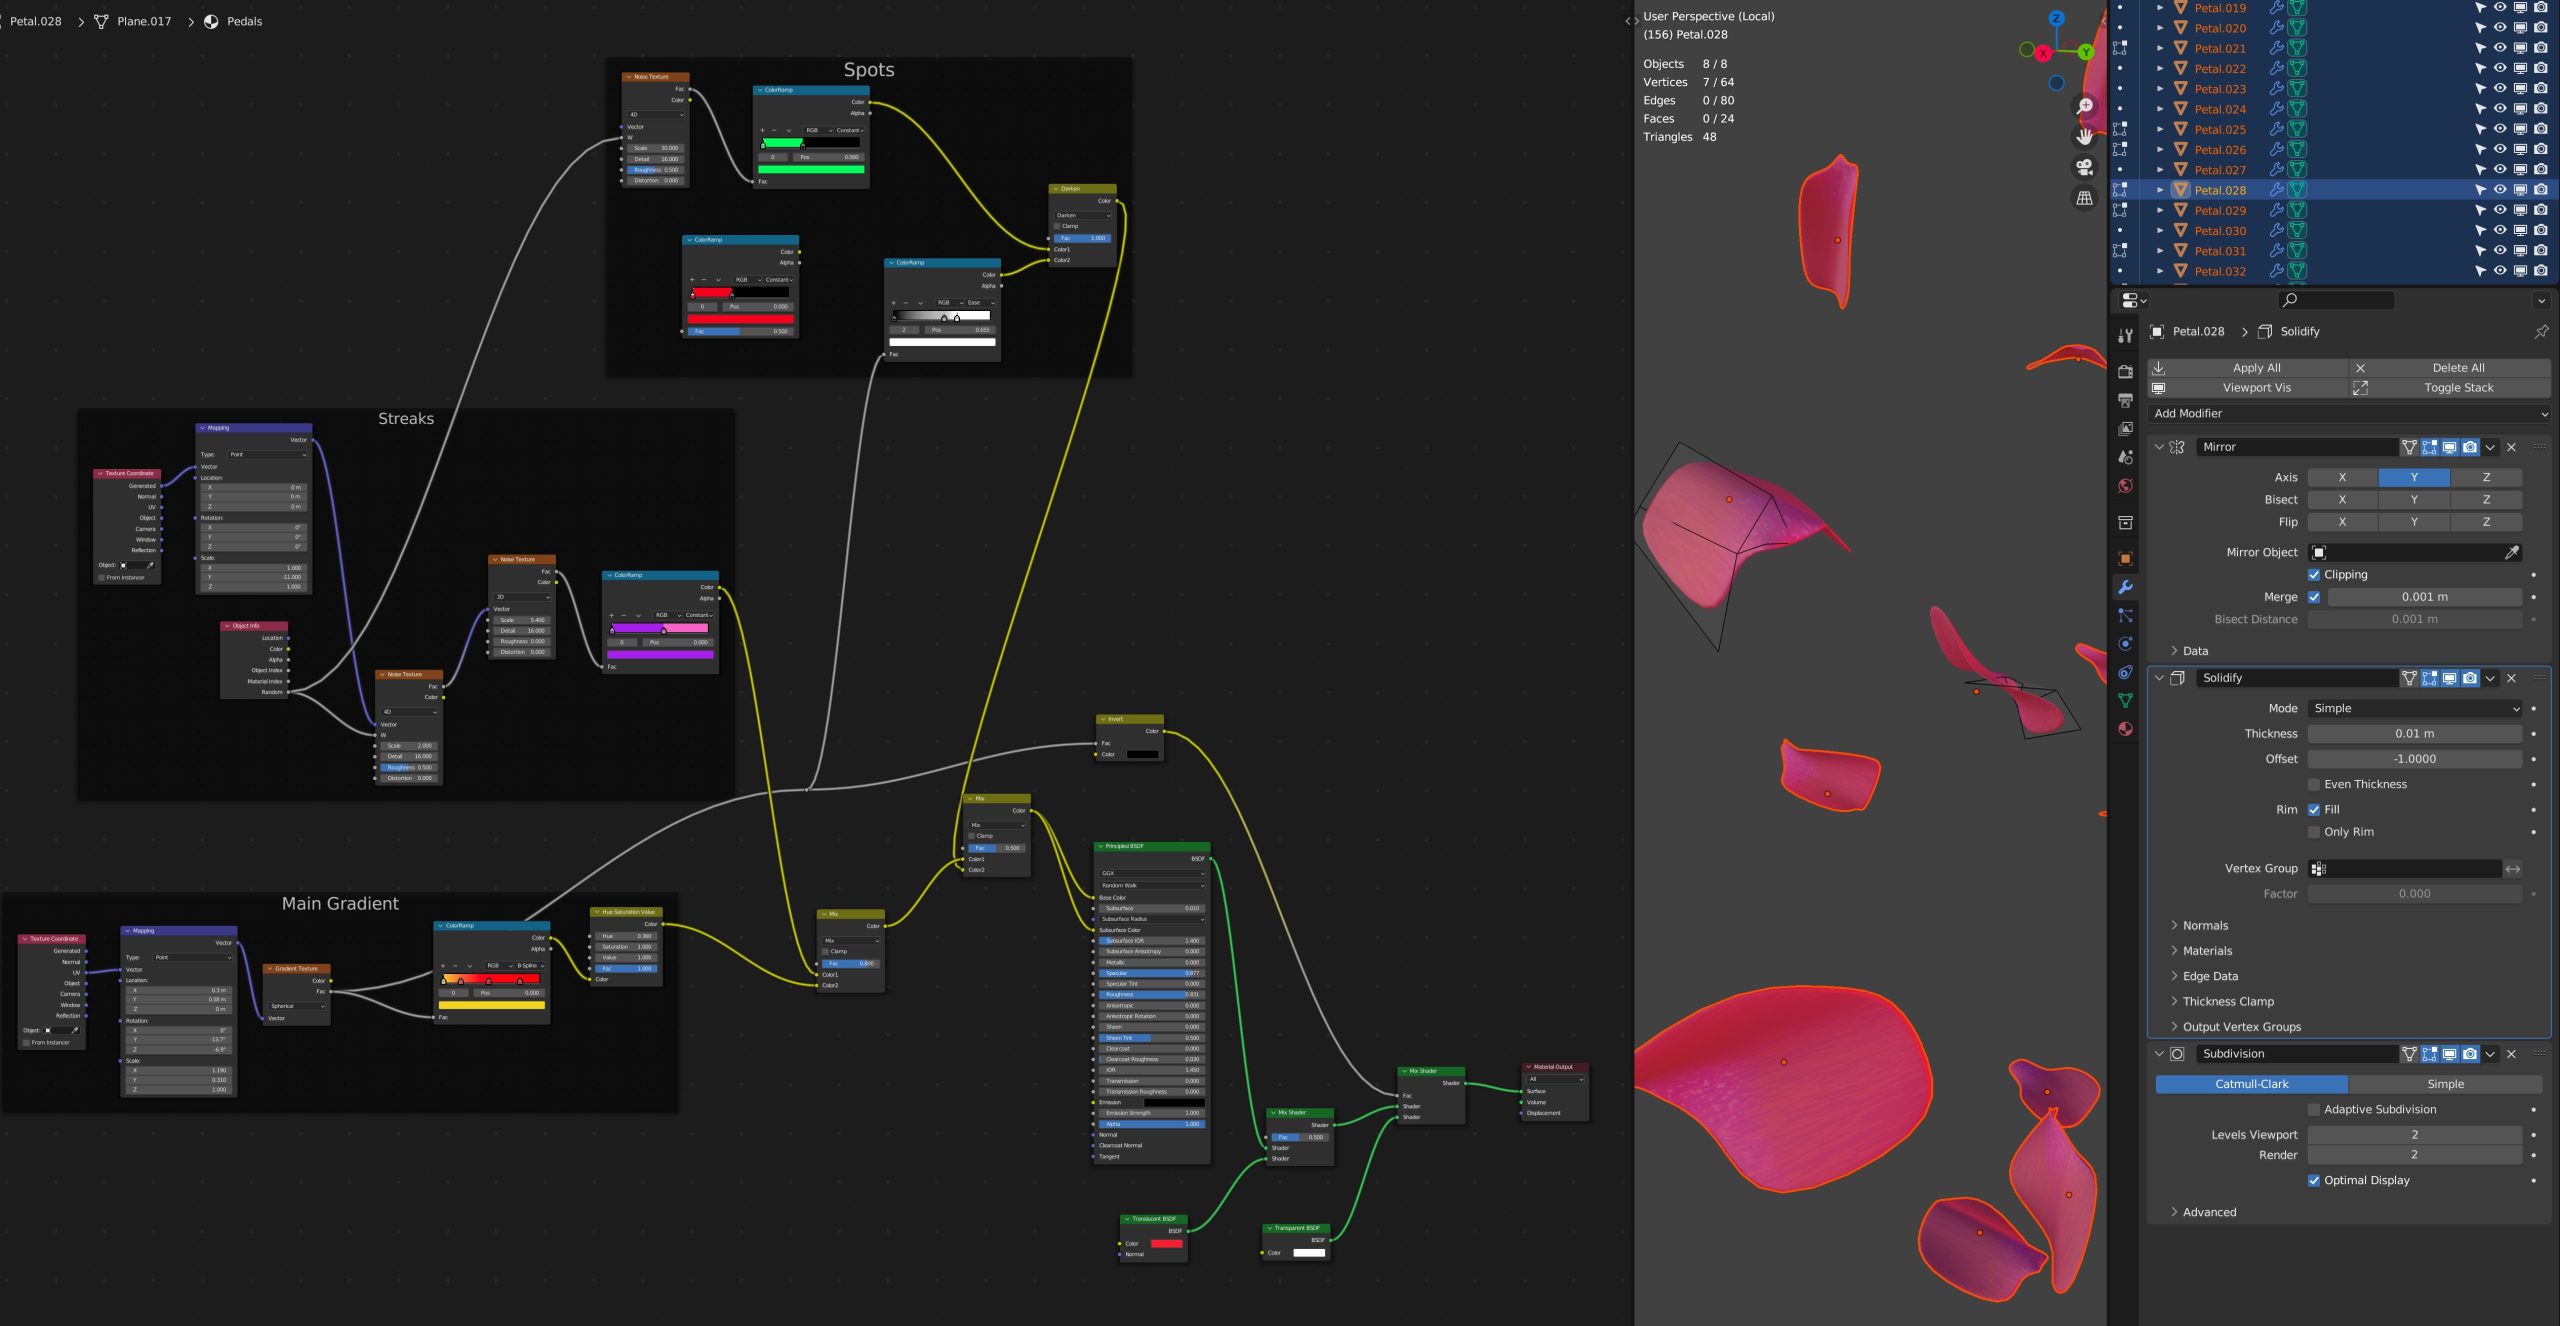
ROSE PETALS
As you must have guessed by now, I like keeping things procedural as long as it’s sensible. These ones are just a plane which has been automirrored (see default plugins). I have duplicated these with ALT+D to keep the copy linked to the original in case I wanted to edit shapes.
This is the shader I used here:
Here is a tutorial for making flowers using geometry nodes:
NECK RUFF
That was fun as it took me a couple of tries. Originally, I had planned as you see here, which you can see qin pink mesh below:
But my problem with that was I couldn’t easily add details all around at this point, and kept the mesh simple. So I pretty much kept only 1 section, added brush booleans (see Bool Tool from default plugins), and then made an array with that using an empty. I wanted two arrays there so that the ruff had more detail, so I added another array. Then in the orange one bottom right, I committed to it, converted all to mesh (around 160.000 faces), and the surface deformed.
For the ruffs in the forearms, I have used the same, just a smaller array, and lattice instead of surface deform as I wanted finer/flexible control.

Shader is nothing fancy here as I have used some mapping, gradient textures, and color ramp to mask circles around for color variations.
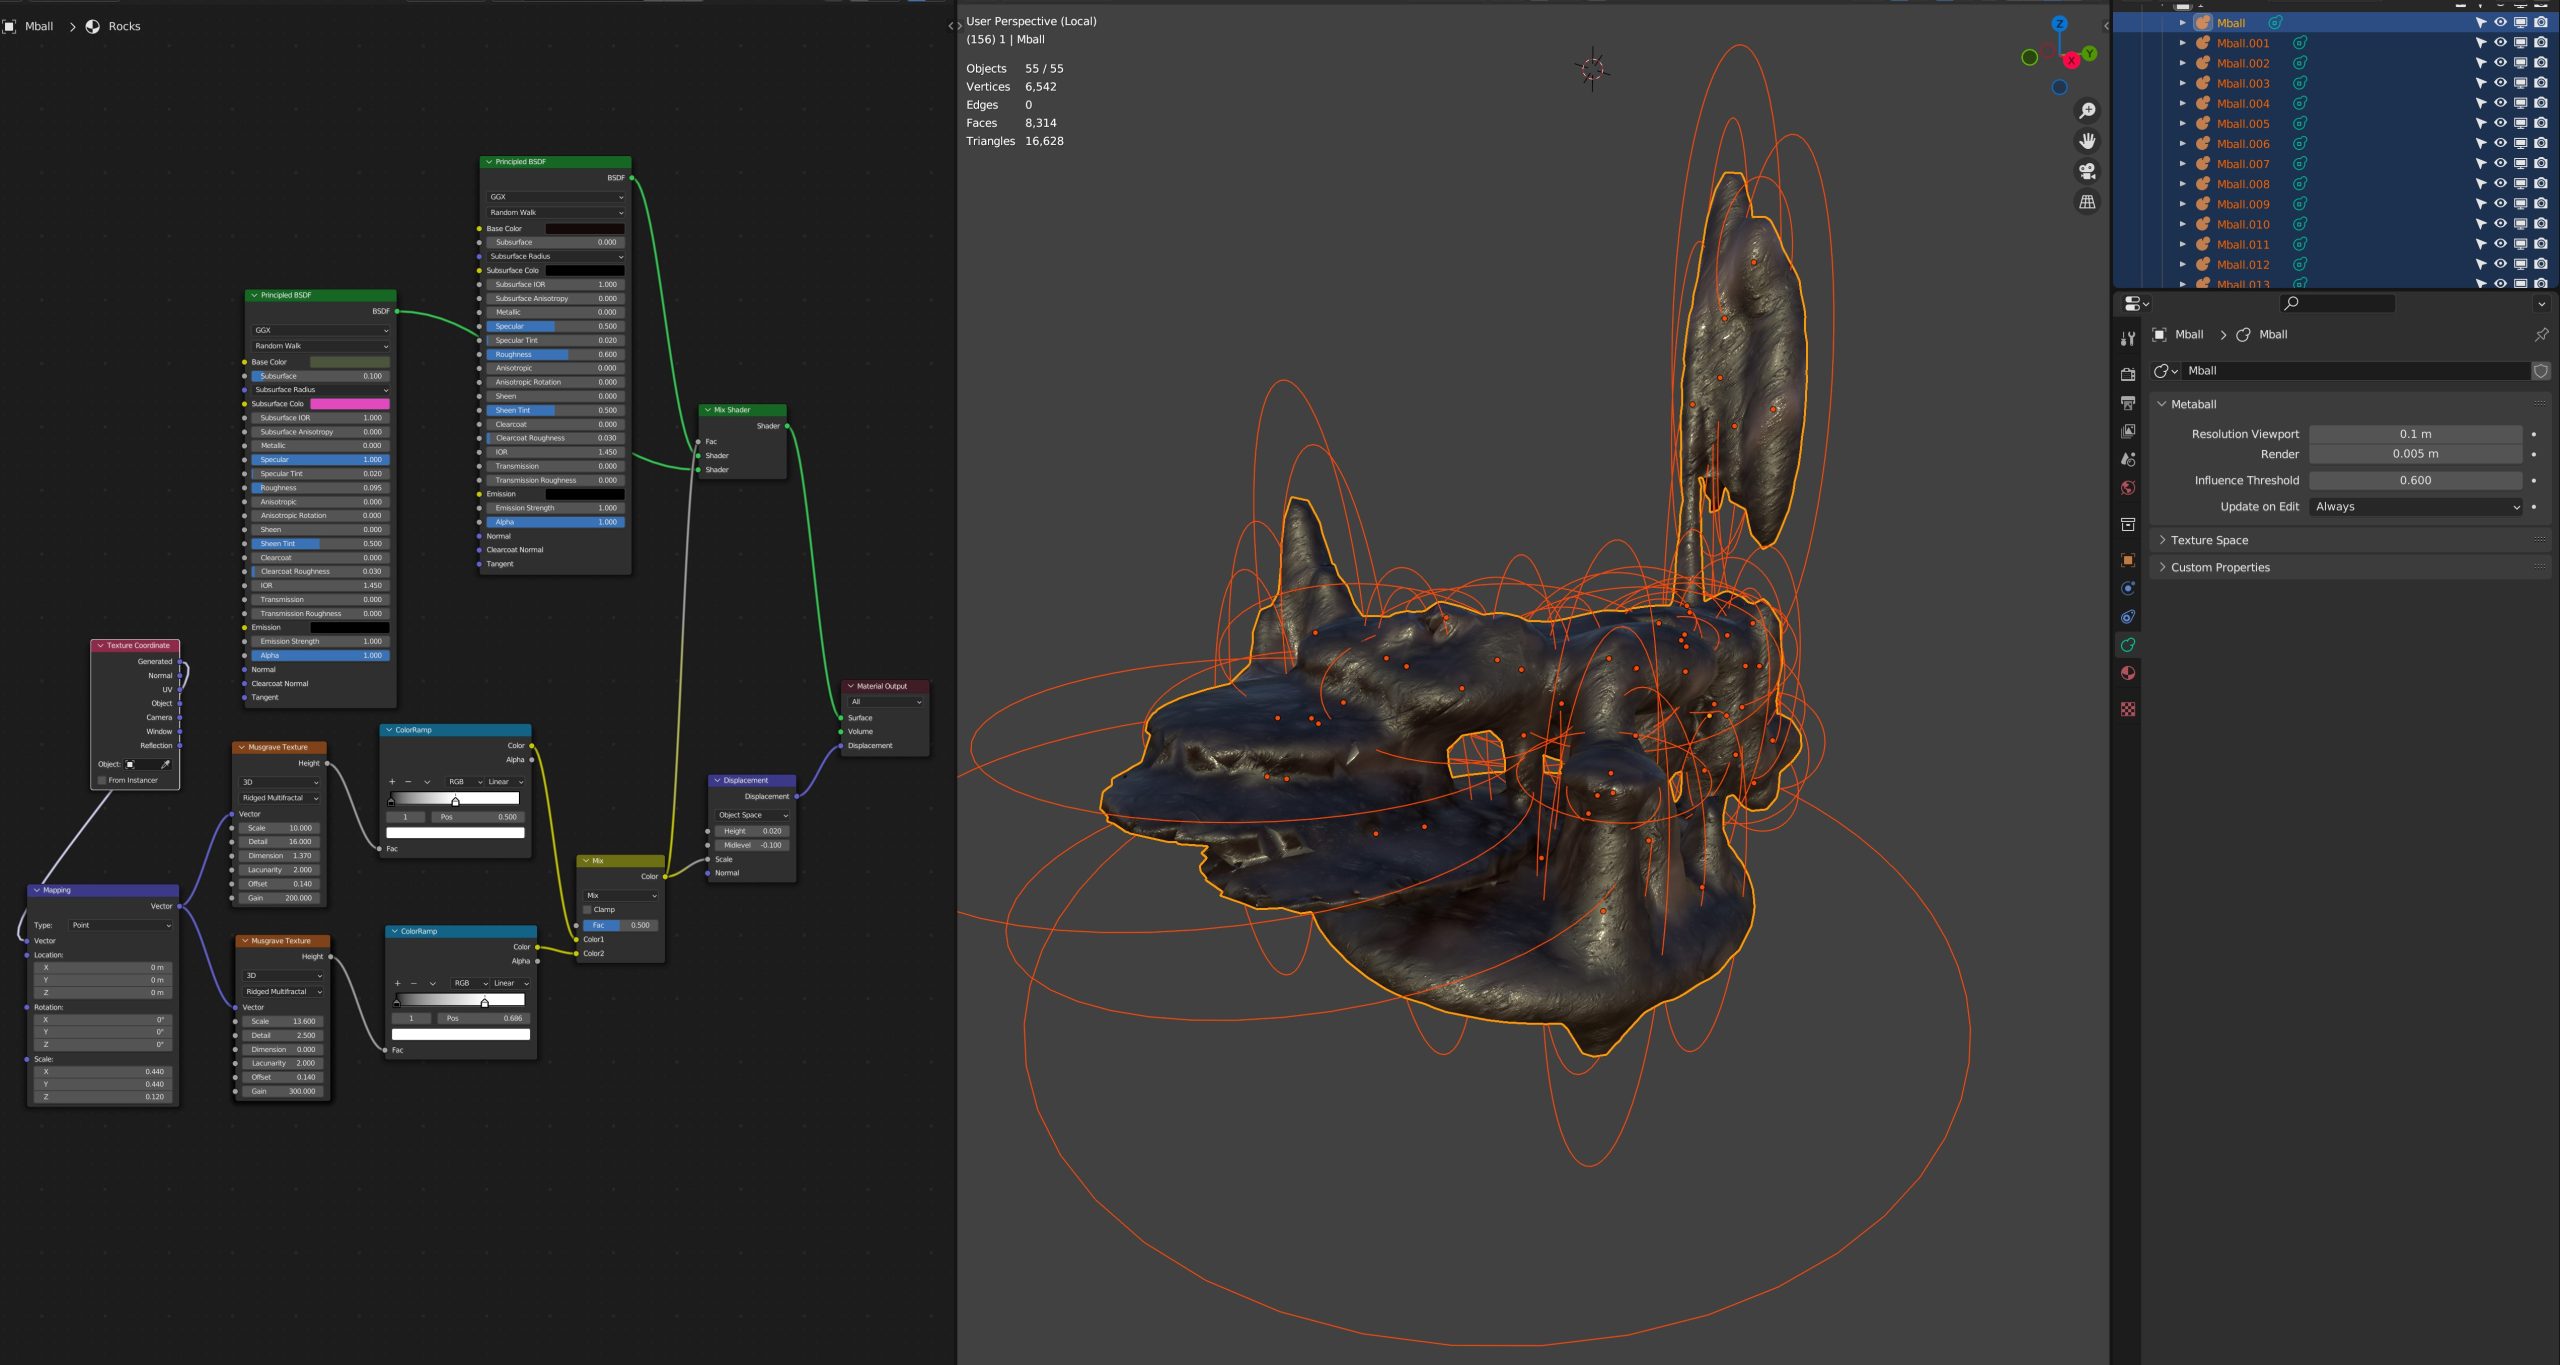
STALACTITES
I just wanted to experiment around with the shapes and composition, and have something I can move around forever. Commit to nothing. The procedural shader is again basic, just some Musgrave texture, colorramps, and some displacement. There are plenty of tutorials around on procedural rock generation to match the style you are going for.
Here are the stalactites or rock formations in caves:
TEXTURING
All shaders, with the exception of hair, are procedural as you have noticed by now.
Marble-Skin transition was made using texture coordinate mapped gradients. Only the part I have selected is really active in masking between the two materials. I wanted the flesh furthest from the crown to gradually turn to marble. Originally though, I wanted several parts from different directions to be marble with finer control (but not vertex painting), and the center of her body to be fleshy, and these gradient parts of the shader were left in (for future use).
LIGHTING
The world is just a color, plus a principled volume with a low value.
I just kept adding lights, and it looks like pure chaos. But the groups really are the usual ones:
- A number of spotlights that serve as my key light.
- Some area lights from the bottom side coming up, emulating water reflections or so underneath.
- A rim spotlight directly behind her.
- Some weak point lights here and there to accentuate anything I felt was left too much in the dark.
ANIMATION
Although no mesh animation was involved in this one, I do have a camera setup track along a circle/curve 180 or 360 on my startup file. This serves as a basic turntable, mostly for social media content to provide a 3D view. I can’t be bothered with baking, UVs etc. to upload anything to 3D model viewers.
There are many turntable tutorials and techniques online; the idea generally is you either keyframe your model to rotate and have the camera static, or you have to move the camera along a track curve or so.
I chose the last to keep things simple, should I ever want to add any other animation elements or motion later on. I think I based mine on this one: https://www.youtube.com/watch?v=1byaQygtcpc
Sometimes, Eevee makes the amount of frames easier to handle given my hardware situation. I made a minor adjustment on one problematic shader (think it was displacement on stalactites) before switching to this renderer, exported, and converted it to a GIF with Gifski (MAC).
FINAL RENDERING
This was actually my composite render from Blender.
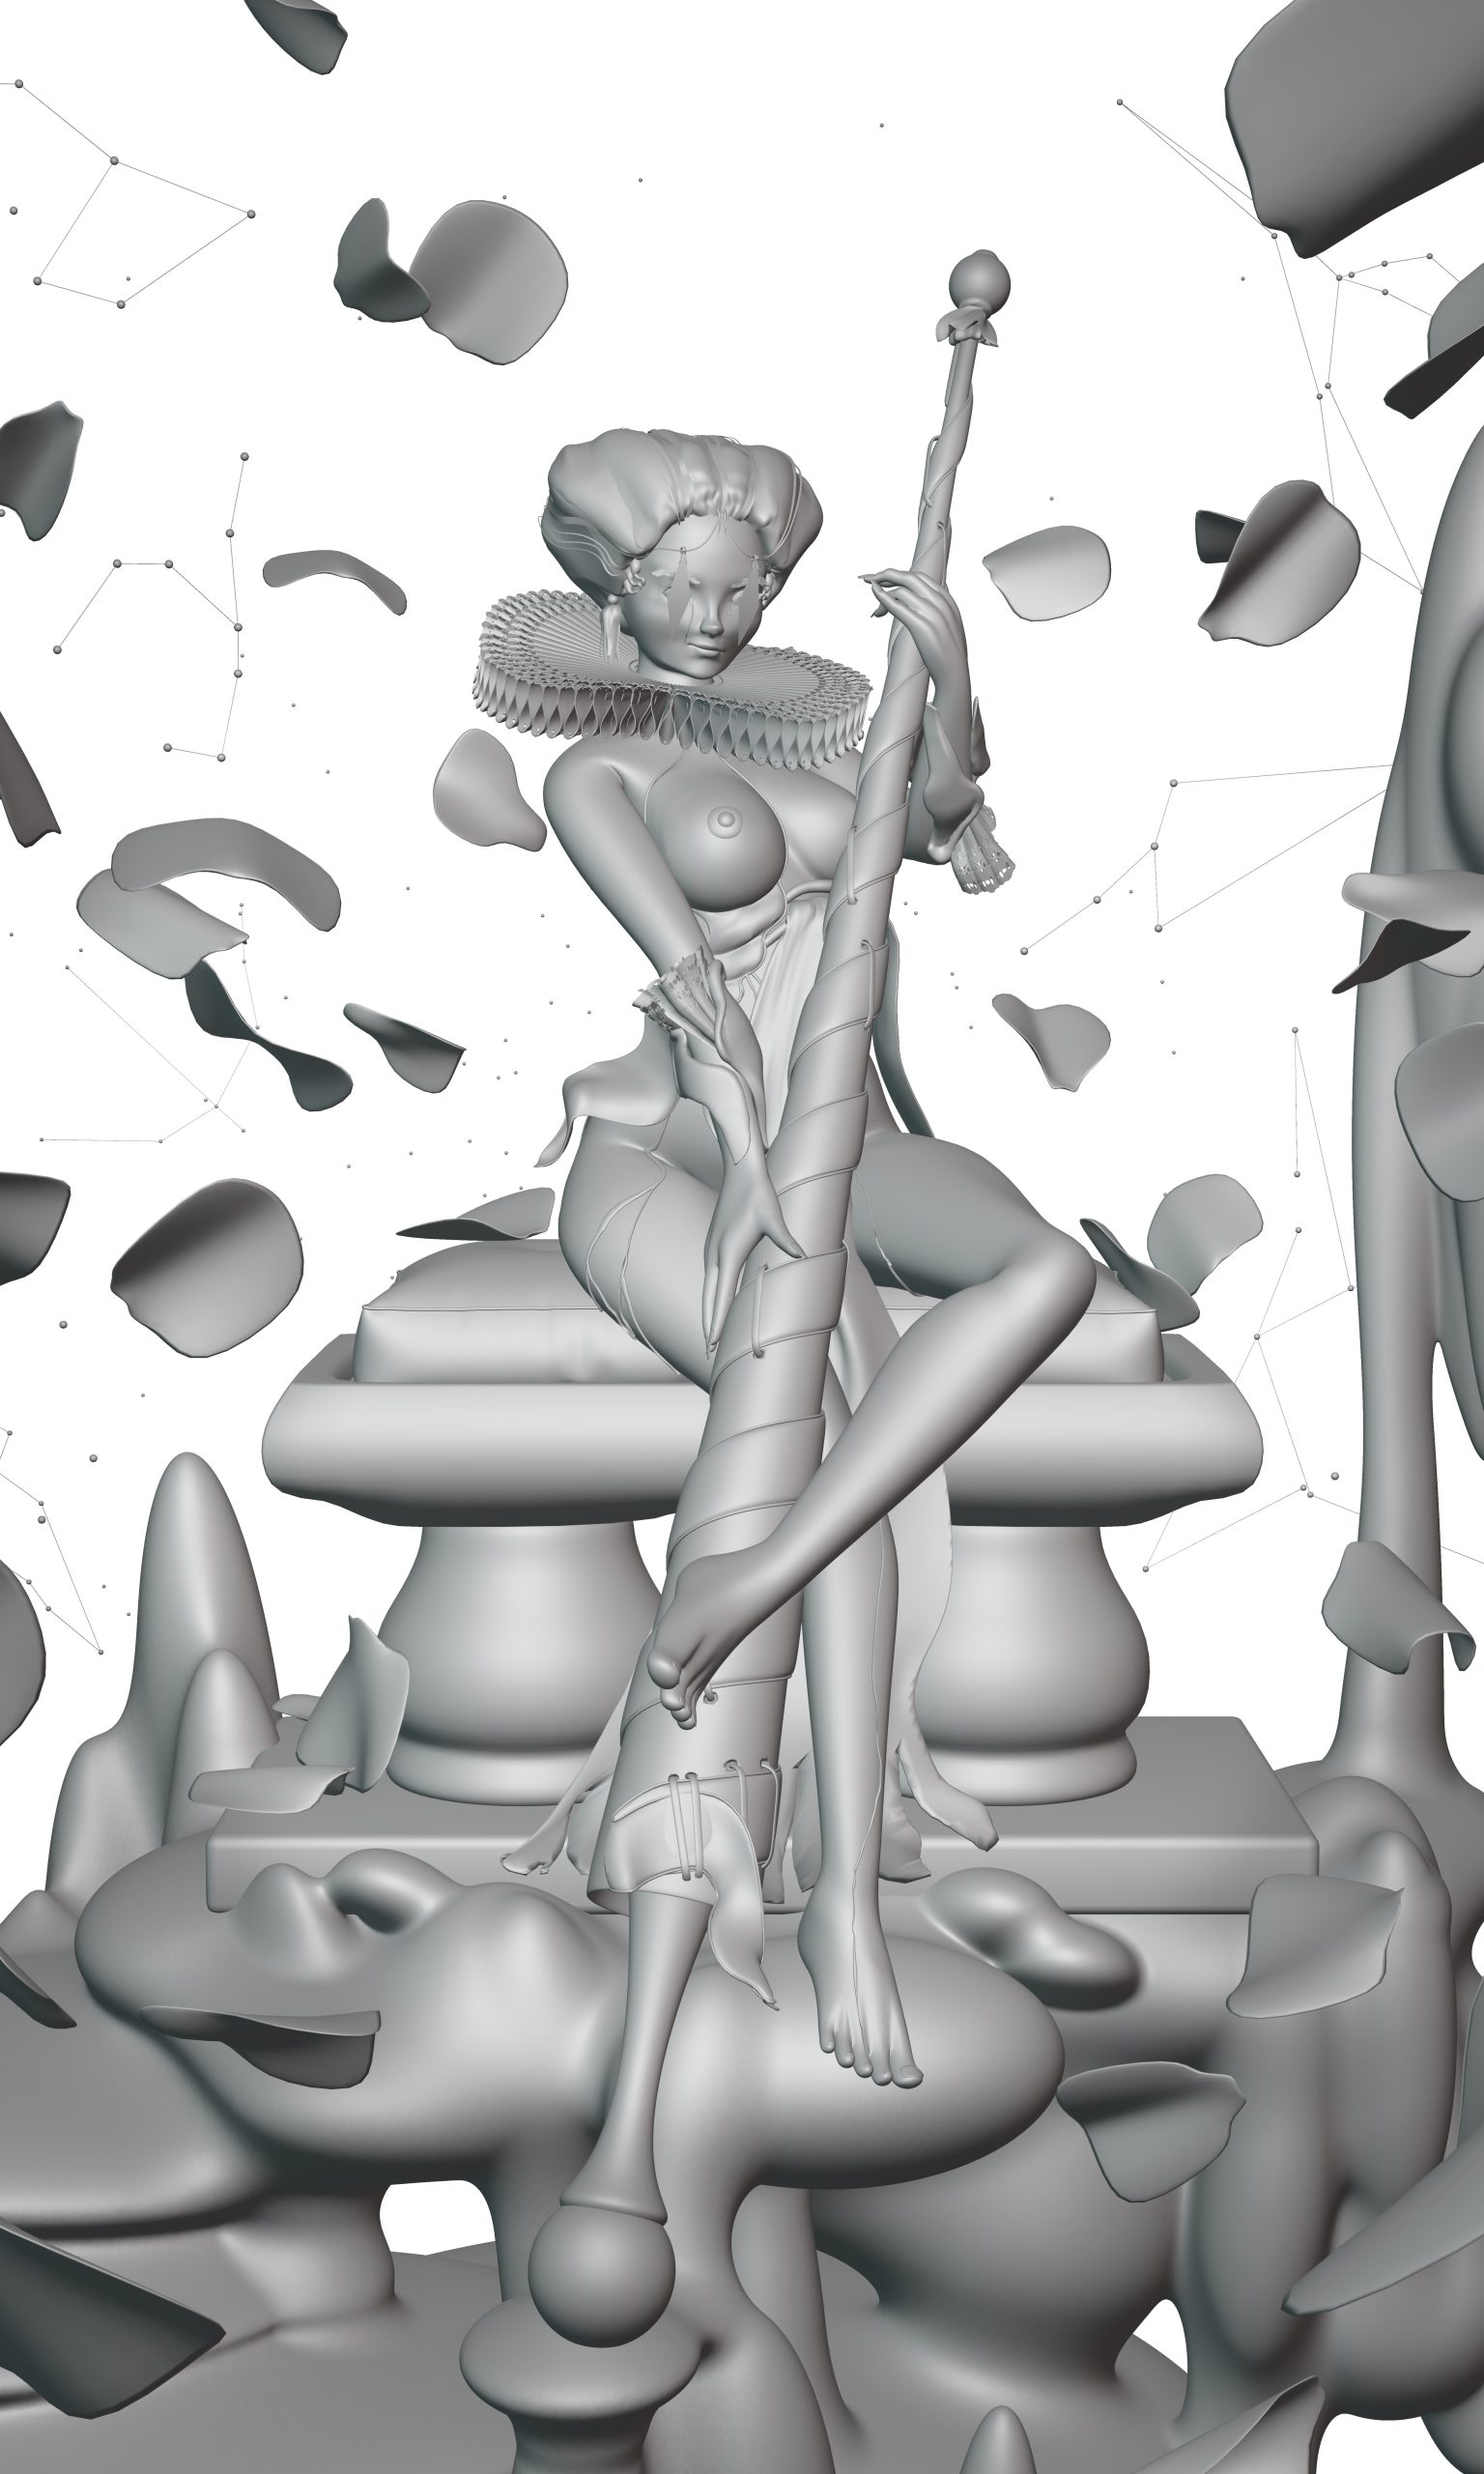
Ambient Occlusion and Clay render
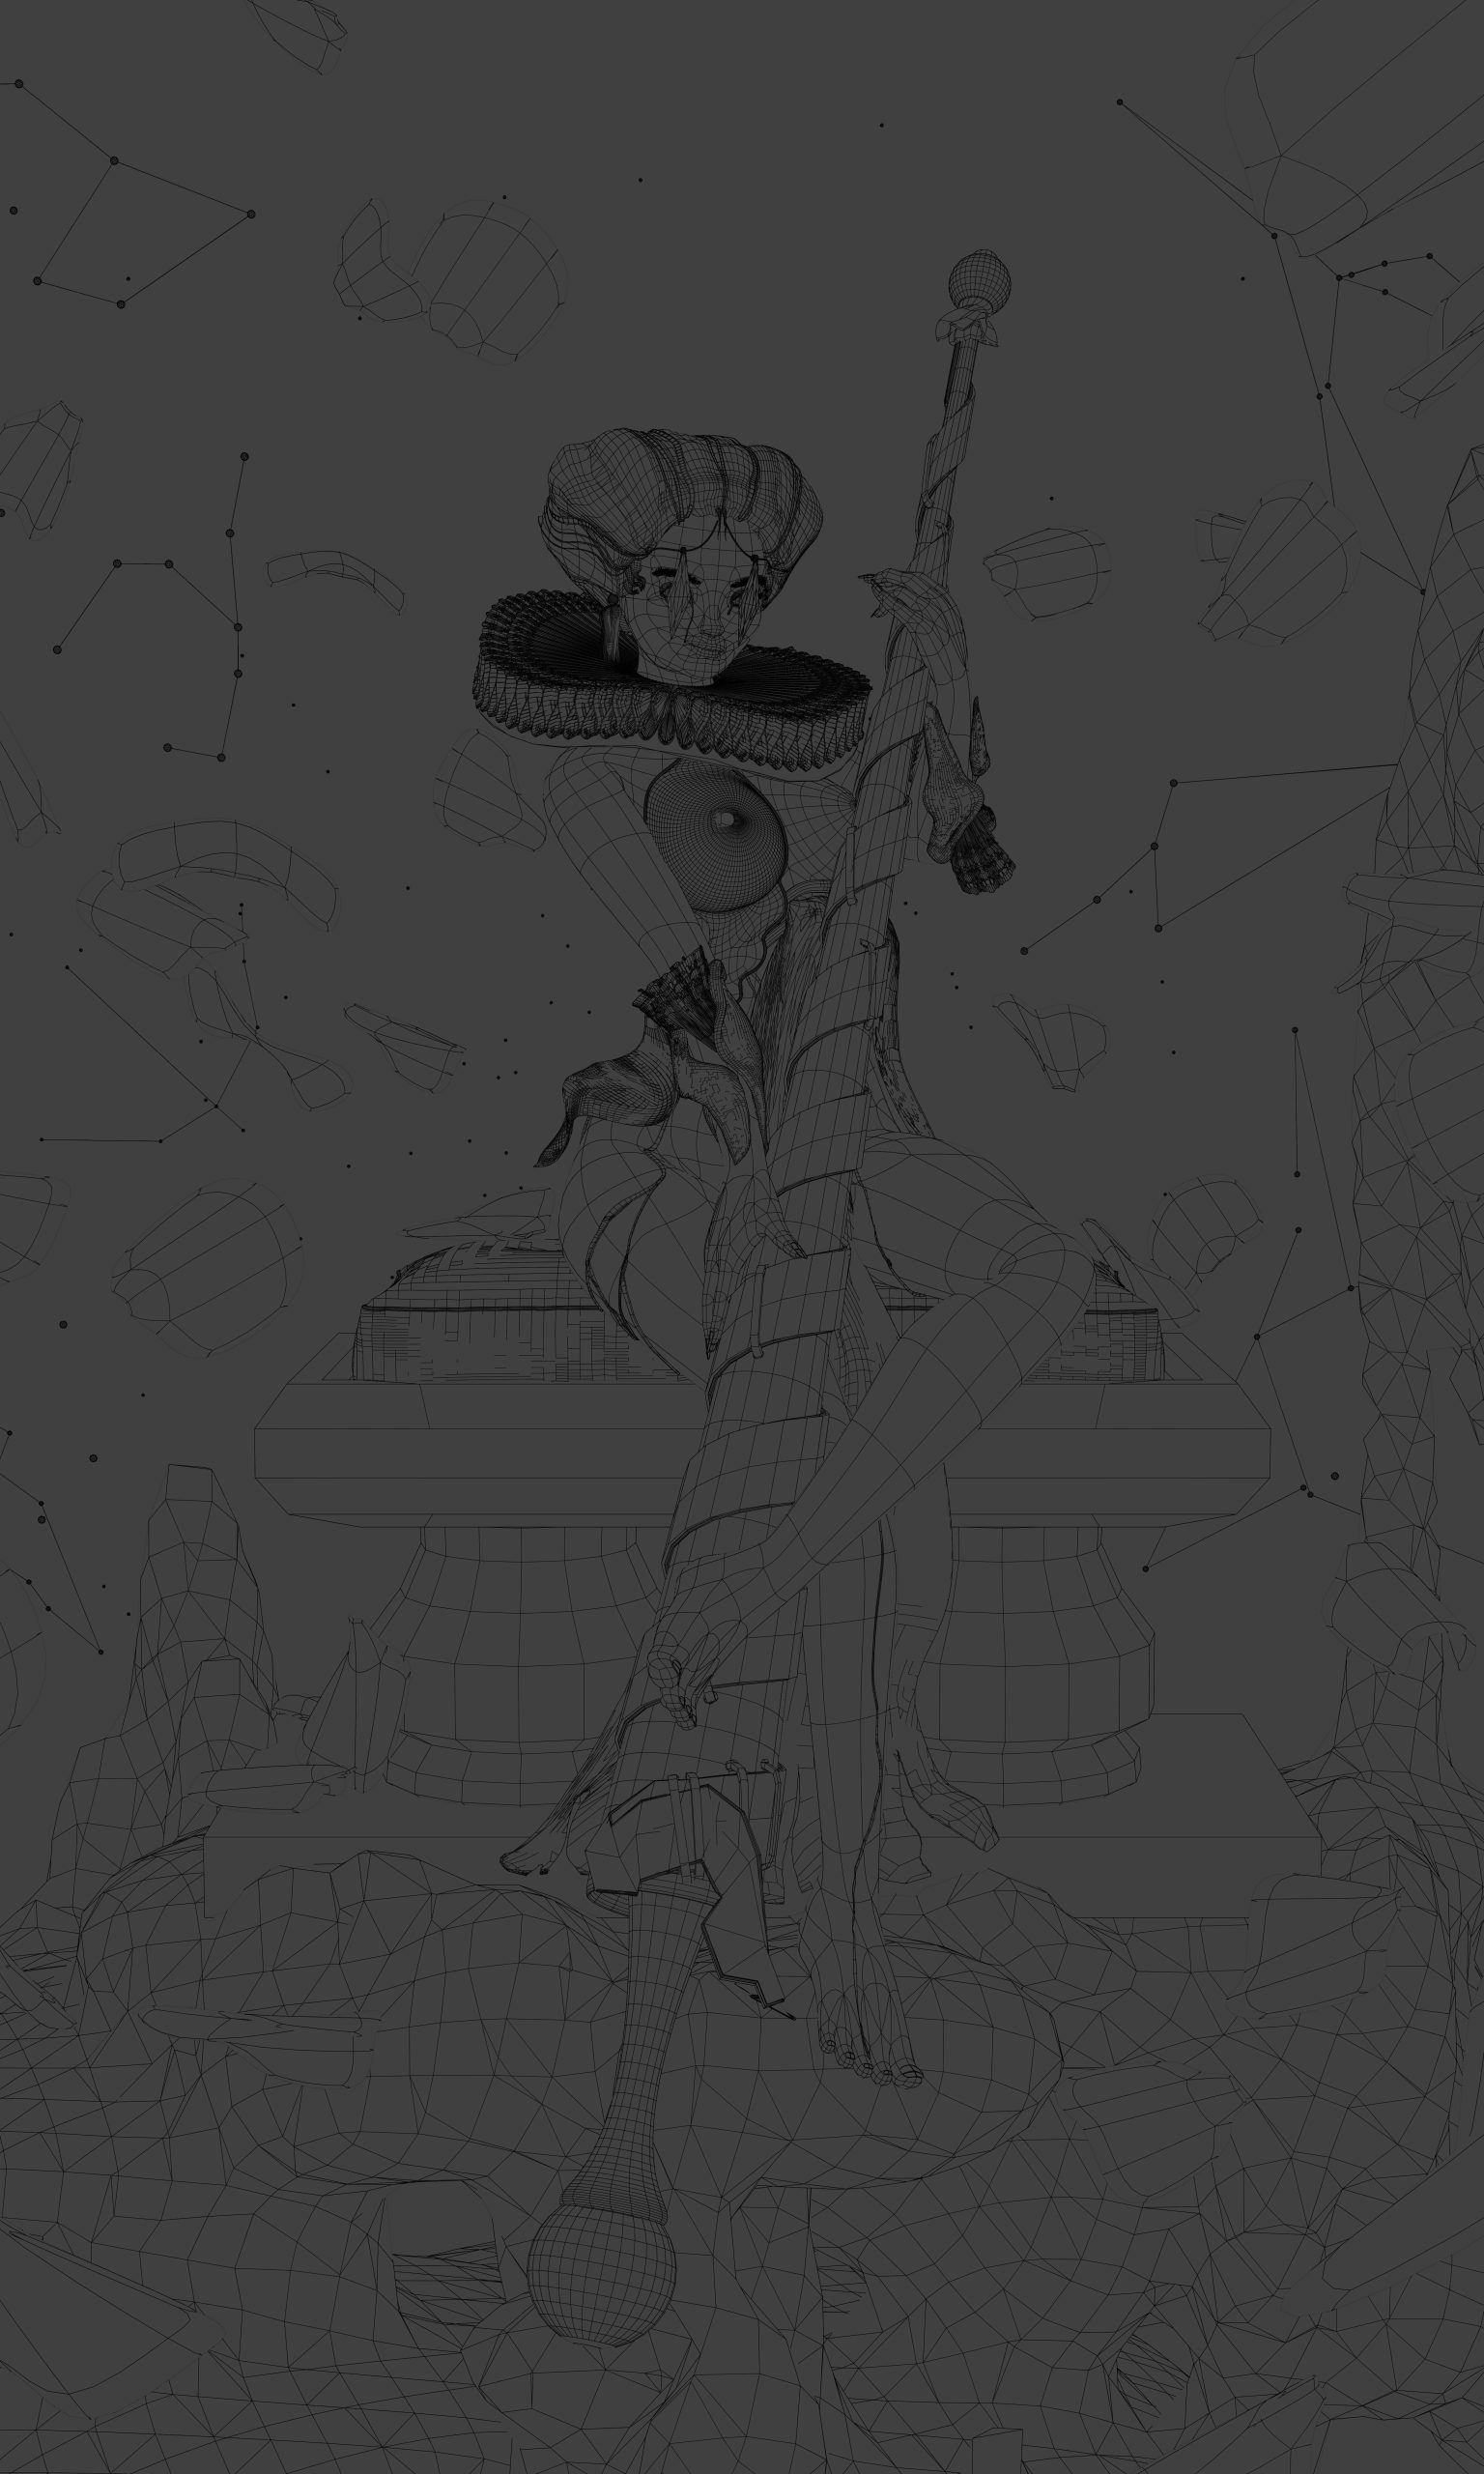
Wireframe and Mist Pass

You will probably notice it’s all flipped from the final render. I regularly flip any image, either 3D or 2D painting, both during the process and after, and with this one I liked how the flipped one read in the end.
From this point onwards, it was all post-processing, using the various passes in photo editing to composite as I needed.
POST PROCESS
Both the flaming halo and background flames were painted with “flame brush.” The feeling I decided to go for here was kind of Diablo II lettering flames rendering, like the way flames appear in the game.
The rest are just retouching here and there, mostly adding on the hair.
The majority of the post-processing had to do with masking areas using render layers and adjusting lighting etc. locally.
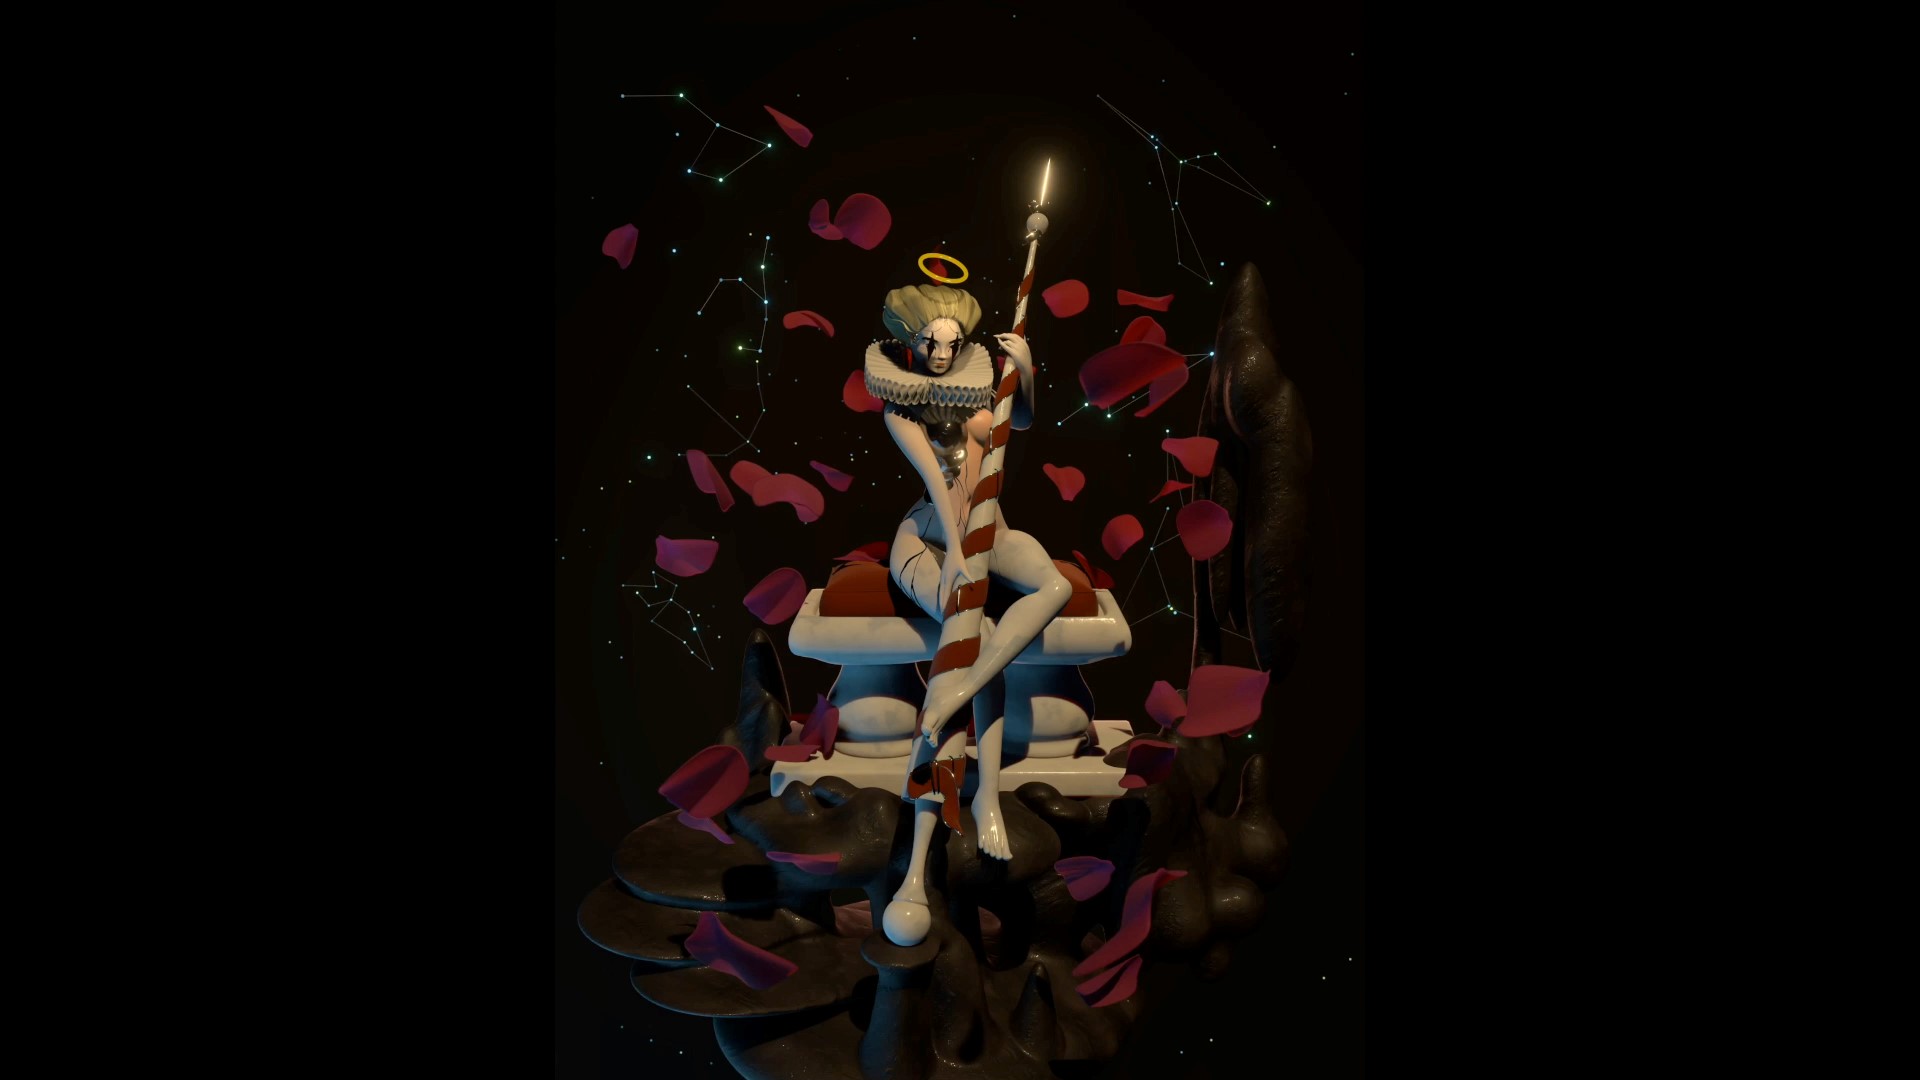
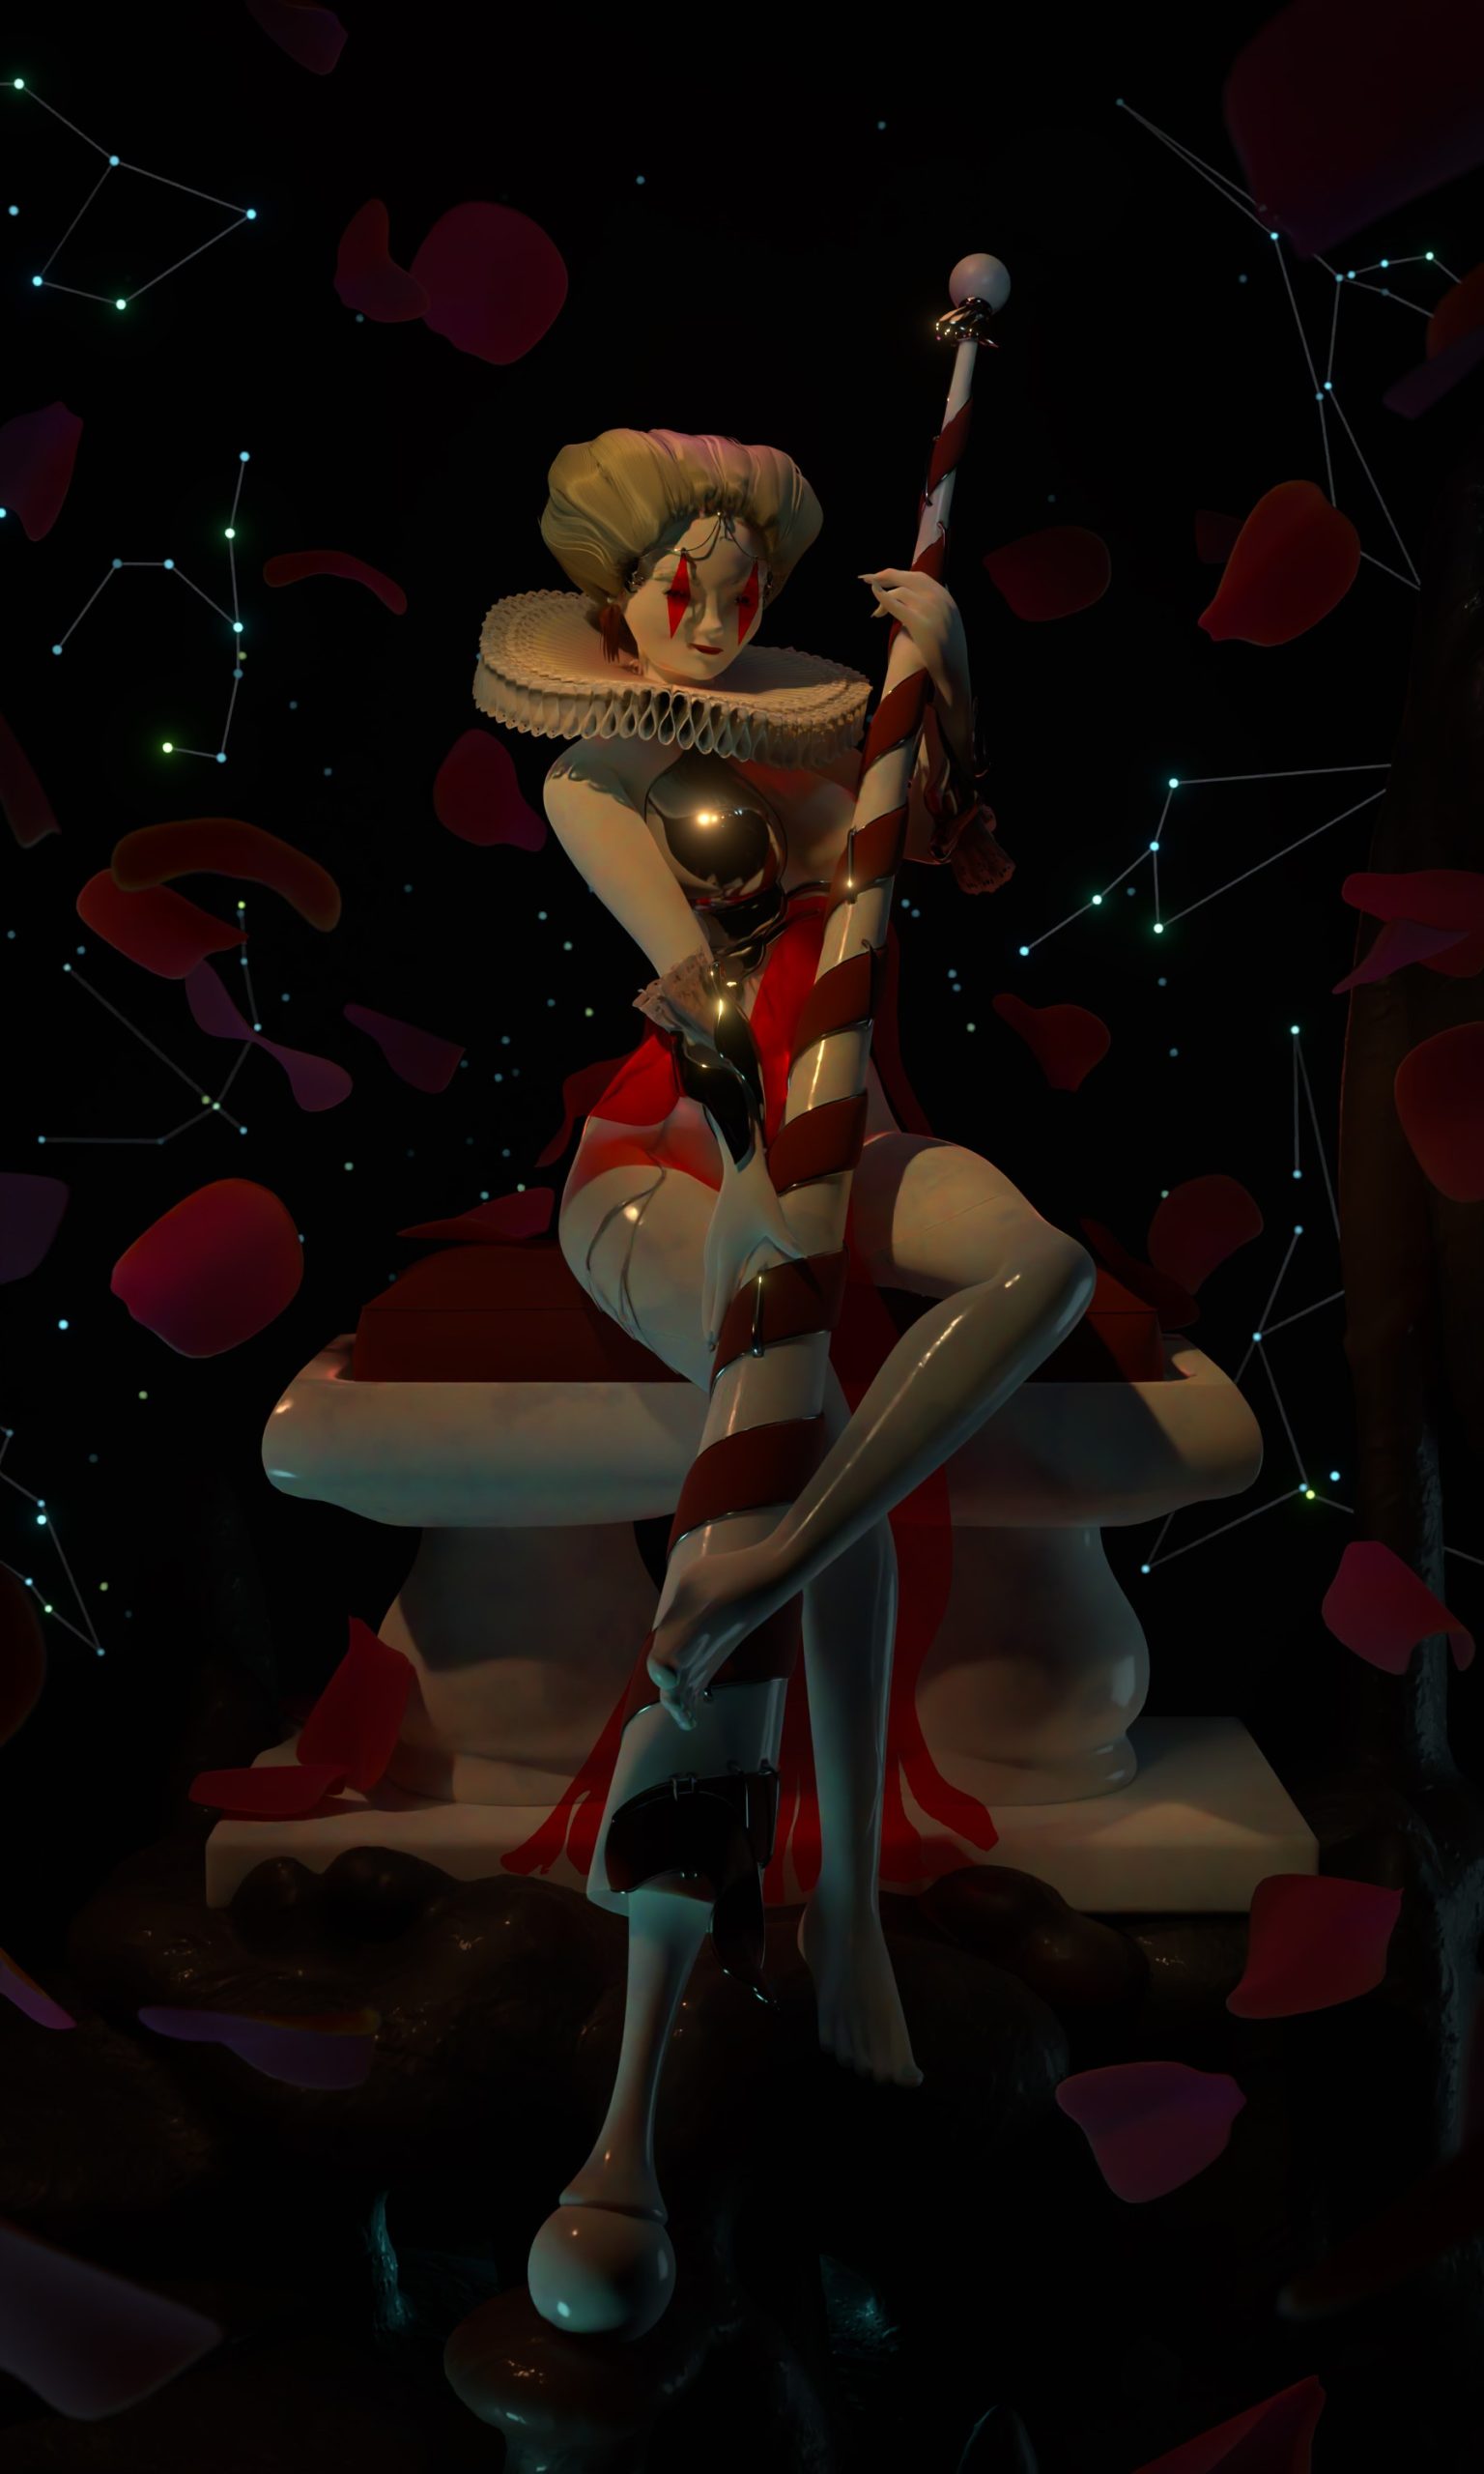
LANSH-AR-LOTTE
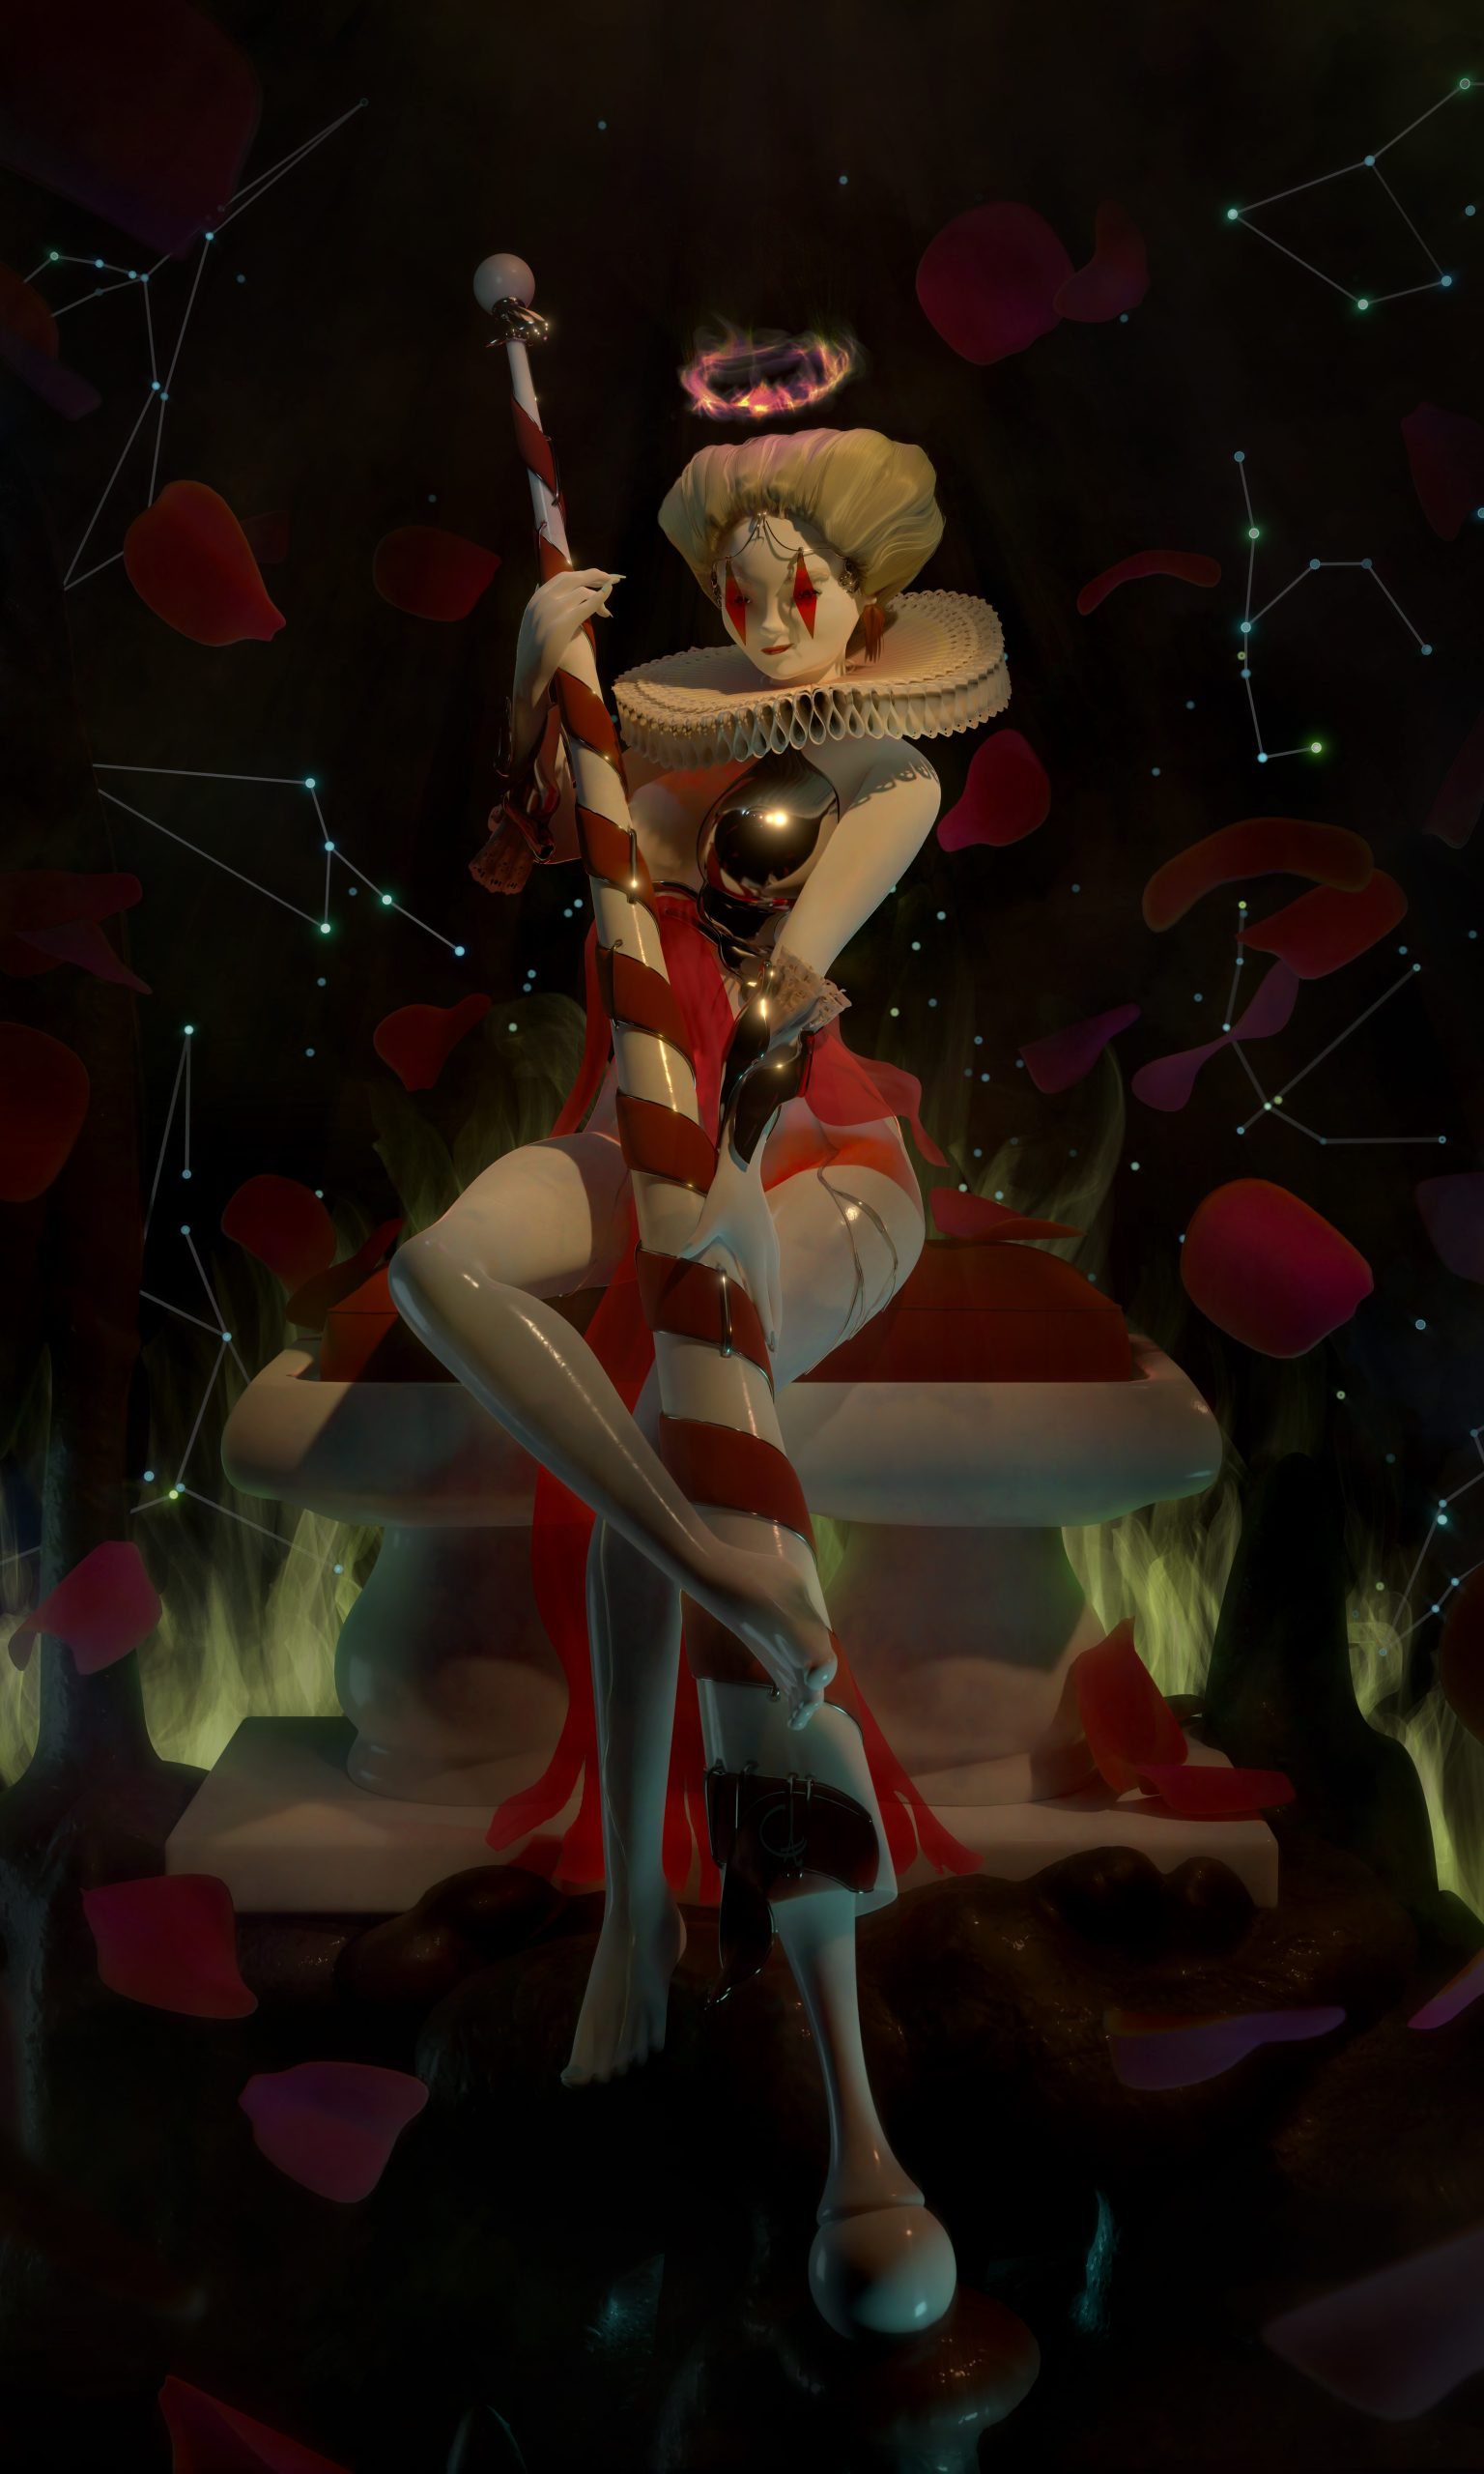
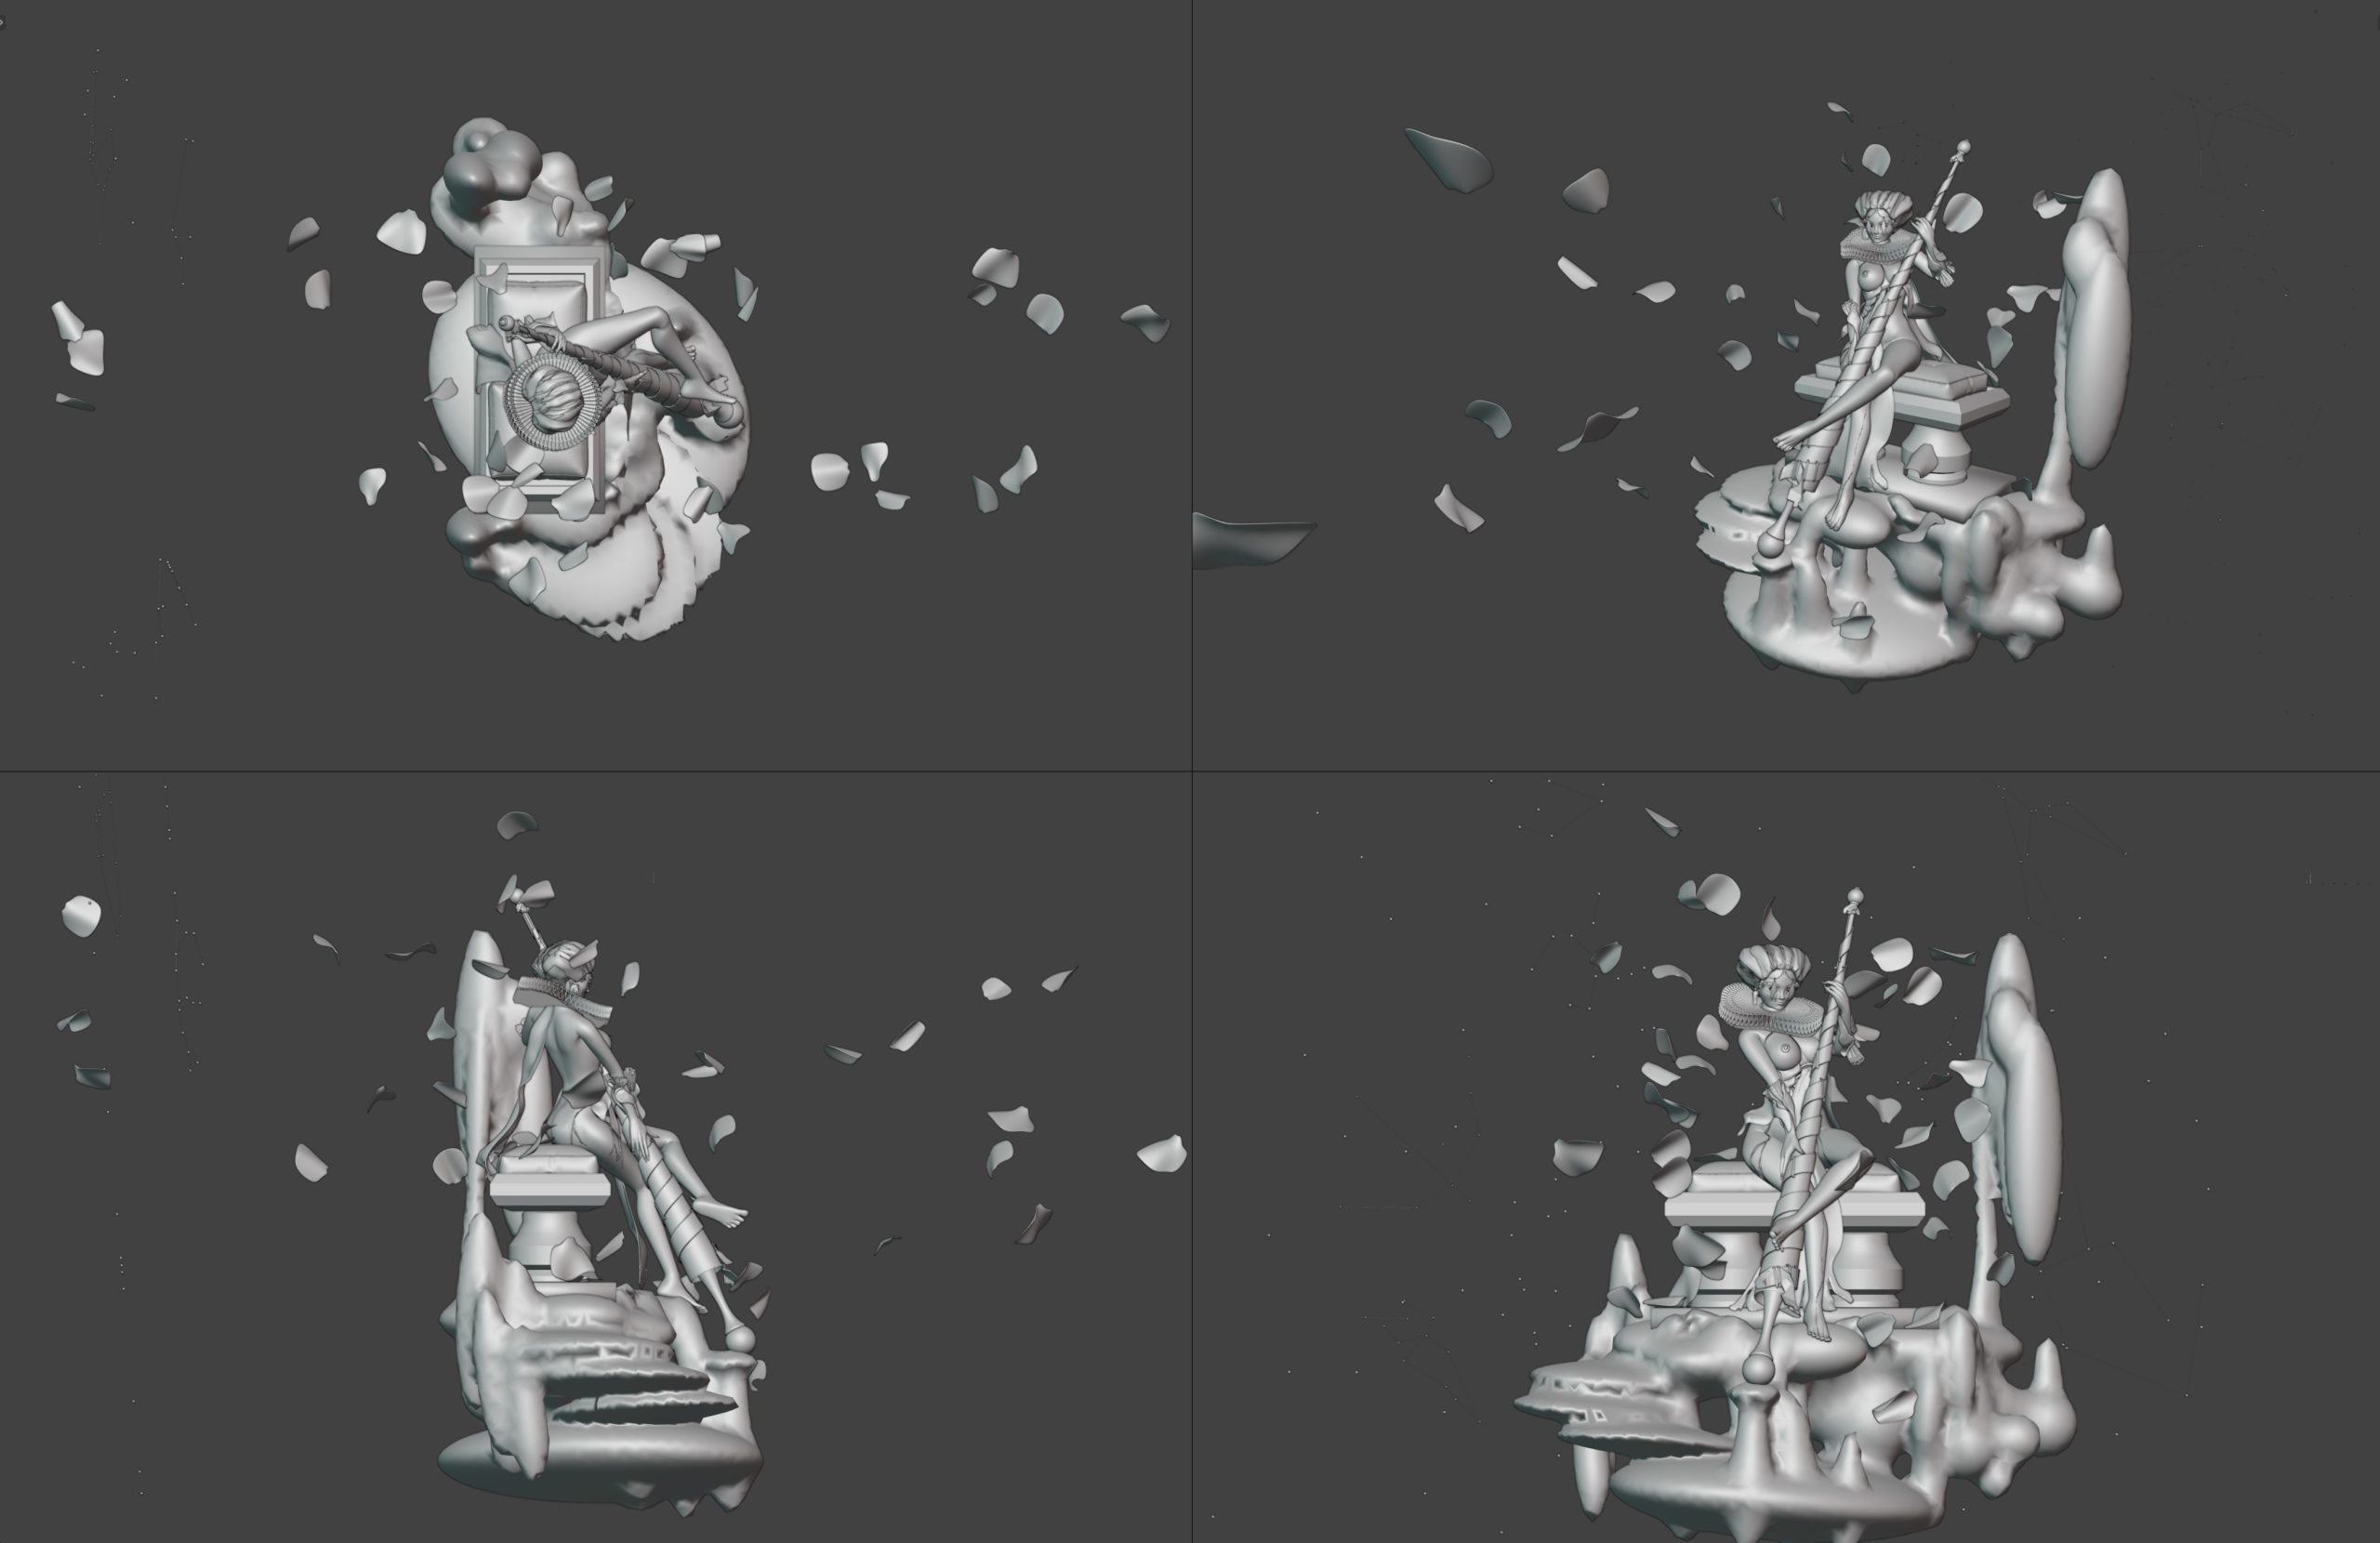
Quad view. Ctrl+Alt+Q, an all-time favorite.
And there you have it!
Thank you for reading this article and I hope that you’ve learned something new.
About the Artist
Atalluc, a software engineer from Glasgow with an enthusiasm for art.


