Behind the Scenes: Elf and Halloween Pumpkin
INTRODUCTION
Hi guys! I am a self-taught 3D artist from Russia. I create my work in Blender and publish it under the pseudonym, Kwituki.
I like to create stylized 3D illustrations. But this year, I decided to go deeper into rigging and animation to give dynamics to my characters.
INSPIRATION
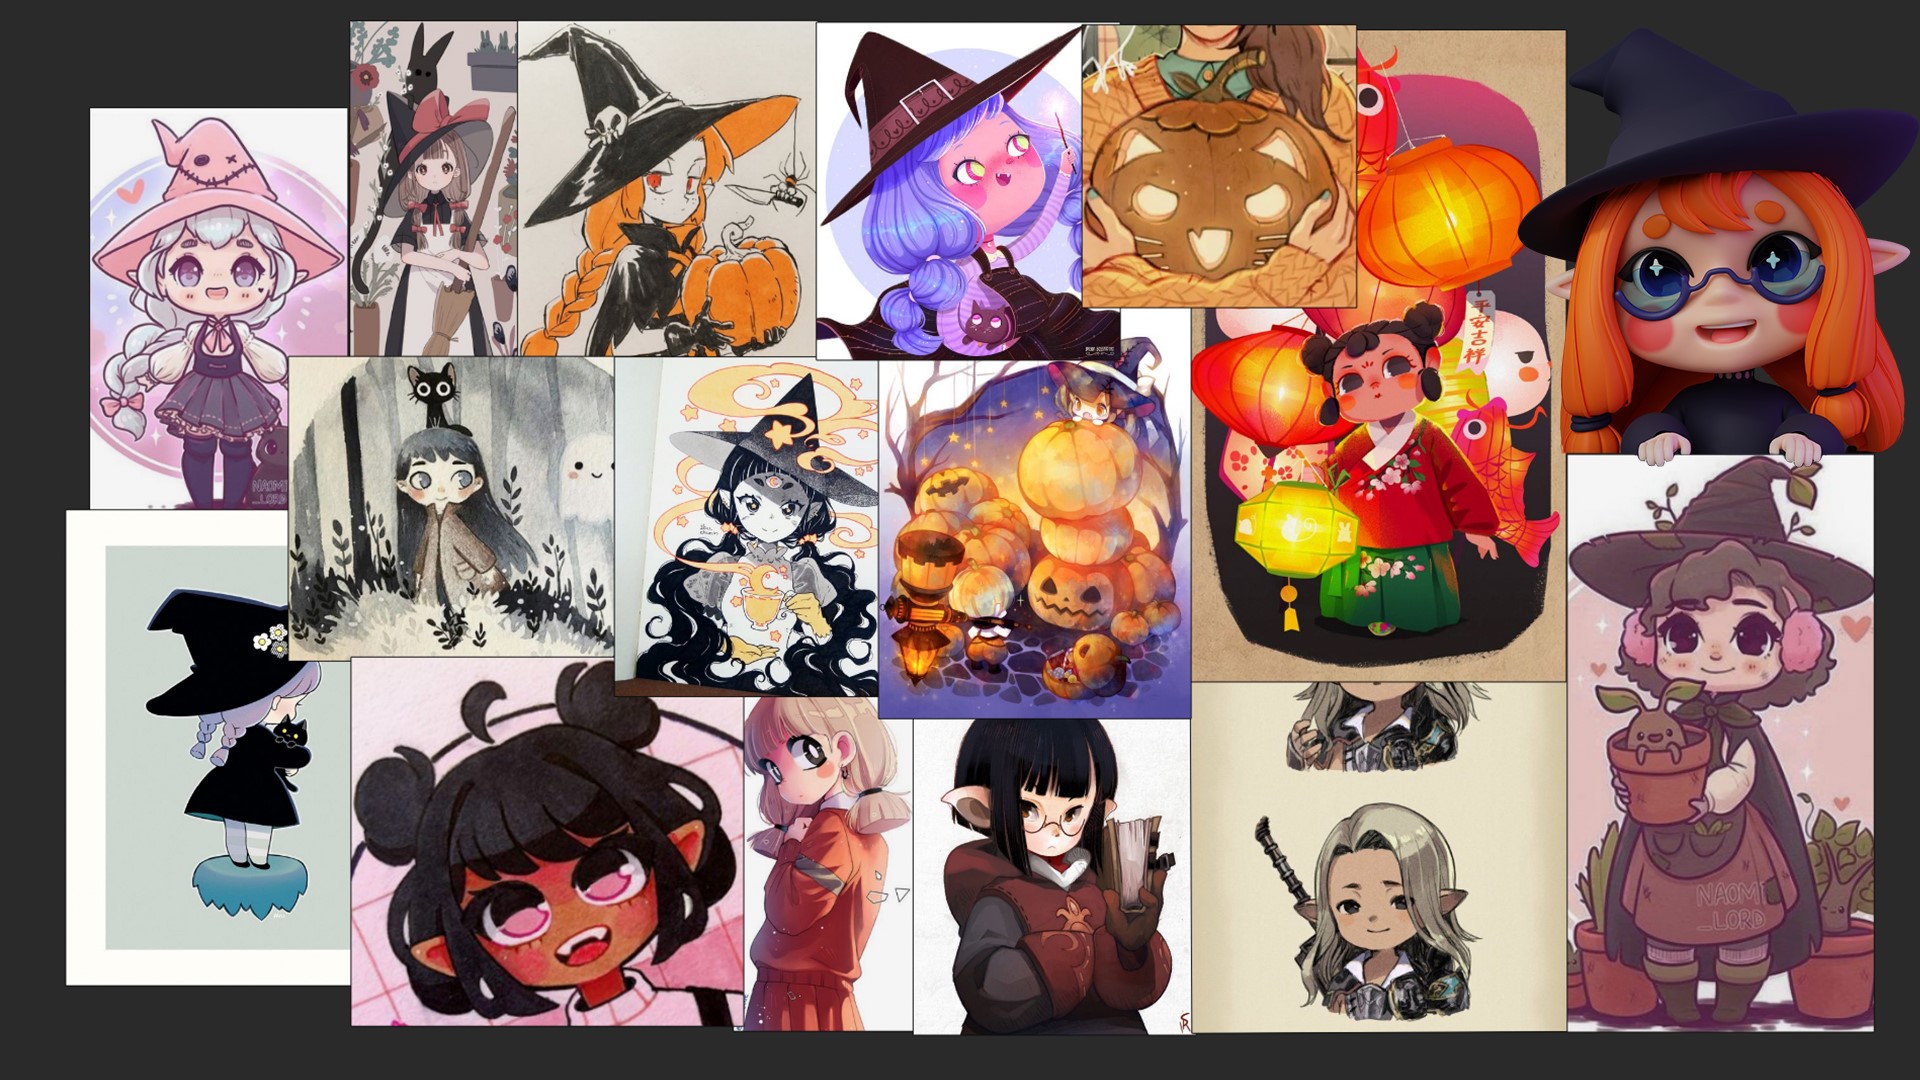
I like mystical and fabulous stories and characters. The Halloween holiday is great for implementing such ideas. For my work, I collected various pictures that helped me form a general idea of the character that I wanted to make.
For convenient placement of references, I use the PureRef program
PROCESS
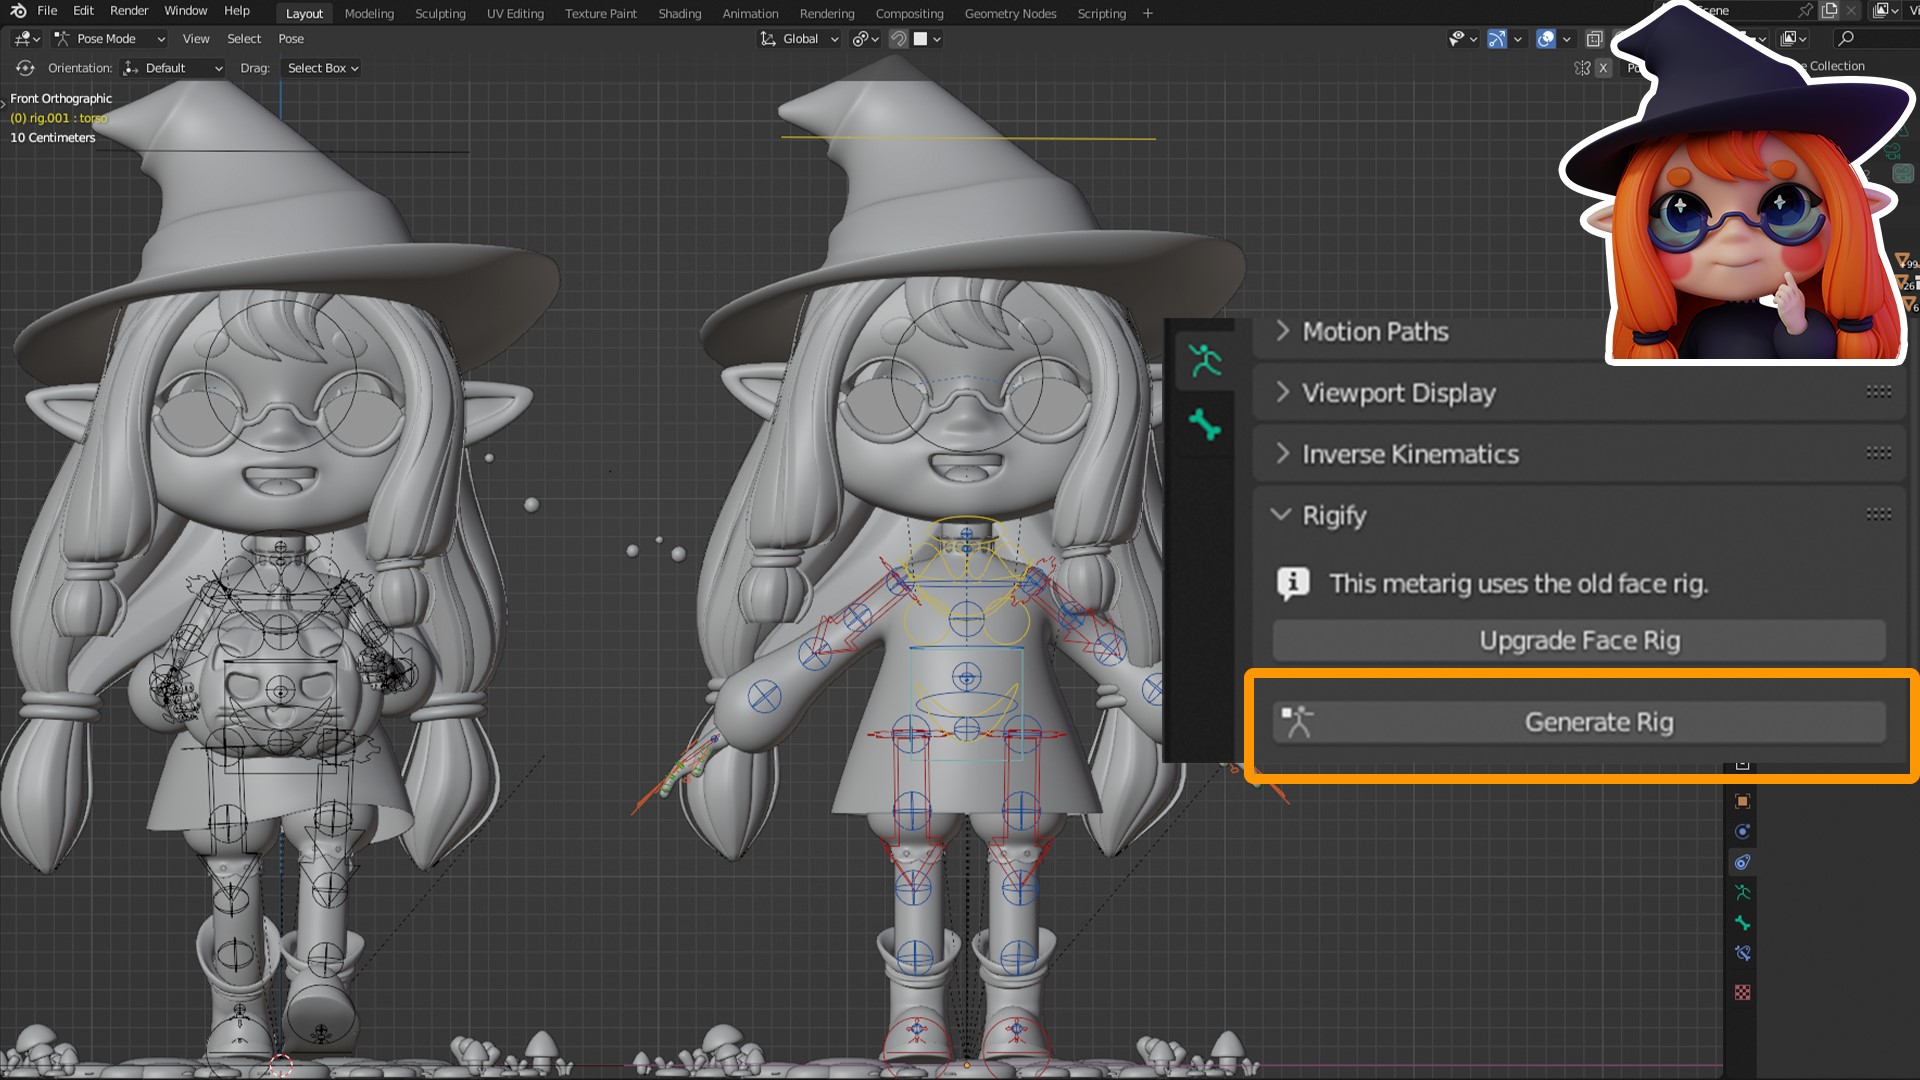
To bring this little girl to life, I created a rig for her with the help of Rigify addon.
You don’t need to download this addon, for Blender already has it. To begin with, I placed the skeleton and moved all the bones into place. I removed the bones of the face, and revived it in a different way as mentioned below.
If you’re removing facial bones, don’t forget the tricky little bone that’s hidden in the head bone.
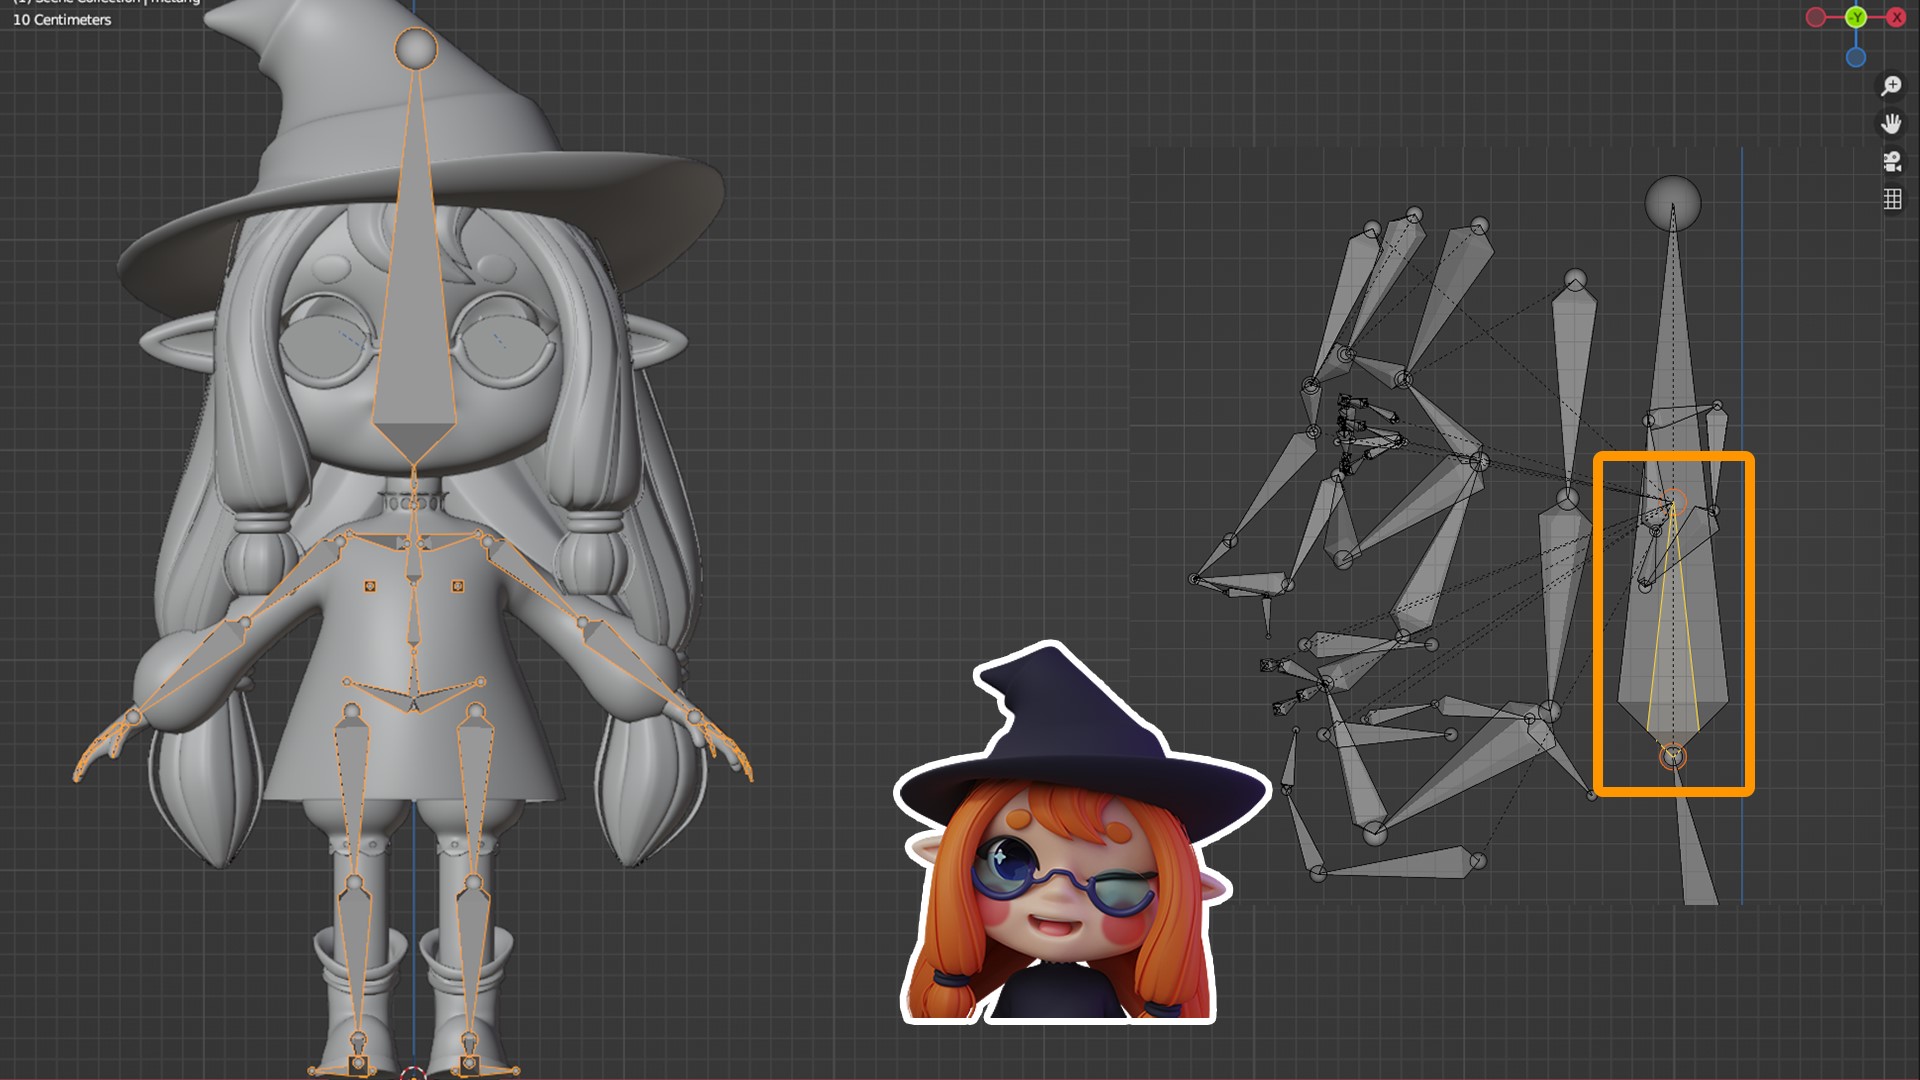
After placing the bones, generate a new rig. With such a rig, it will be easier and more convenient to control the character.
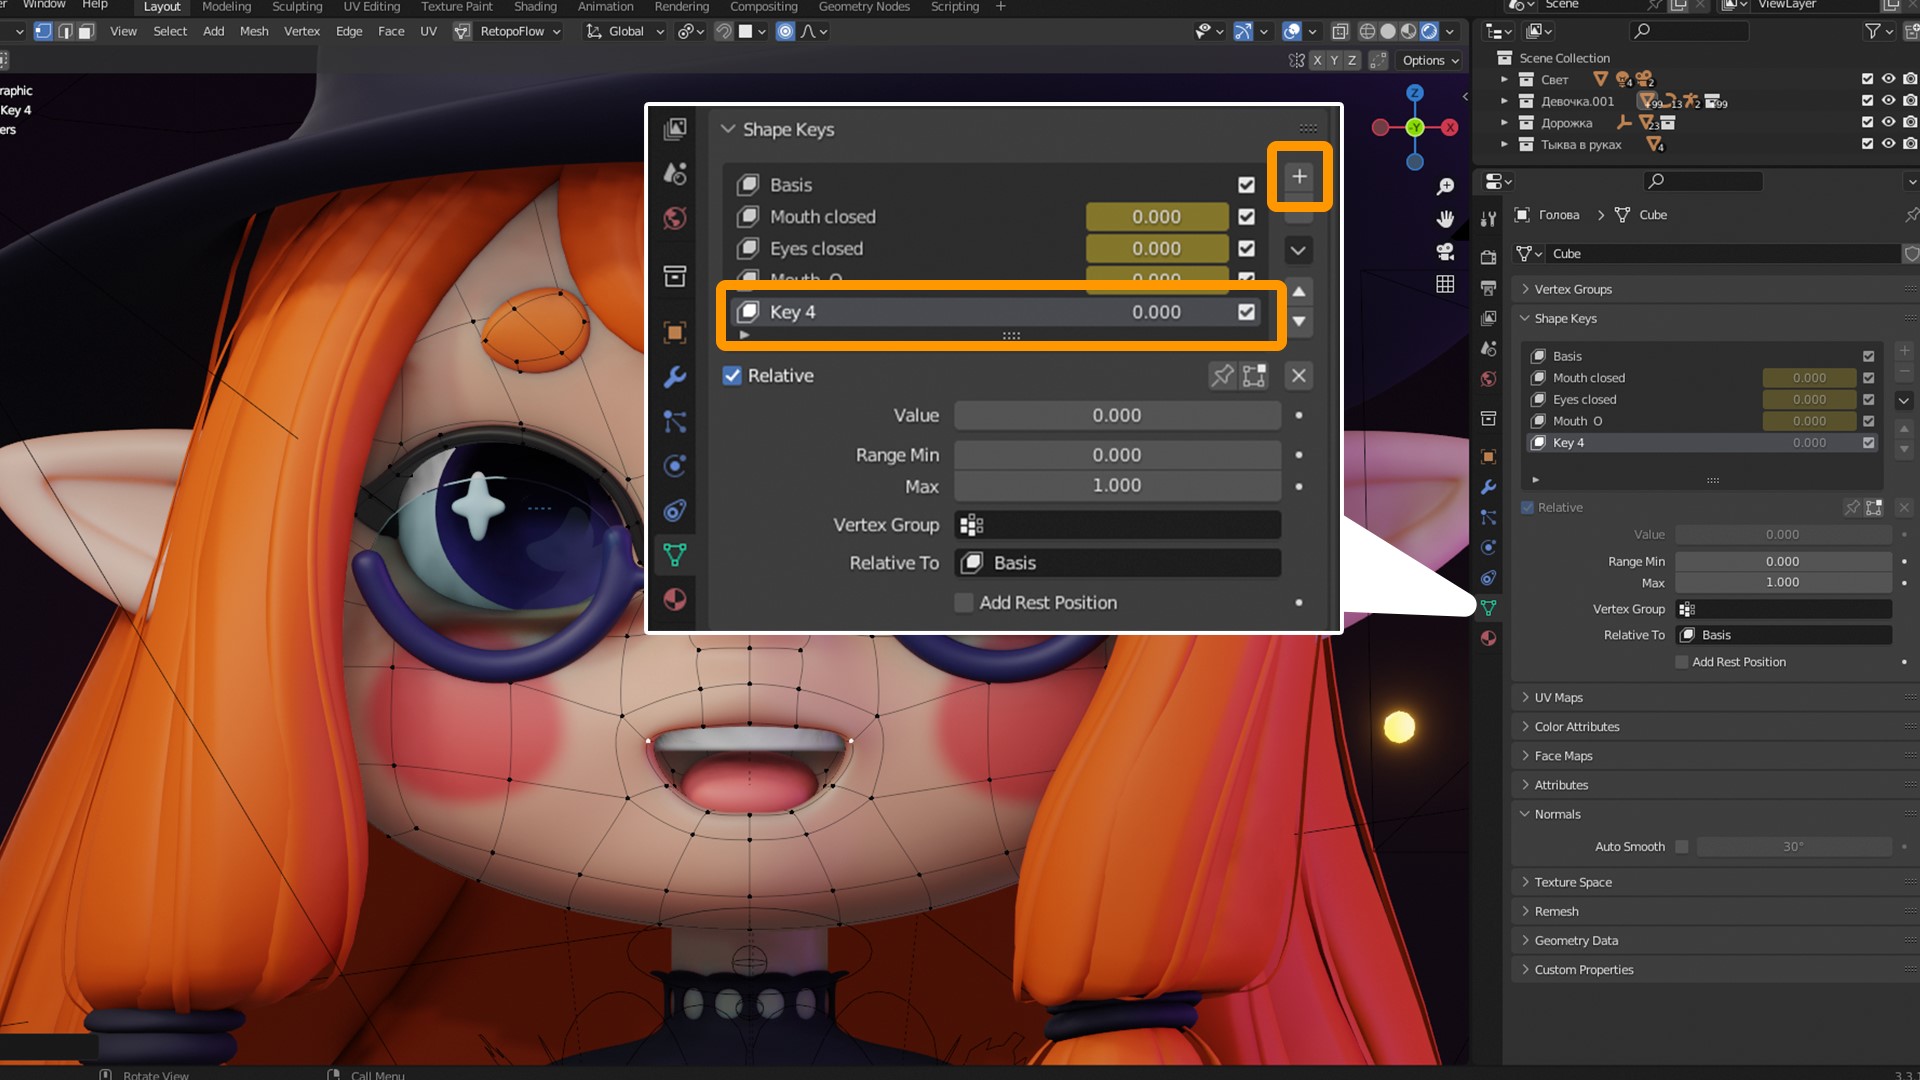
How were the facial expressions made? Shape keys! To begin with, a basic emotion is created from which all the rest will be created.
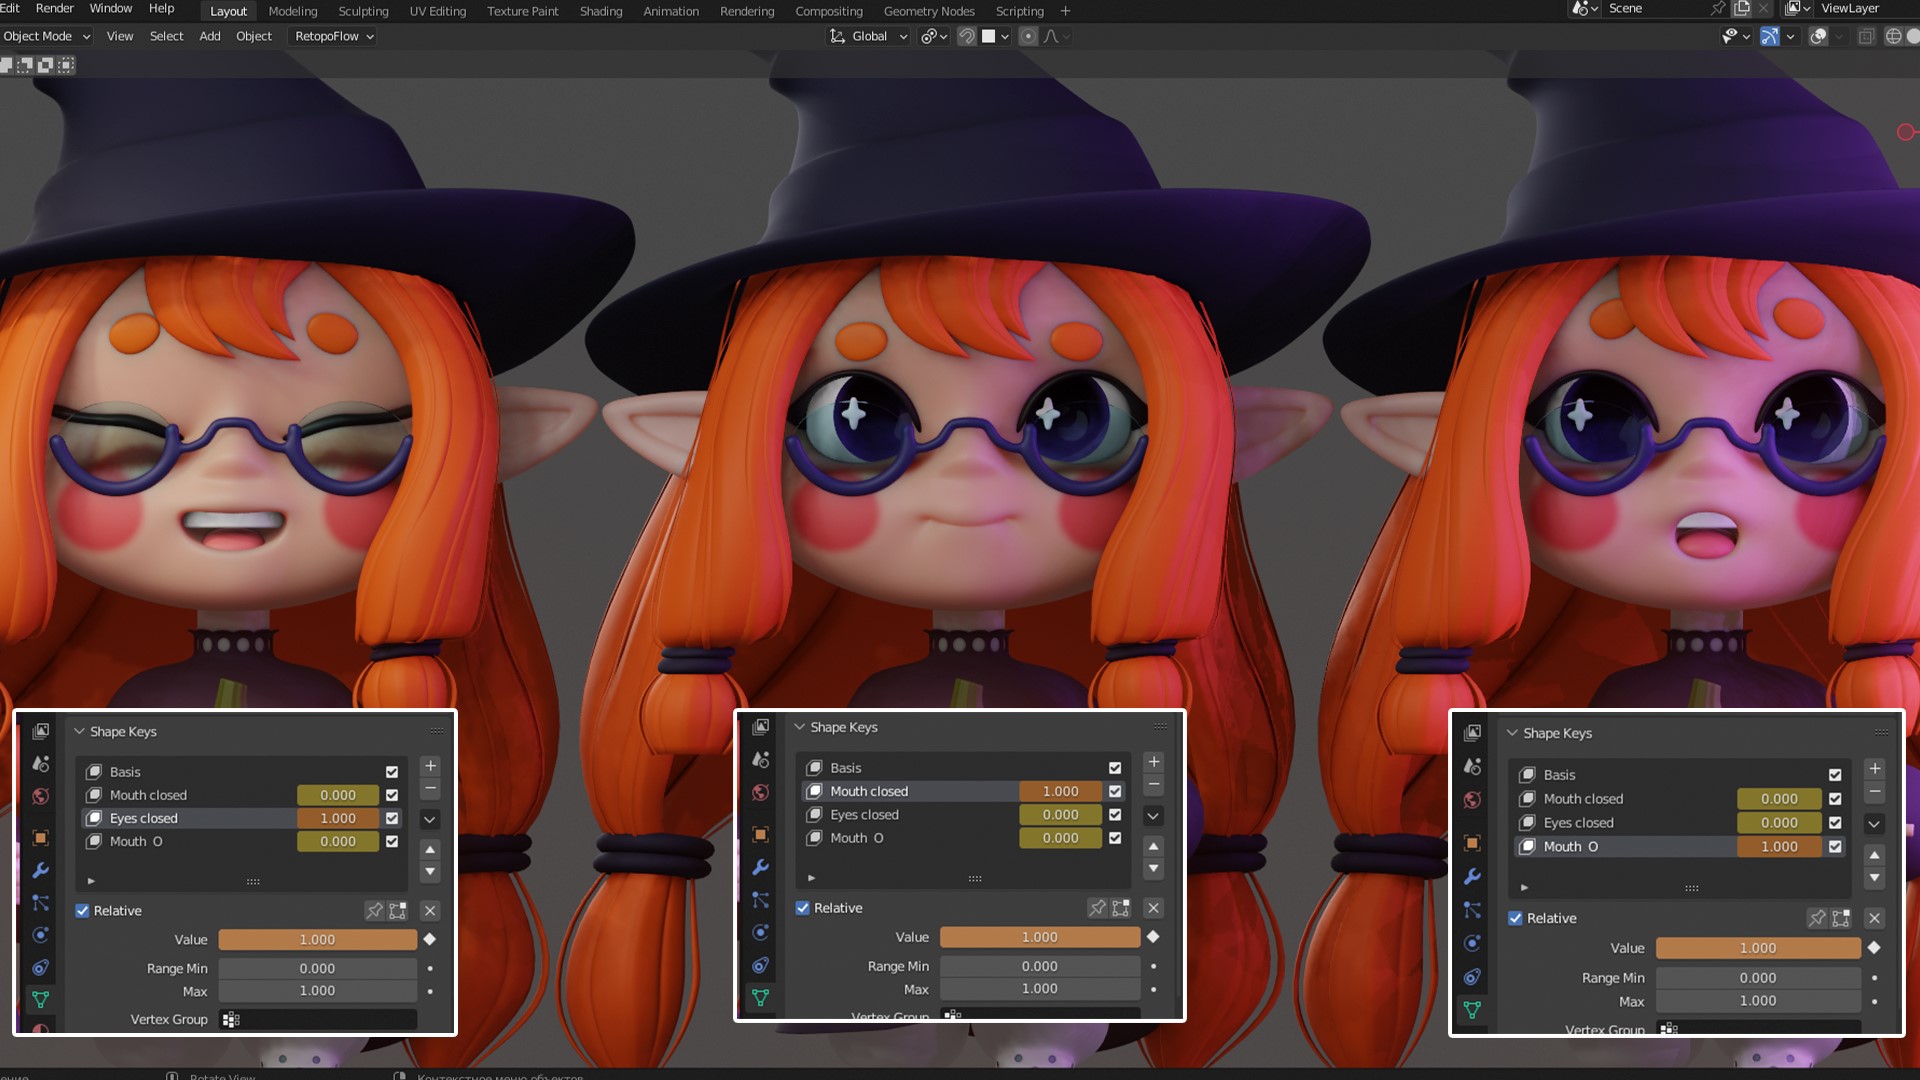
To create a new emotion, just press the plus sign, go to the Edit mode, and change the face of the character as you need.
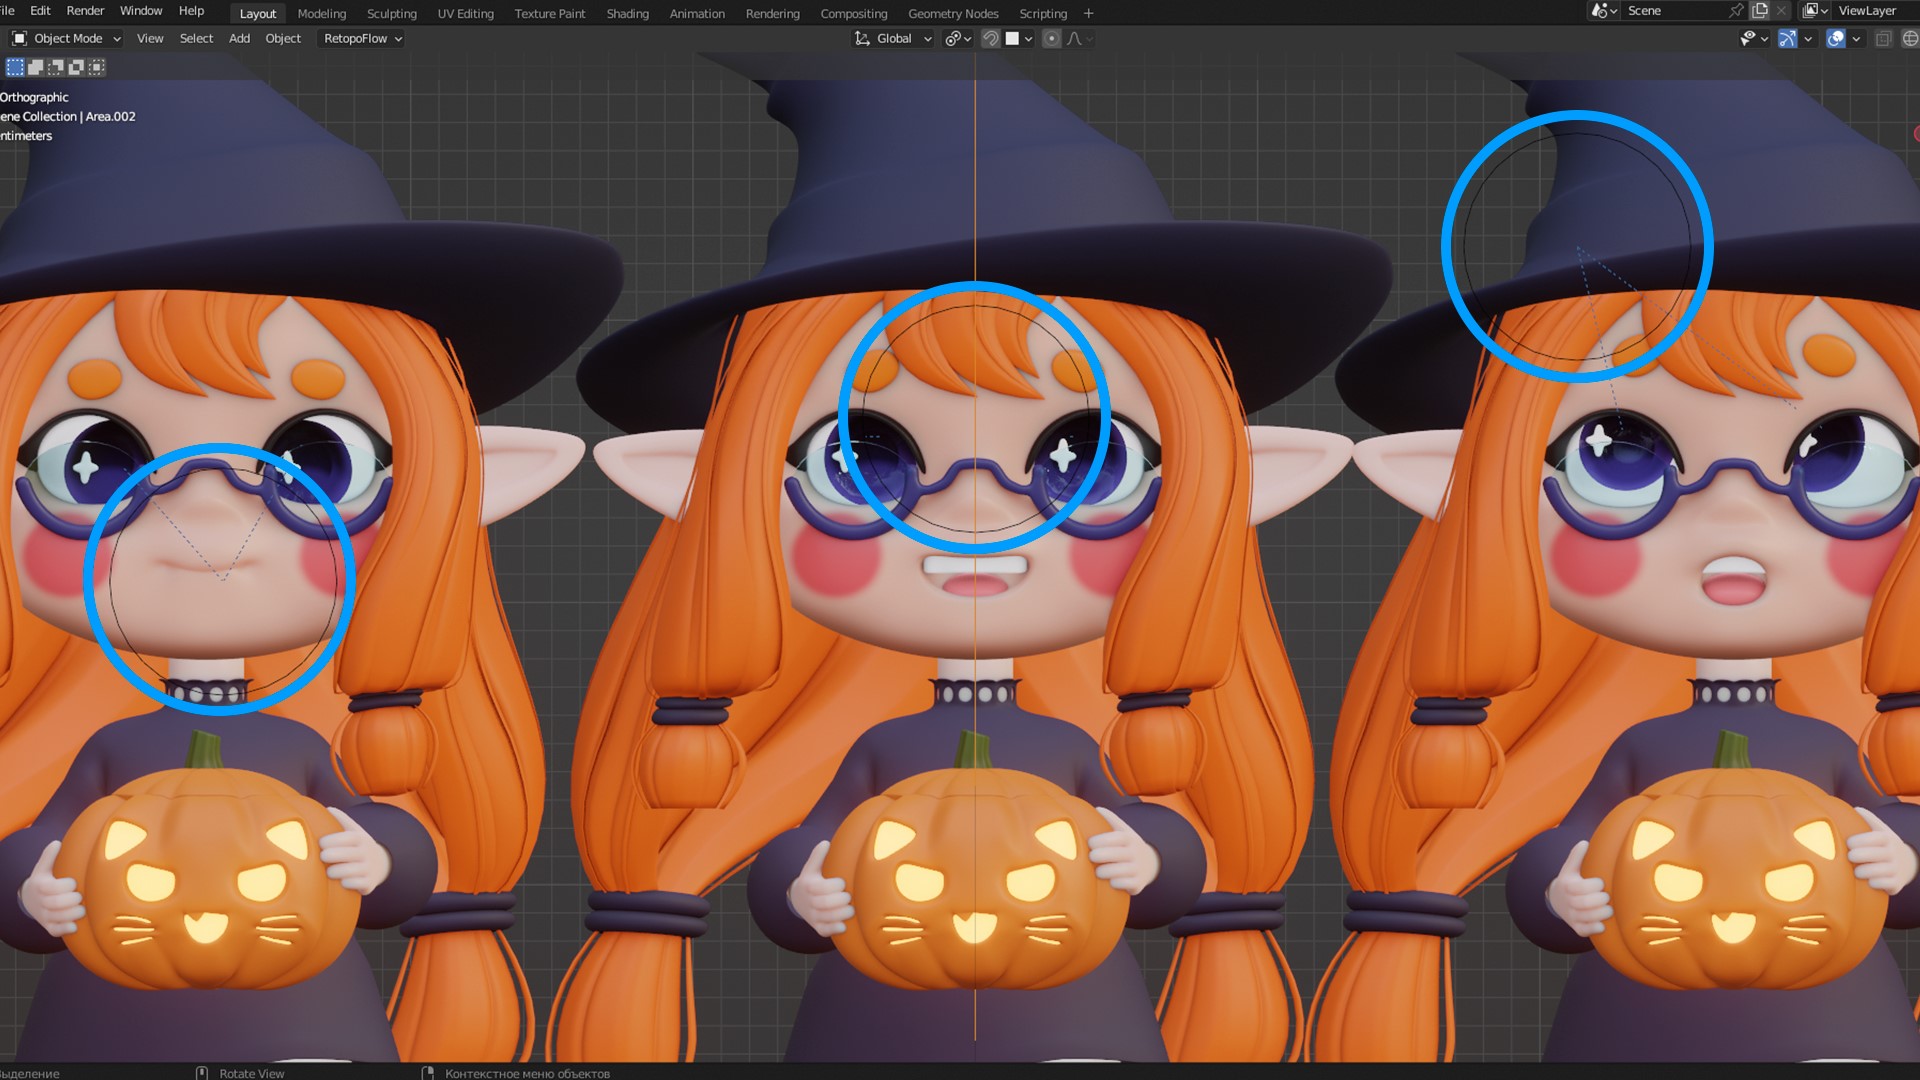
To control the eyes, I used a dummy circle to which I bound each eye using an Object Constraint – Track To.
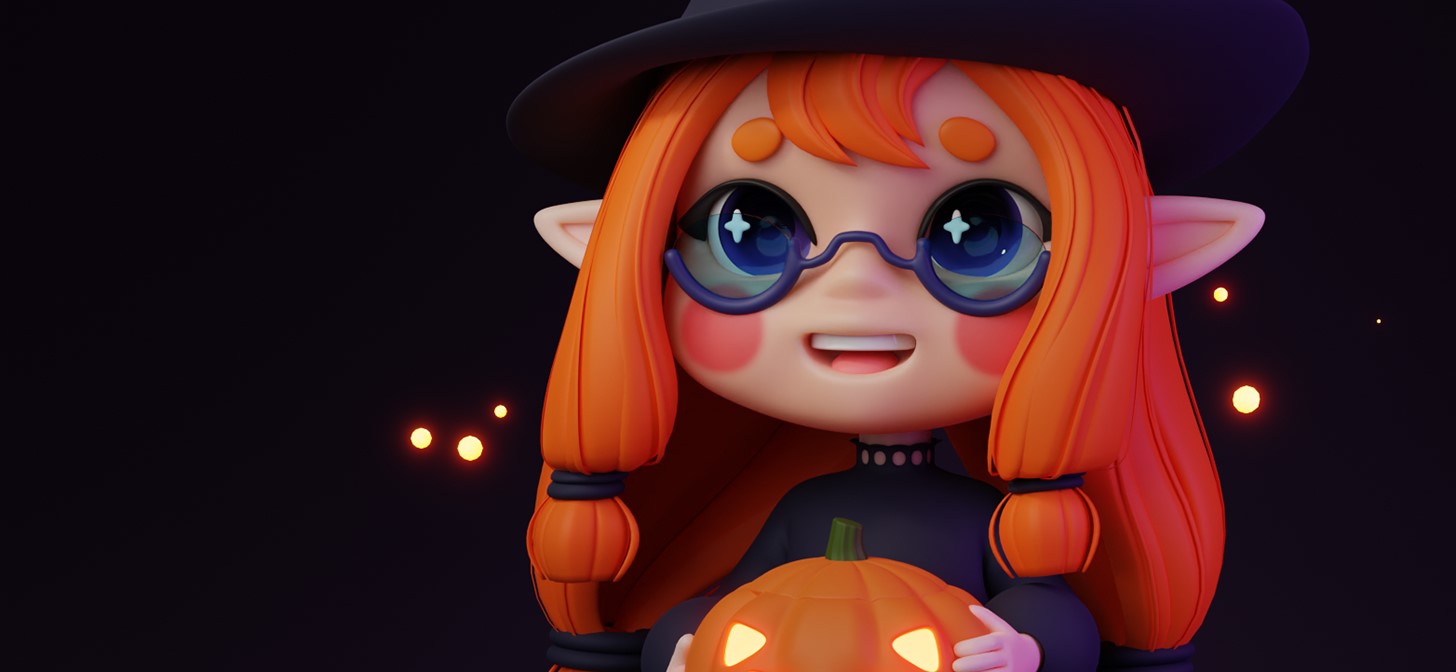
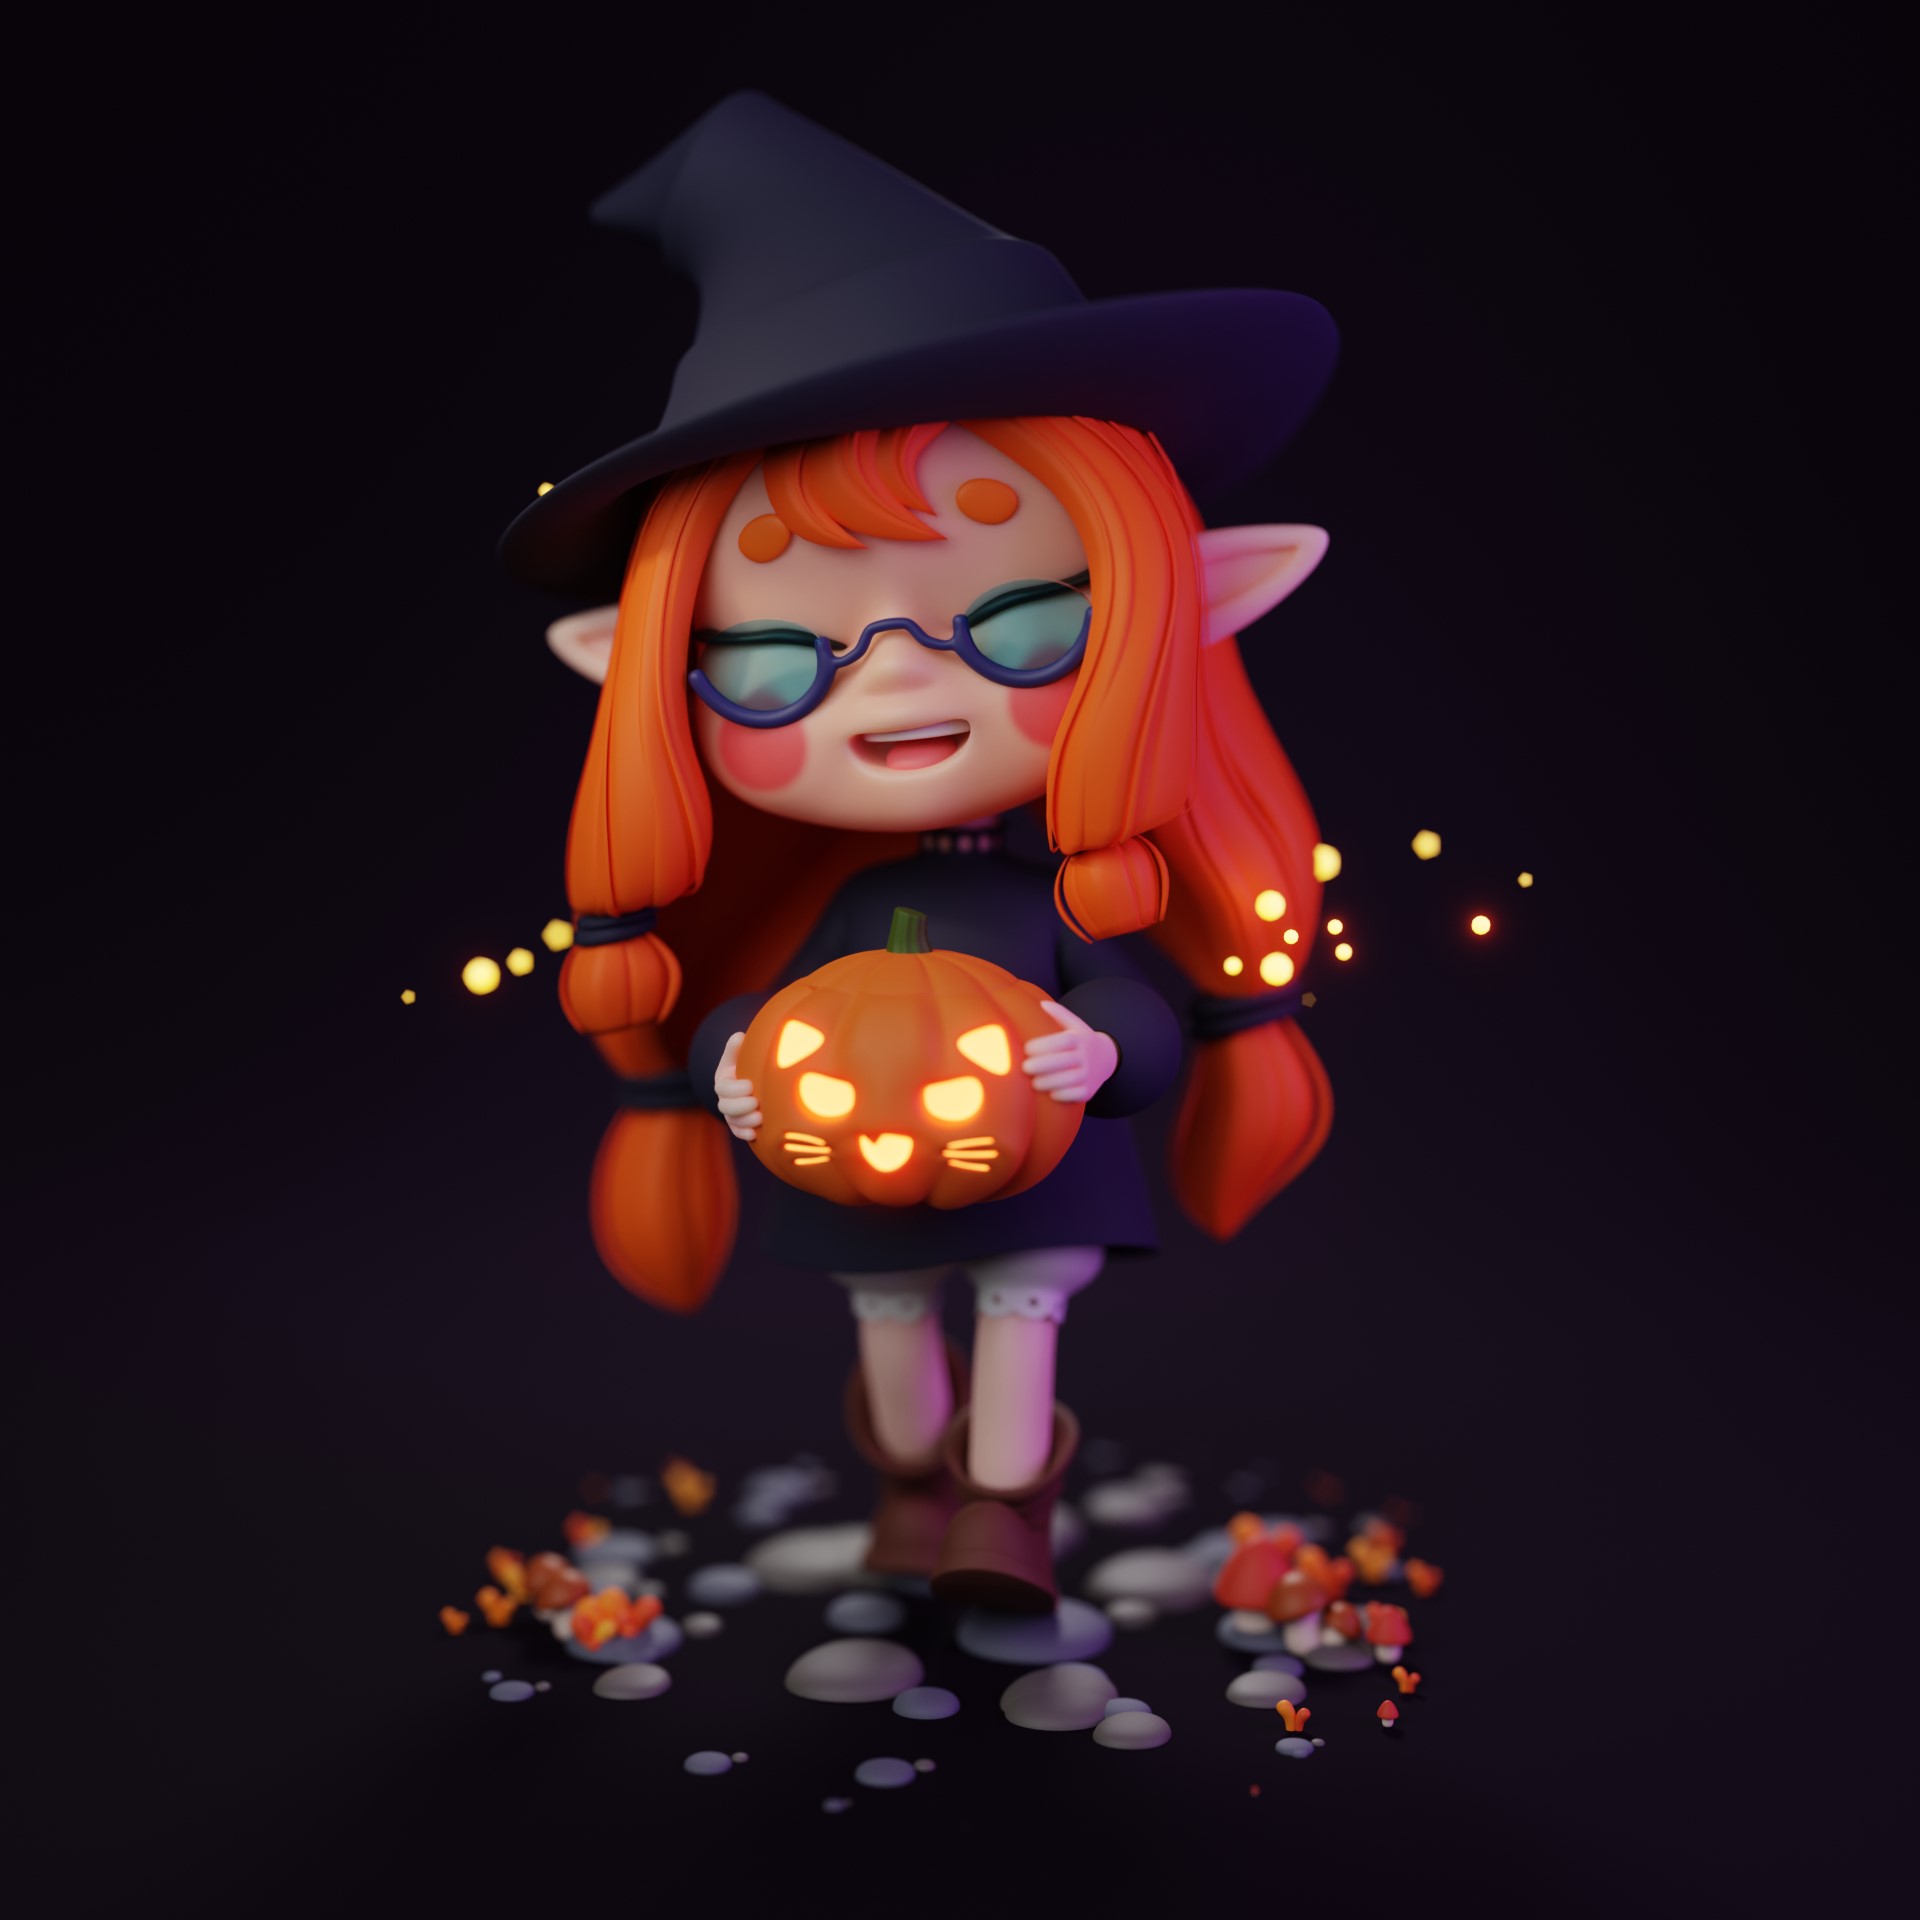
ELF AND HALLOWEEN PUMPKIN
When all the bones were in place, and the character was in the right position, it was time to render!
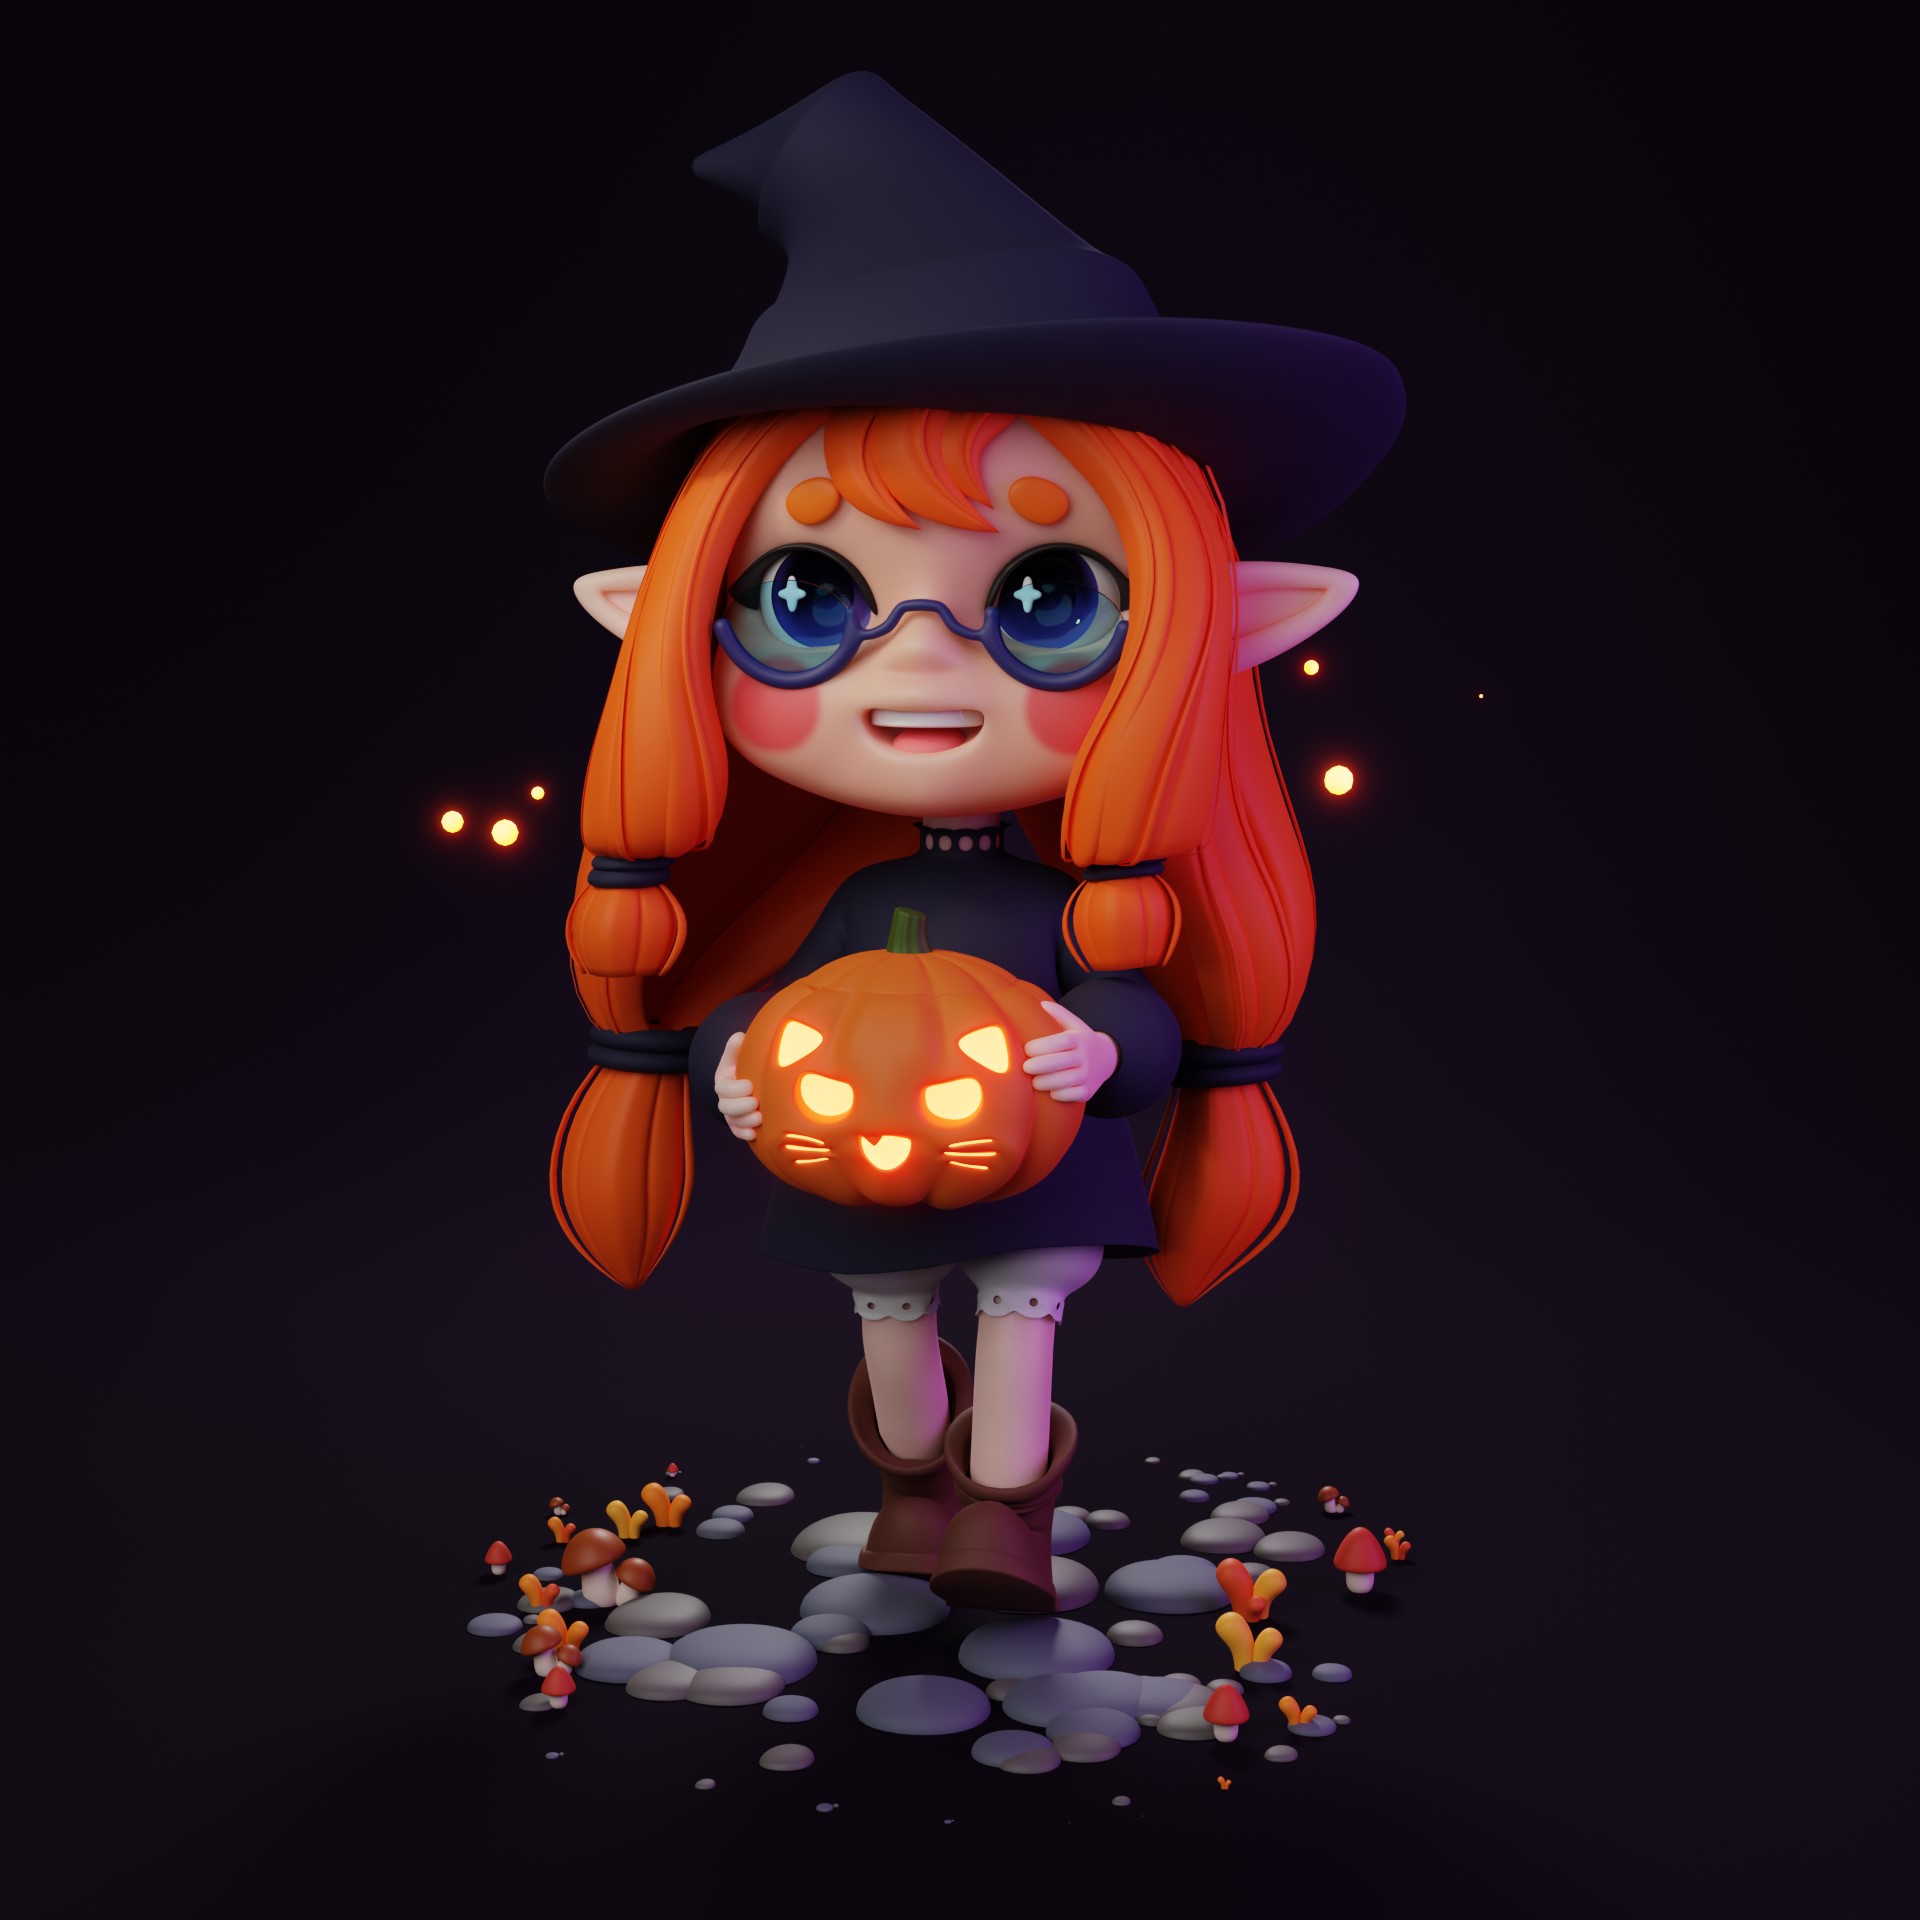
I made several renders with different emotions.
As well as a render with white material (clay render).

And there you have it!
Thank you so much for reading this article. You can find more of my work on Instagram. Have a nice day!
About the Artist
Natasha Medvedeva, is a freelance 3D artist from Vladivostok.


