
Behind the Scenes: Fuwarin

INTRODUCTION
Hi, I’m Viriel Boyboy, a 24-year-old from the Philippines.
I was a traditional artist before I learnt 3D. I started learning 3D back in 2019 through self-study; I had no background or training. Now I do freelance and commissions while building up my portfolio. I like creating realistic characters and bringing them to life
INSPIRATION
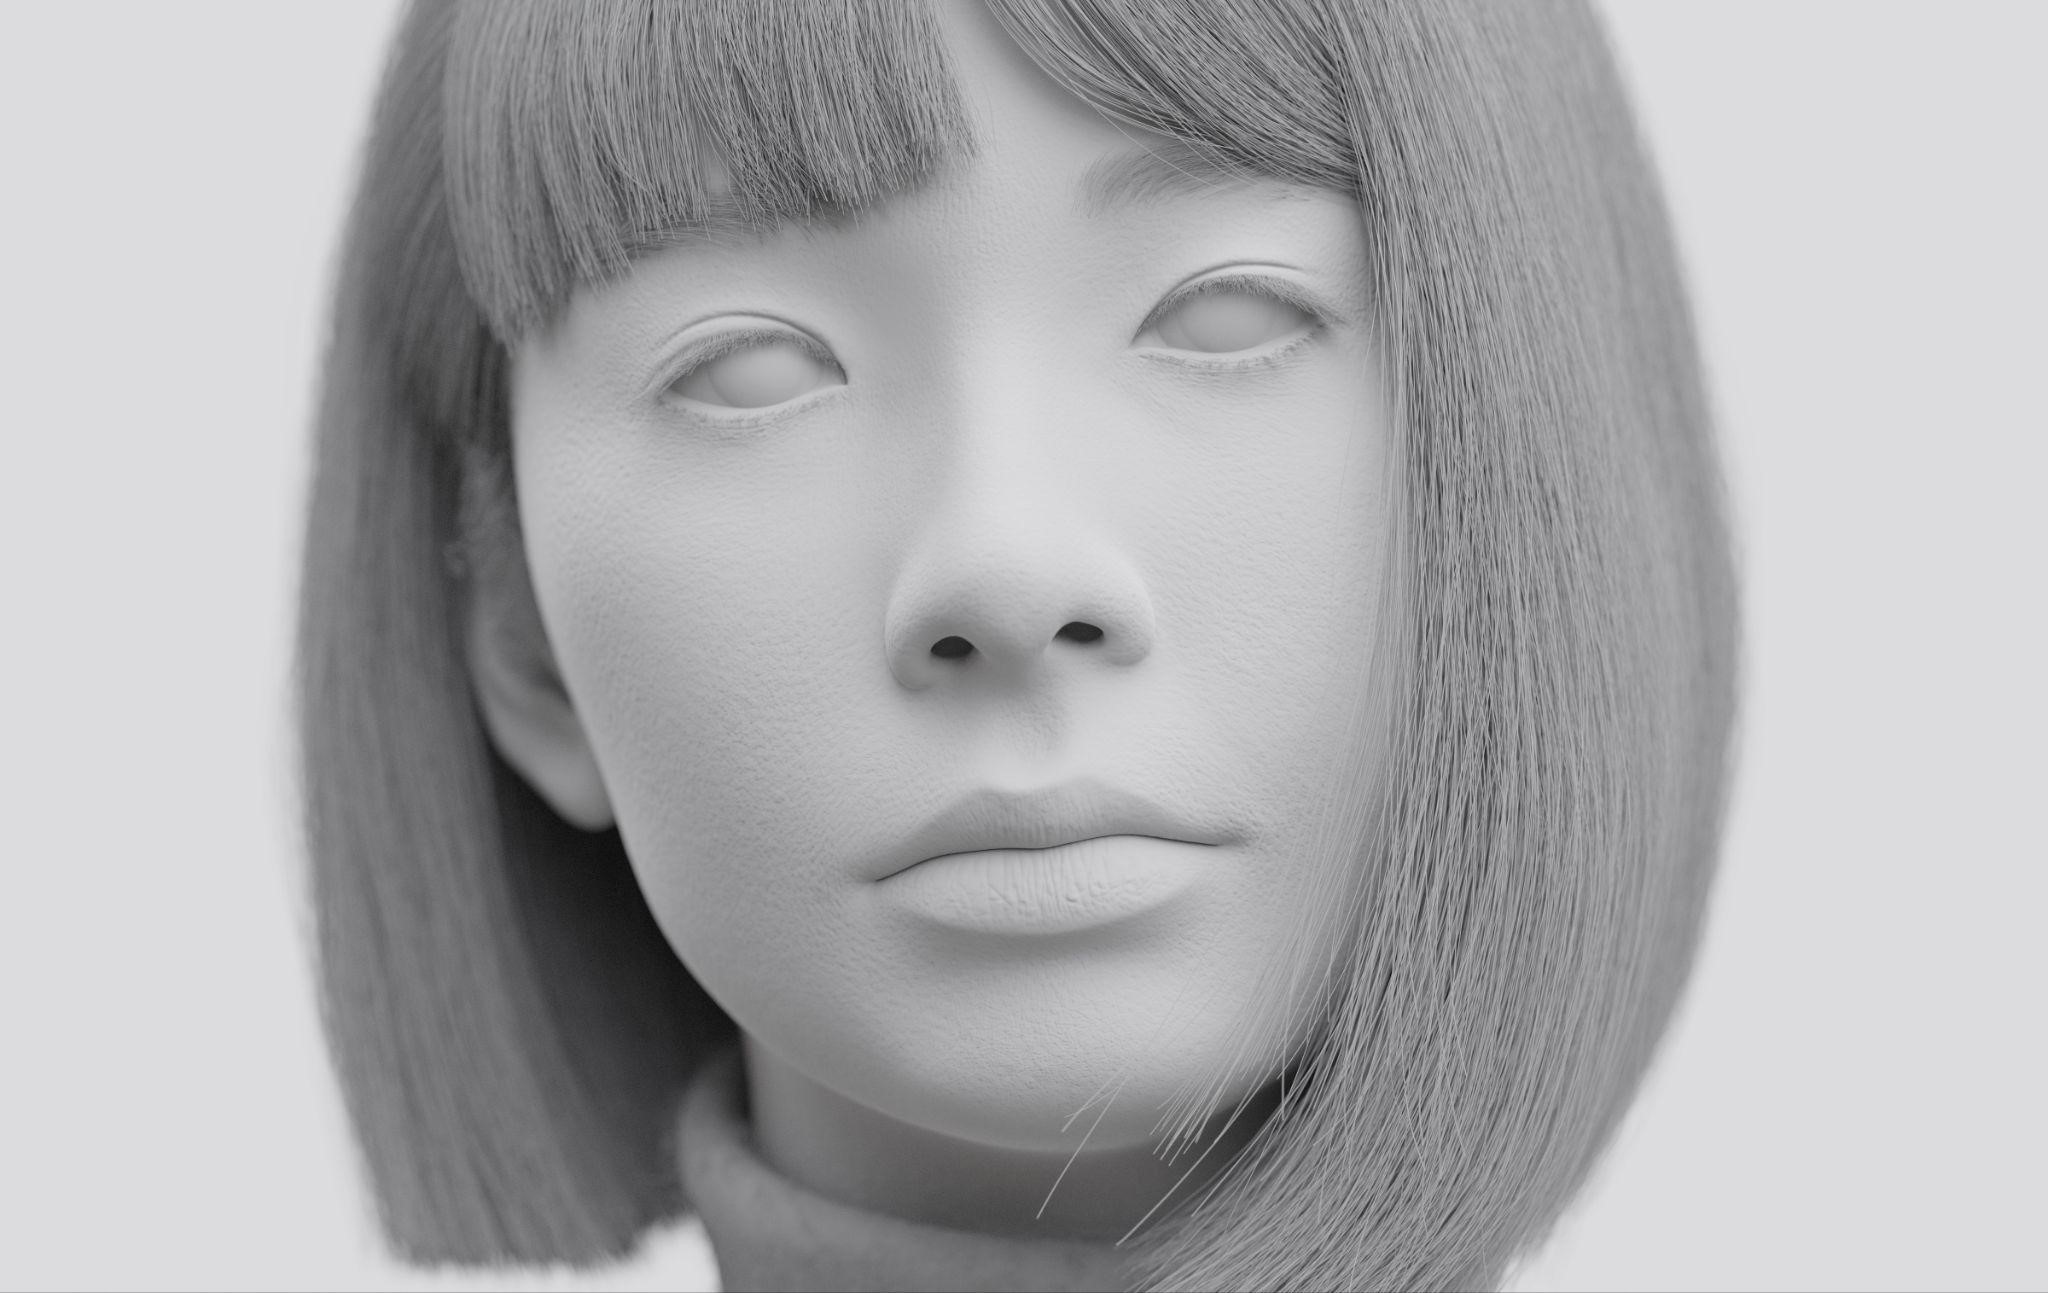
My Instagram has this algorithm on photography. One time, I was browsing Asian portrait photography, and thought it would be great if I tried to do a 3D similar to it. So I took a lot of those references and tried to create a 3D portrait.
TOOLS
I used ZBrush for sculpting and Substance Painter for texturing. Then I used Blender on the rest, that includes grooming, UV editing, modeling, and rendering. I also used Photoshop to refine some textures.
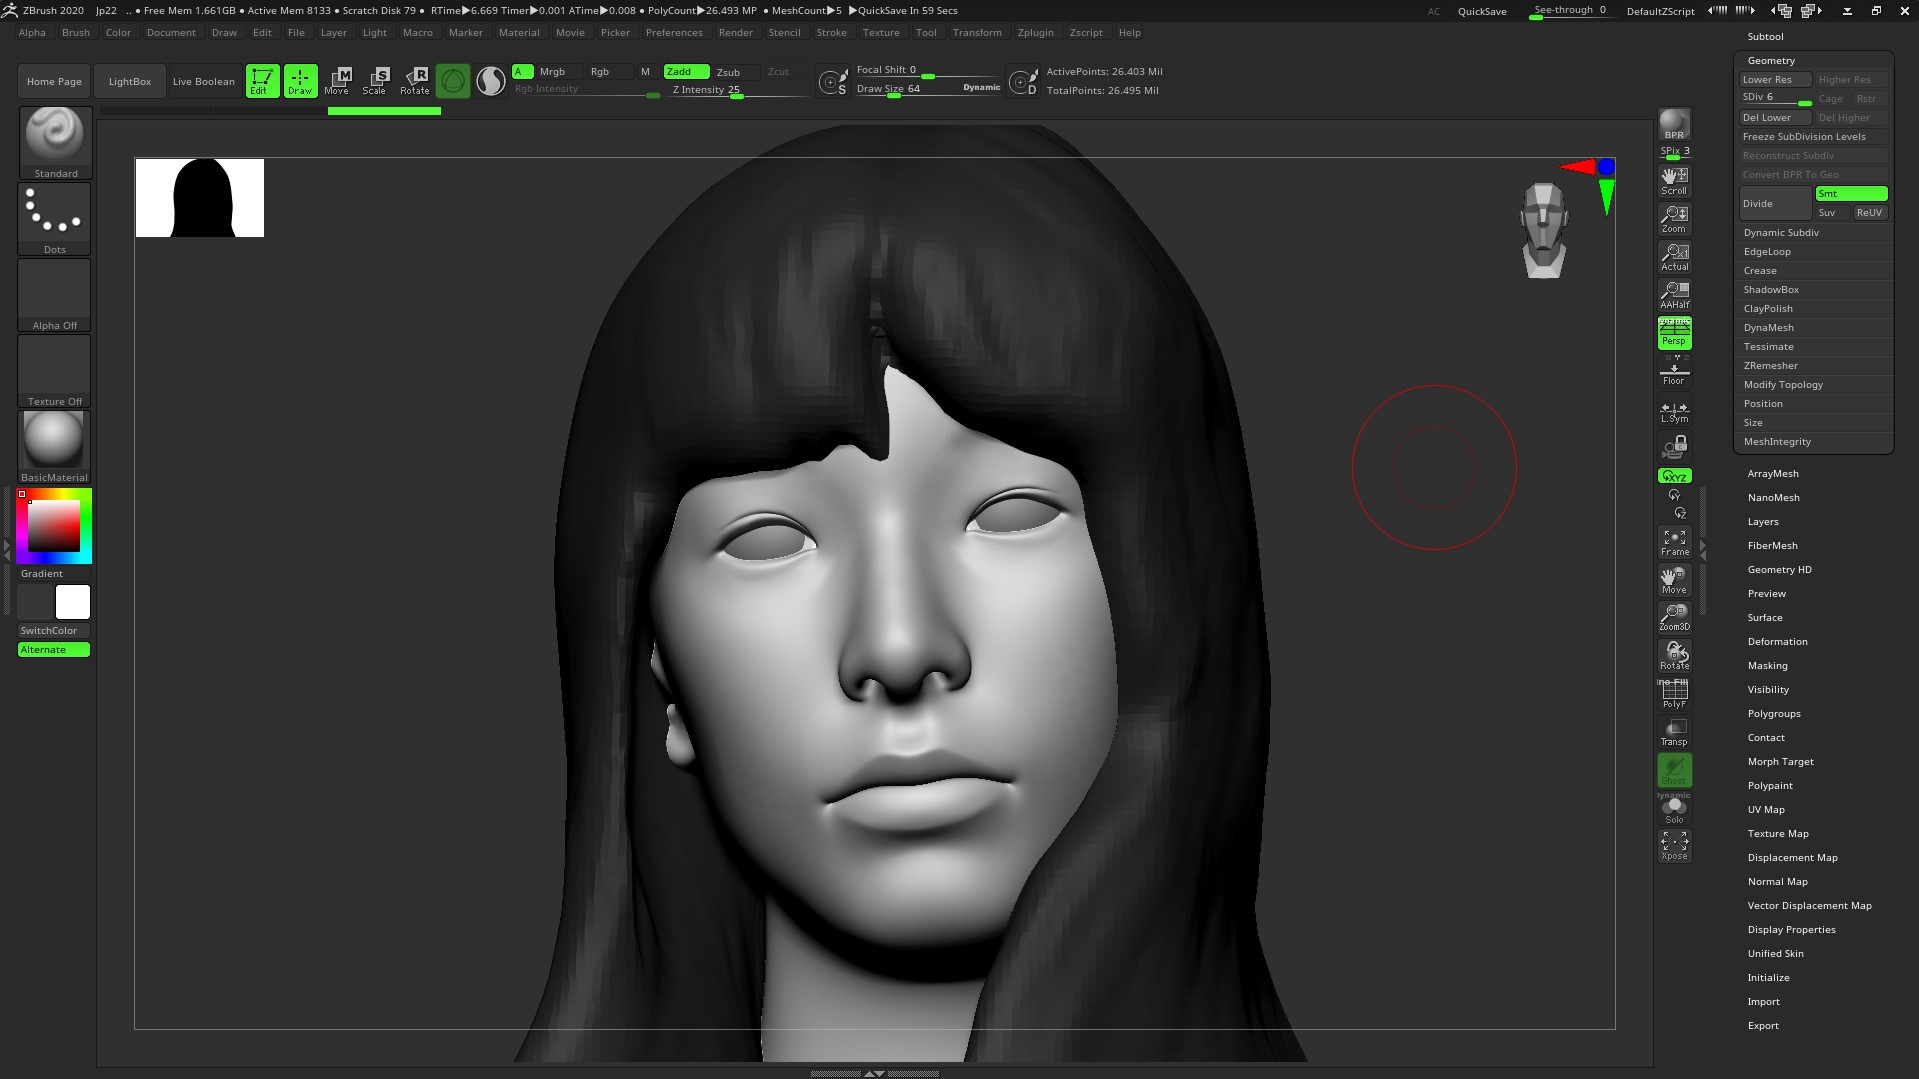
SCULPTING
This was the early stage. I used my personal base mesh with an already clean topology so that I didn’t need to retopologize. This is not the final sculpt, for I did a lot of adjustments throughout the whole process.
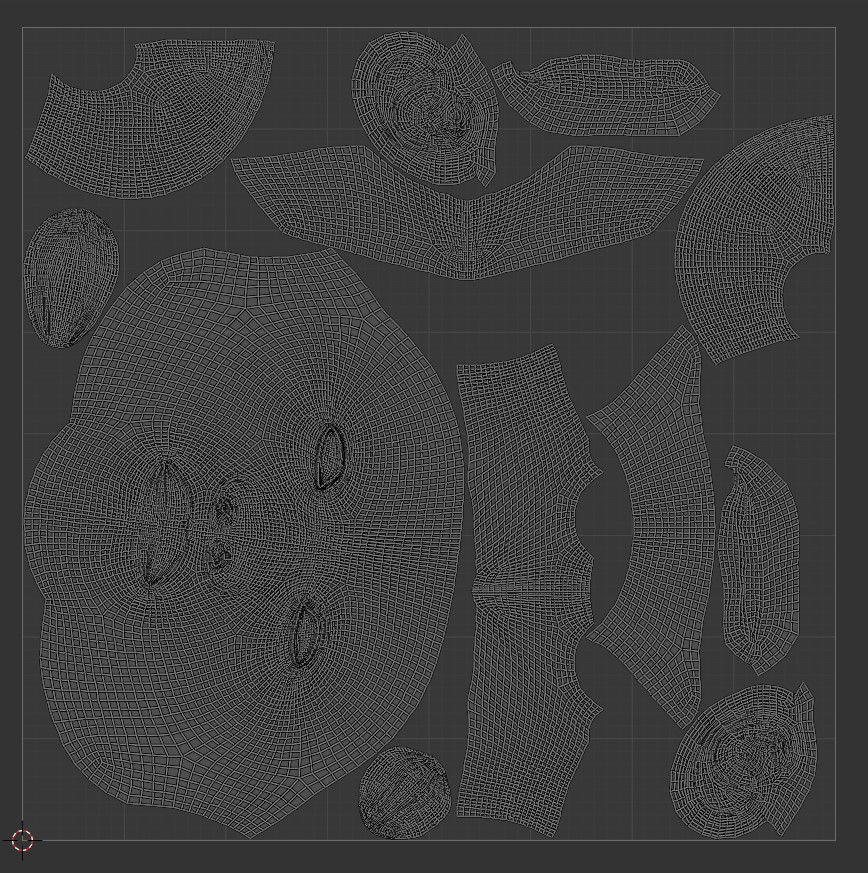
UV MAPPING
This was simple. I just needed to make sure that there were no seams around the face. I already planned the final pose so I knew which areas were going to be visible and which weren’t. This was why I downscaled some areas like the back of the head so I could upscale the others a little. This would help me get more resolution for textures.
TEXTURING
For texturing, I used Texturing XYZ. The resolution was 8k and my maps were color, roughness, specularity, normal, ambient occlusion, and height.
I did the base color first, and projected a skin color from Texturing XYZ and did some overpainting.

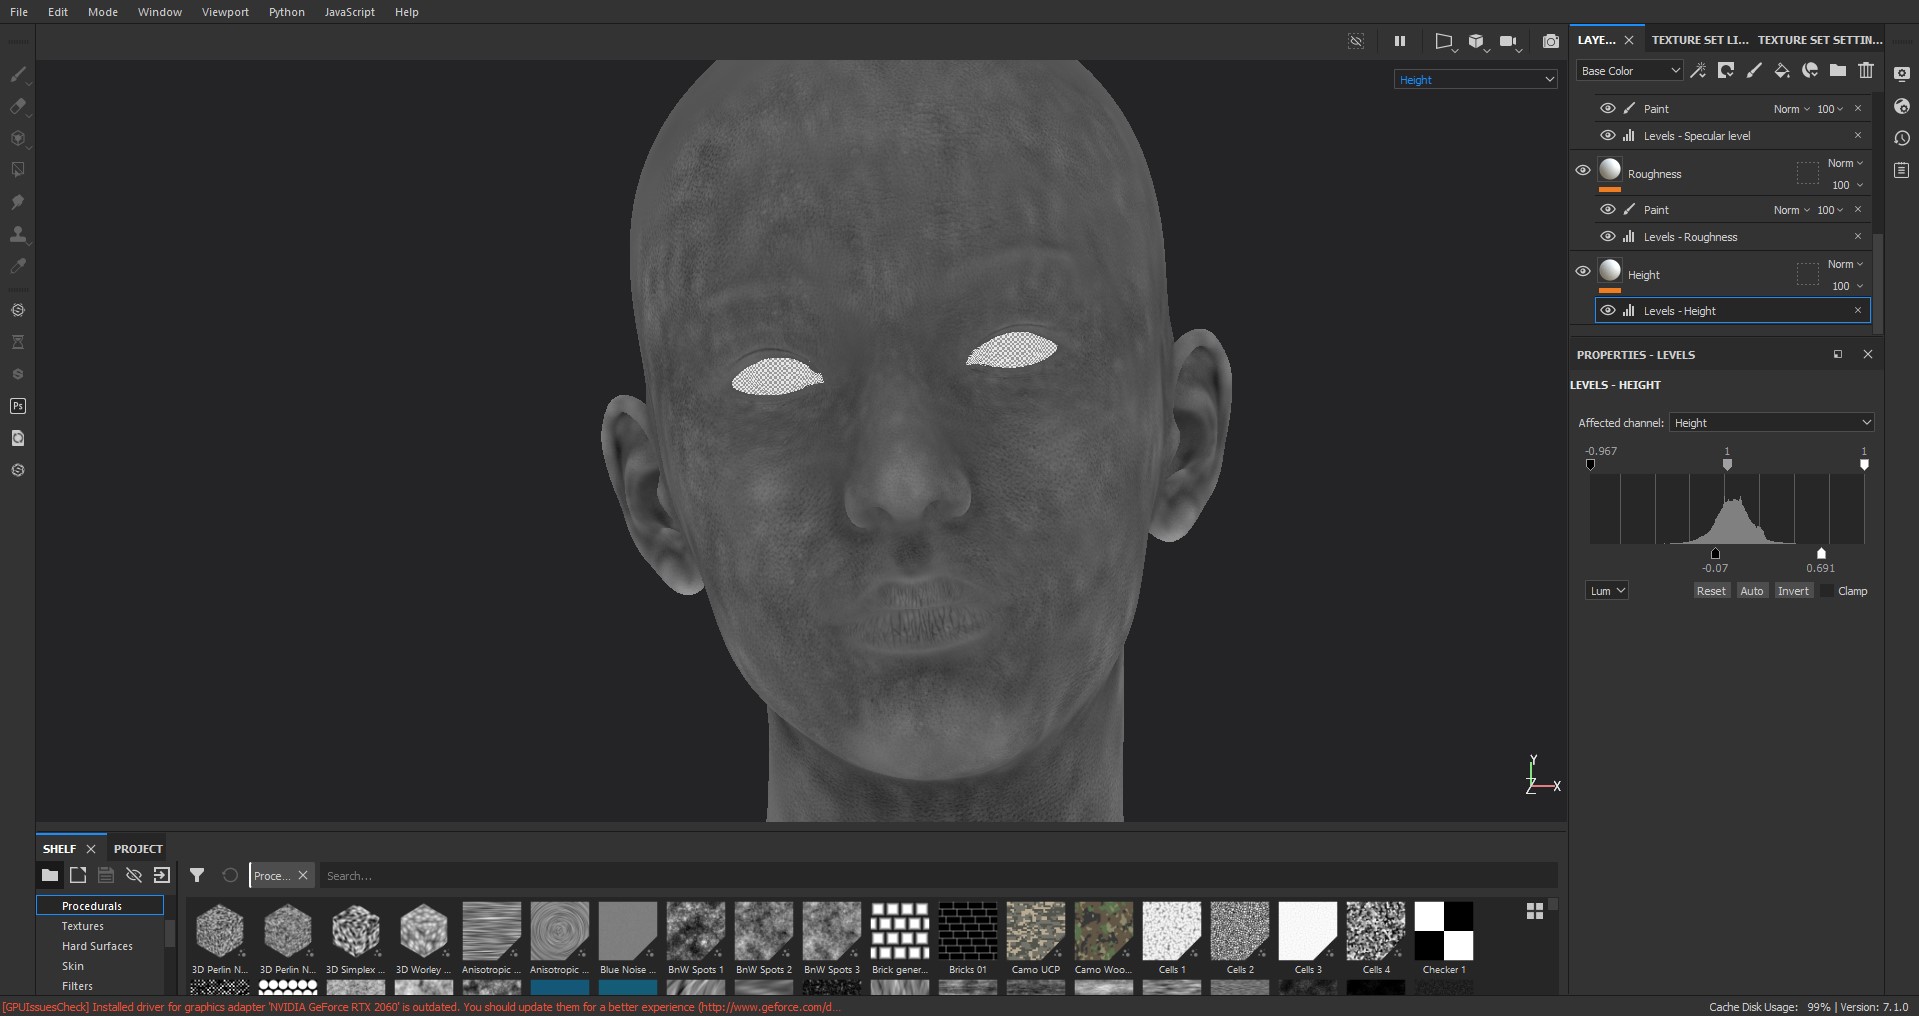
Next was the height map. I did the details in ZBrush using TexturingXYZ and imported it to Substance. As you can see, there are black and white spots here which I fixed in Photoshop to get the micro details only.
Next was the roughness. I used the height map that was already fixed in Photoshop and softened the levels a bit. Then I painted the areas which were more glossy like cheeks and lips.

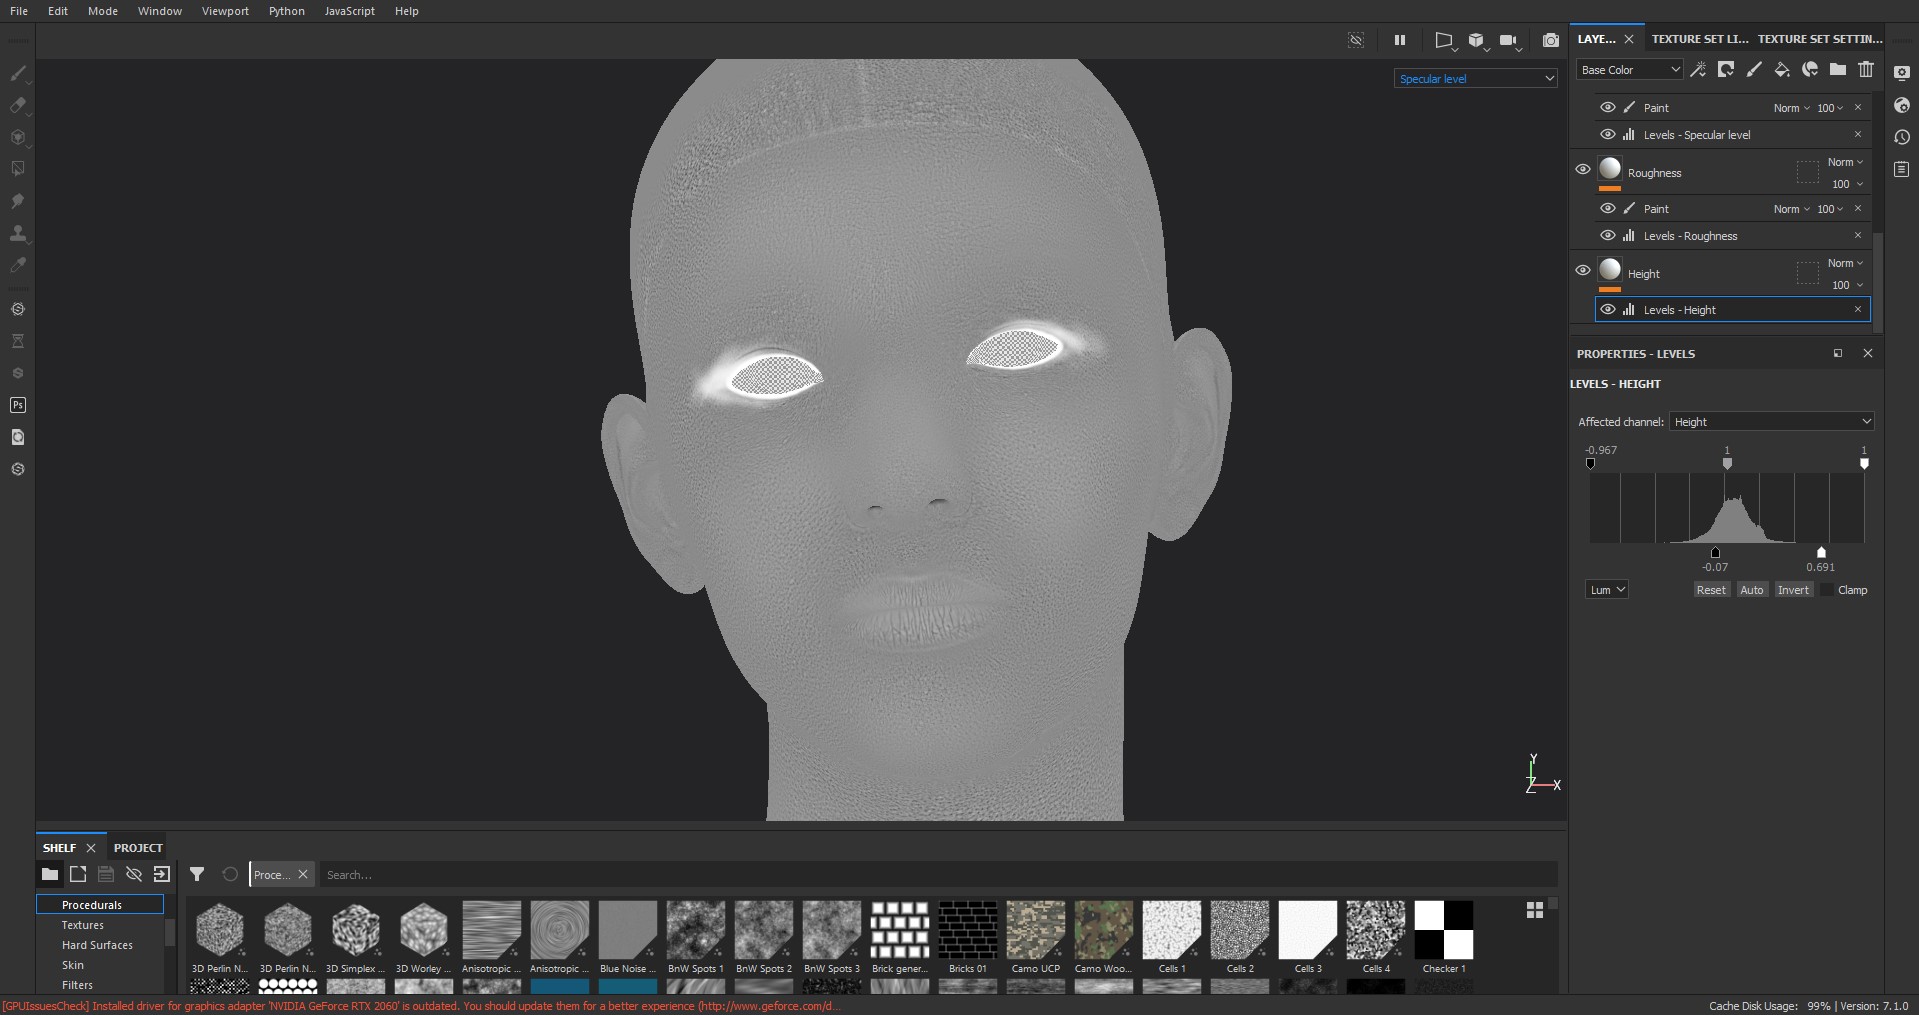
Next was the specularity. This was to control how much light an area could get. As you can see, I made the eyes white because I wanted it to be reflective. I also painted the lips a bit.
As for the normal map, I just converted the height map to normal since it gave better and more sharper results.
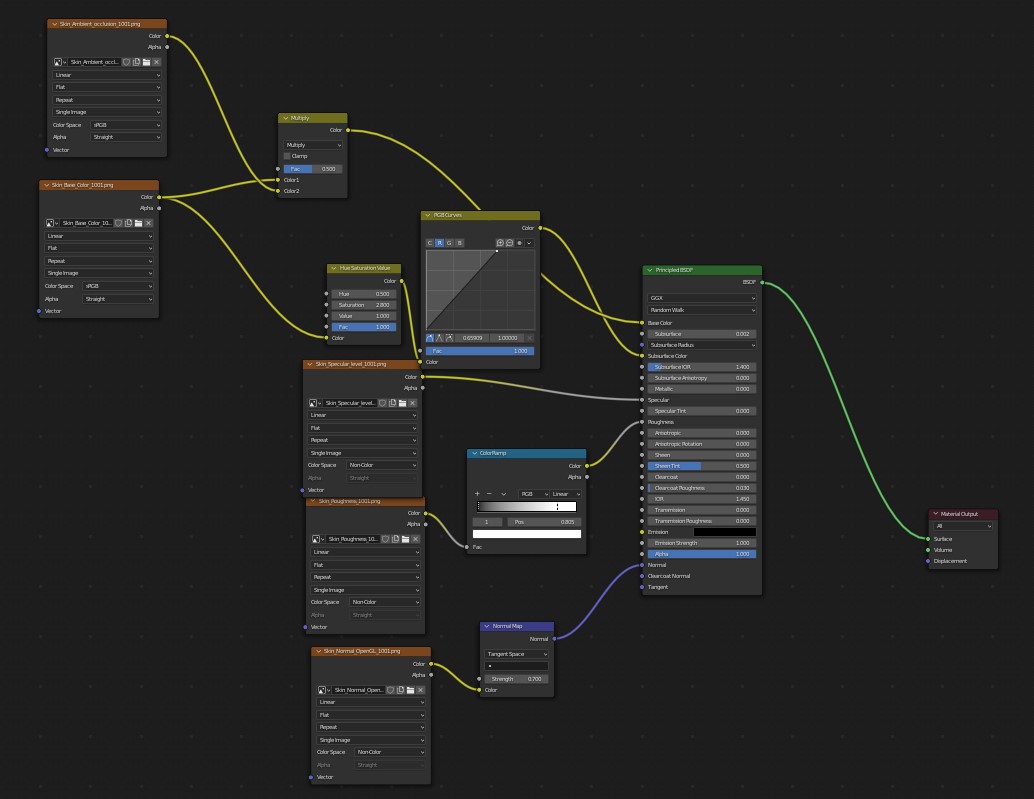
Now that I completed the textures, time to set the materials. This is the skin node, and it’s pretty simple since I already put most of the adjustments to textures. This is just textures connected to a principled shader with some adjustments like curves, hue, etc.
You also need subsurface scattering here. What I did was copy my base color and crank up the saturation, and then used it as a subsurface color. For subsurface strength, you just need to experiment with it.
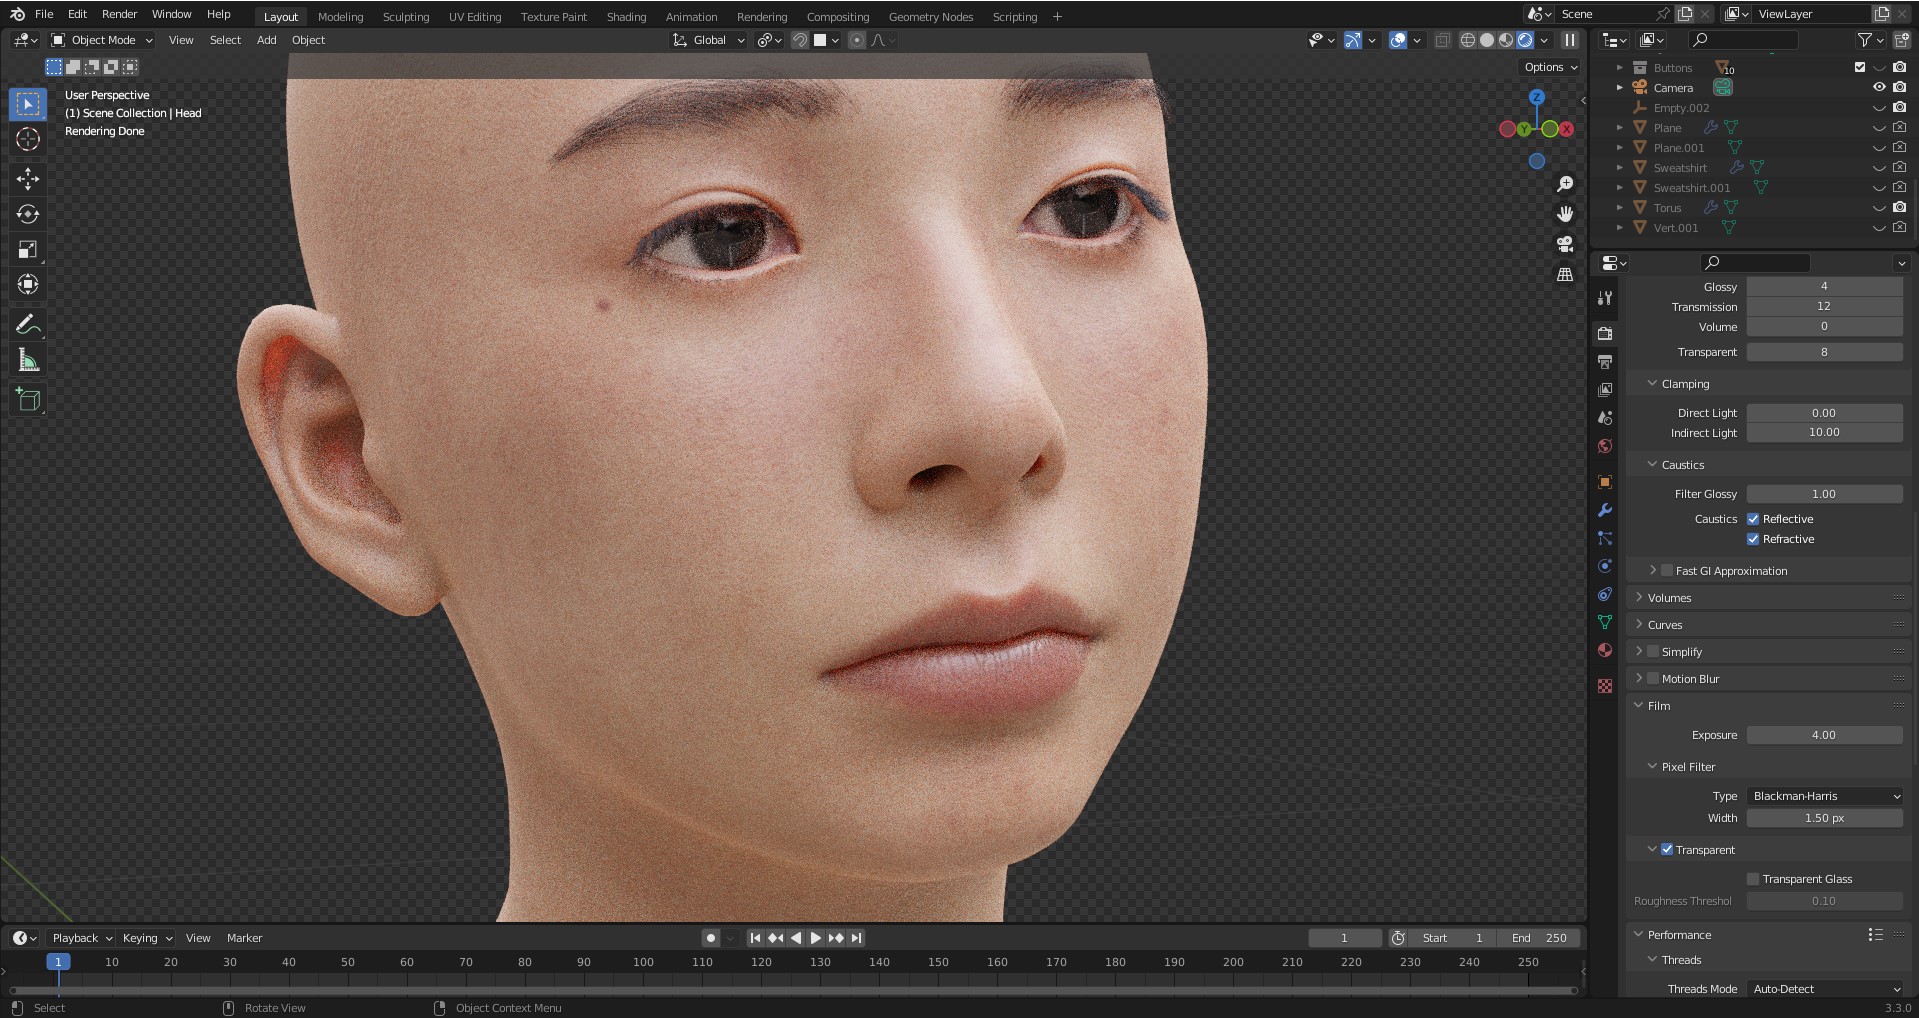
This is the result in viewport.
GROOMING
Now to the hair part. I used hair particles on this.
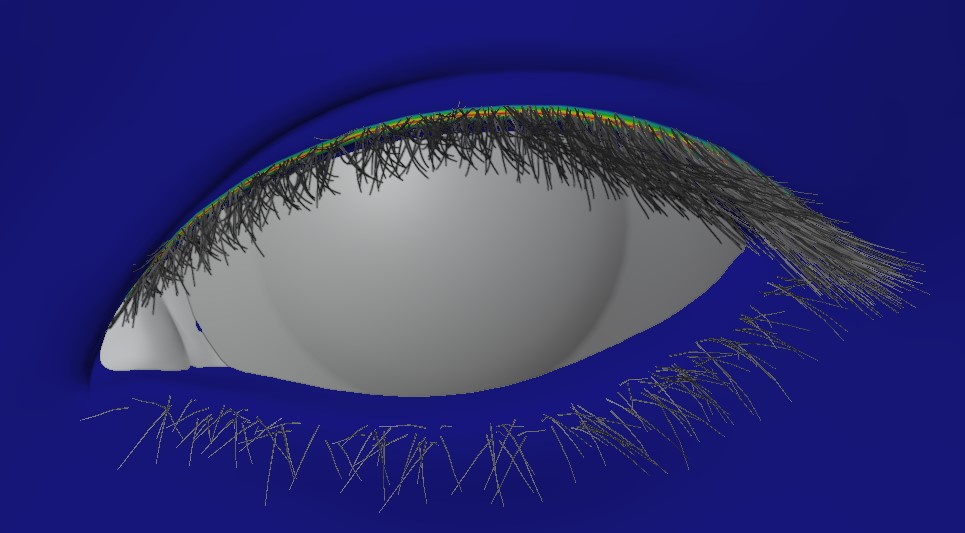
First off, the eyelashes. I used interpolated settings here to get more hairs, then I weight painted the areas where eyelashes should be. That way, the interpolated hairs will only grow on the weight-painted areas.
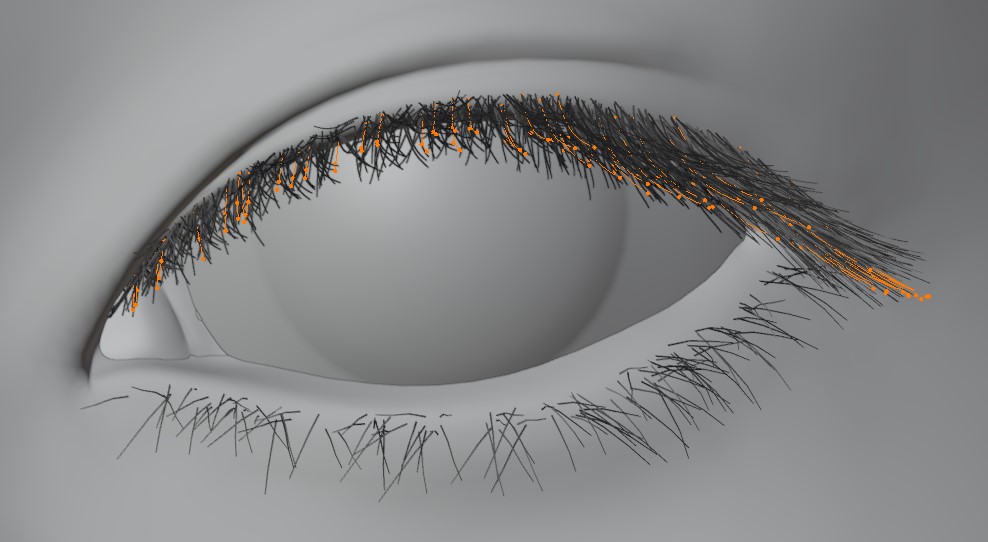
That way, the interpolated hairs will only grow on the weight-painted areas.
Next are the eyebrows. This one is different—I used simple settings on this one and divided it into three parts. These were three different particles; the one on the left is where the hairs are more clump, the middle is a little more spread than the left, then the right one is where the hairs are shorter and a little more spread. I didn’t use any weight painting on this one.
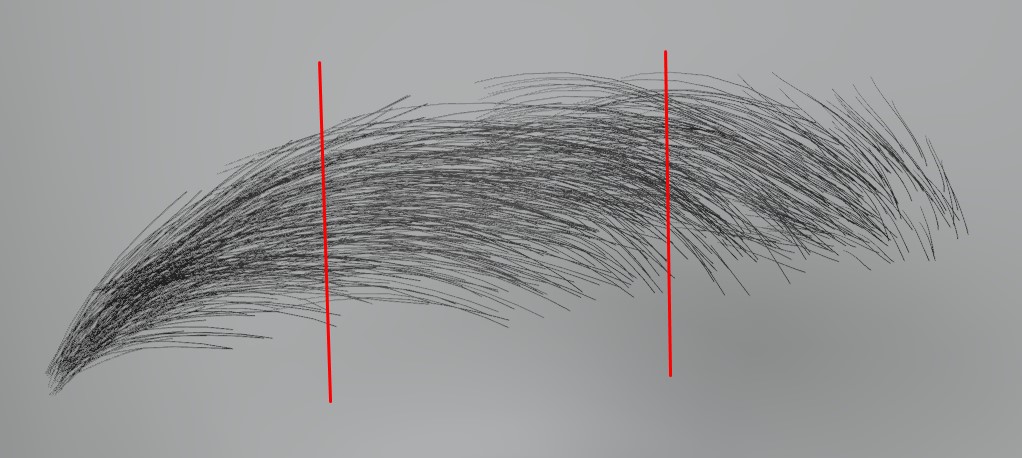
Next up is the hair. For this one, I used simple settings and then put hair one by one using the add brush in particle edit. For hairs, your setting is the most important. The key here is to remove all perfectly aligned hairs that give away the realism. There are a lot of settings that can make that away like random, endpoint, kink type, etc. Also make sure to uncheck the close tip so you can edit the thickness of hair.
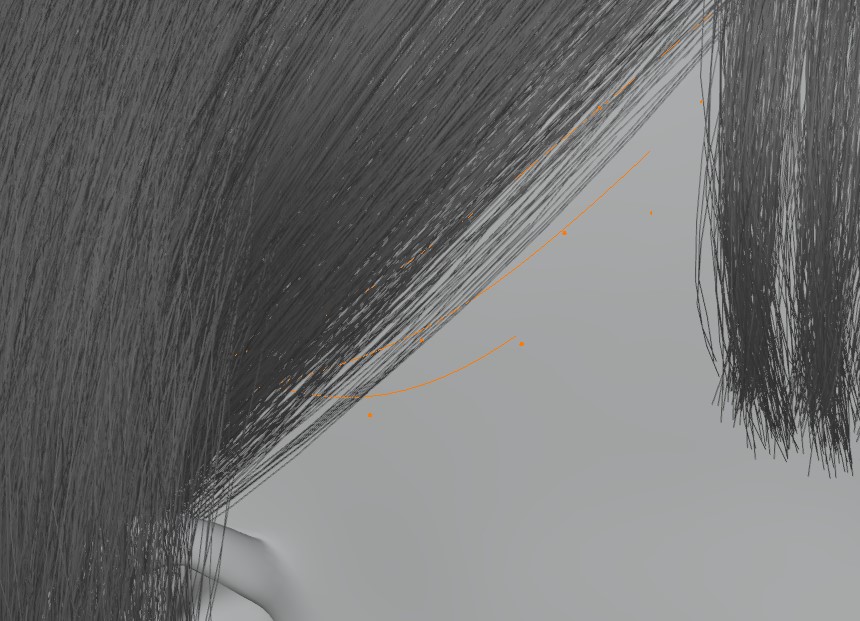
For the bangs, I used three different particles here with different settings. This is important because hair needs to be random.

For the hair on her left, I duplicated the bangs and used the same settings, but tweaked it a bit and ramped up the randomness a little to get that fluffy look.

This is my setting for the hair on her left. As you can see, I used a curve on the clump as it’s easier to control. Also, you will see that I used the endpoint and random settings, which is important to get that natural look.
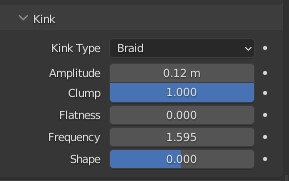
I also used kink settings where I chose braids because it will split the hair into parts with different flows.

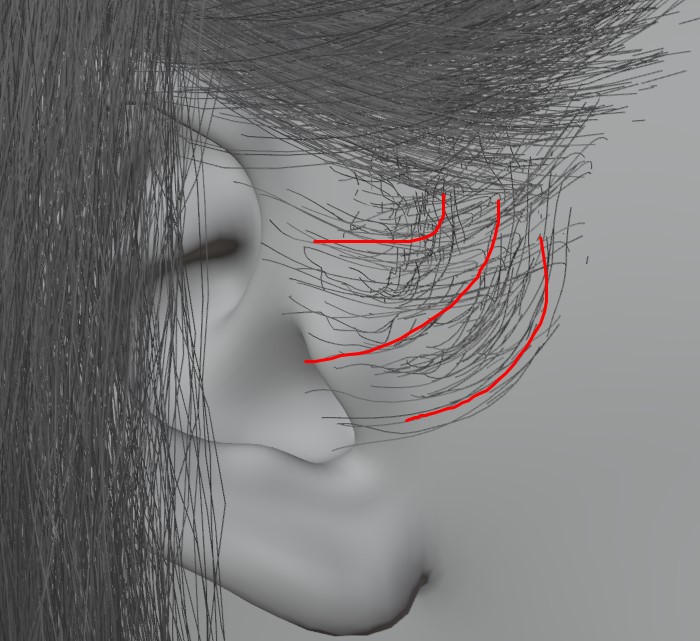
Next is the hair at the back. Most of this hair won’t be visible to the camera, but I still need to fill it all to get the correct shadows. The settings were the same but with a larger clump and more hairs.
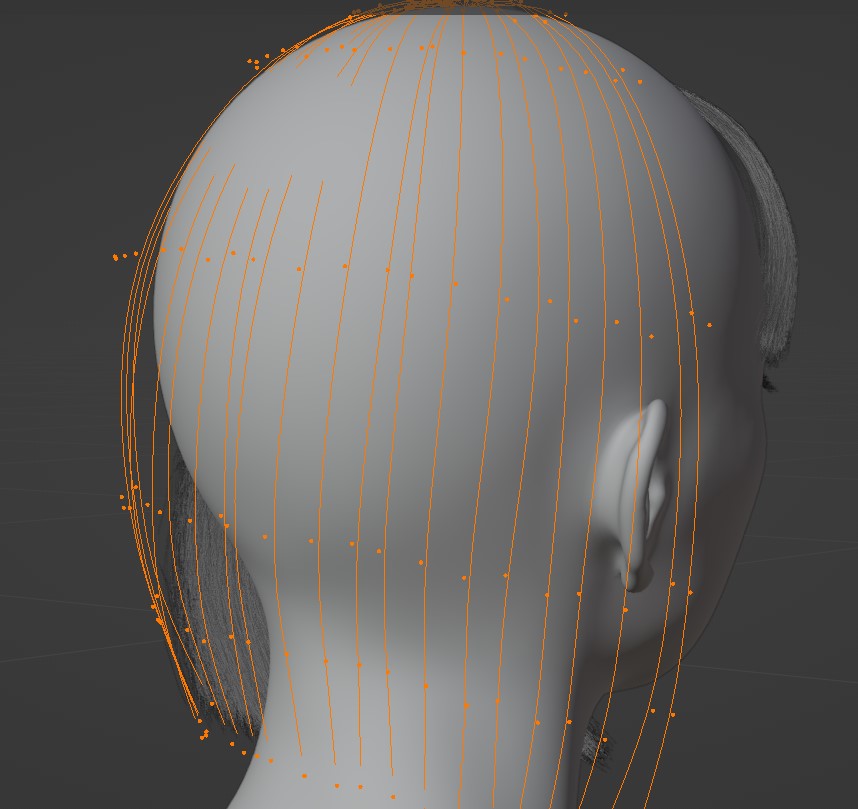
Next, I added random hairs which were isolated from the main clumps. This one has different settings, few hairs, and more randomness and endpoint. This will give a more natural look.

After that, I added one thin hair clump. The settings for this are similar to random but with more clump and less radius.
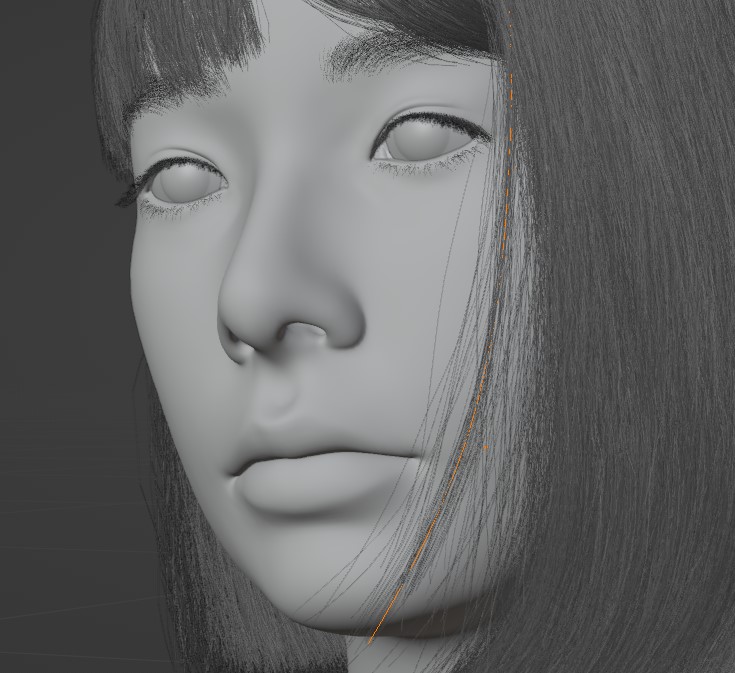
After that, I worked on the hair on her right. First, I did the hairs that go through behind her ear. The settings for this are the same except I reduced the randomness a bit as this hair is supposed to be a little more stretched.

Next, I did the hairs below that. I just copied the particle settings and adjusted the clump because this is where hair is supposed to get a little loose.
I added this hair next. These are the hairs before sideburn, which are clumped and have less radius.
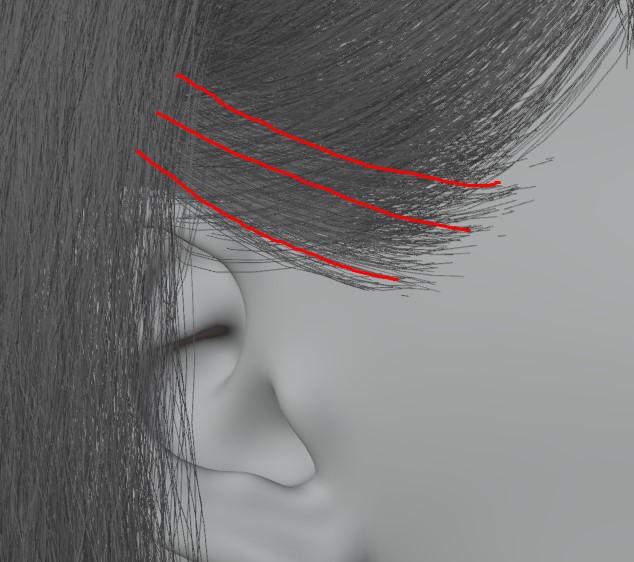
Next is the sideburn, which has a different setting. It’s similar to the random hair setting except that this one is a lot shorter and has fewer hairs.
For the hair material, it’s just a simple Principled Hair BSDF with black color.
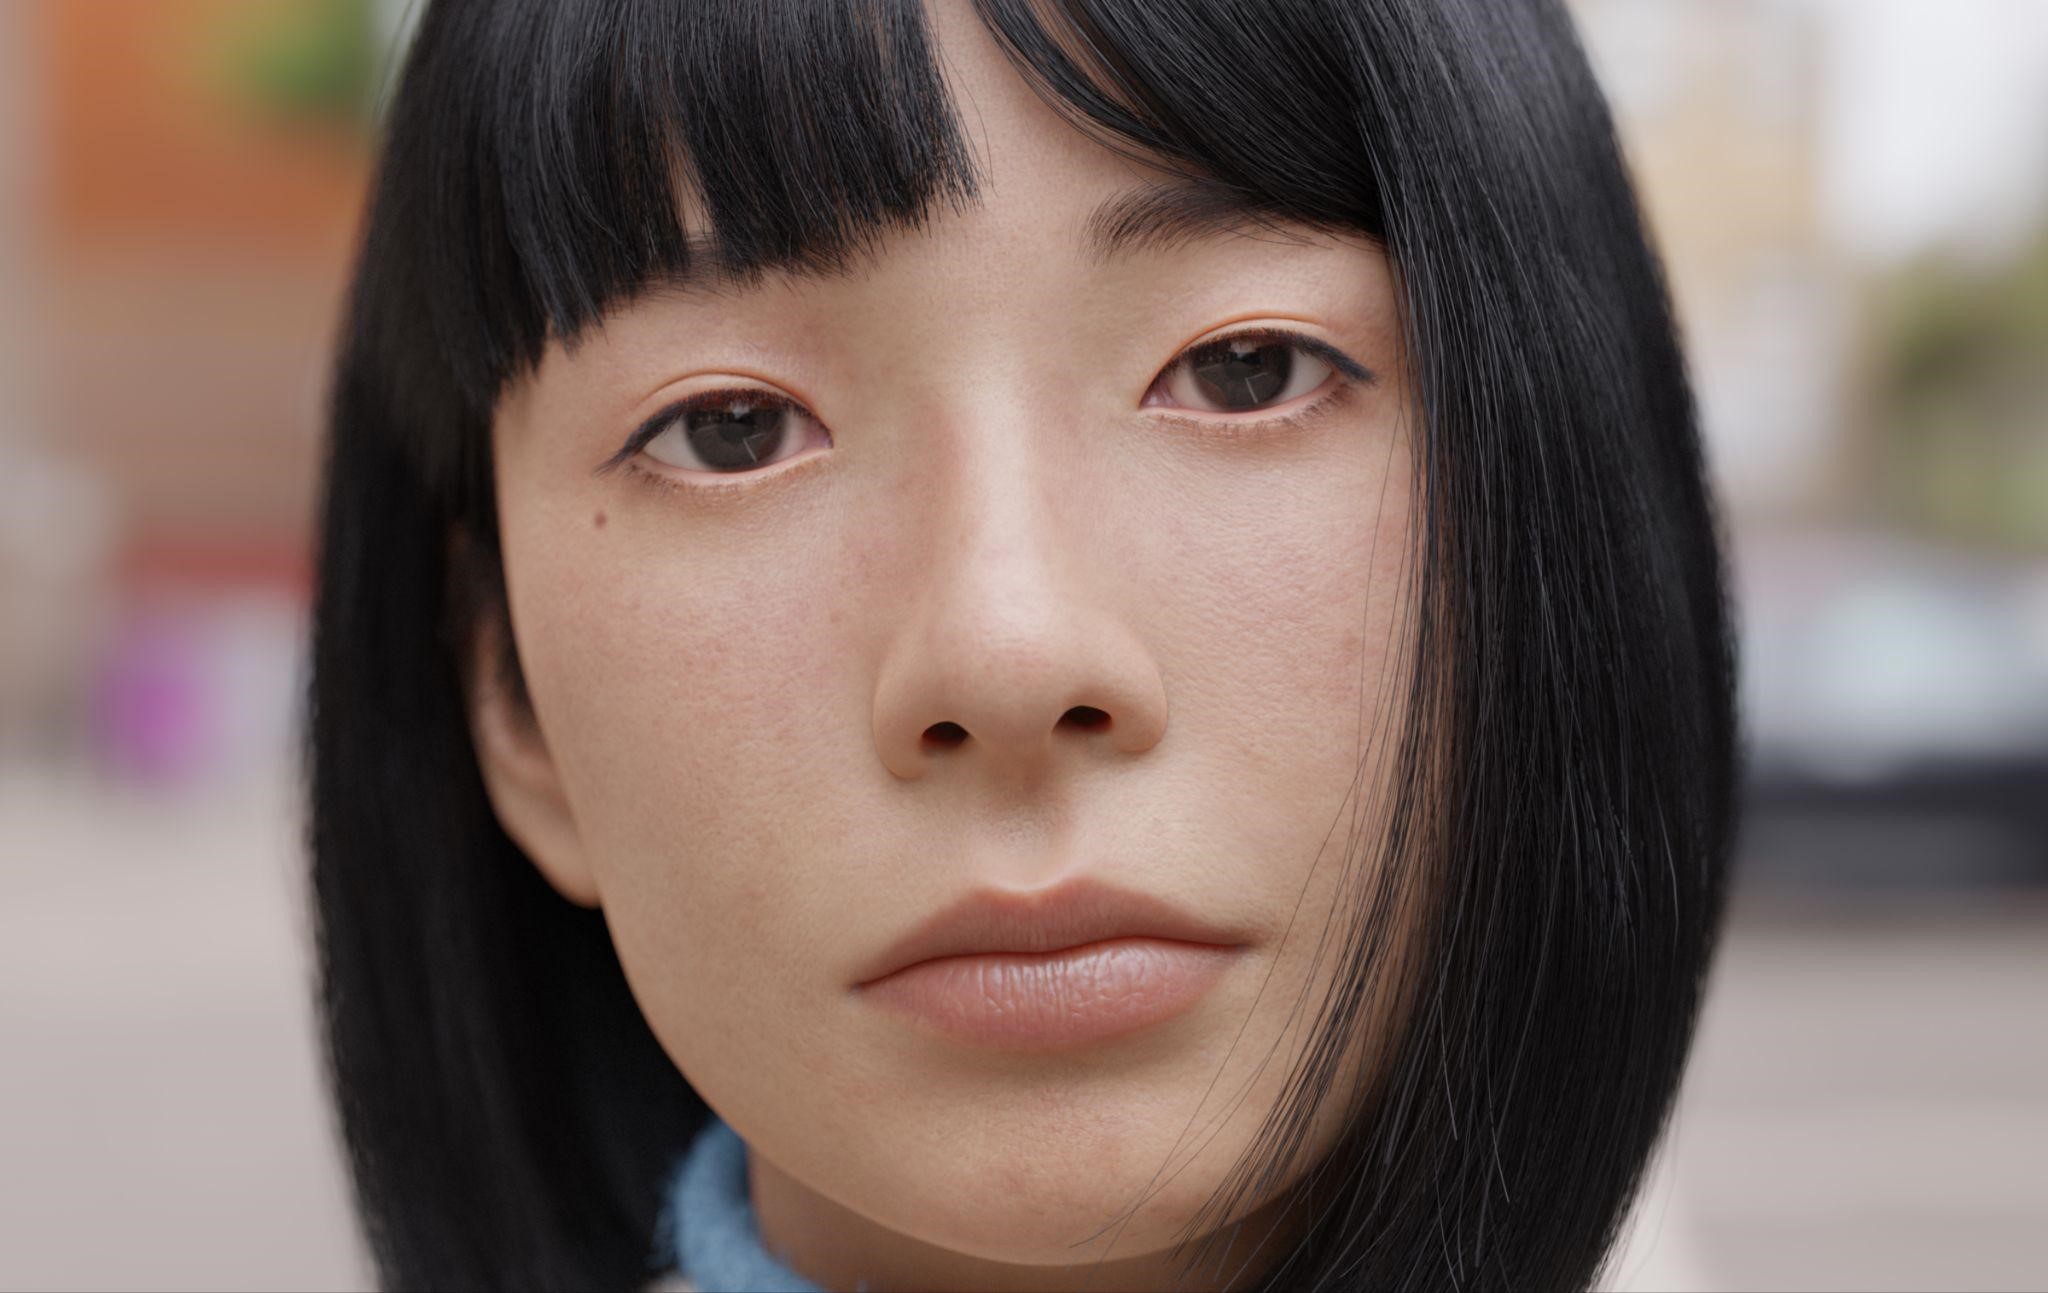
FUWARIN
This is the final render. The first one is with 150mm focal length. The next one is with 80mm focal length with different lighting.
This is the clay render. For this render, I just used Principled BSDF material with gray color and max roughness.
And there you have it!
Thank you so much for reading this article. You can find more of my work on Instagram. Have a nice day!
About the Artist
Viriel Boyboy, a 3D Character Artist from Philippines.


this was very useful, thanks for taking the time to share.
I thought specular was a no go area by Blender Guru himself, why create a specular map
Thank you for sharing ❤️