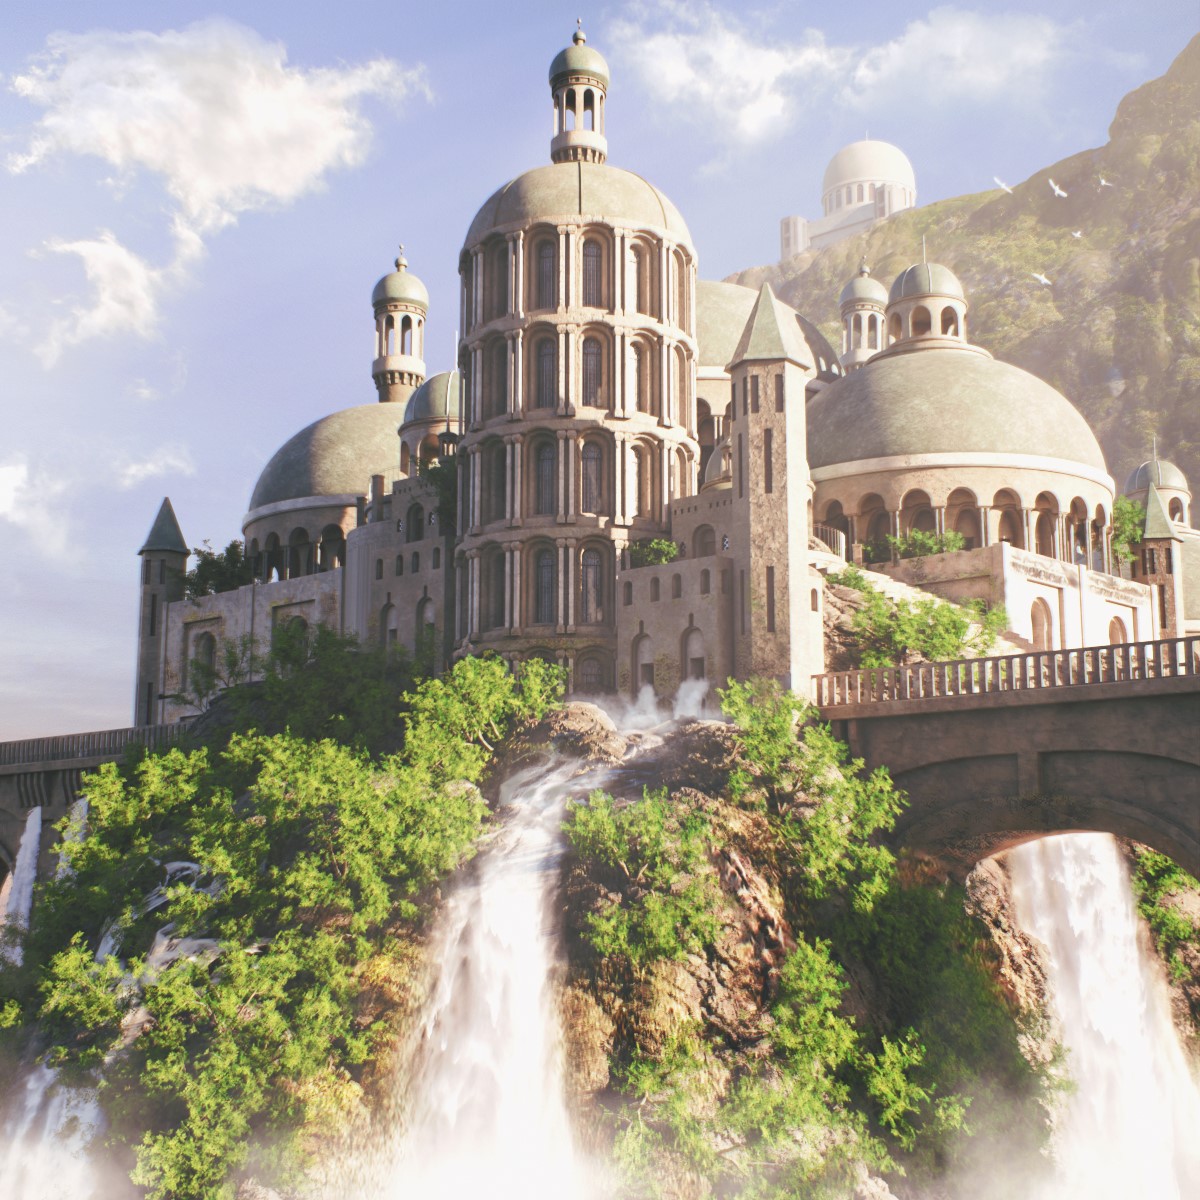
Behind the Scenes: Fantasy Temple
INTRODUCTION
Hi everyone, my name is Carlos Cardona, also known as Chuck CG. I’m a 30-year-old self-taught 3D artist from Mexico. I started using Blender in 2014 and I’ve been using it since then. I make assets and tutorials, which are available on my two YouTube channels, in English and Spanish.
I combine my 3D passion with my job, which is not 3D related.
INSPIRATION
The main idea for the scene came when I was rewatching the Lord of the Rings movies.
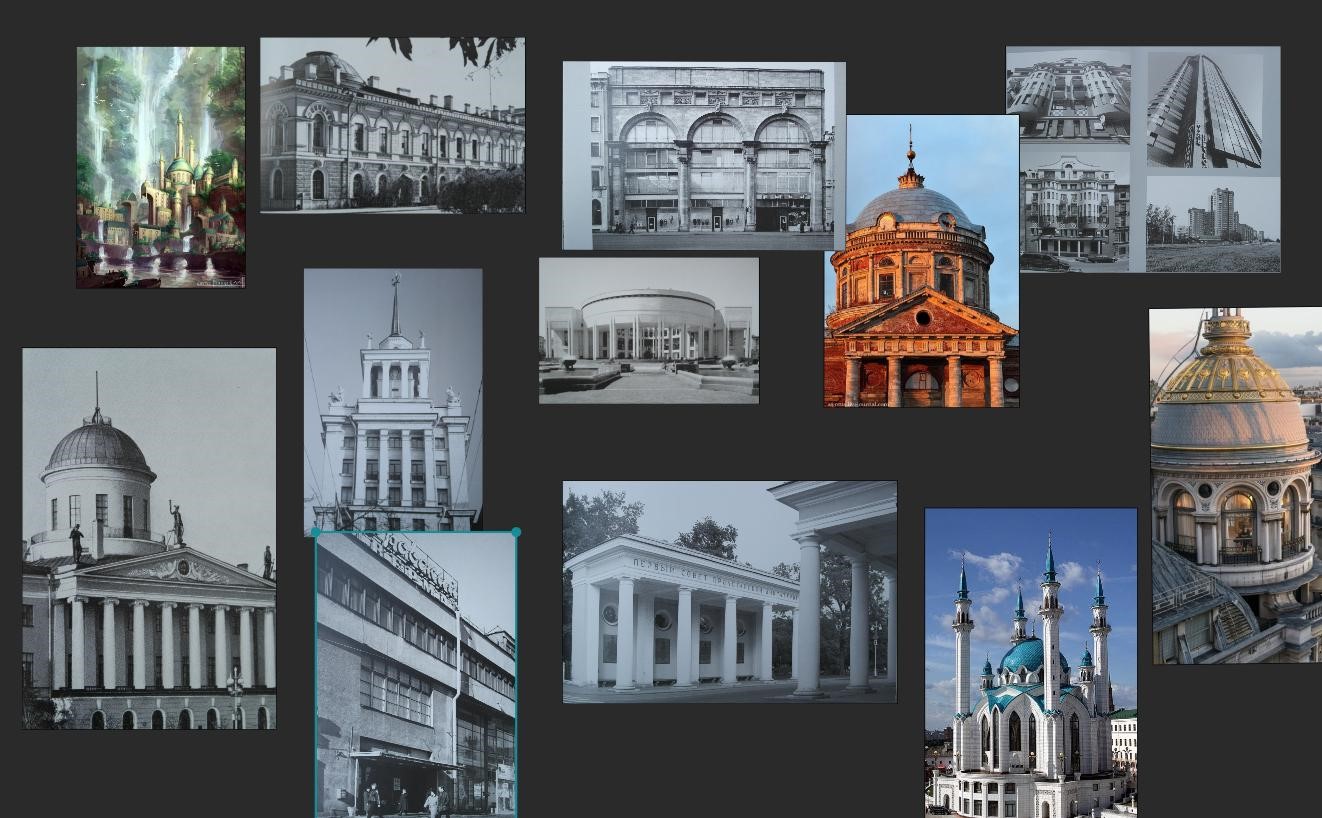
I always use Pinterest for inspiration, so I gathered pictures of the architecture styles similar to the elven kingdoms. At first, I made a tutorial for YouTube where I showed how to make a dome. Then I continued with the rest of the elements and started my scene.
BUILDING THE SCENE
I used Blender for modeling. I like to use the free add-on, JMesh tools, which is the only add-on that I really need for modeling and is essential to me.
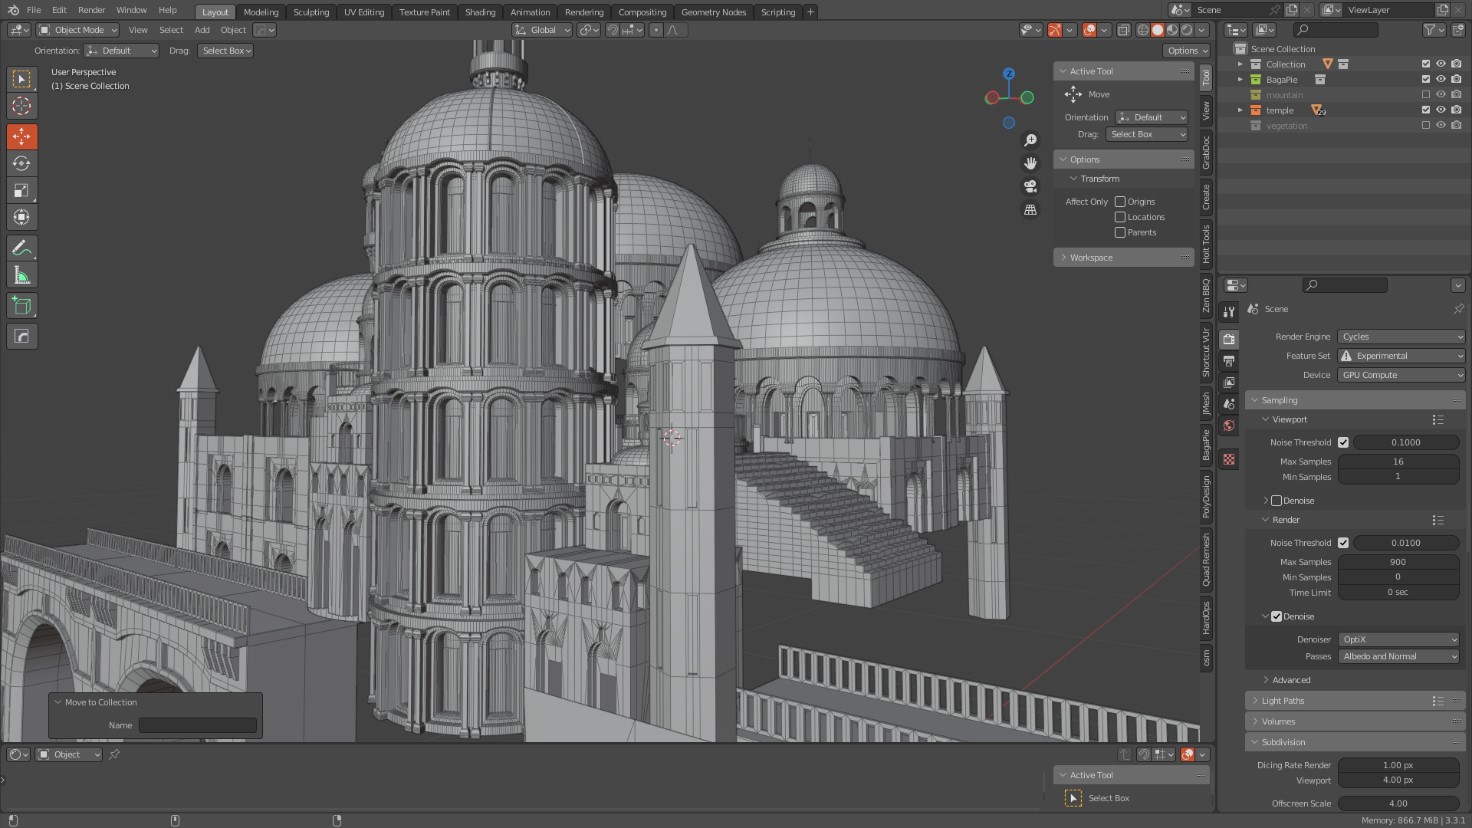
I used 2 modifiers to make the circular shape, array, simple deform and, of course, some modeling. I explained all this in my tutorial.
TEXTURING
For texturing, I used Substance Painter since this would be an asset pack that I wanted with PBR textures.
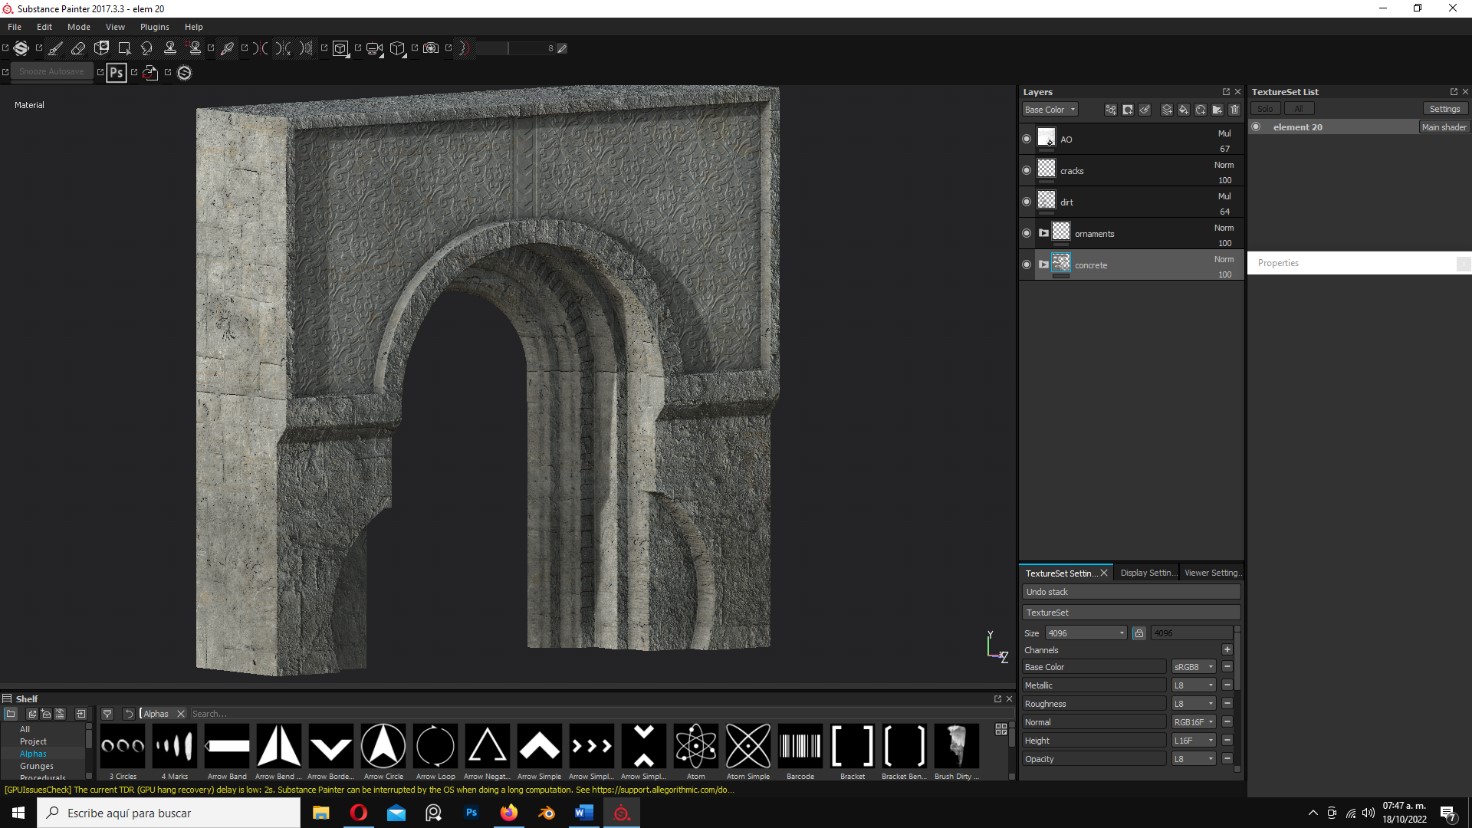
I started with a material that had some noise. Then, I added textures of concrete and bricks, plus some cracks with a height map.
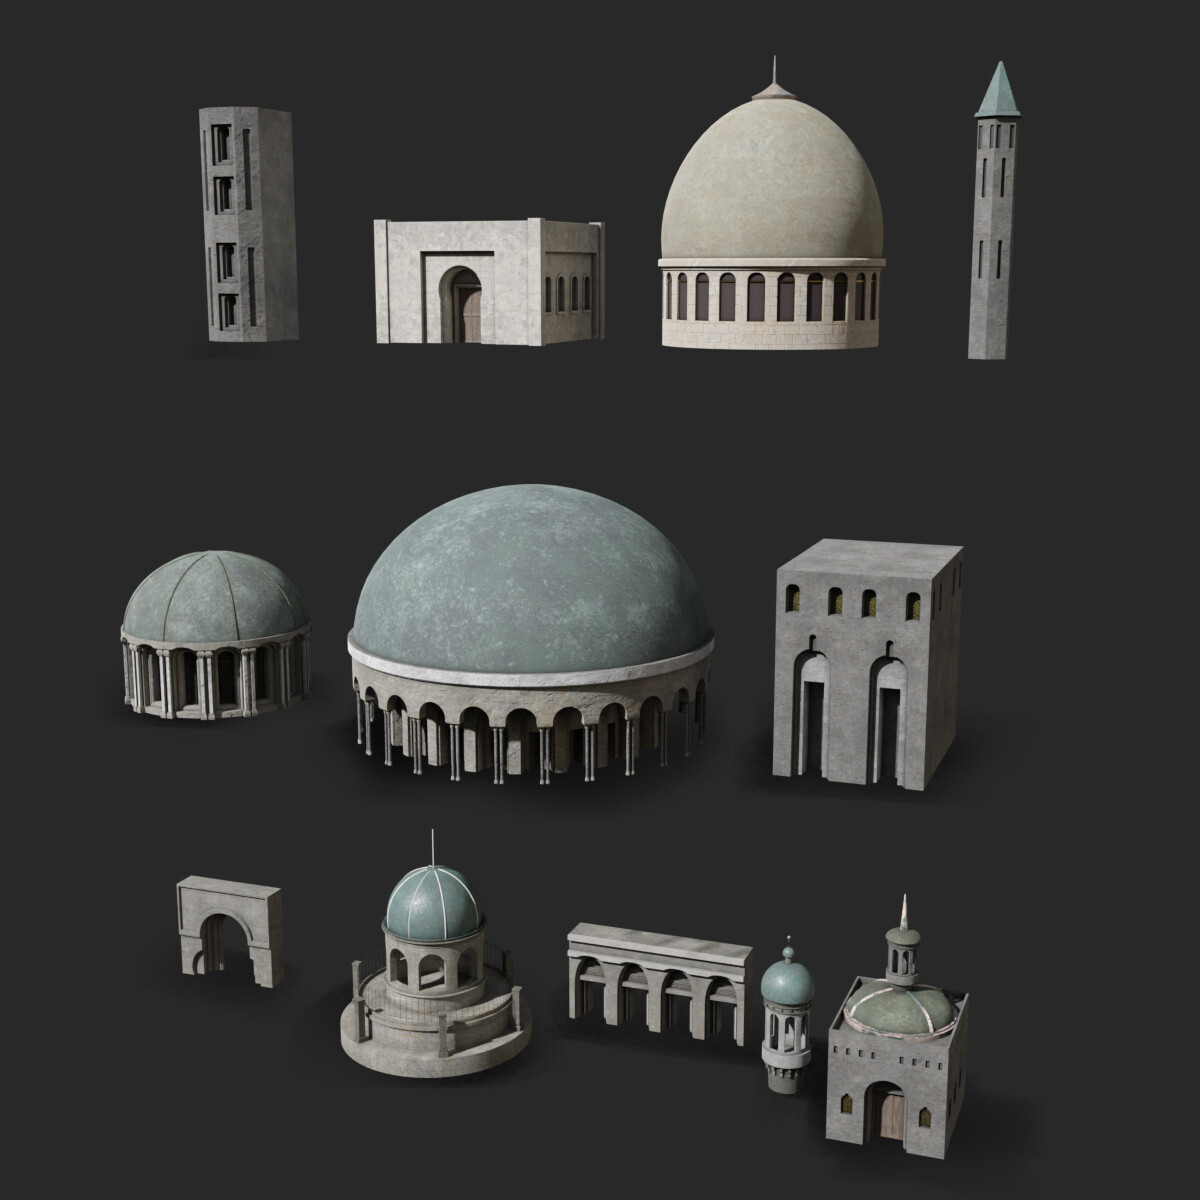
These are the all buildings that I used, textured.
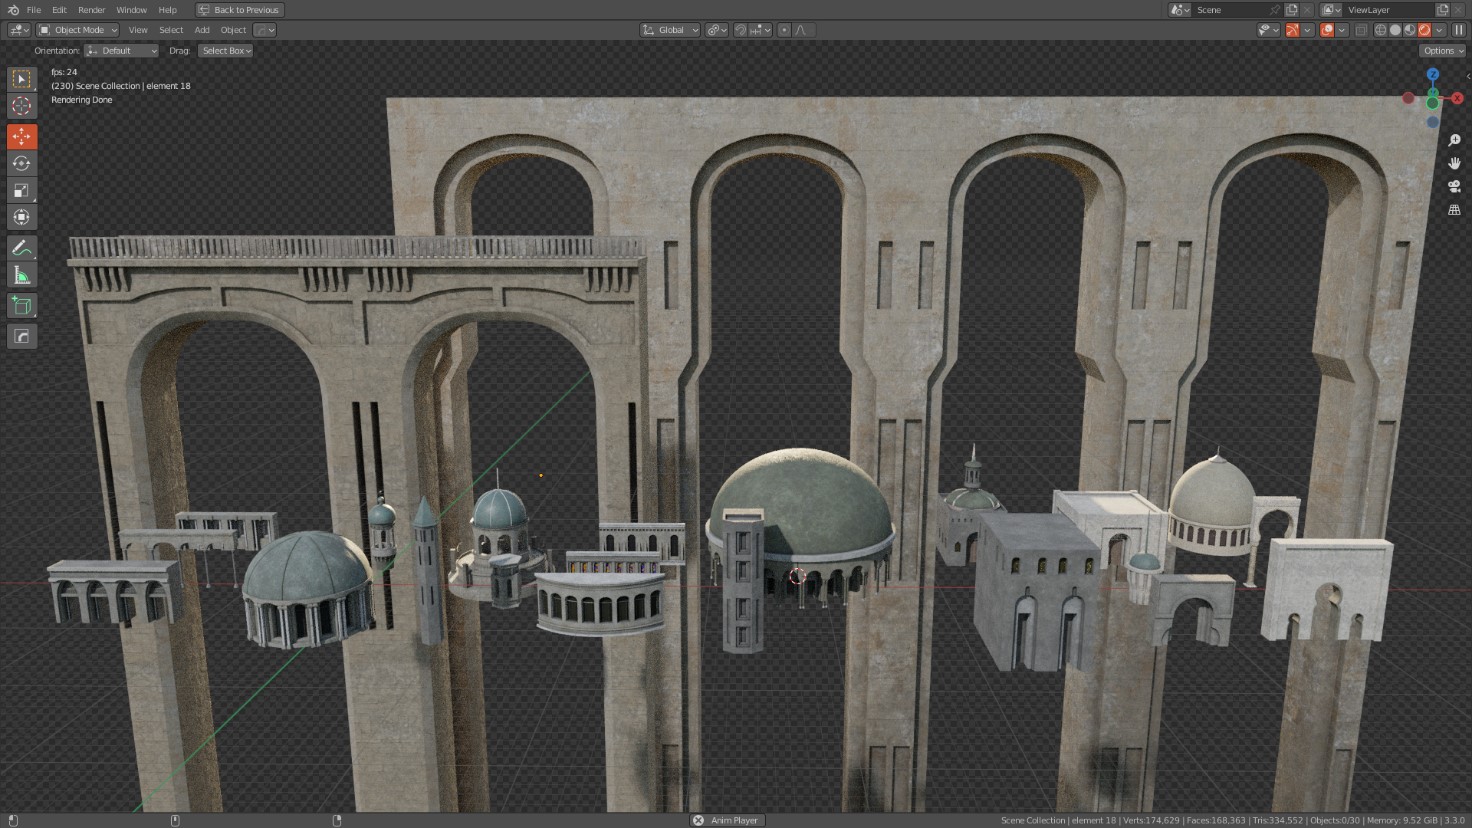
Here they are, positioned in its place.
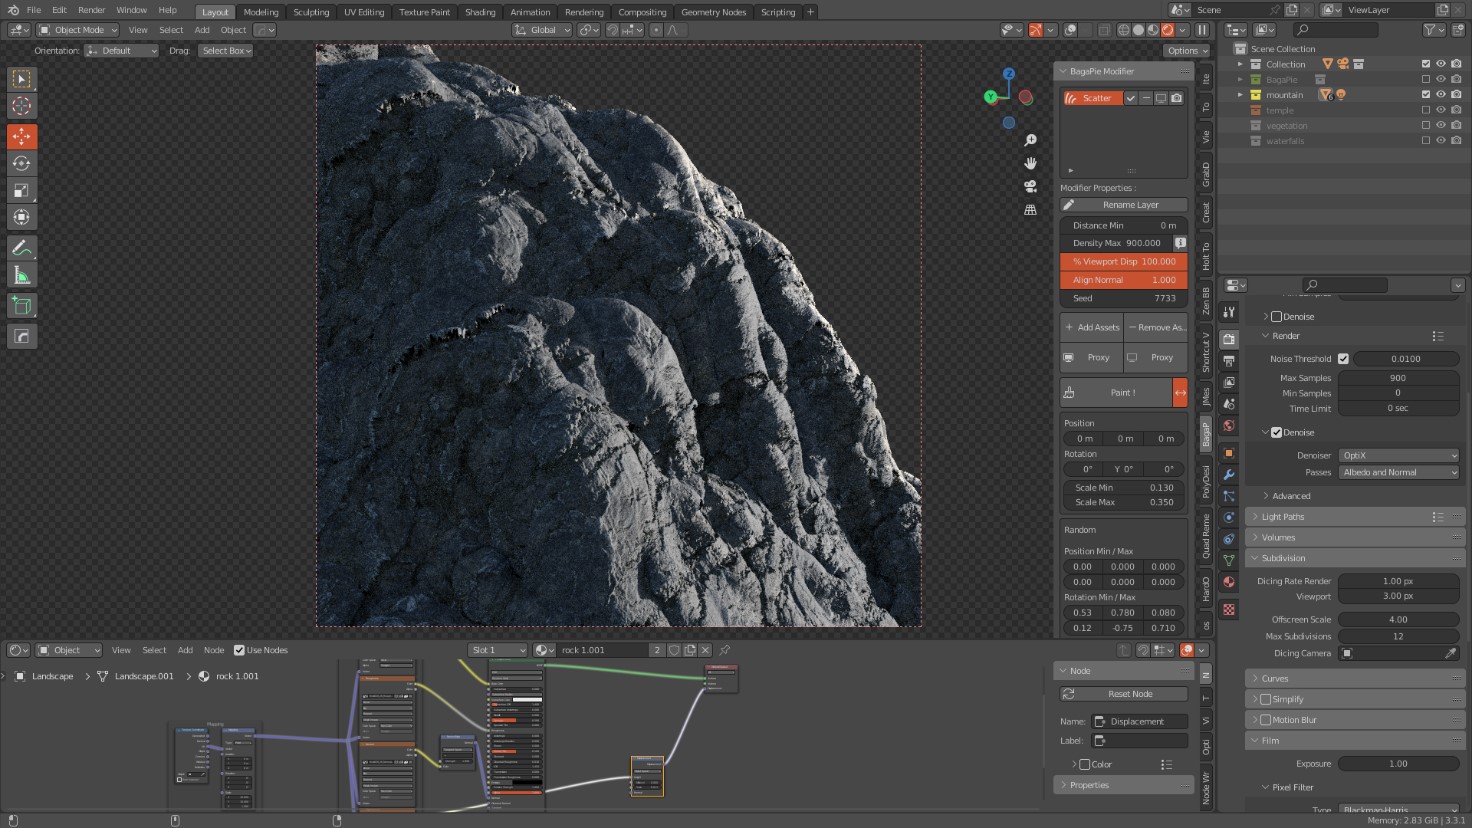
TERRAIN
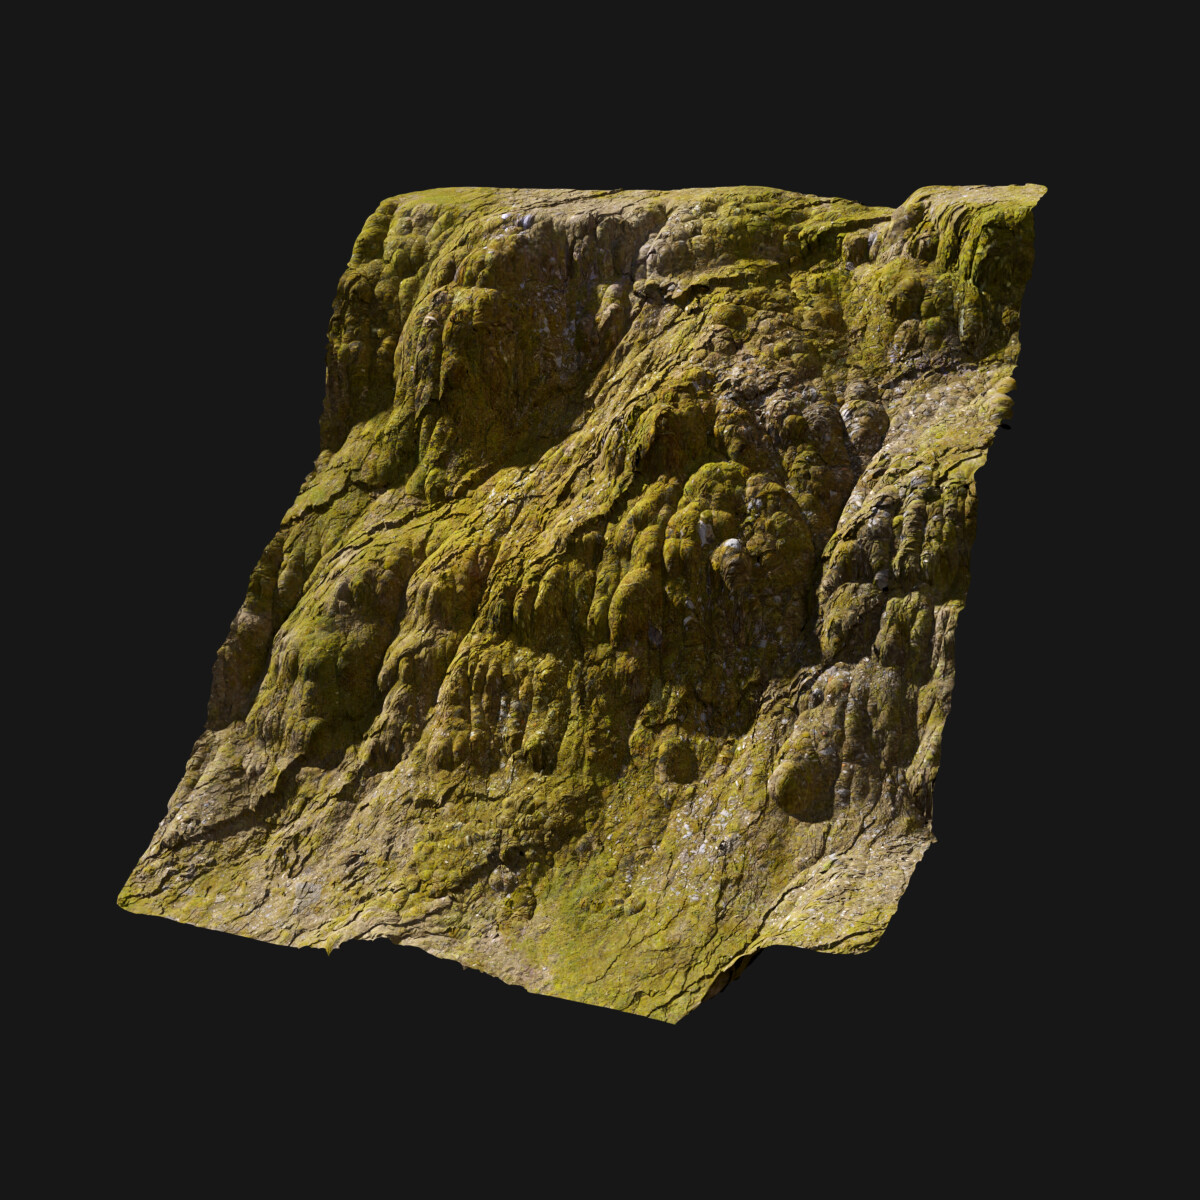
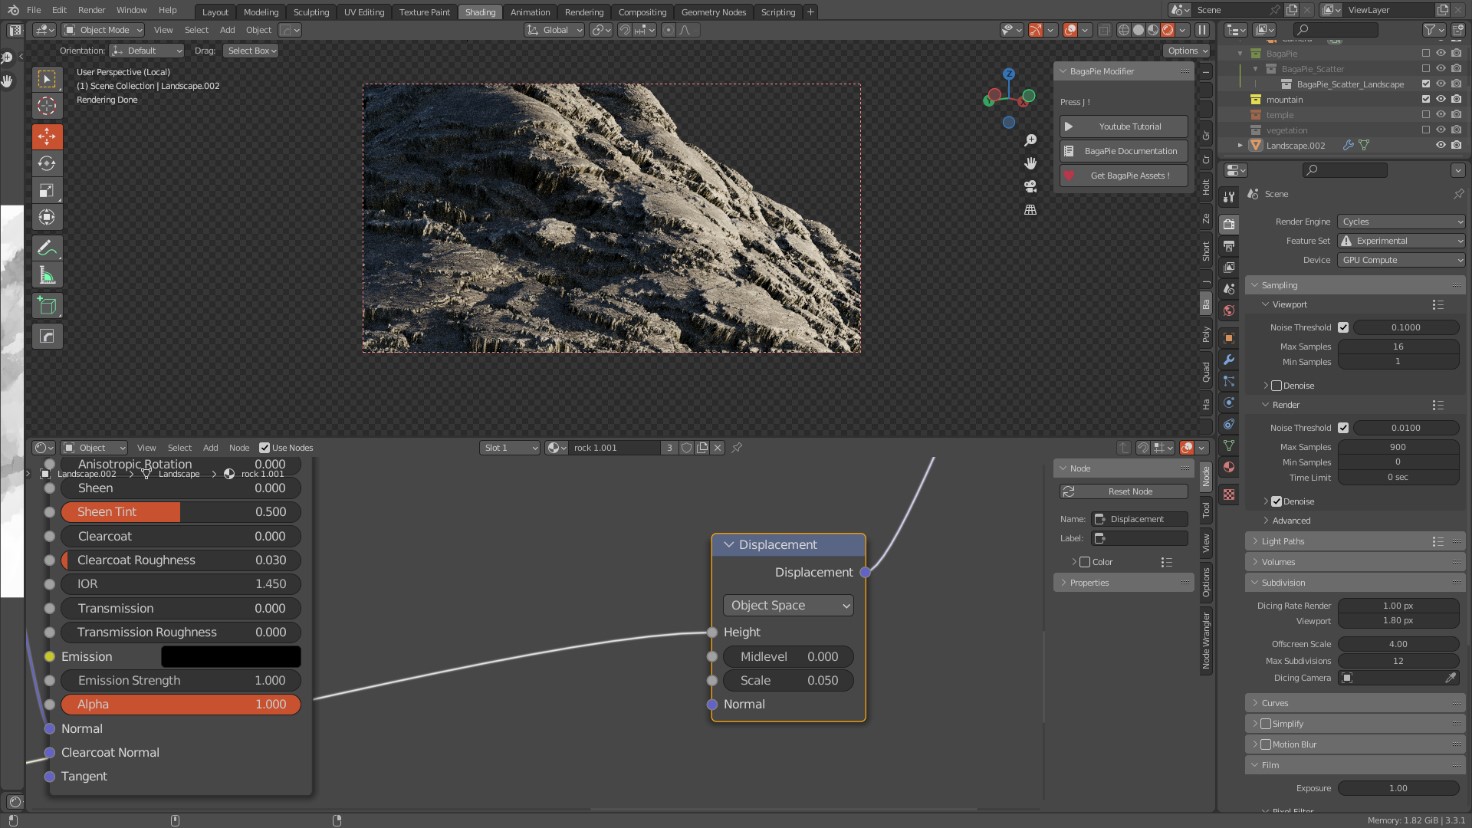
To create the mountains, I used A.N.T landscape addon which is included in Blender. I used textures from ambient cg but I wanted more details for the rocks, so I added a displacement map, using adaptive subdivision and micropolygon displacement.
To do this, we need to change to experimental cycles. First, add a subdivision surface modifier and enable adaptive subdivision in the modifier.

Connect the displacement map to the displacement slot in material output (but we need a displacement node between the map and output). Then connect the displacement map to height.
Finally, in the material tab under settings, we need to switch from bump only to displacement and bump.
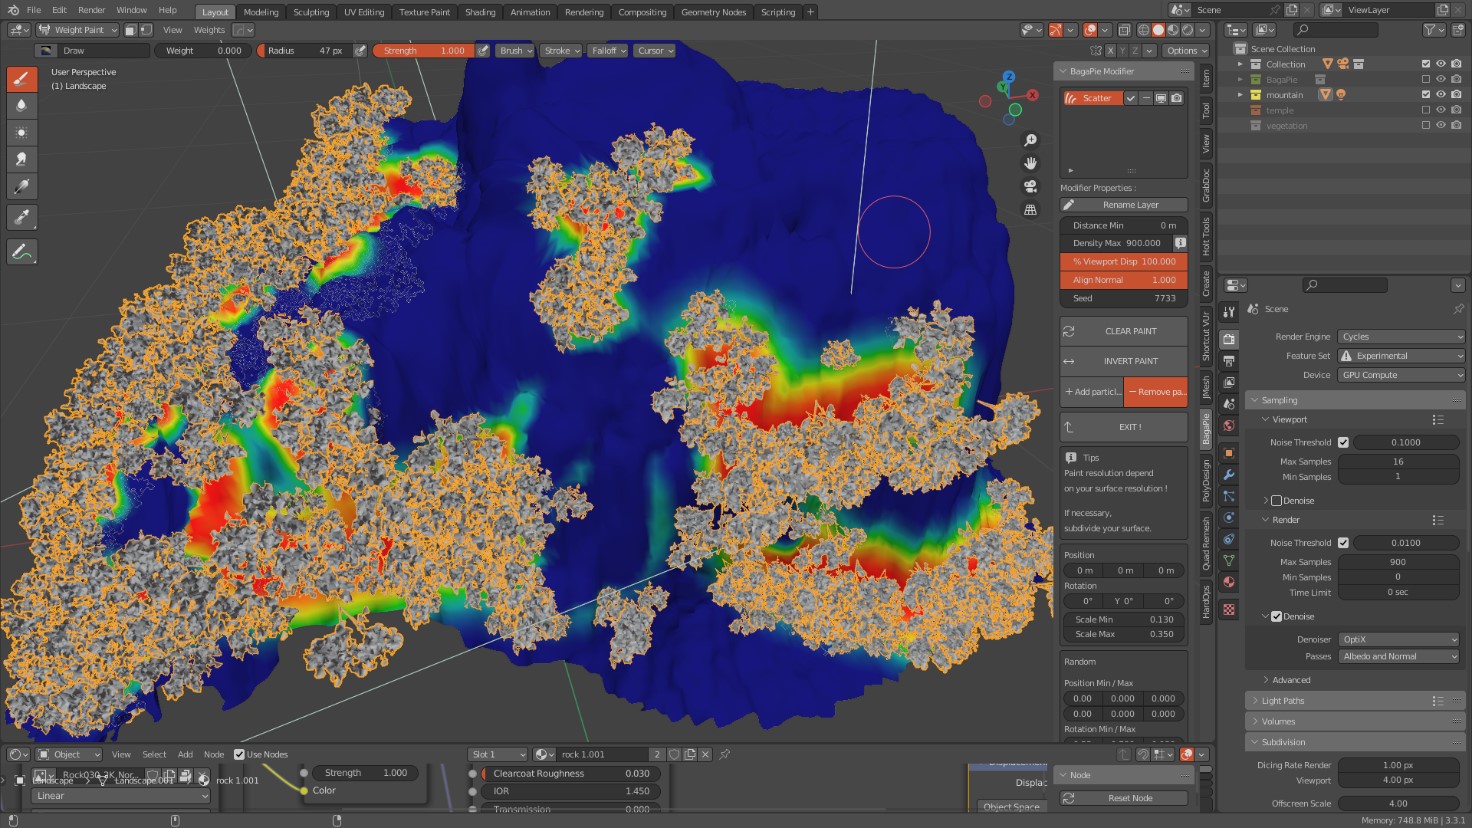
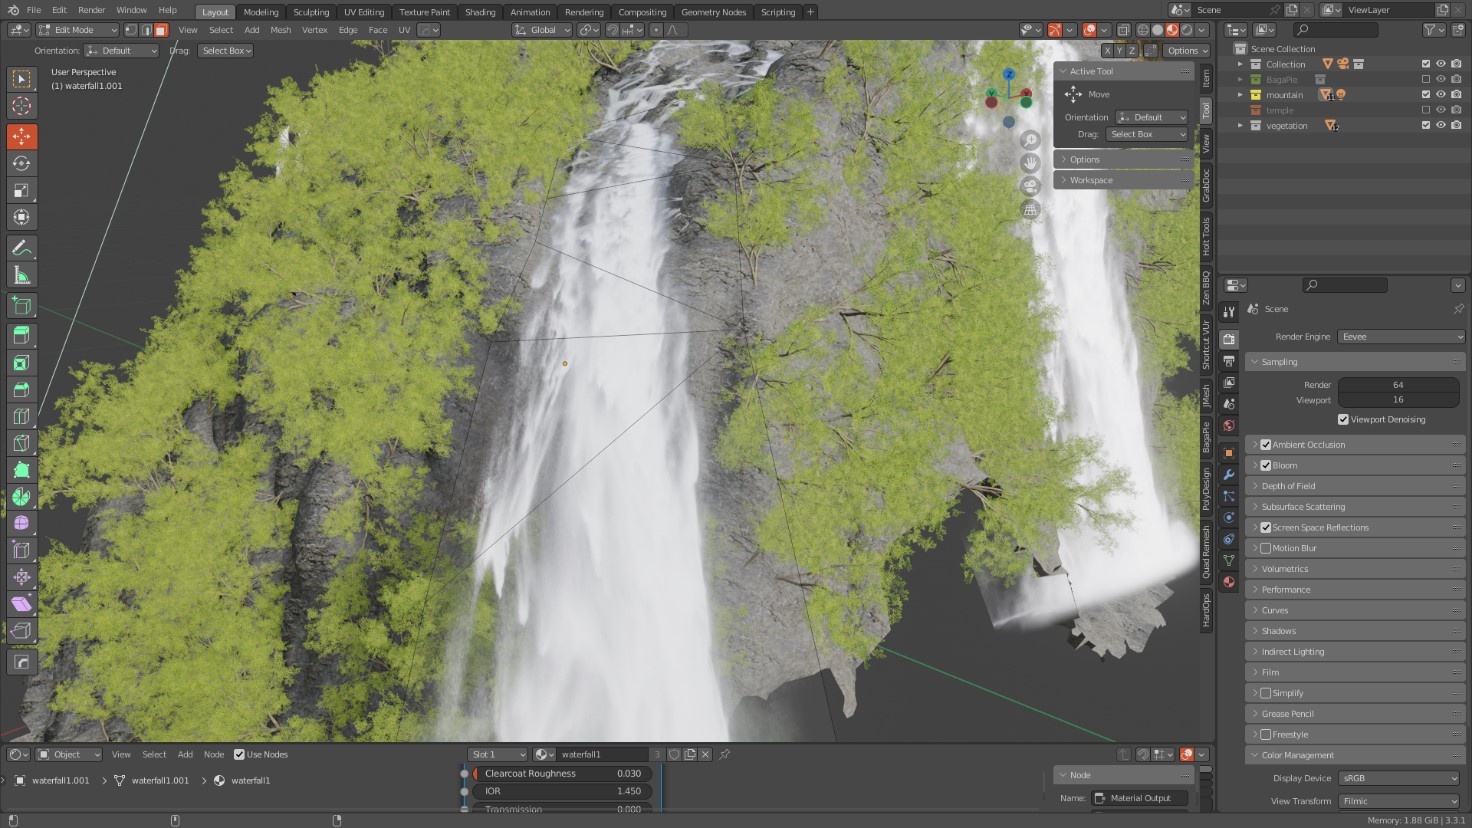
VEGETATION
I created some trees with the Sapling Tree Gen addon, which is also included in Blender.
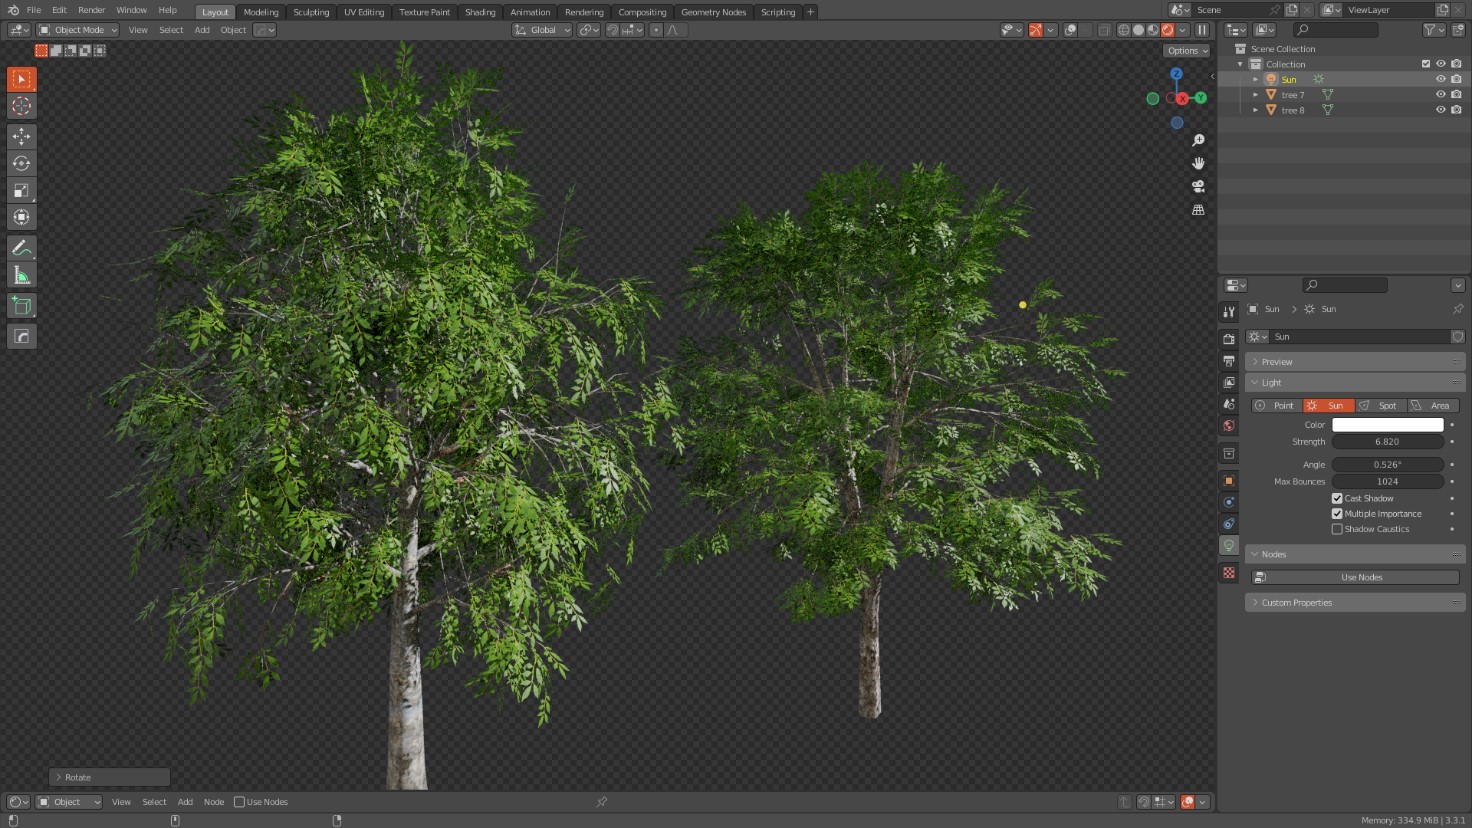
Then, I scattered them with the BagaPie Modifier addon. This is an amazing free addon.
WATERFALL
To create the waterfalls, I just imported an alpha plane and subdivided it.
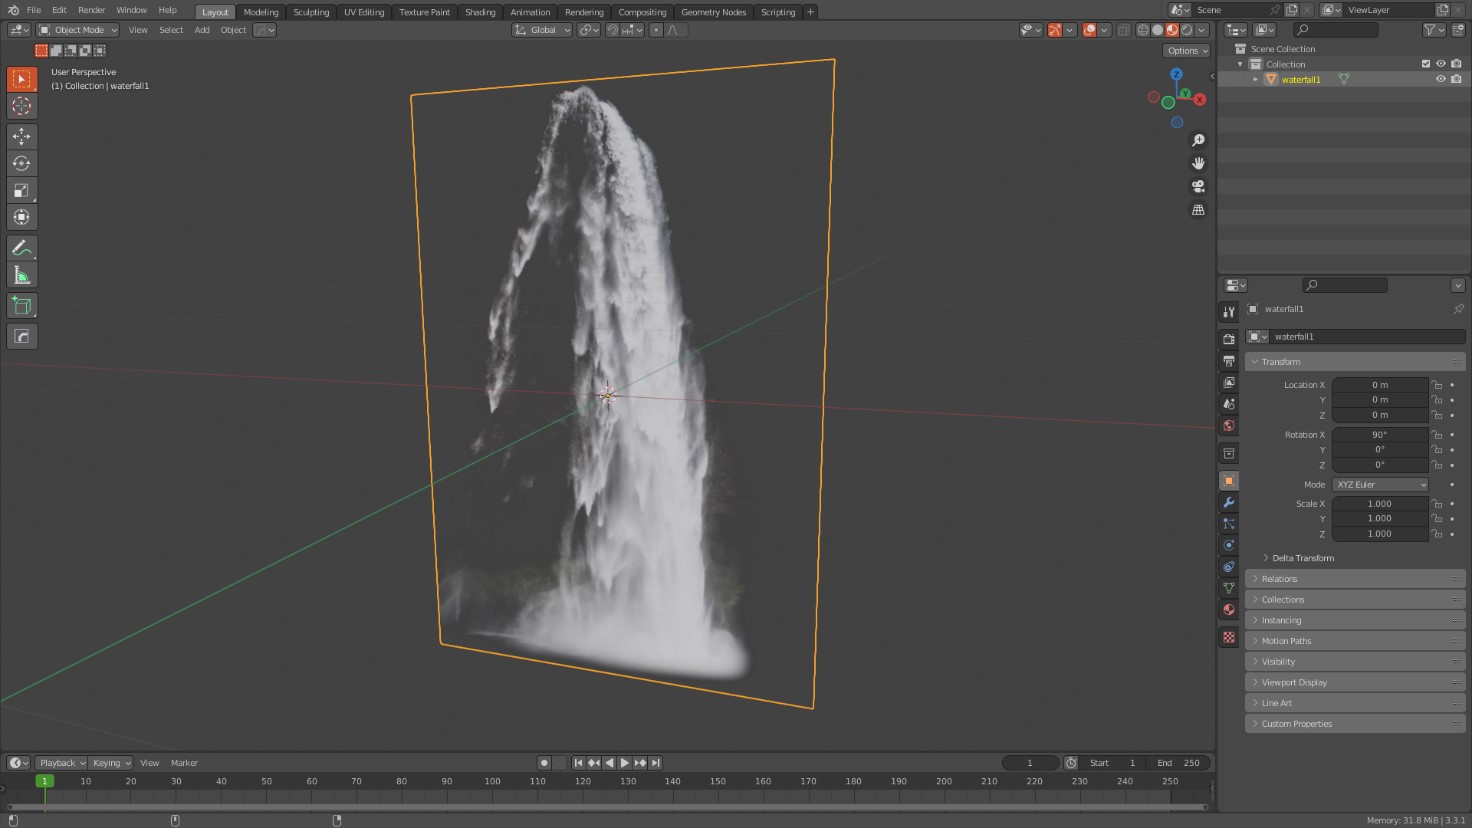
And then, I gave the plane the shape of a mountain to give it the 3d look.
For this, I followed a tutorial from Jose Vega, where he explains how to do it.
LIGHTING
For exterior scenes, I like to use the sky texture. This is a very powerful tool and very easy to use. We can change the elevation and rotation of the sun until we find something that fits.

Of course, HDRI images are very useful but if we use cycles, the sky texture can save us a lot of time.
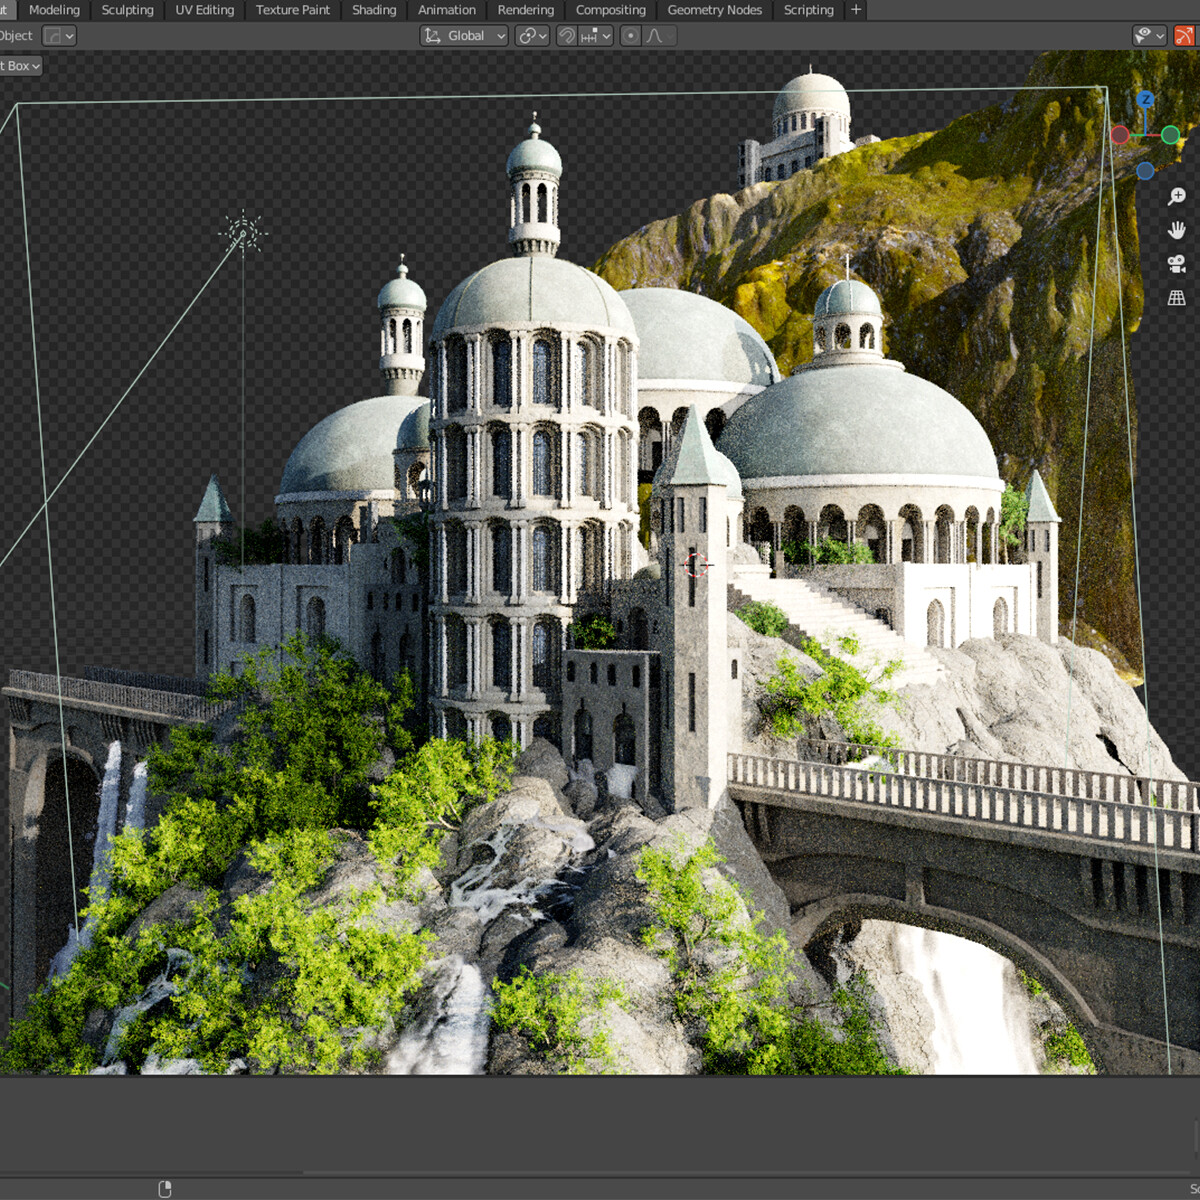
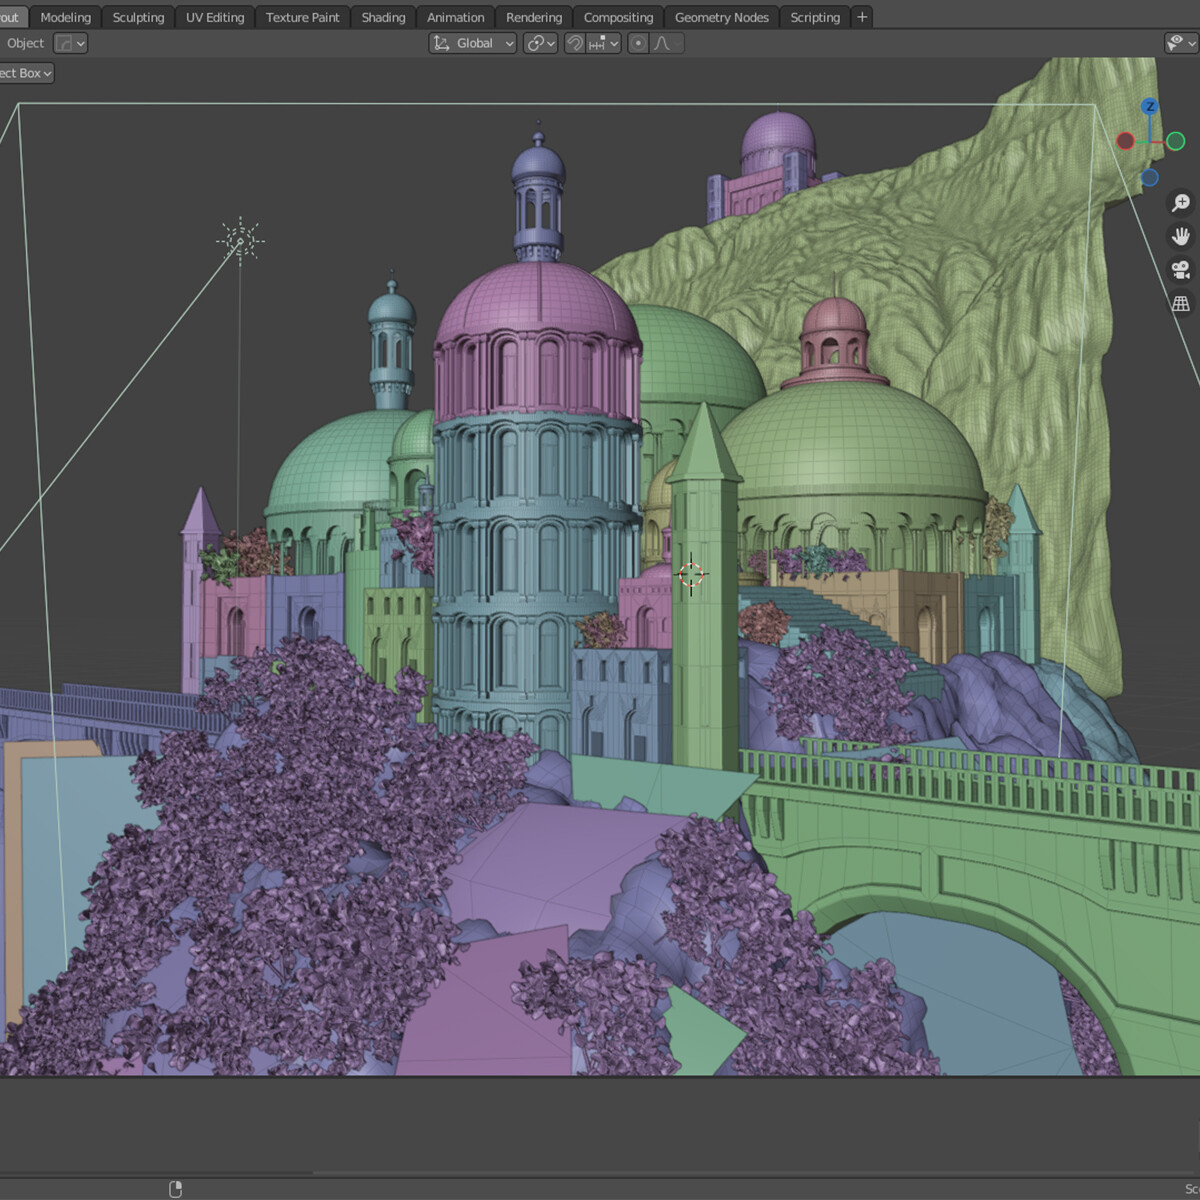
Here is the final preview of the scene in the viewport.
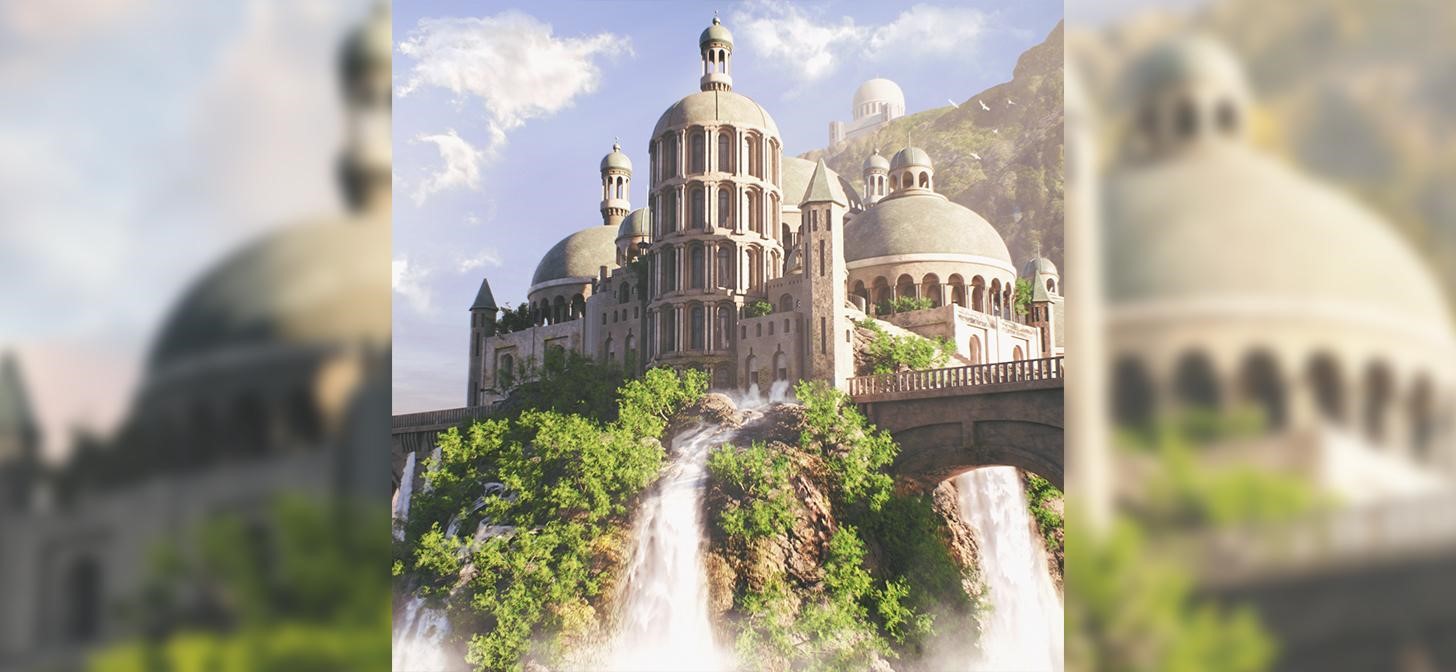
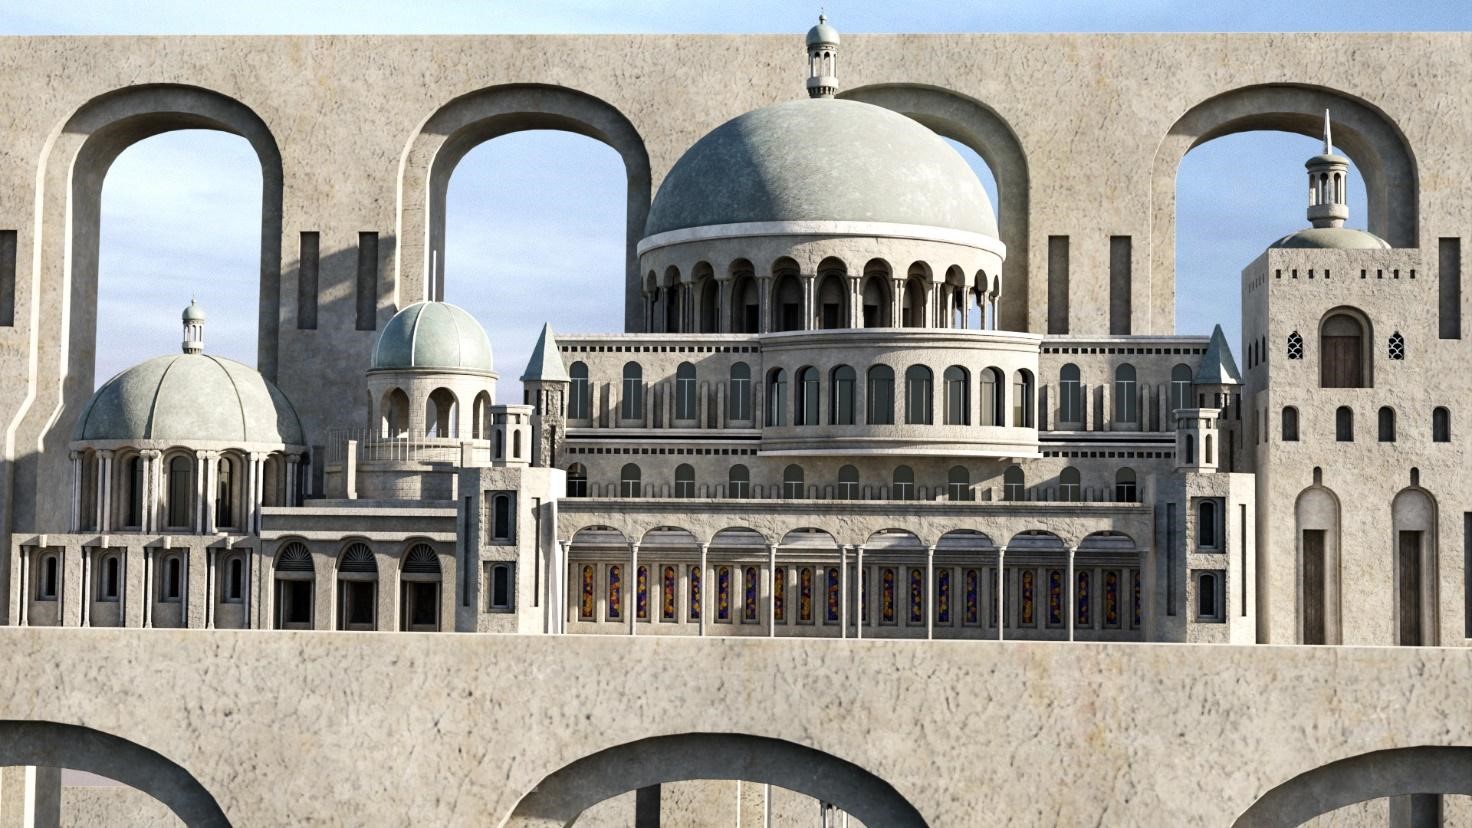
FANTASY TEMPLE

That’s it! Thank you for giving me the opportunity to share my process here! I hope you have found this article helpful!
Happy Blending!
About the Artist
Carlos Cardona, a 3D artist from Mexico who loves to create fantasy and sci-fi work. He is currently making tutorials and assets.


awesome