Behind the Scenes: Space Colony
INTRODUCTION
Hello guys, Kshitij Bhate here from Sangli, India. I am a passionate freelance environment and concept artist, and a software engineer.
I have been using Blender for two years; I started back in 2020 when the pandemic hit. Beforehand, I had no knowledge about any 3D tools, but was interested about how VFX and CG were done for movies. So, Blender was my first 3D tool which, till today, I still use as my major weapon for any project.
Initially, Blender started as a hobby and eventually became my passion. Throughout my path with Blender from the very beginning days, I always had a goal of making large scale environments in Blender but there were almost no tutorials for it. So, I struggled to make it work. I have used Blender for many international projects of large scale environments using both Eevee and Cycles.
INSPIRATION
So, the inspiration wasn’t very specific. I just laid out all my likes of moods, structure and composition in a reference board, which always makes me create something truly unique and try not to copy a reference or artwork rather creating something of my own. While I didn’t completely use my reference board, here is how I laid my images that gave some space to think.

Everything was done in Blender; even the color grading was done in the compositor.
ASSETS
I generally don’t spend time on making assets for the environment which are very common and obvious. If something has to be unique for modeling, then I will do it right away.
So, I used assets from Kitbash 3D and also some of the assets from Blender market. These assets were already textured; I only did some touch up for textures.
Models are already good but these types of assets are not optimized at all, so I always do some manual re-modelling work on existing models for reducing poly count. Another method that helped me a lot is using instanced meshes.
Just for a comparison, I could say my experience before using instance meshes is, as if you don’t use instance meshes you would even feel 64 GB of RAM is not sufficient. Instance meshes always cut your memory usage by almost half (depending upon how many duplicated meshes you are using and then instancing). Instancing can be done by putting all meshes together in a collection and then adding object menu to collection instance and then choosing your collection.

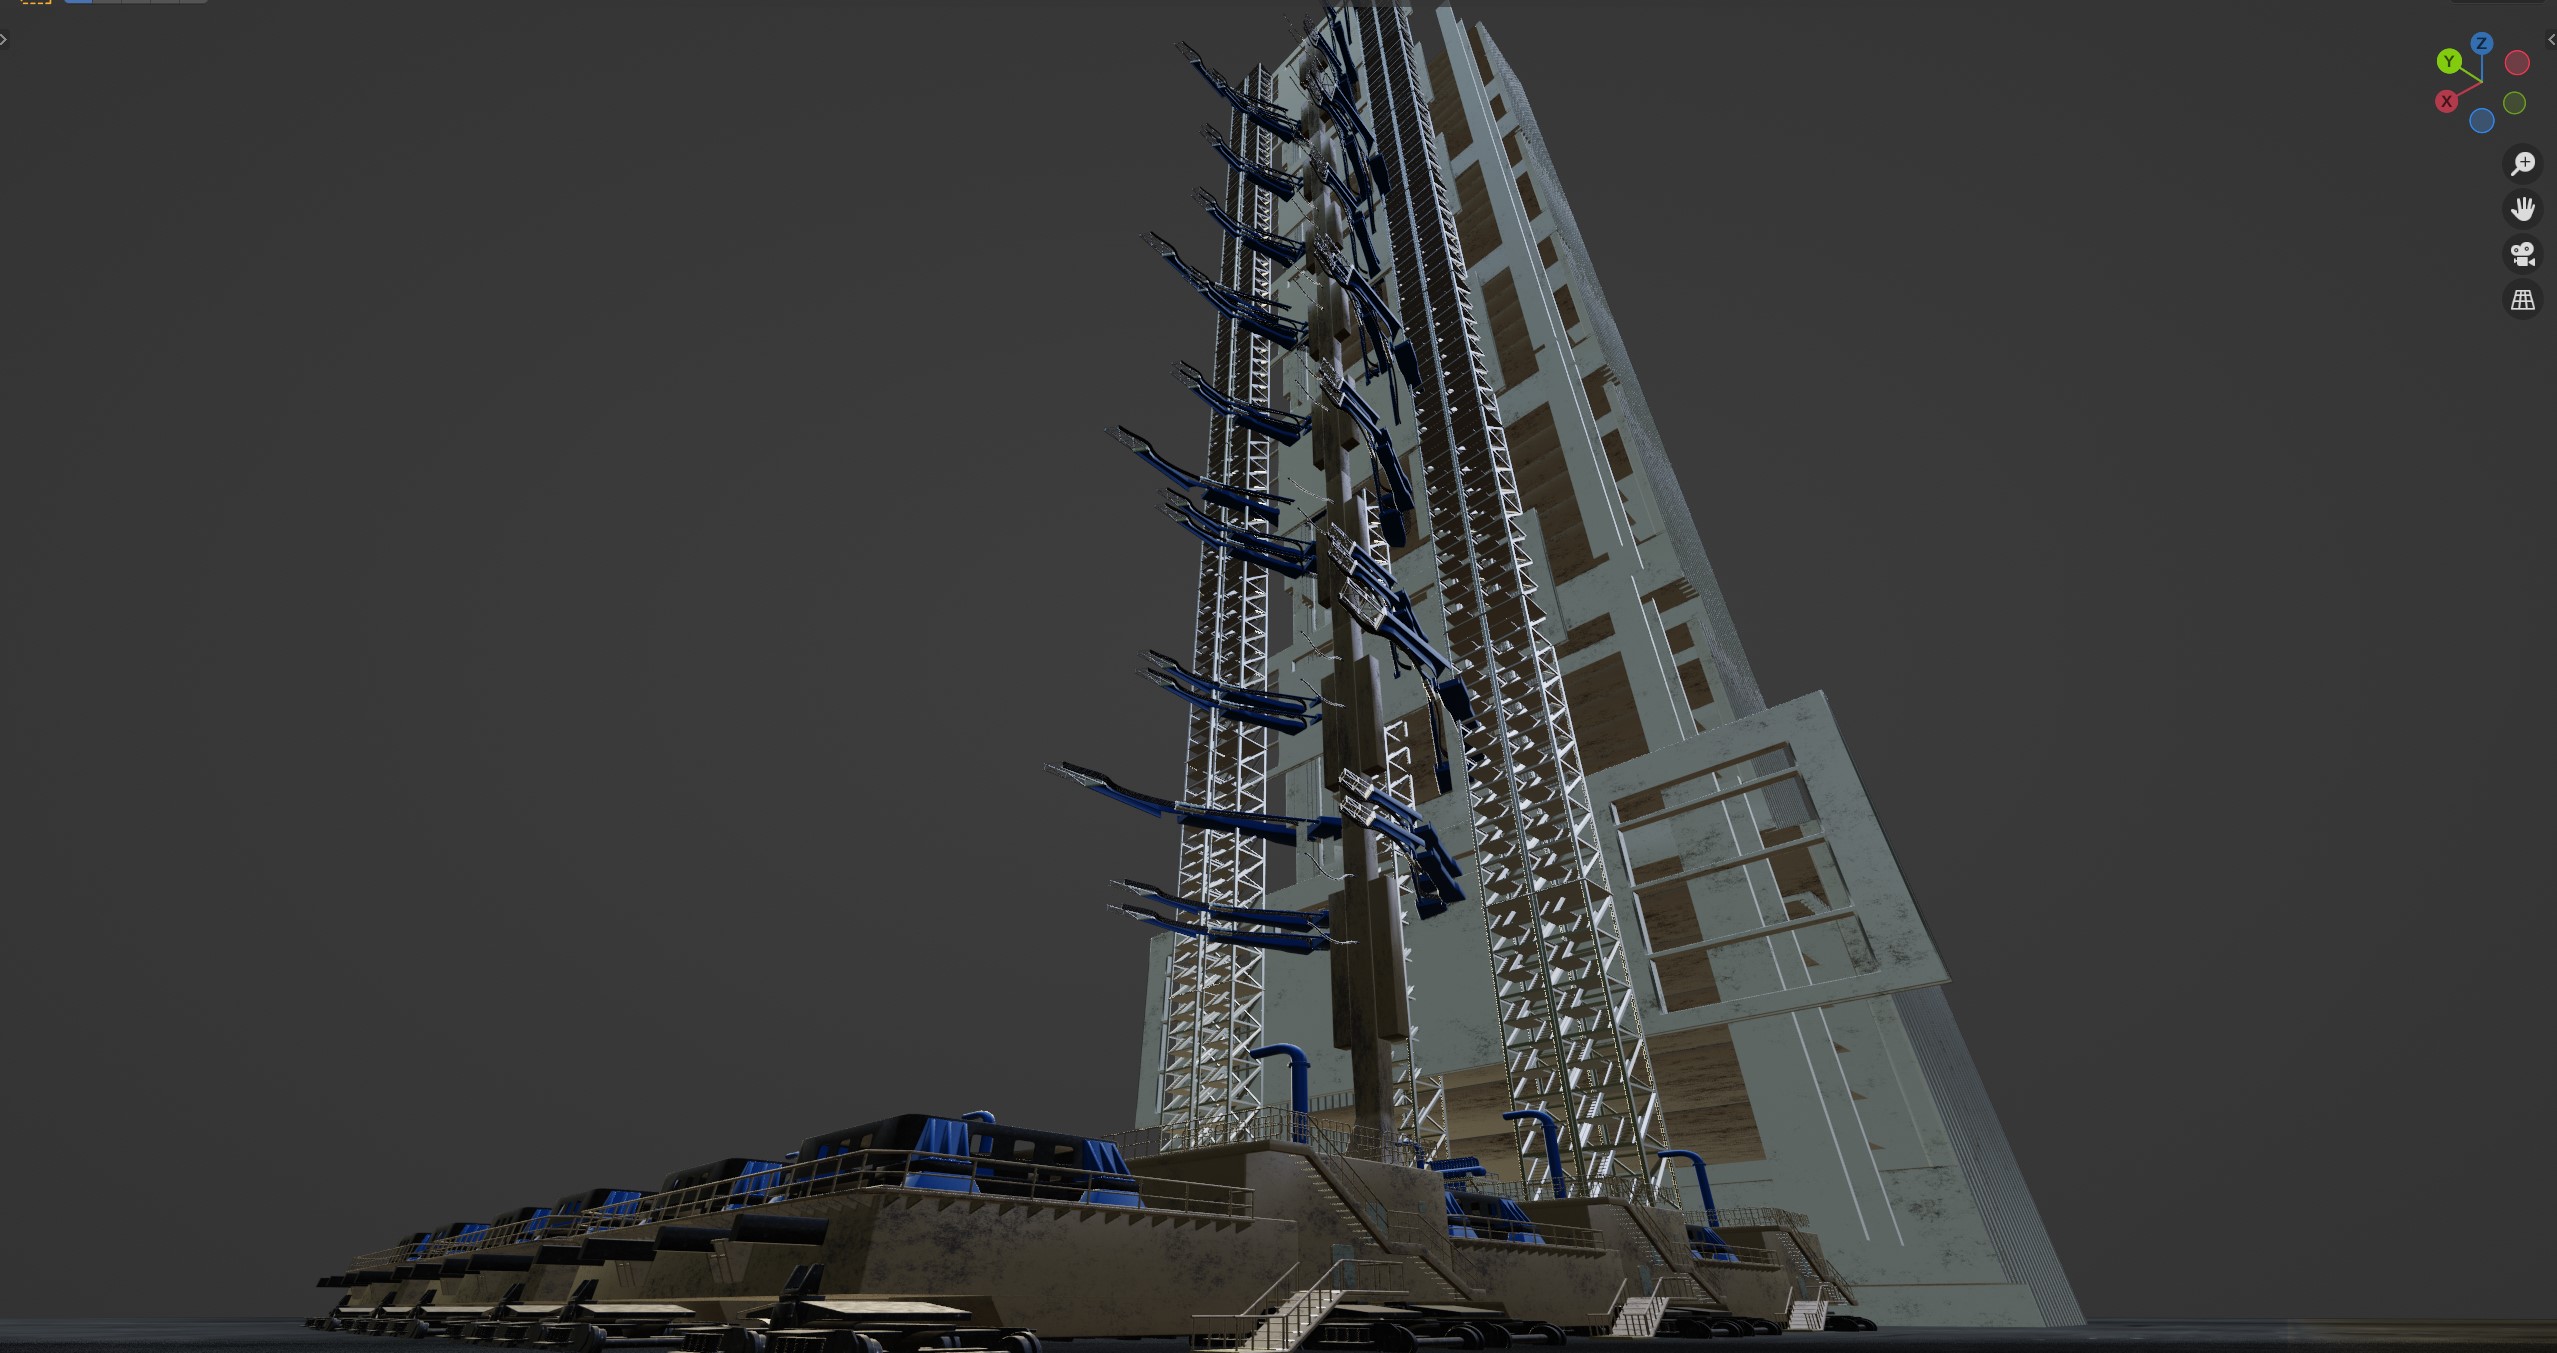
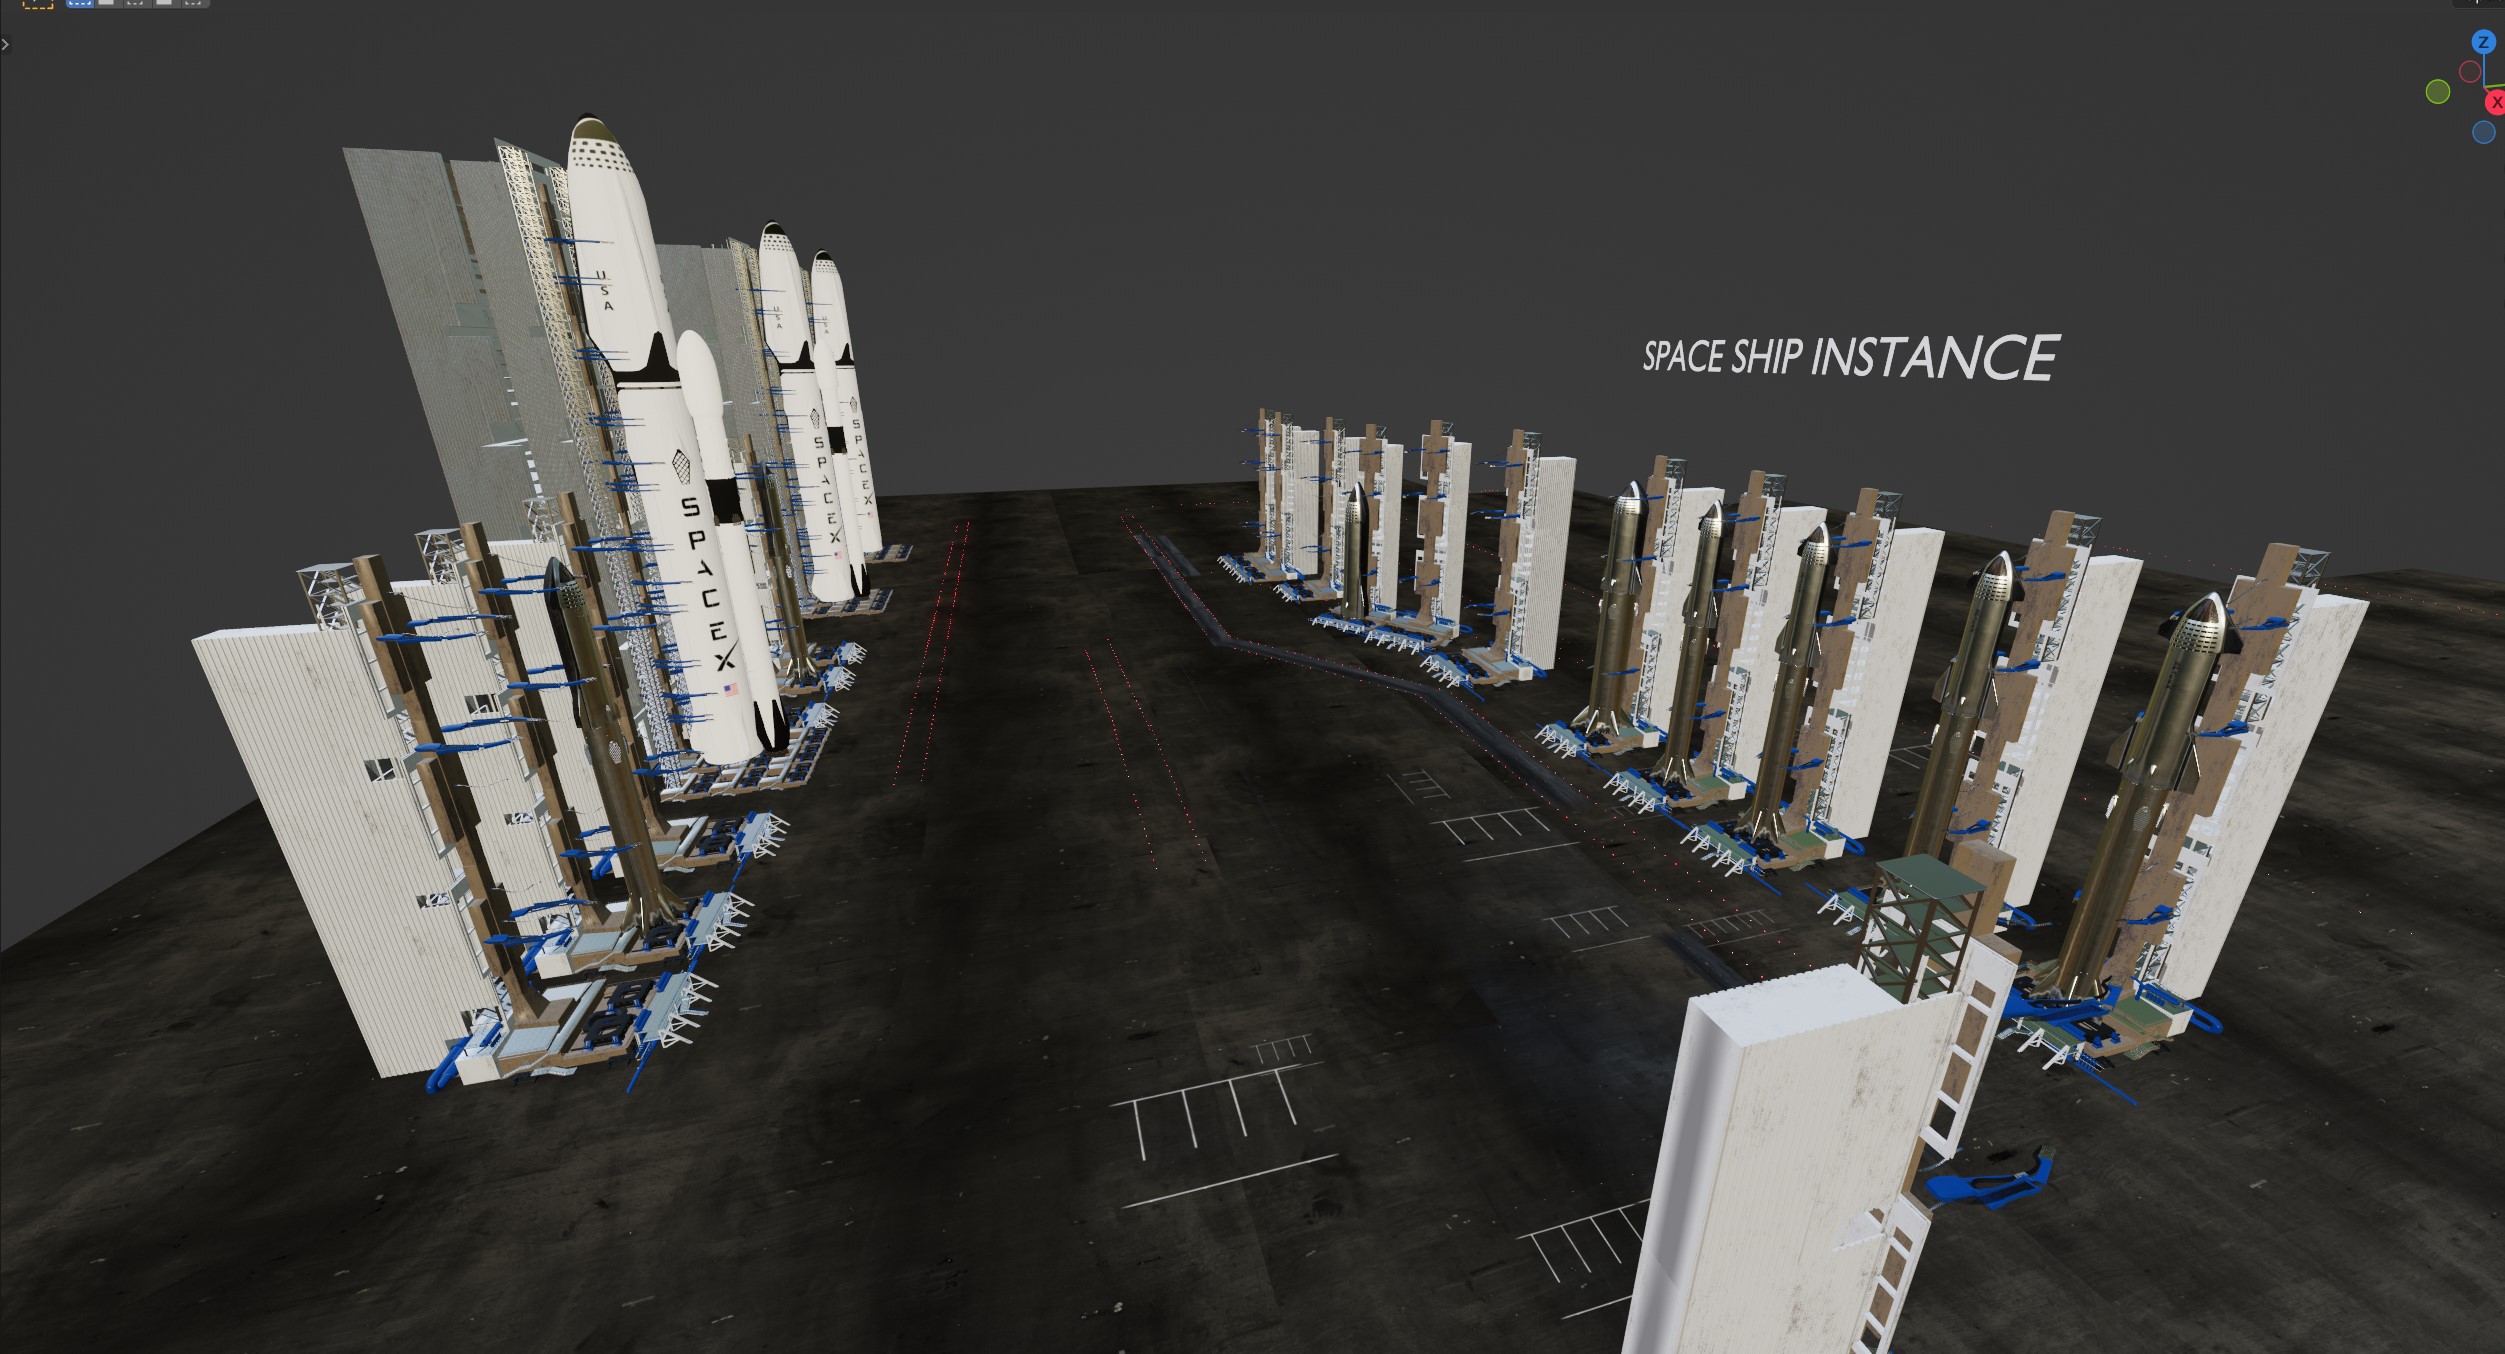
The assets below were from Blender market and didn’t have detailed textures nor some advanced modeling, just simple rocket systems and a landing pod, but here I could really show you how instancing can help while making large models using separate parts of existing models.
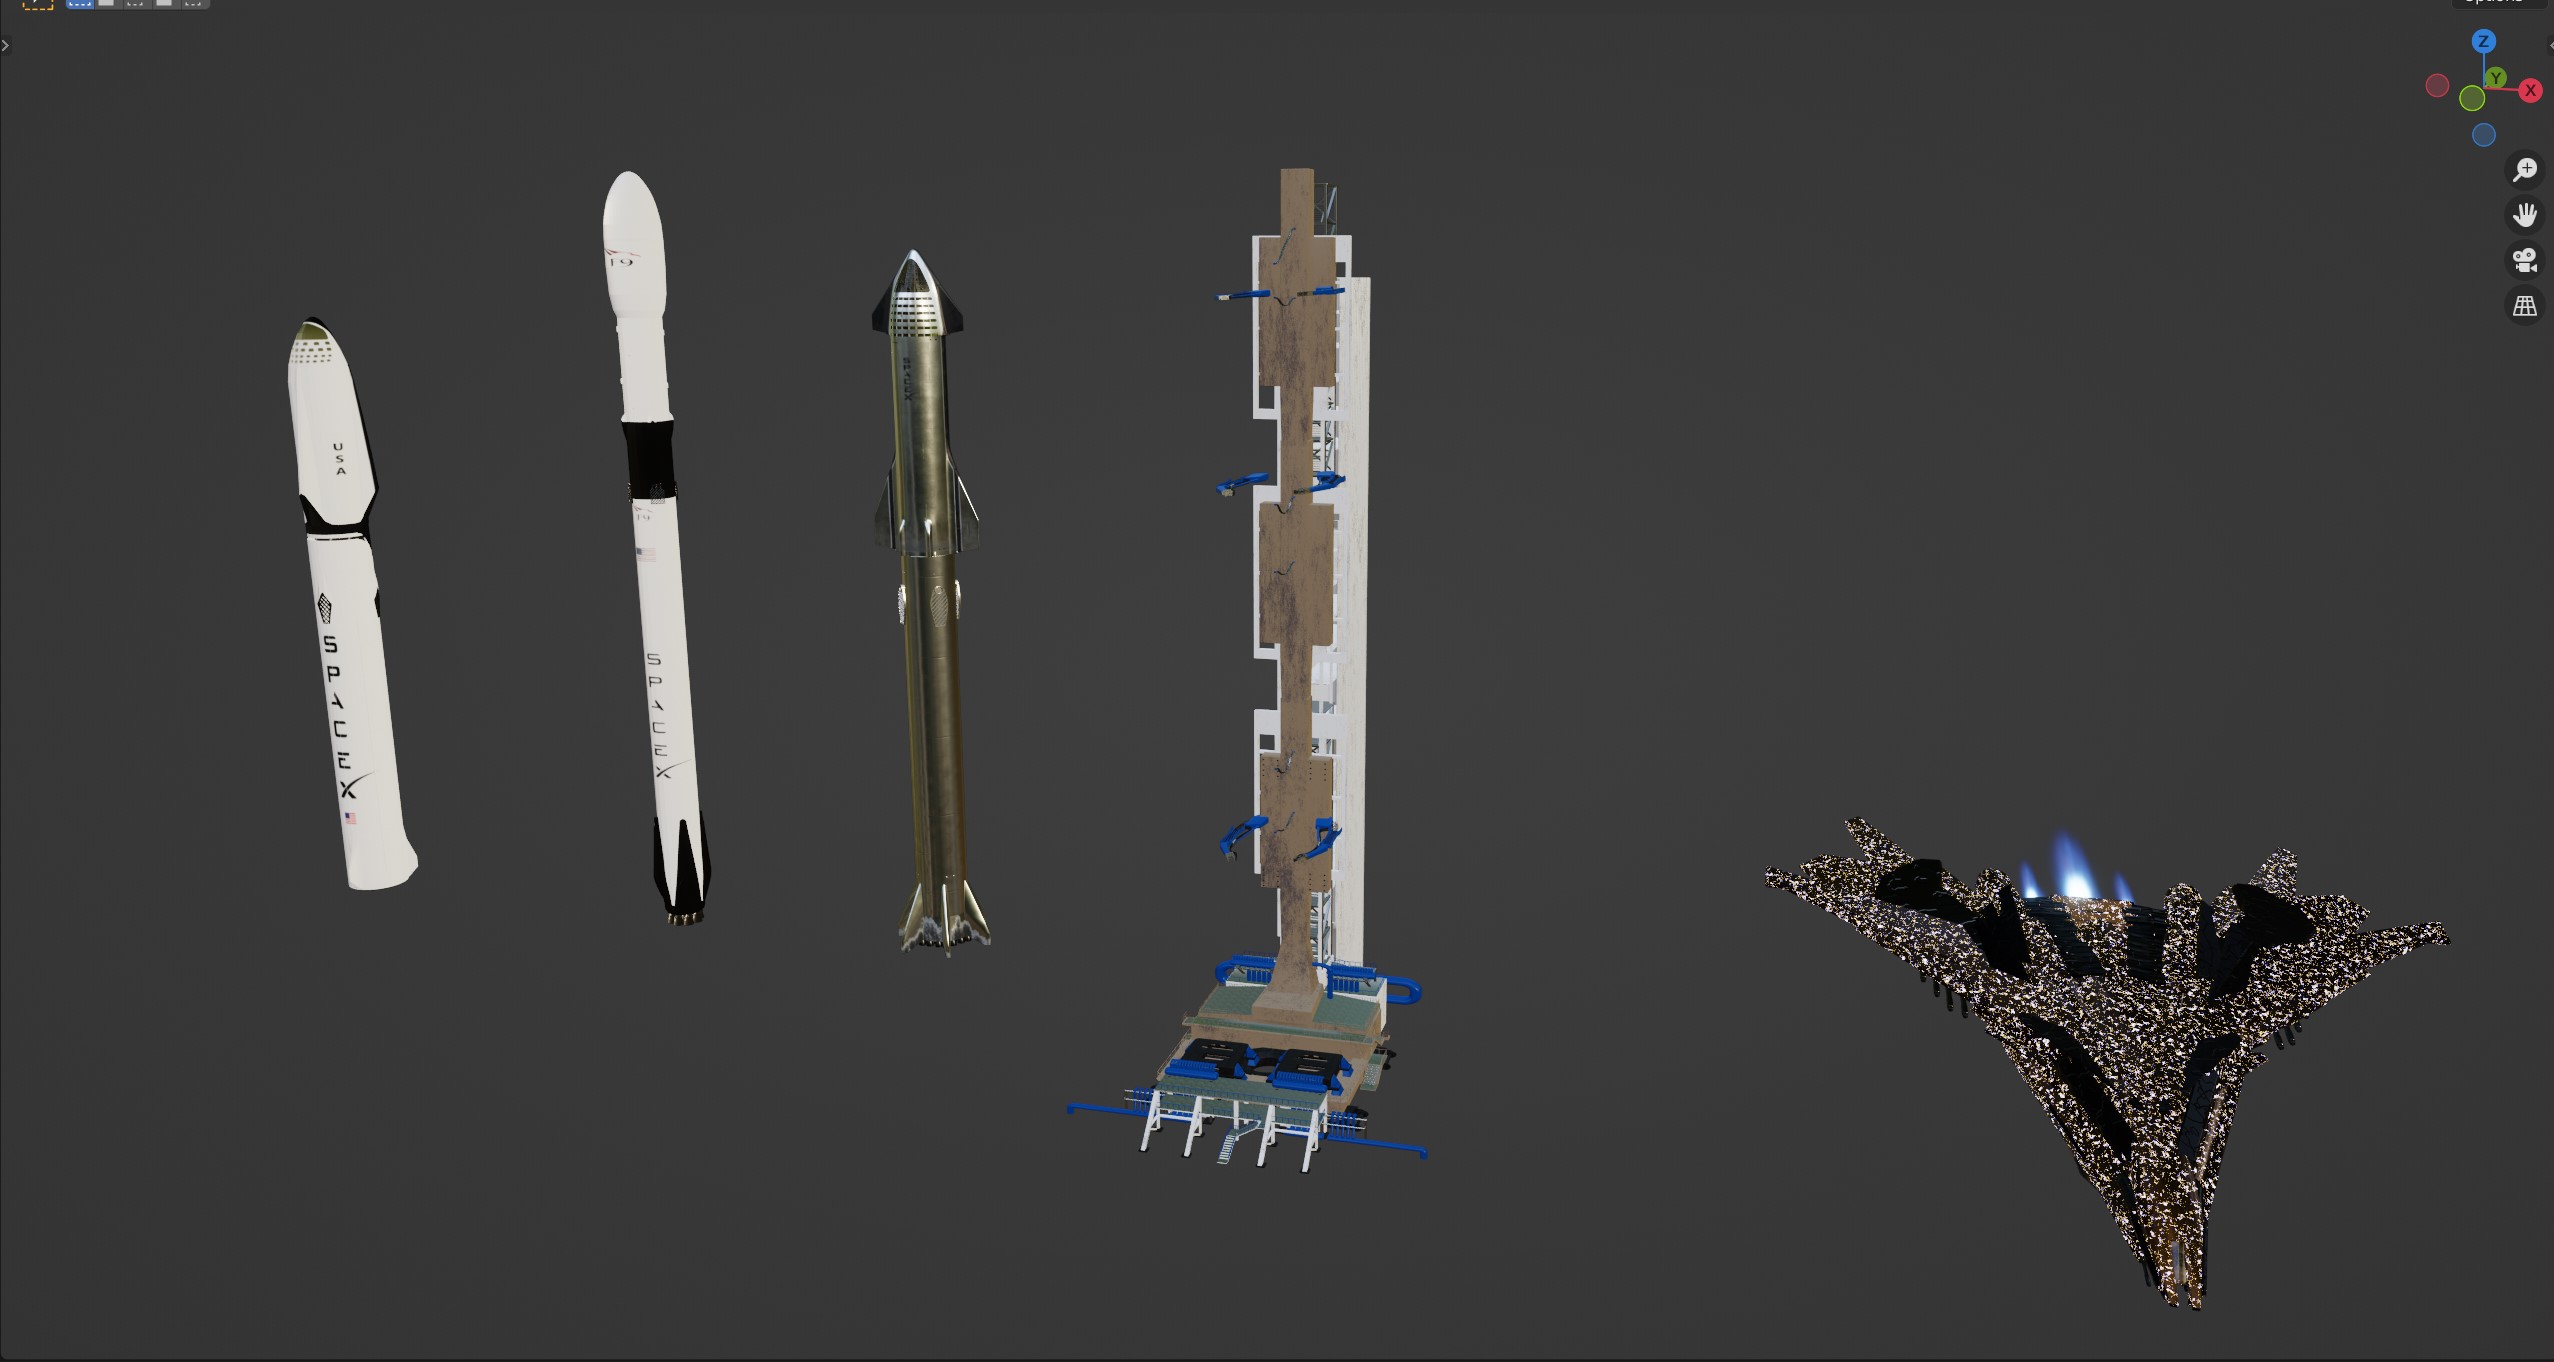
The model shown below was made using individual parts which were instanced, which means this doesn’t affect my memory usage whatsoever.
TEXTURING
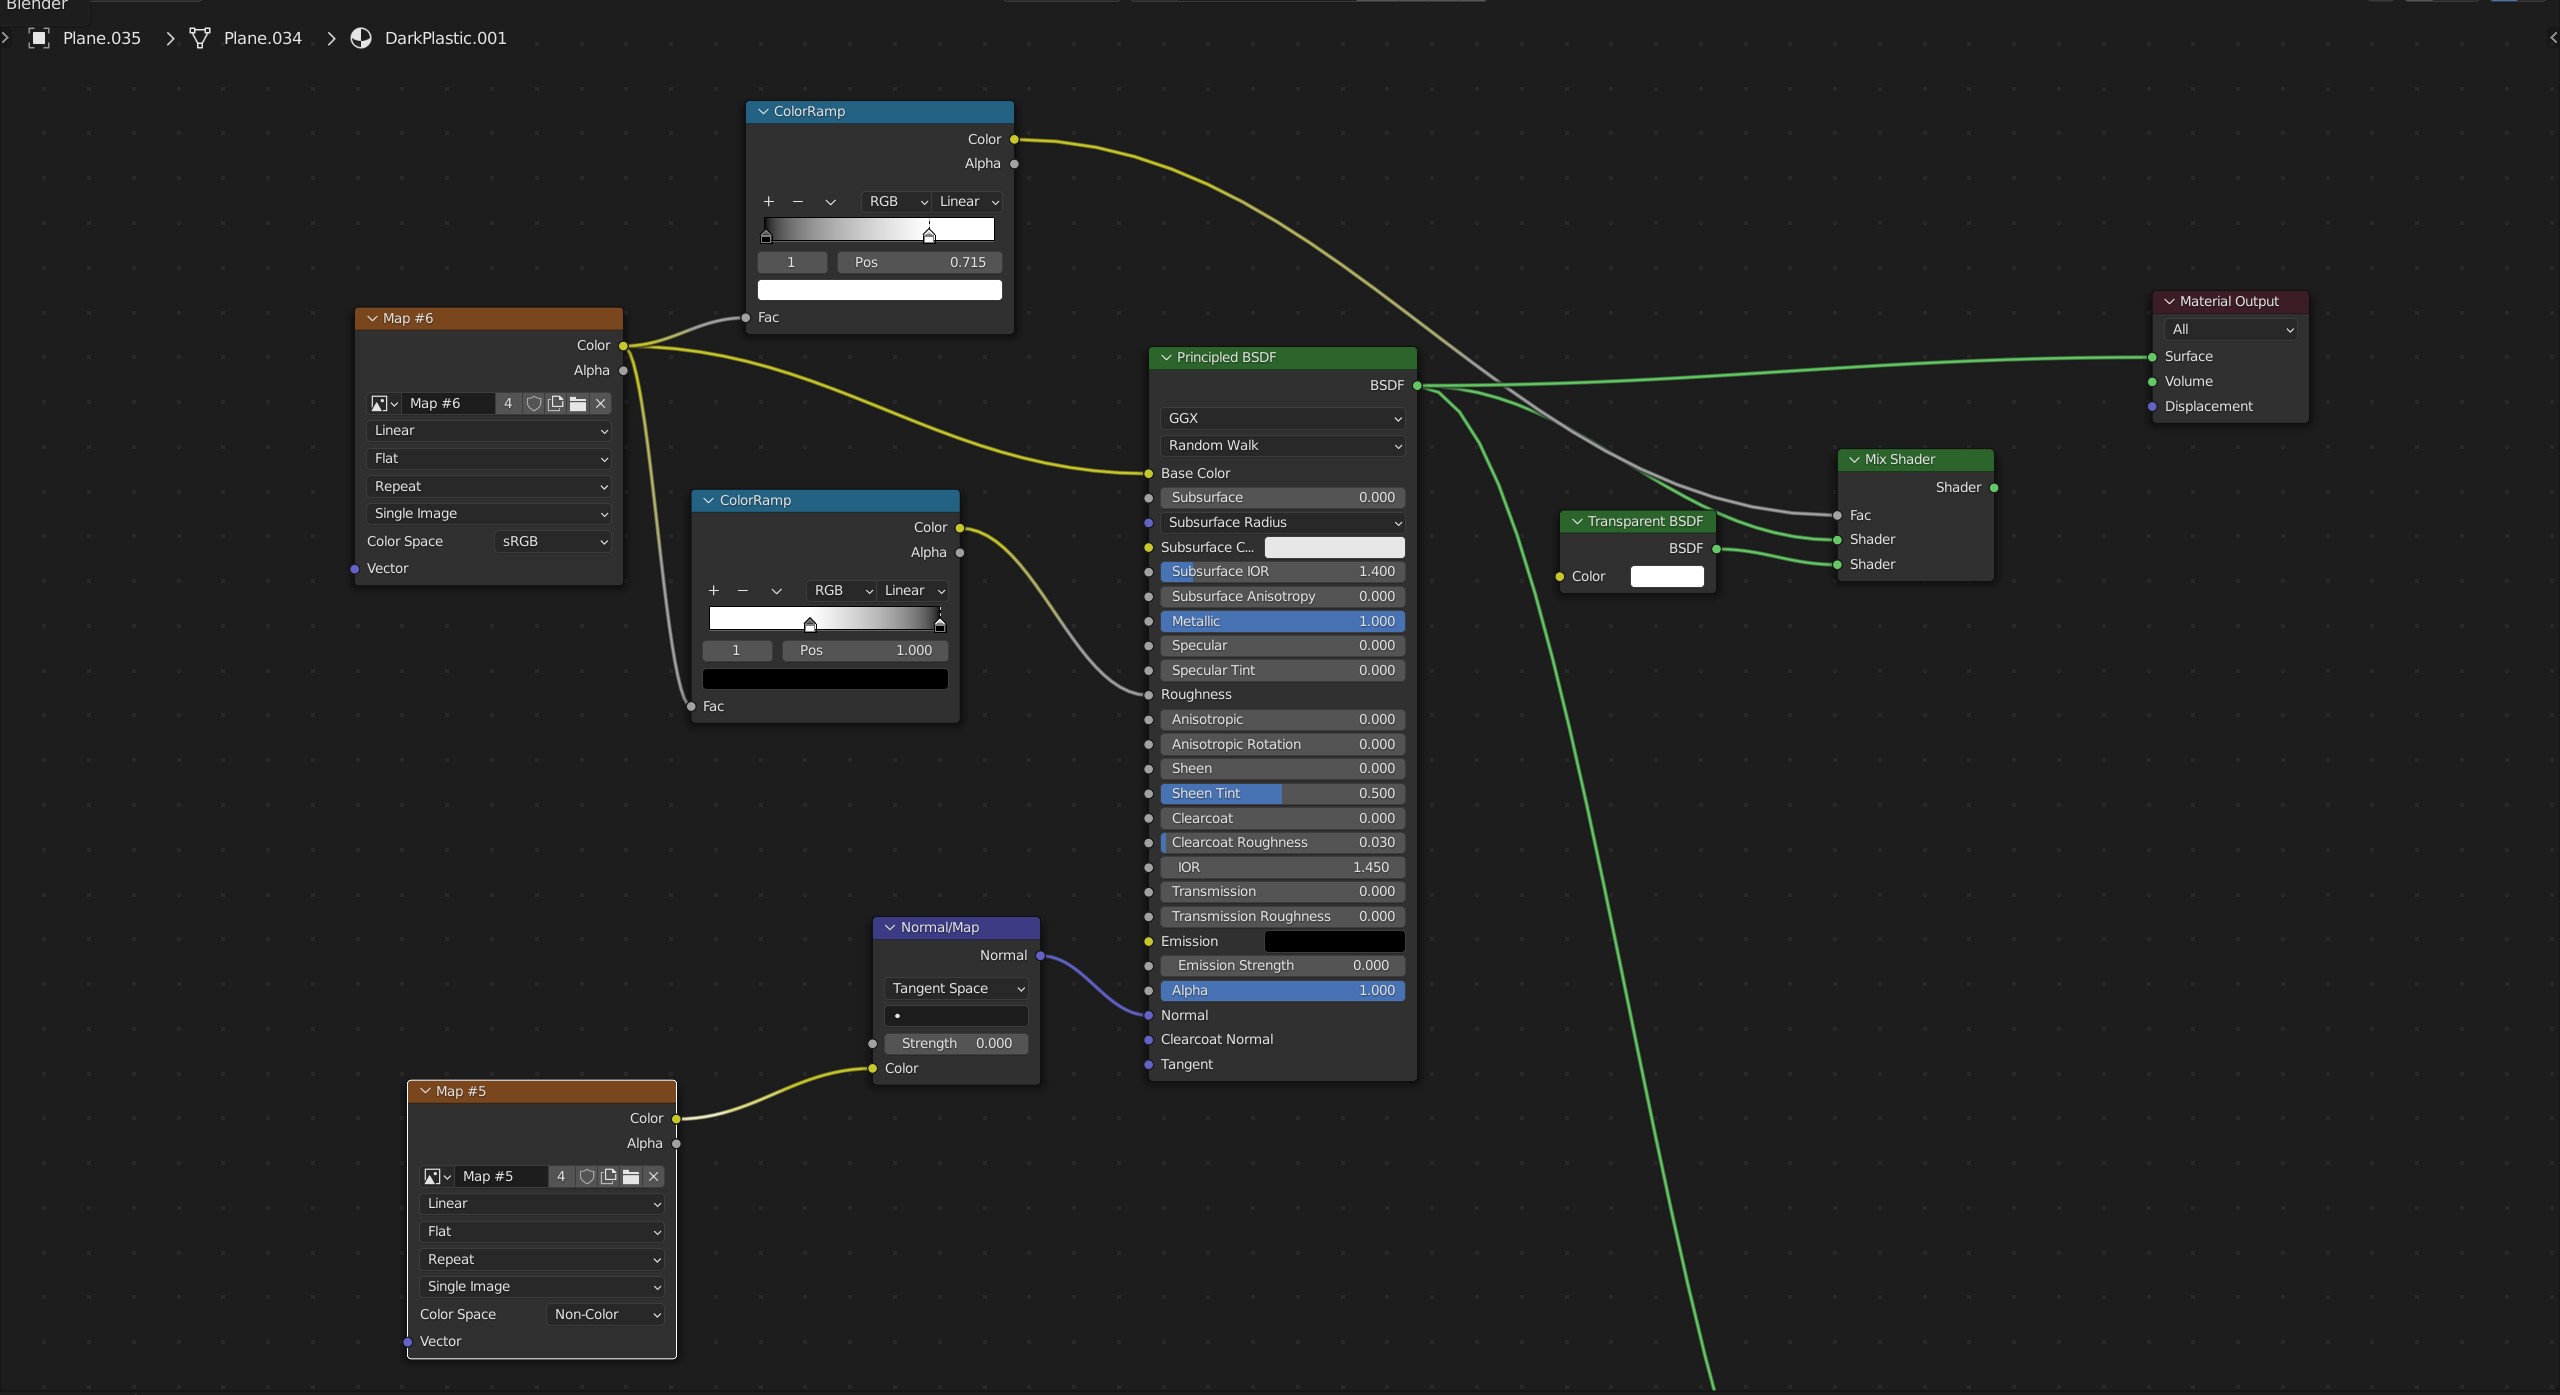
At the very initial stage, I only put some planes with metal textures and some roads to layout and plan how things would look from above or with a bird’s eye view.
Plane with metal textures from simple shader,
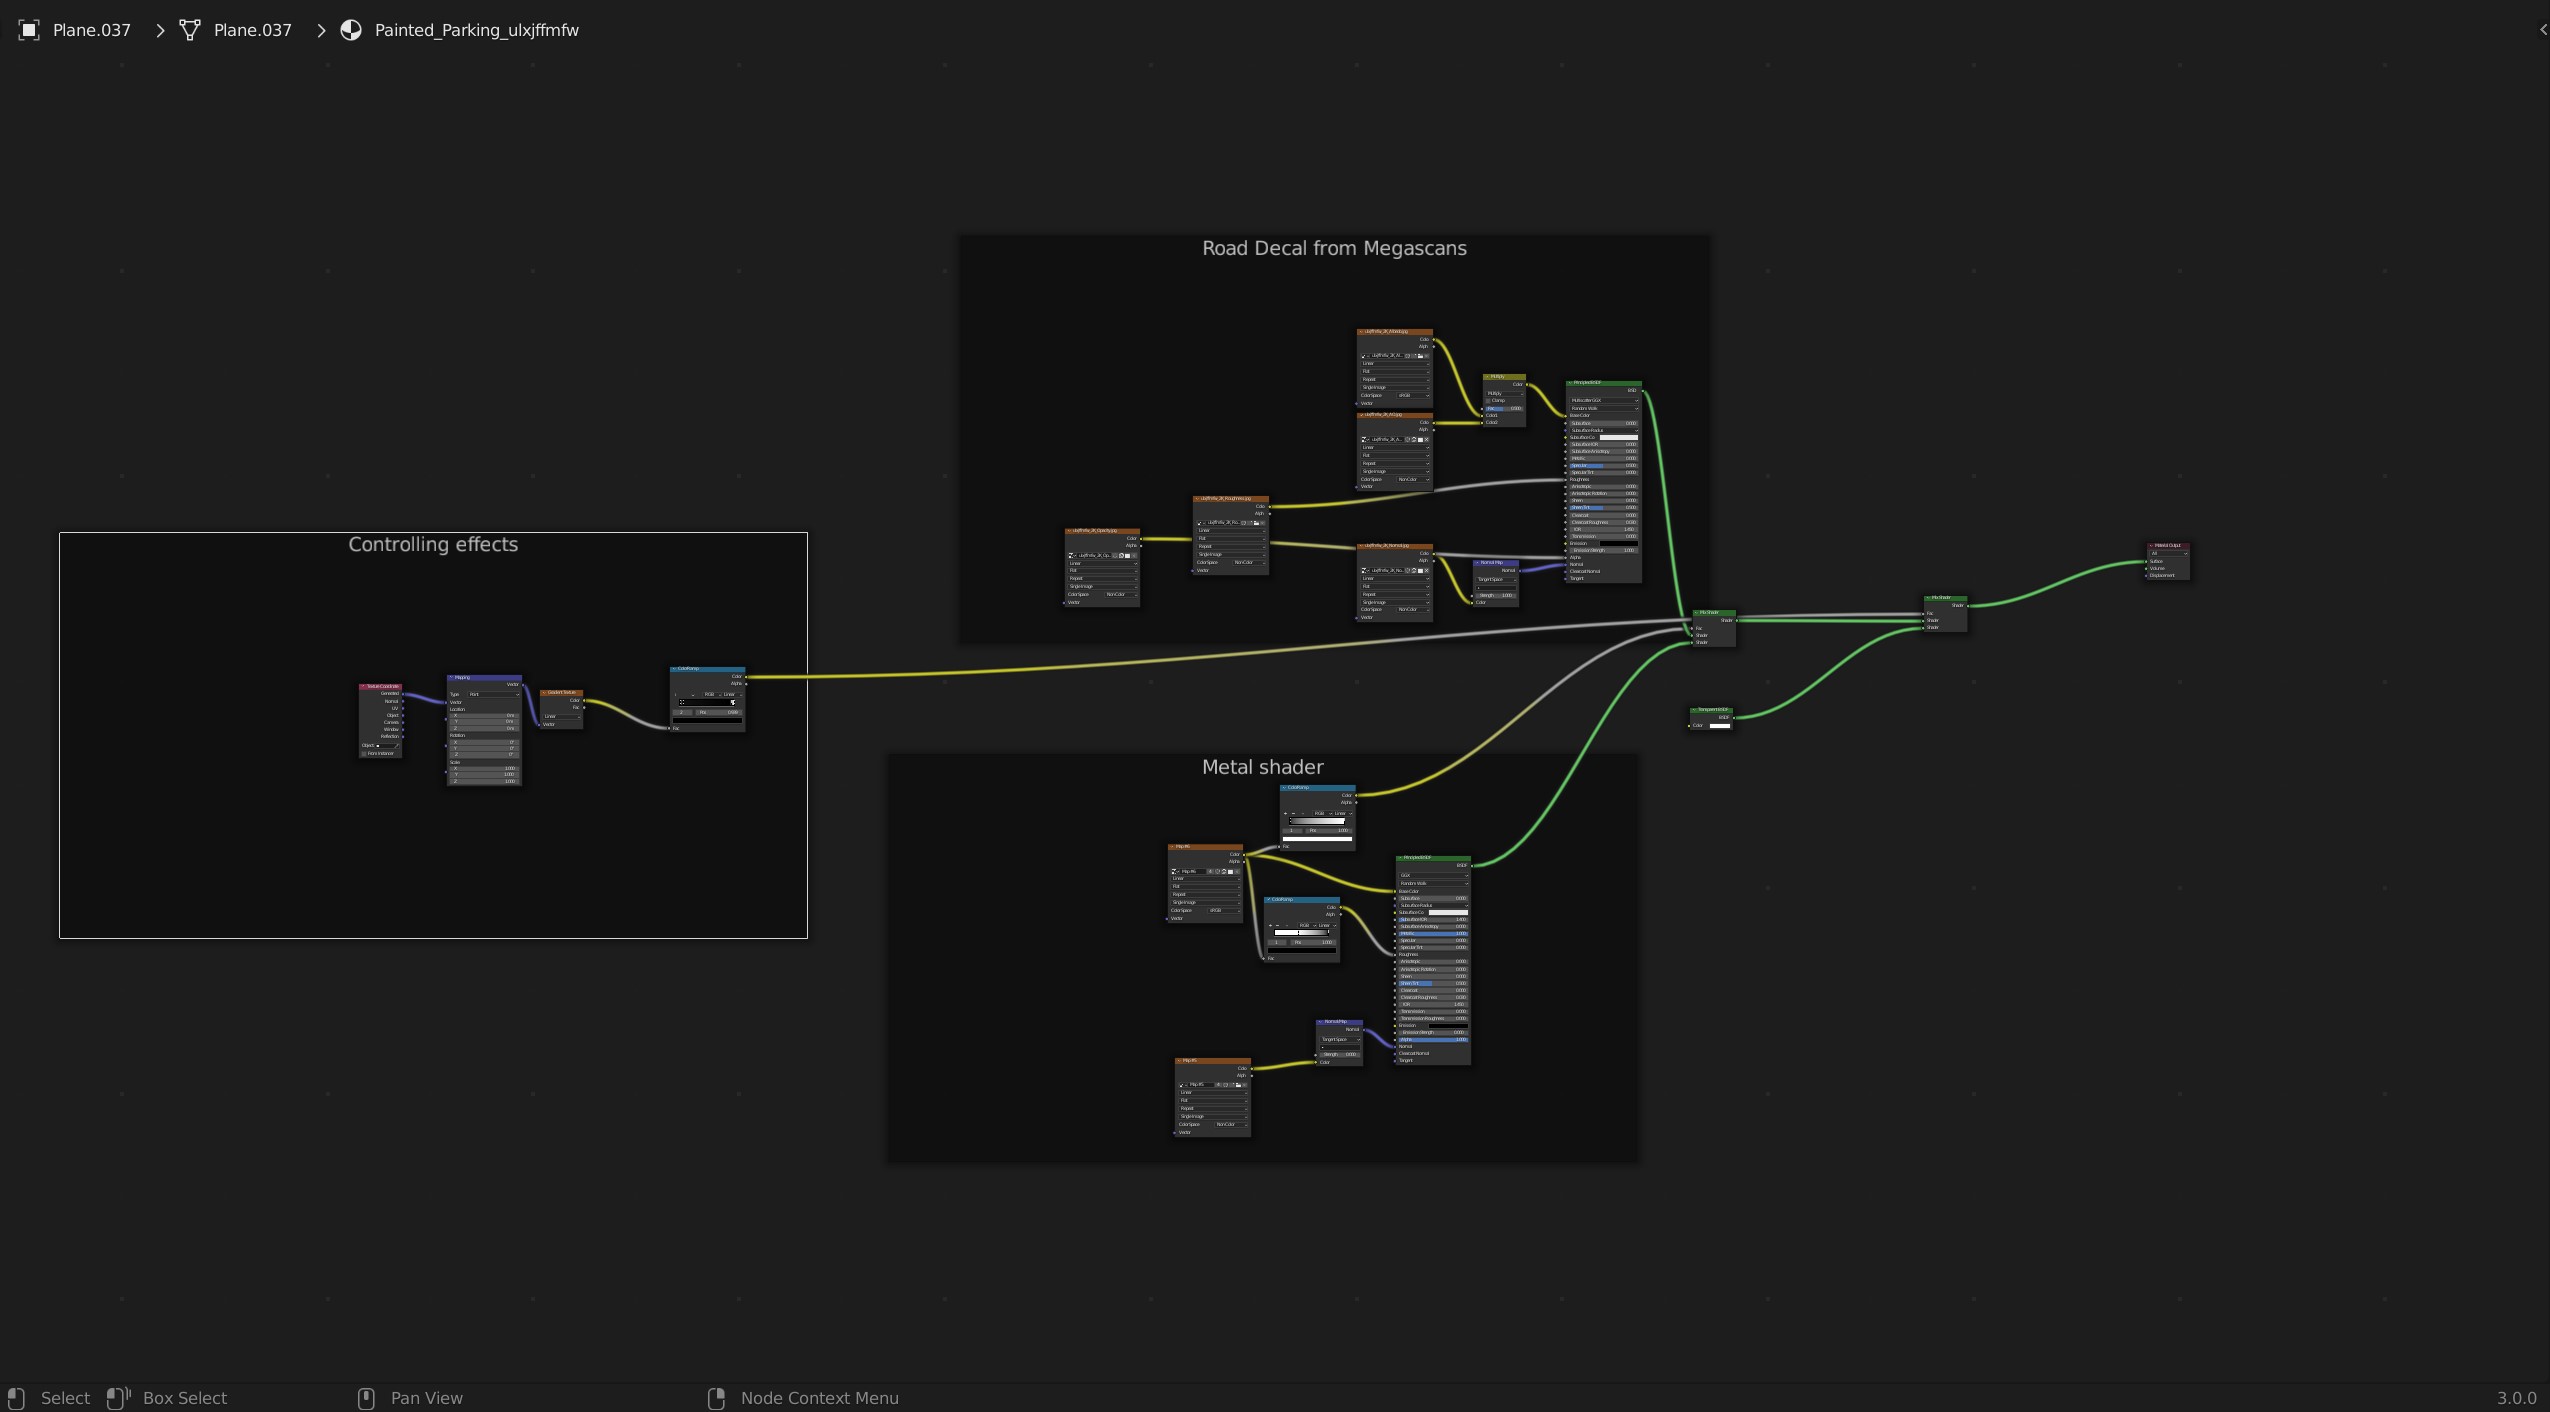
Road decal shader from Megascan library mixed with road shader for parking lines on base plane,
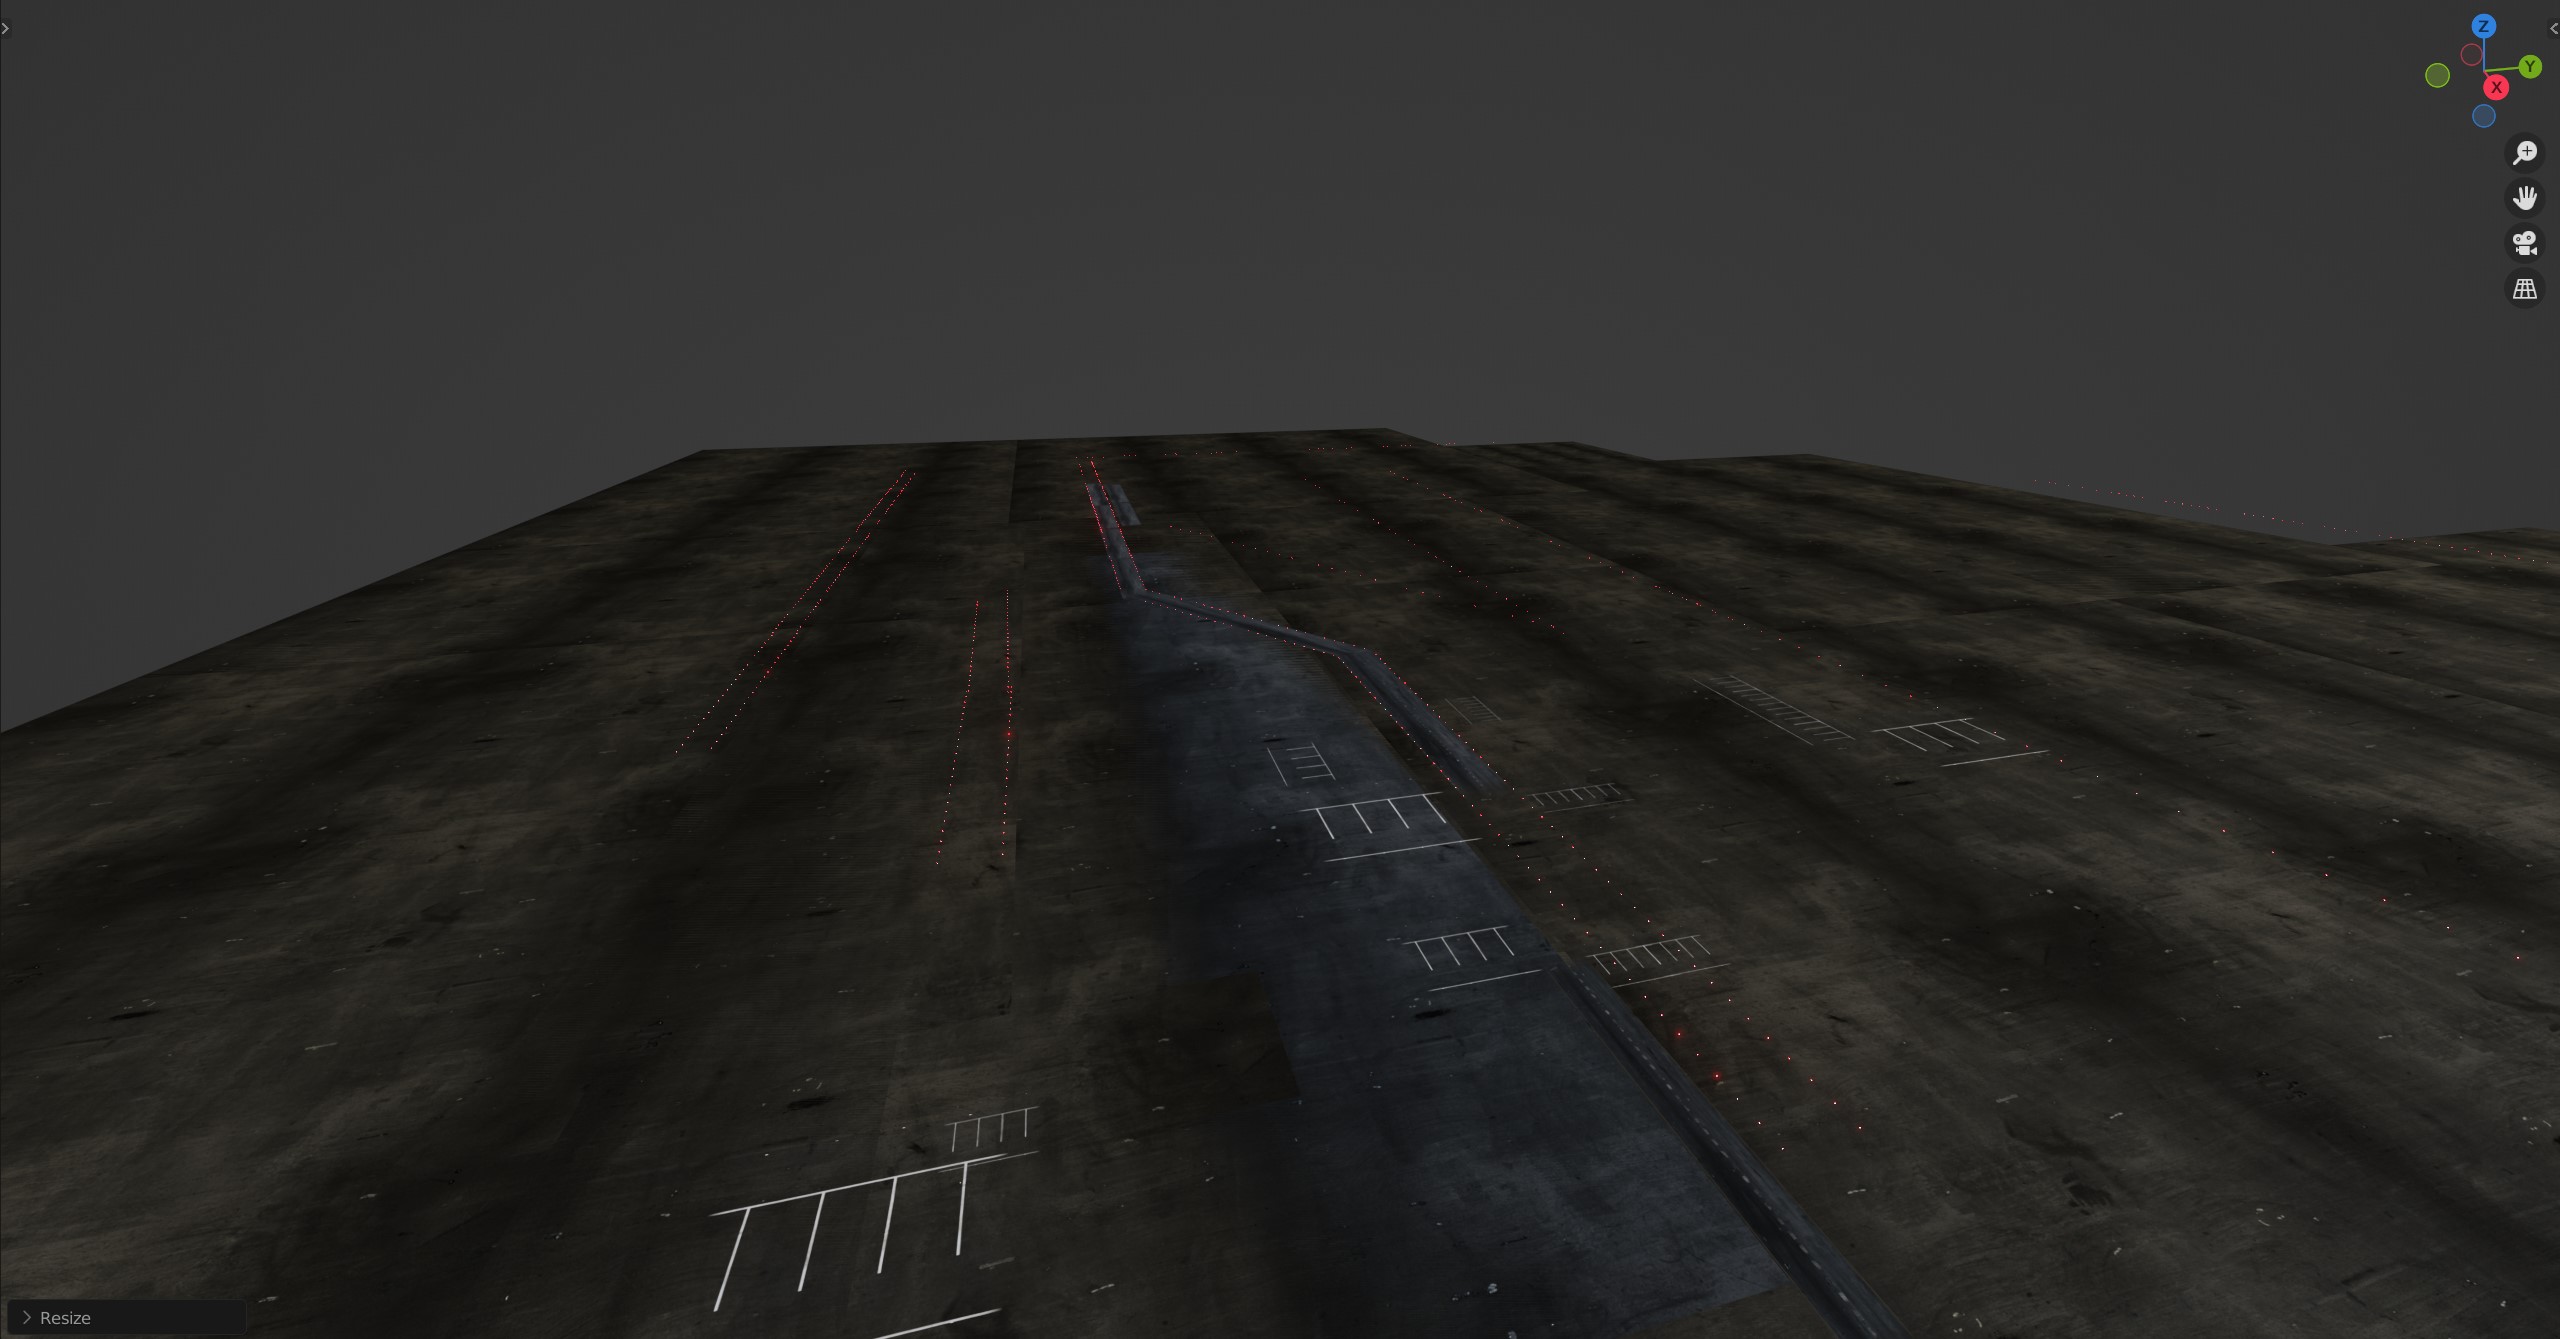
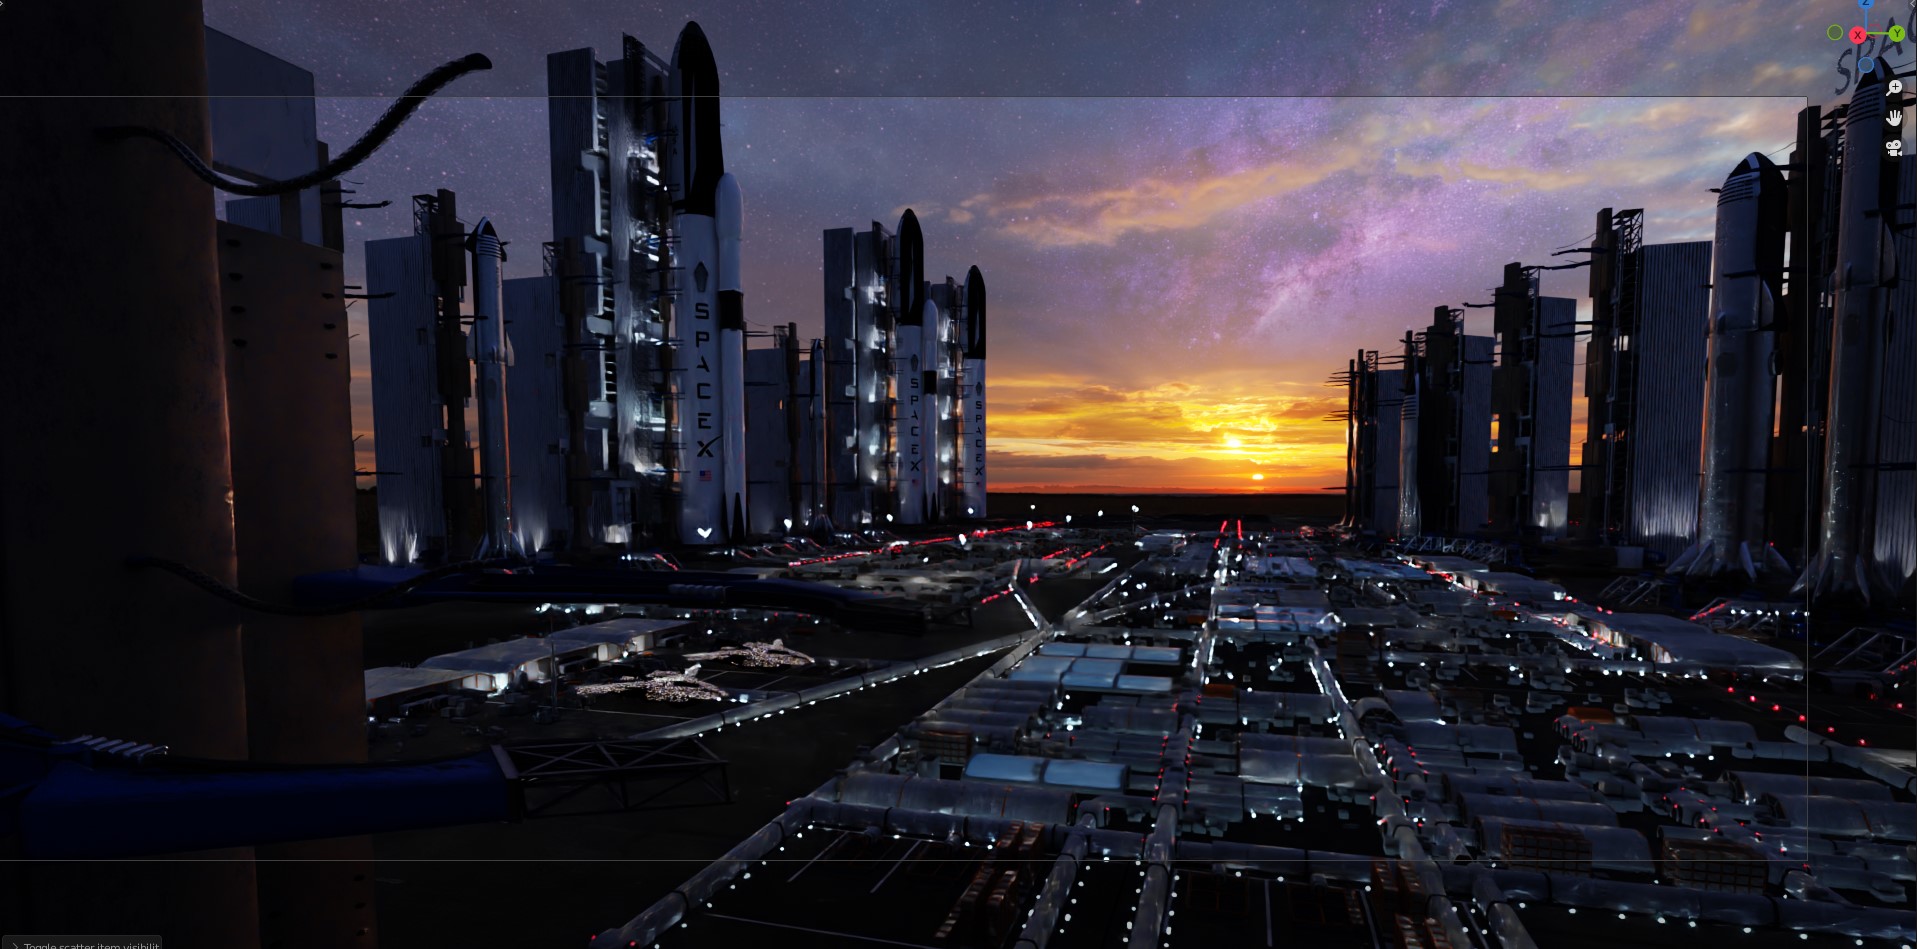
Next step was to put things together with space rockets and launching pods, with those red lights helping me guide the placements and overall shape of the colony. This is how it looked after placing assets.
LIGHTING
As soon as I had the placement ready, it was time to play around with atmospherics and lighting, and testing out how shaders looked in render mode and to see if there were any texture bugs so that I could fix it. This is where instancing came in way more helpful; if I had an error in a particular model, I didn’t have to make changes on those models but only the original model and then it would be reflected back to those instances (also known as child elements).

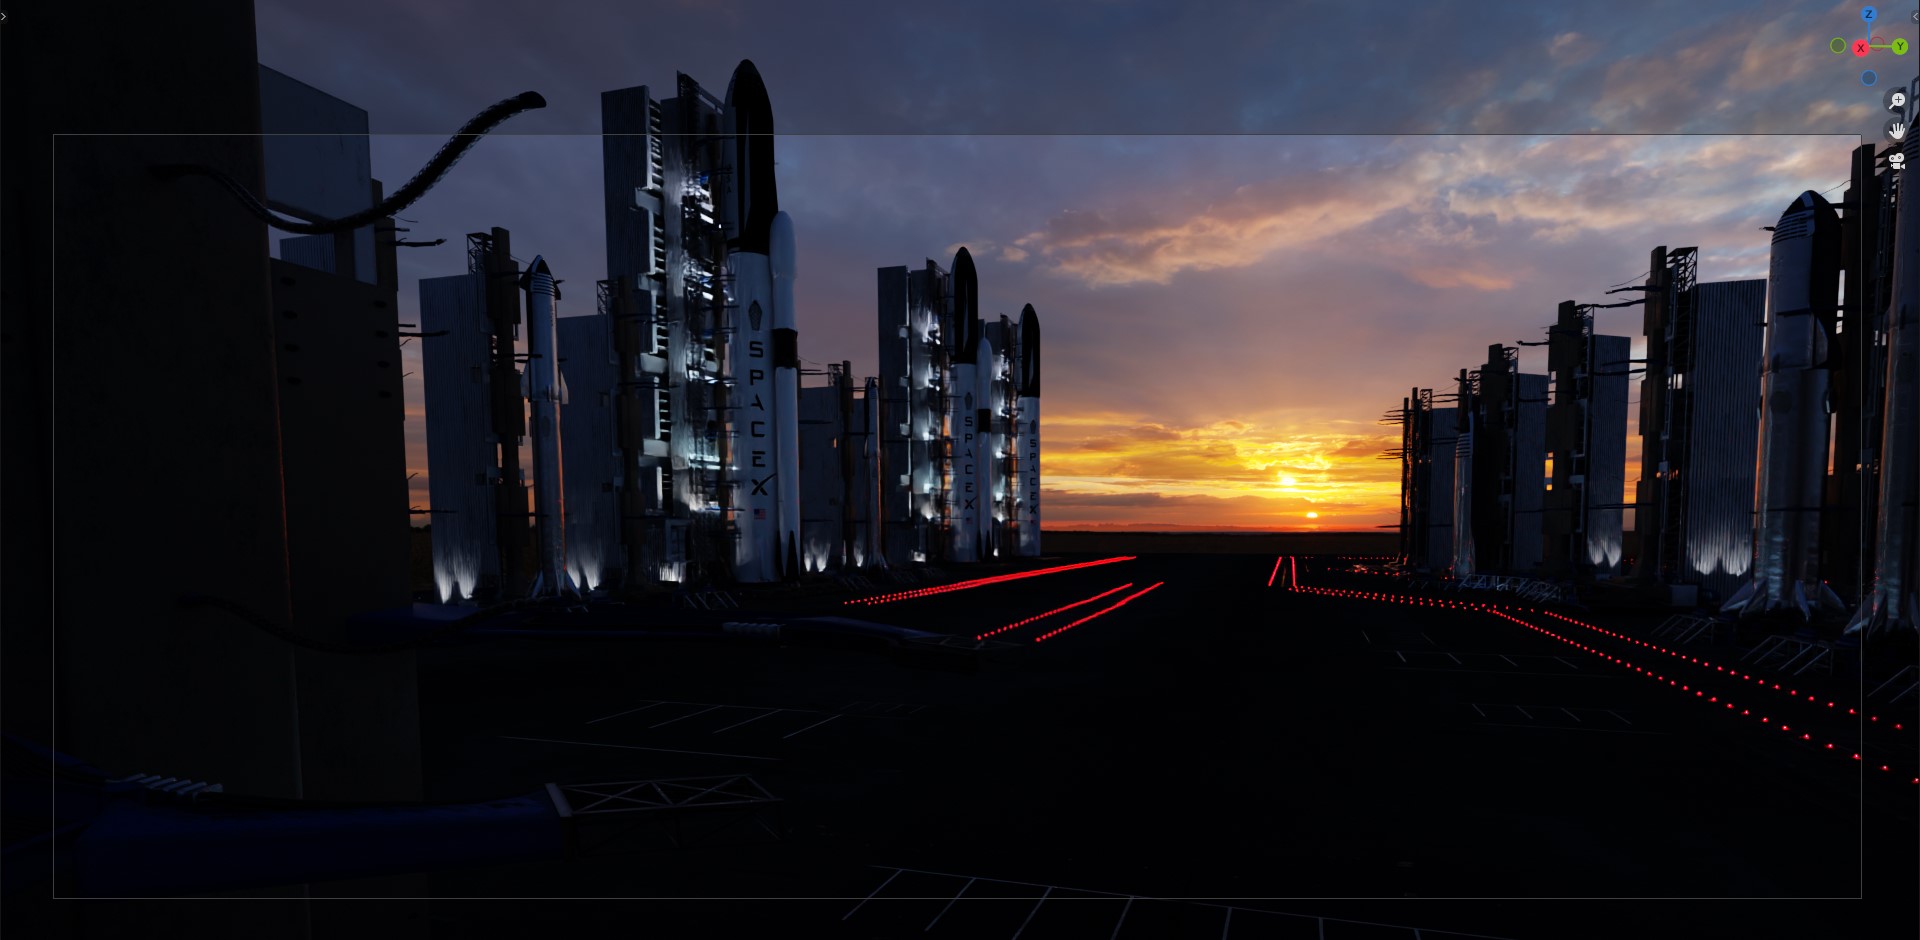
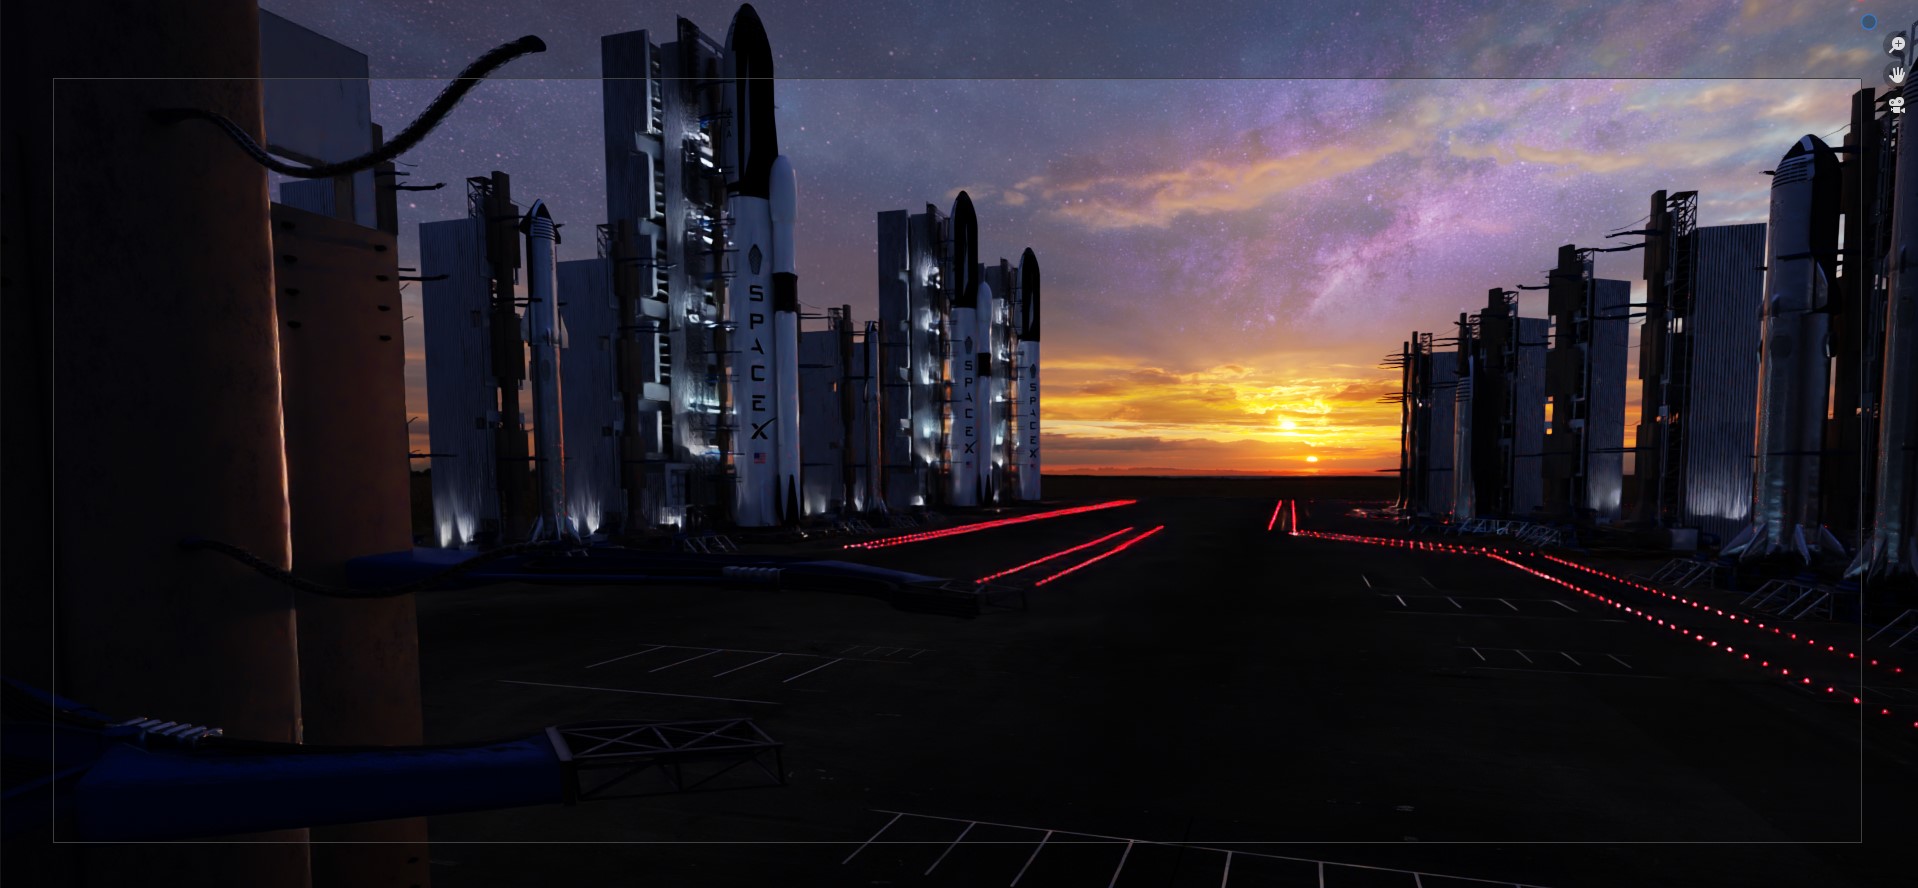
With this, I was almost happy with how the models looked and felt. Now was the time to play around and find some better composition as the further layout depends upon it. The most suitable composition I found was the image below.

I usually post my composition set cameras in Discord servers to get feedback from amazing artists, but one particular help was from a well-known artist named Tobi from GTGRAPHICS who helped me gain some more confidence over composition after sharing over his Discord server.
Time for advancing some stuff with putting HDRIs and matching direct and indirect lighting with HDRIs.
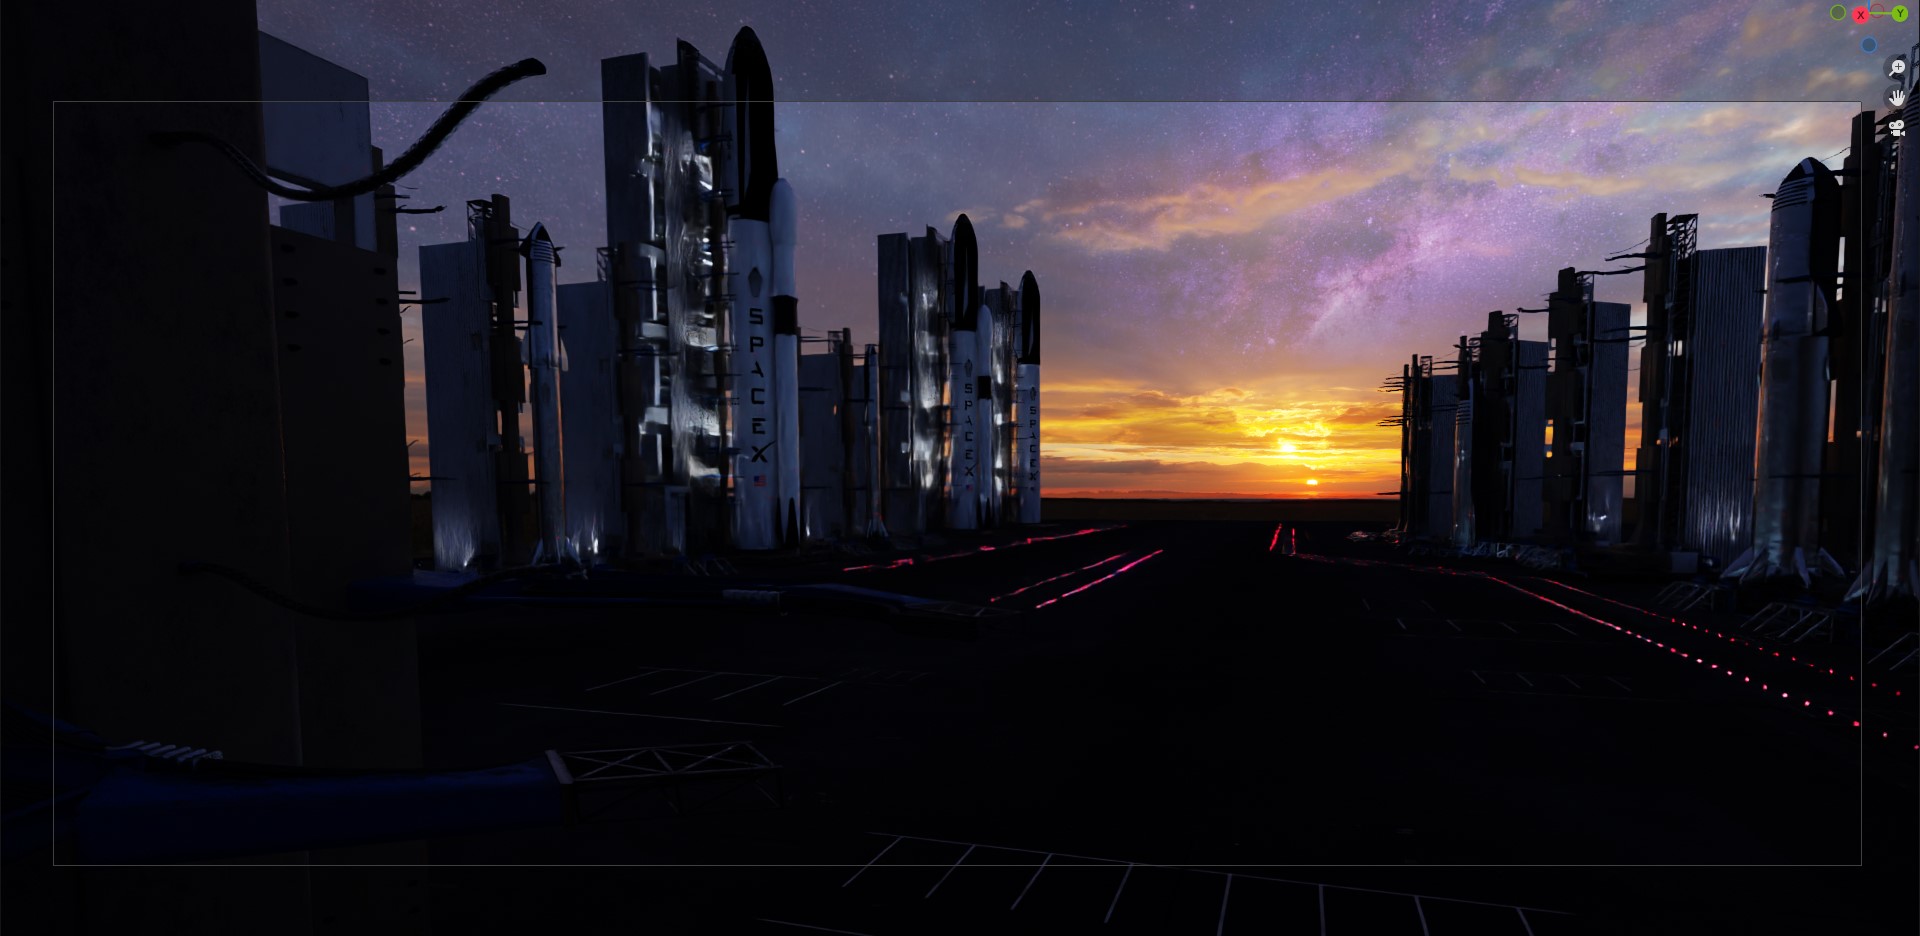
After just adding HDRI, the entire look changed and with some more controls in the world setting node editor, I rotated the HDRI to align and make the composition more good. I always mix two HDRIs to make it look more dramatic. You can get HDRIs from NoEmotion HDRs. You can see the HDRI names I used so that you can get the same look as mine.

Yet after this, I wanted to make the HDRIs look out of this world so I added some more HDRIs for adding stars and other stuff. It was very subtle and not even visible properly but I wanted stars, so here is how it looks after adding them.
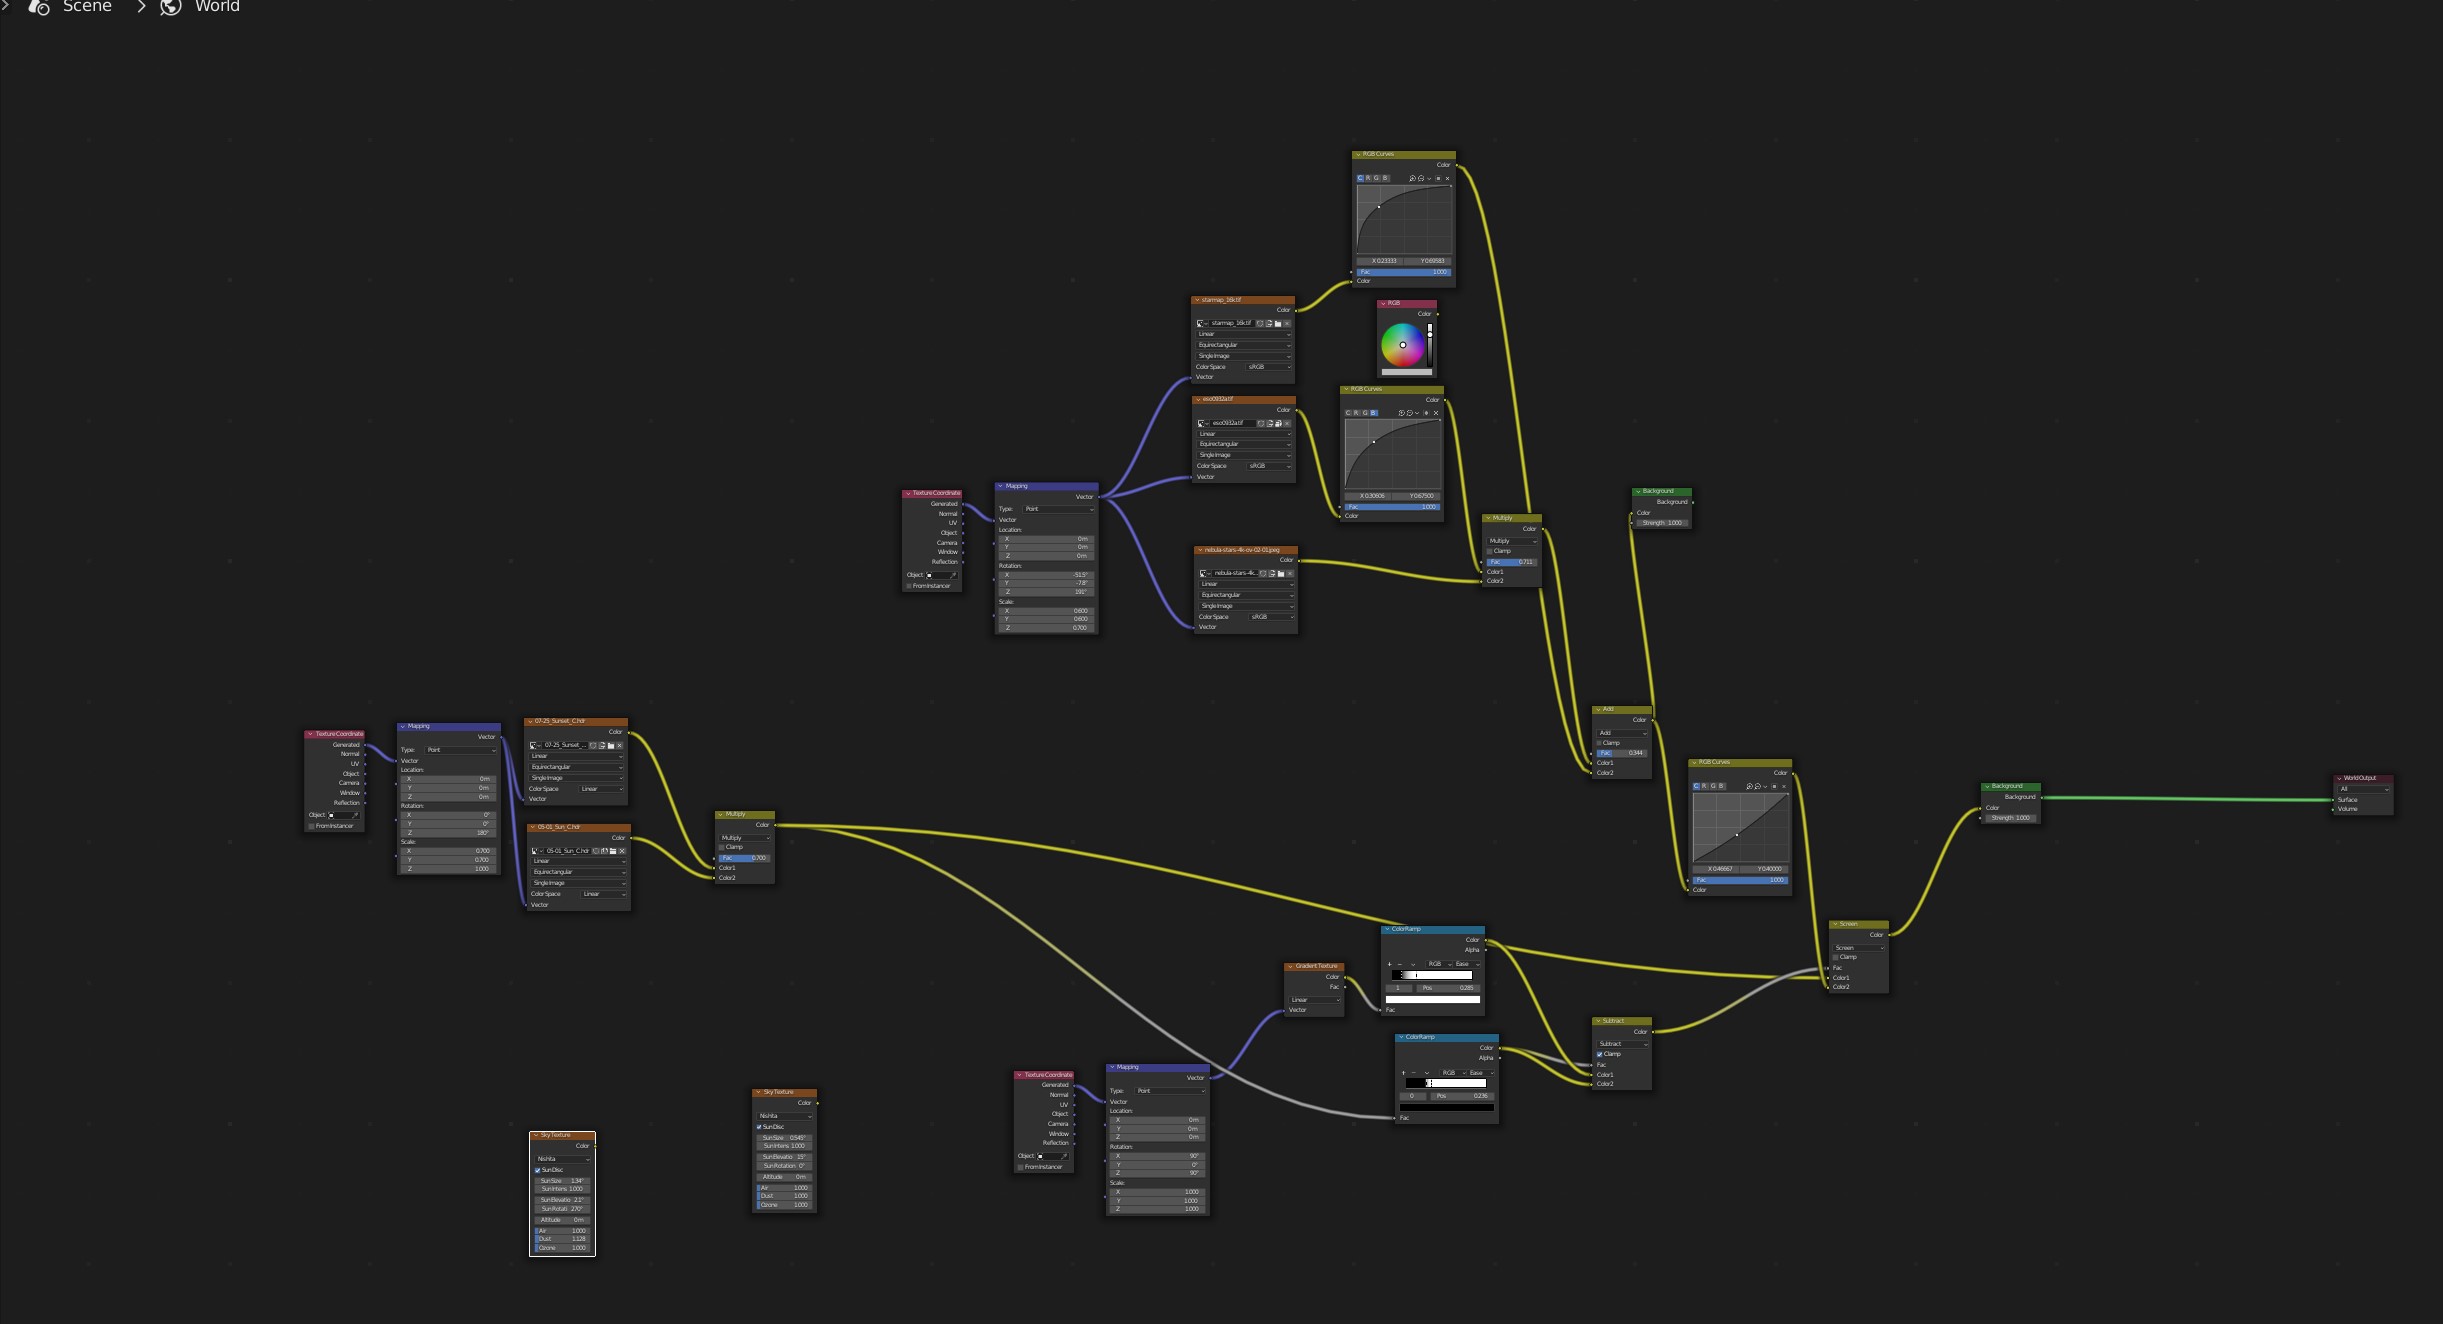
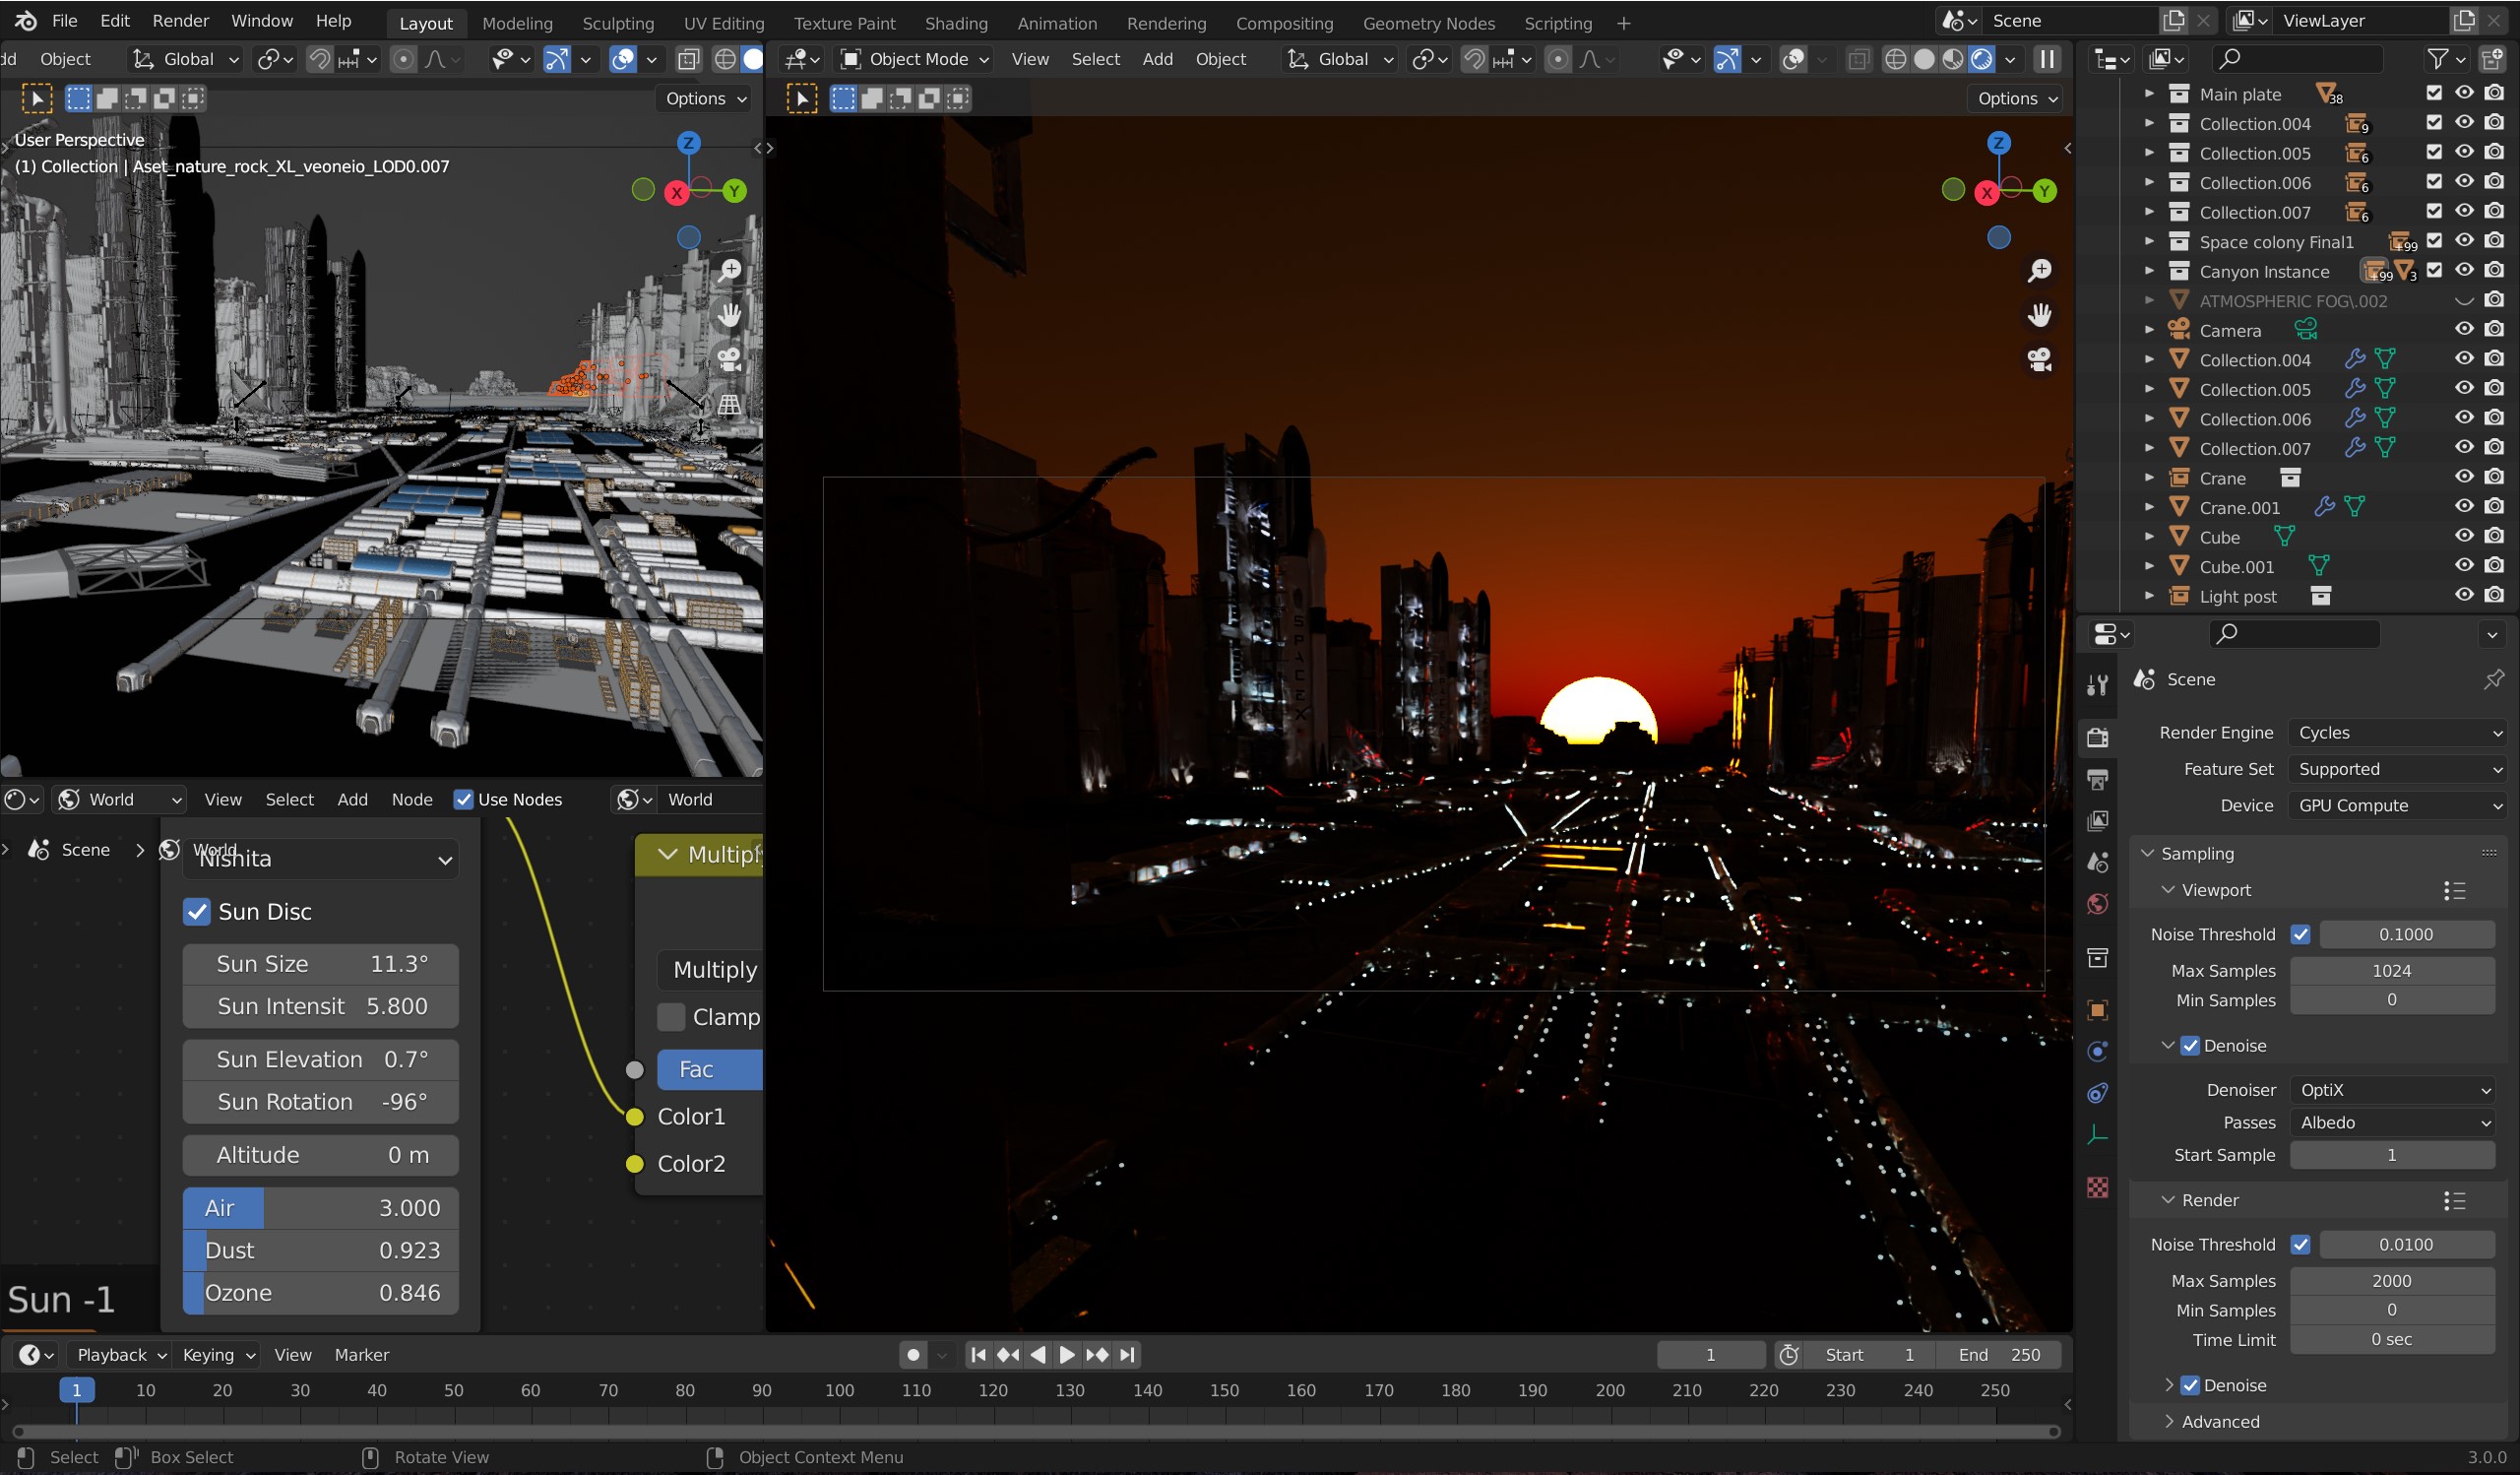
I wouldn’t go too deep with the node setups as it was just mixing things with a gradient. Time to work on lighting both direct and indirect ones. I usually use multiple sun setups to make lighting similar to HDRIs. For this I used two sun lights, one for direct light coming from the sun and the other for indirect light.
The horizontal placed sun is for the direct sun set to orange yellow and the other vertical sun setup set to purplish blue. This is how it looks from the side view.
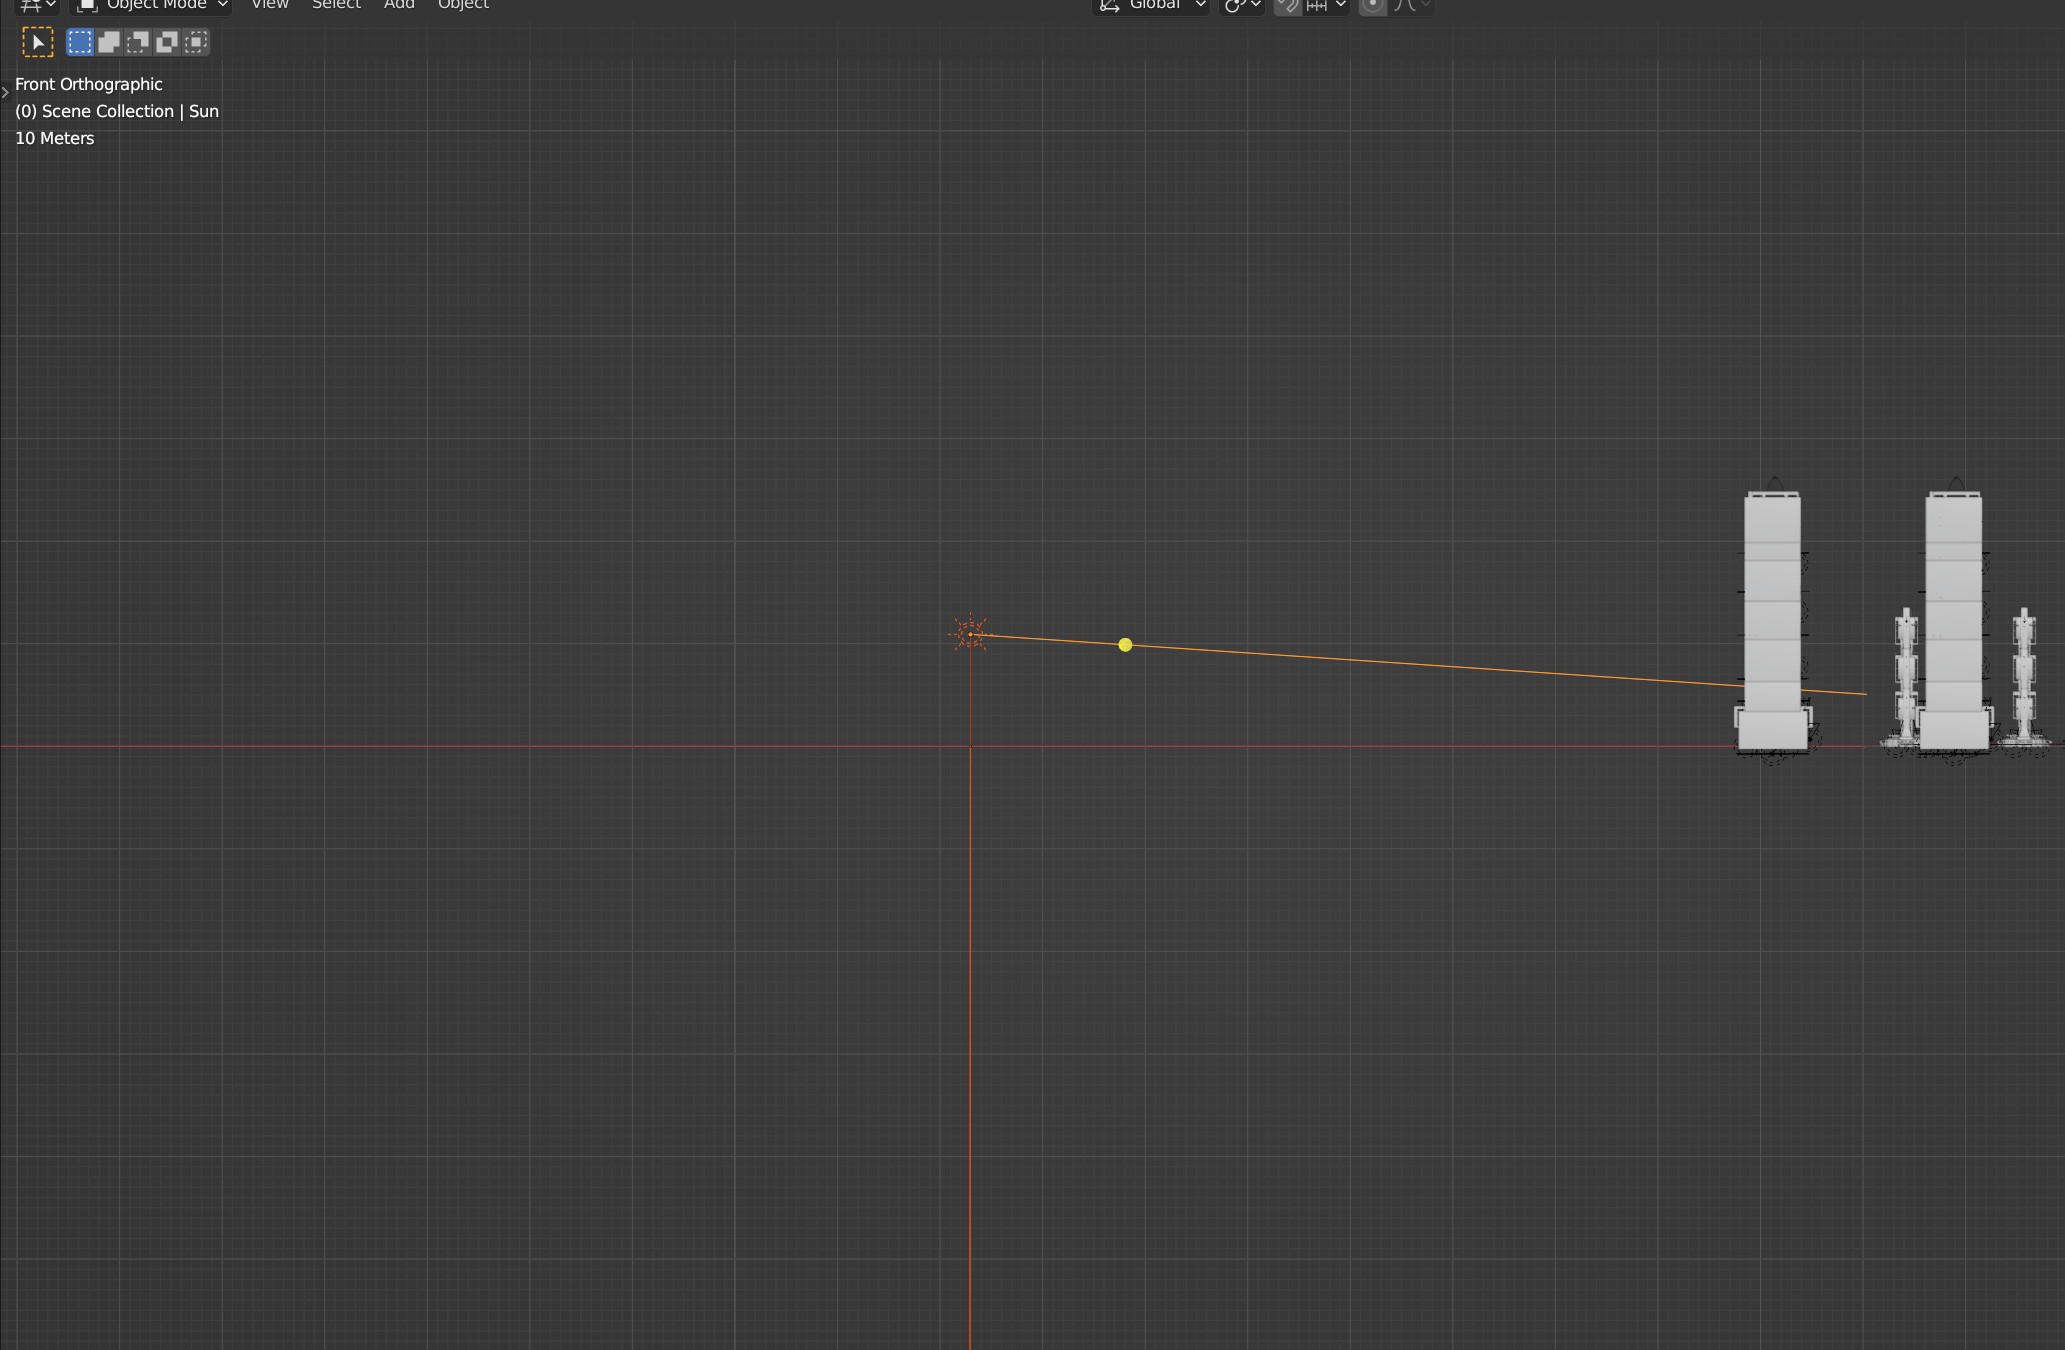
Here is how it looks after adding suns,
Very subtle but not very visible, I did this because I knew as soon as I added atmospherics, the entire look would change so I needed to keep the sun powers less in initial stages.
It was finally time to make the structures look large in scales and that is why I used volume shaders. The shader was made as a real atmosphere behaves. That is as we go up from sea level, the atmosphere becomes thinner and thinner.
Test render to understand the atmospherics,

The viewport version was very blurry and not approximately visible how the lighting looked so I had to do a test render, and it was very satisfactory. Now it was time to make it look more crowded and colonial-like.
ADDING MORE DETAILS
Coming back to those small assets from Kitbash3D, I made an individual collection for every mesh to instance it. I added small lights and other lighting stuff only once to the main mesh.
So, when I instance them, it will automatically be added to the child elements.

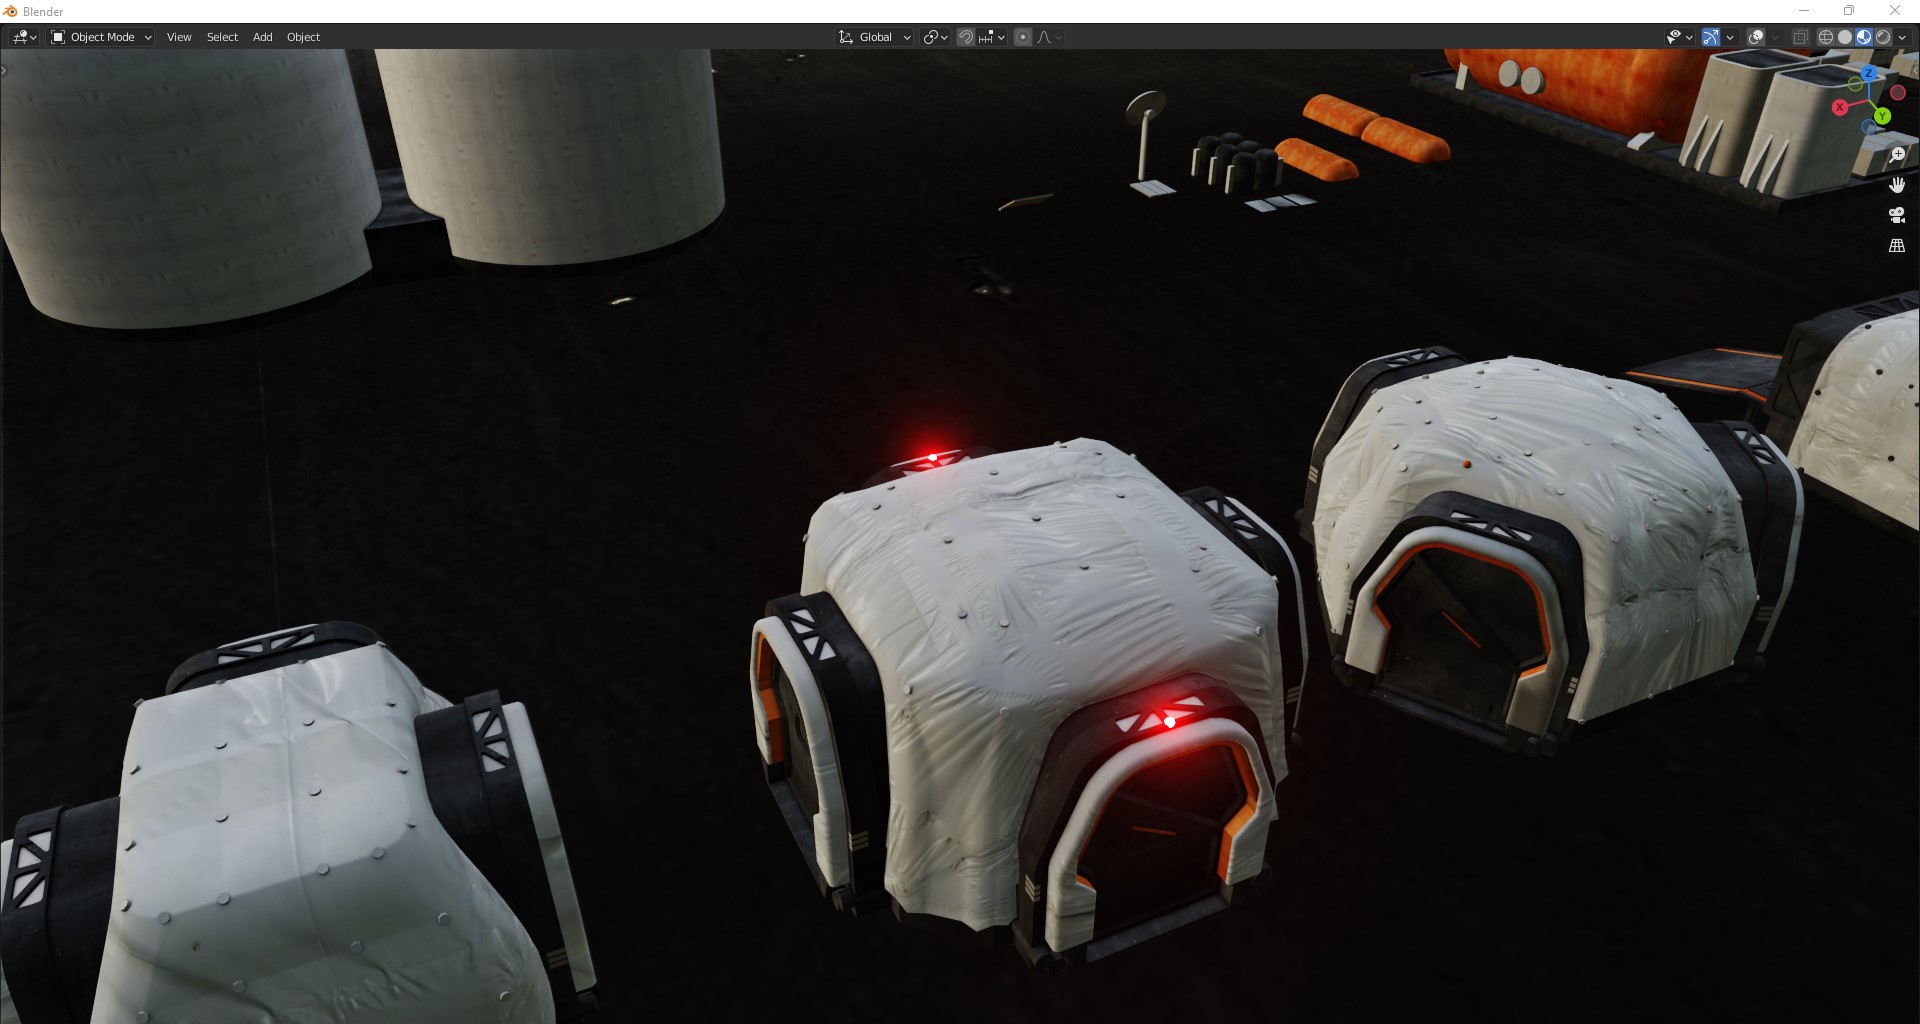
Moving over to the colony layout, I had already worked on a similar colony environment so I had some references for the structure.
Reference of my own environment,

Thus, I moved forward with just the initial layout, like how the tunnels were connecting to each other.
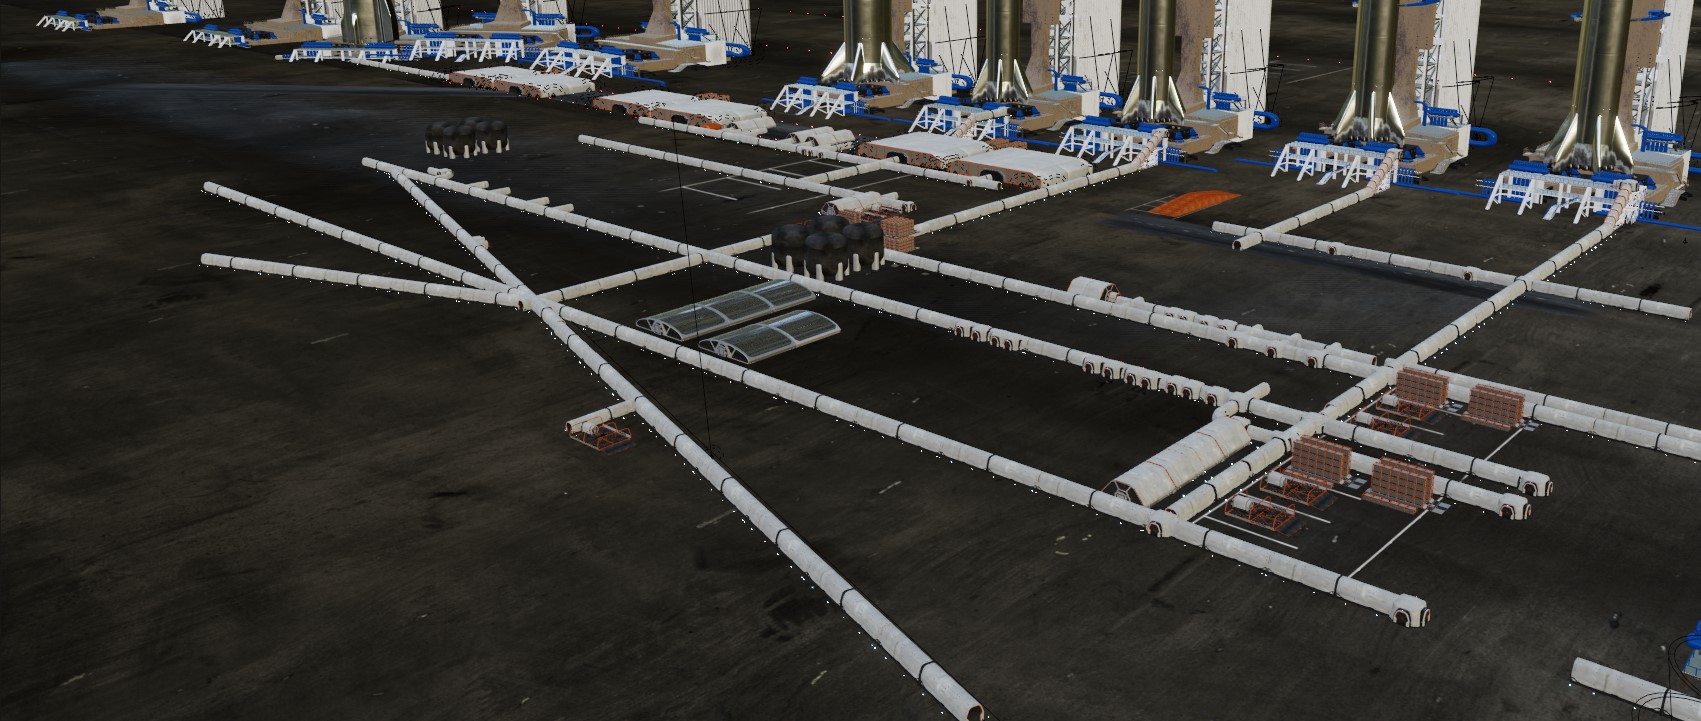
At this time, I was only focused on how it could make it look crowded and full of assets because then I would simply duplicate this entire small layout over and over.

Then this entire section was duplicated over 4 times to make it look like a colony.
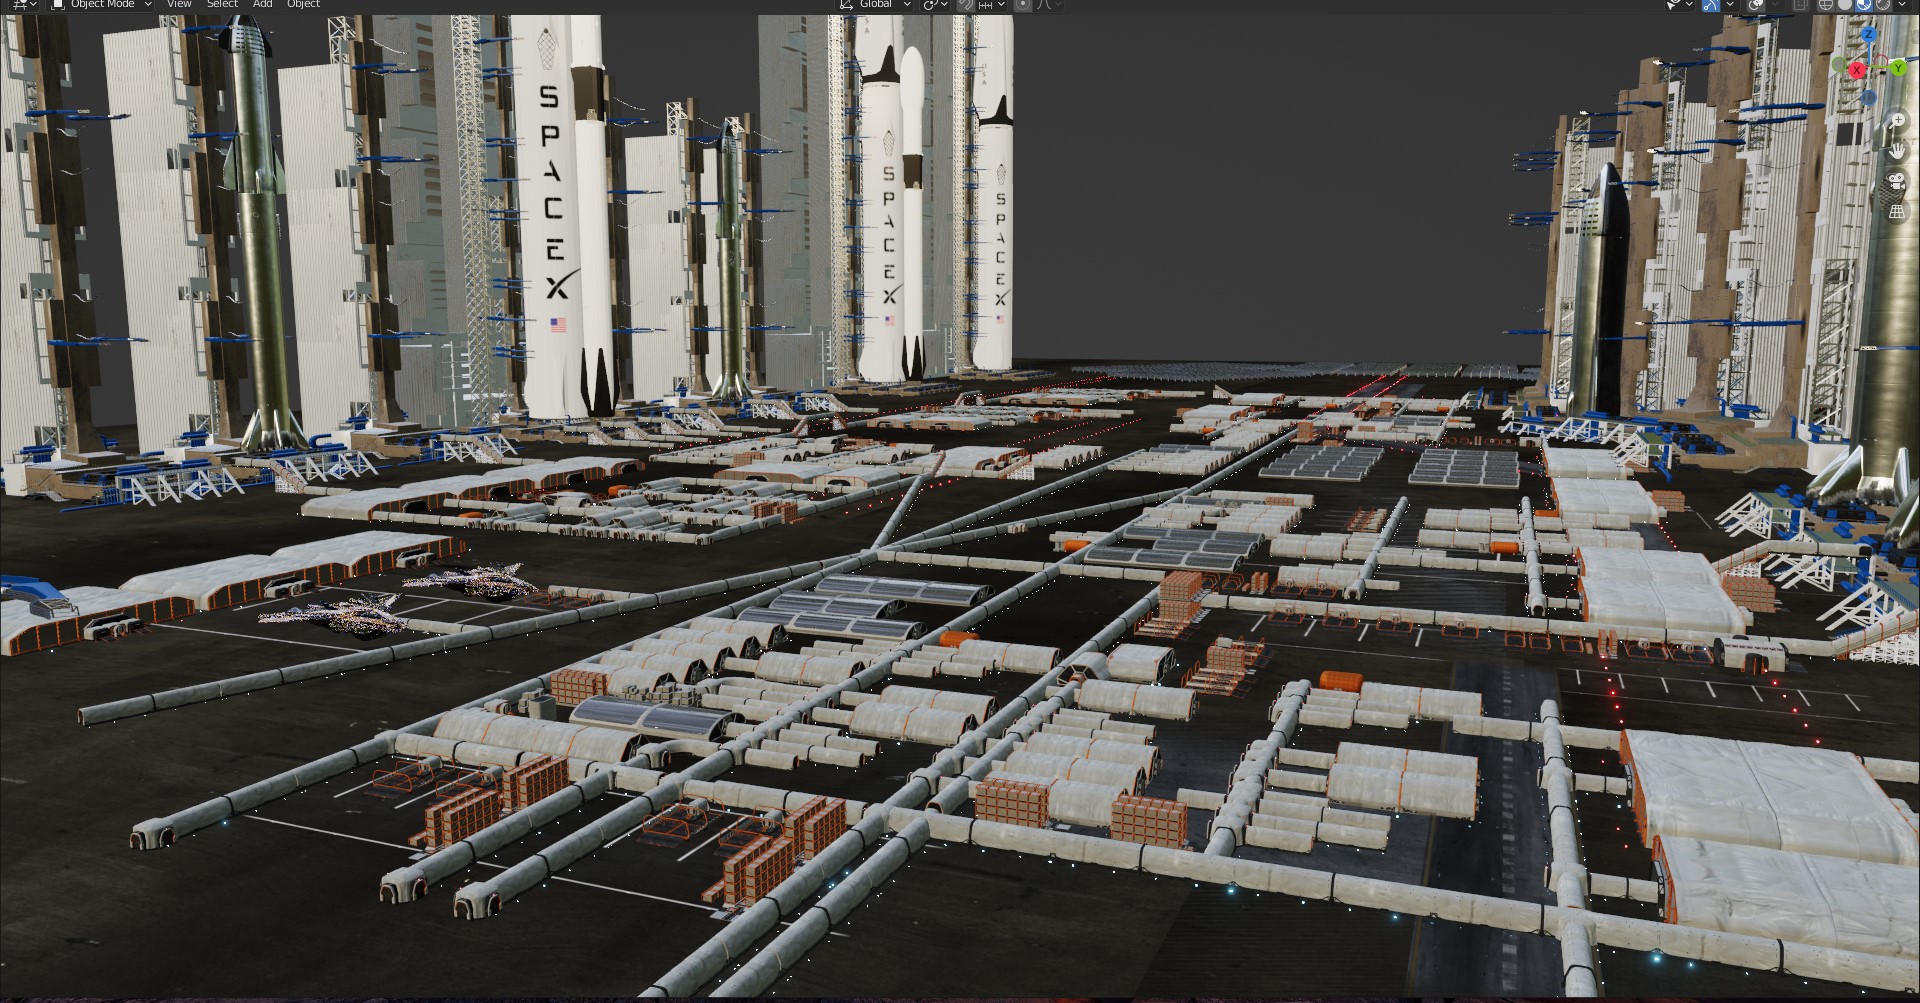
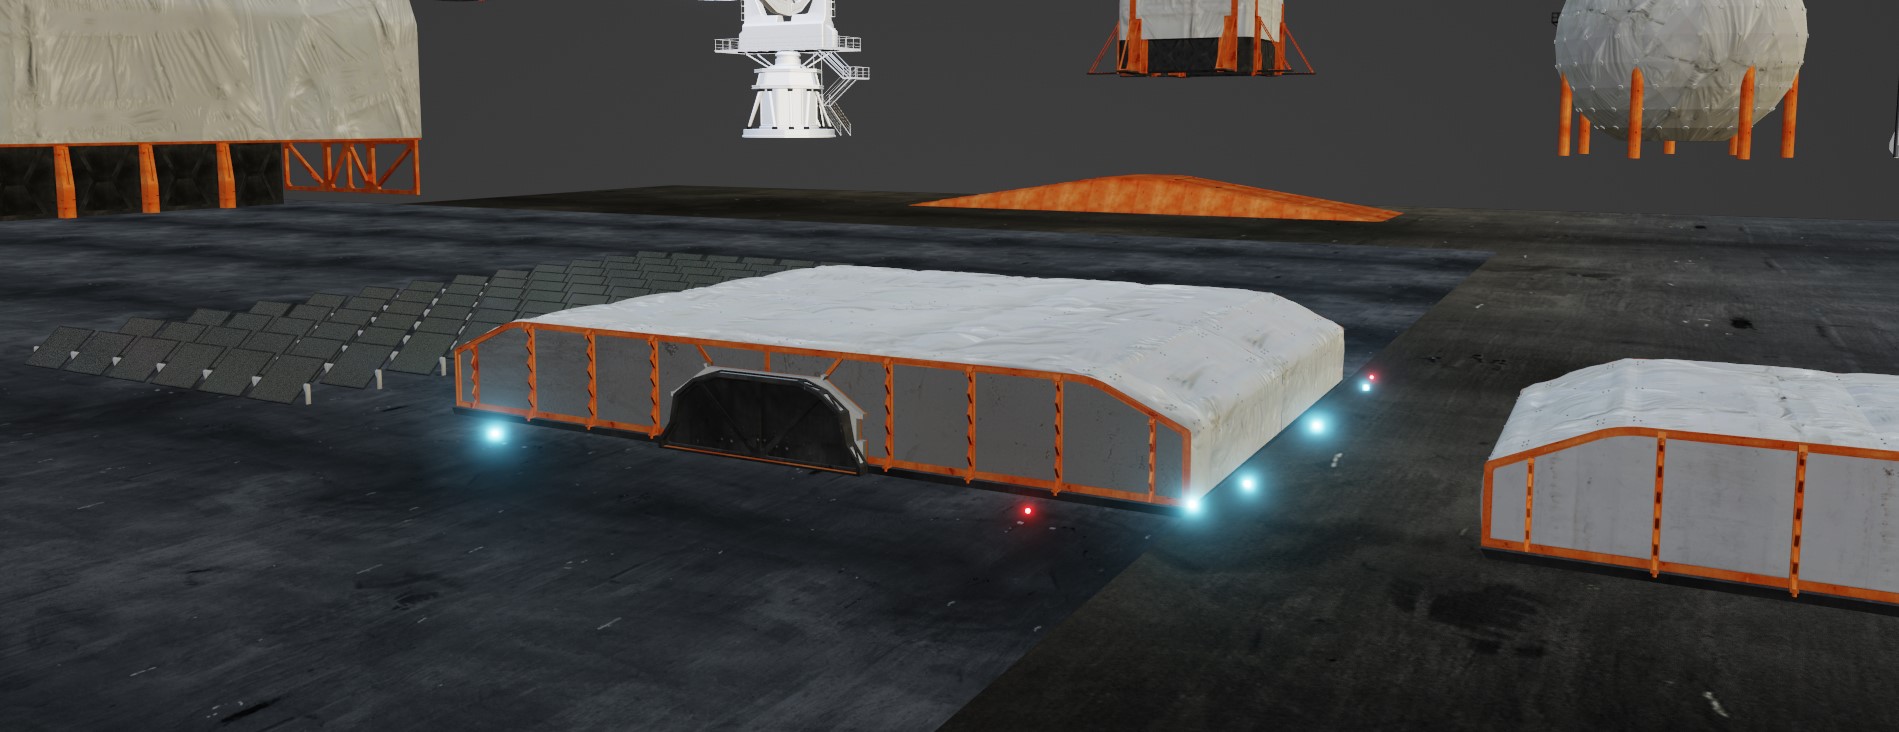
I wanted to focus on each and every detail so I also added a small, raised structure to make the launch pods look more accessible.

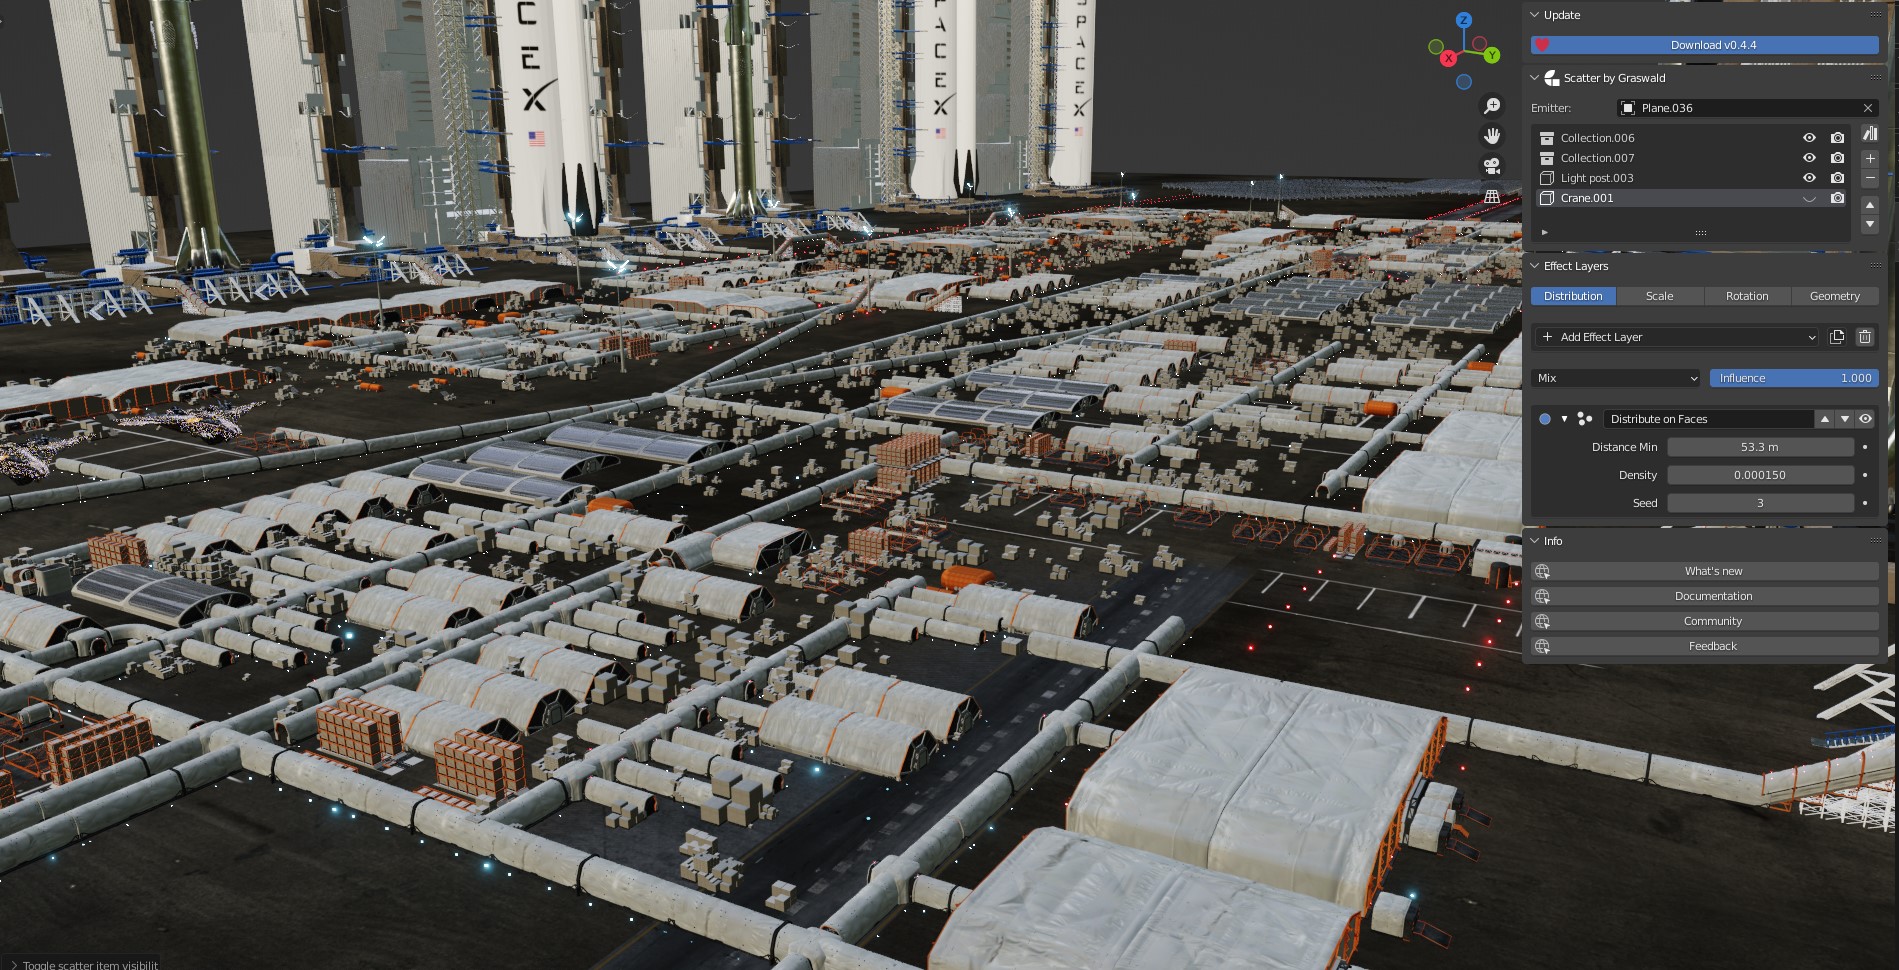
Now, it was time to add more and more details but this hand placement layout took me days to complete, so I was looking for more robust solutions for scattering stuff. That’s how Gscatter – powerful layer-based scattering for free (graswald3d.com) free addon came in handy.
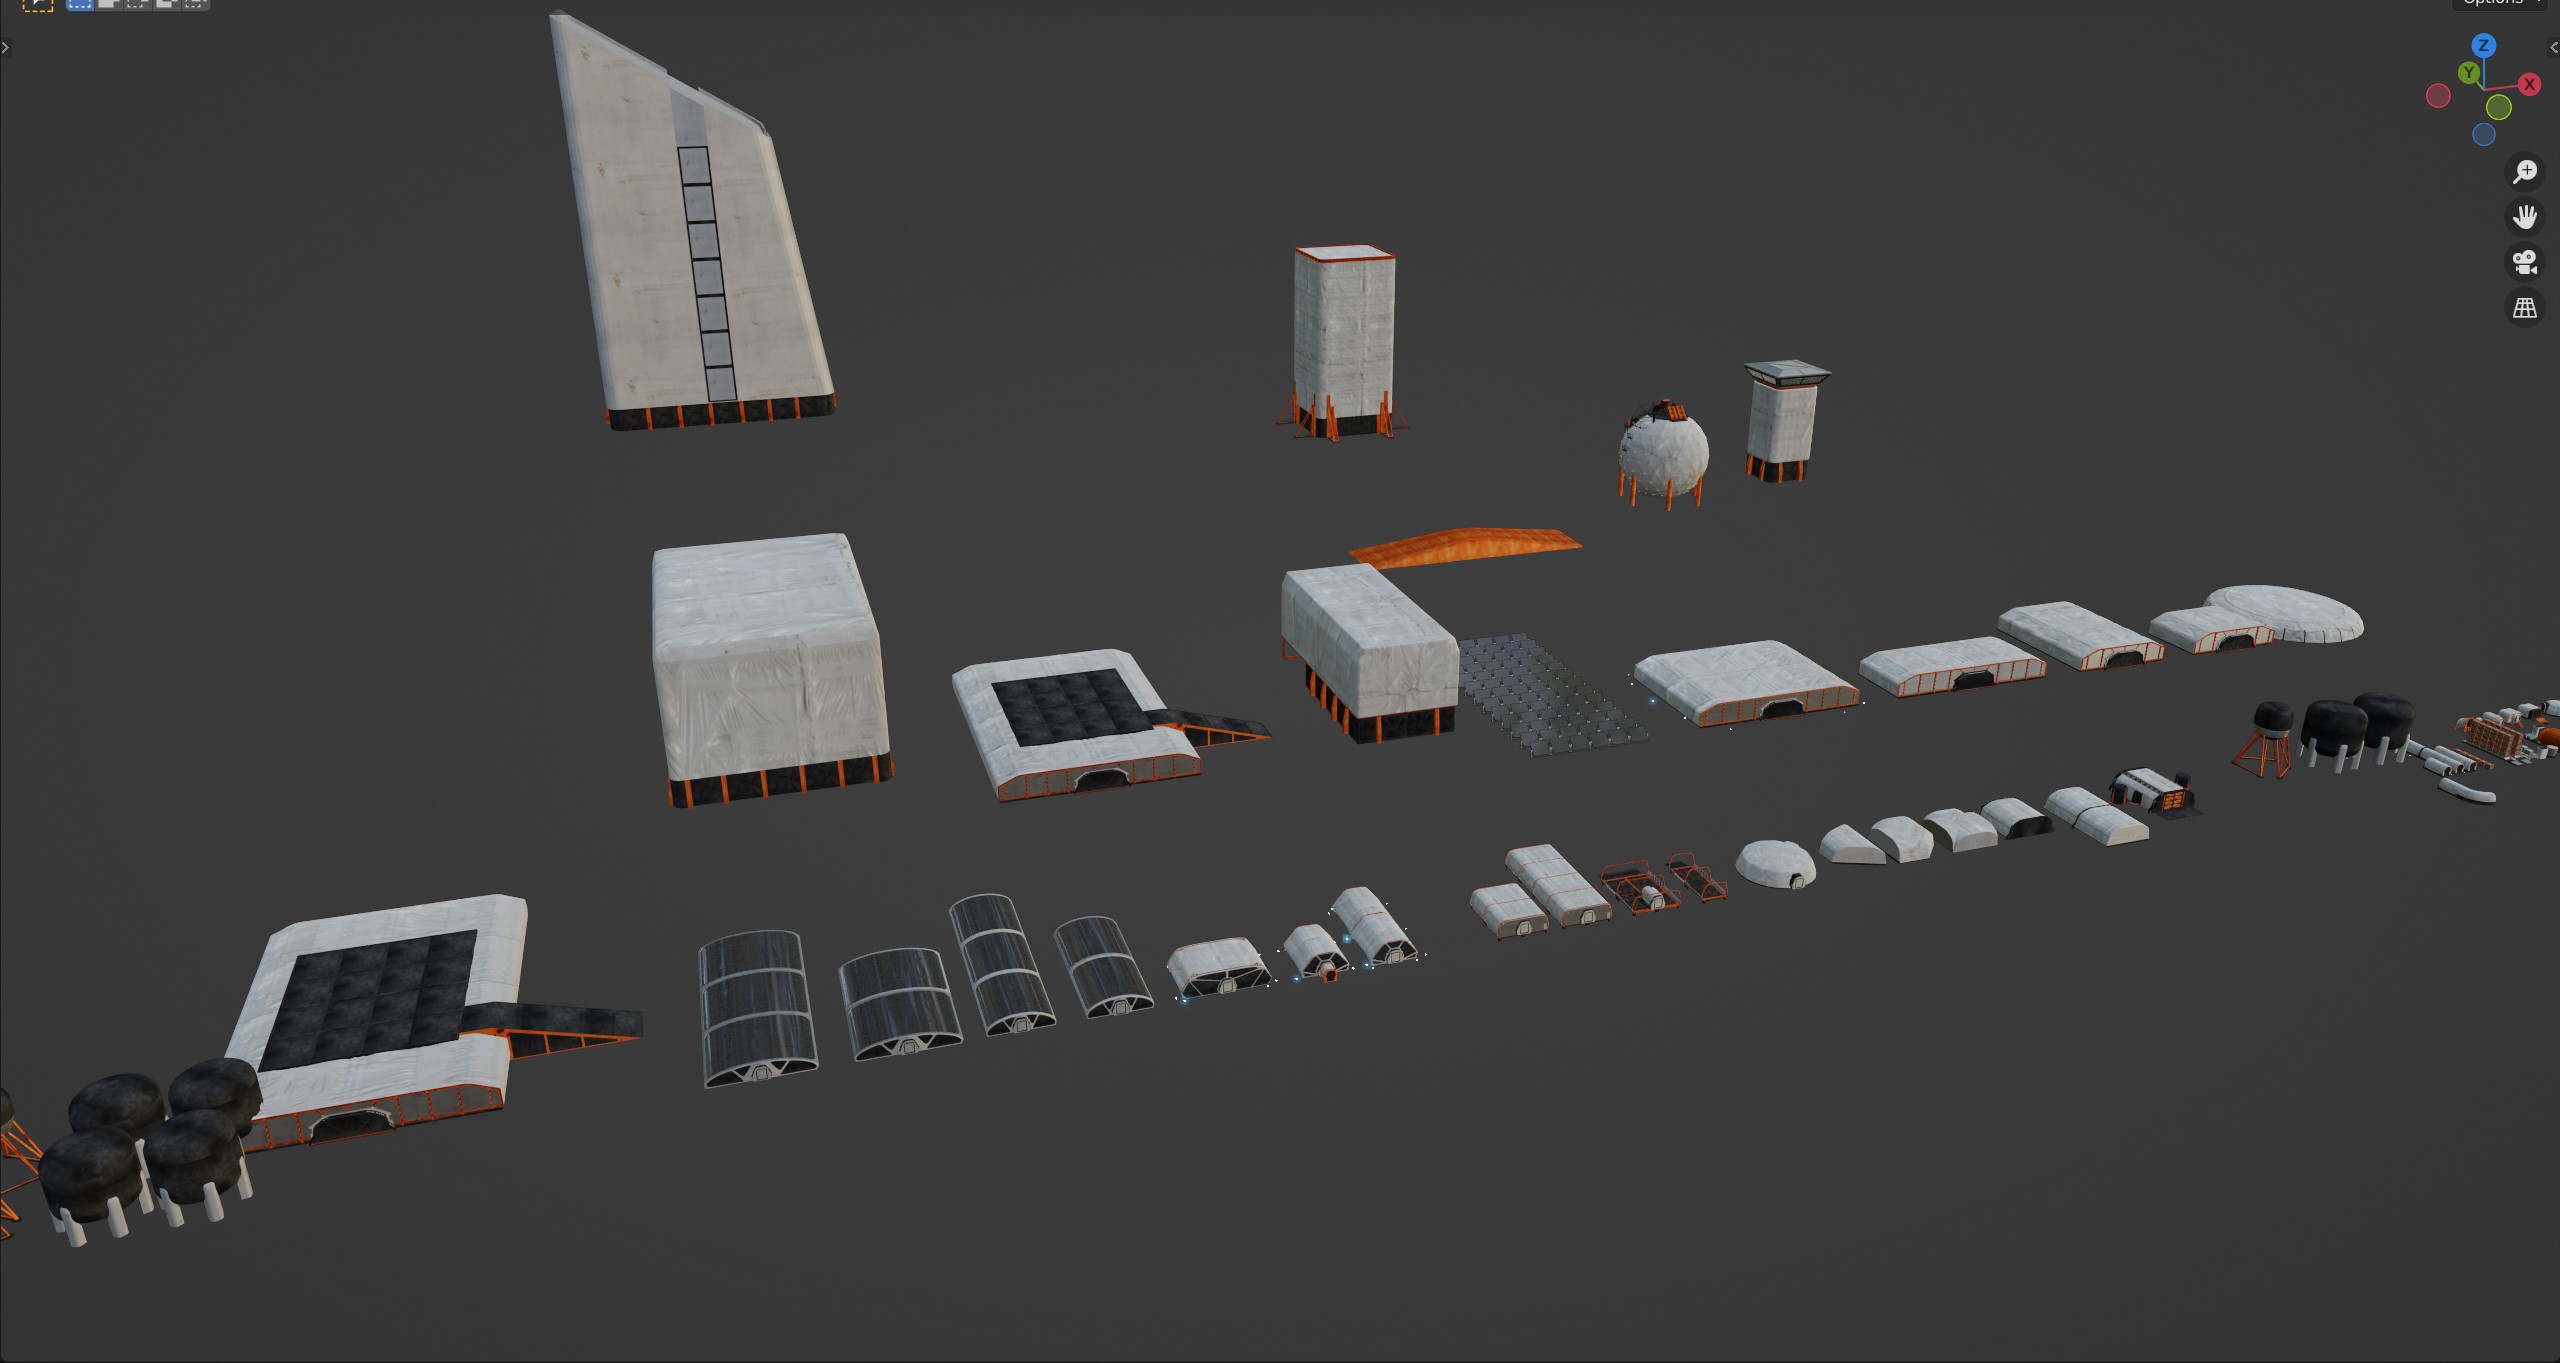
I put all small assets in a collection and then used Gscatter to scatter them,
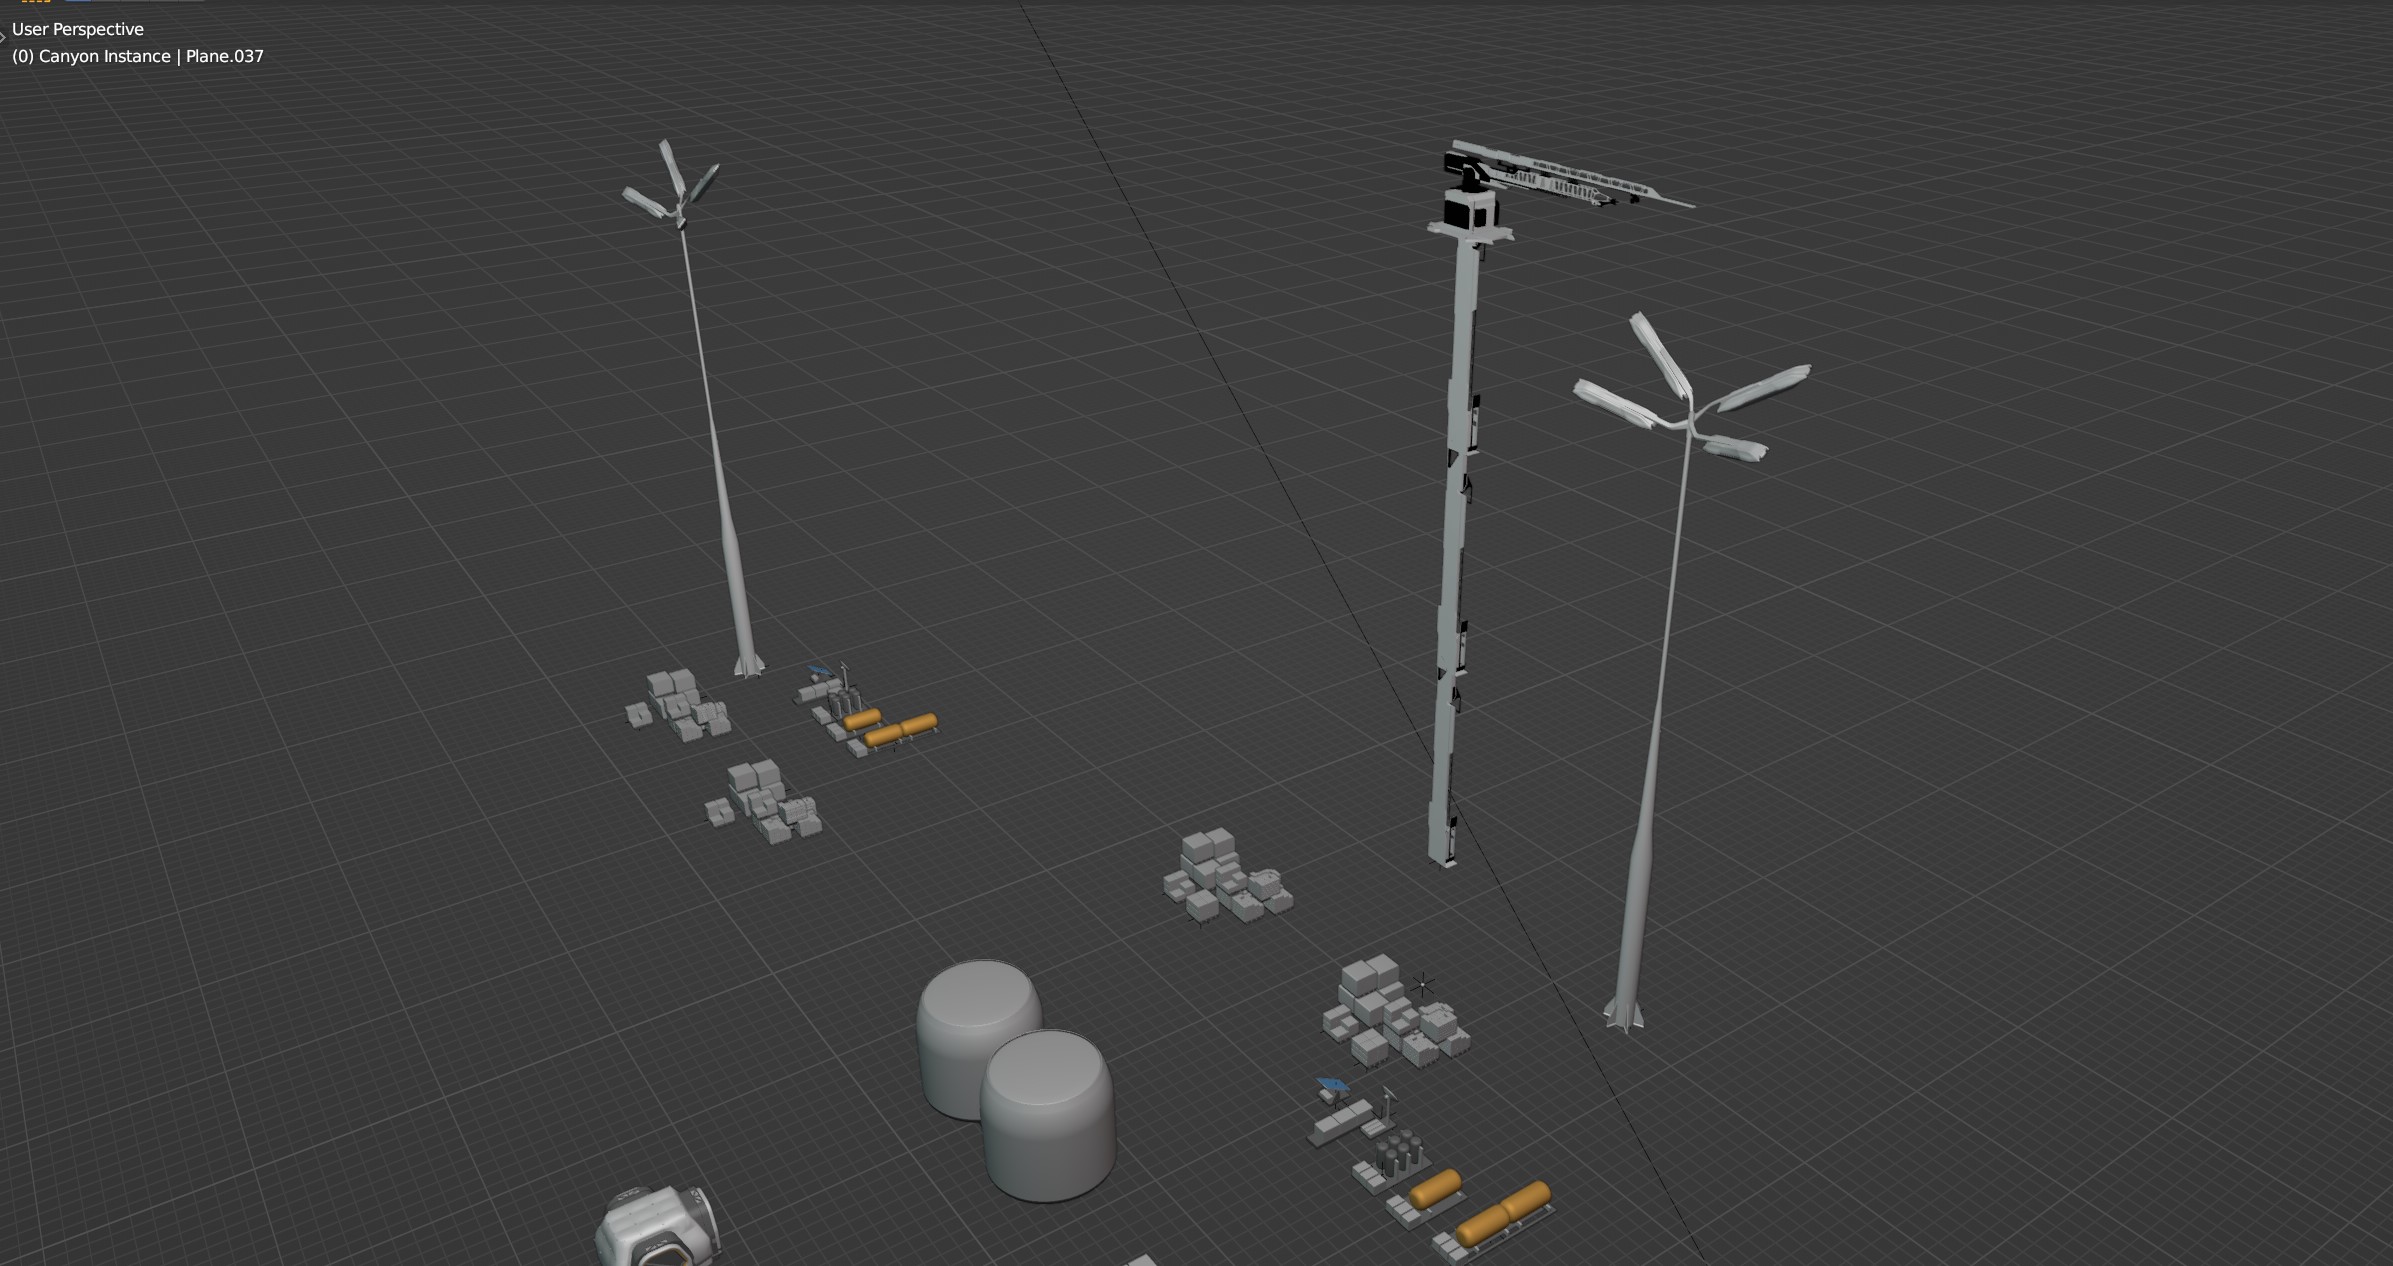
Assets used for scattering with Gscatter,
With this, it looked more alive and sensible. But after a lot of experimentations with light placements to those assets, I finally figured out a proper look and this is how it looks in viewport, all the lighting from the colony was coming from the lights that I added to the base mesh before instancing. For more accurate results, I also added some area lamps on top of it to make it look like its coming from a colony.
Finally, I added more details as it was feeling that something was missing out. So, I added towers, satellites, cranes, and other small details.

A work-in-progress rendered with proper atmospherics without color grade version.
COMPOSITING
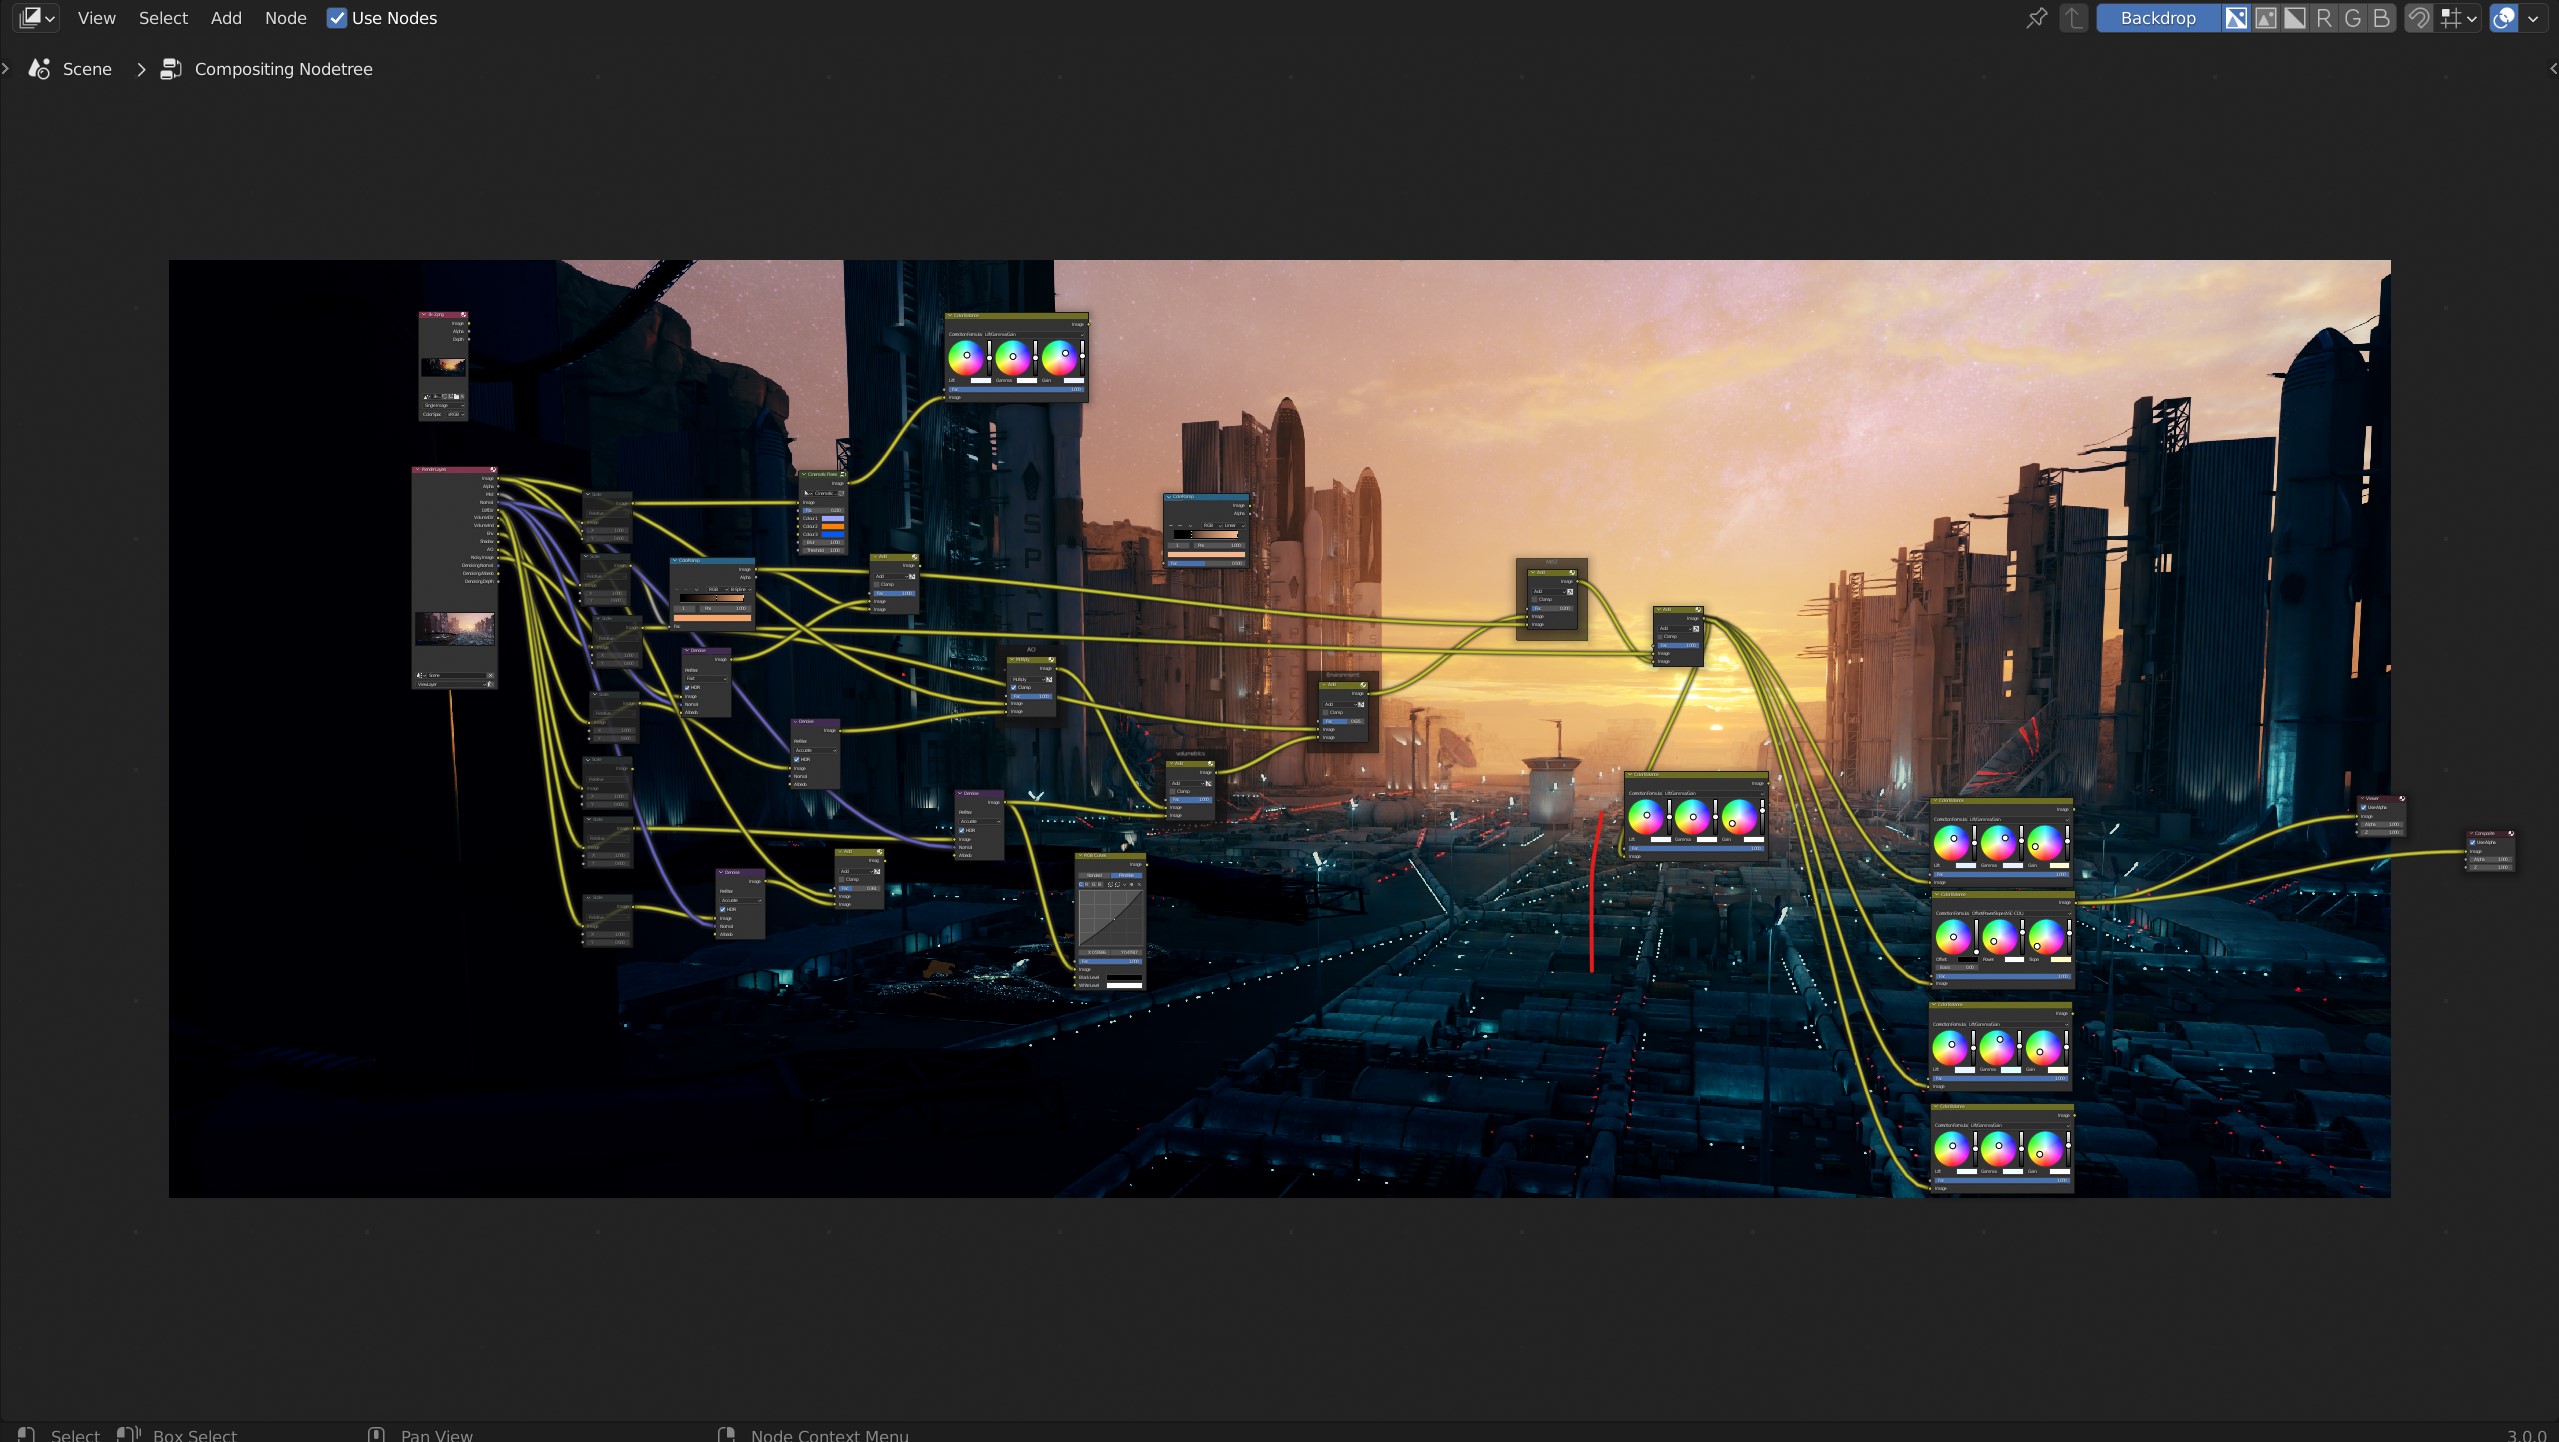
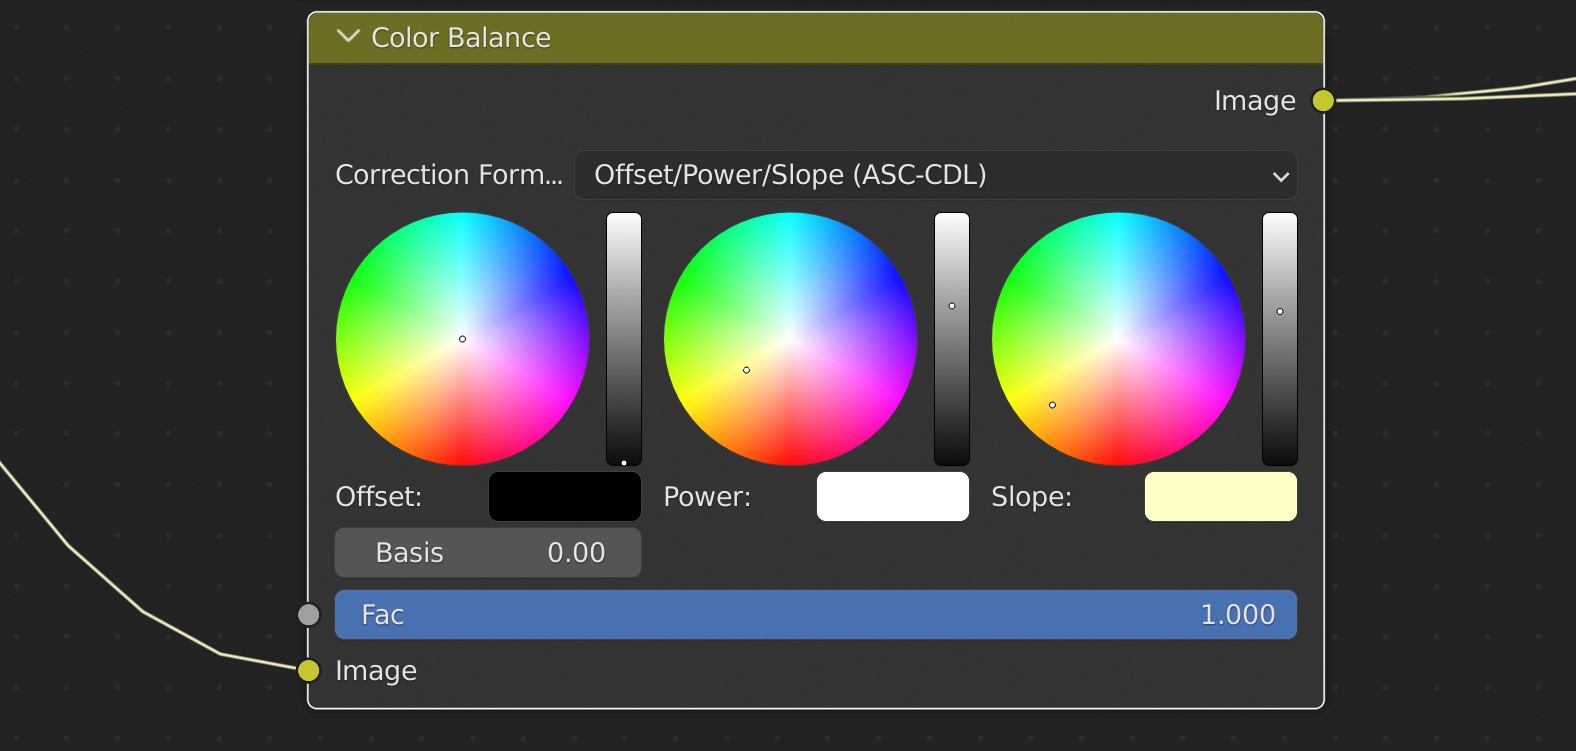
I used different passes for compositing the shot. I always prefer to use Blender for post processing work. The passes used were Normal, Diffuse Direct, Volume direct, Environment AO, and Noisy image; all of these were hooked to their own denoises and were mixed layer by layer. But the final look that made it more interesting was this one color balance node. I specifically was aiming to achieve that Hollywood color grade style, but of course I am not a professional color grade artist.
Color balance node which made the final color grade look.
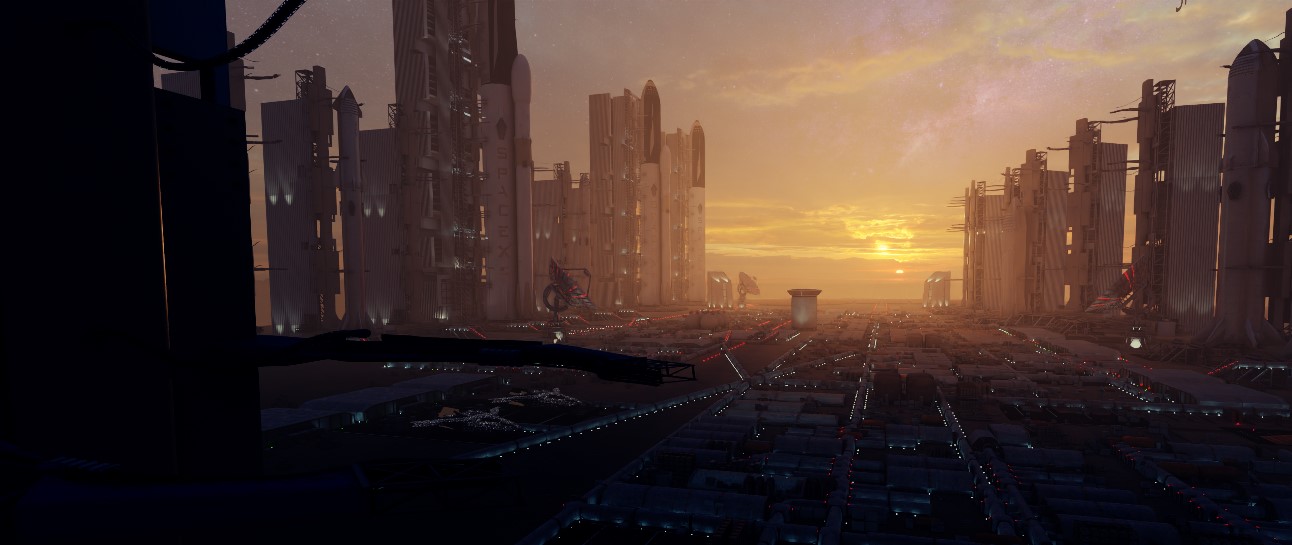
I also added some canyons and other things from the Megascans library for different layouts using the same instance method. A second version of the environment was with a red dwarf-like sun, almost using the same environment properties as before.
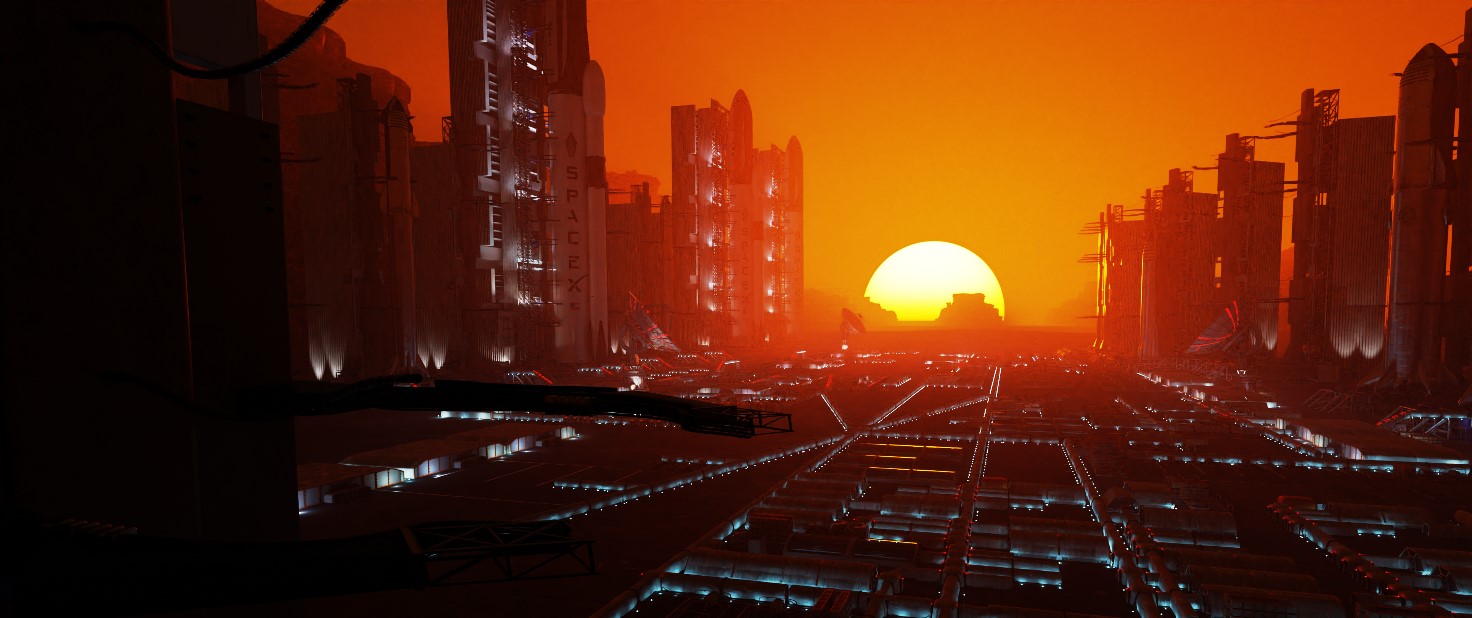
Final Viewport rendering can be seen in the below video,
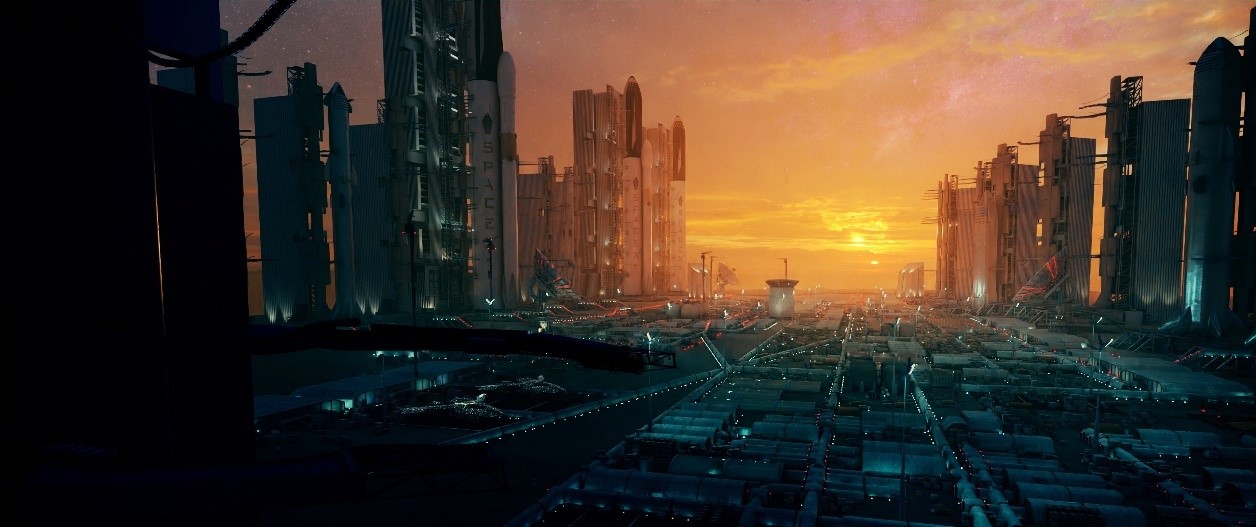
SPACE COLONY
FINAL THOUGHTS
I have written this article keeping intermediate Blender artists in mind. These techniques can be used to make any large-scale environments with maintaining at most details over the assets.
If you want to check out one more environment larger than this using the same techniques I have explained, check this link Utopia 28056 – Artwork / Finished Projects – Blender Artists Community .The particular mentioned environment has almost 9 times more polycount than the current explained one.
About the Artist

Kshitij Bhate, a Software Developer, Freelance 3D artist and Environment artist. He is aiming at getting better at his art and also focused on being a better software developer.


