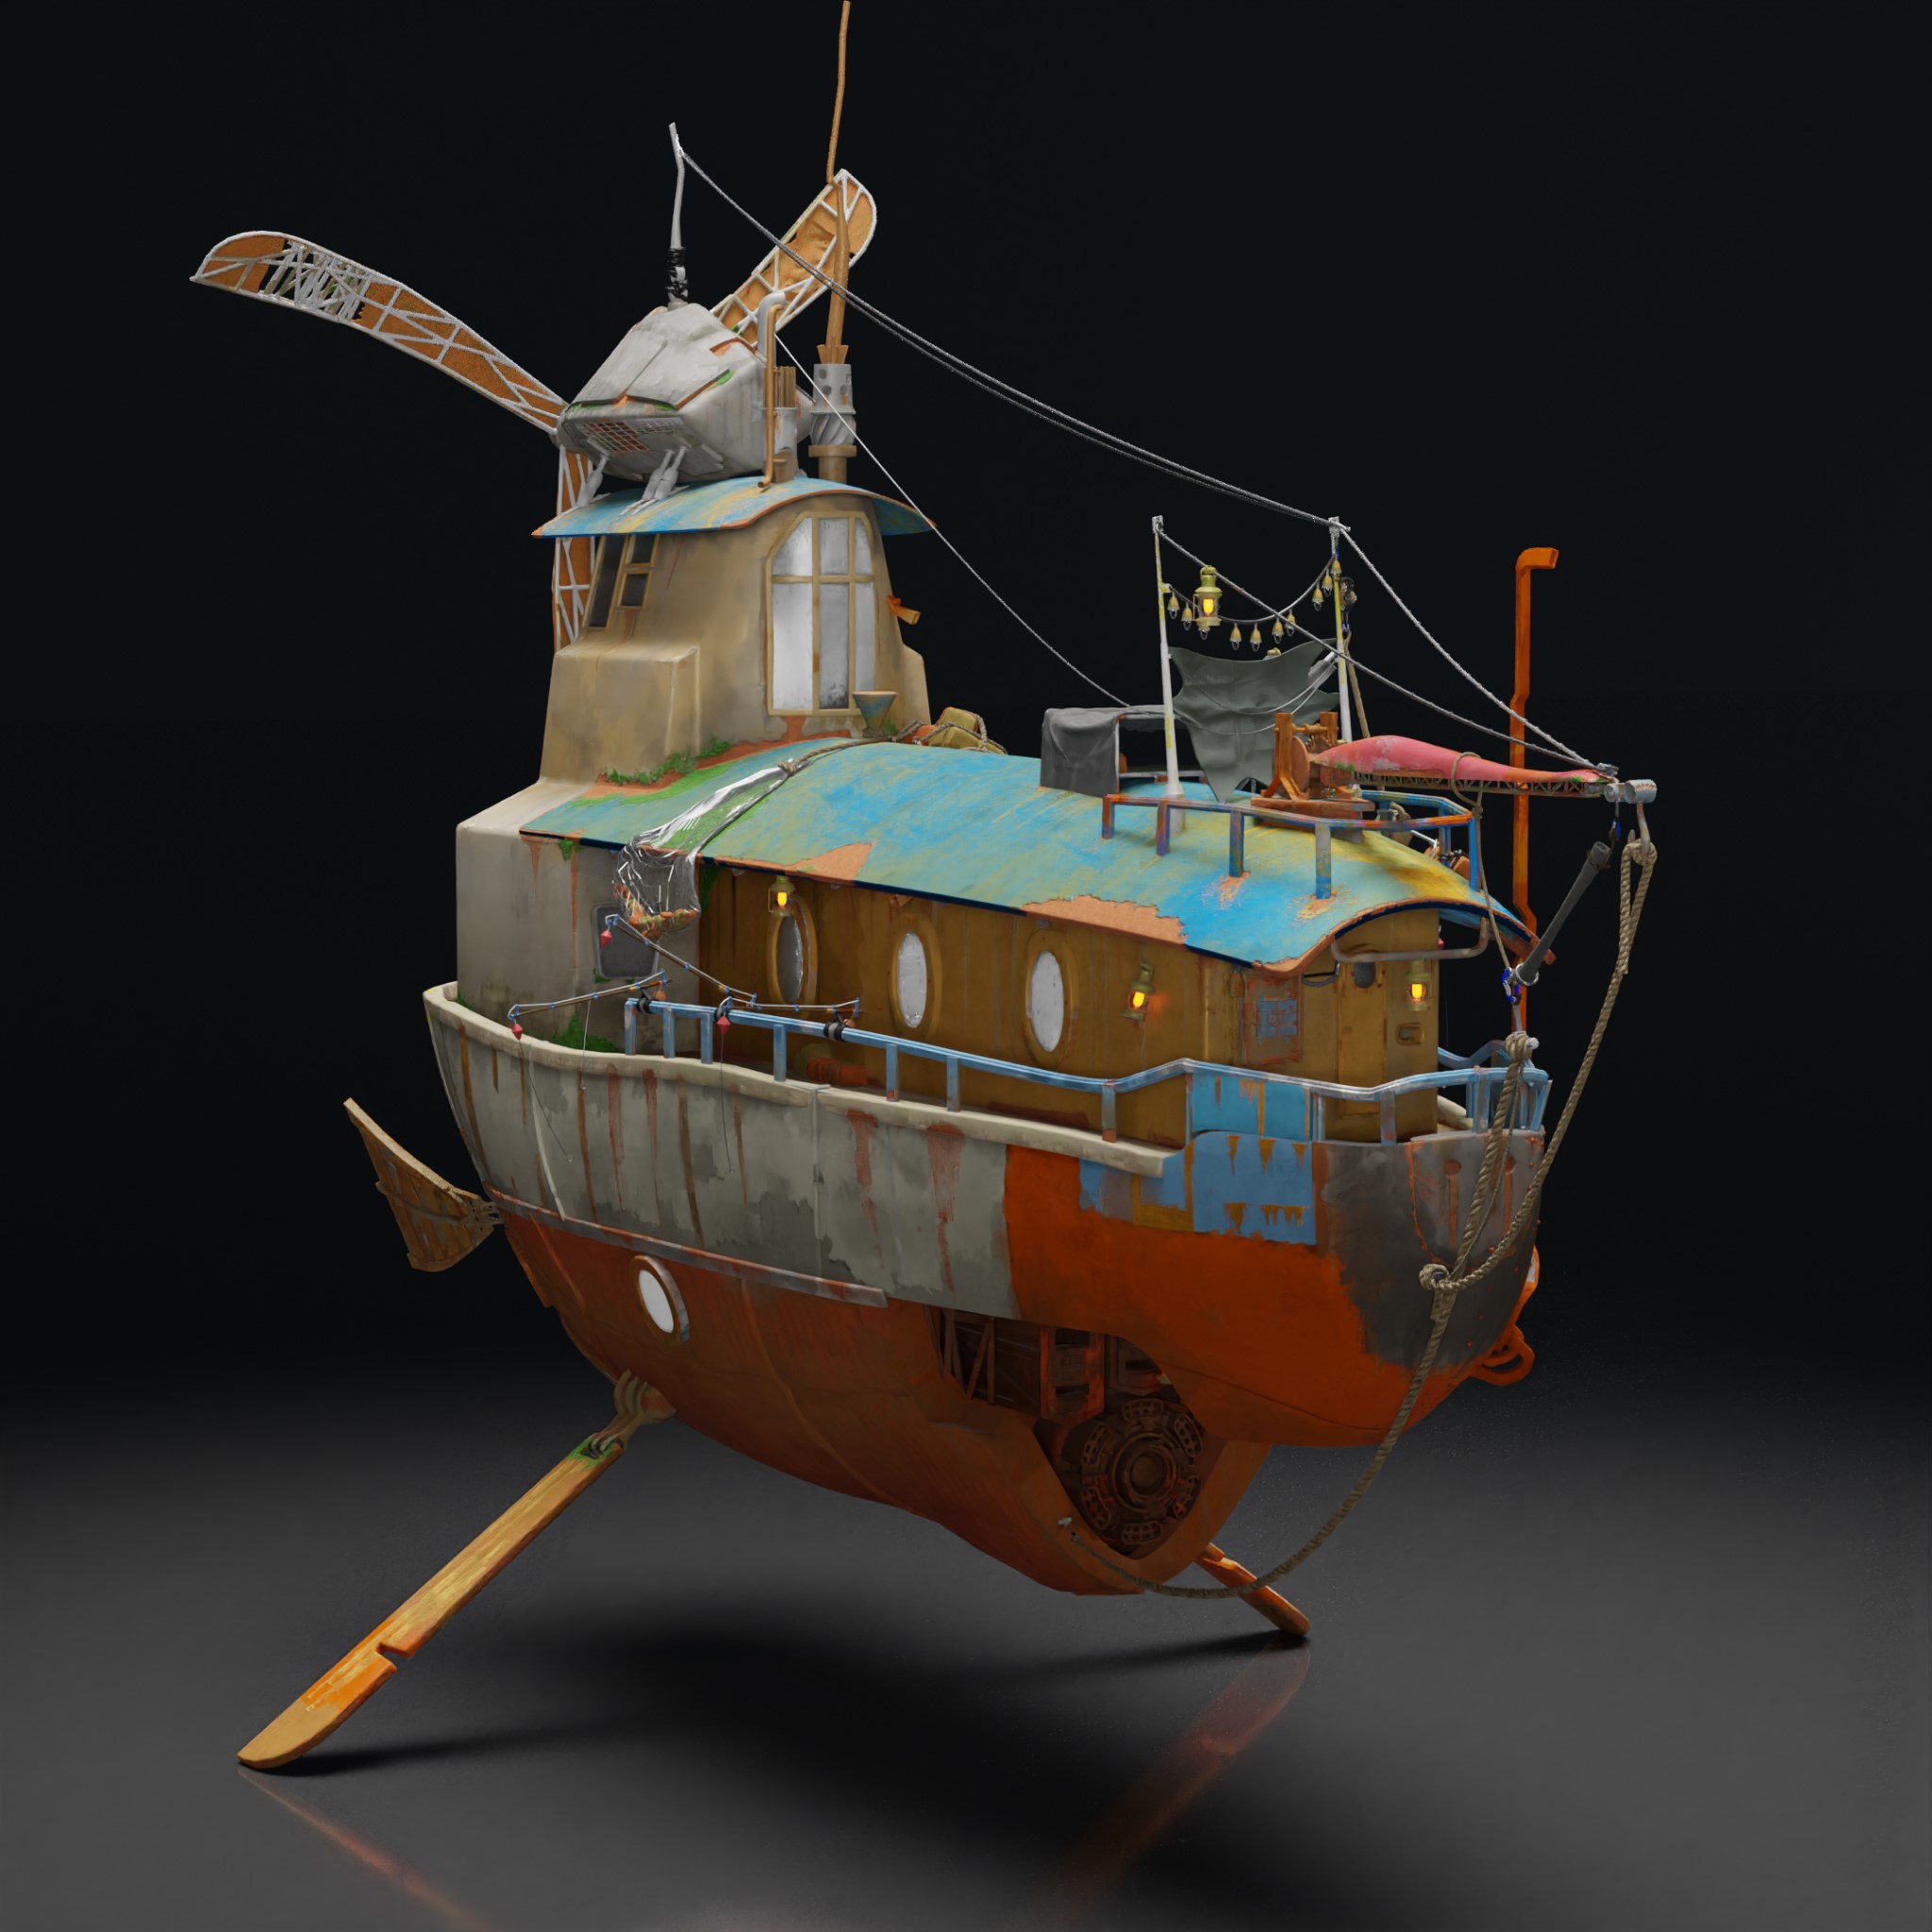
Behind the Scenes: Apricot
INTRODUCTION
Hello there, I am Wafi Izzeldin from Sudan. I am a NET programmer and Web Developer. I started my 3D journey when I was learning about machine learning—no pun intended—and was looking for a visualization tool to help me with the data readability. At first, I was exposed to Game Engines and the game development world which amazed me so much that I started digging into it. As a natural step, I had to find a 3D modeling program, and then there was Blender. I found more passion for artistry than game dev, so I stuck with it and focused on improving ever since.
INSPIRATION
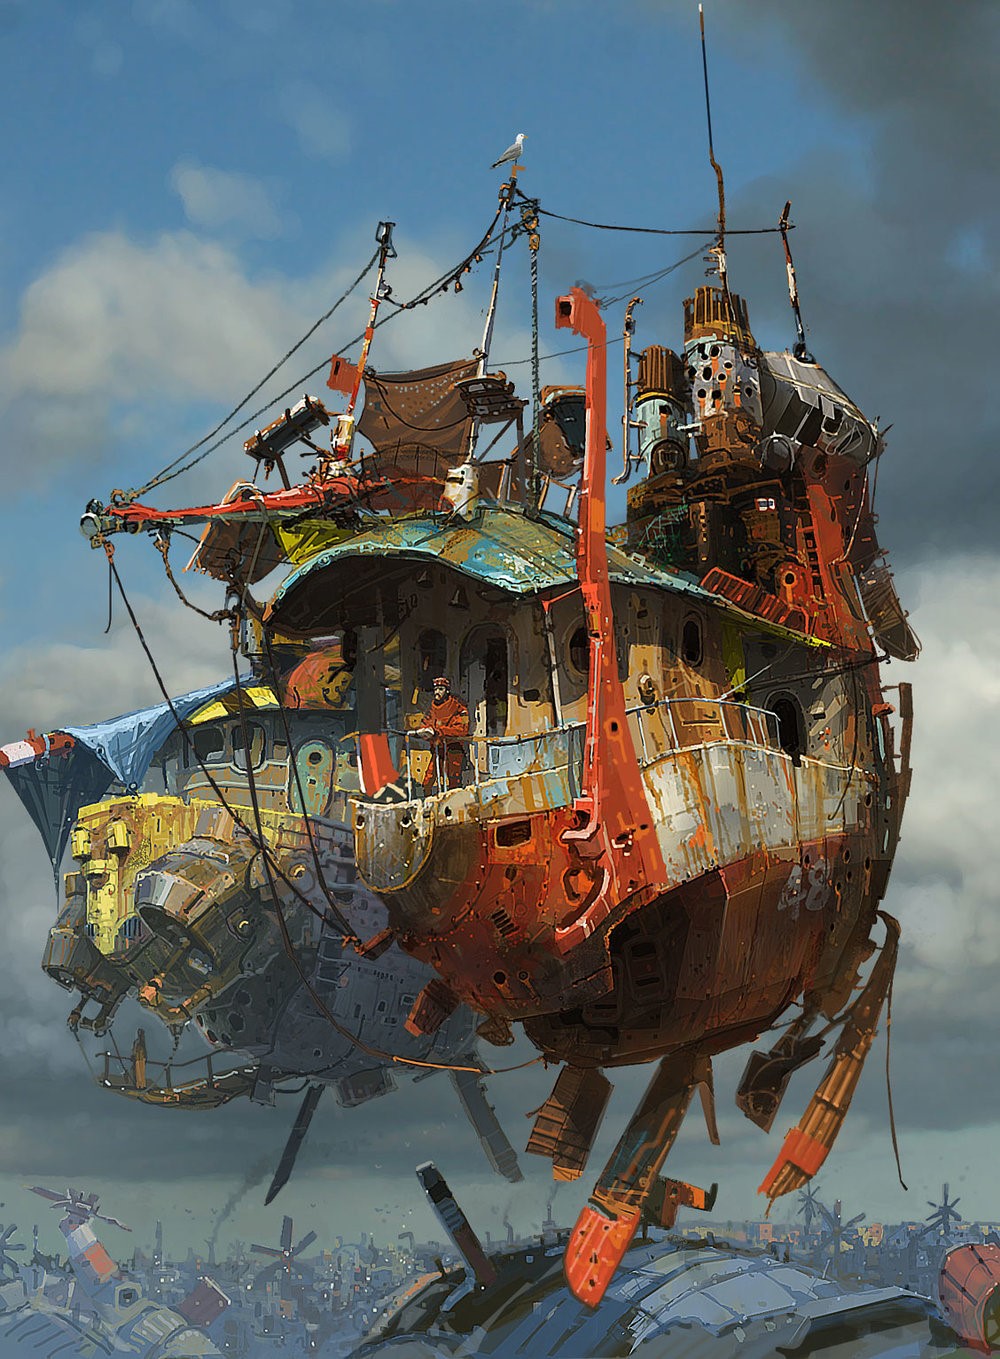
I came across Ian McQue’s work through social media, and found it very good and thoughtful. I even found a talk he did, explaining the thought process of his work. He mentioned that what he was working on was welcoming and inspiring new artists.
https://www.iamag.co/the-art-of-ian-mcque/
This project became a good lesson for me and cleared a lot of fog surrounding “what makes good art.”
My inspiration is mostly about improving what I have already got. The original art piece is already amazing and I learned all that I could from it.
Here is his original artwork:
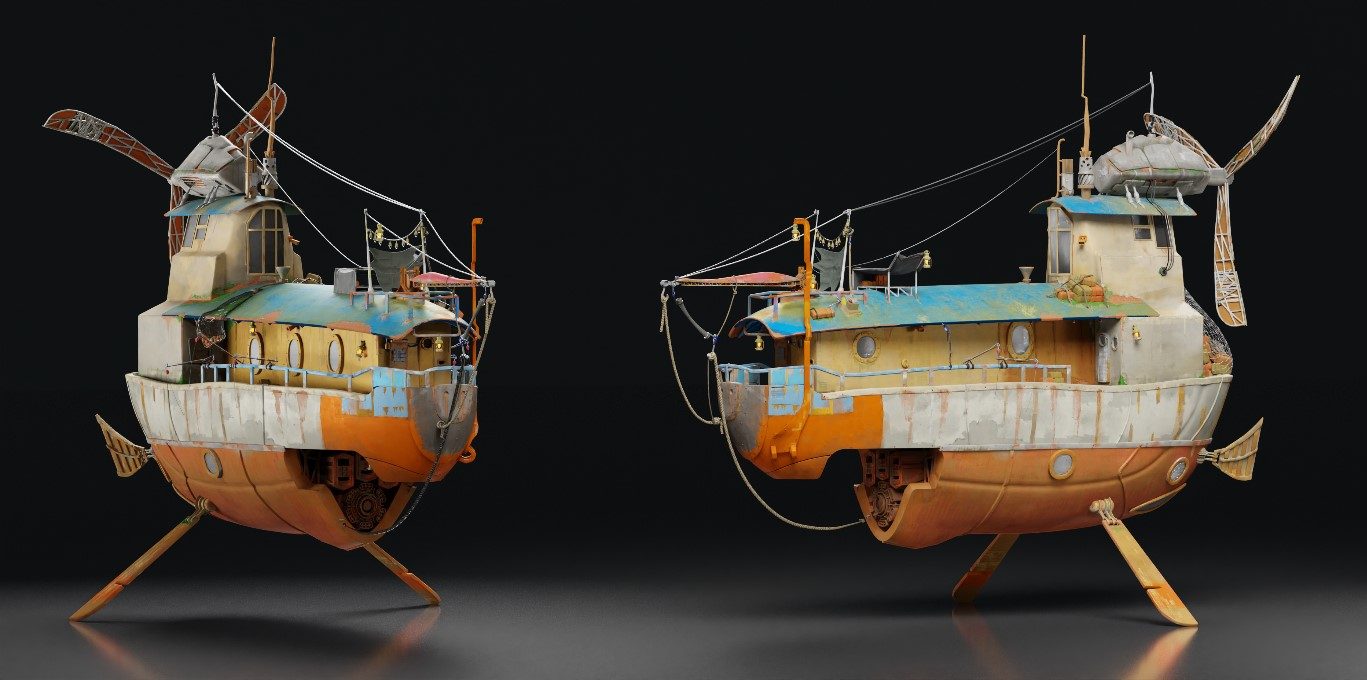
BLOCK-OUT
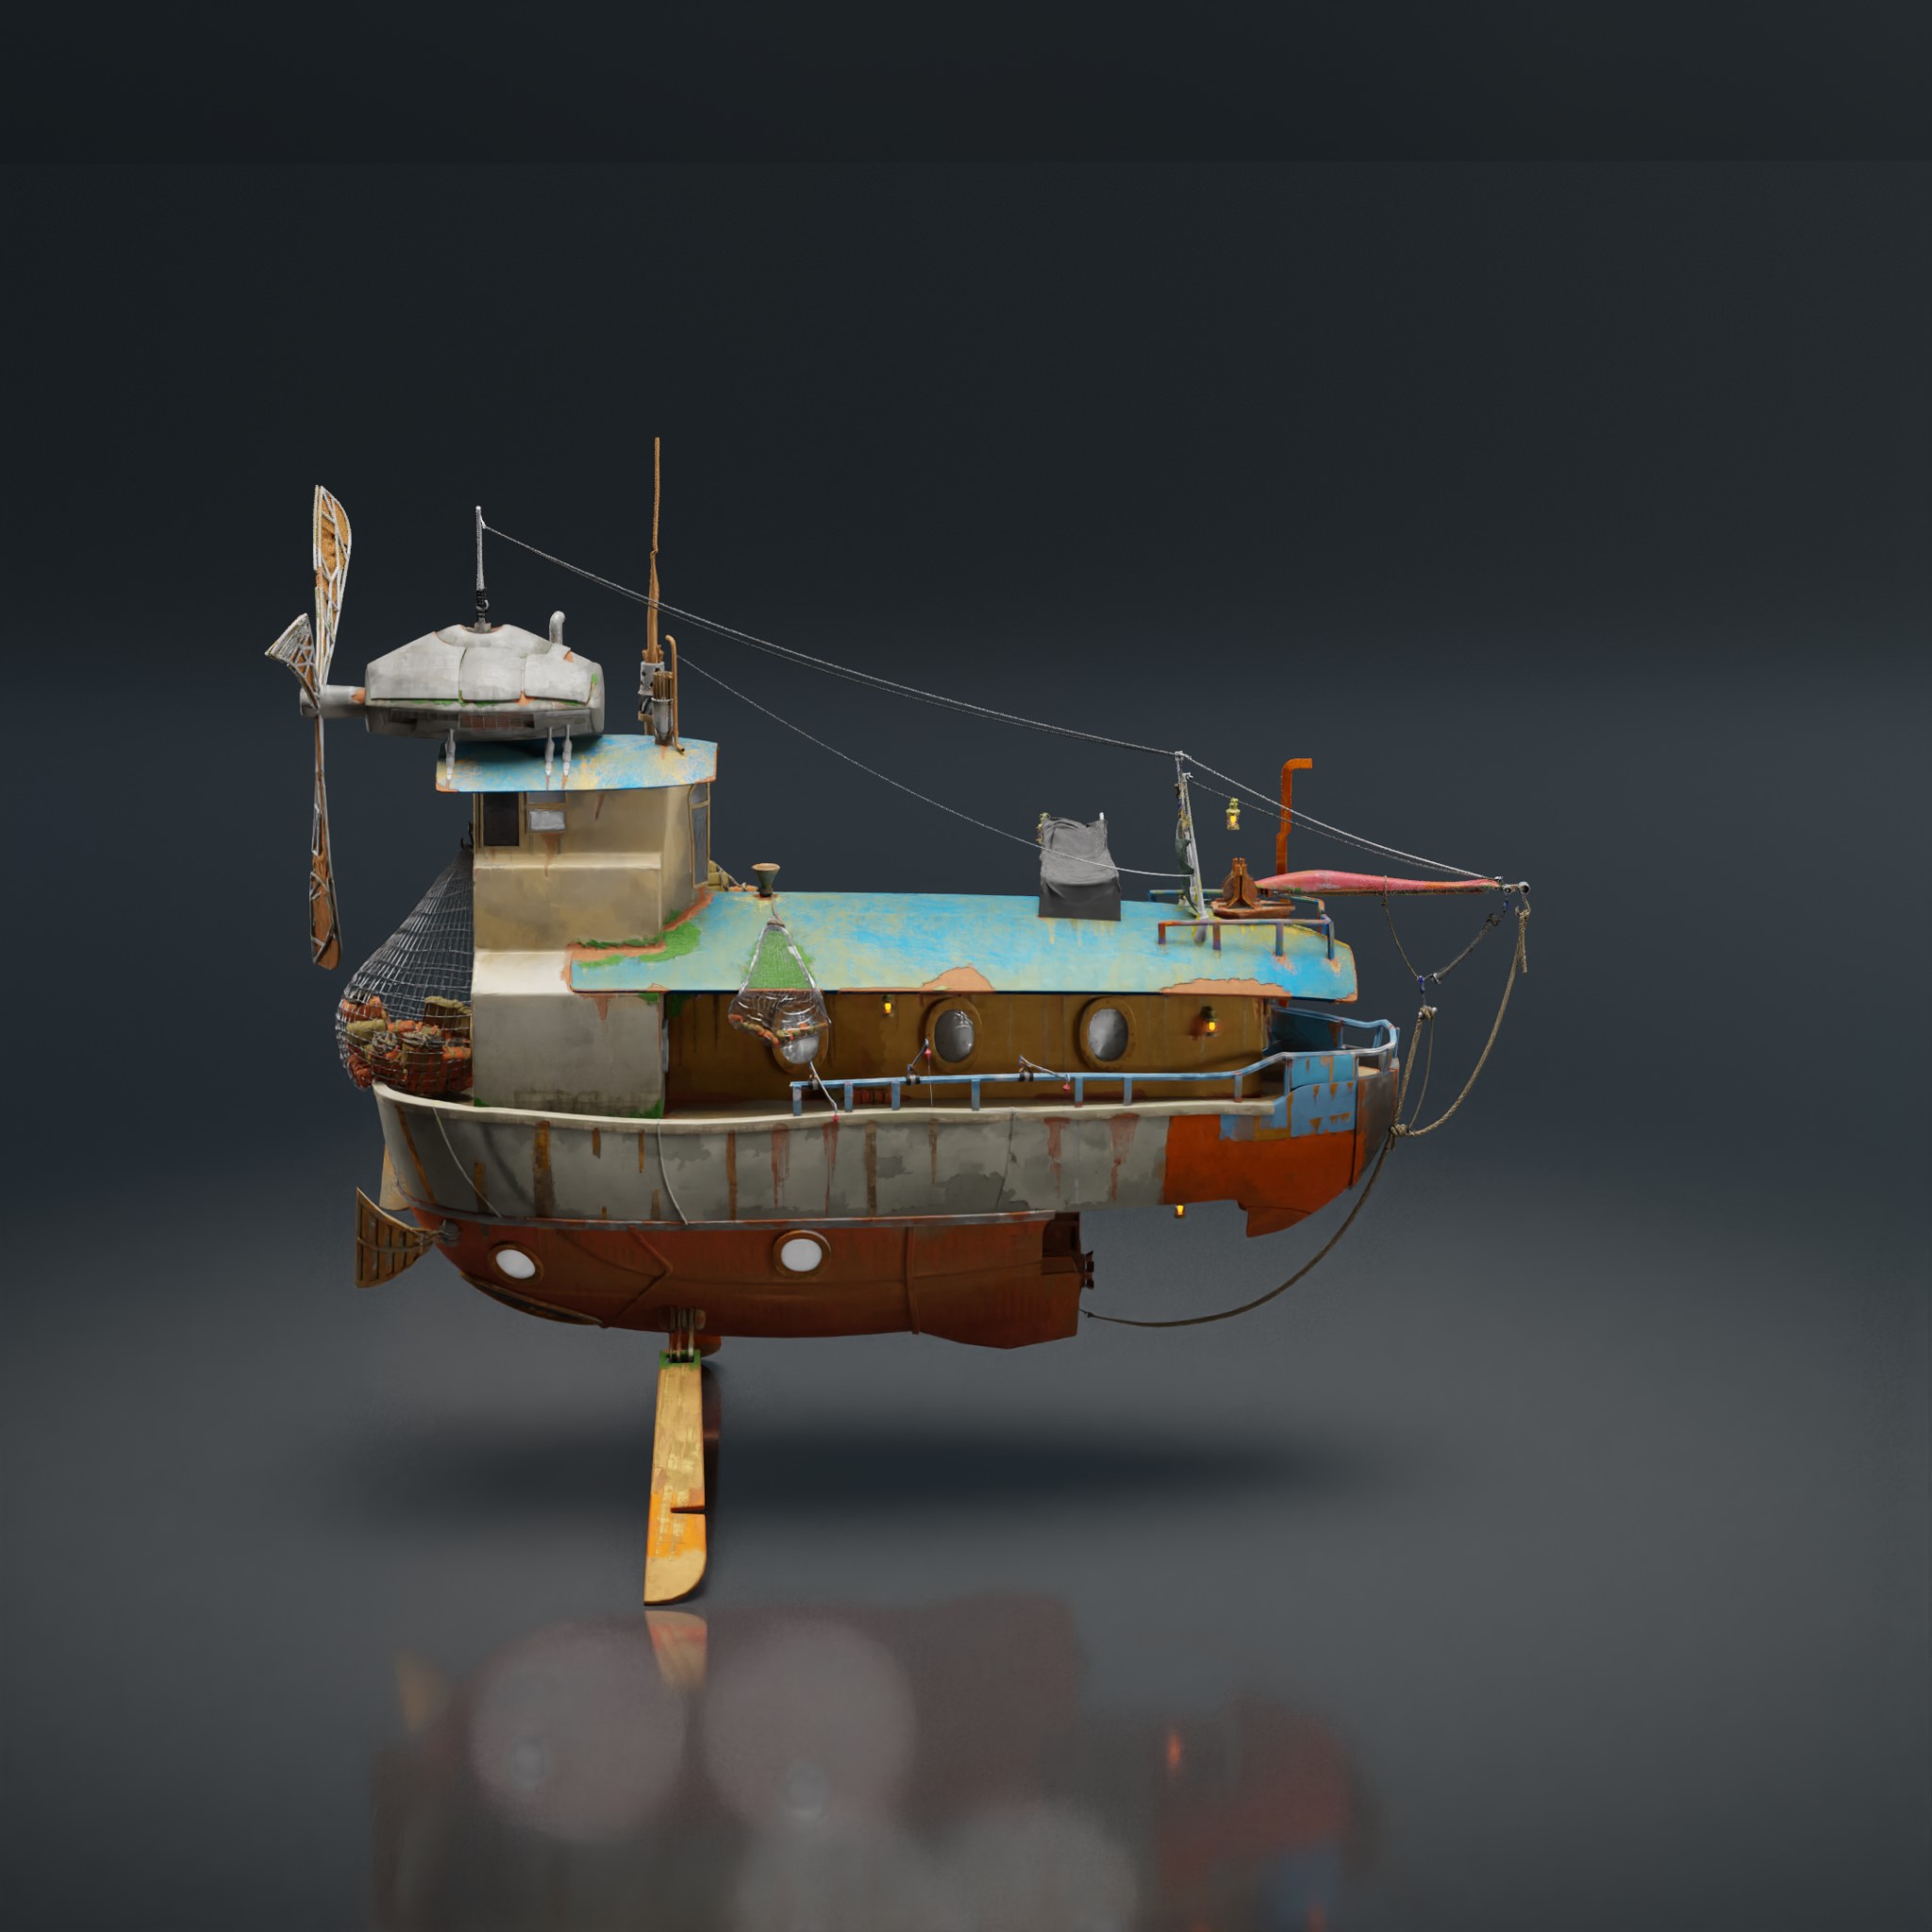
I spent a while and used a lot of proportionally-edited geometry to get a sense of scale. In this case, the artwork was done mostly in front view.
My solution was to close my eyes from what’s in front of me and put a ship in there. One try after another, I managed to get a reasonable scale to work with.

By putting them side by side, the scale made sense. So I kept my measurements and then actually started modeling.
MODELING
A good practice in almost any field is to break things down to their simplest components. In my case, shapes.
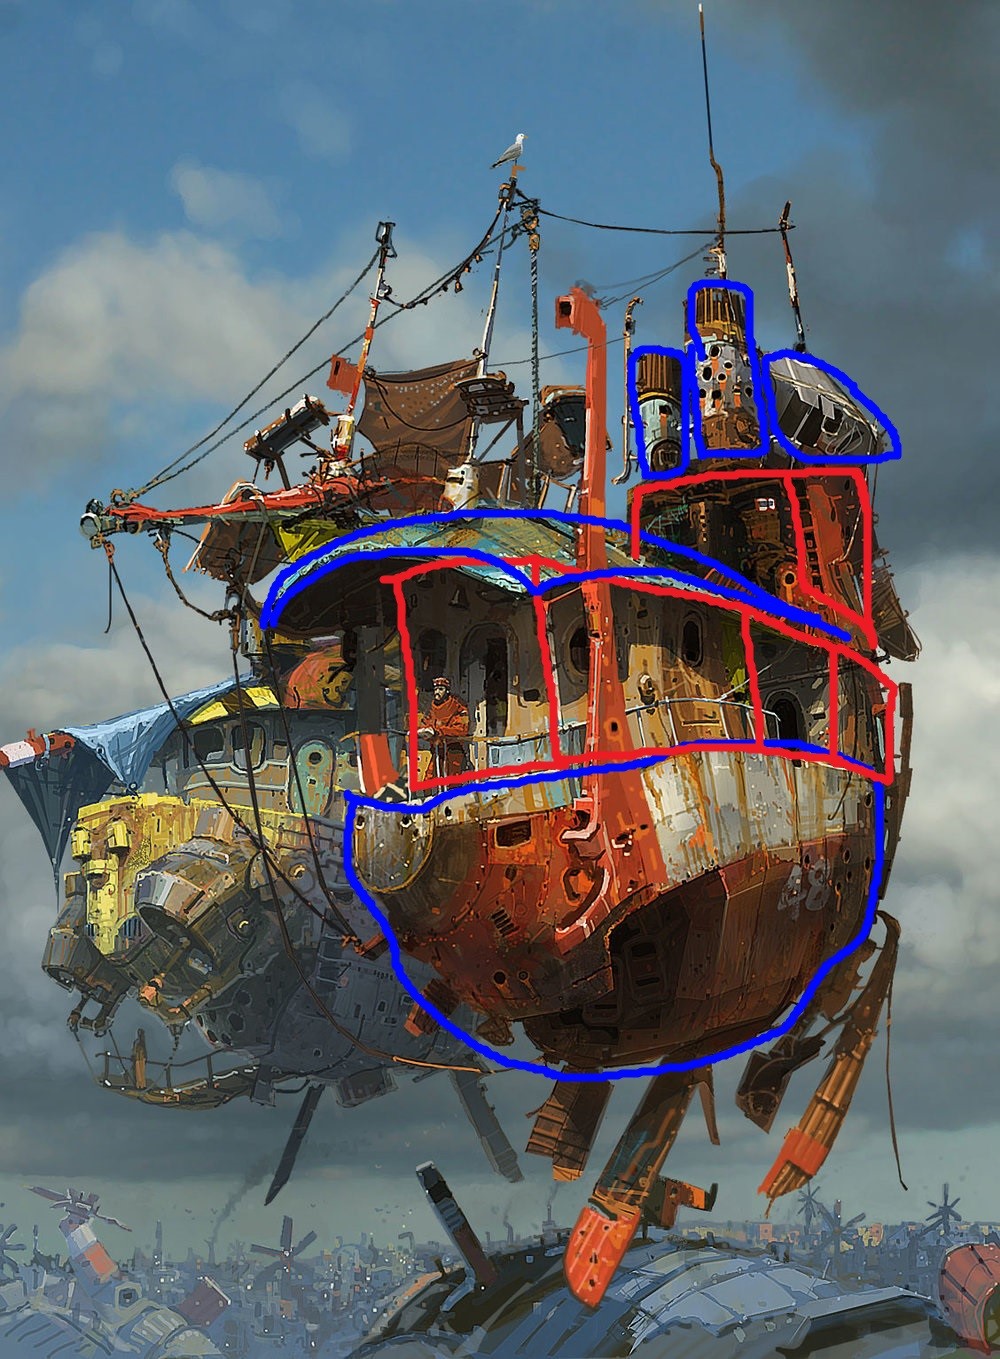
It hardly took any time and with actual measurements in mind, I ended up with very satisfying results.

Next up is medium details and for this, I divided my work into these few types:
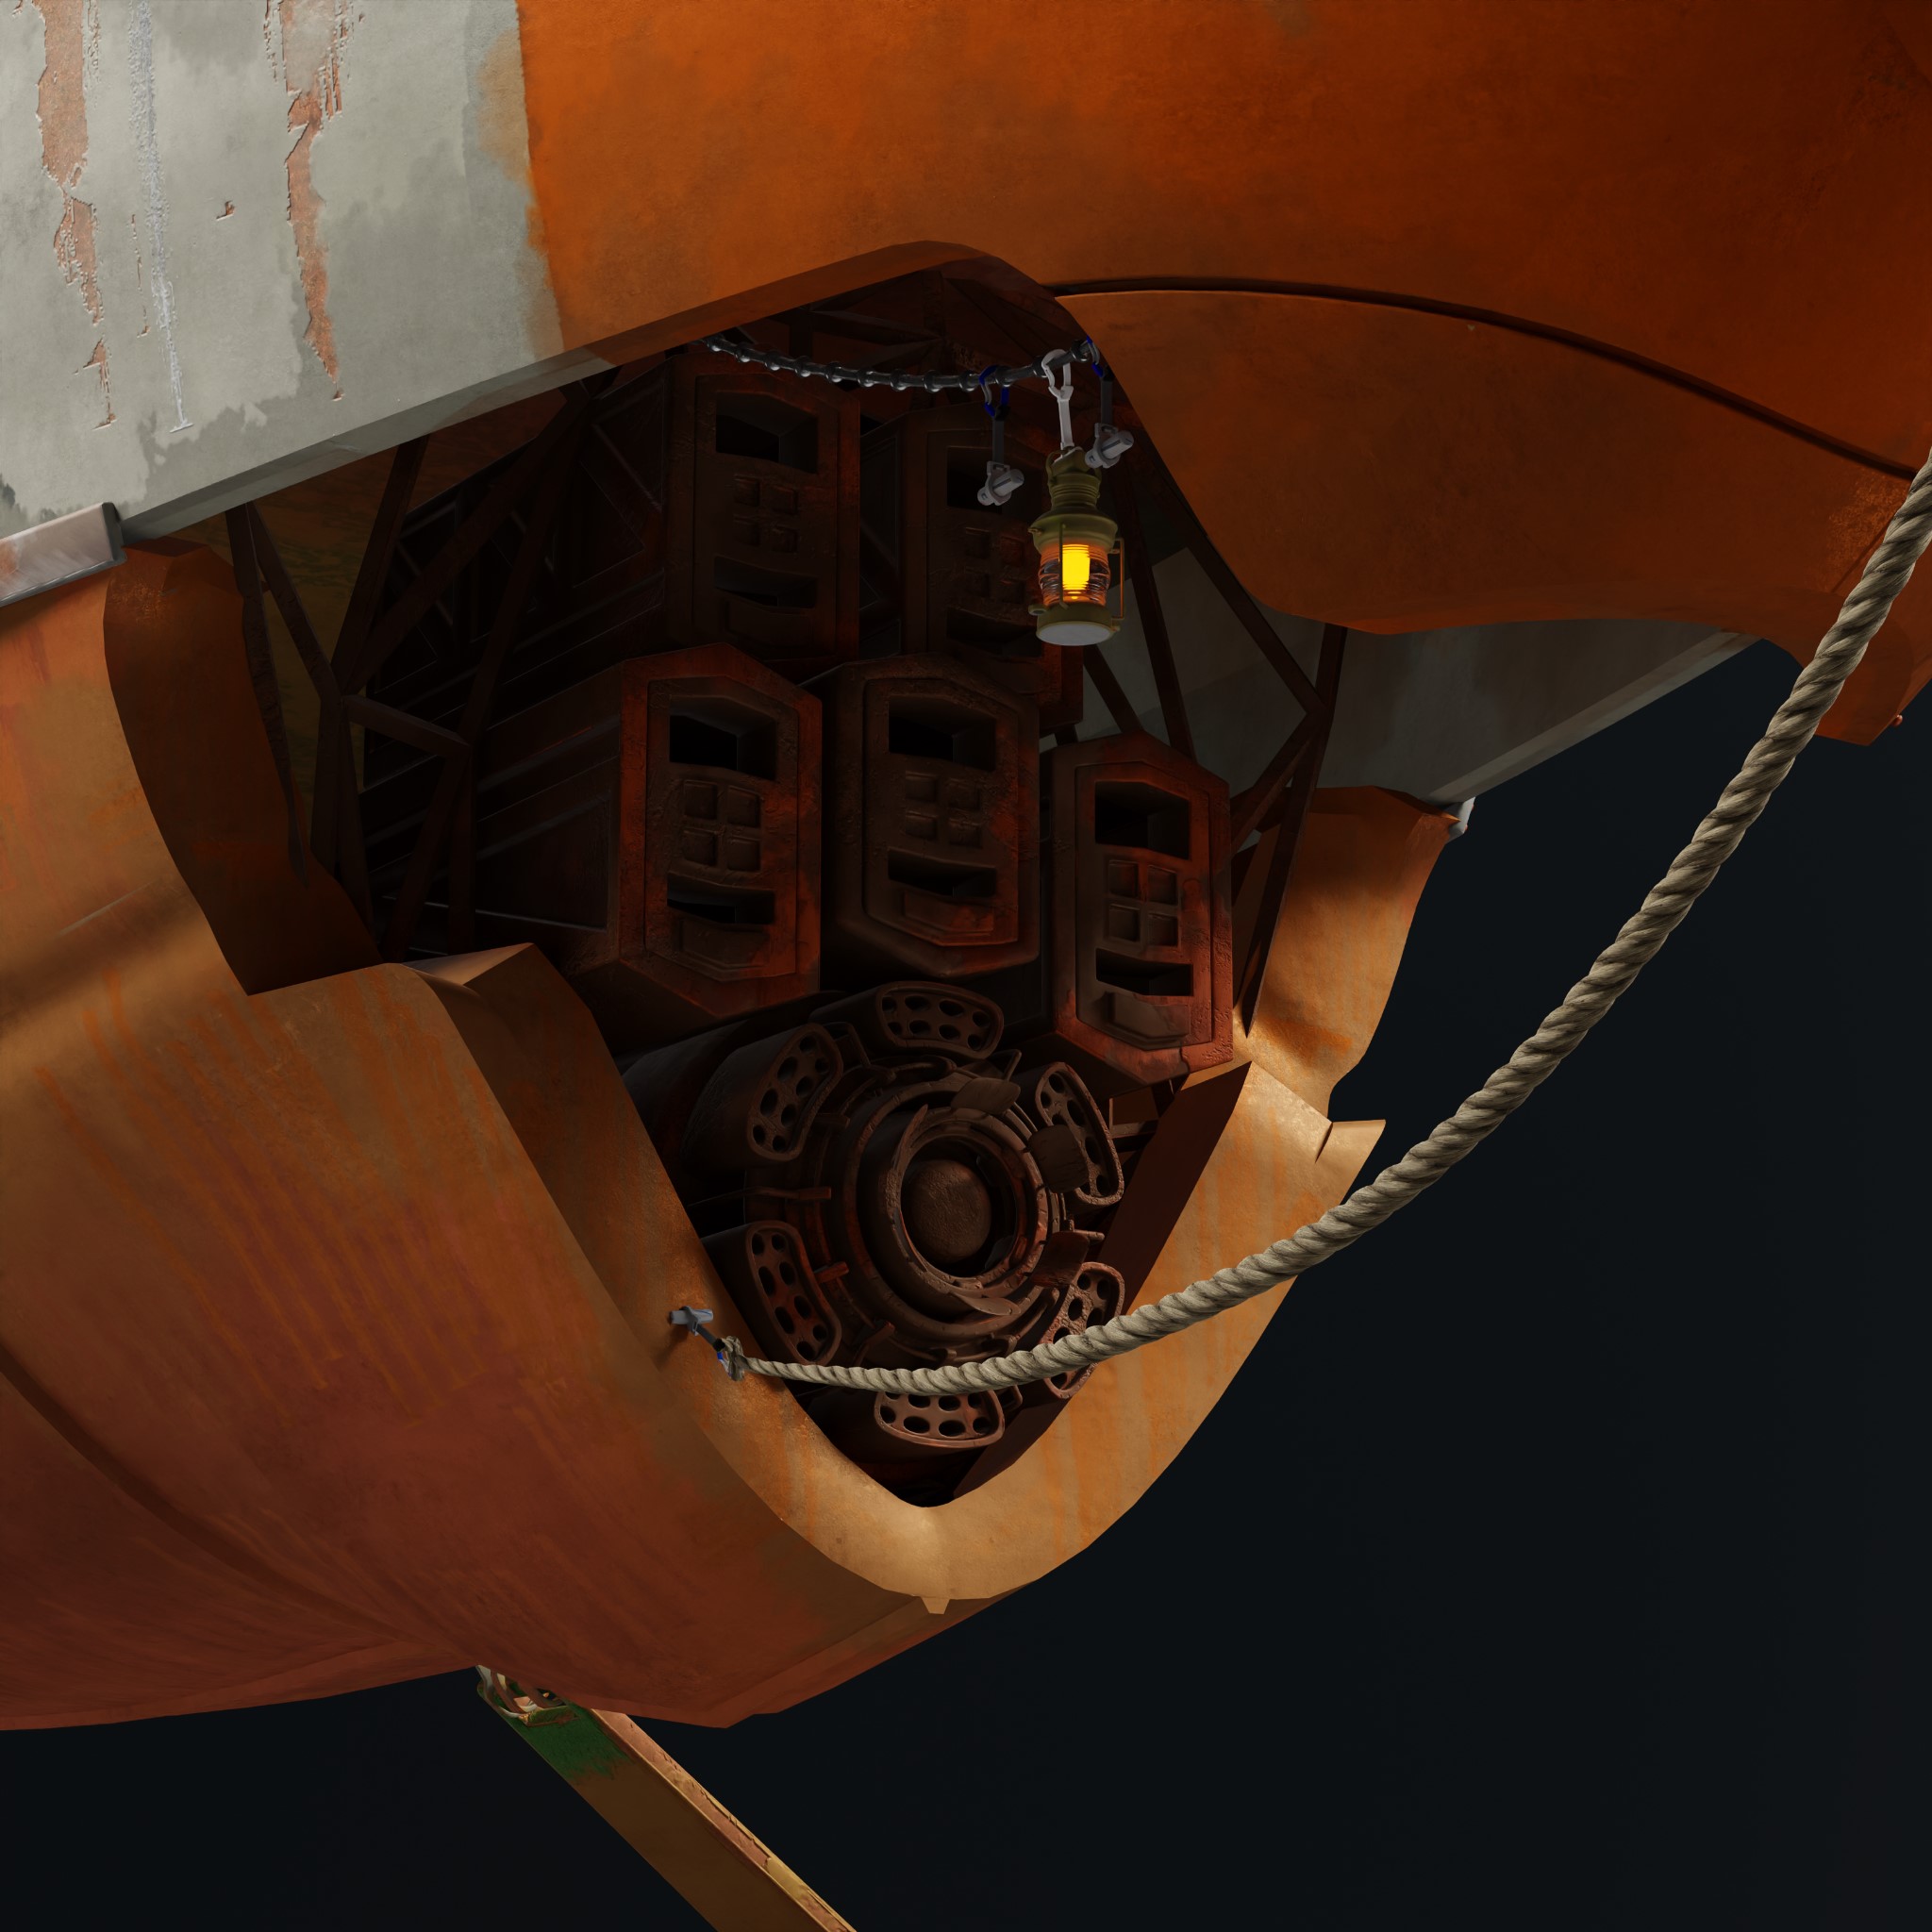
1- If it was a unique model, I just drew it and moved to the next.
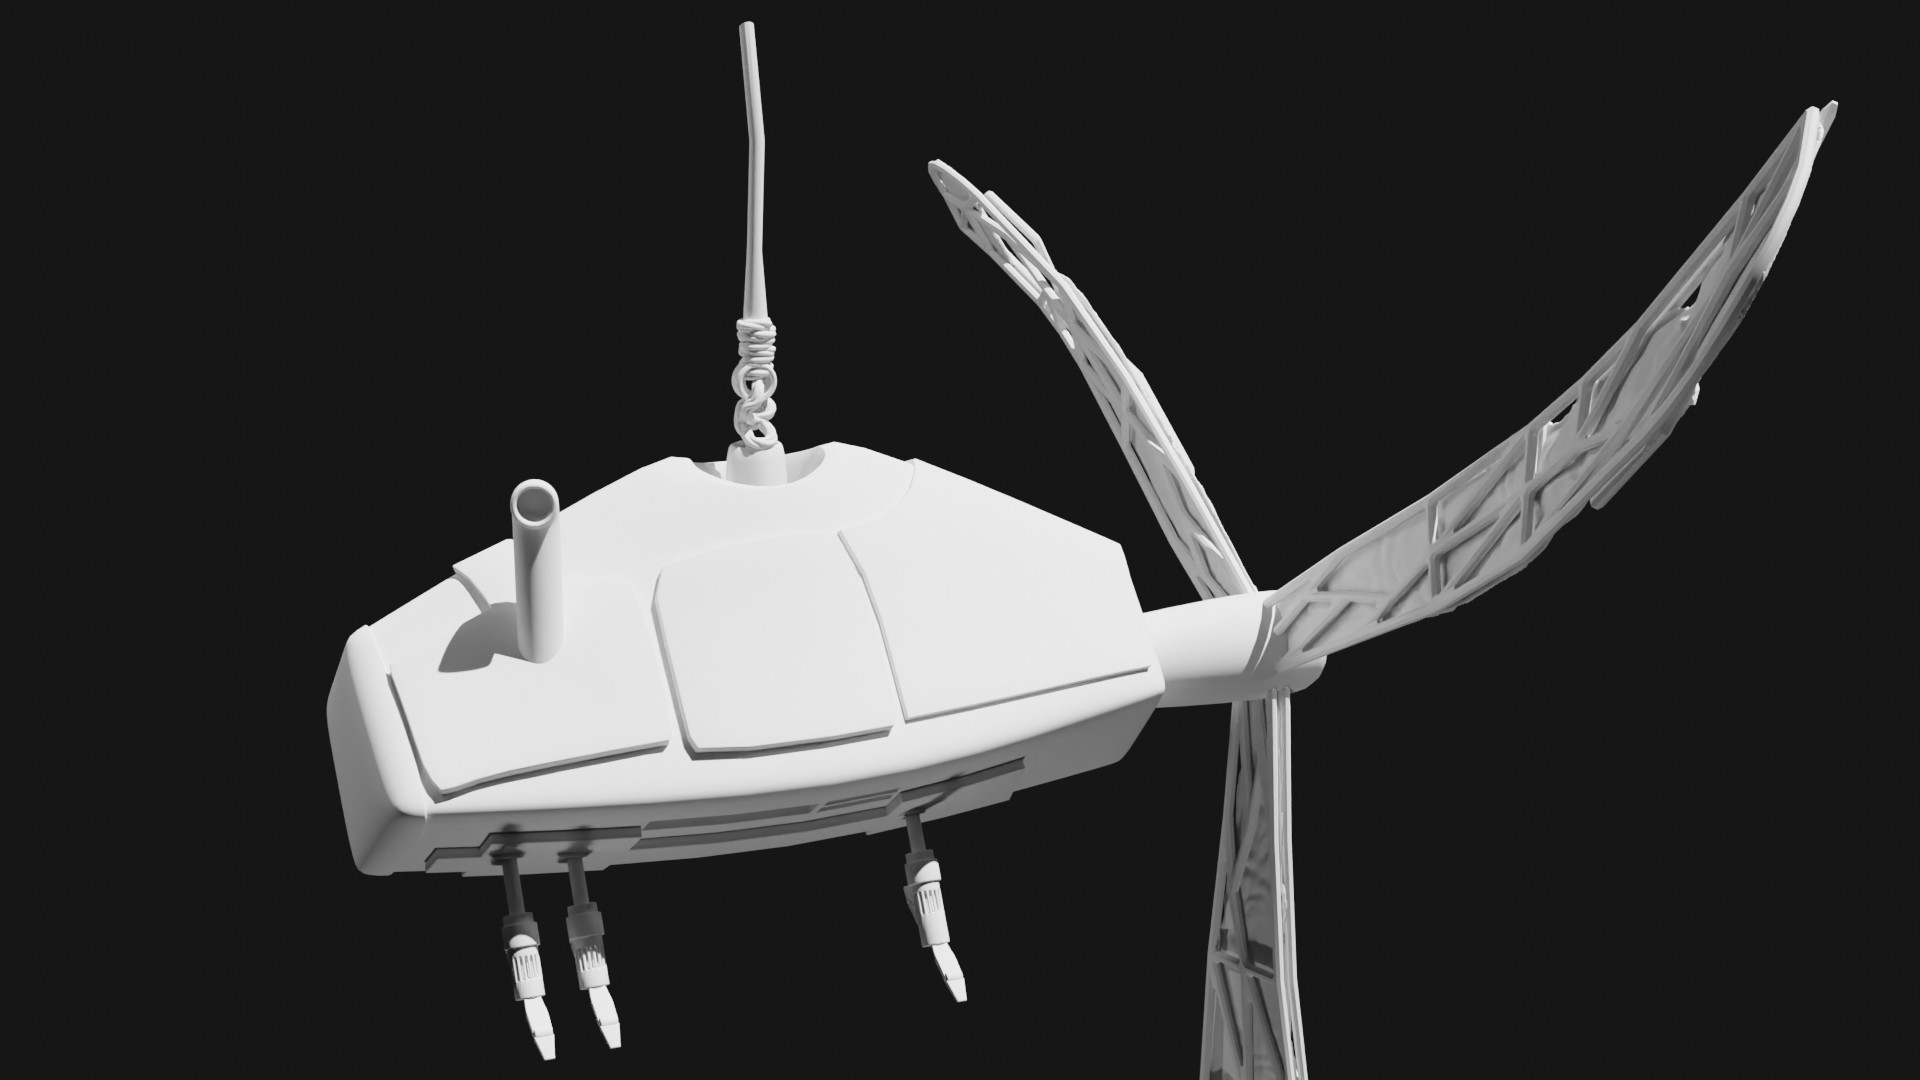
For example, the engine in the back is obviously unique so I broke it down and built it up with all the details I needed.
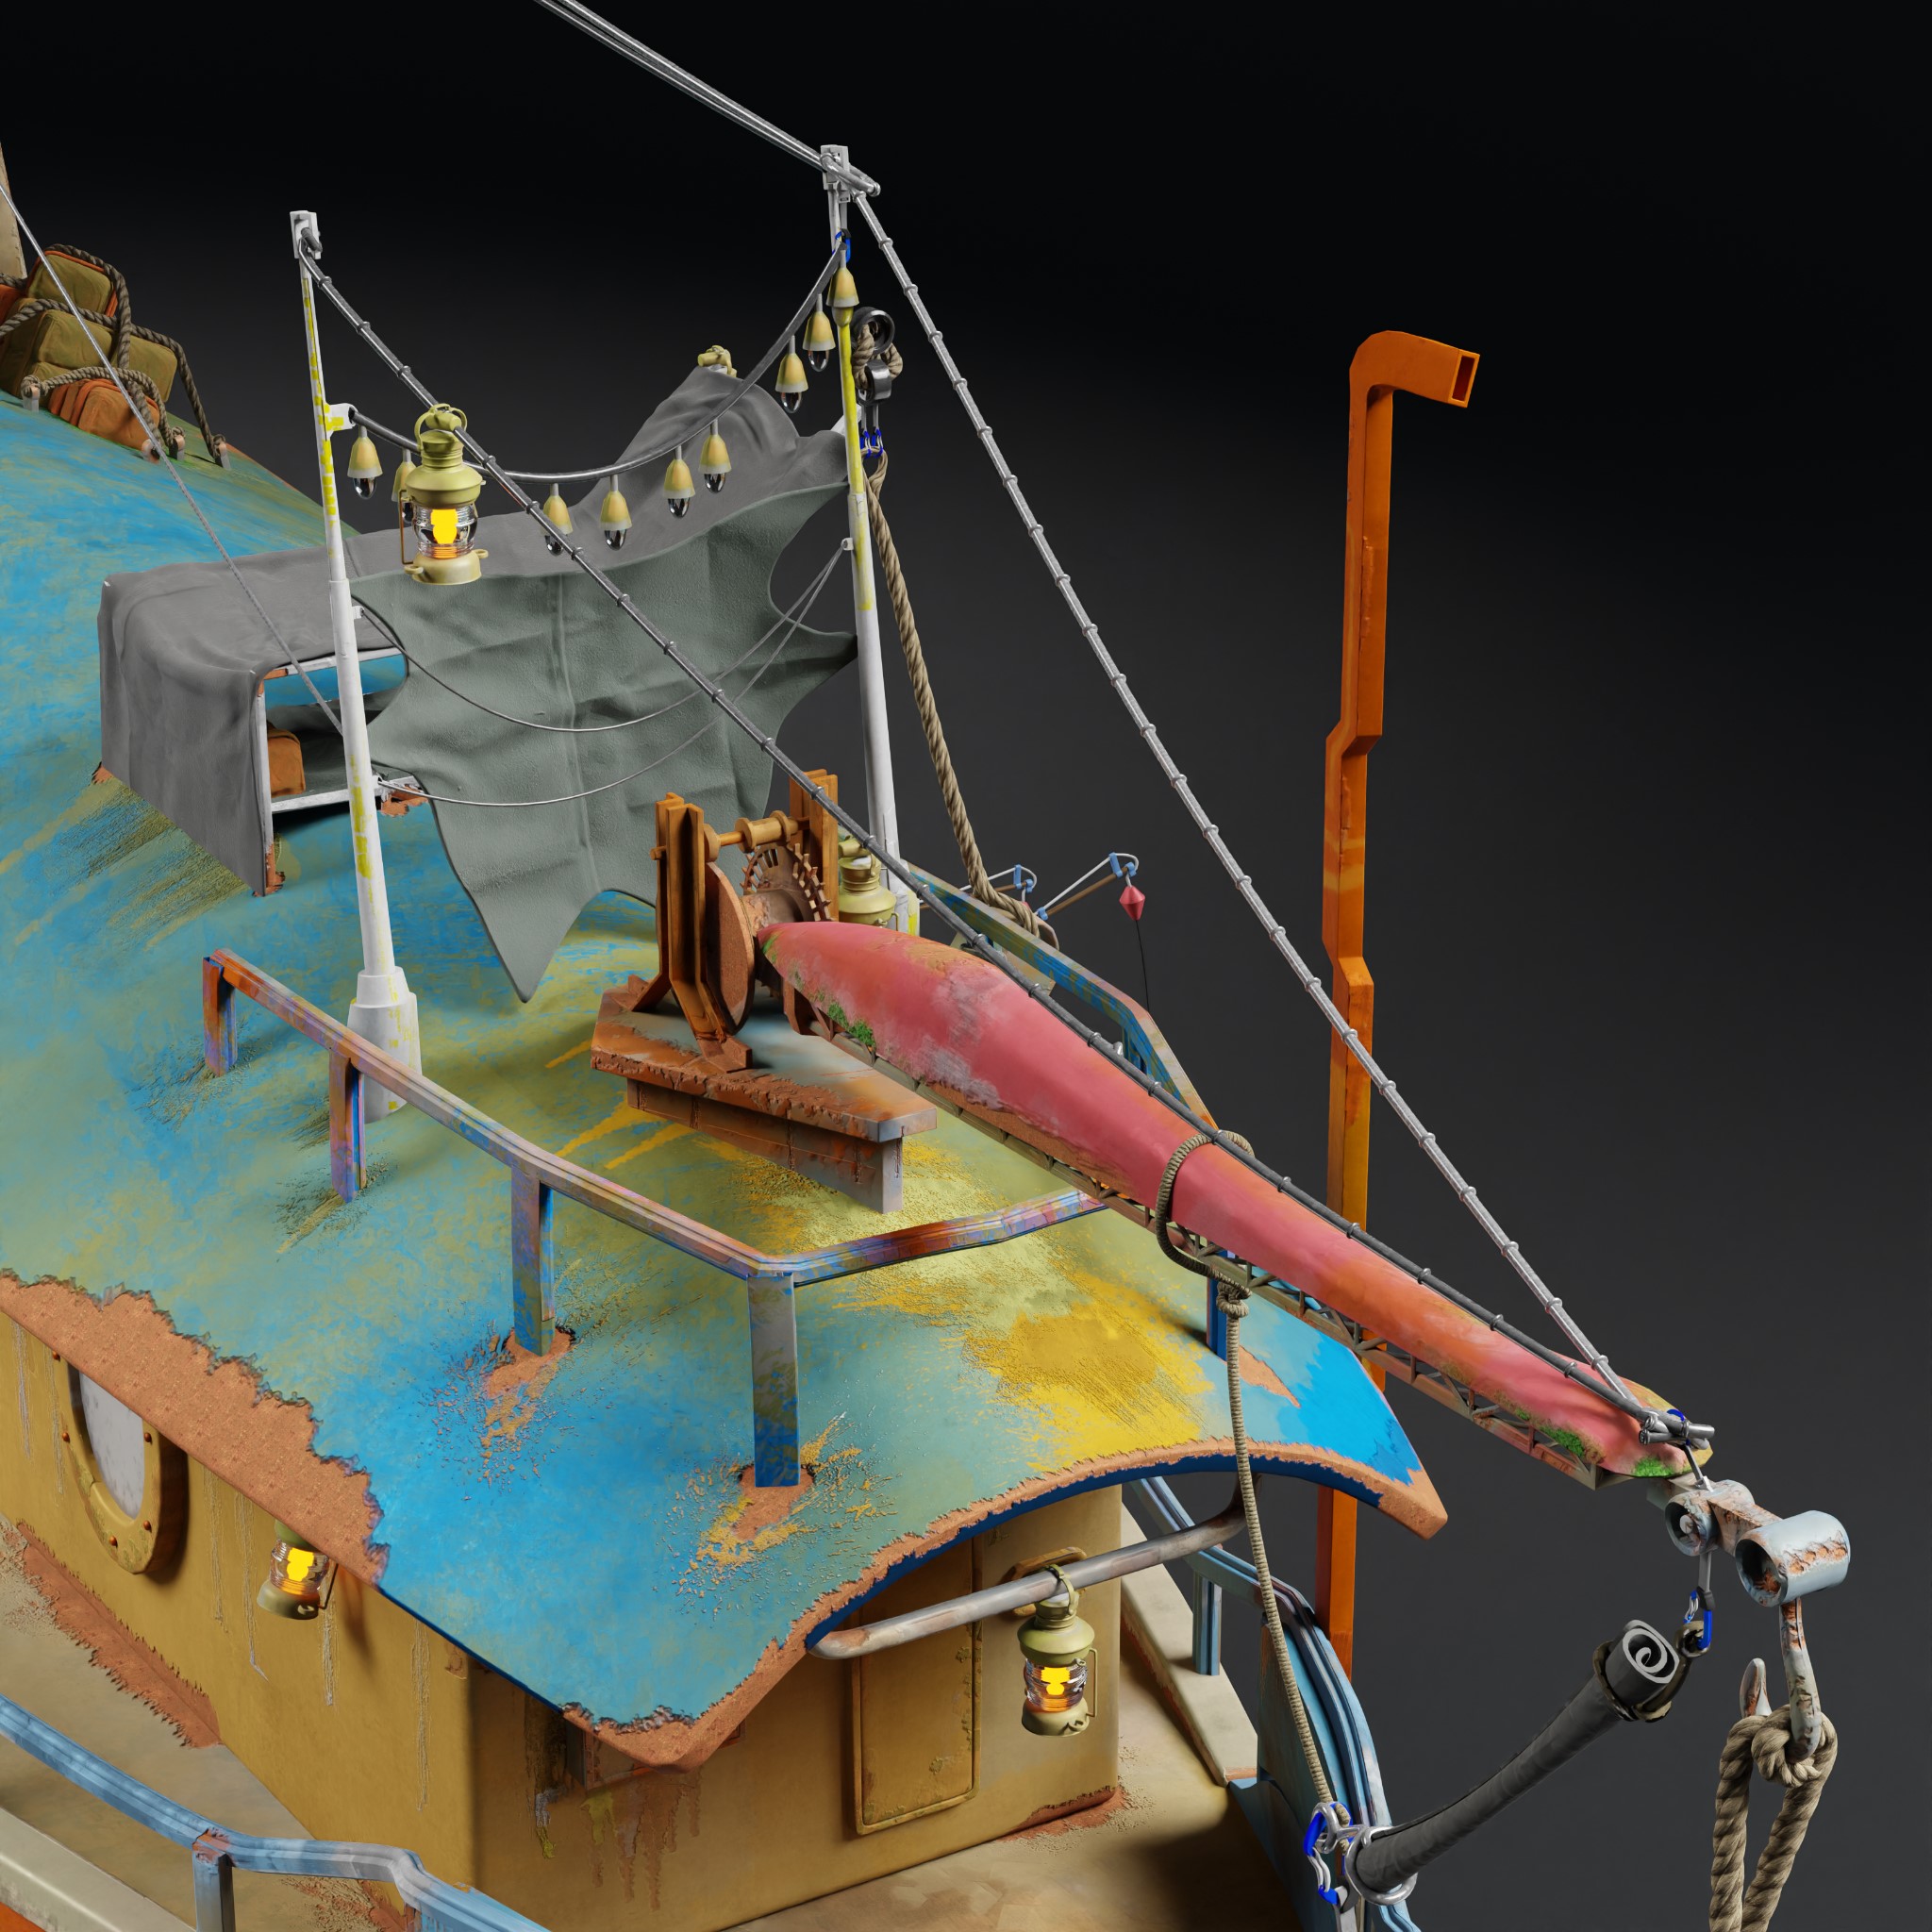
2- If it was reusable, I would finish it early since I’ll just be placing it around when necessary.
This one ties a lot to the ropes I used around the ship.
3- The third type is for all the objects that need to be scattered around the scene but still require further detailing.
In this case, it was mostly the railing, iron bars, doors, and windows.
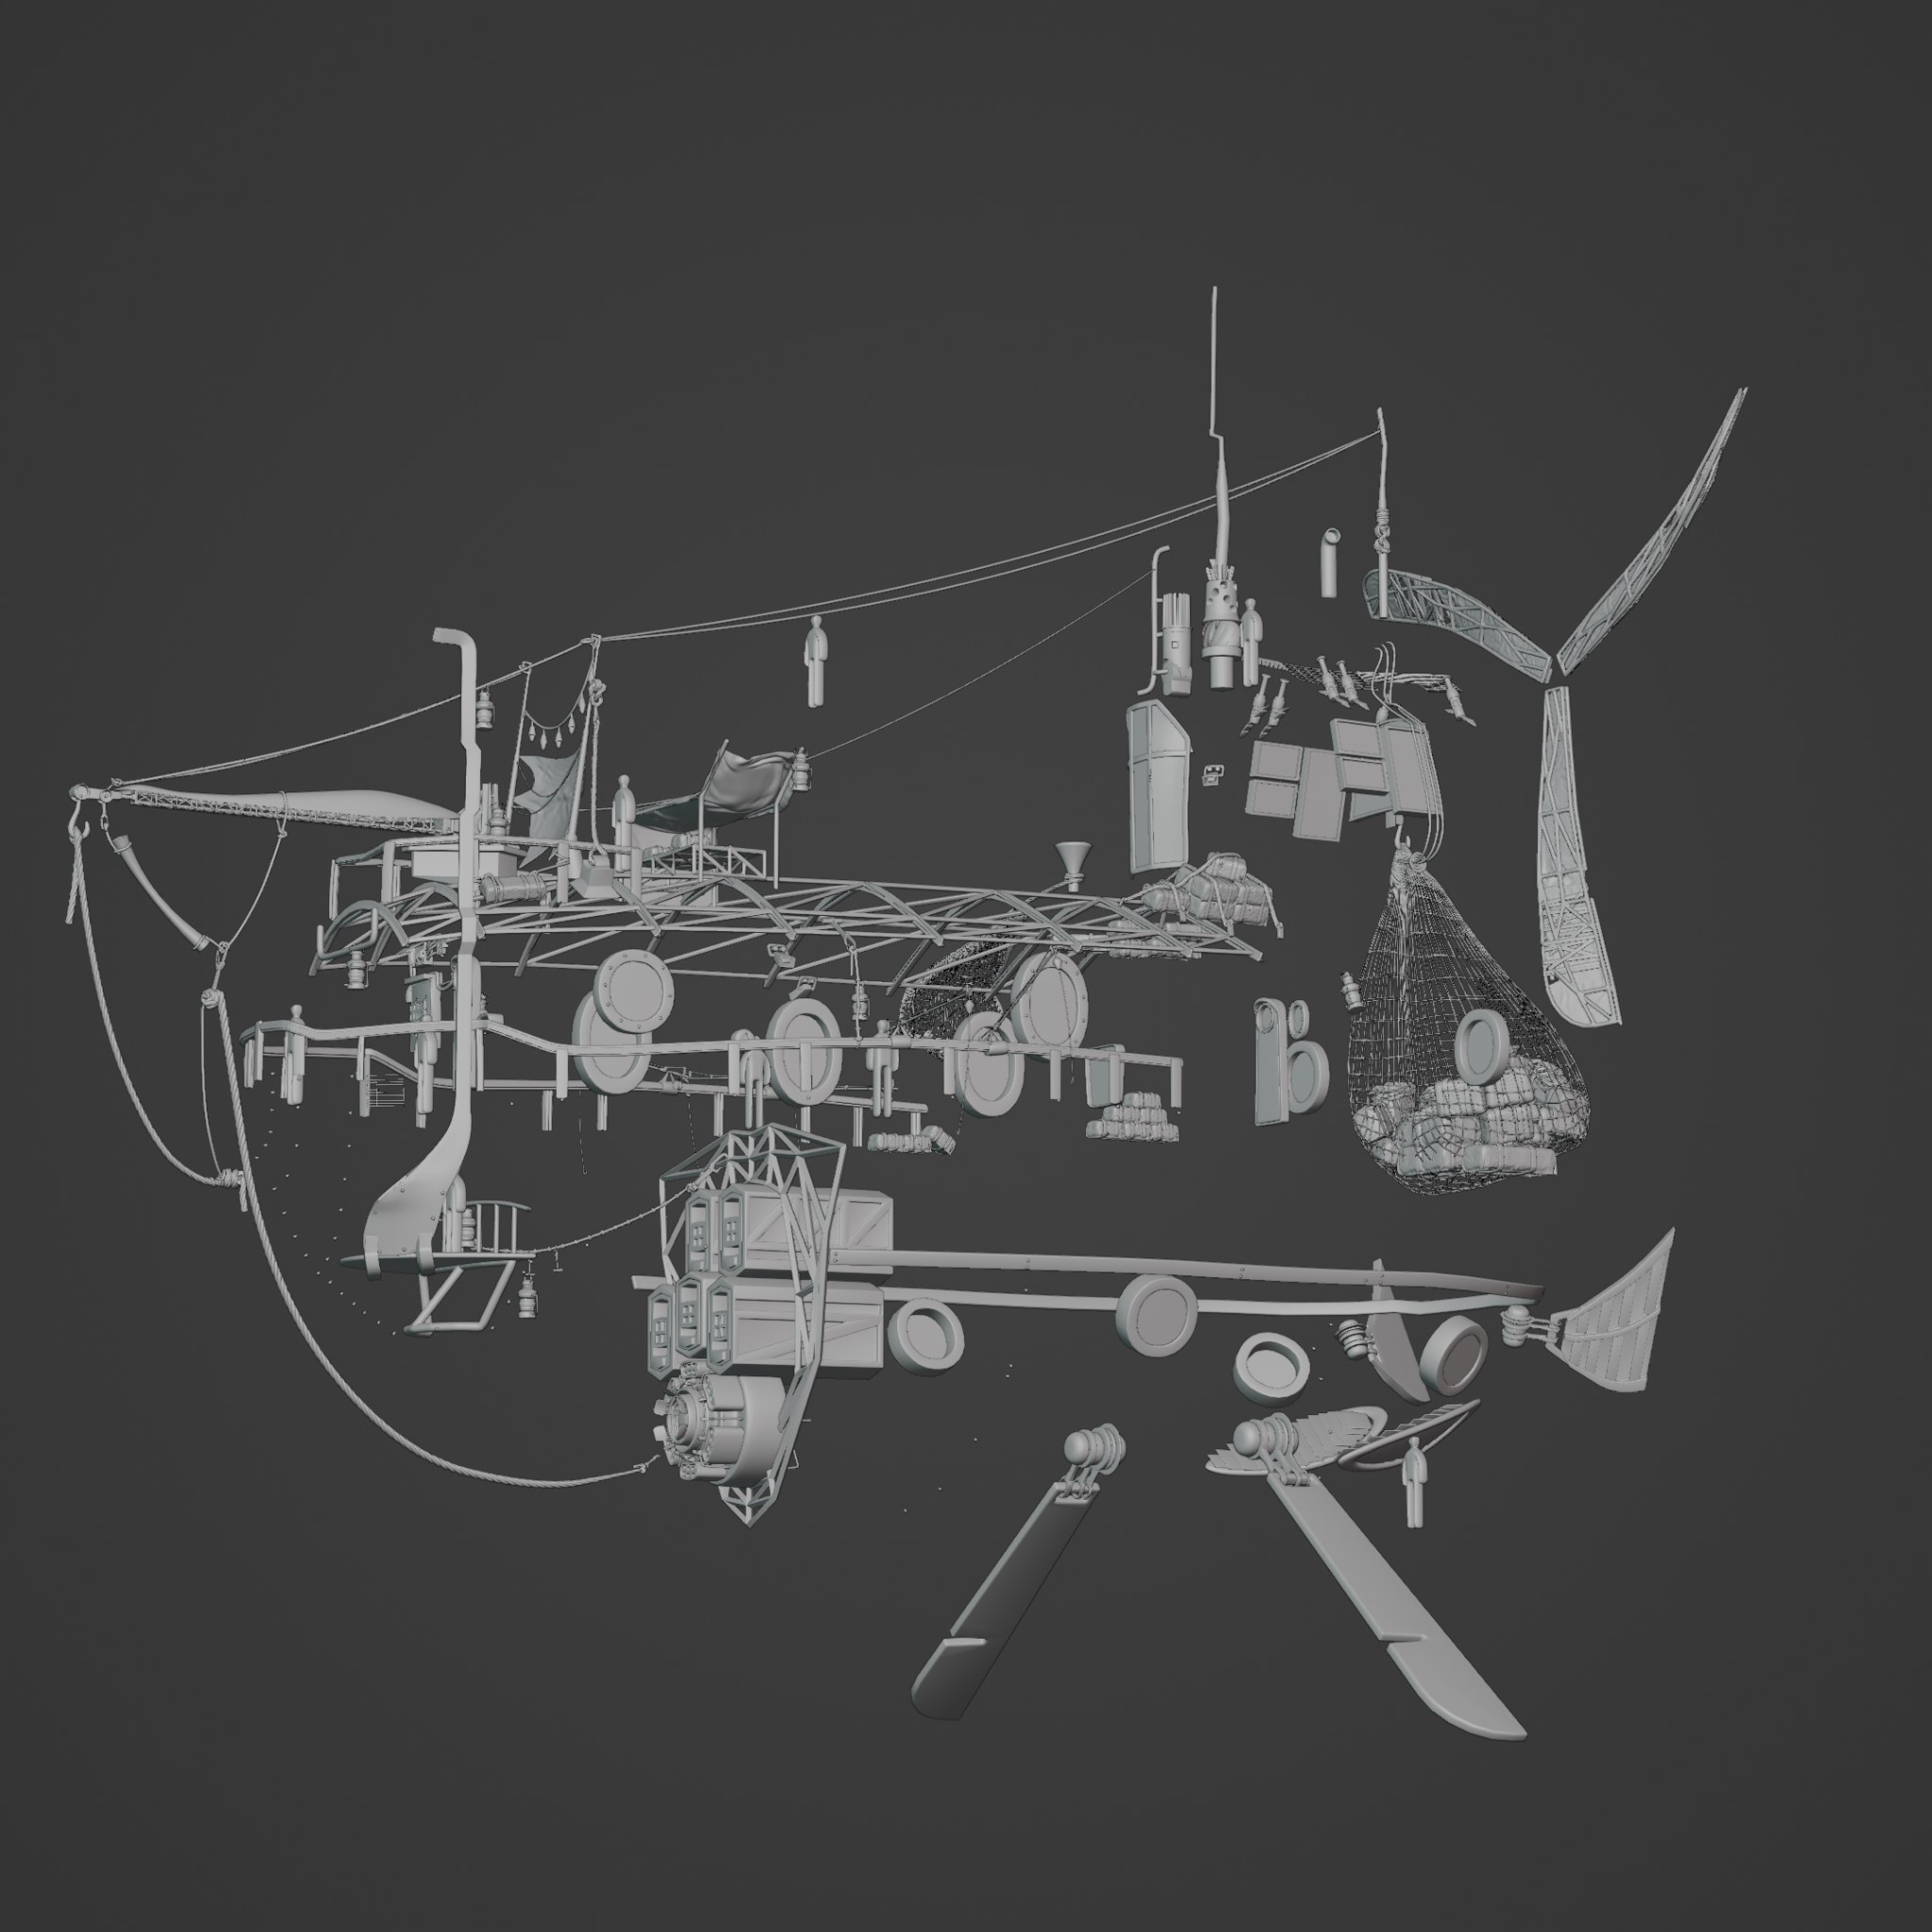
With these types, I found it better to dress the scene and get a feel for things, because once it’s in place, I can edit it, add more details or find new designs. At this point, I needed to add detail and fall back to edit stuff without losing progress.
For UV unwrapping, I usually do it by hand but I already decided to texture-paint the ship. I used auto-unwrapping and it is okay since I’ll be painting over the seams anyway.

It’s not perfect but it saves time.
At this point, I went through the scene and checked to see if everything was correct because I don’t intend to change any object further—this isn’t a good strategy because iteration is key to good art.


TEXTURING
For this part, I broke down the shader that I built to hand-paint the models.
The node setup is a lot but grouped together nicely.
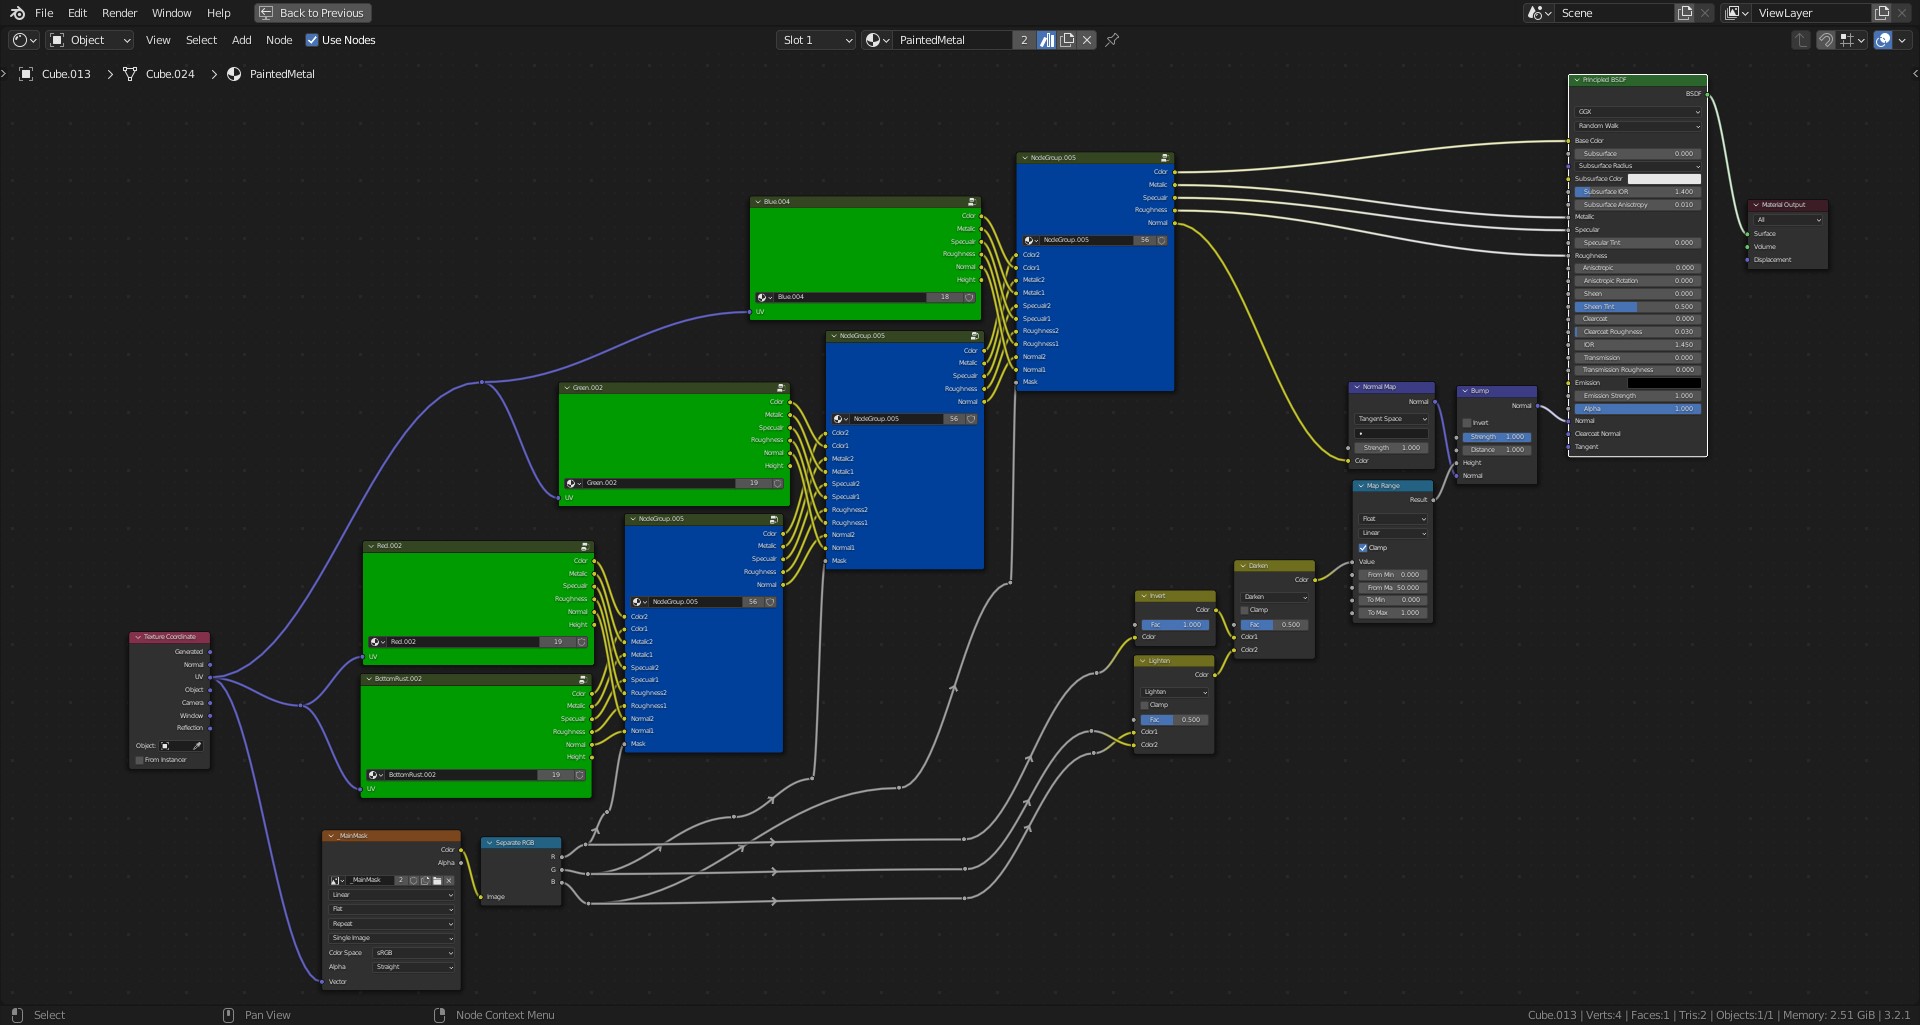
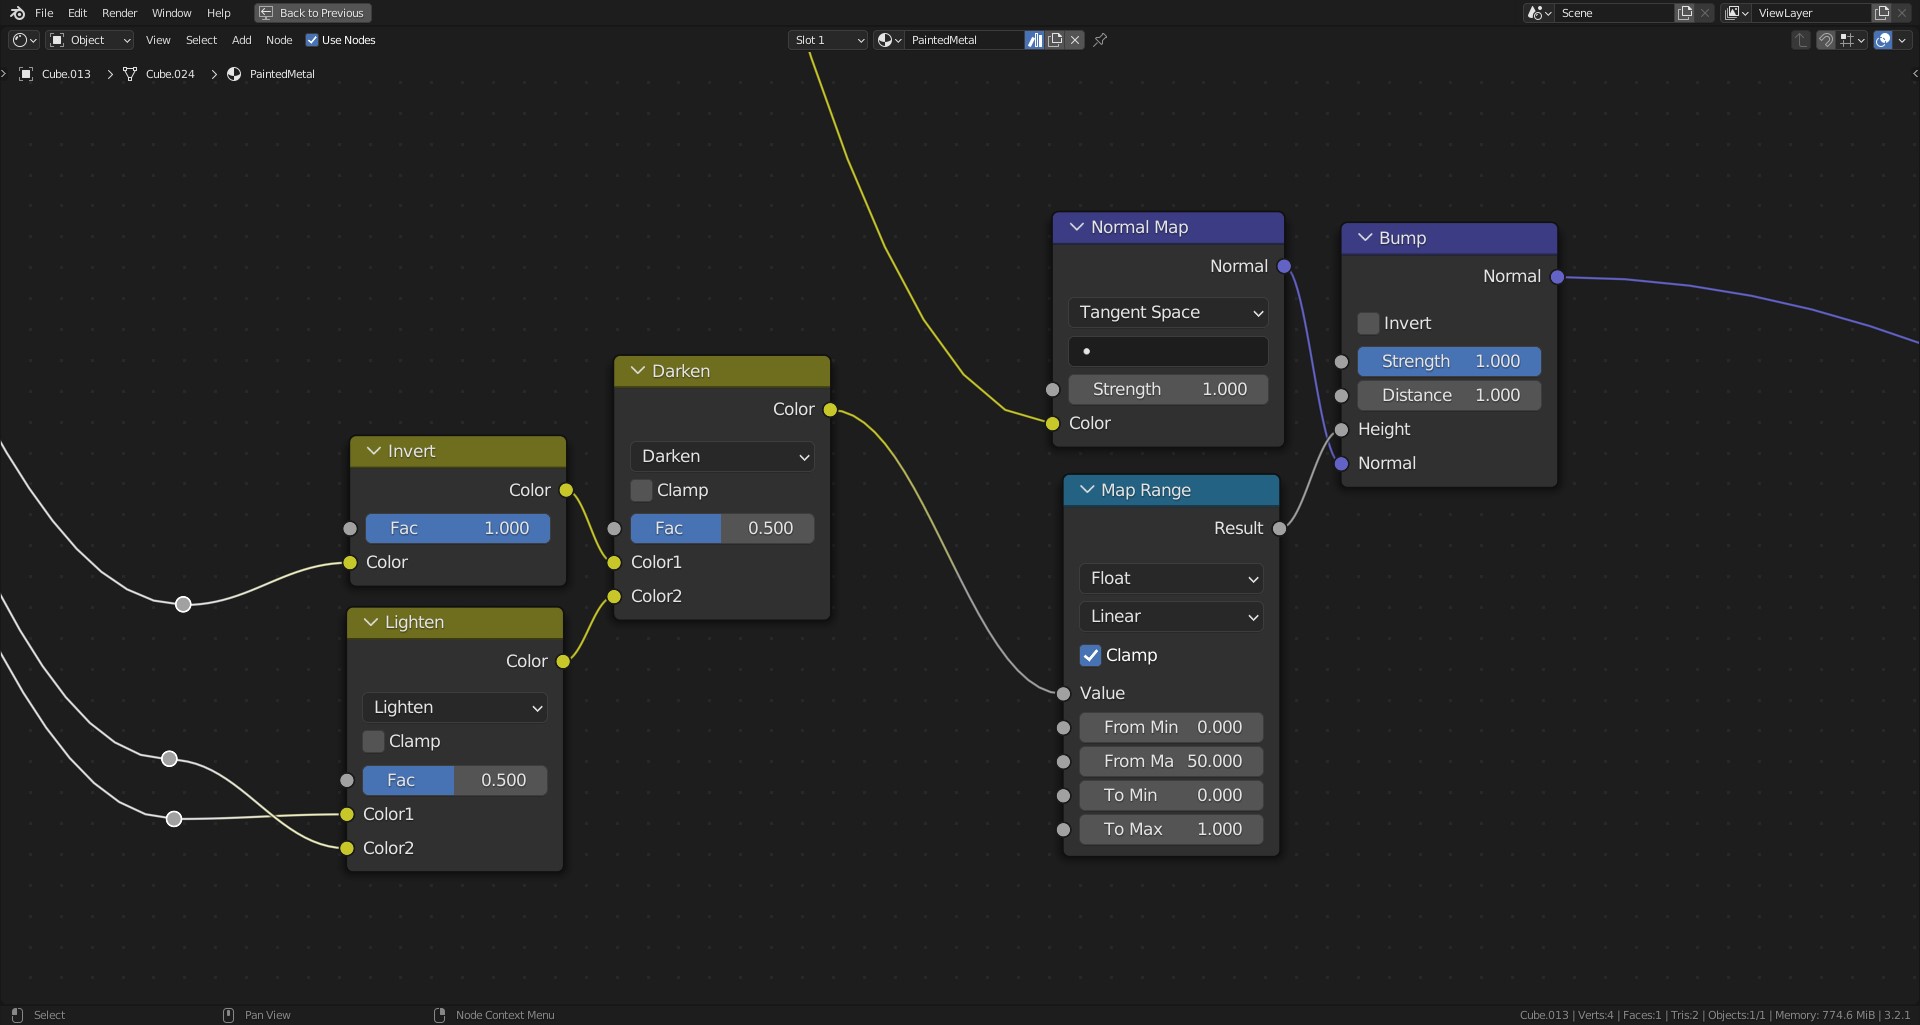
This is the main shader. It is a simplified version just so that I can break down what’s happening.
Below are the green groups. They are the texture sets (albedo, metallic… normal).
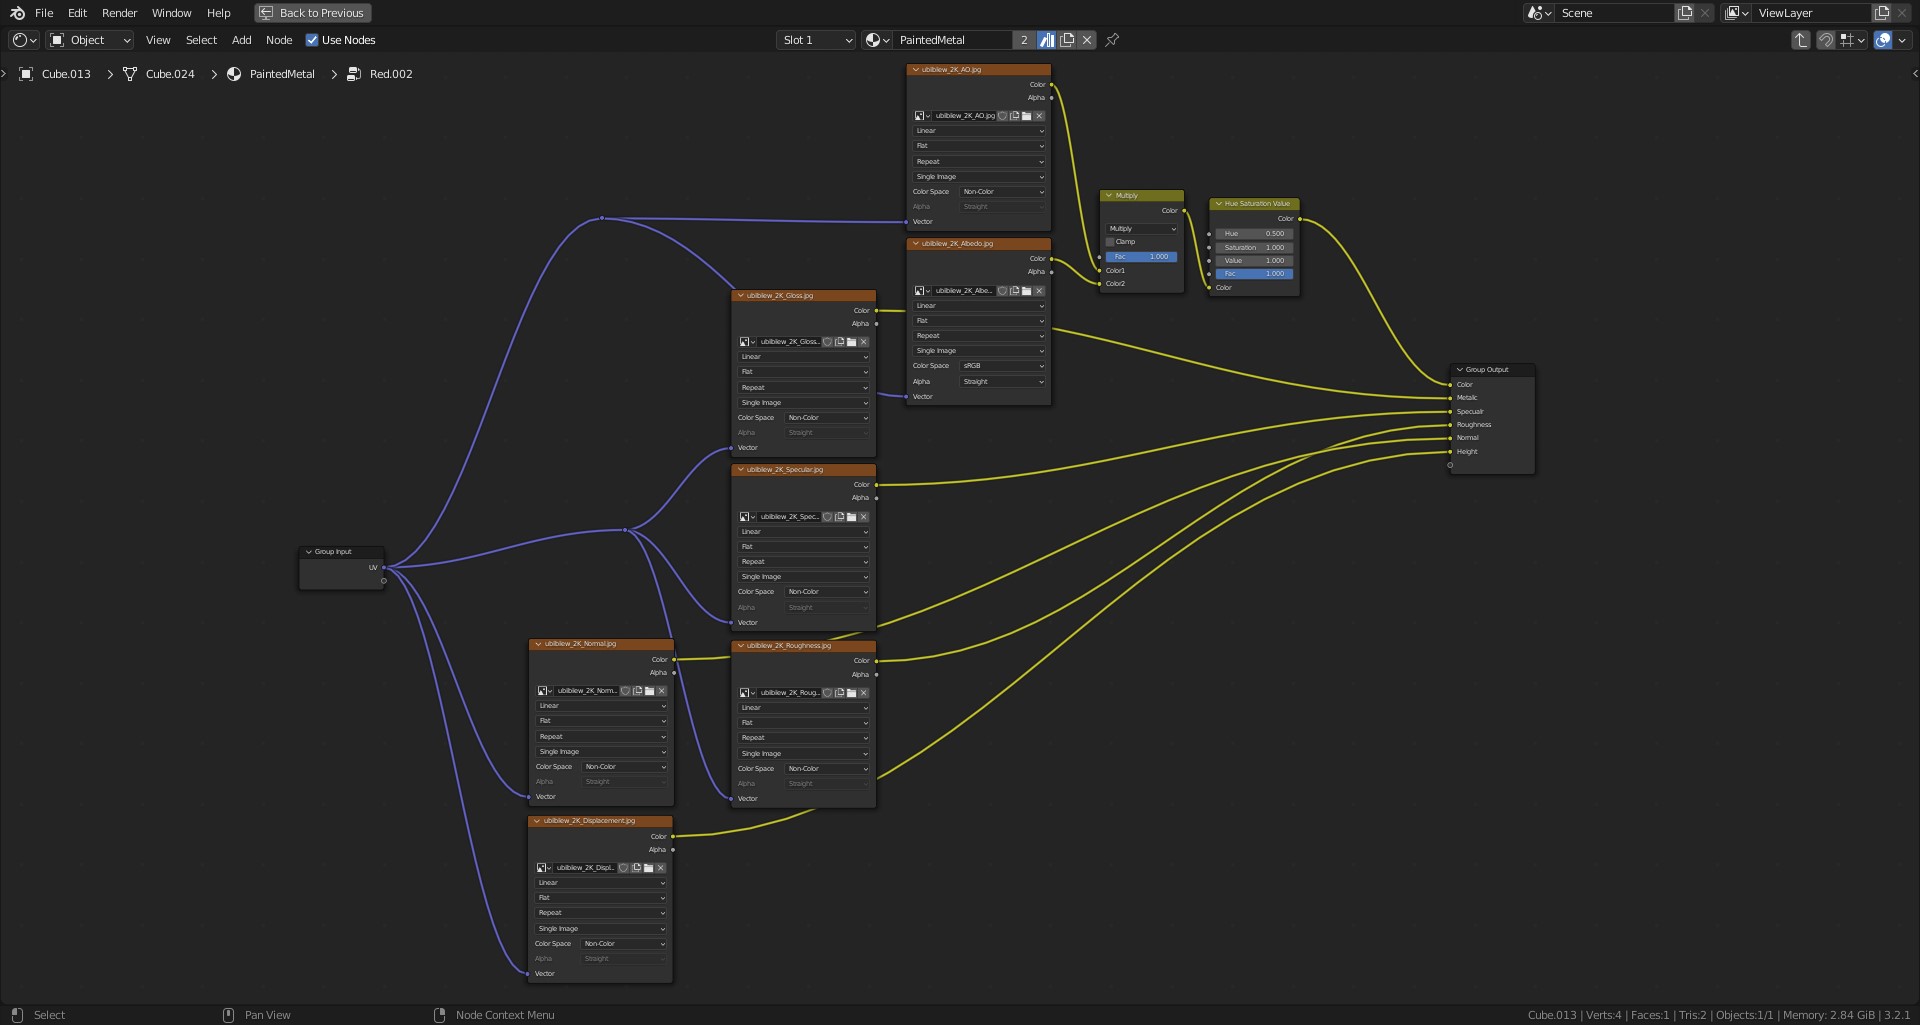
I have 4 groups which gave me 4 materials to paint.
Below are the blue groups, which are just big mixers with a mask.
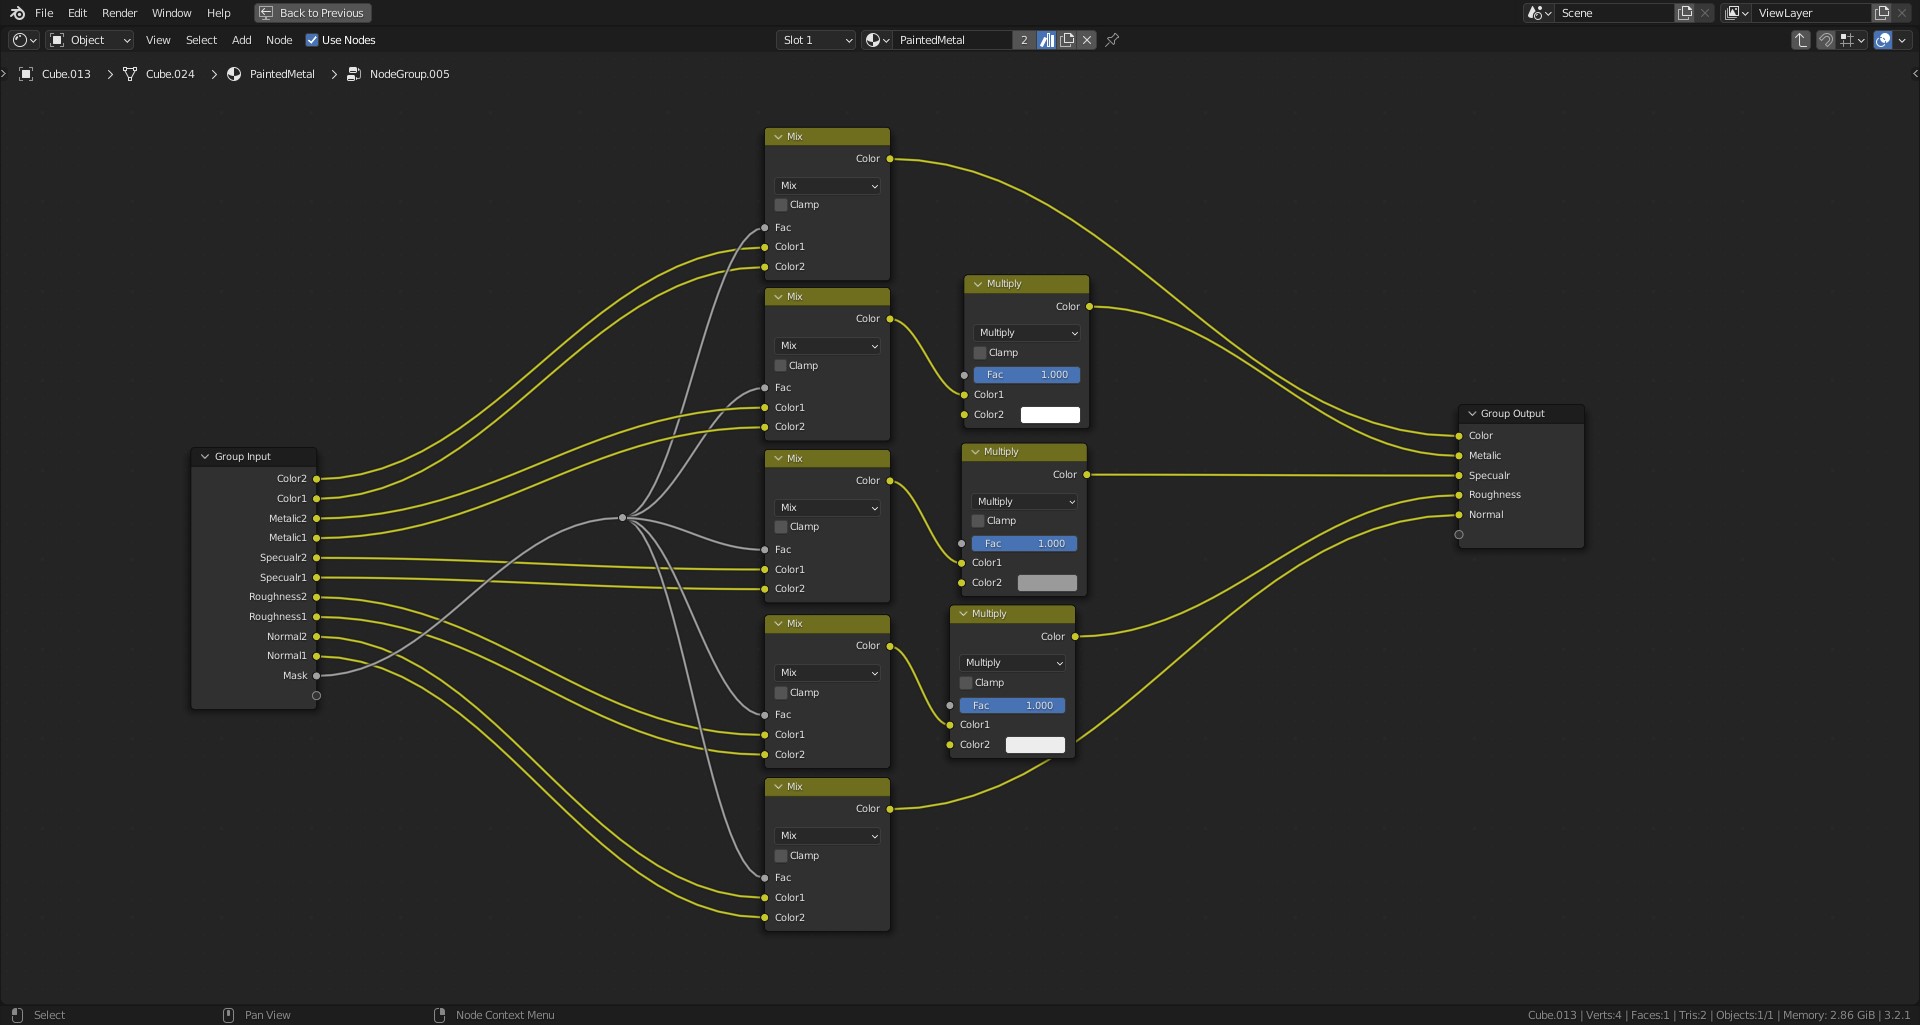
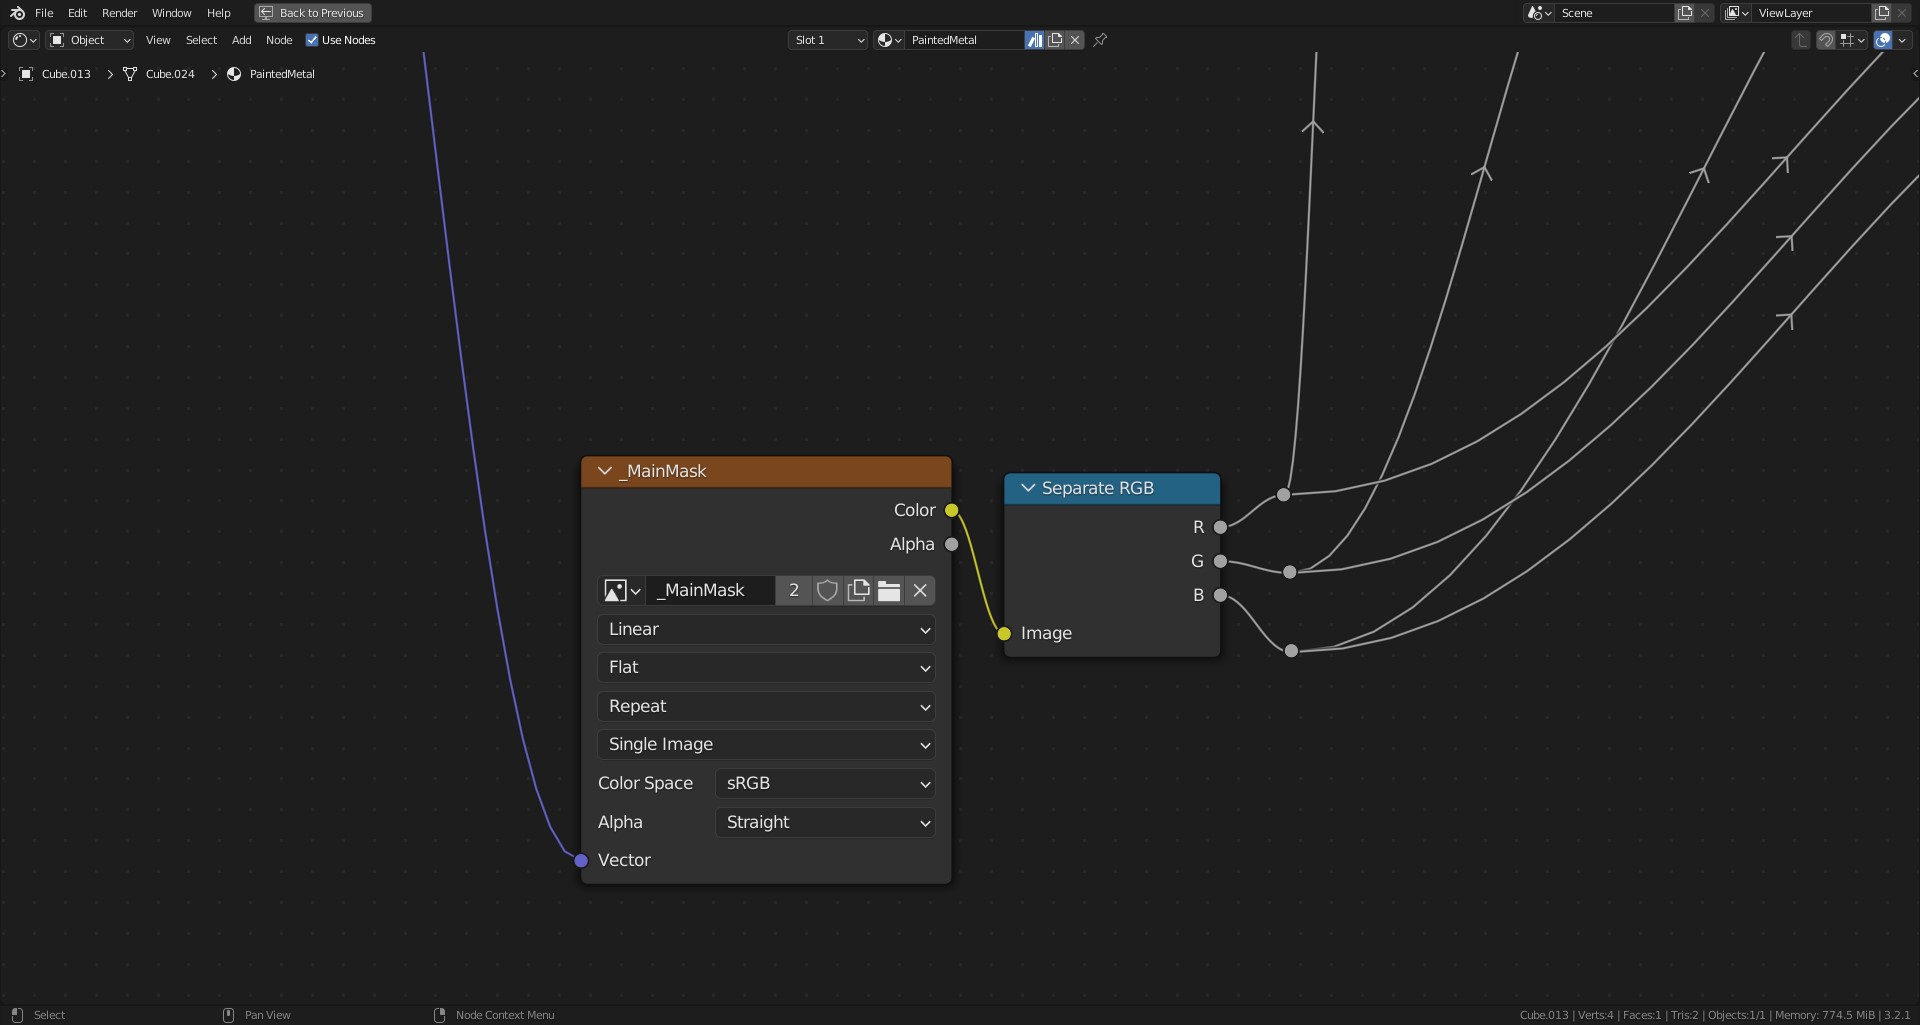
And I have a texture which I use as a mask. I separated the main channels’ RGB as masks for the mixers above.
Lastly, I have this bit of node setup so that I can stack up the materials, like having rust on the bottom and moss at the top layer, making it more believable.

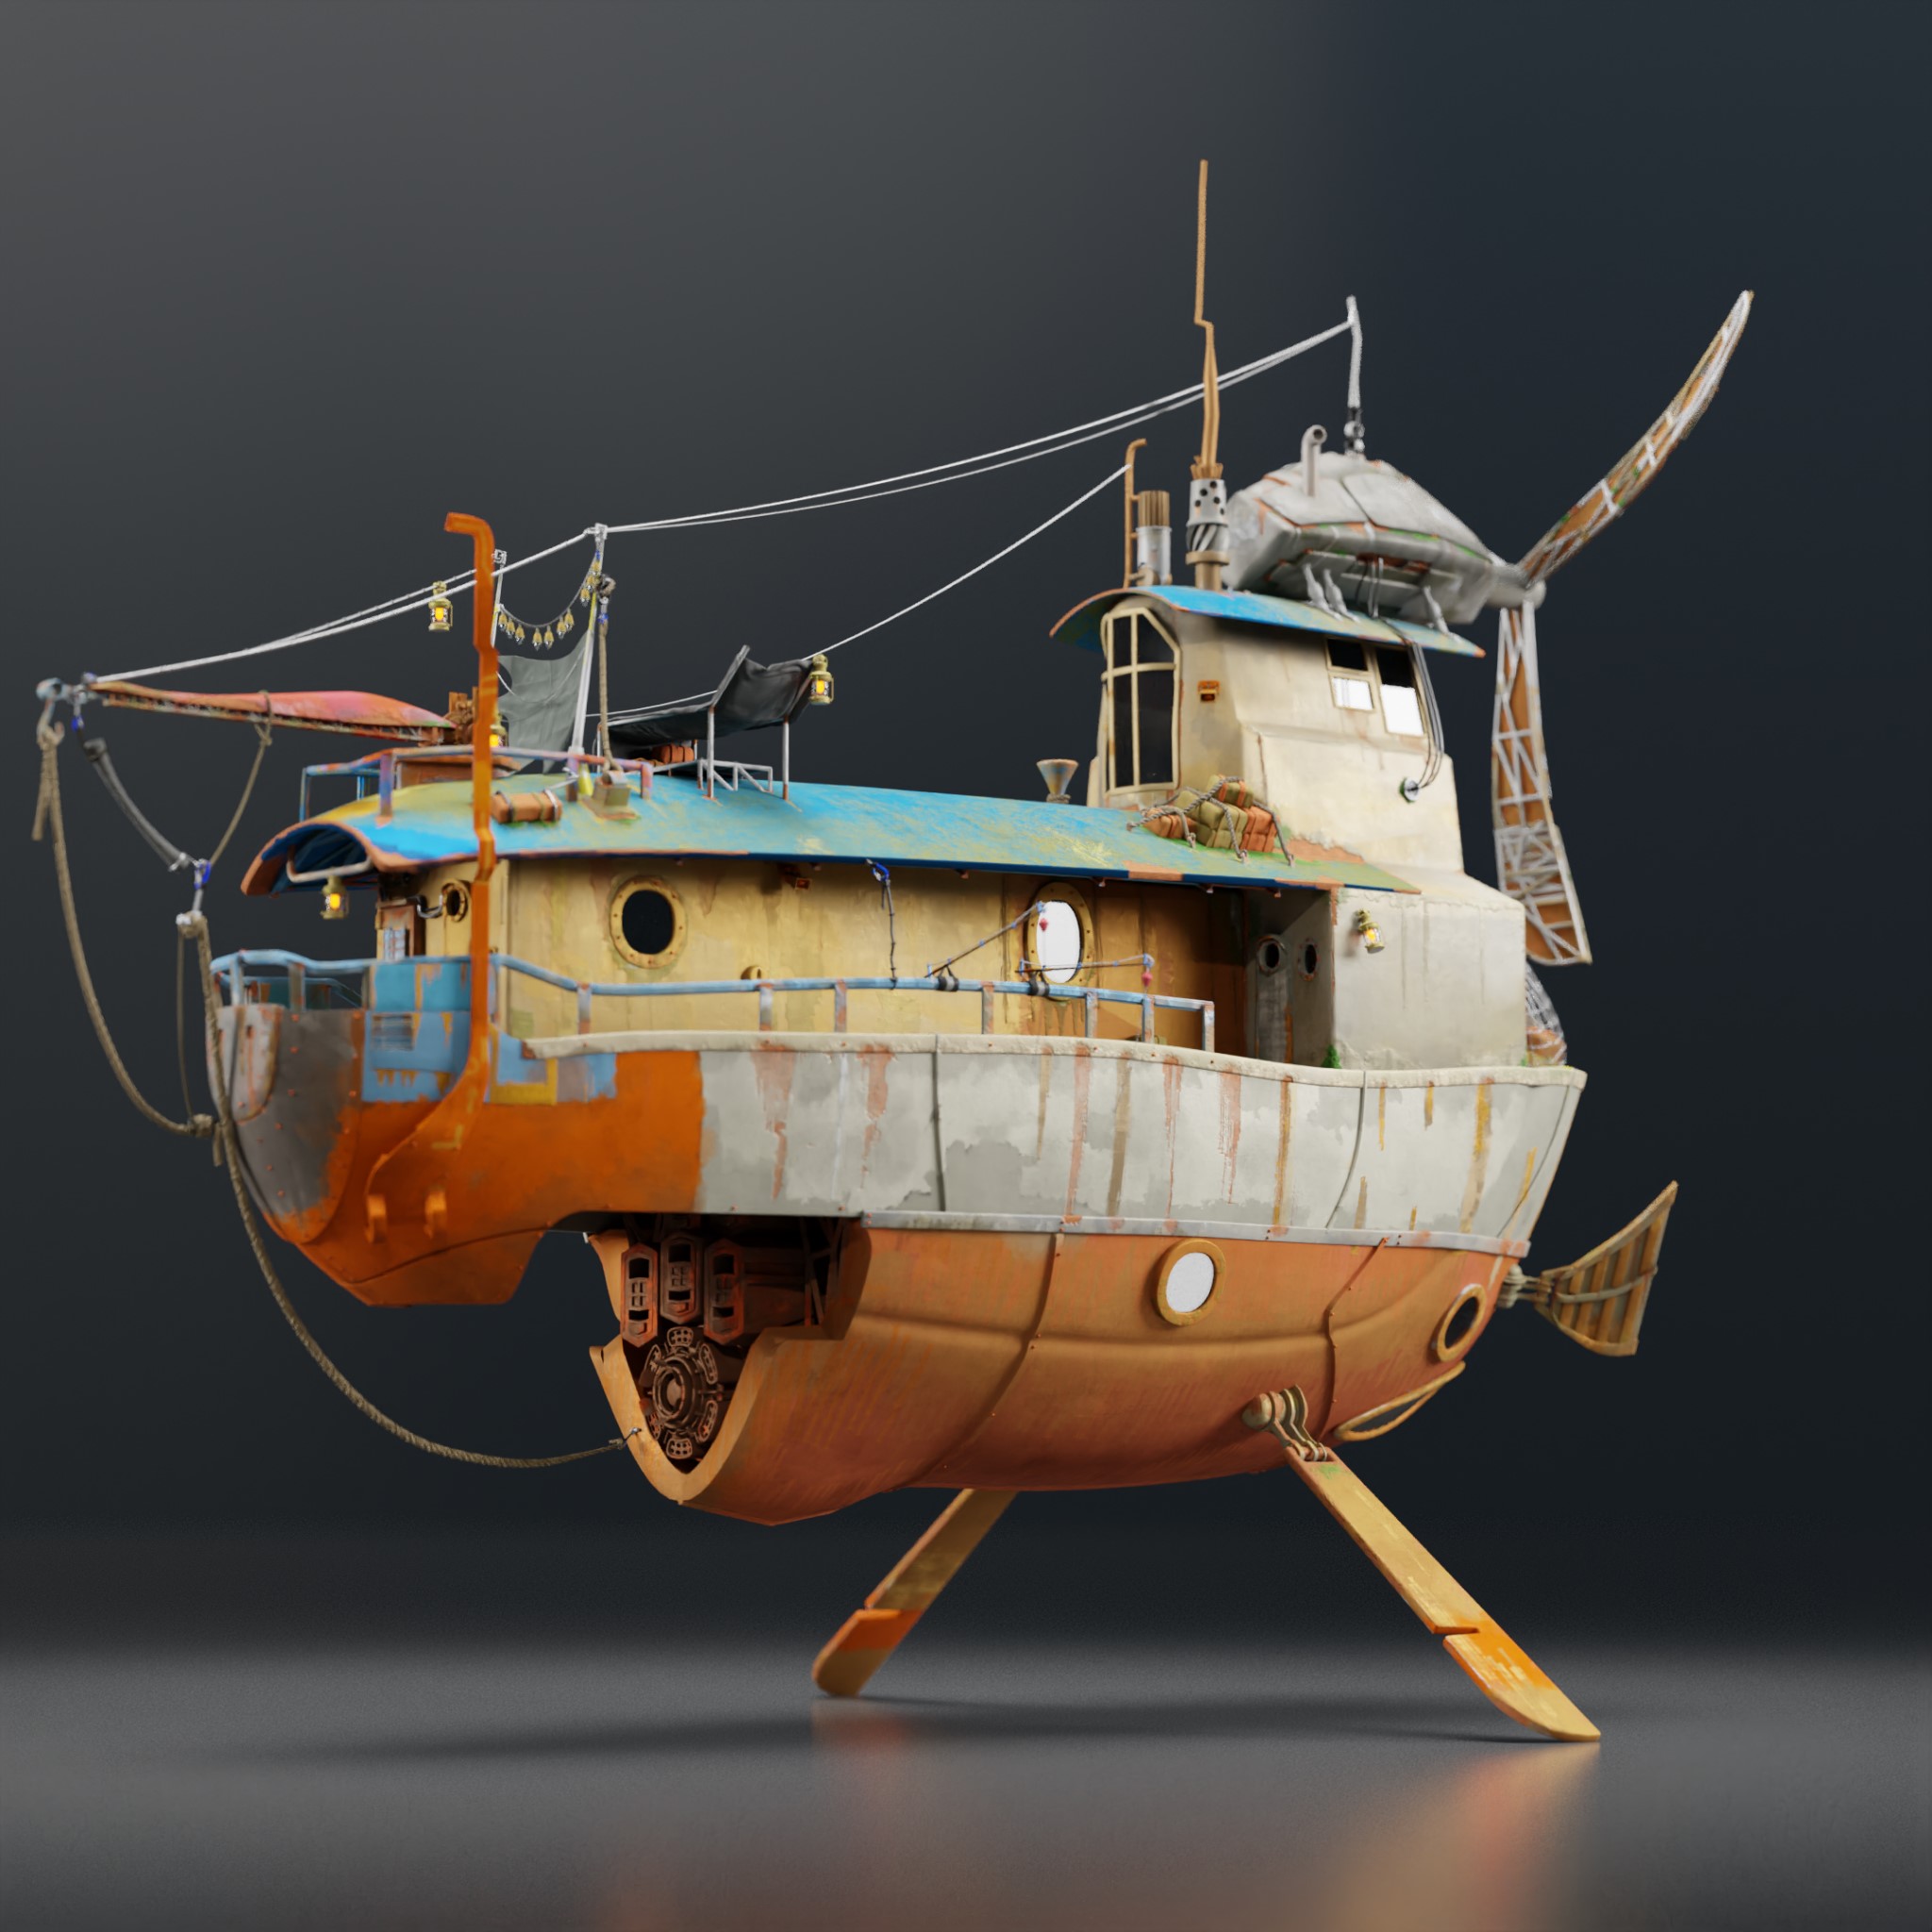
And this is how I painted most of the models in the scene.

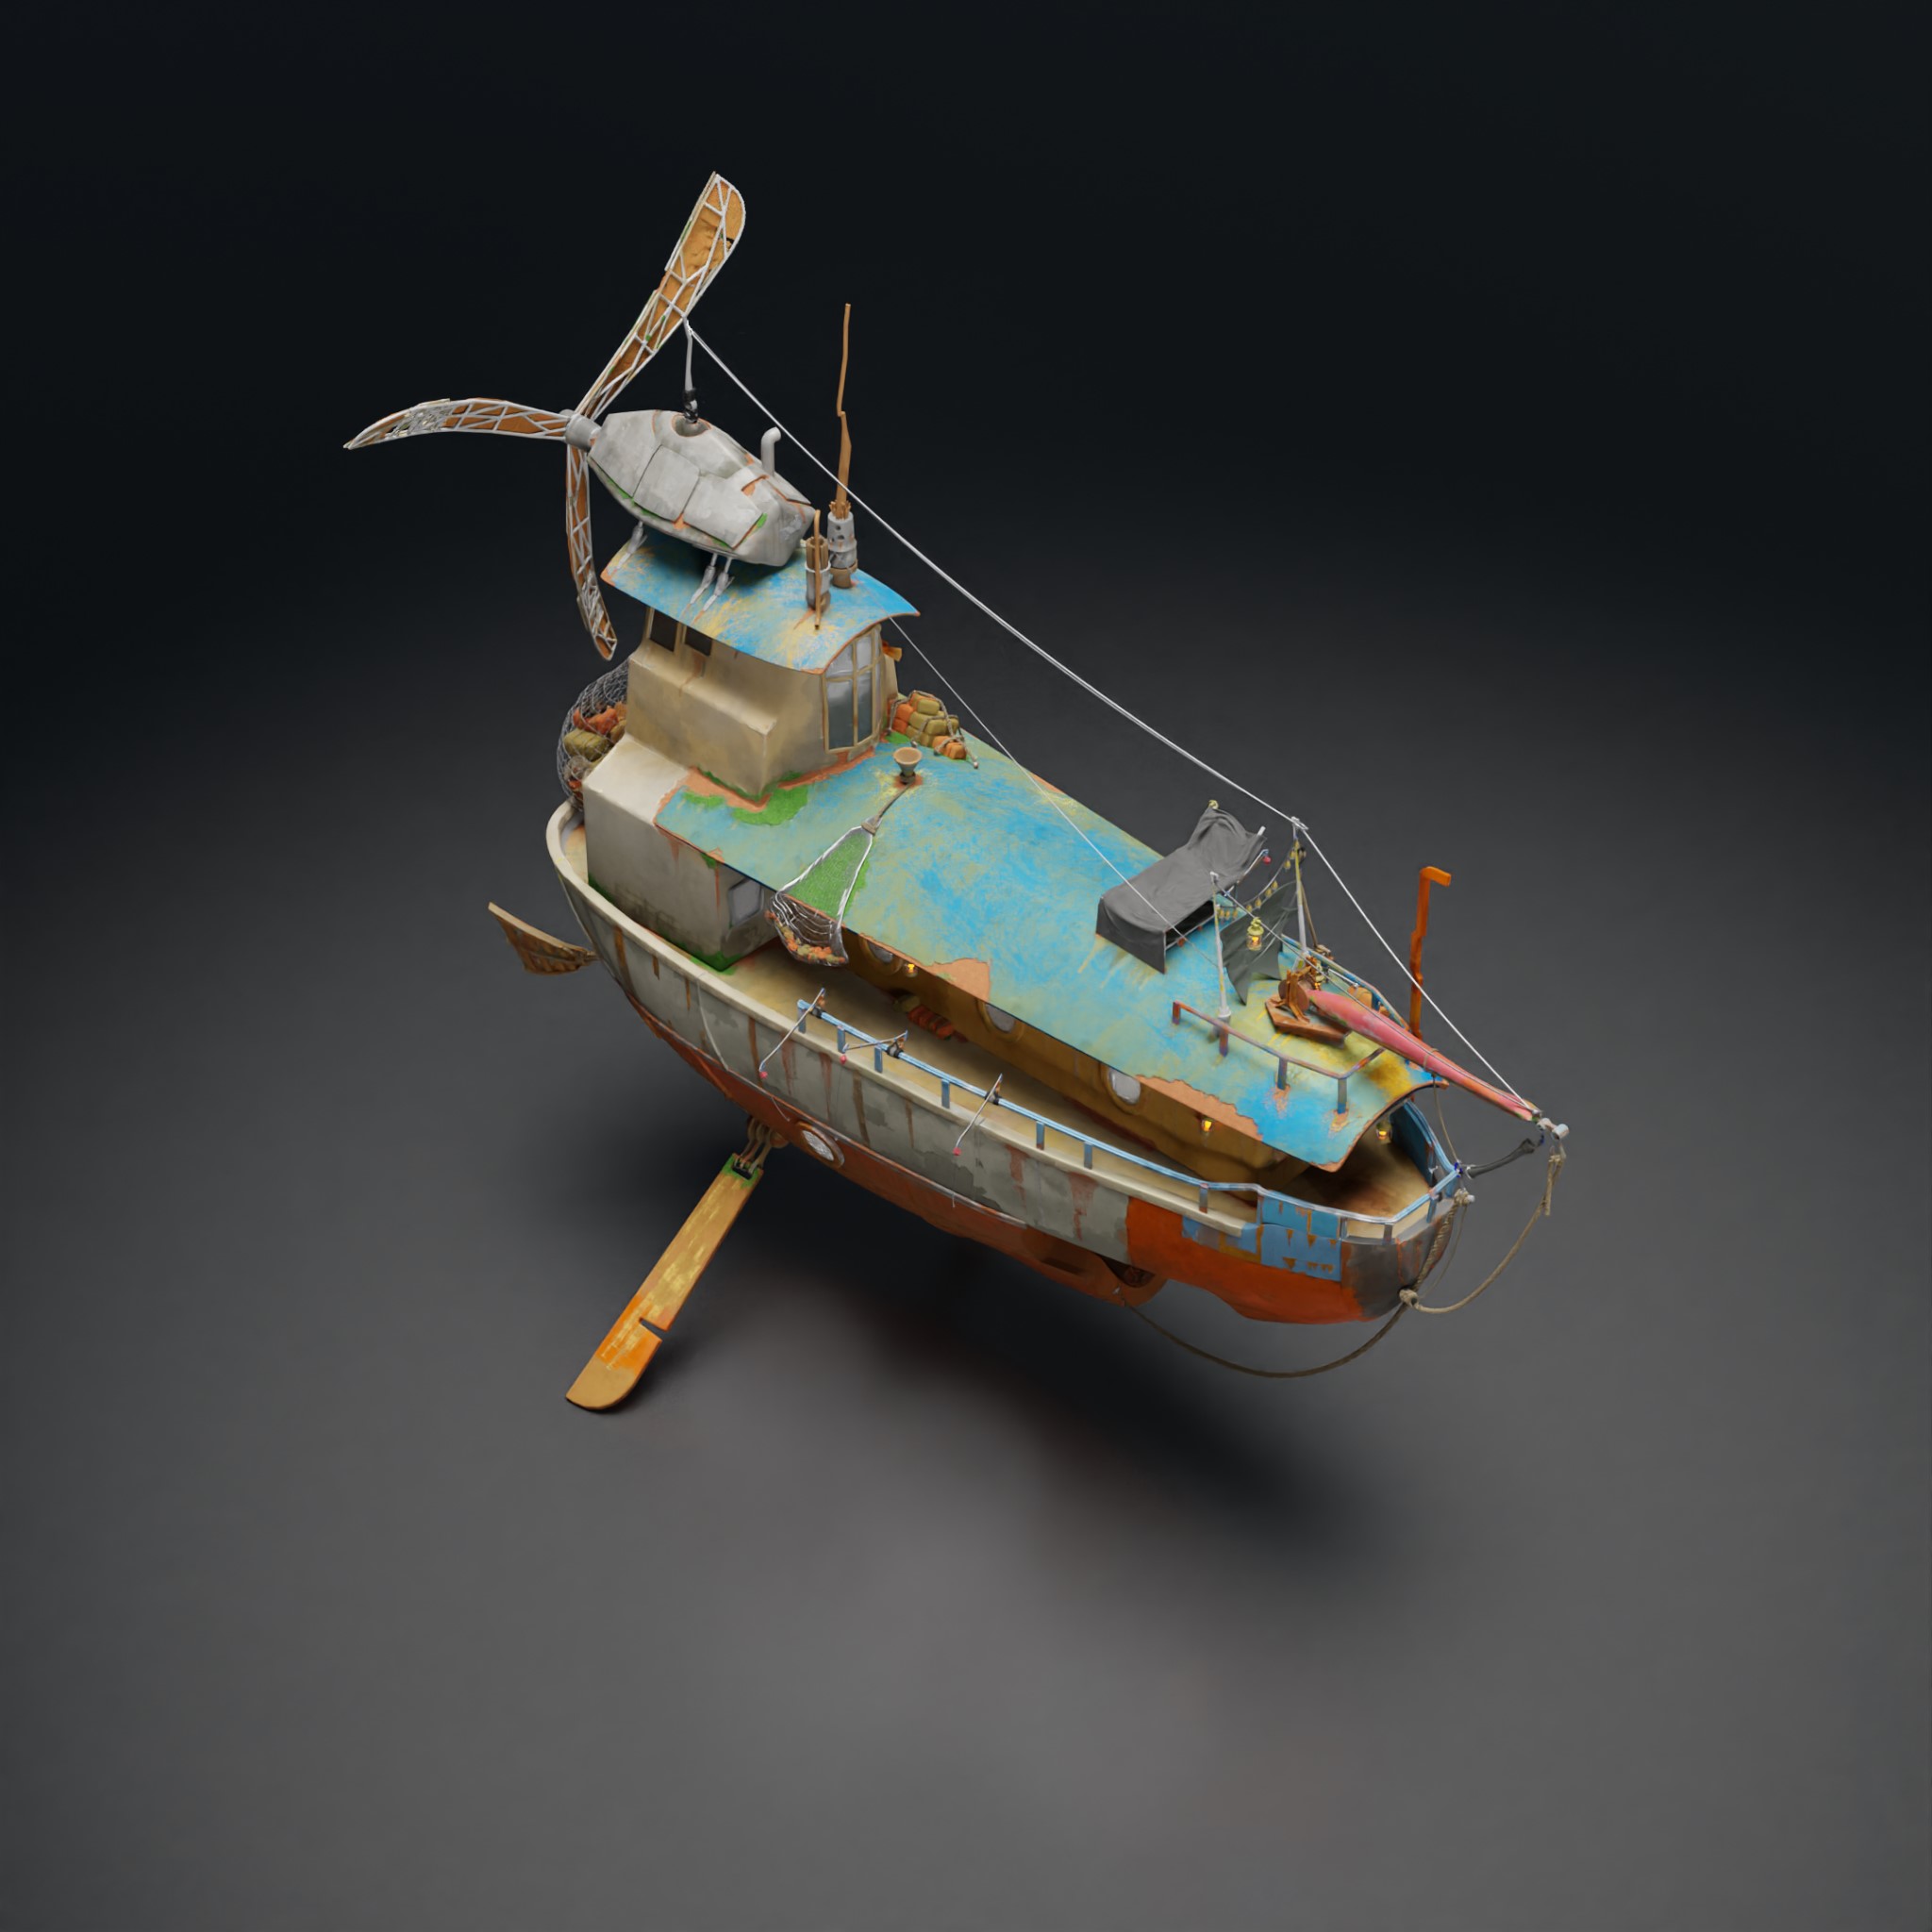
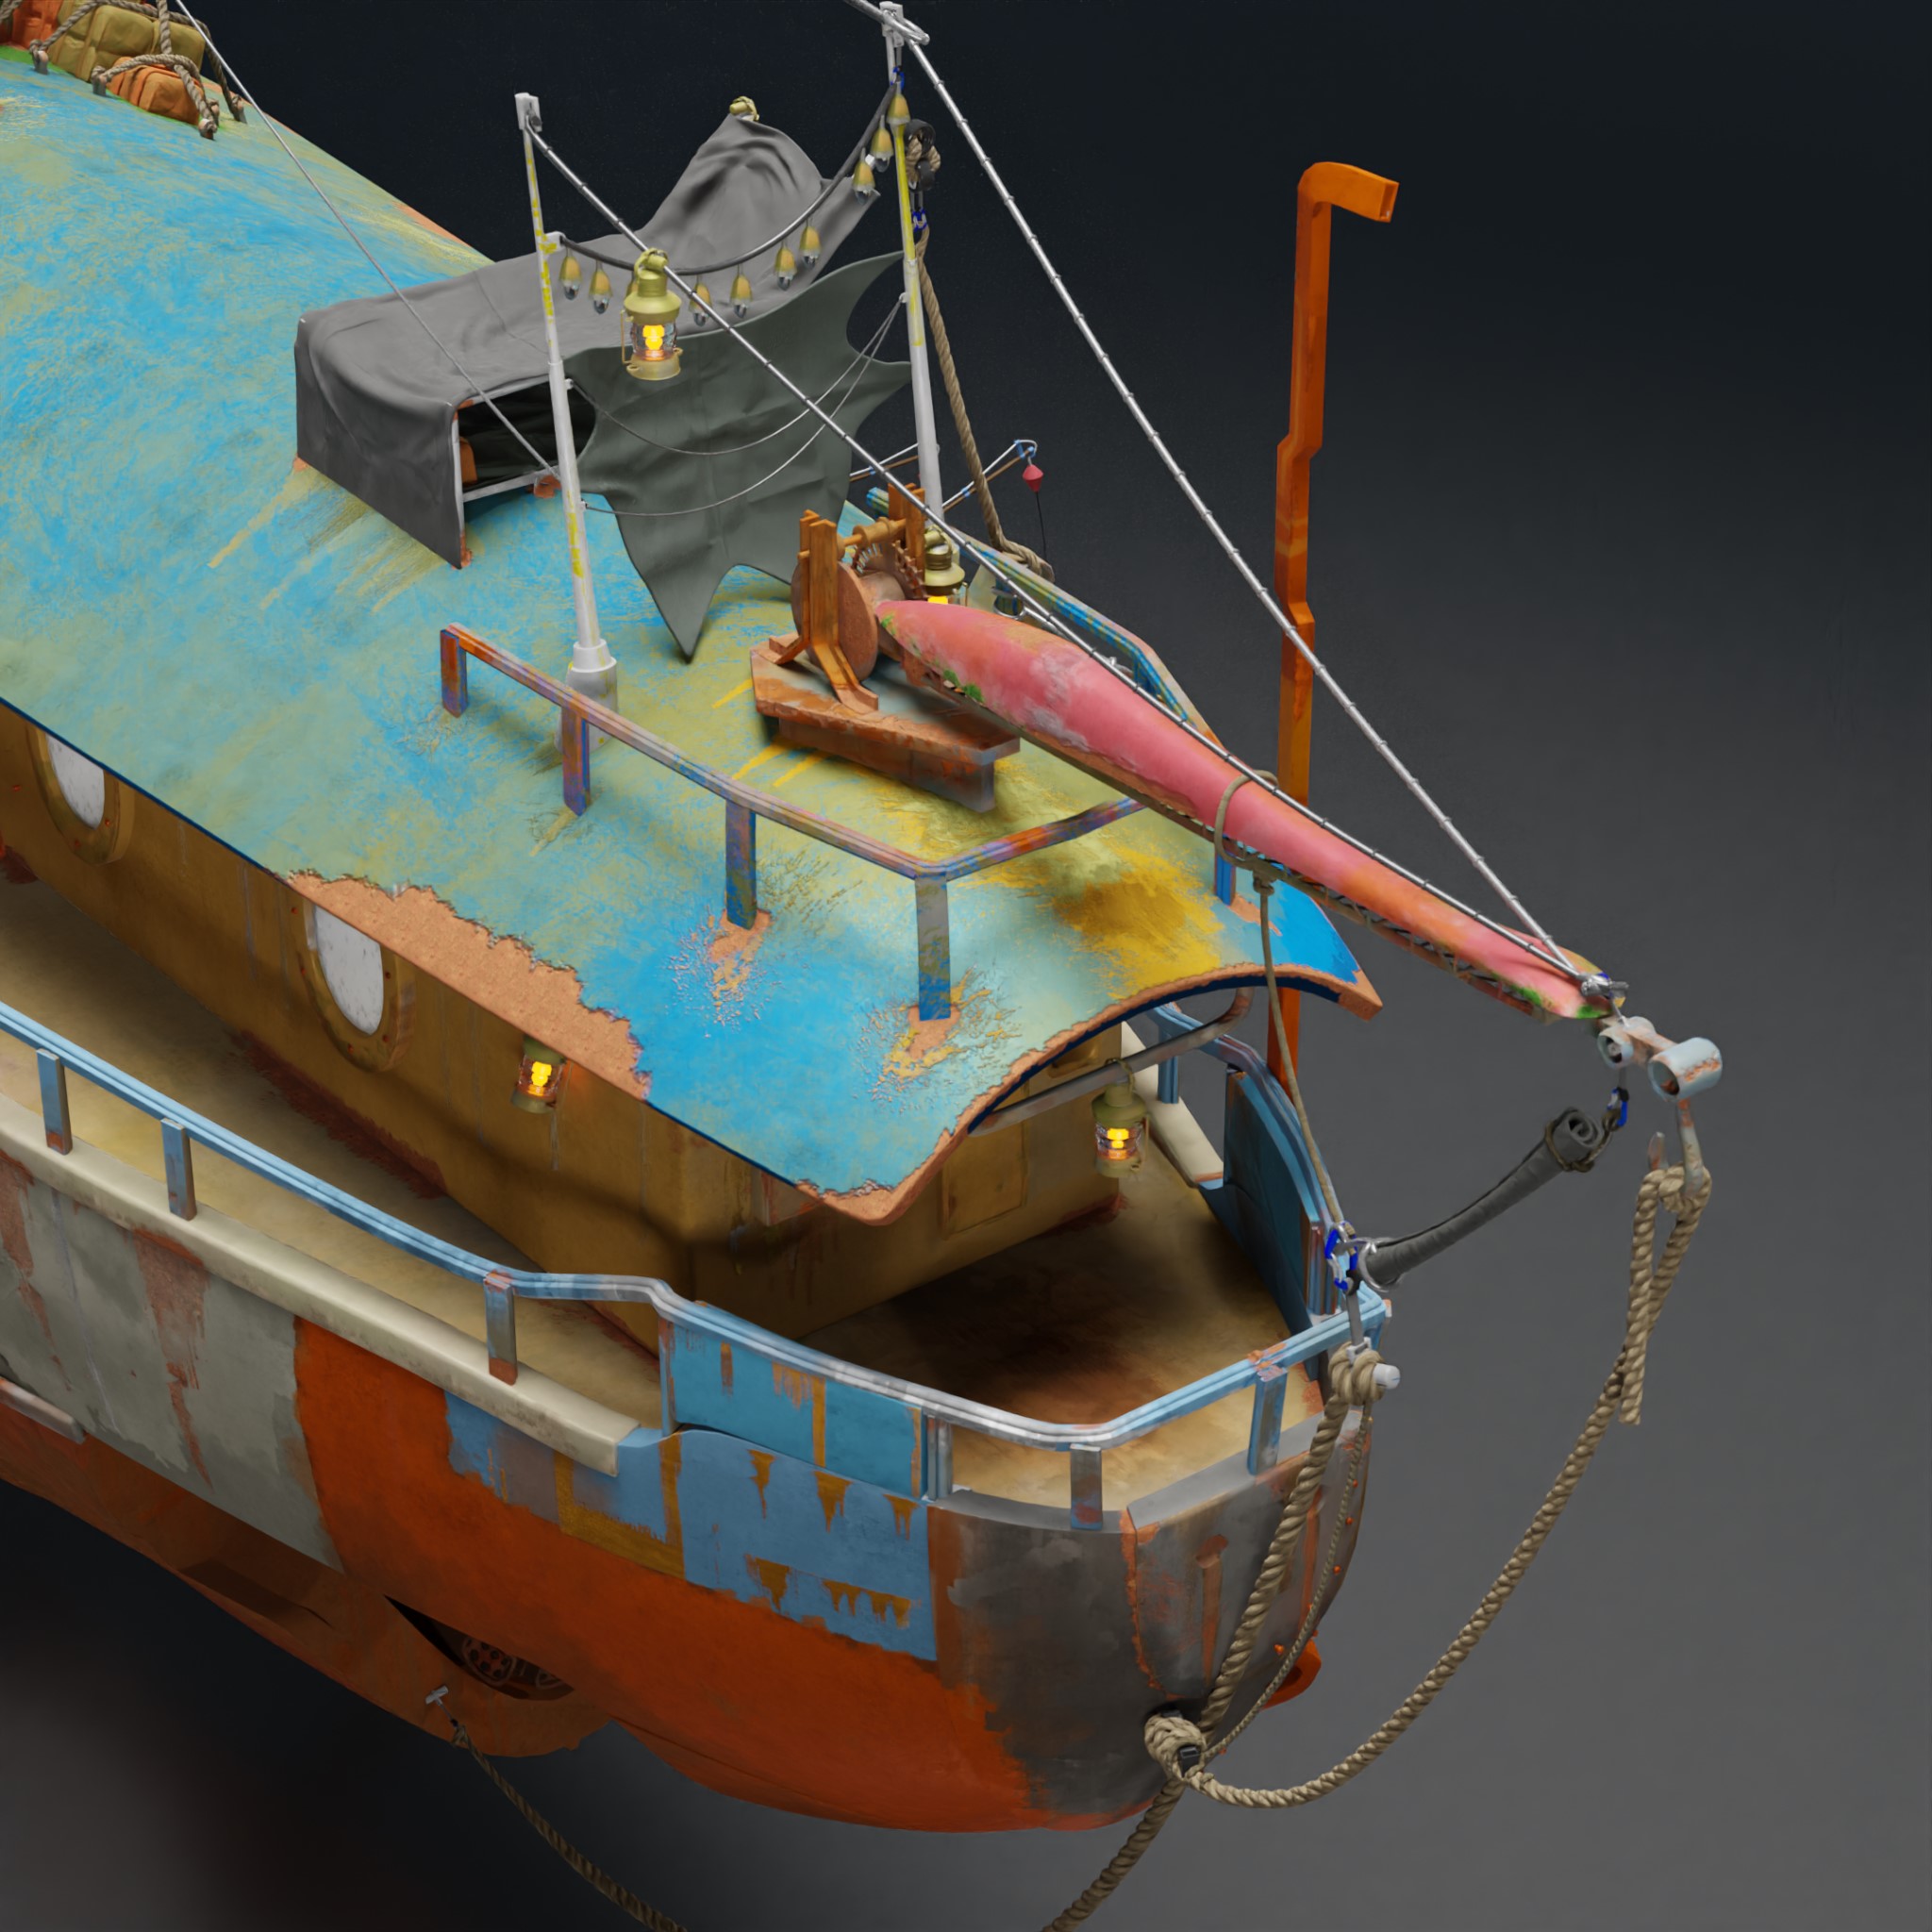
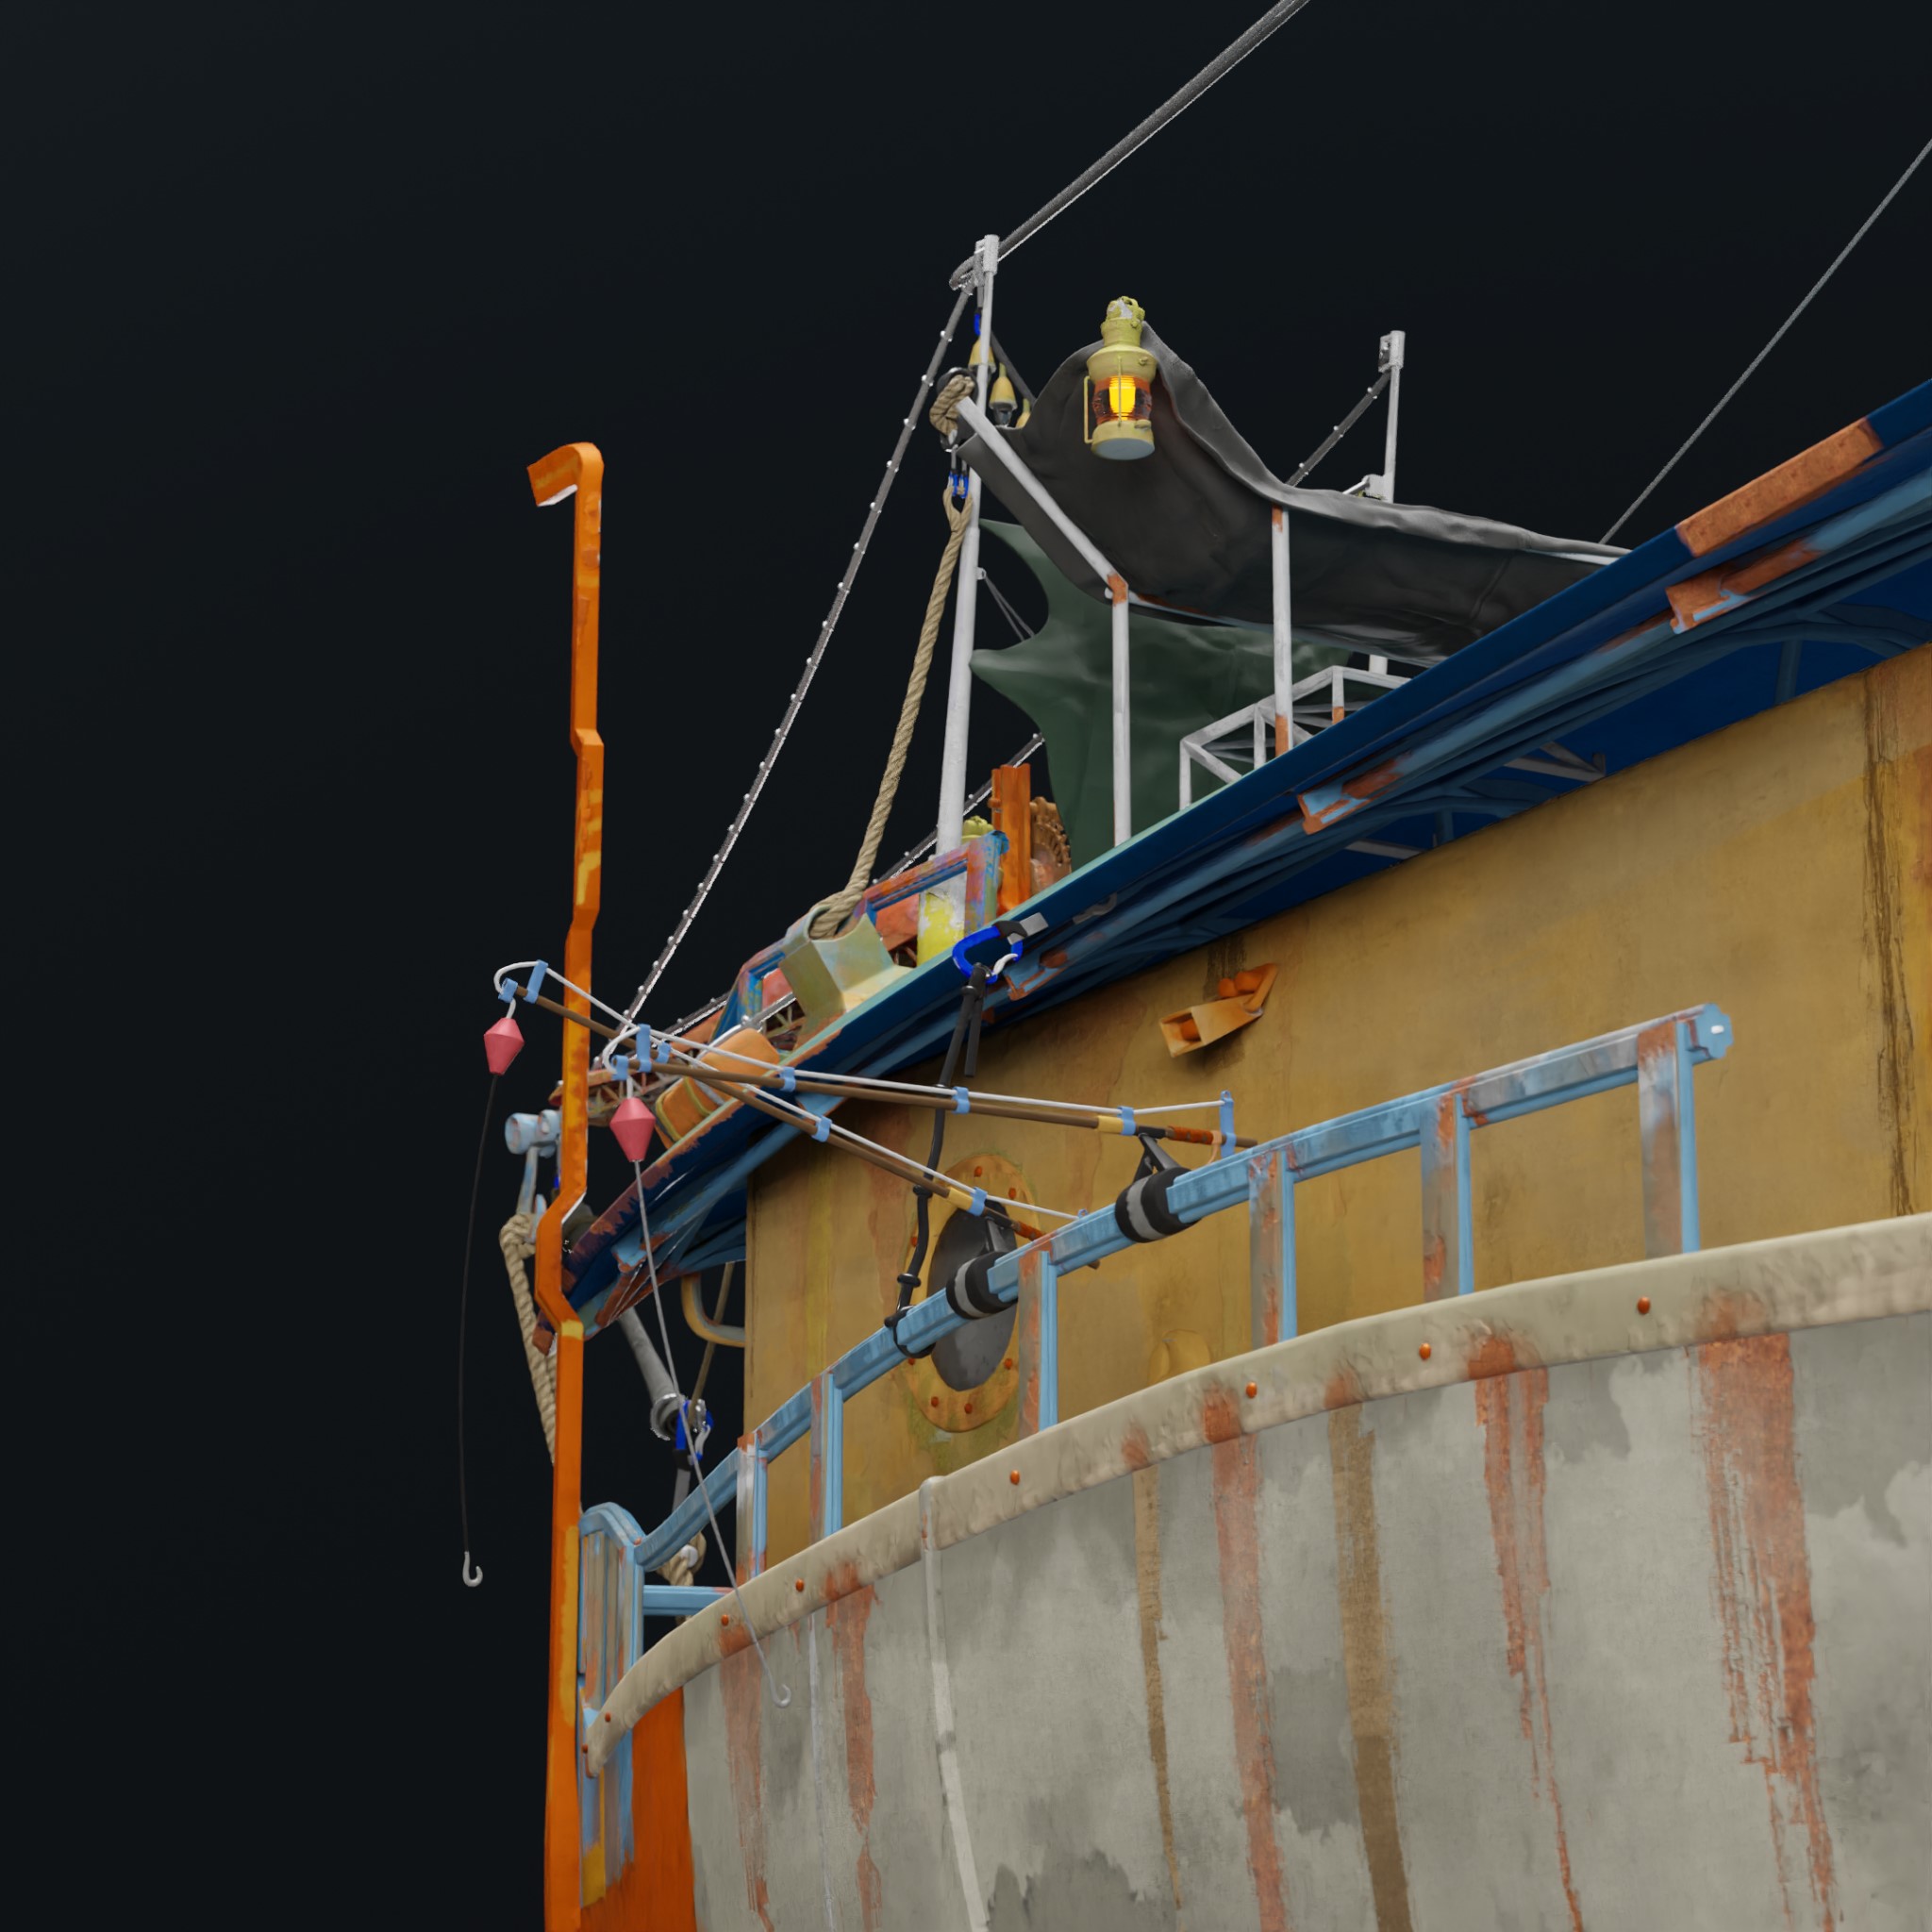
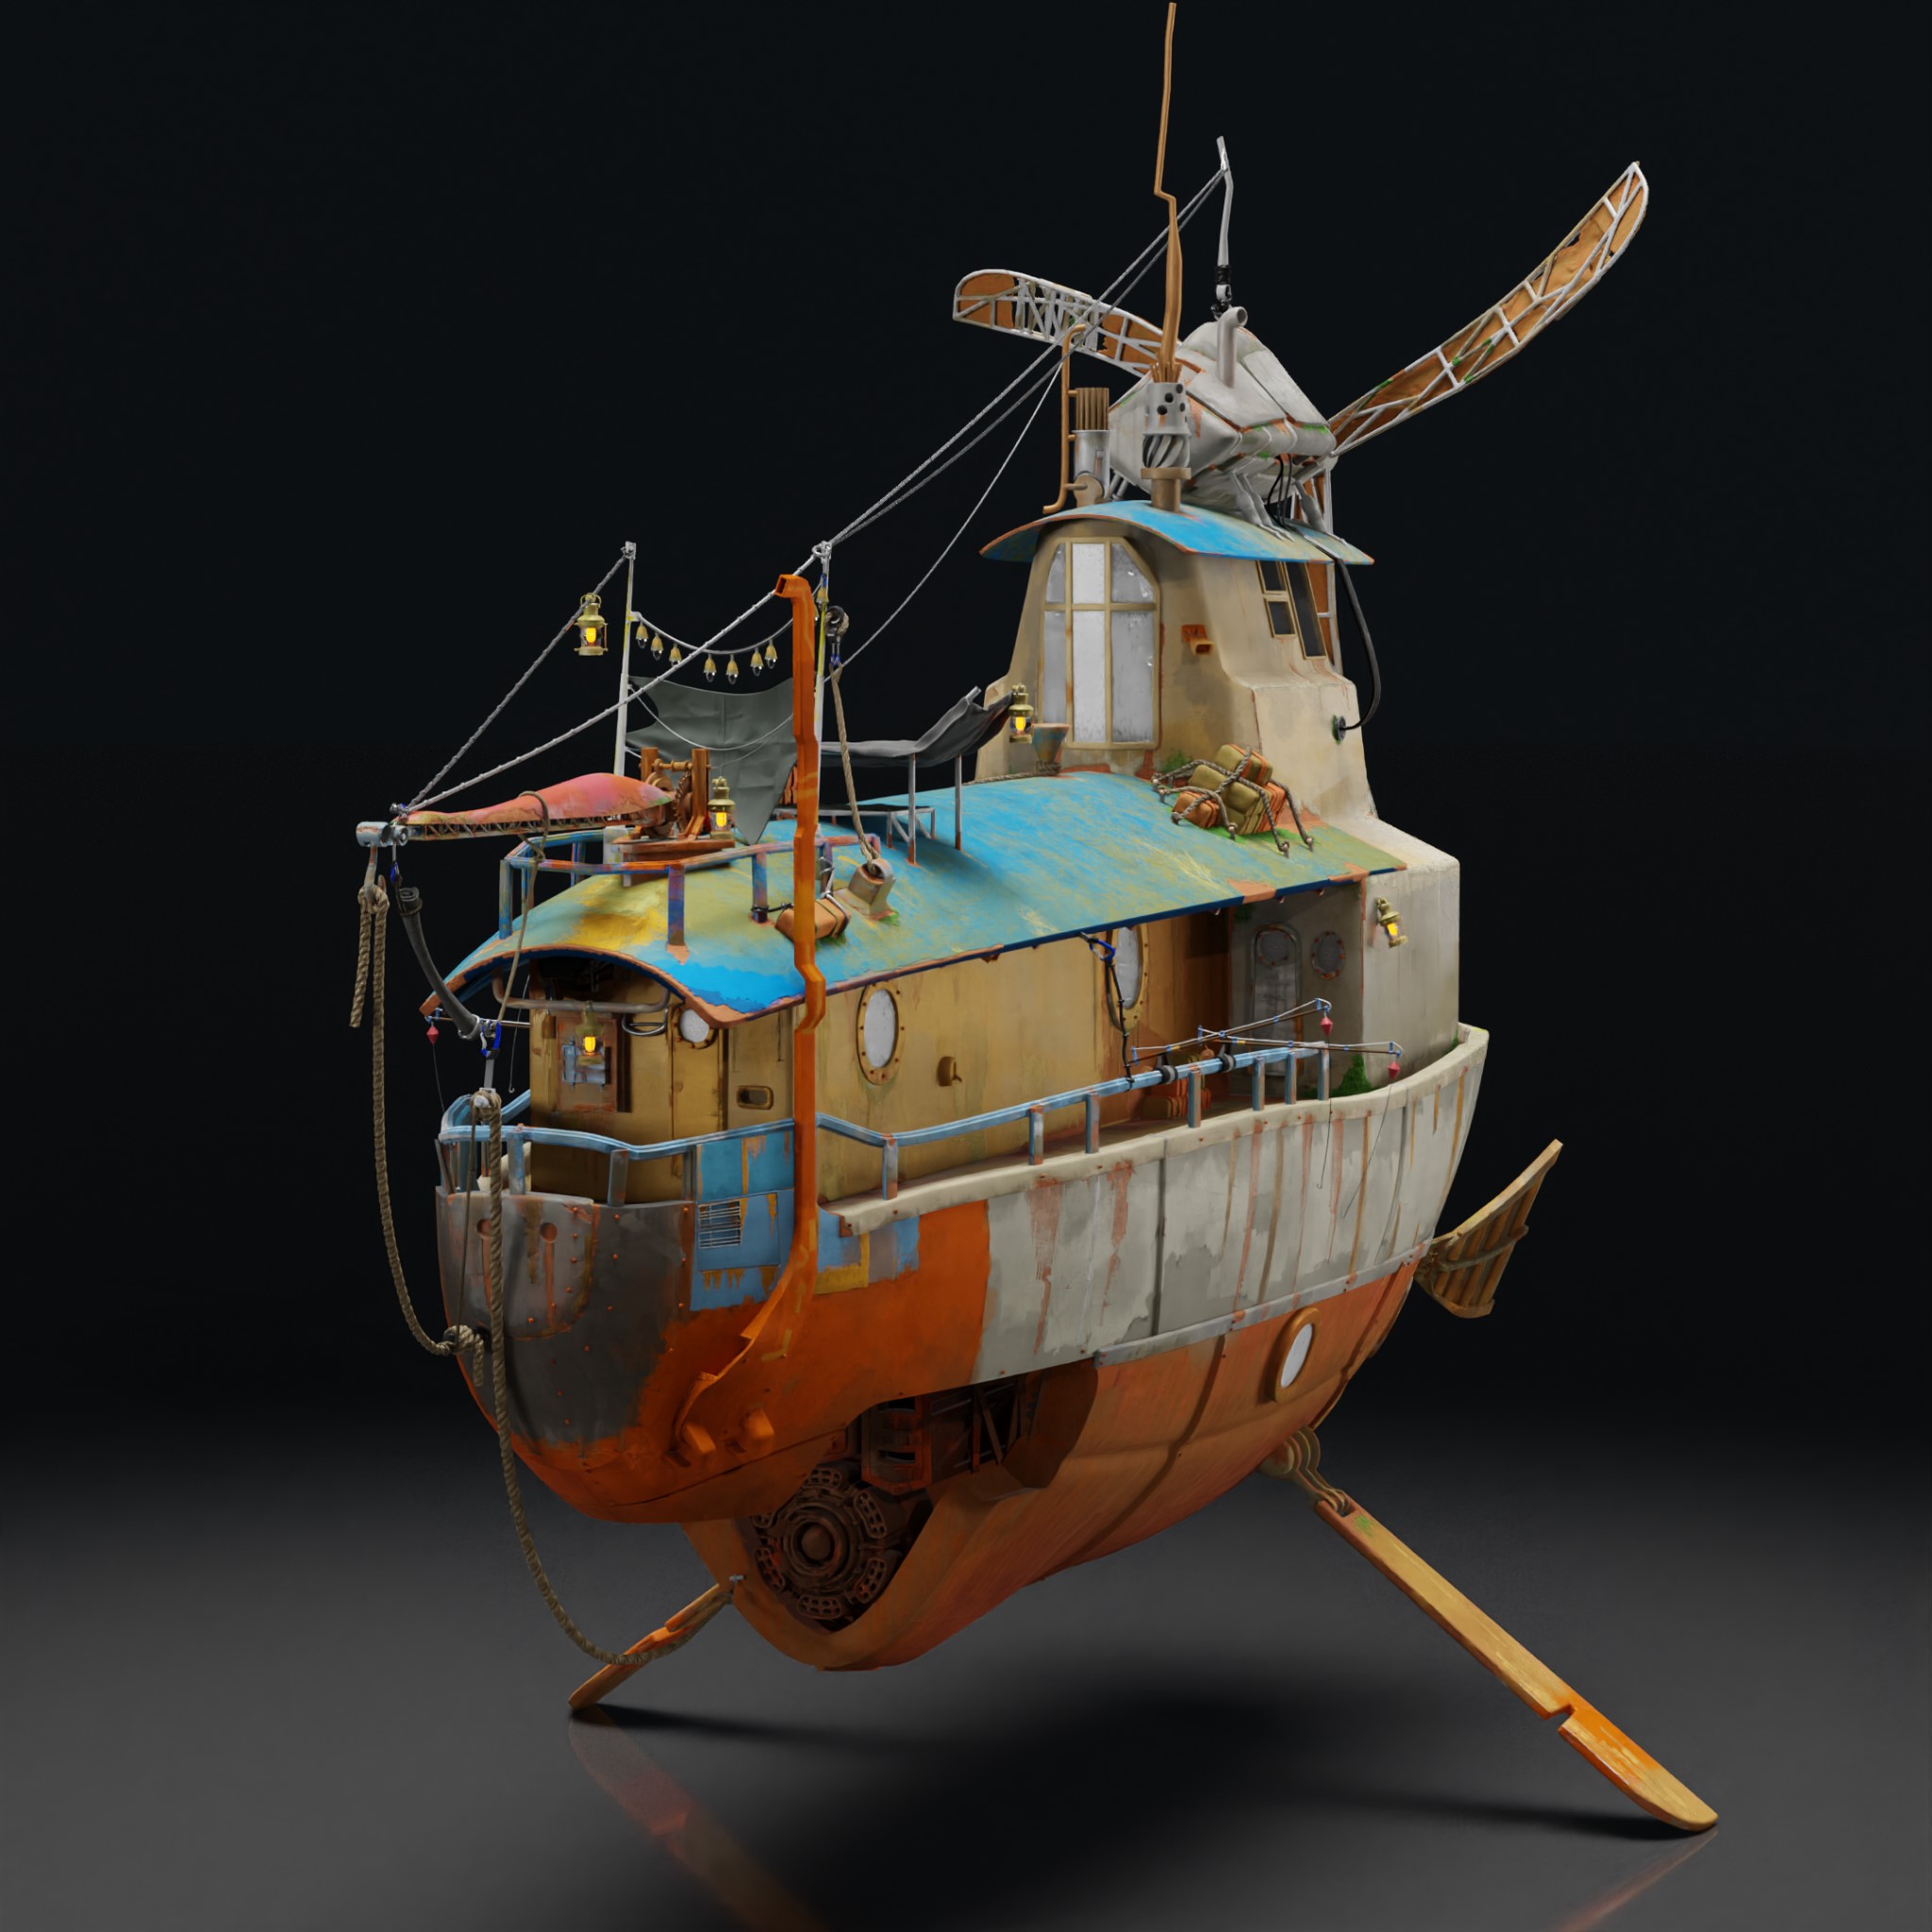
APRICOT


Thank you for reading my article!
You can find more of my work on Instagram, Artstation or on Twitter. I hope you like them!
About the Artist

Wafi Izzeldin, a 3D artist from Sudan, currently working as a programmer at a small tech company.


This was one of the most inspiring thing I’ve read in a while. Thank you Wafi! I also watched a talk by Ian and one thing he said that stuck with me was about color calibration: If the artwork doesn’t read well on other mediums than you own screen the problem is not your screen or the other mediums, but the color design itself.
Thank you so much. It means a lot
Yeah. Color calibration is a valid point..
I did notice something similar with composition when viewed on a mobile screen or a pc
Really appreciate the step-by-step thinking about how you broke down the problem – instead of “create a cube…then add details”
I’m with you on that one , I really struggled with creating artwork at the bigging specifically because of that cube problem ,
tuts were either too simple or complicated but wasn’t explained thoroughly