
Behind the Scenes: Baby Girl
INTRODUCTION
Hello, folks! My name is Emmanuel Okafor, and you may know me as “The Luwizart.” I am from Nigeria but have been residing in the Philippines for about ten years. I graduated with a degree in Information Technology for my Bachelor’s and Master’s. I have been a self-taught 3D artist since 2011. Something that started as a passion is now my profession. I enjoy working on personal projects to experiment, improve my skills, and tell stories through my art during my free time.
Blender 3D has been my key to entering the world of 3D. It has provided me with many opportunities like creating art that I connect with, having a YouTube channel focused on creating free tutorials for self-taught artists like me, and working on projects I receive. It has also allowed me to develop products for the Blender market, and I cannot forget the fantastic community that drives it all.
INSPIRATION
Sometimes, I get lost looking at work from other artists for inspiration. I enjoy watching videos from big studios that illustrate the step-by-step progression of their projects.
The usual spot where you would find me is on ArtStation where they showcase the best artwork that I use as inspiration. The original concept of this particular art piece, Baby Girl, was done by Gyimah Gariba (2016) which I found on that platform.
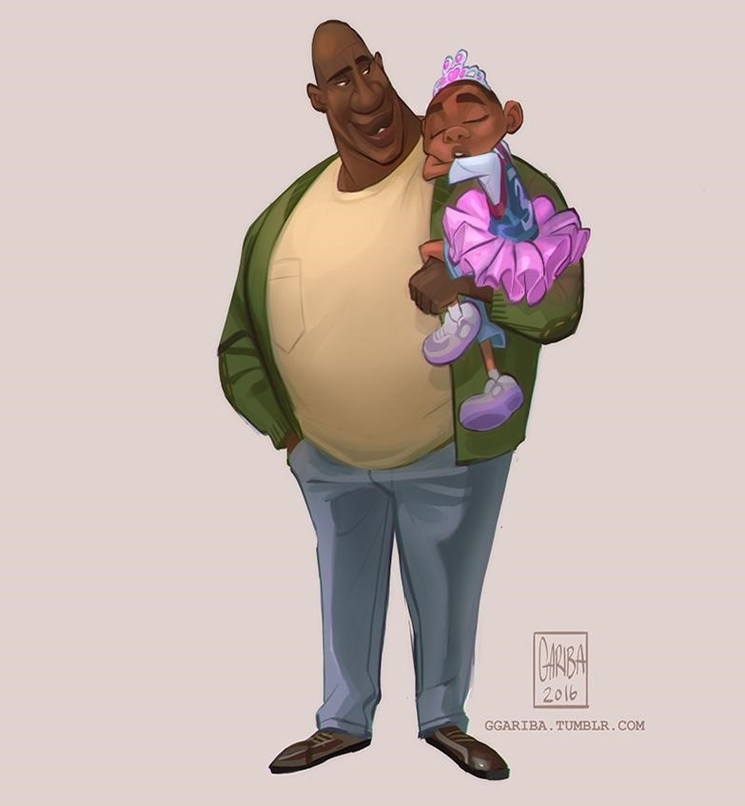
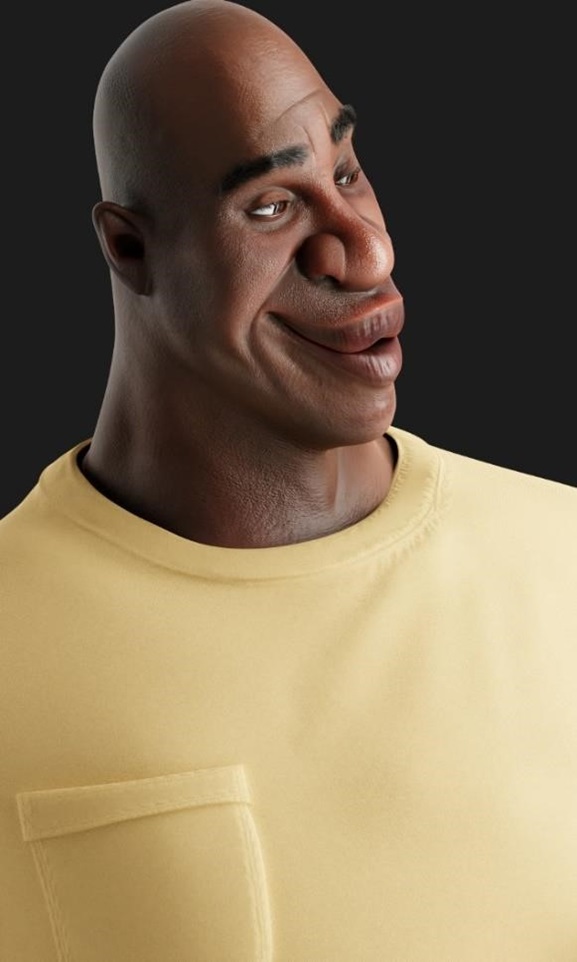
Typically, after I see concept art that I like, I make a mood-board to define the style into which I would be translating it. For this, the overall design is stylized with a slightly realistic detail level, somewhat similar to a Pixar detailing.
MODELING
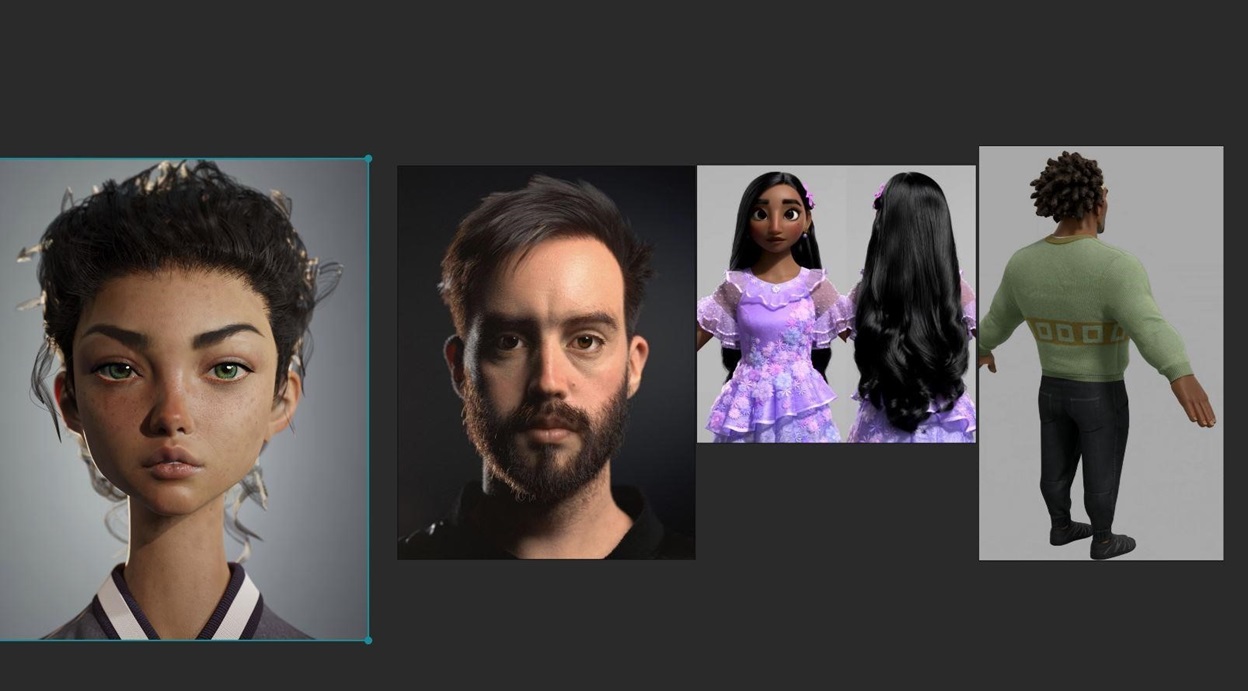
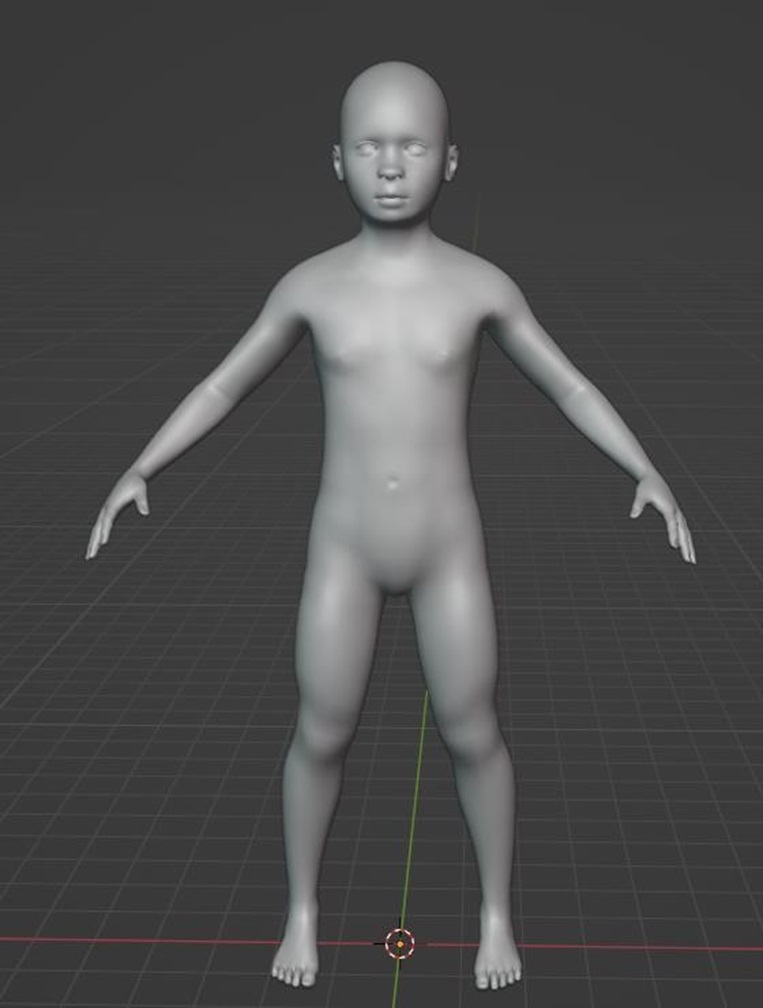
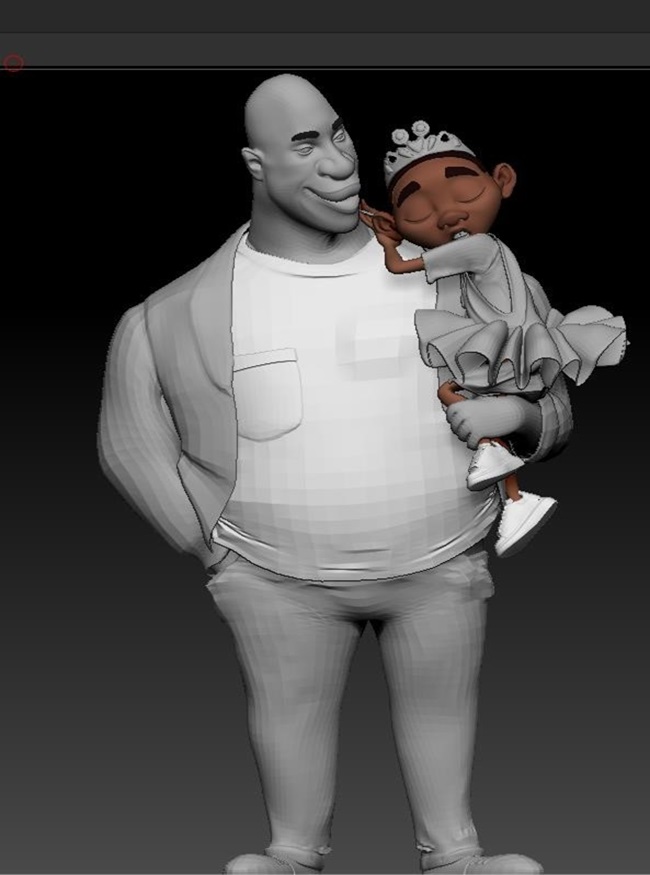
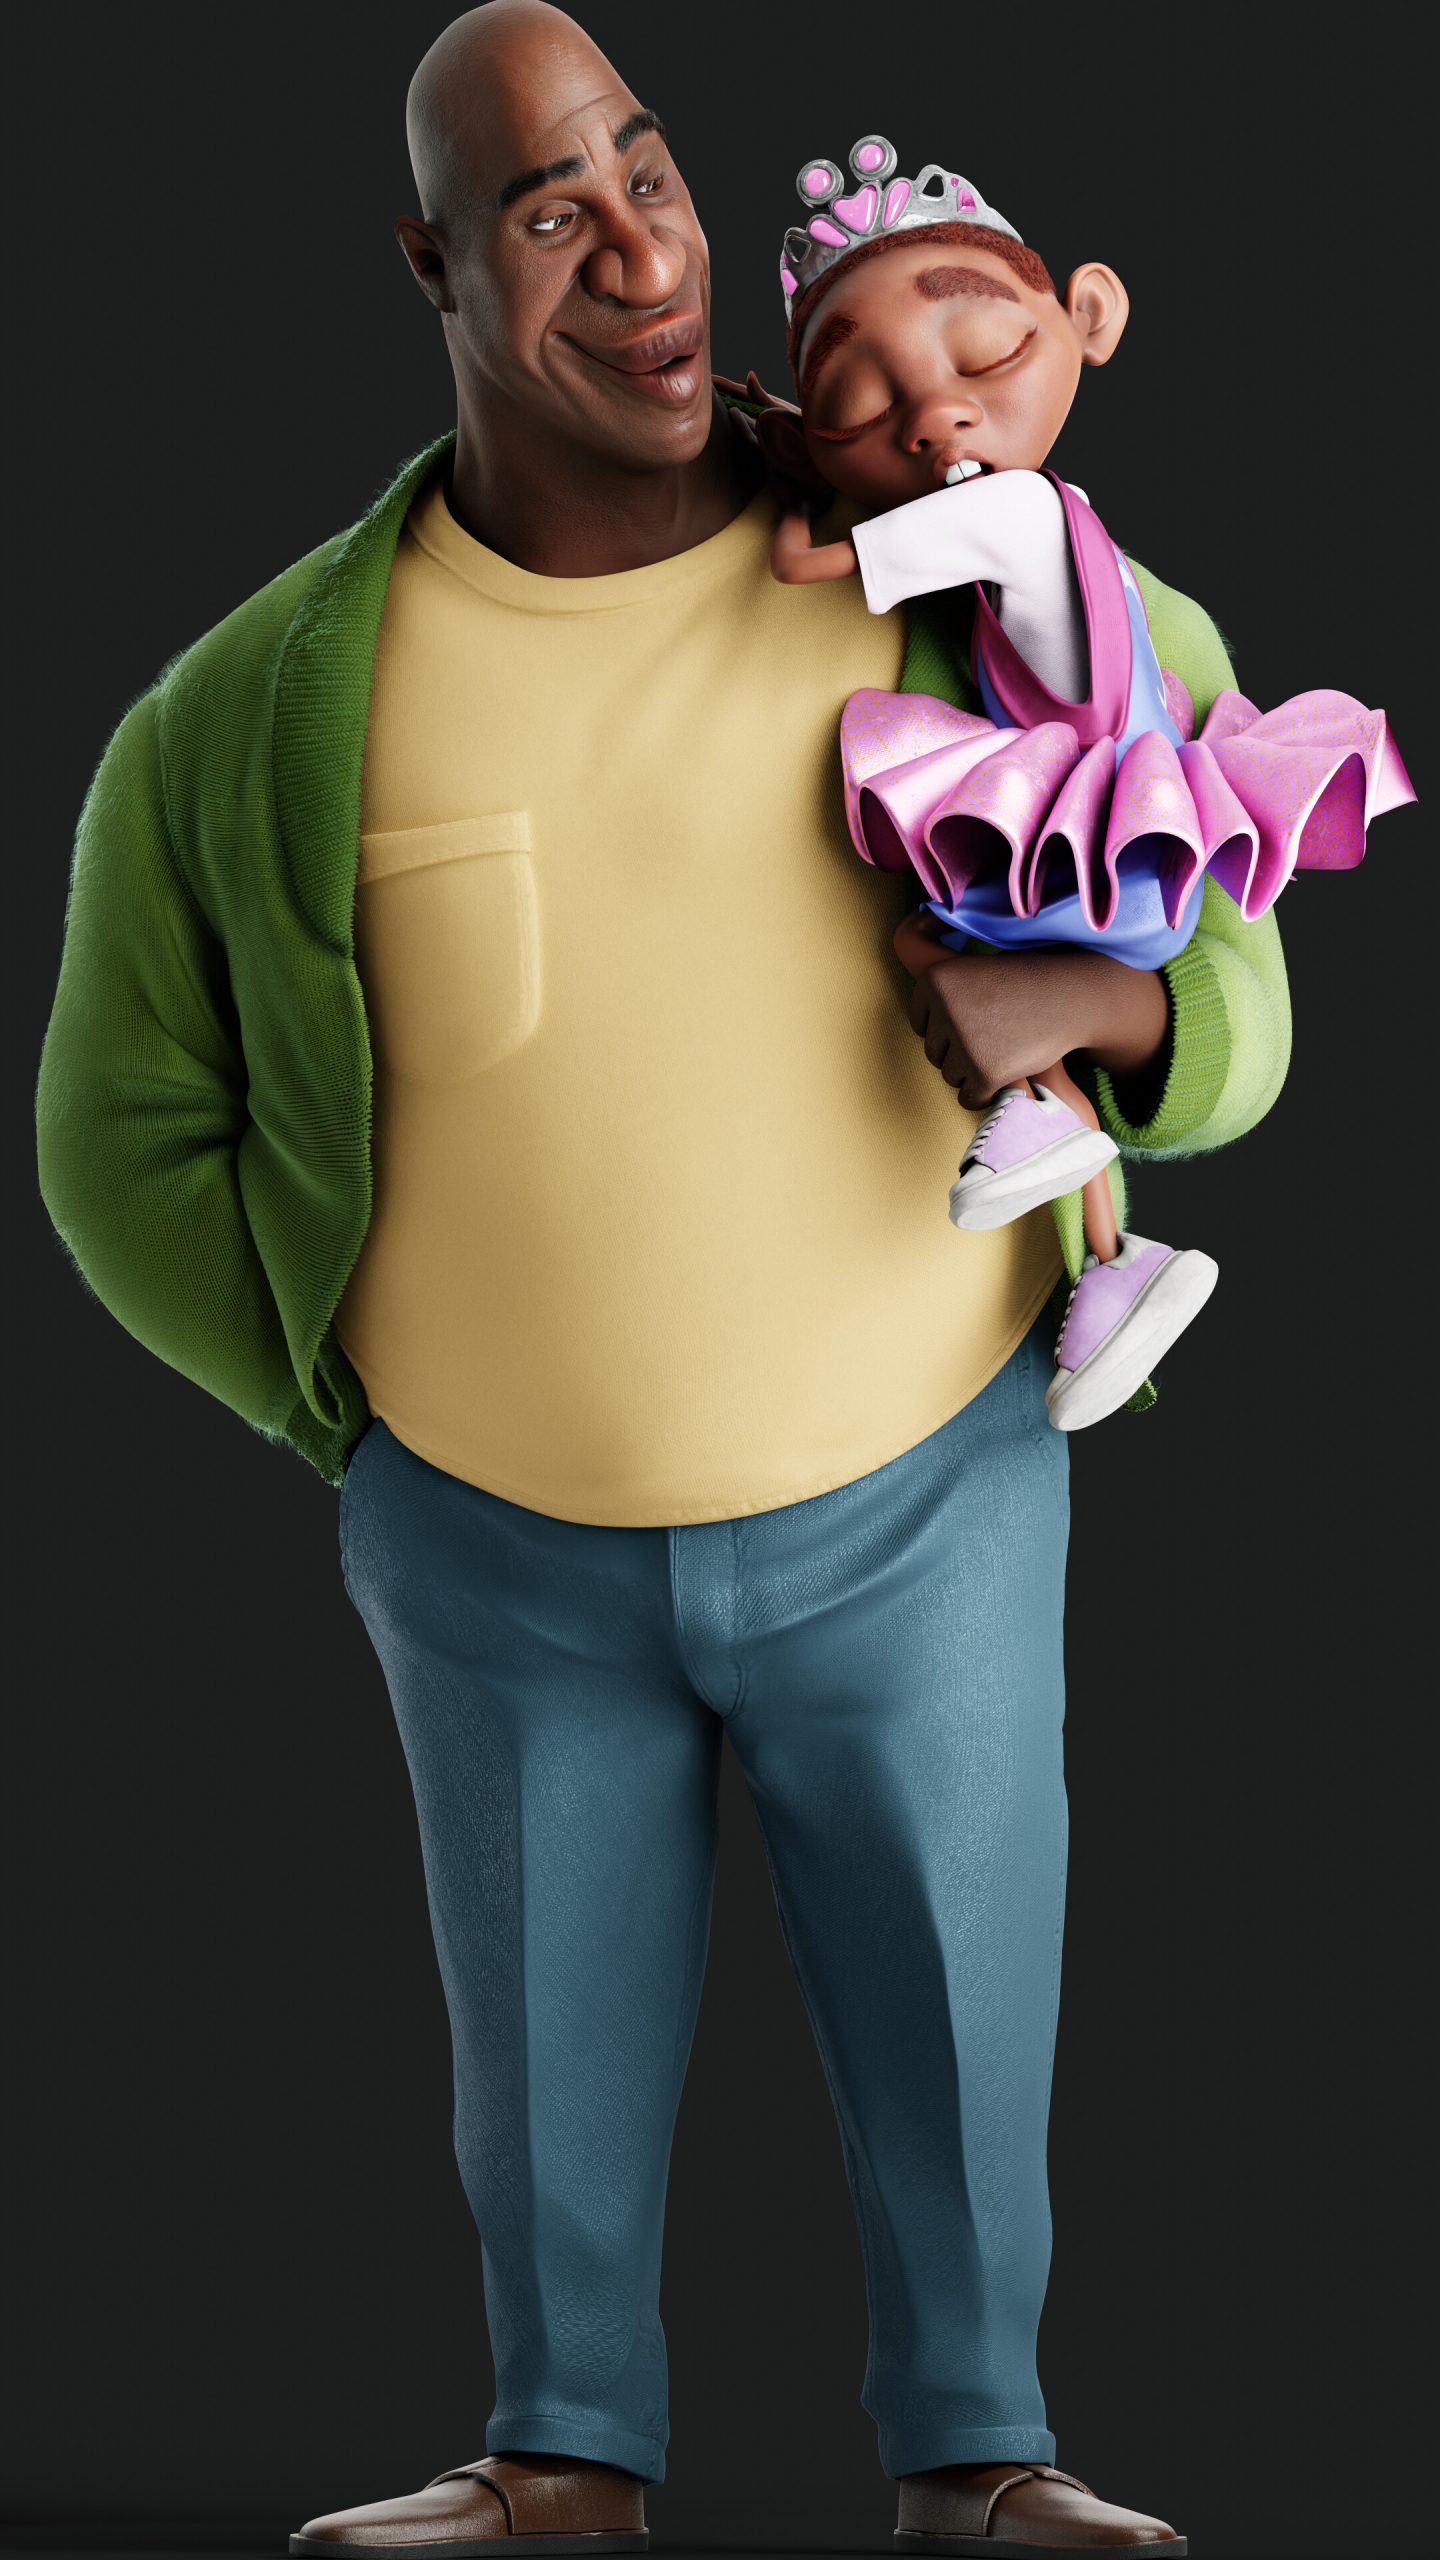
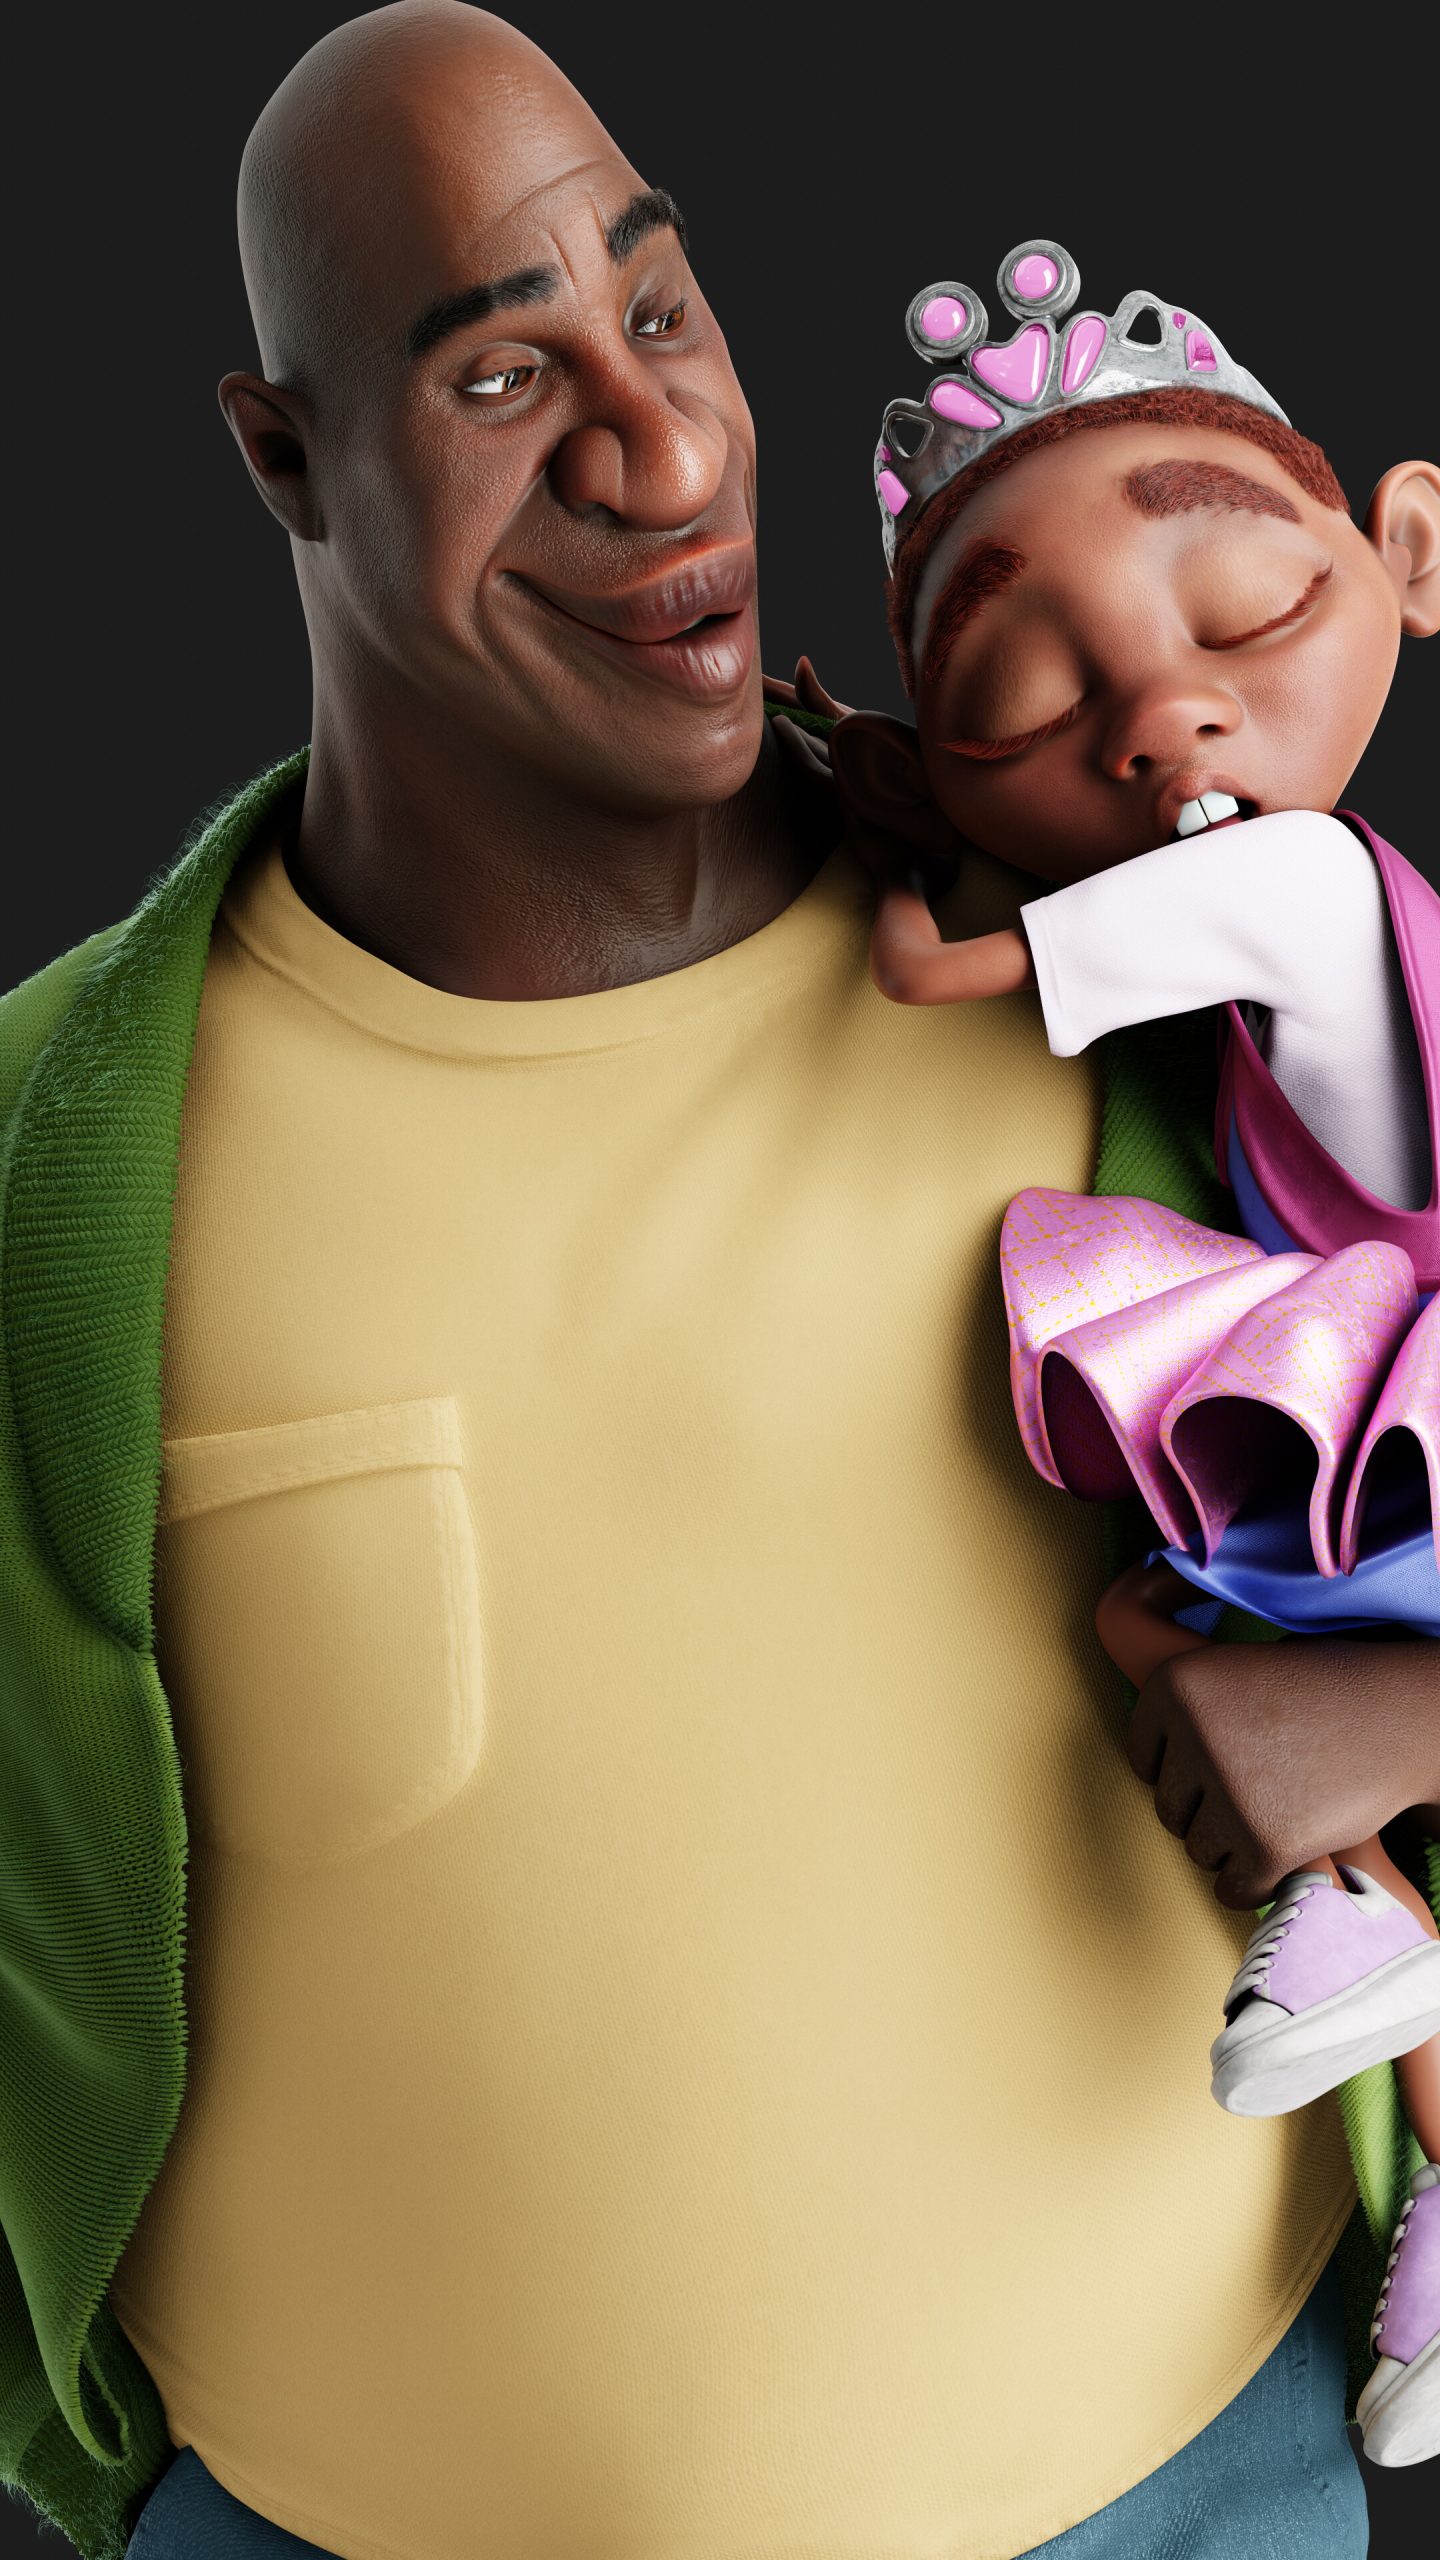
The project’s scope involved creating two characters, a father and a daughter. Therefore, I had to leverage any method to speed up the process. I started with a base model that I got from the MakeHuman free software.
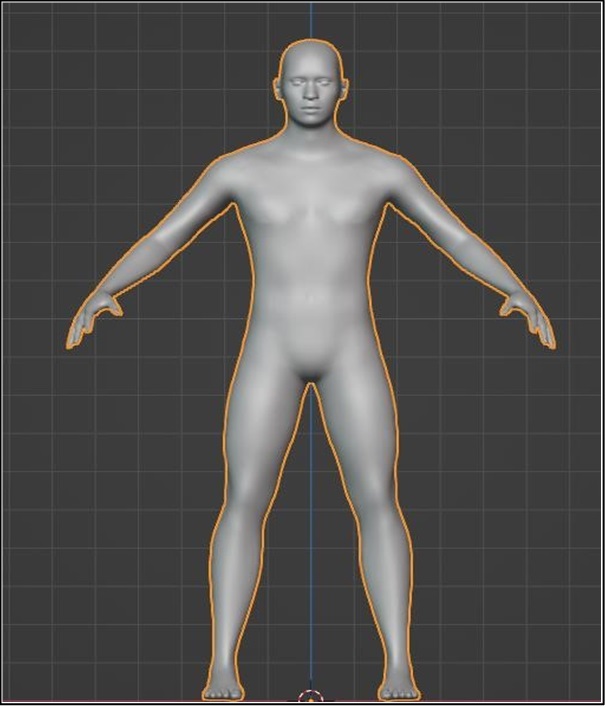
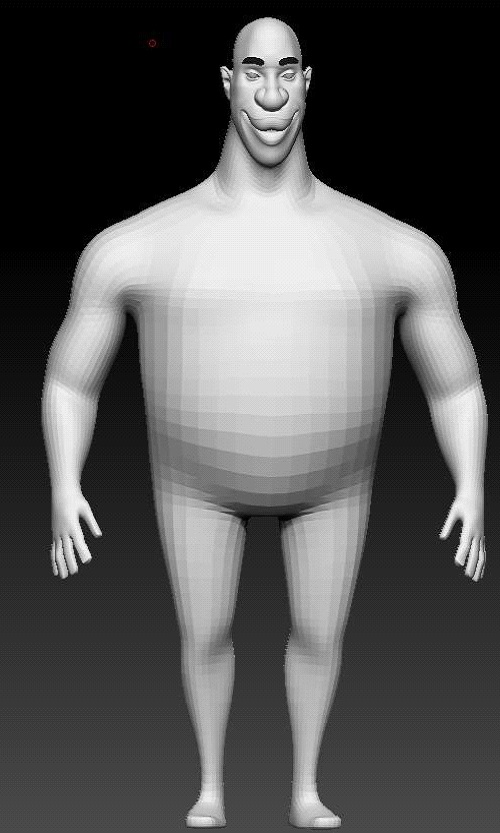
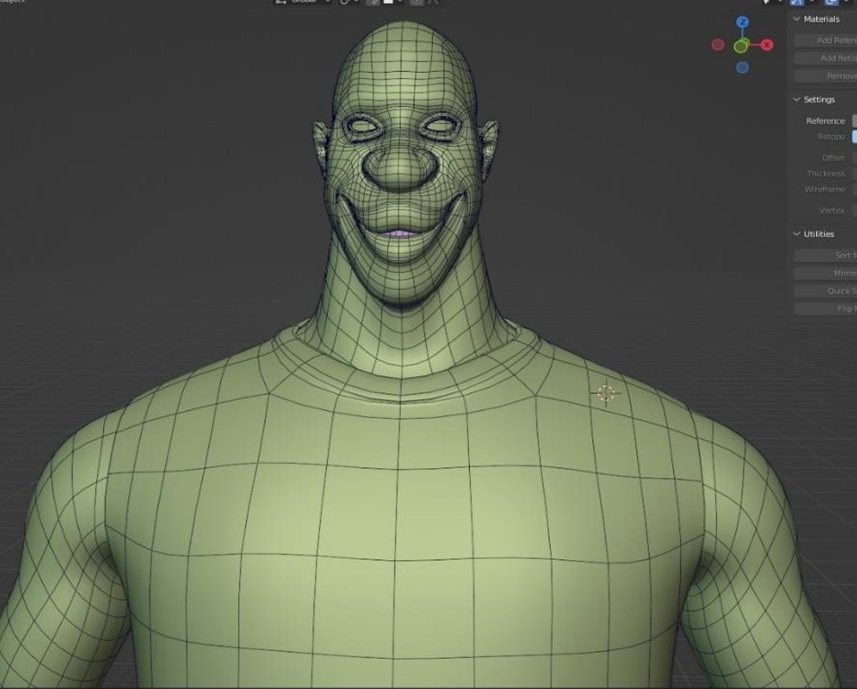
The next step was to use the ZBrush to sculpt the form of the character. The goal was to match it with the source concept. After completing the form, I retopologized the sculpture for a clean topology. I also intended to rig the character for the posing to keep everything neat which was necessary.
The same workflow was used for the daughter’s model.

POSING
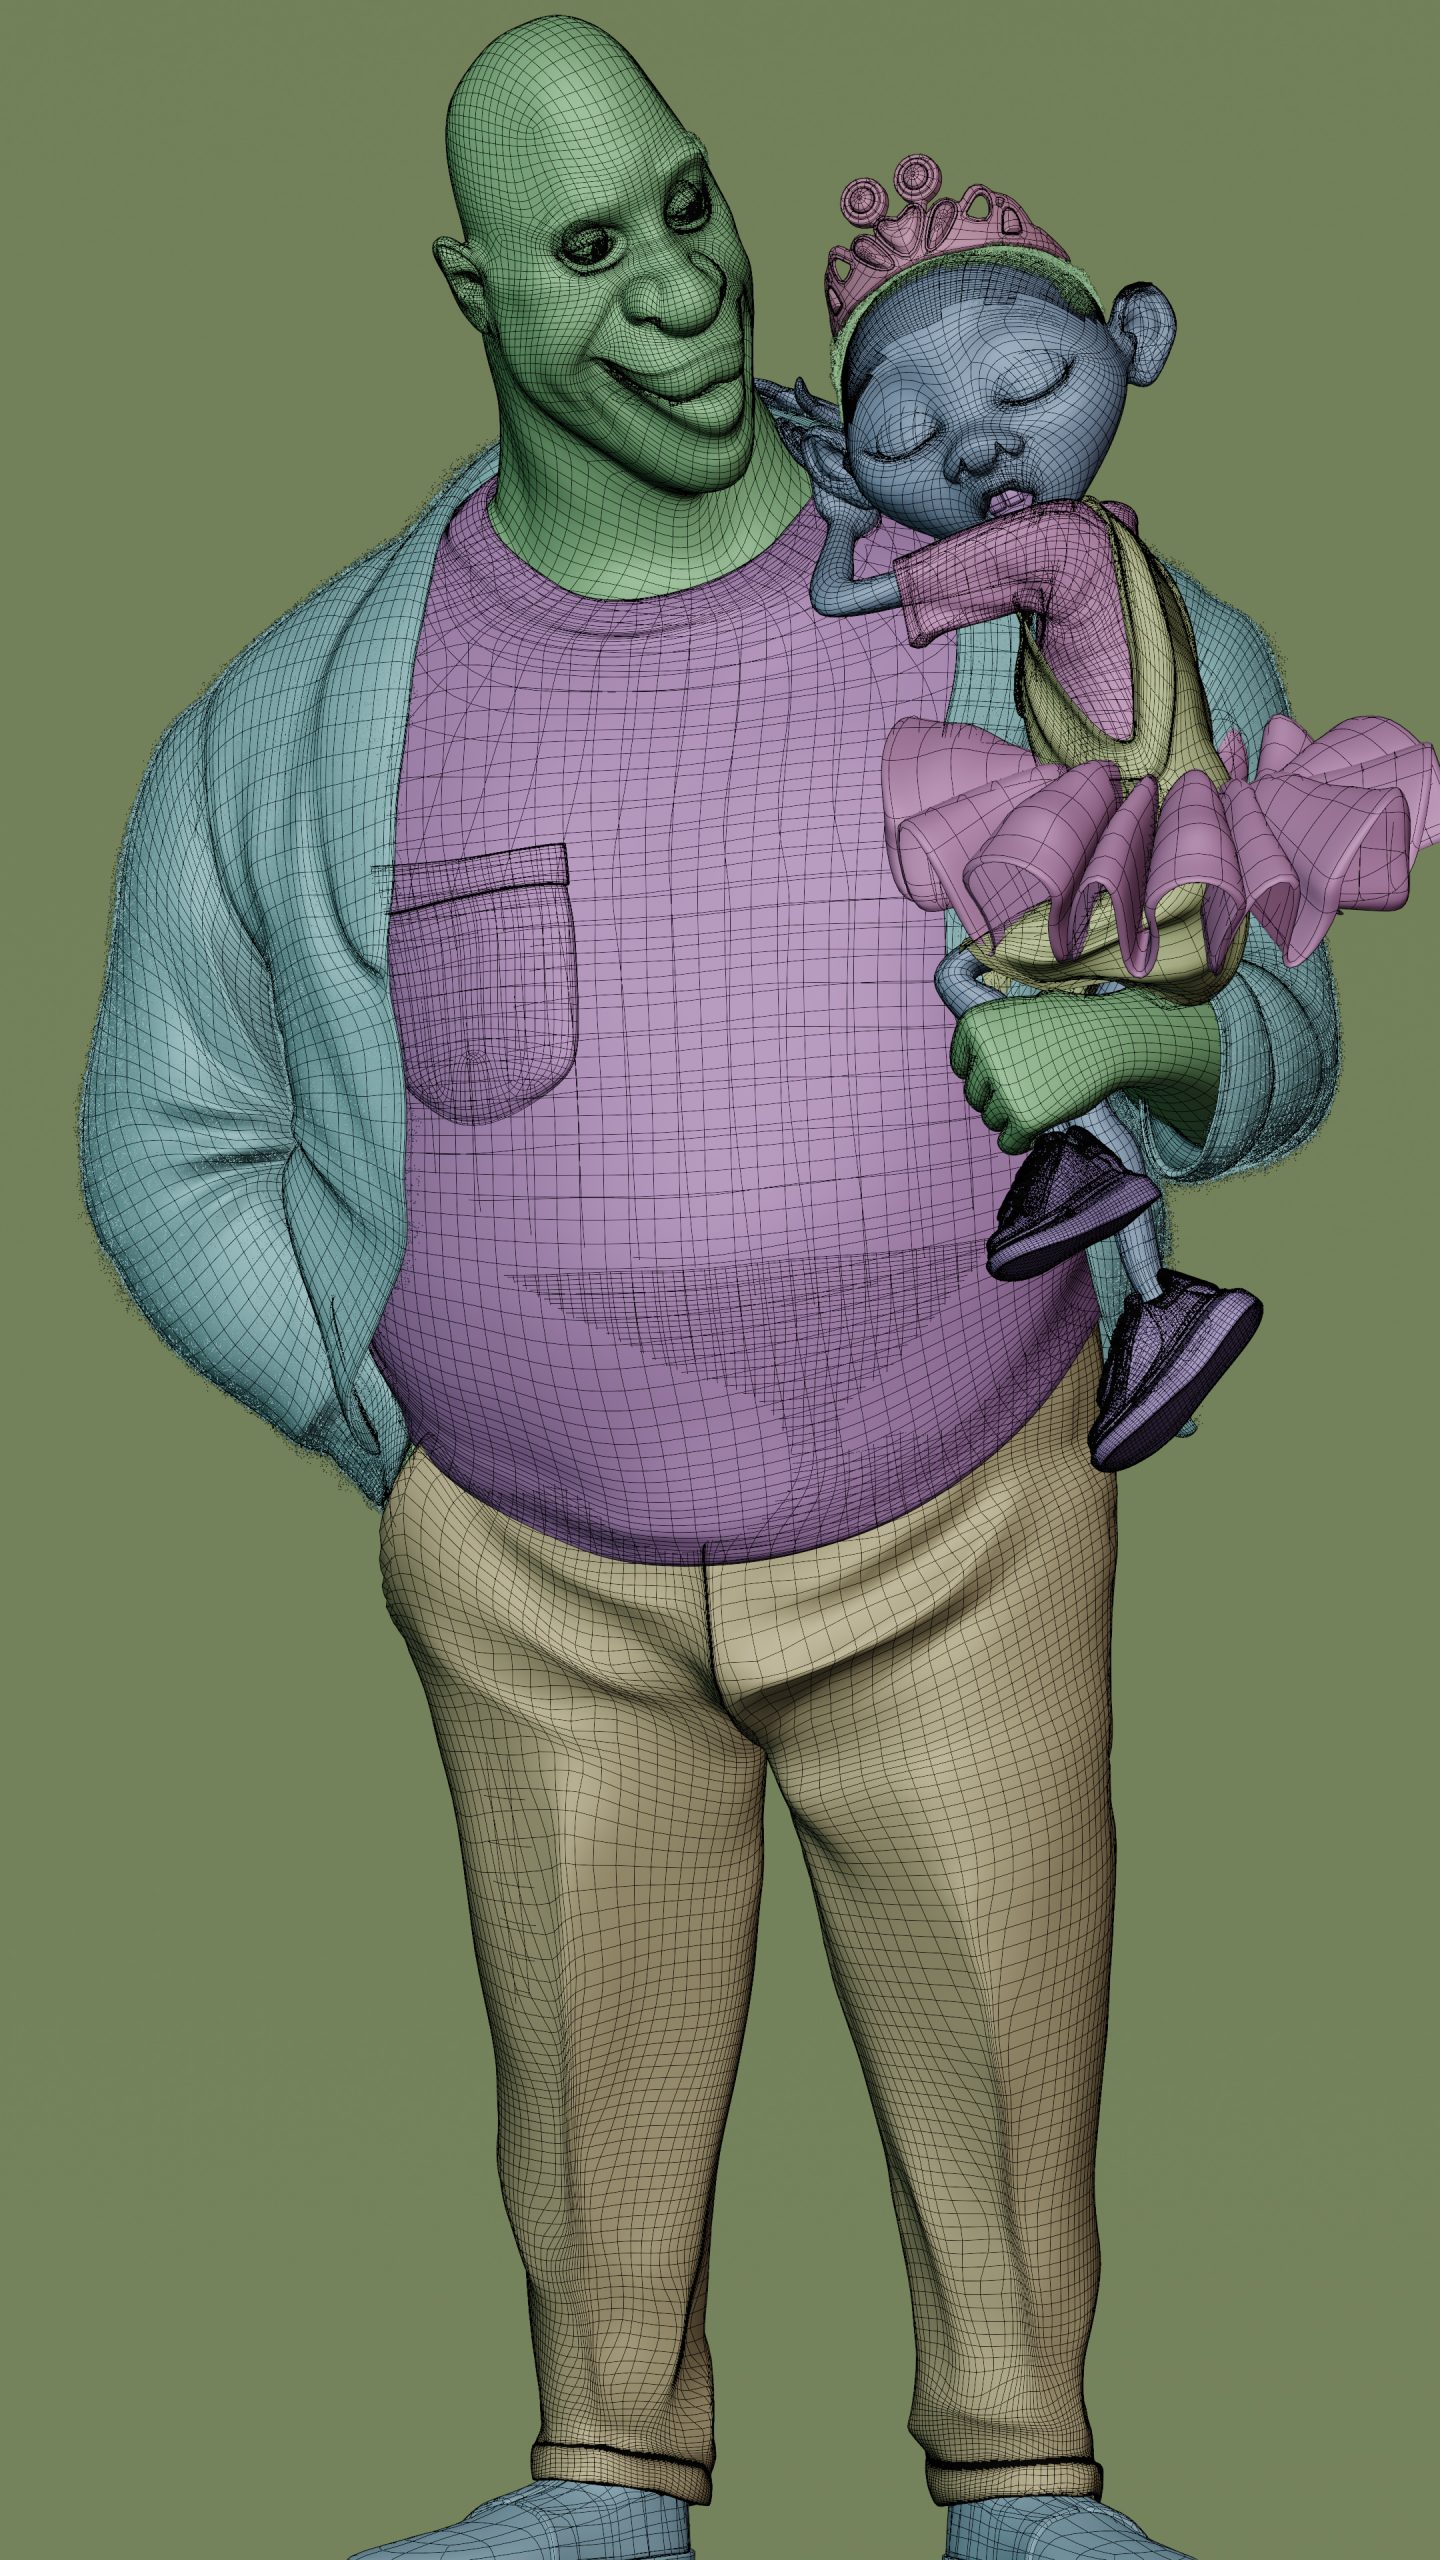
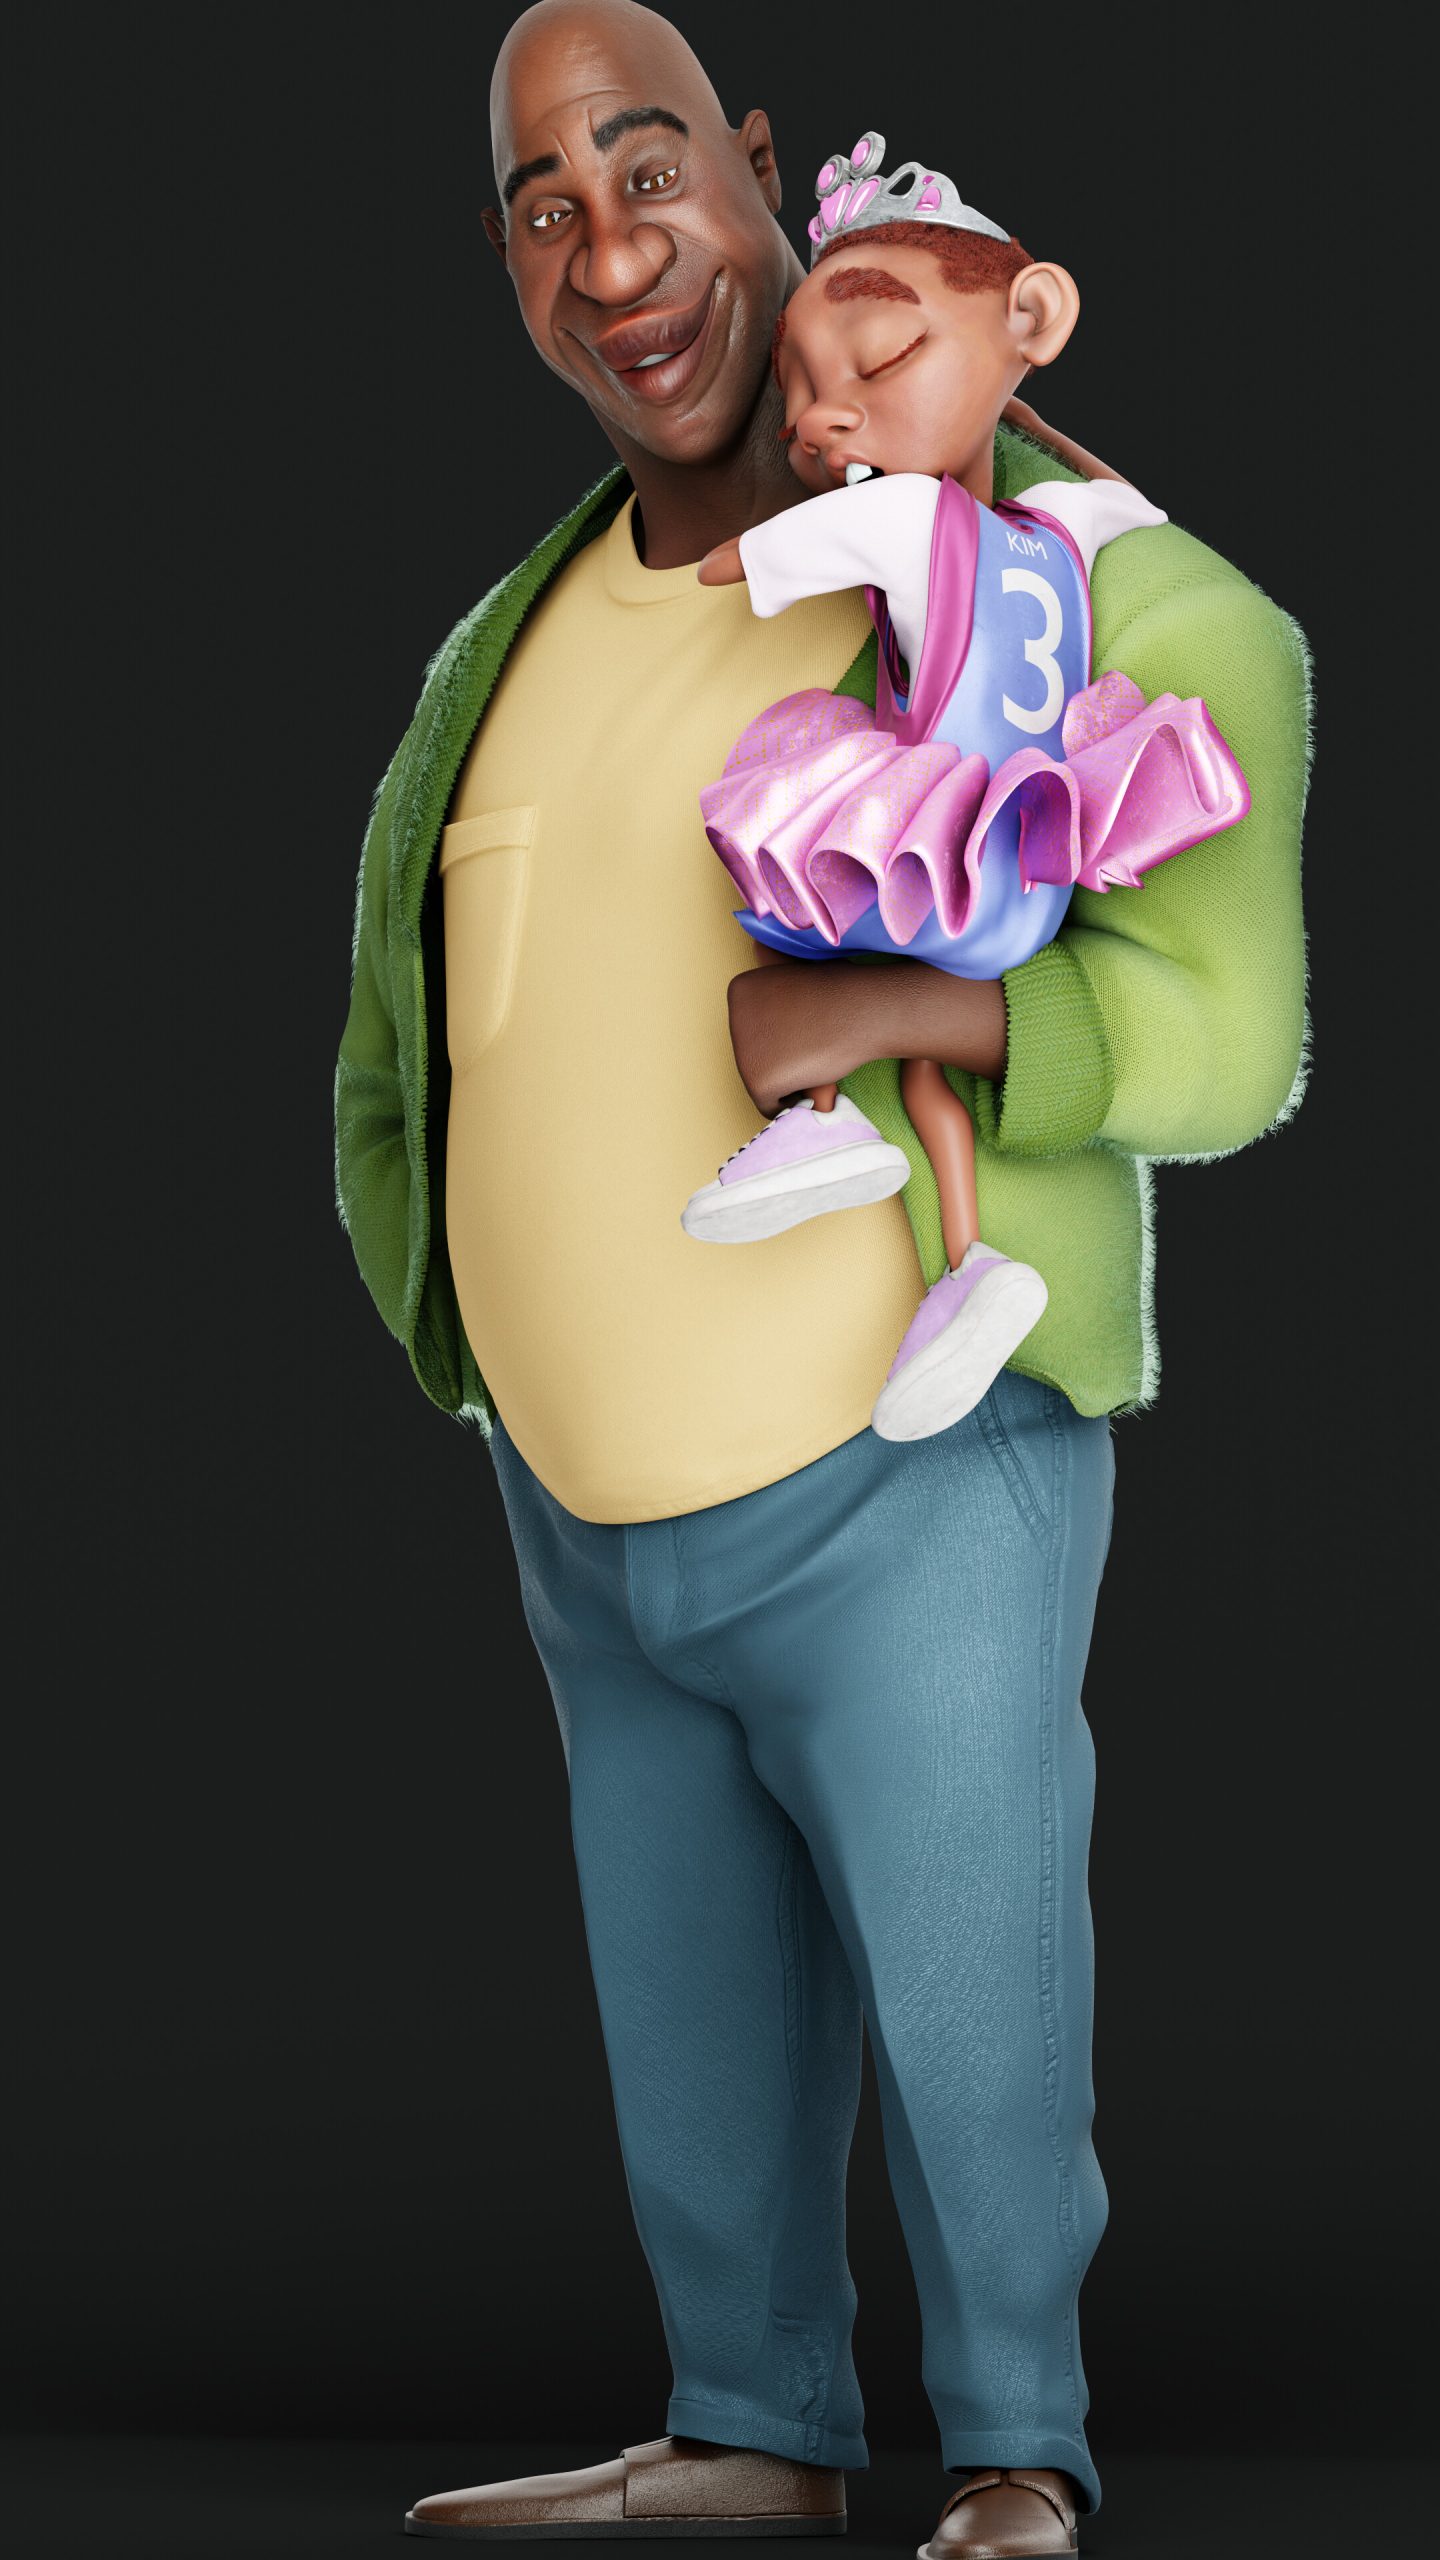
Rigging the character was made easy using Rigify and supplemented by a tool that I created, which will be released soon. Afterwards, I positioned the characters to match the pose of the original concept.
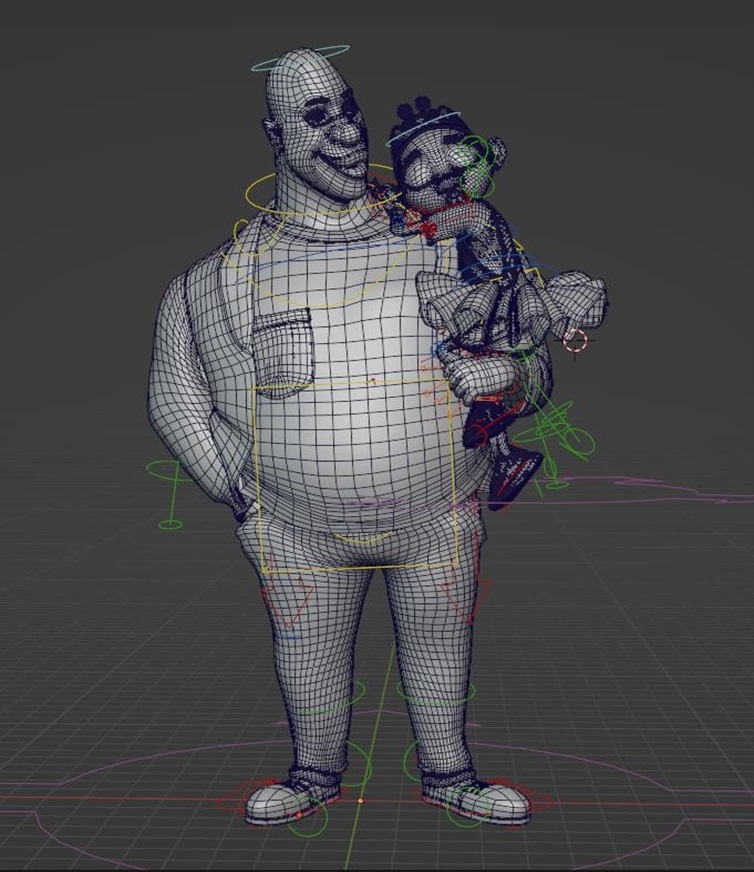
To add some realism, I stimulated the clothes to rest well on the characters. Once I was happy with it, I applied all the modifiers and brought them back to ZBrush. There, I fixed all the posed forms and added the final details that would be baked into textures.
SHADING
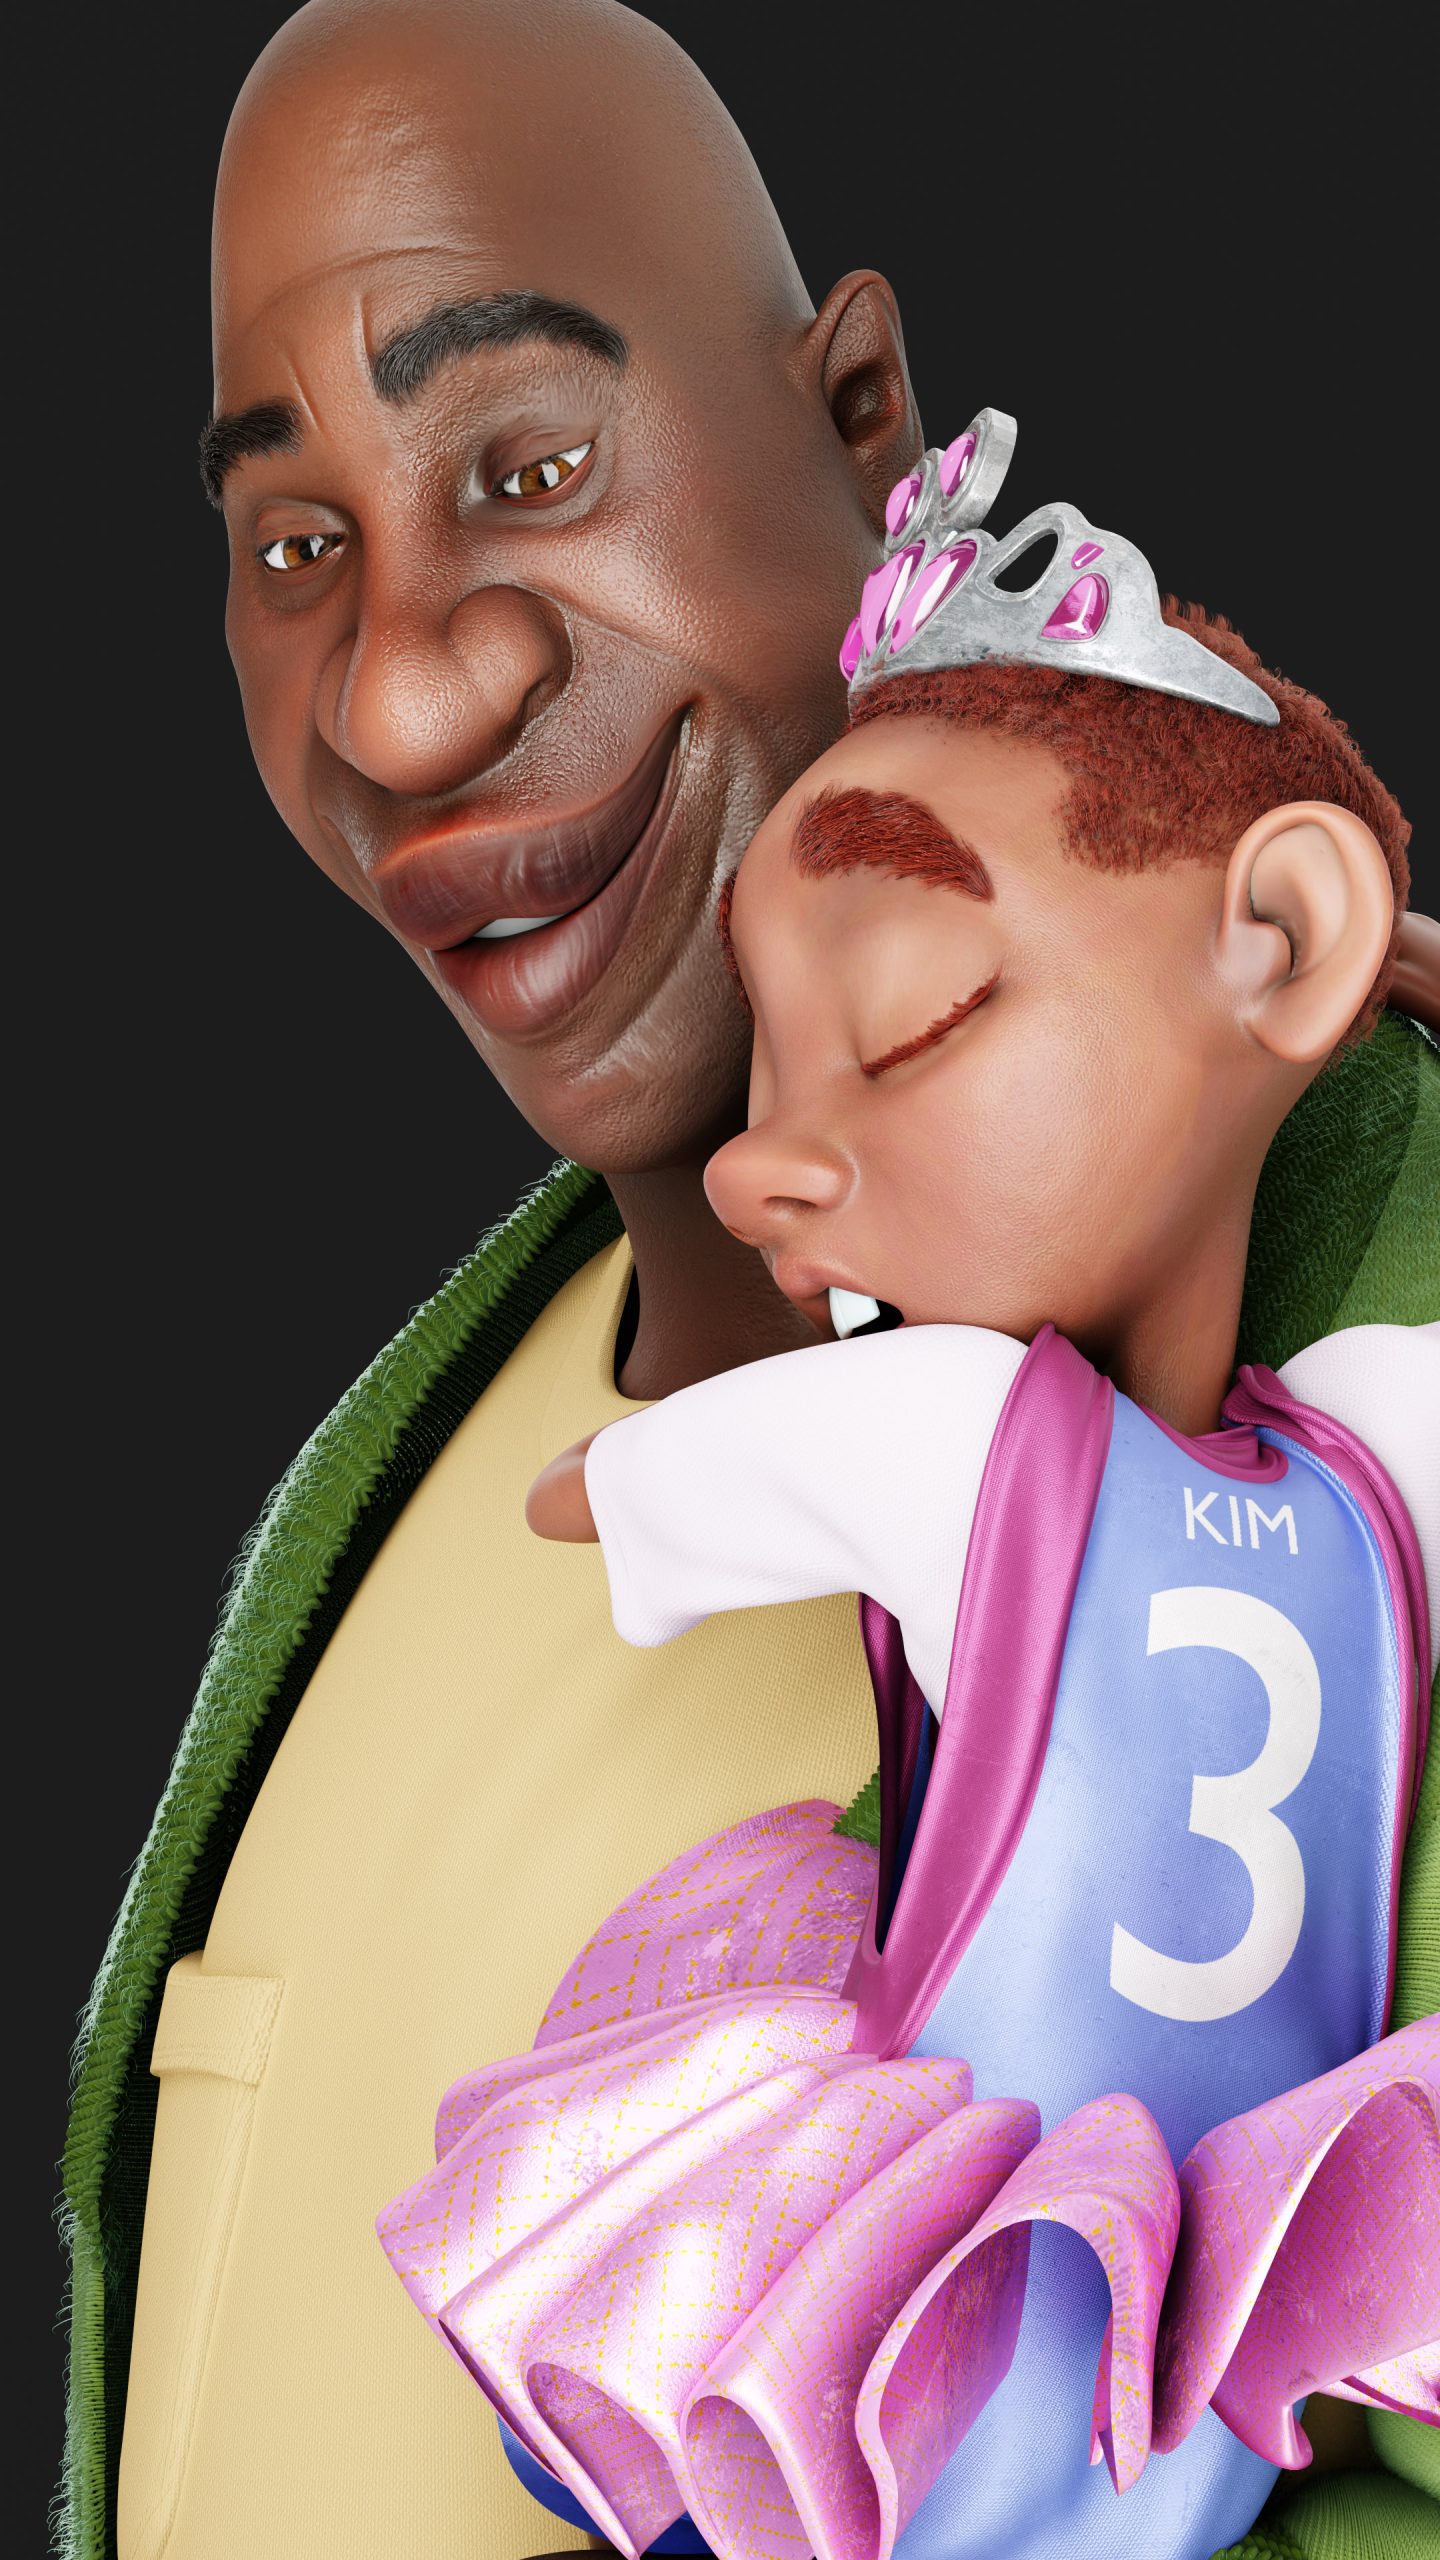
The character shading was enjoyable, particularly since you can play around with different maps (diff, spec, roughness, normal, displace, and sub-surface) to get the desired result.
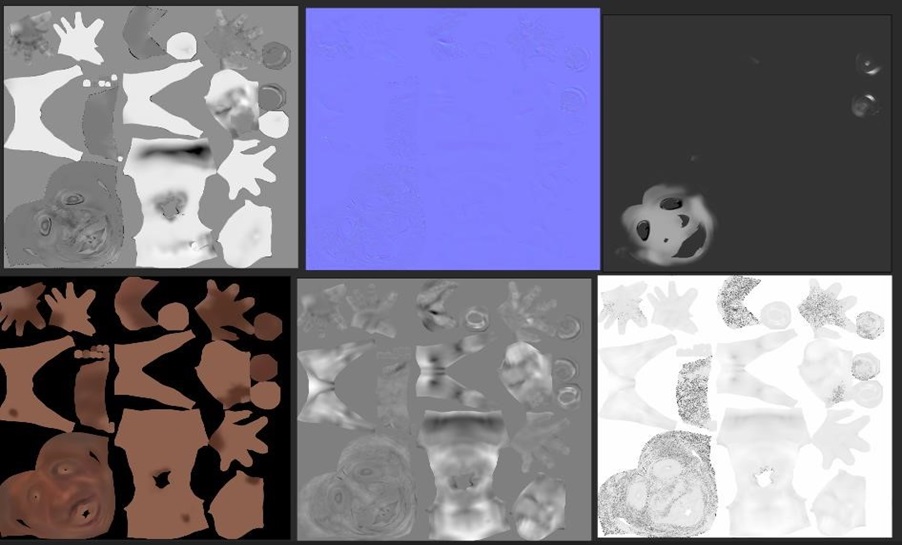
This is the texture of the father’s clothing.
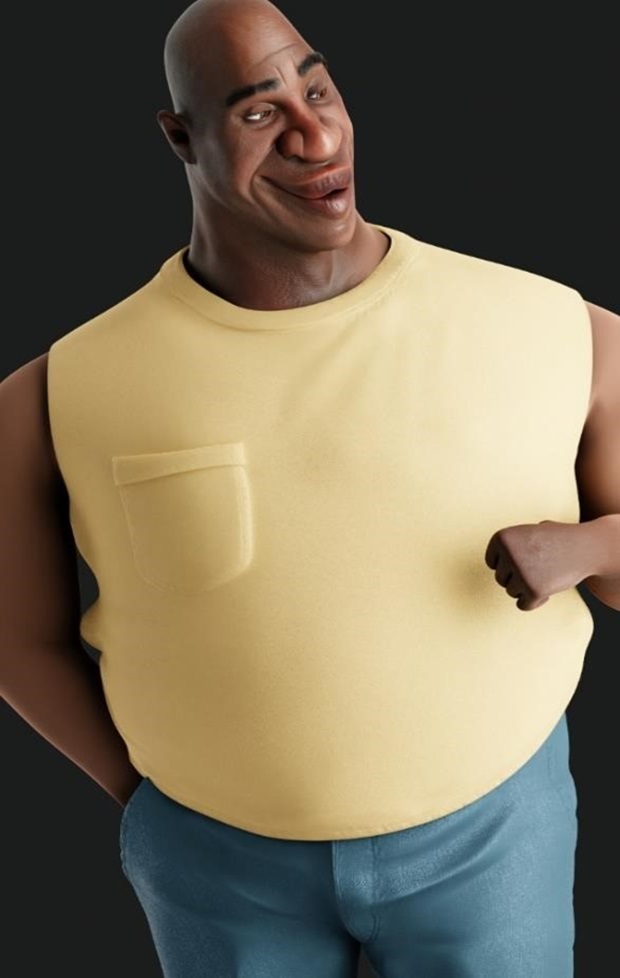
For the jacket shading, I used a combination of displacement texture, alpha texture, groomed fur, and principle BSDF with some SSS to get the soft look. 
LIGHTING
For the lighting, I used 3-point and HDRI to achieve my desired effect of indirect light and reflection. After the final render, a little color correction was done to finalize the artwork.
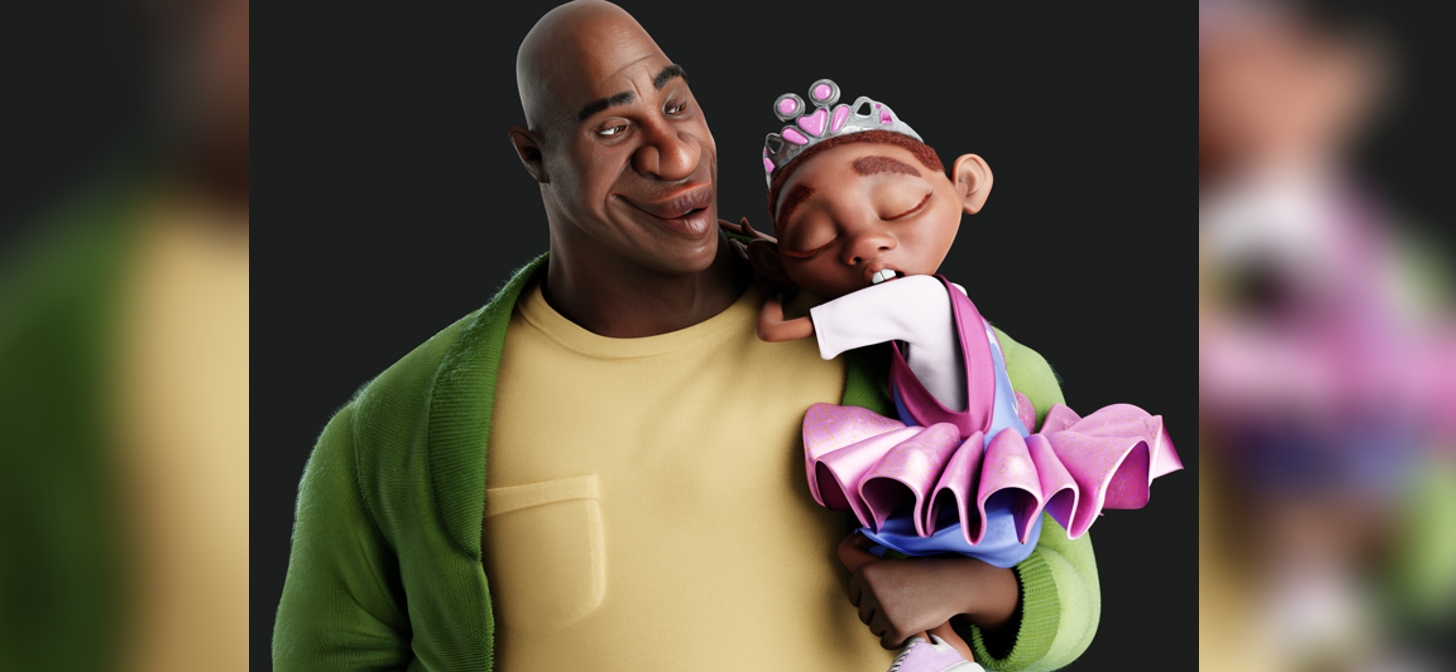
BABY GIRL
Thank you for reading my article, I hope you have a great day!
About the Artist

Emmanuel Okafor, a 3D artist from Abuja, Nigeria. Currently working as a full-time freelance artist in Philippines.


this looks great…both the sauce-art and your rendition are quite similar and different enough to give their own unique warm vibes of a father’s love…this was a joy to read
question…why’d you choose to use z-brush over blender?
Using Zbrush is just something that I am comfortable with. you could easily achieve the same thing with Blender. so it is just a matter of preference
Excellent execution of the concept design! Nice clean workflow, as well. Great job!