Behind the Scenes: Witch
INTRODUCTION
Hi! My name is Lucas. I’m from Porto Alegre, Brazil. I graduated in Design, the field in which I’ve started learning 3D. I spend countless hours on tutorials, time-lapses, articles and all this stuff from the internet. Doing personal projects is really valuable for me to learn new ways and to solve things in 3D.
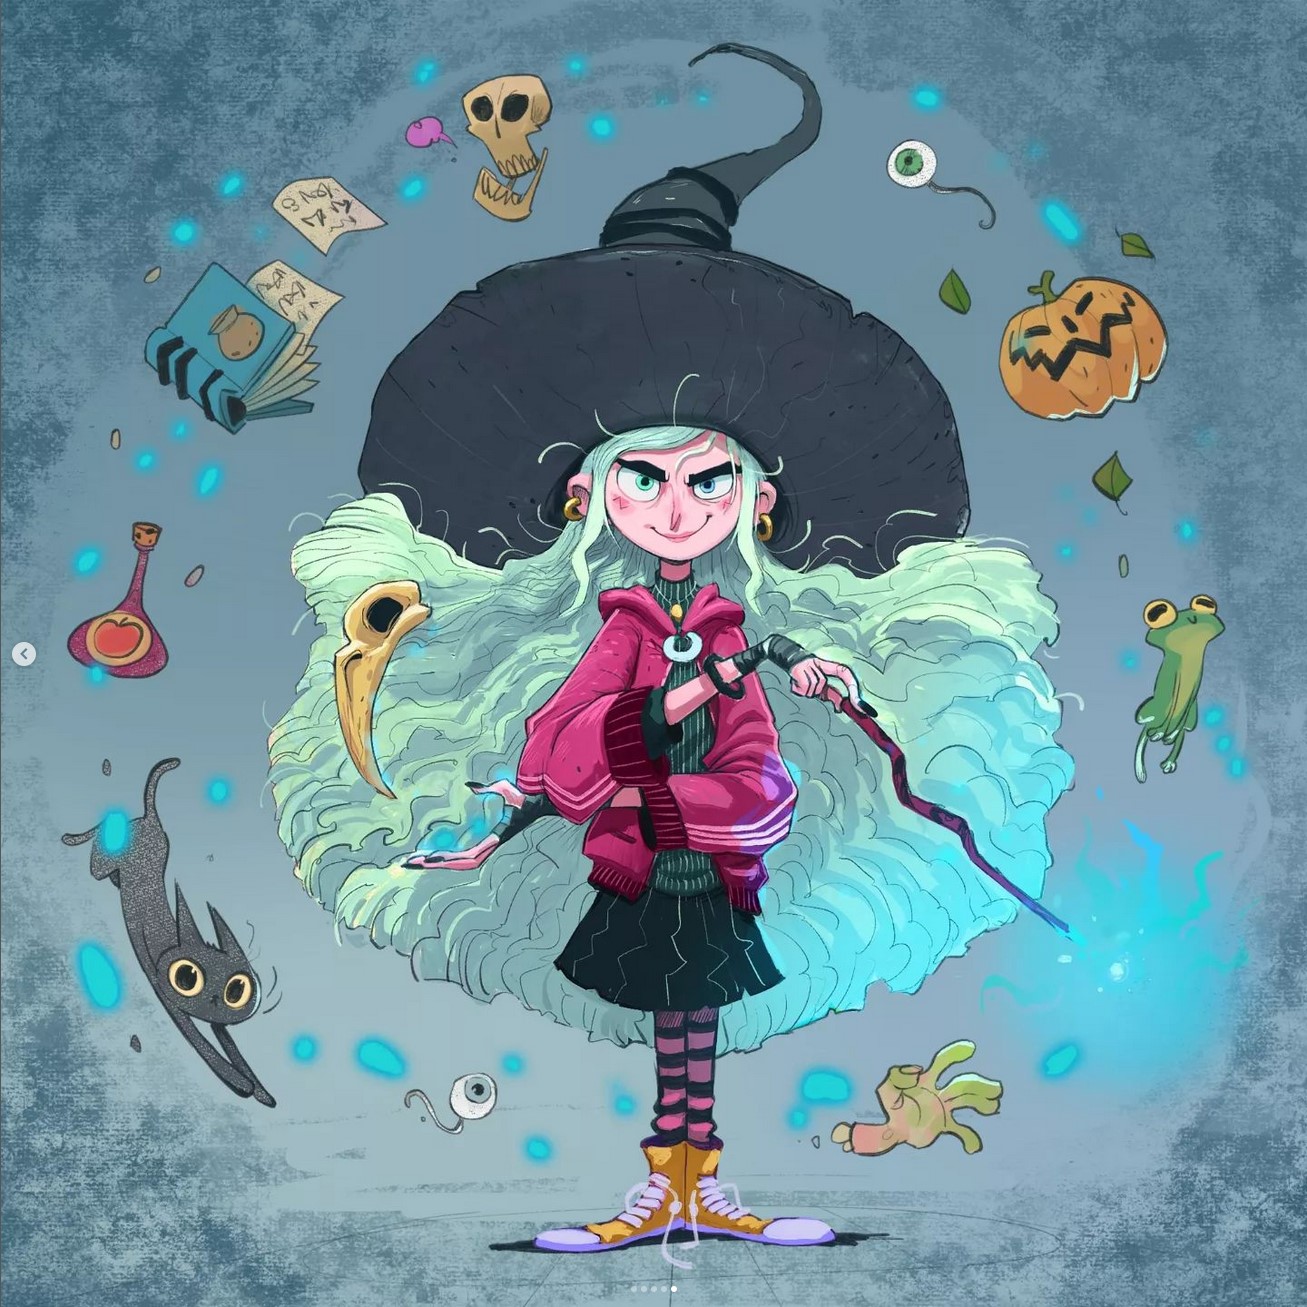
INSPIRATION
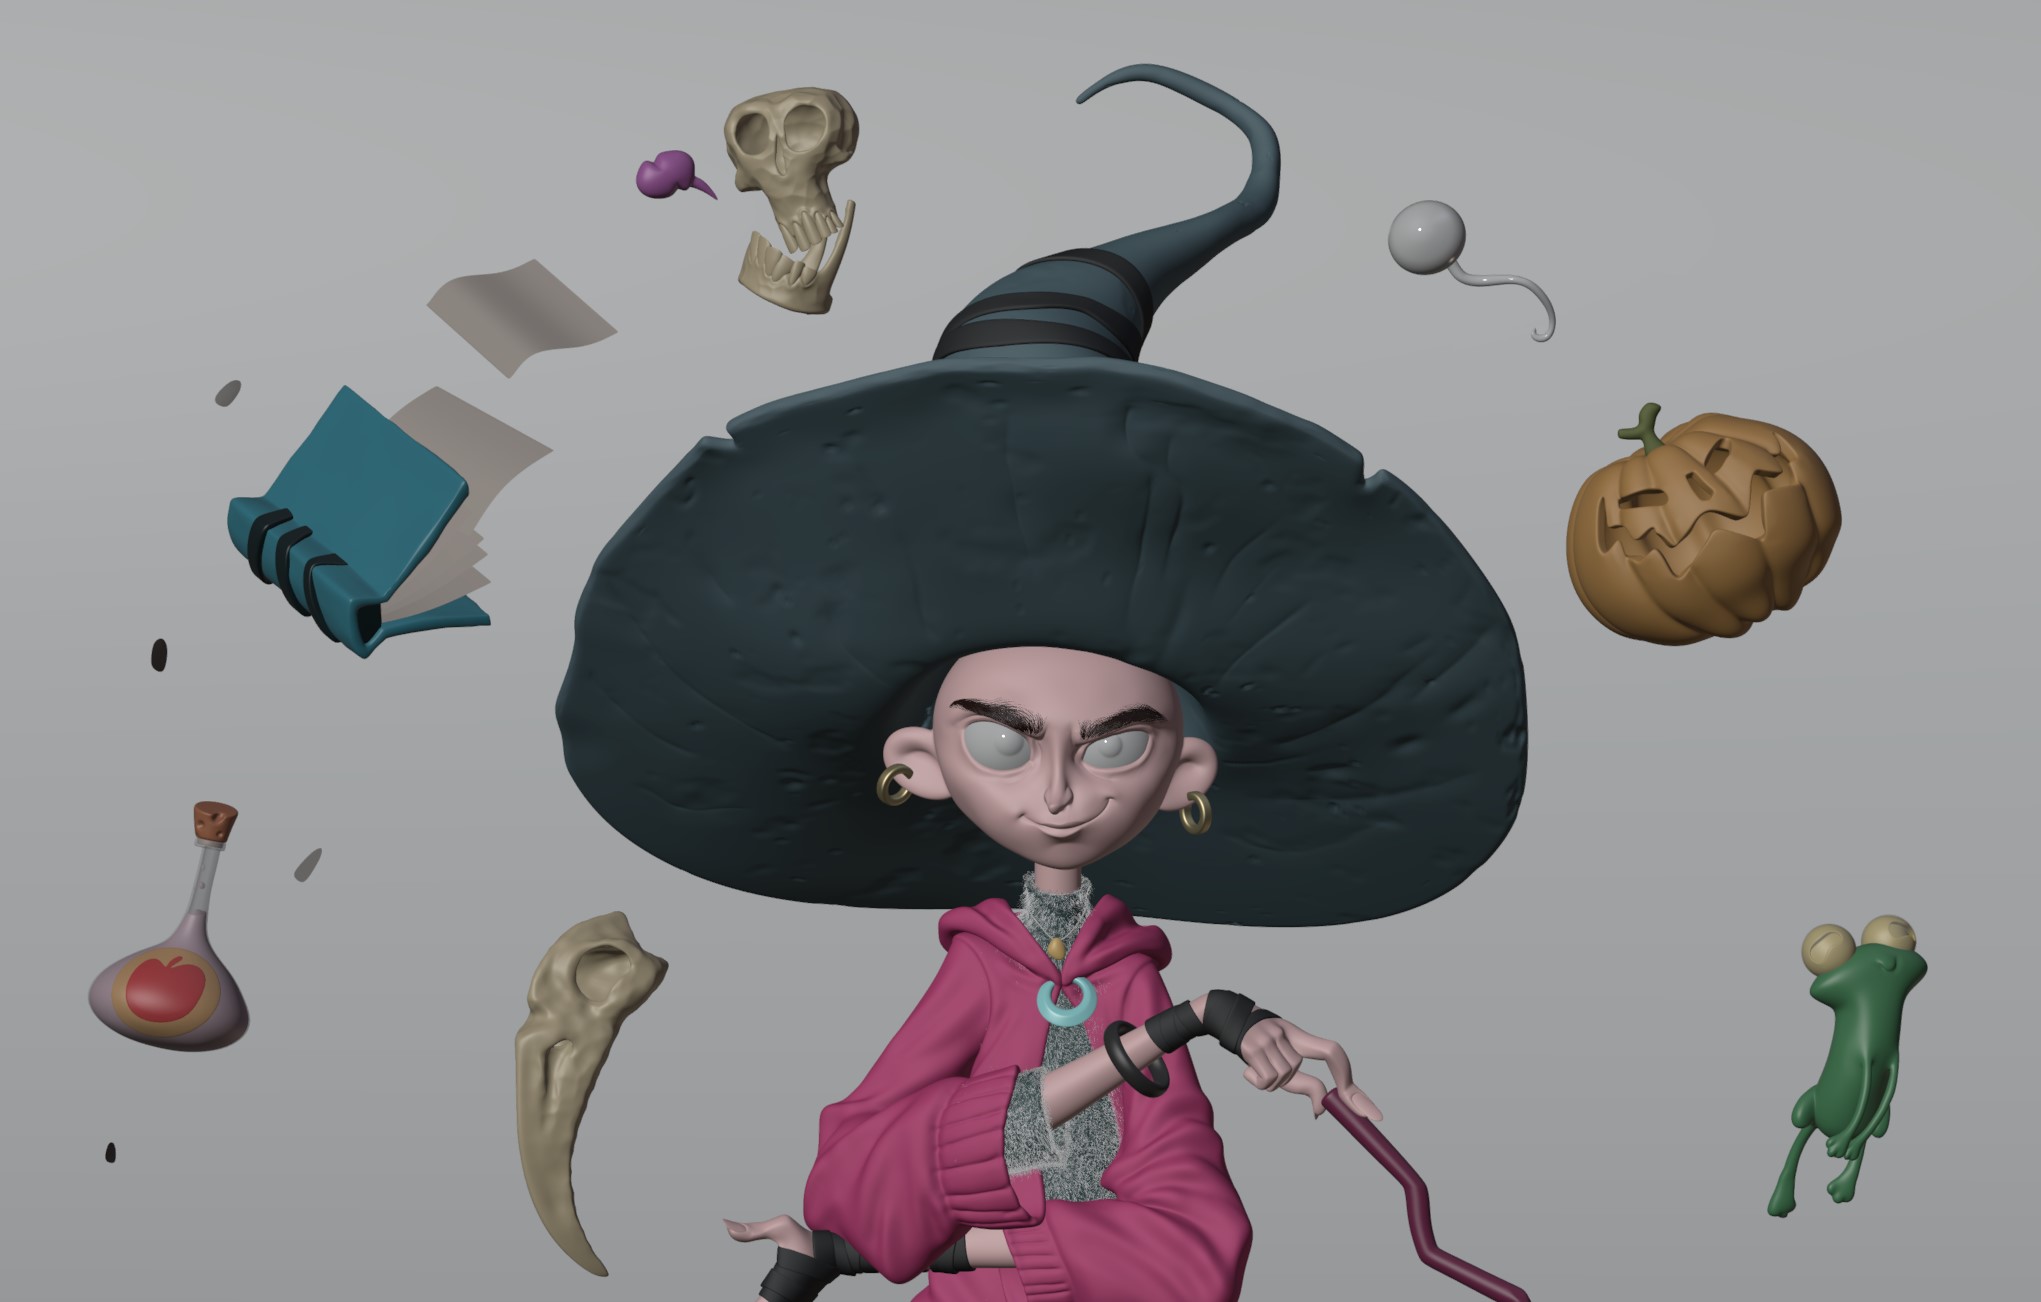
I was browsing through Instagram and saw this beautiful concept art of a witch surrounded by some cool objects, done by Guille Rancel, and I couldn’t resist creating my version in Blender.
HARDWARE
- AMD Ryzen 7 5800X
- NVIDIA GeForce RTX 3060 12 GB
- 32GB RAM
MODELING
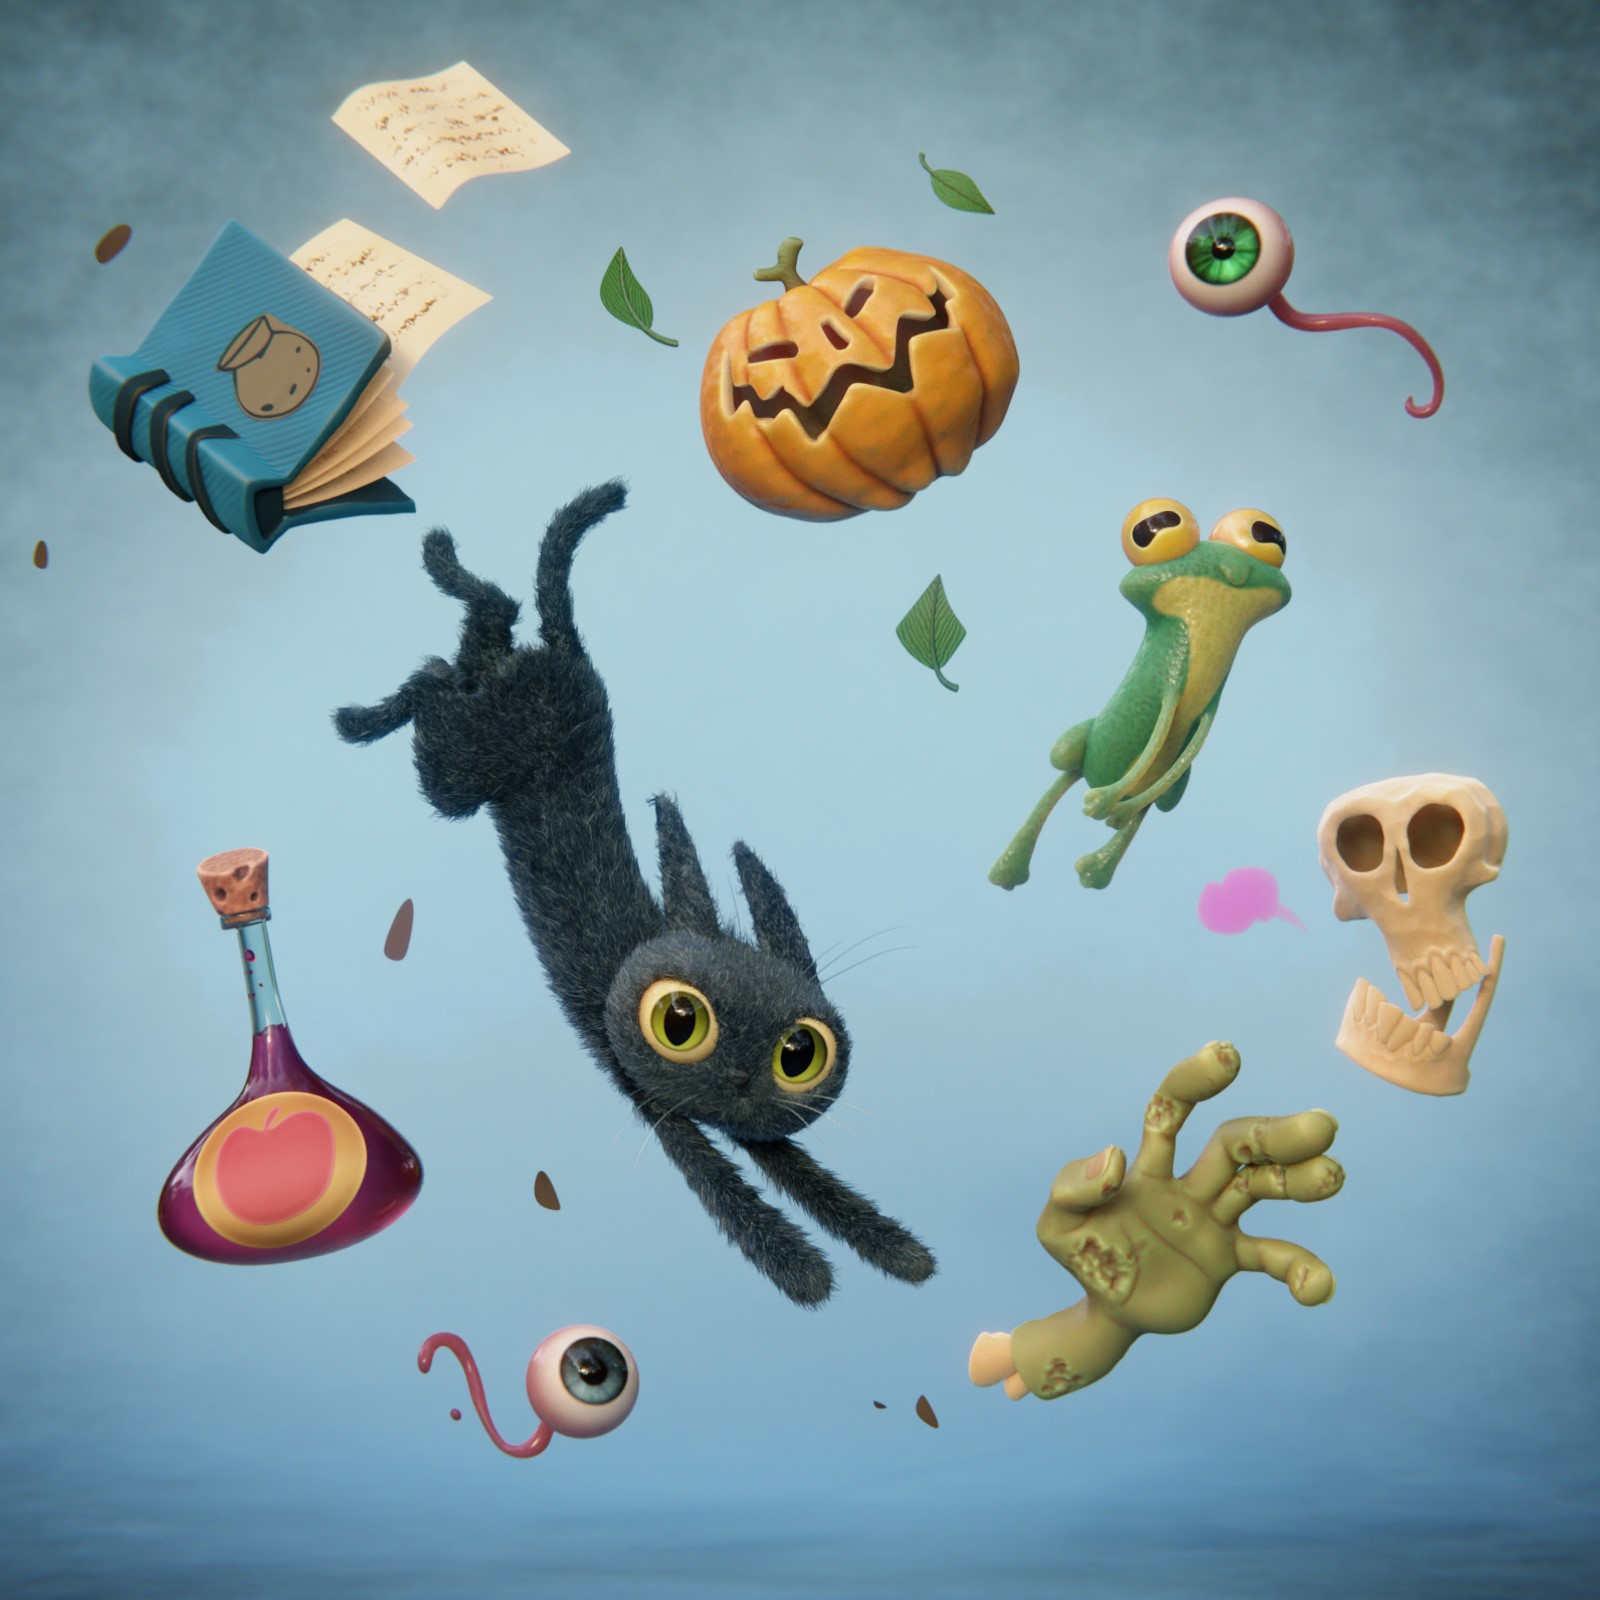
So for the modeling, I placed the concept art on the front view, just drag-and-dropped the image on the viewport, and start working from this angle mostly. I grabbed some objects like the hands from another personal project. They were already rigged so it was easy to pose them. The shoes were also stolen from another project and tweaked into the witch concept.
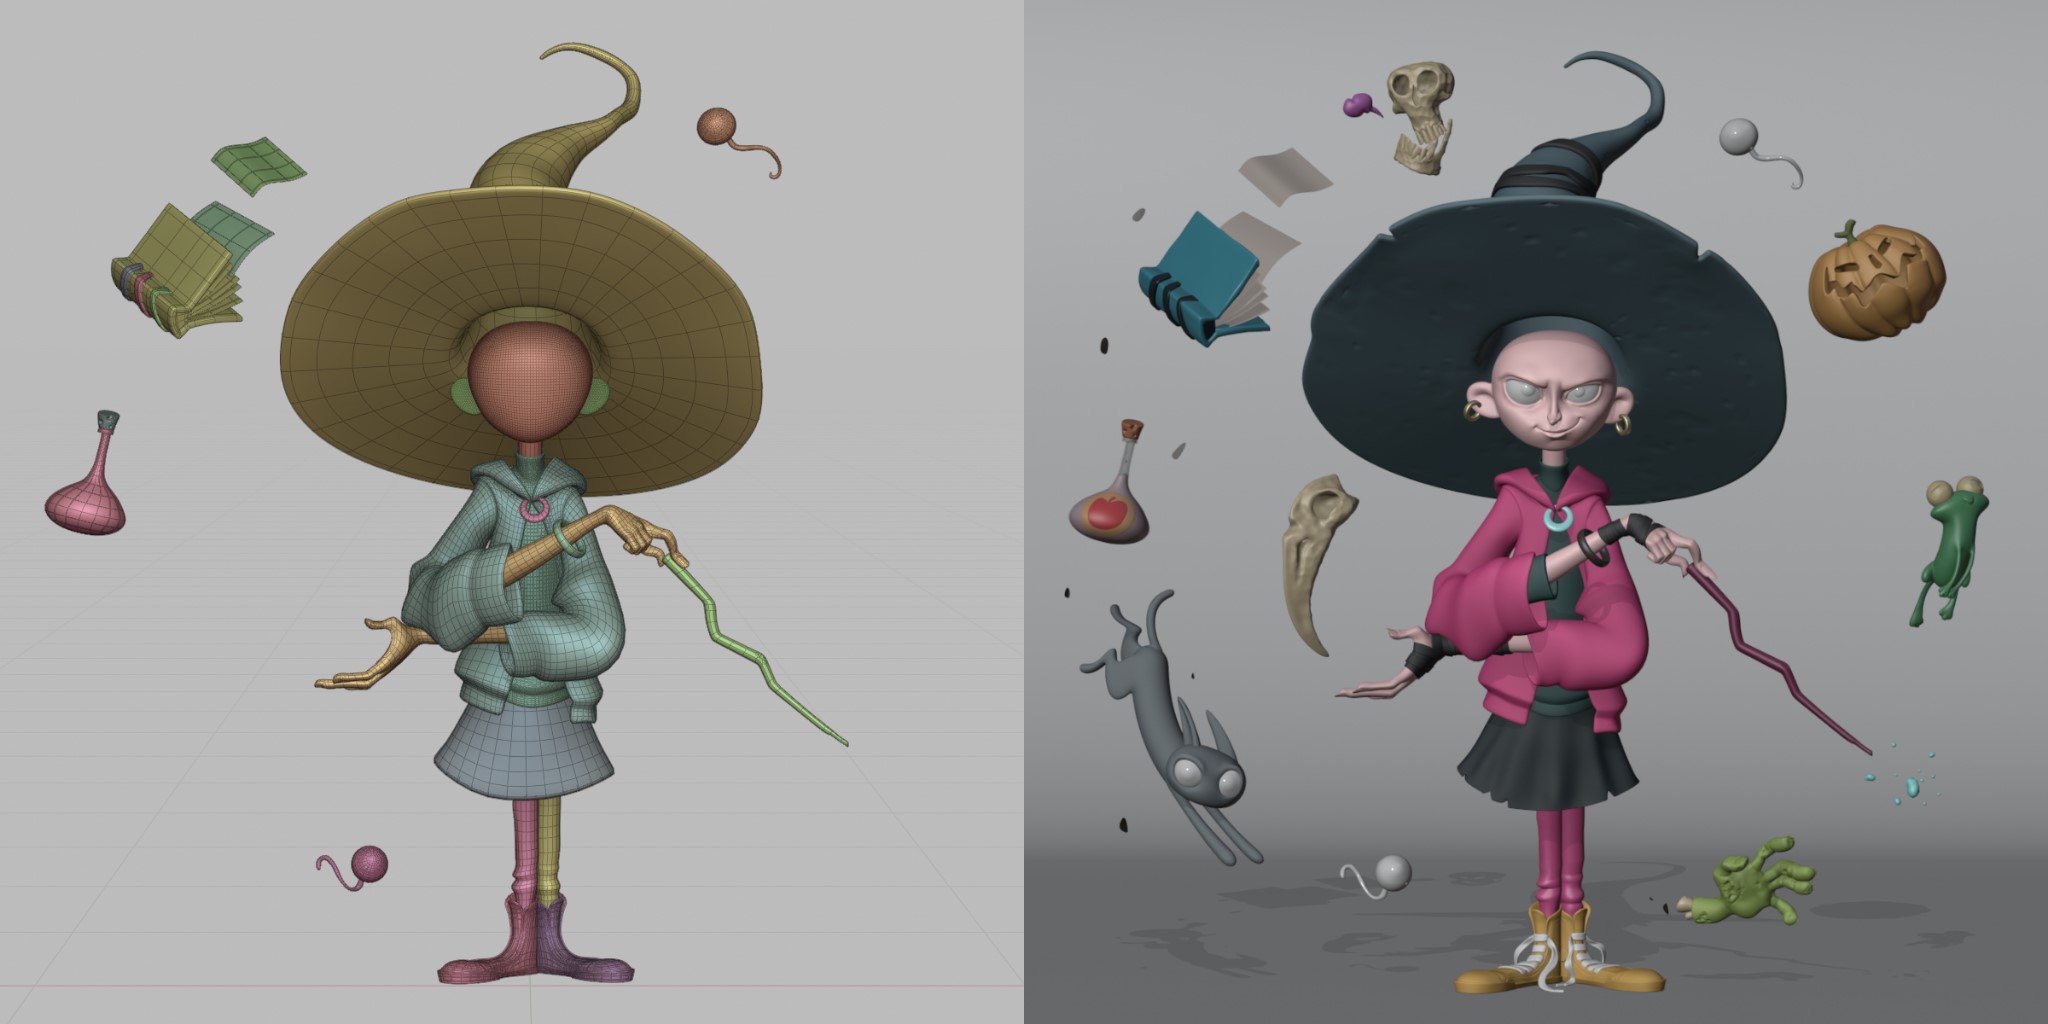
Everything else was modeled using Blender tools and sculpted using the Quad Remesher to have a decent topology to work with, like for the face, the cat, and the frog. The eyebrows were created using the Eyebrow Pack from the master Nazar Noschenko.
SURFACE
For the textures and materials, everything was done using what Blender has to offer.
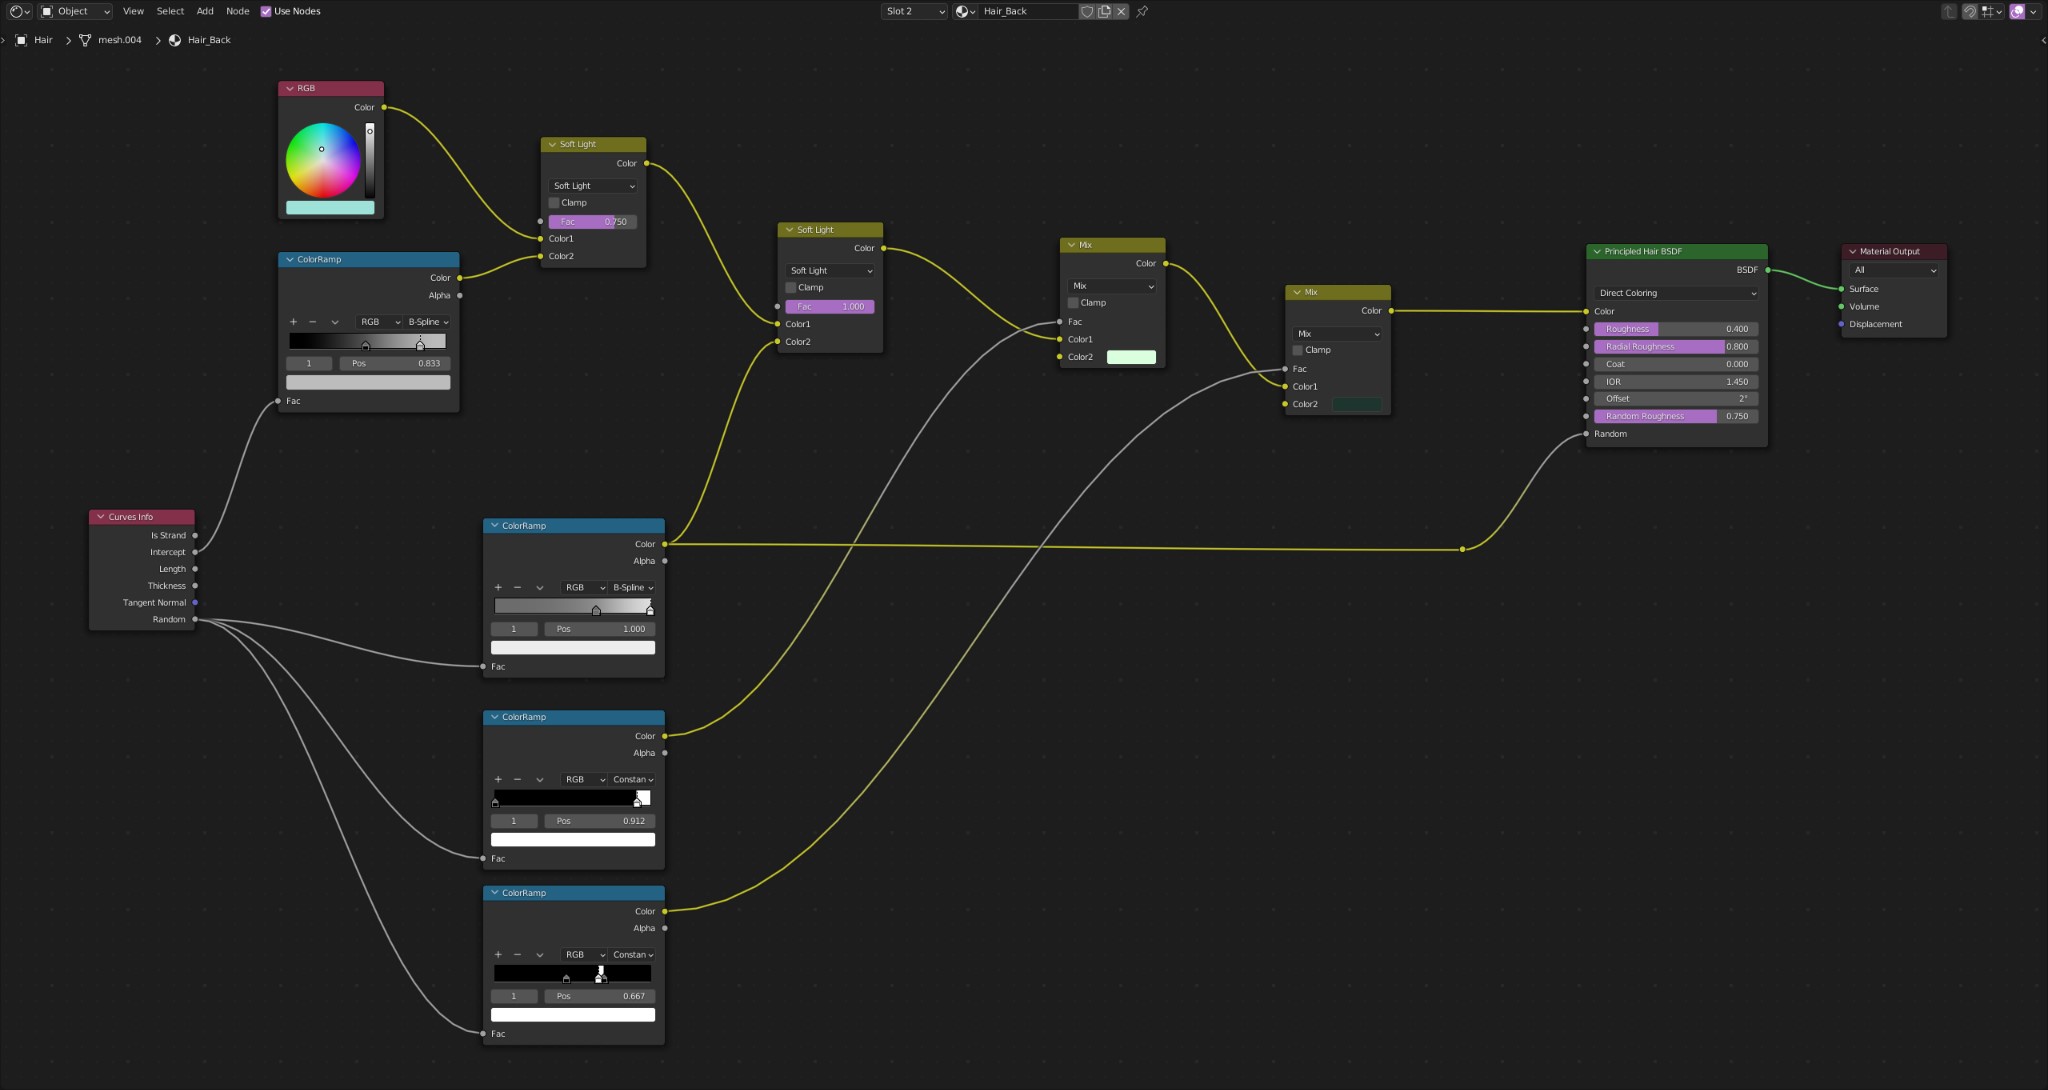
The eyes were created using the Auto Eye. I used a lot of Layer Weight (Facing), and the Pointiness with the ColorRamp node in some ways to achieve different looks for different materials. These are probably my favorite nodes.
I also used the Wave and Noise textures nodes a lot. The colors were done using Vertex Paint, now renamed to Color Attributes, and they were also used to create the black and white masks. The new Paint on sculpt mode was working great by the way.
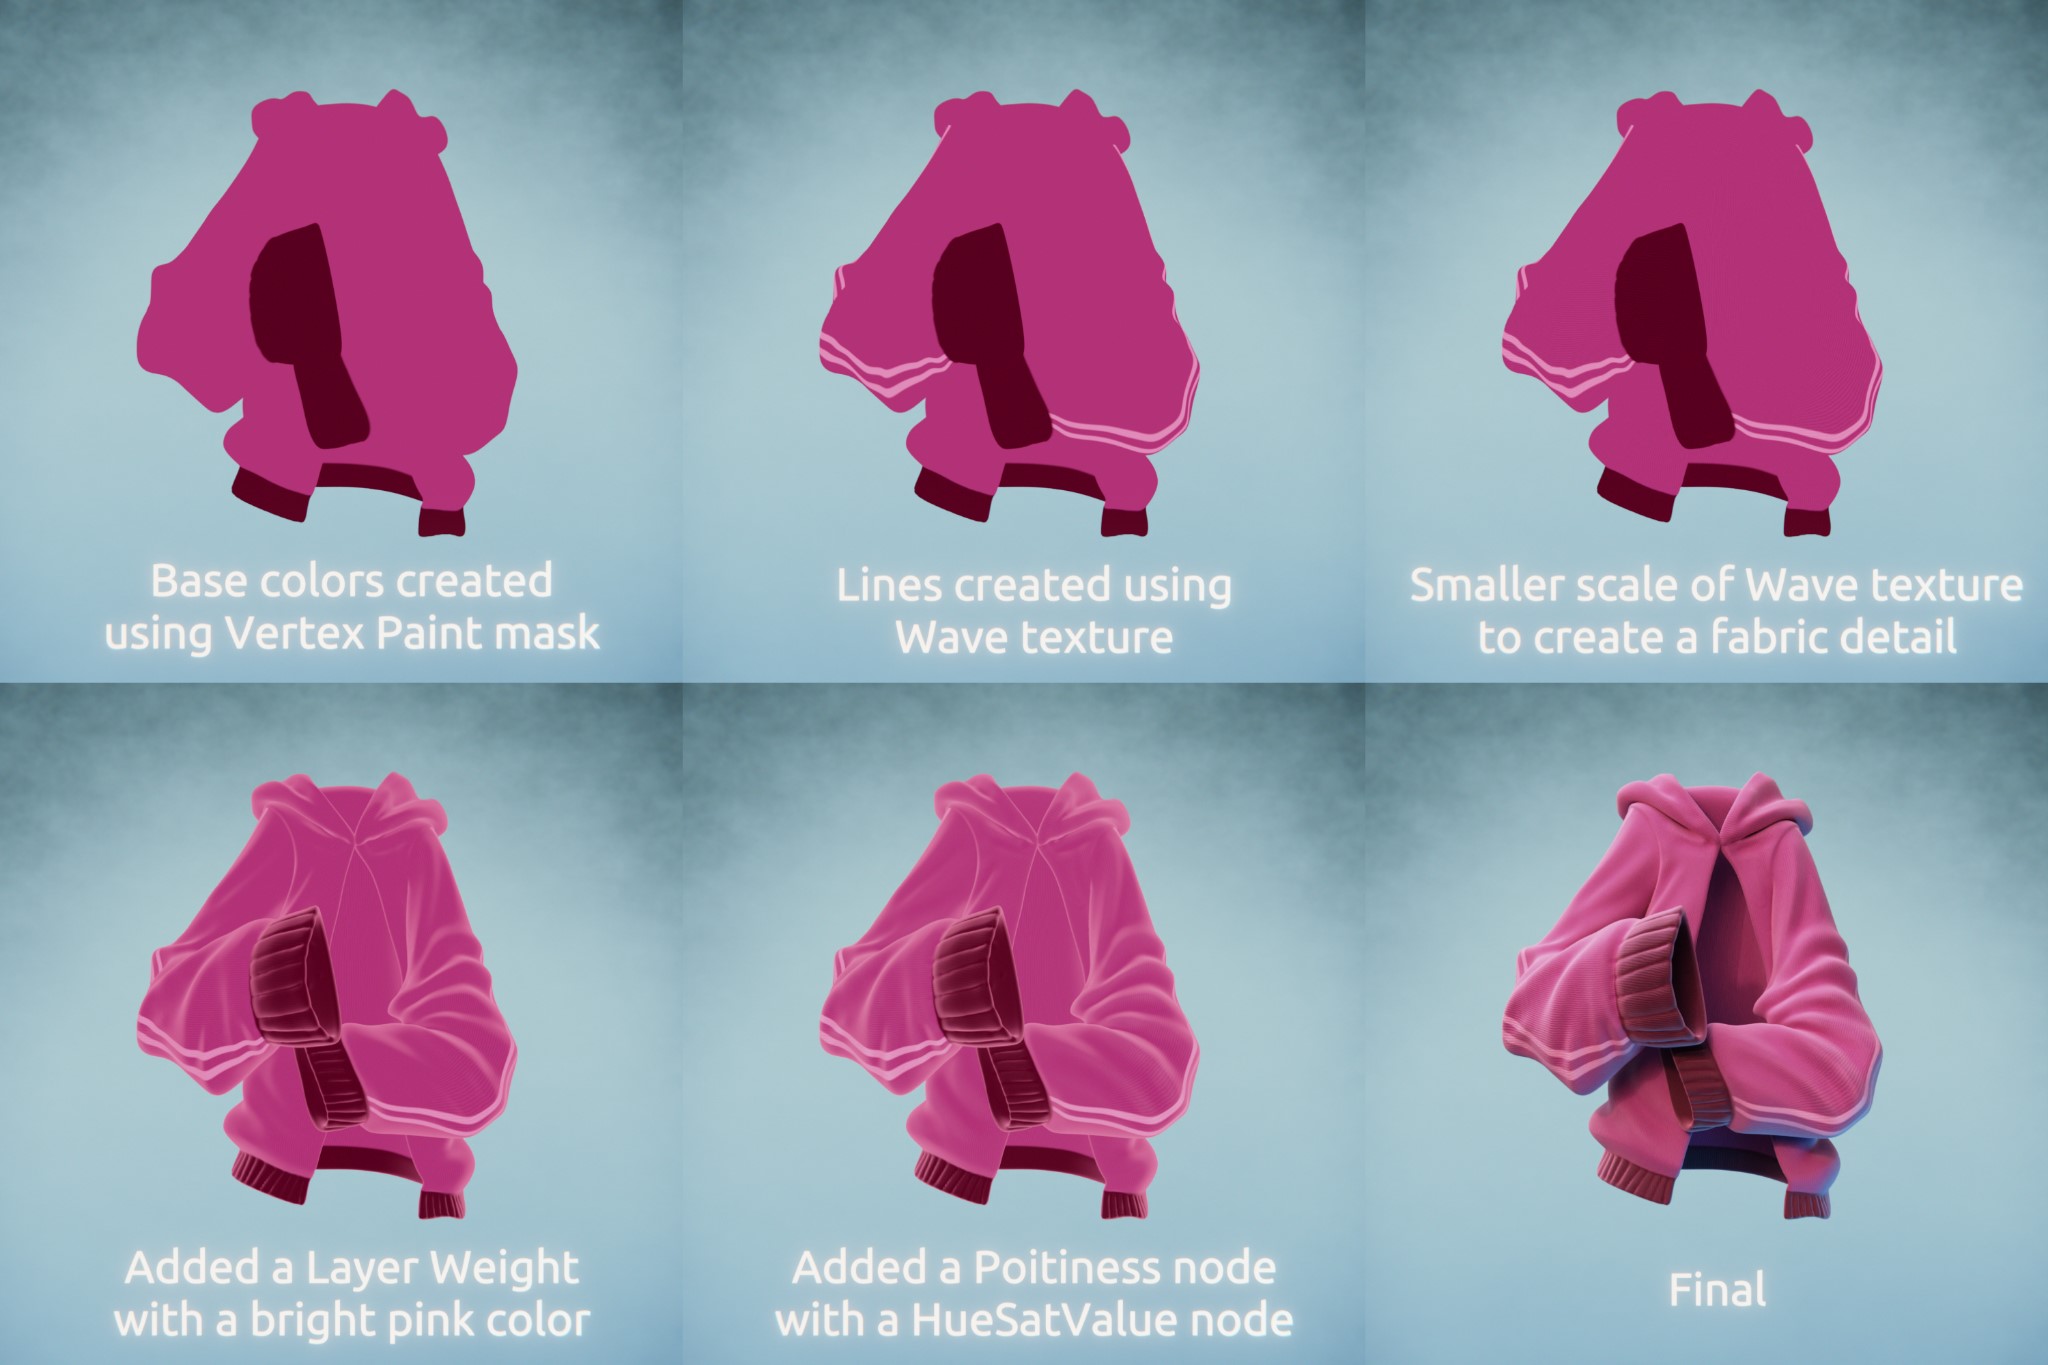
Modeling plays a big role on how the material will look, so it’s a mix between the things I mentioned above. The key to making good materials in my opinion is to think about what the object or the character is exposed to, like climate conditions. Try to differentiate the several materials on your scene: fabrics, plastic, metal, and subsurface, so they all look distinct, especially for things that are side to side. Take use of at least the Color, Roughness and Bump inputs. In most cases, if you use these inputs, your materials will have more chances to look believable.

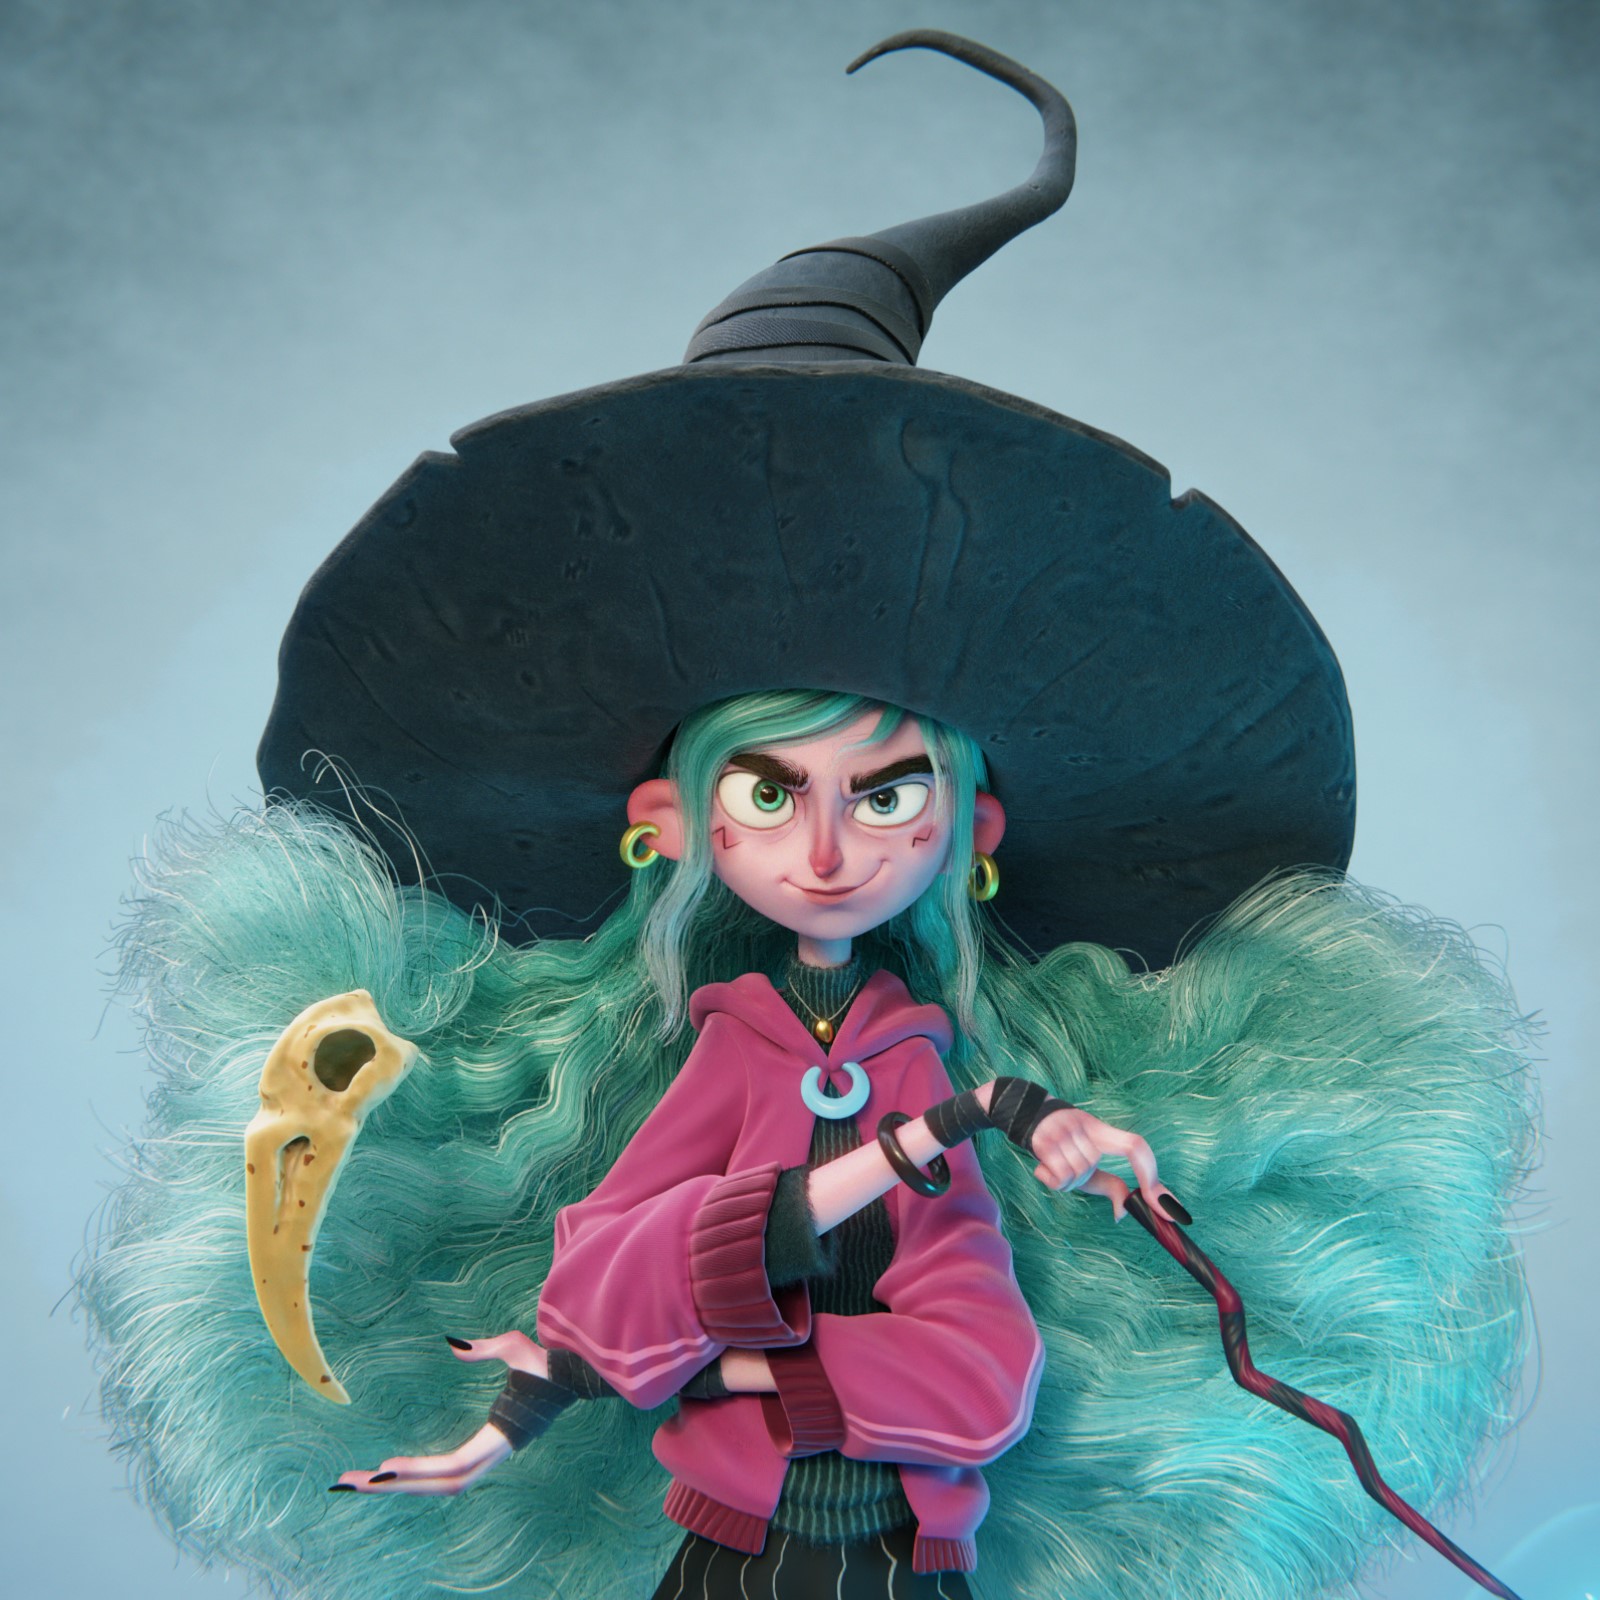
HAIR
The hair was created using the Blender particles system. I created one system for the fringe and two separate systems for the back of the hair, mostly because I used a different Twist effect for each side.
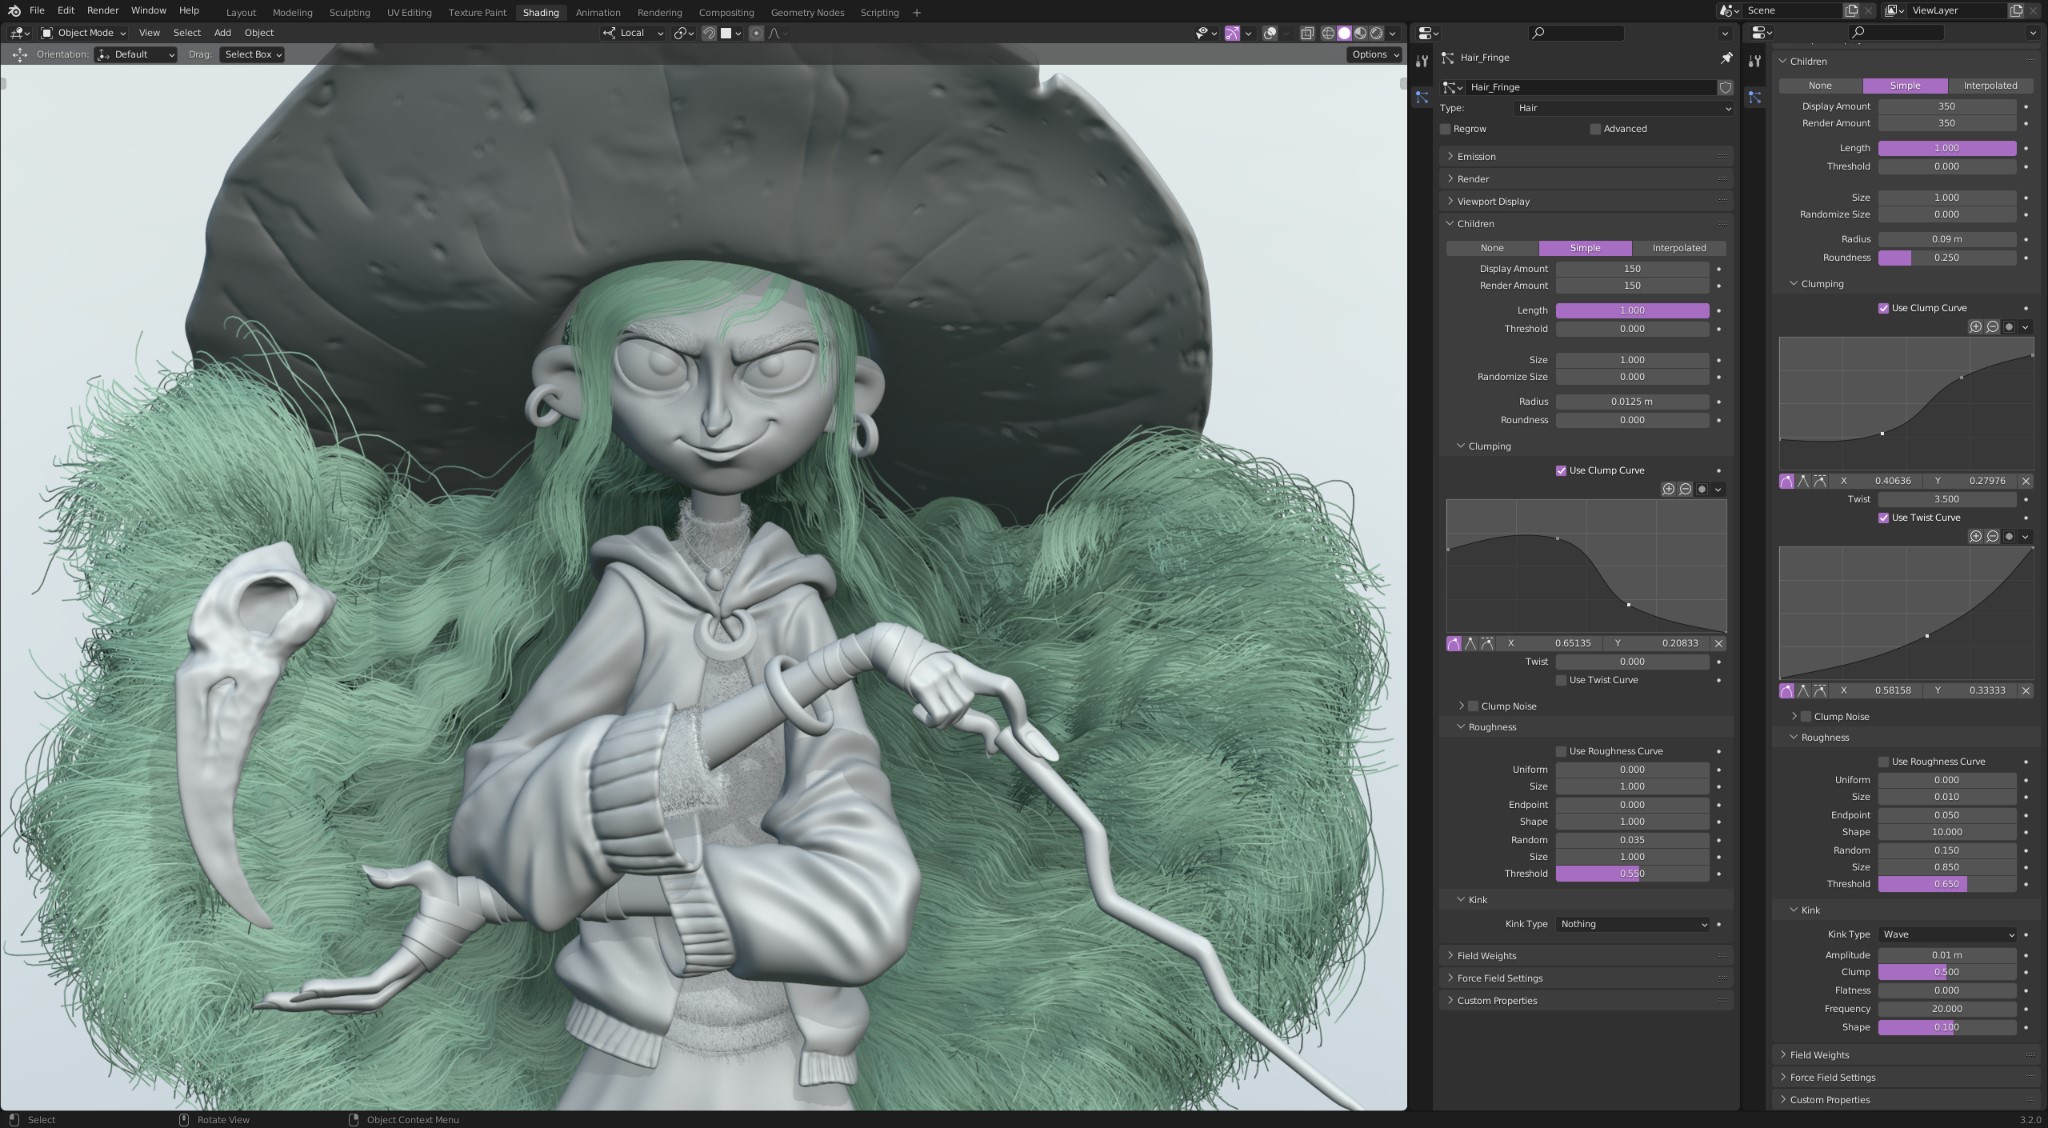
A very handy add-on that I used was the Hair Extension Toolkit, which added a lot of useful functions to the default particle system. My favorite is the function for splitting and merging particles from selection, that otherwise you would need to create a new particle system comb again.
LIGHTING
The lighting was fairly simple: I just used one of the HDRI that comes within Blender and a Point Light in the spell position. I wish there was an option to enable the render of these HDRIs that comes with Blender by default.
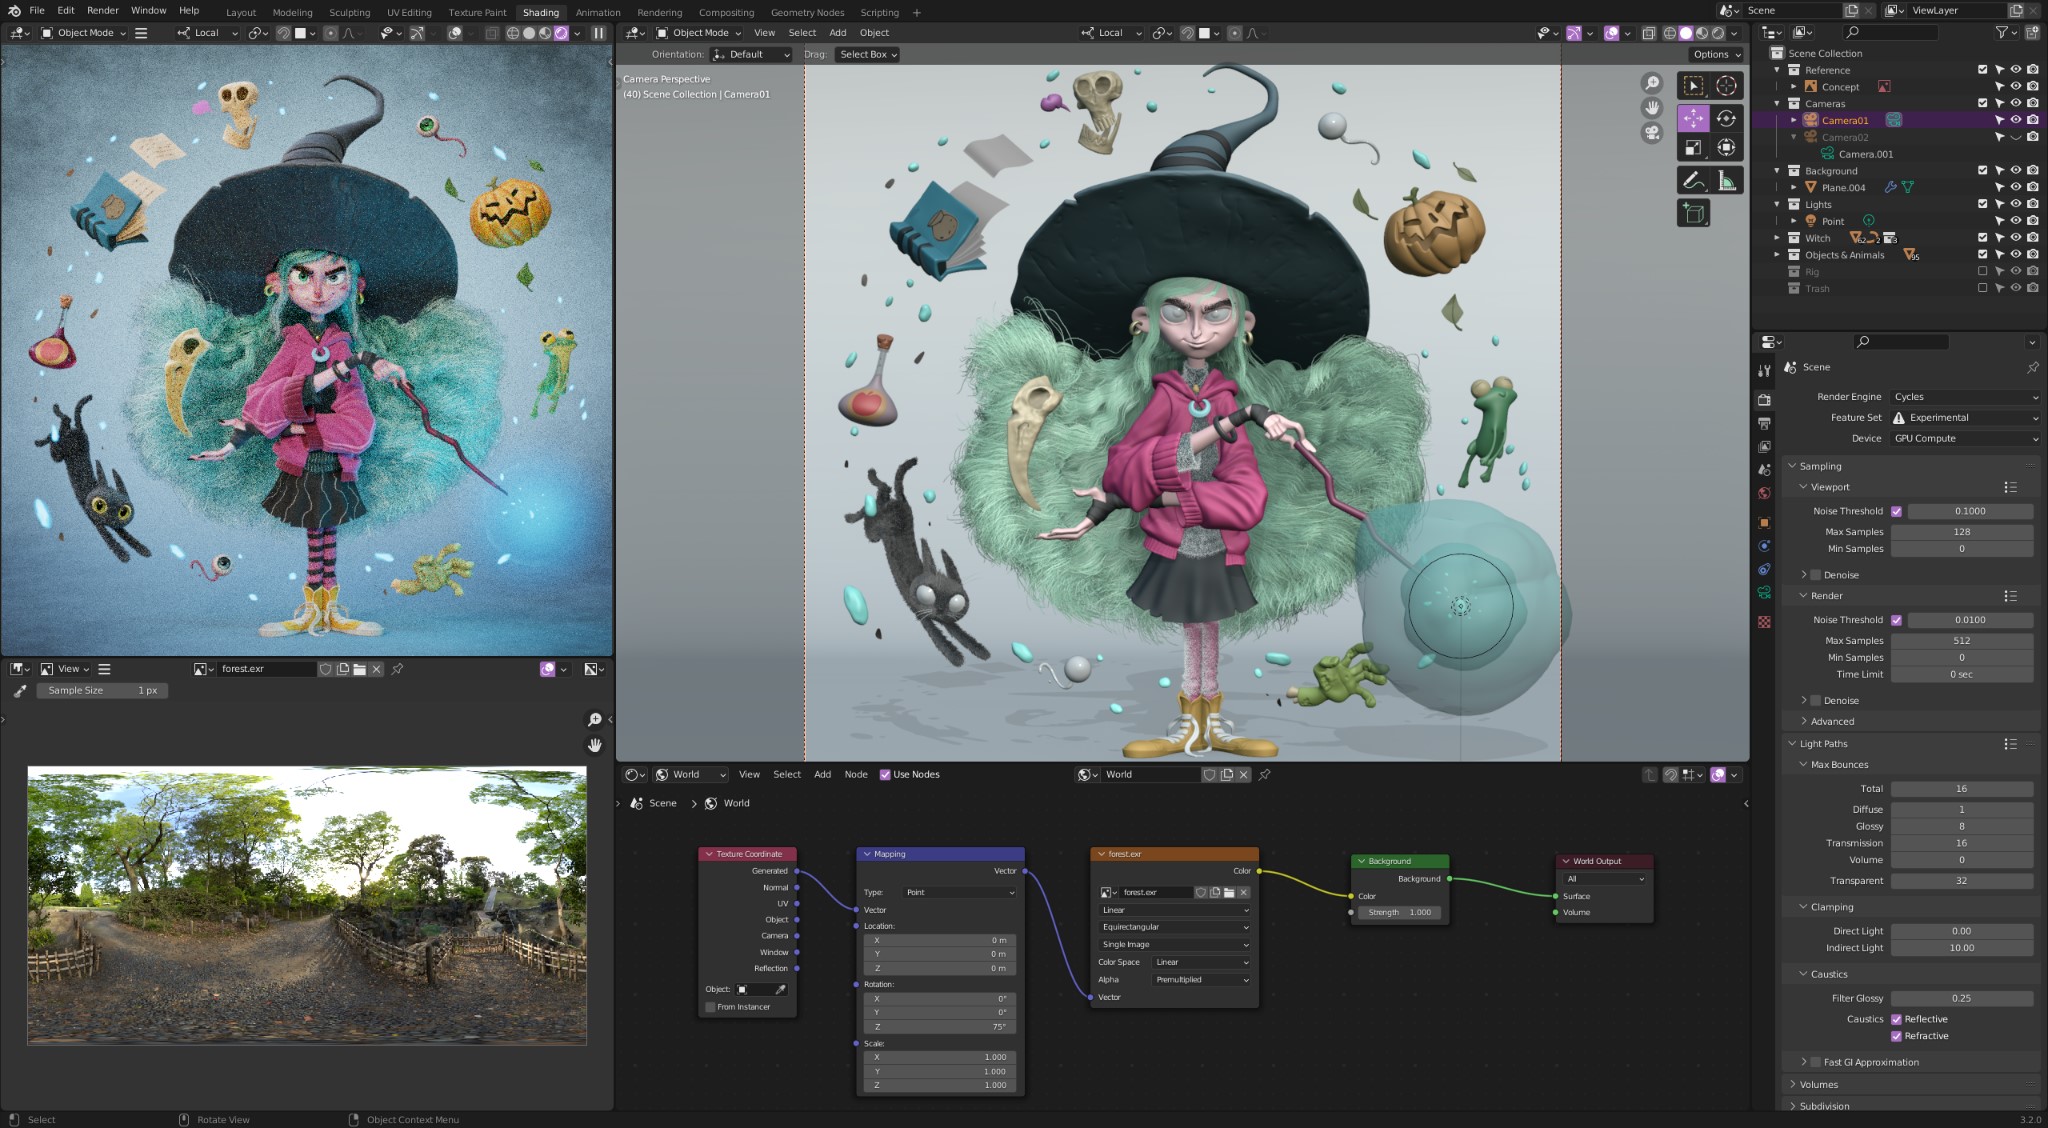
These are the folder locations for each OS if you want to use them. Some of them are from the site HDRI Heaven and you may want to download a bigger resolution.
- Windows – C:\Program Files\Blender Foundation\Blender <version>\<version>\Datafiles\Studiolights\World\
- MacOS – /Applications/Blender/Contents/Resources/<version>/Datafiles/Studiolights/World/
- Linux – /opt/Blender <version>/<version>/Datafiles/Studiolights/World/
COMPOSITING
The compositing was really simple, just a denoise filter with a little bit of contrast and color balance, a glare effect, a little bit of lens distortion and jitter.

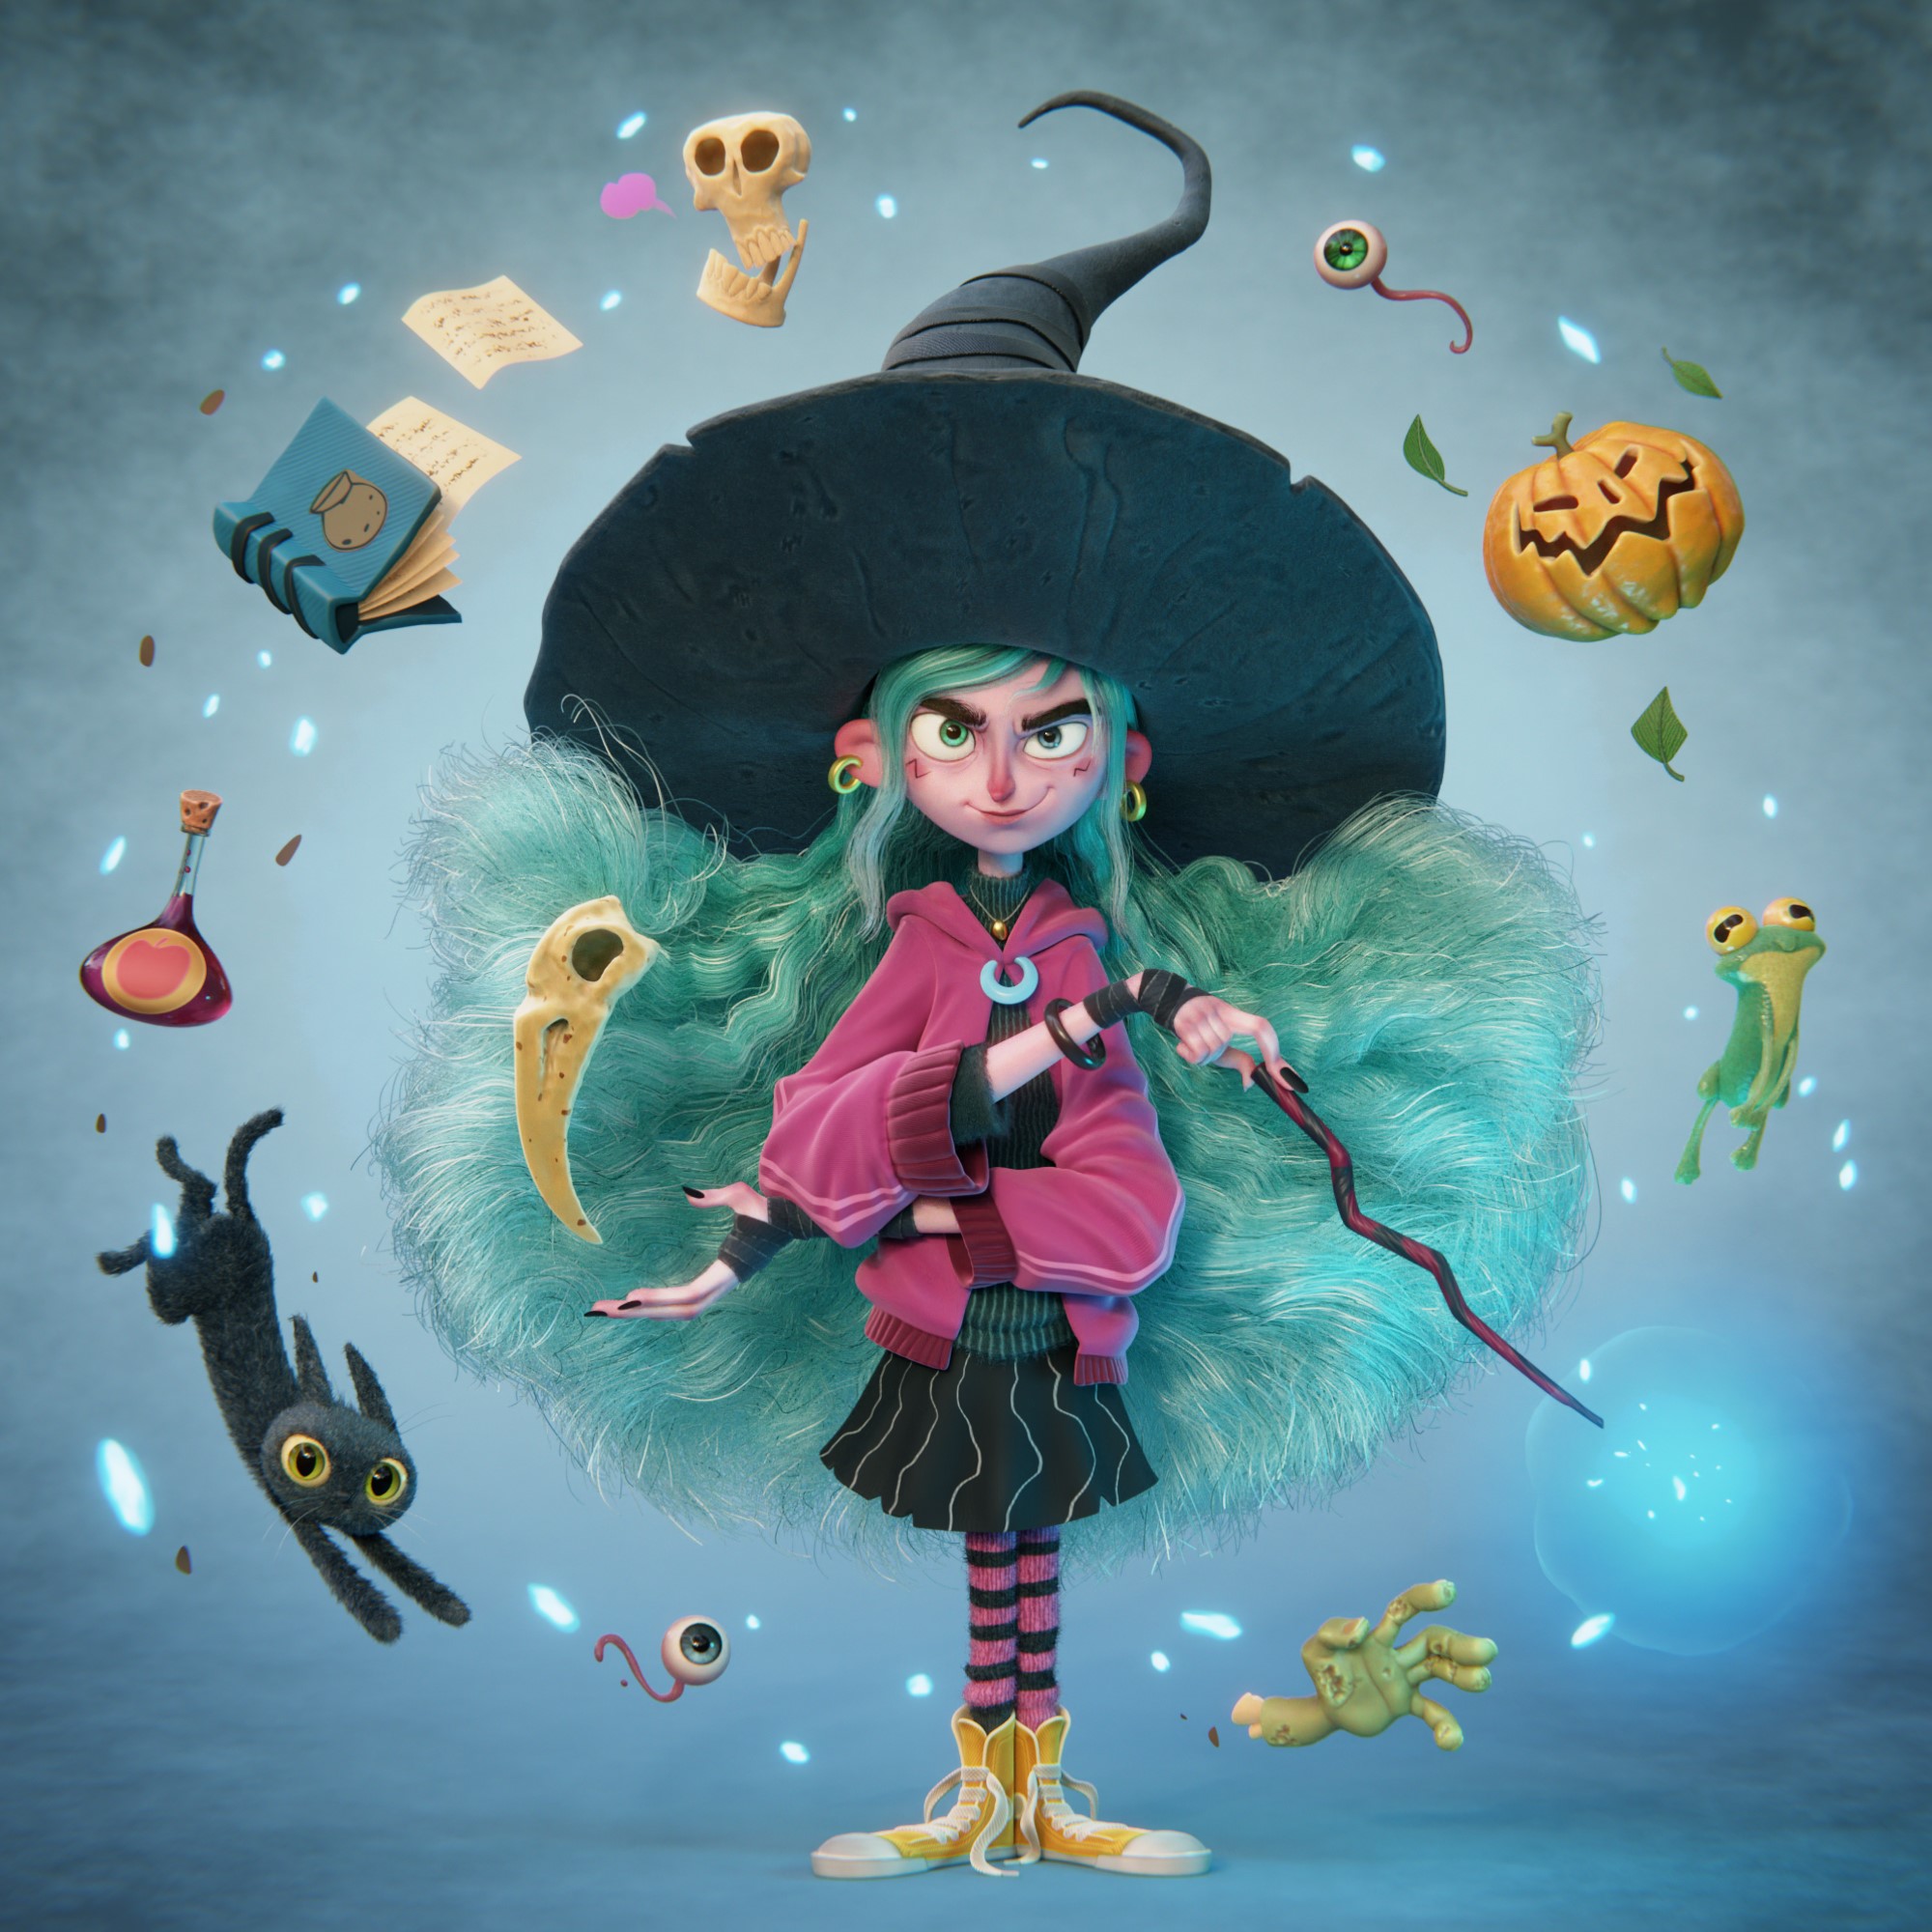
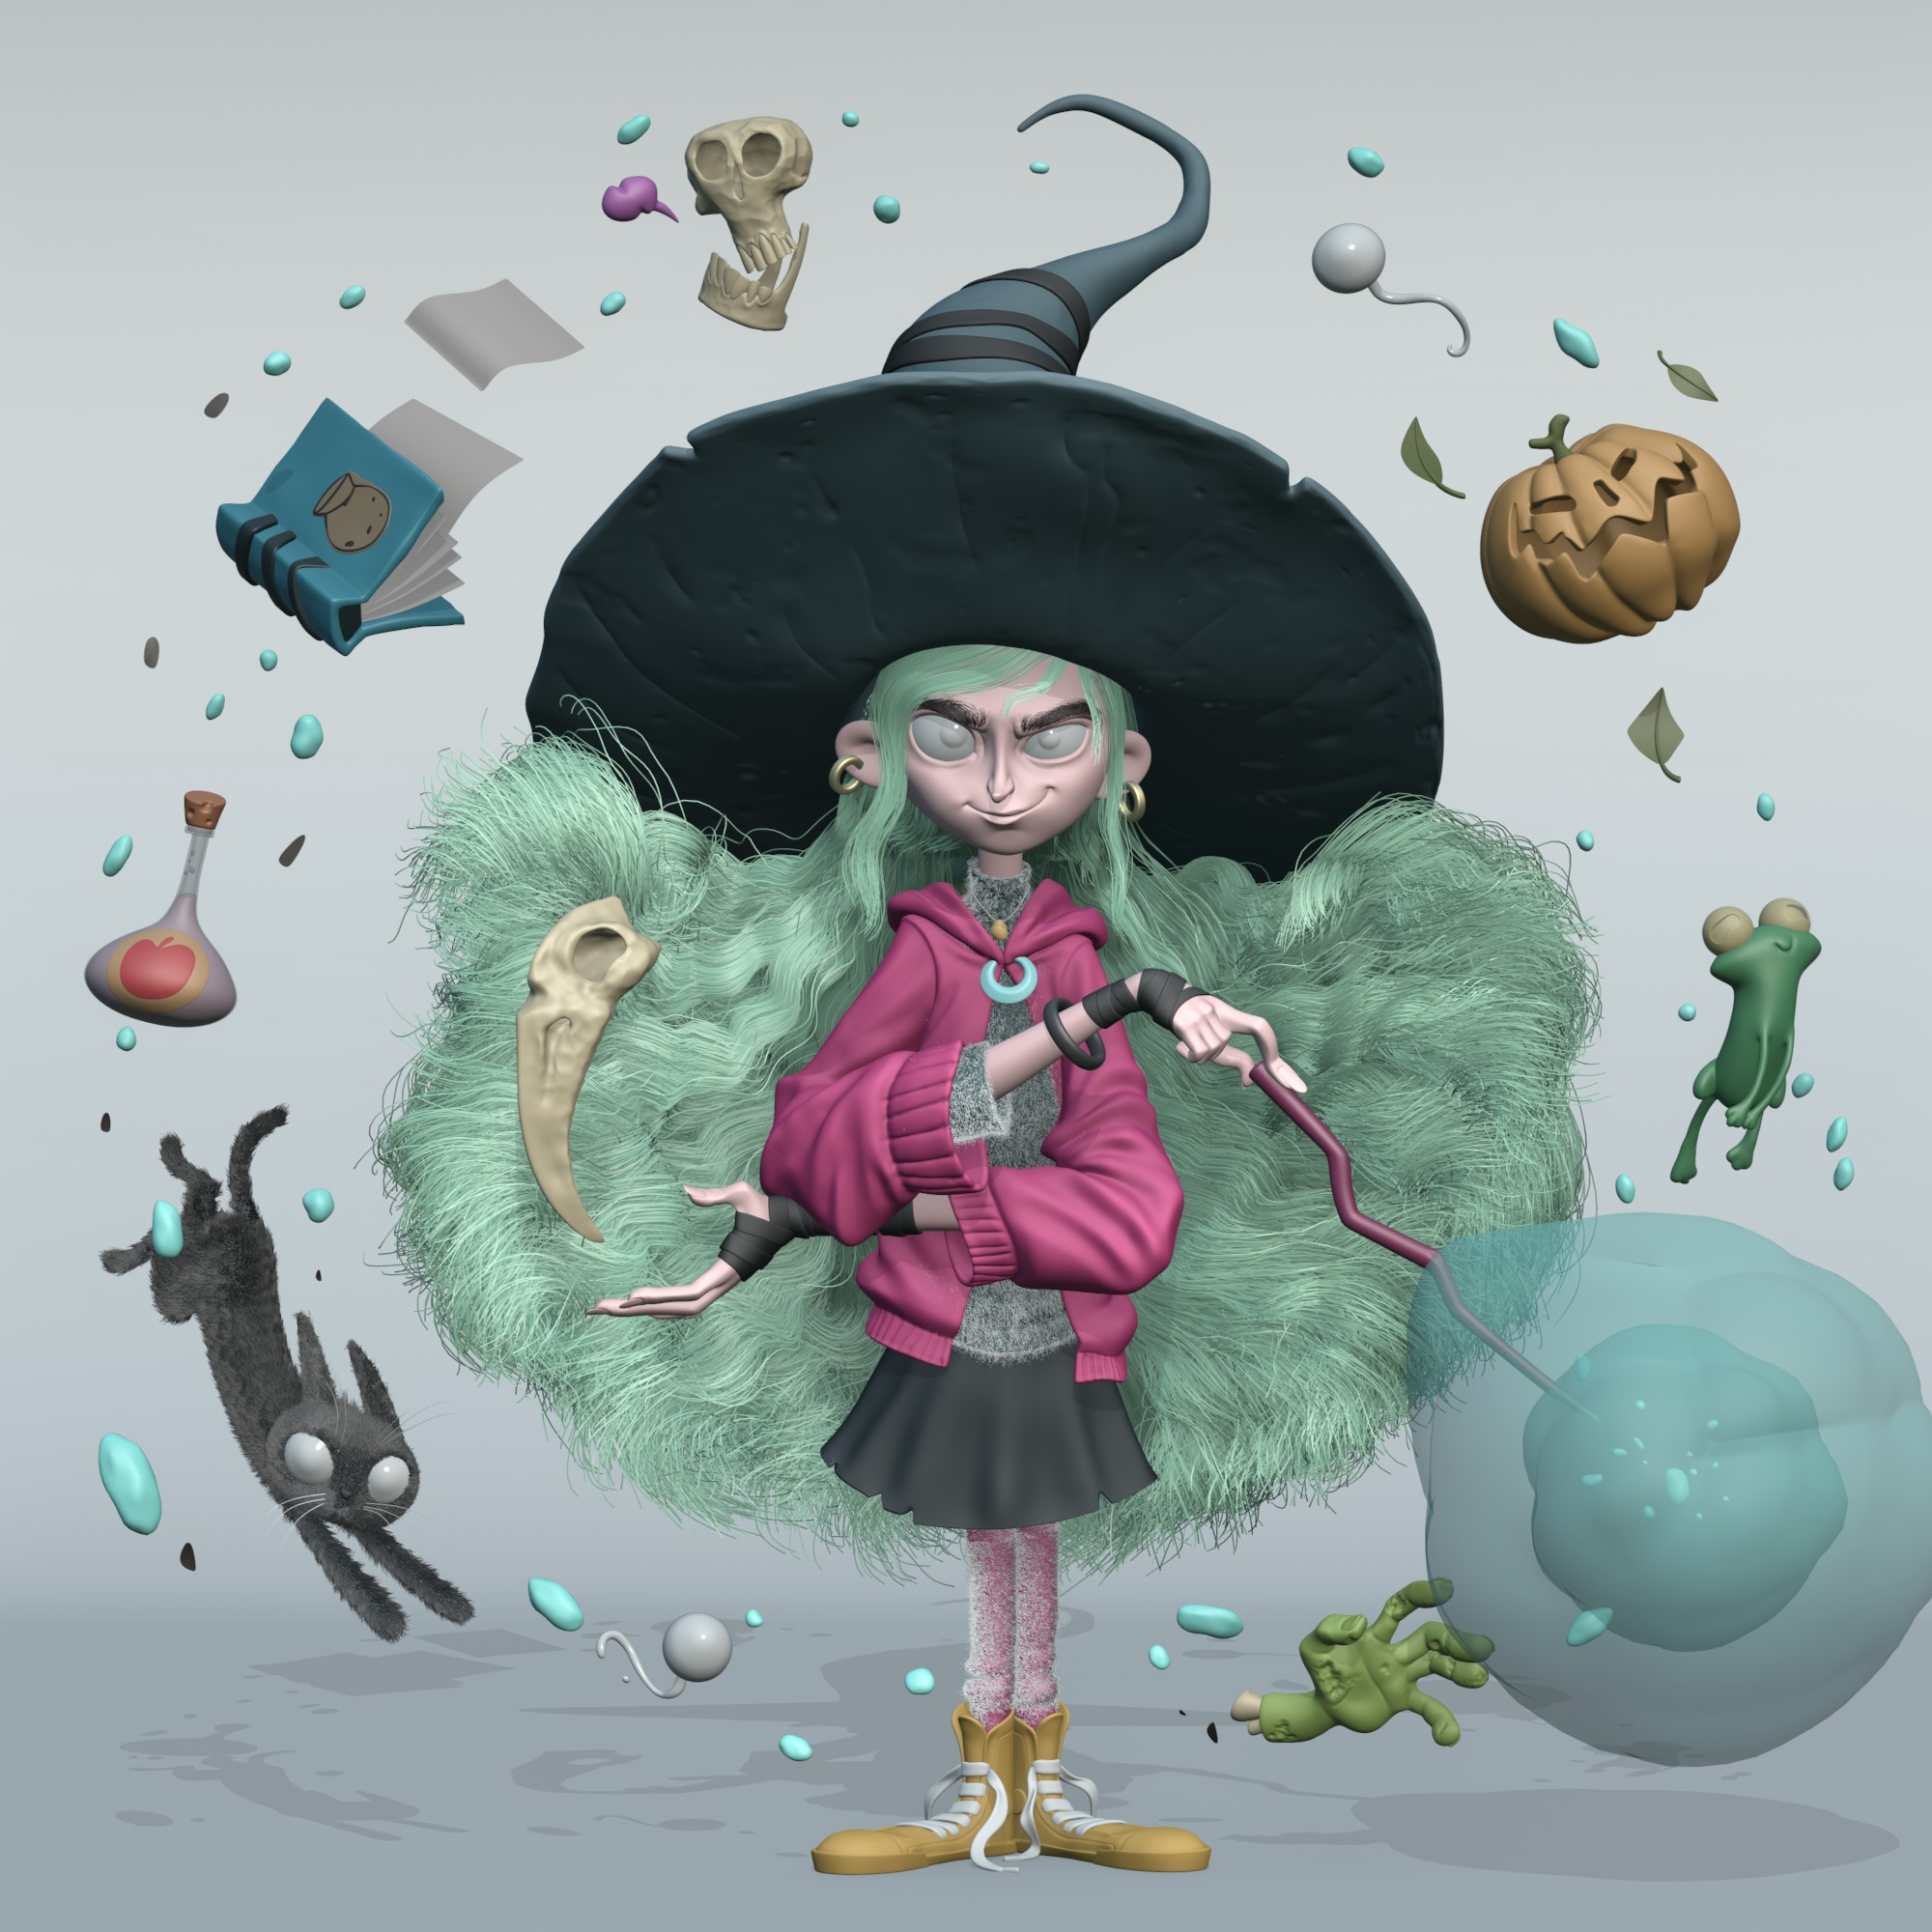
WITCH
Thank you for reading this article, and have a great day!
About the Artist

Lucas Falcao, a 3d artist working with Blender from Brazil. Currently working for three awesome companies, Prêt-à-Template, CG Cookie and Winkel Games.


Thanks for the article. Fantastic artwork
Amazing work Lucas!