Behind the Scenes: Beyond Galactic Pastures
INTRODUCTION
Hi, my name is Jairo and I’m a varied artist from Spain. I started learning 3D art in 2016 by using Blender to make simple scenes, characters, and sprites for my video games. It became the main tool for my creative work.
I like to experiment with this software to come out with something interesting to show, bring a character to life, or tell a story. I’m also into web development and interface designing, so Blender is very useful for me to make icons, items, and other interface elements.
I made my first space art by using a simple image editor without layers. Today I do them in Blender by mixing 2D and 3D elements. It’s very flexible for me to have full control of everything in the scene and I love to play around with material nodes.
INSPIRATION
Outer space and nature itself never ceases to amaze me and I usually do many artworks related to it. I like vibrant colors and dynamic compositions so I try to implement them into most of my works.
Space art is a very important kind of art to me because I got many skills by creating artwork related to it. I saw thousands of artworks, but I really felt inspired by Star Spirits of Play and Disruption. I found this drawing while I was exploring art around the internet, and it encouraged me to start doing space art. It’s the reason why I got into digital art and ended up doing what I do today.
PROCESS
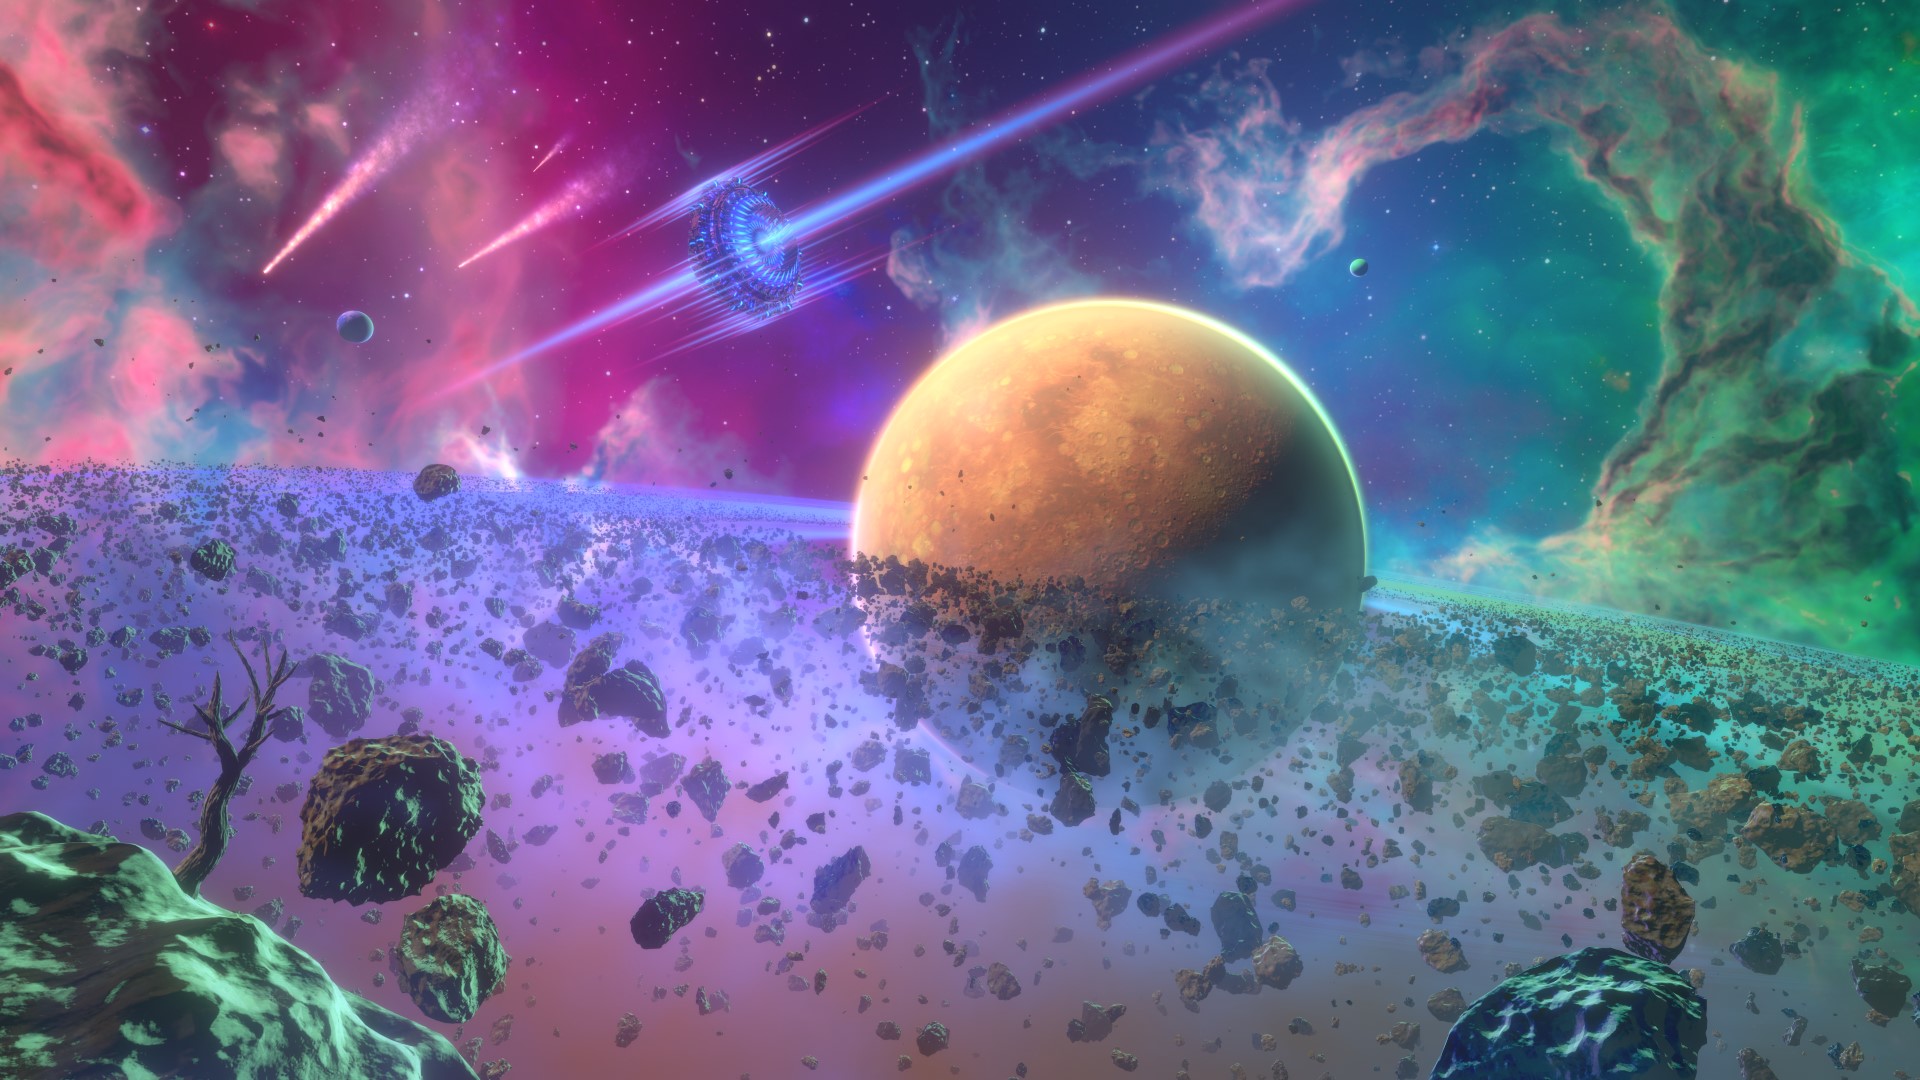
This scene is created and composed in Blender (Eevee), using procedural shaders and some resources. I also used Photoshop to edit the needed textures externally.
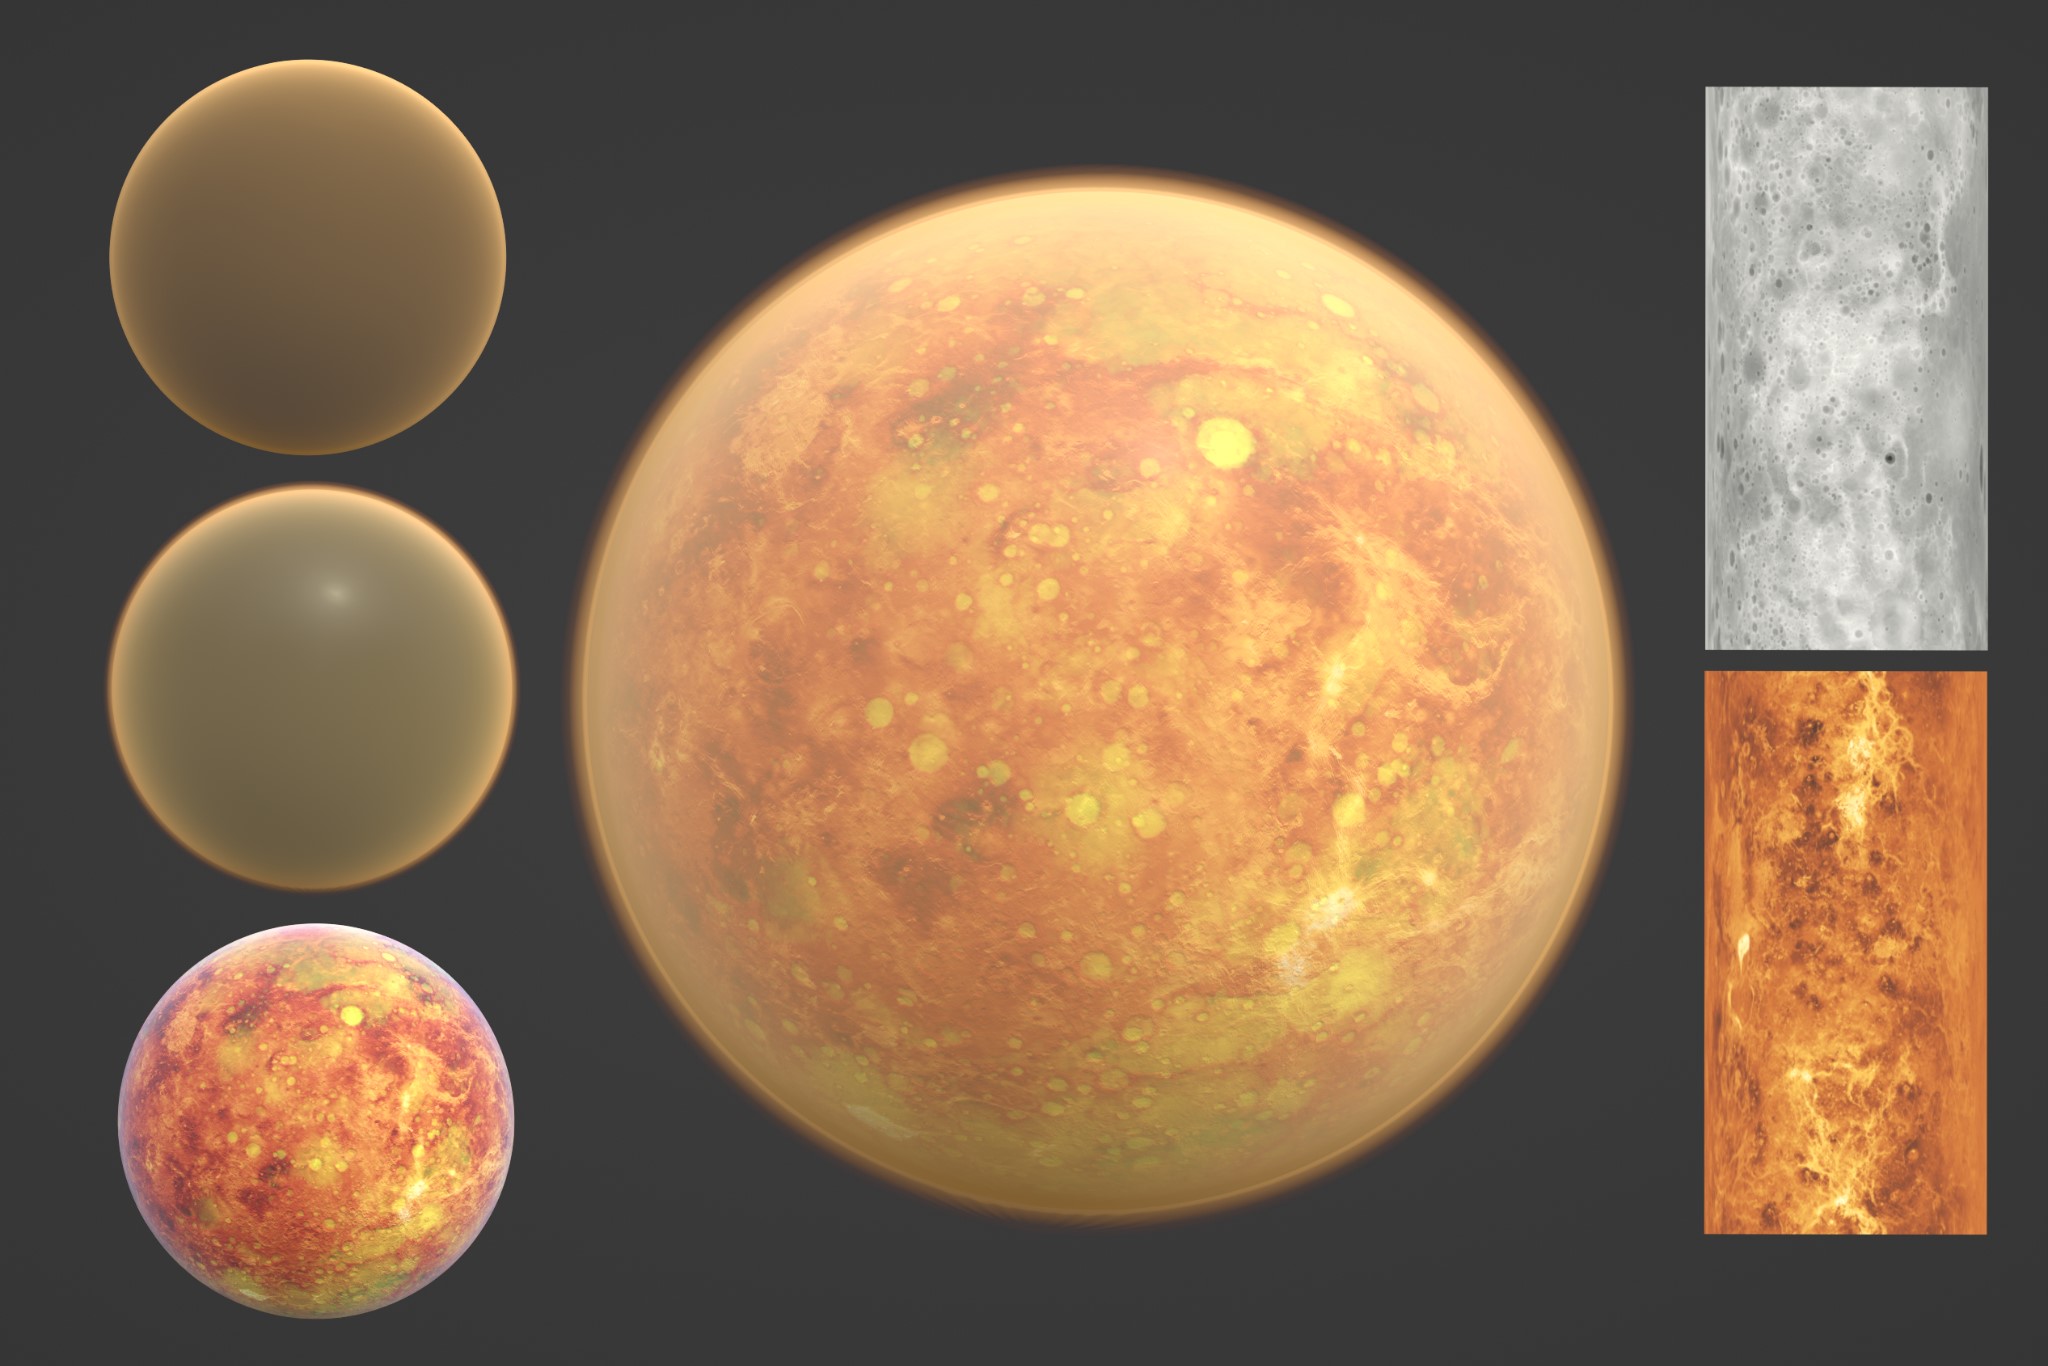
PLANET
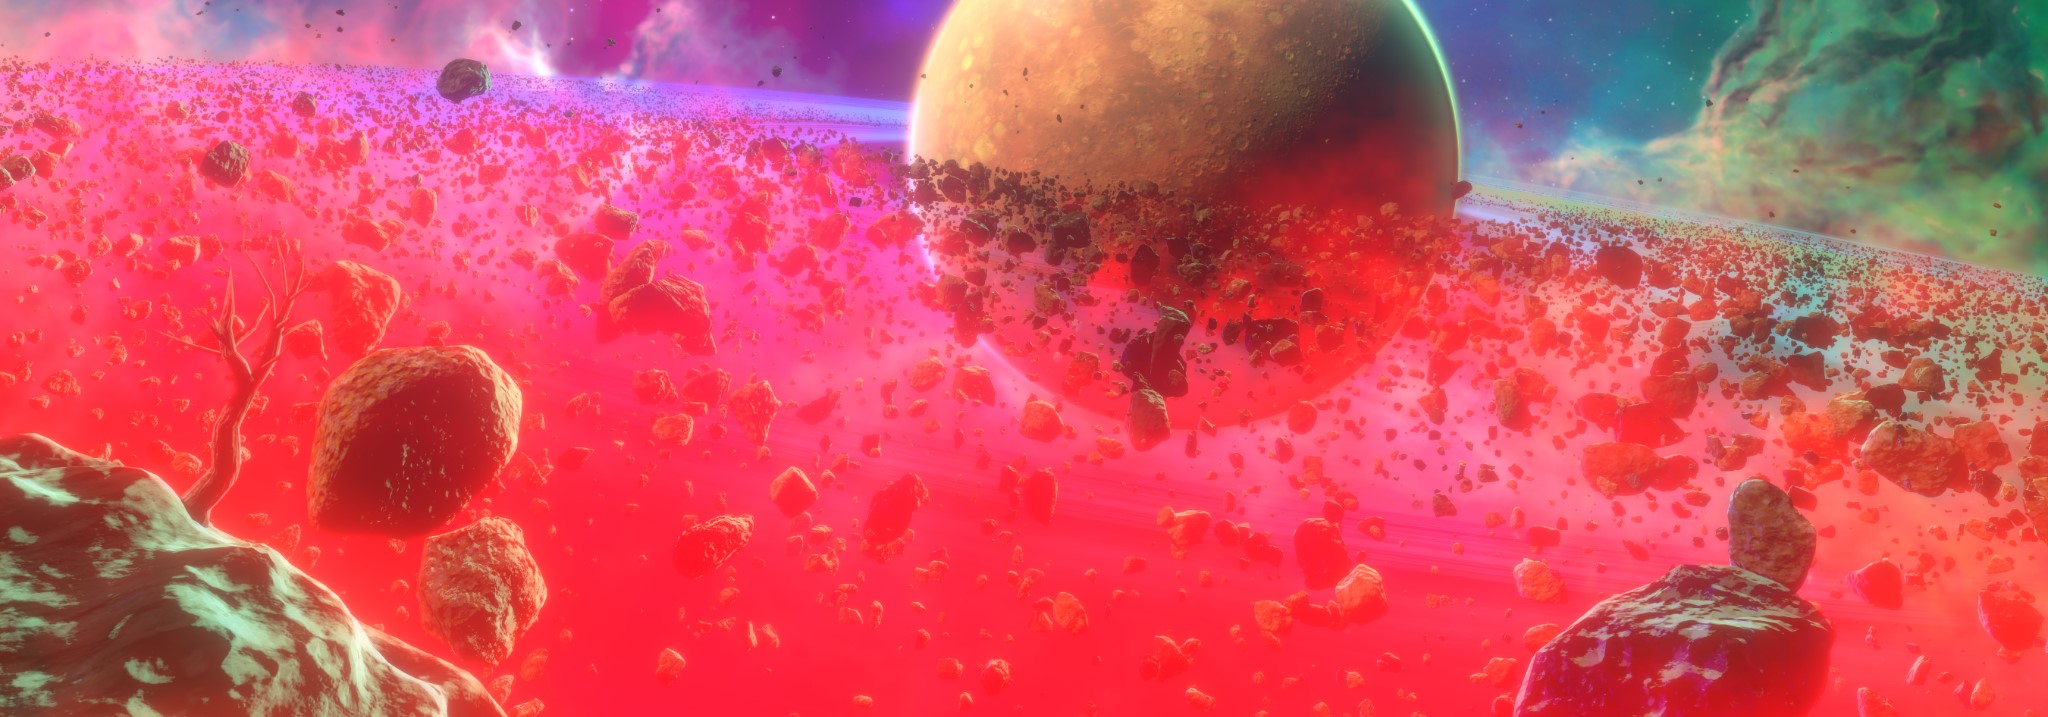
The planet is composed of three elements: one surface and two atmospheres. I’ve used Mercury and Venus’s equirectangular textures provided by NASA to create a fictional surface.
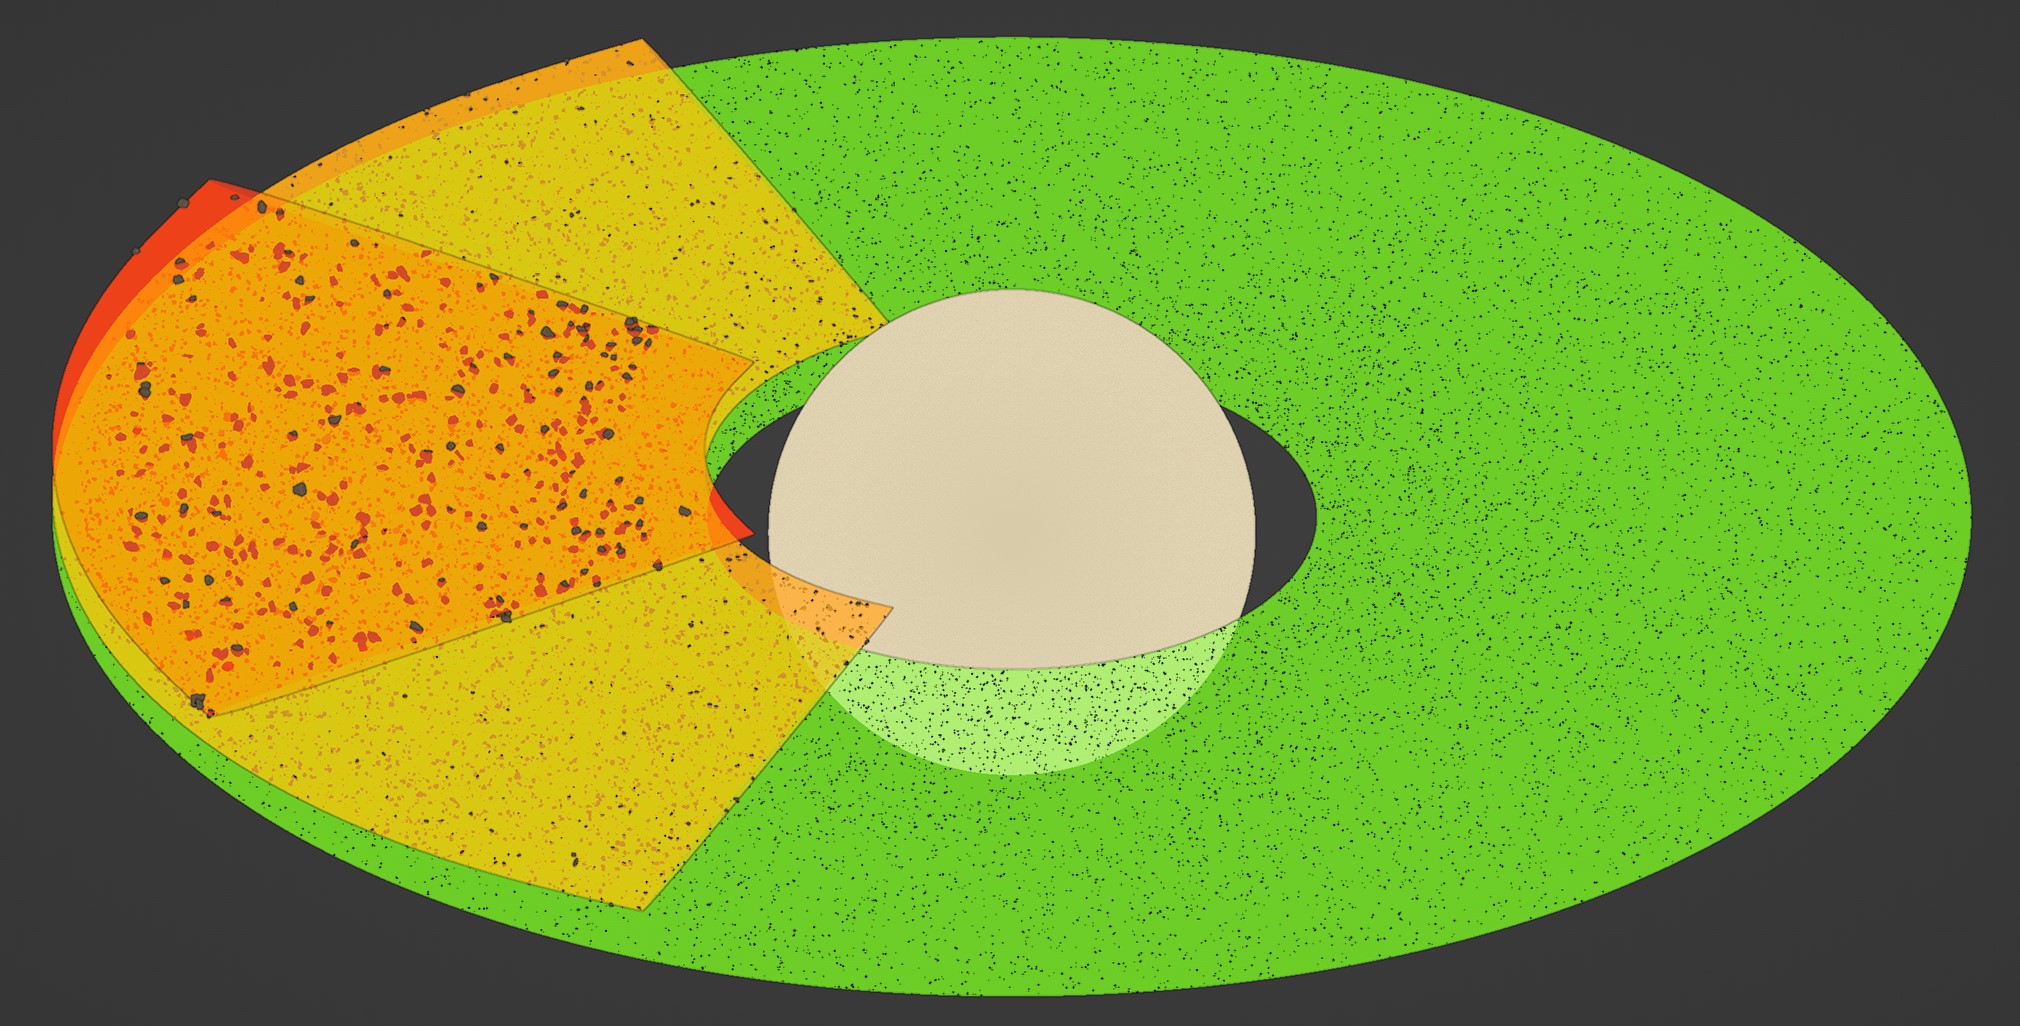
PLANET RING
The ring element uses three different particle sizes to get a better sense of depth as it gets closer to the camera.
ENVIRONMENT
A volumetric material is placed for the scene to look more dramatic.
This material includes 3 noise textures, 3 RGB (overlay) nodes, 3 voronoi textures, 3 color ramps and 3 more RGB (overlay) nodes joined together to a gradient texture. This is again connected to two color ramps, one connecting the Principled volumetric shader and one connecting a RGB (mix) node. There is a mapping node and a vector curve node connected to one of the second group of the RGB (overlay) nodes.
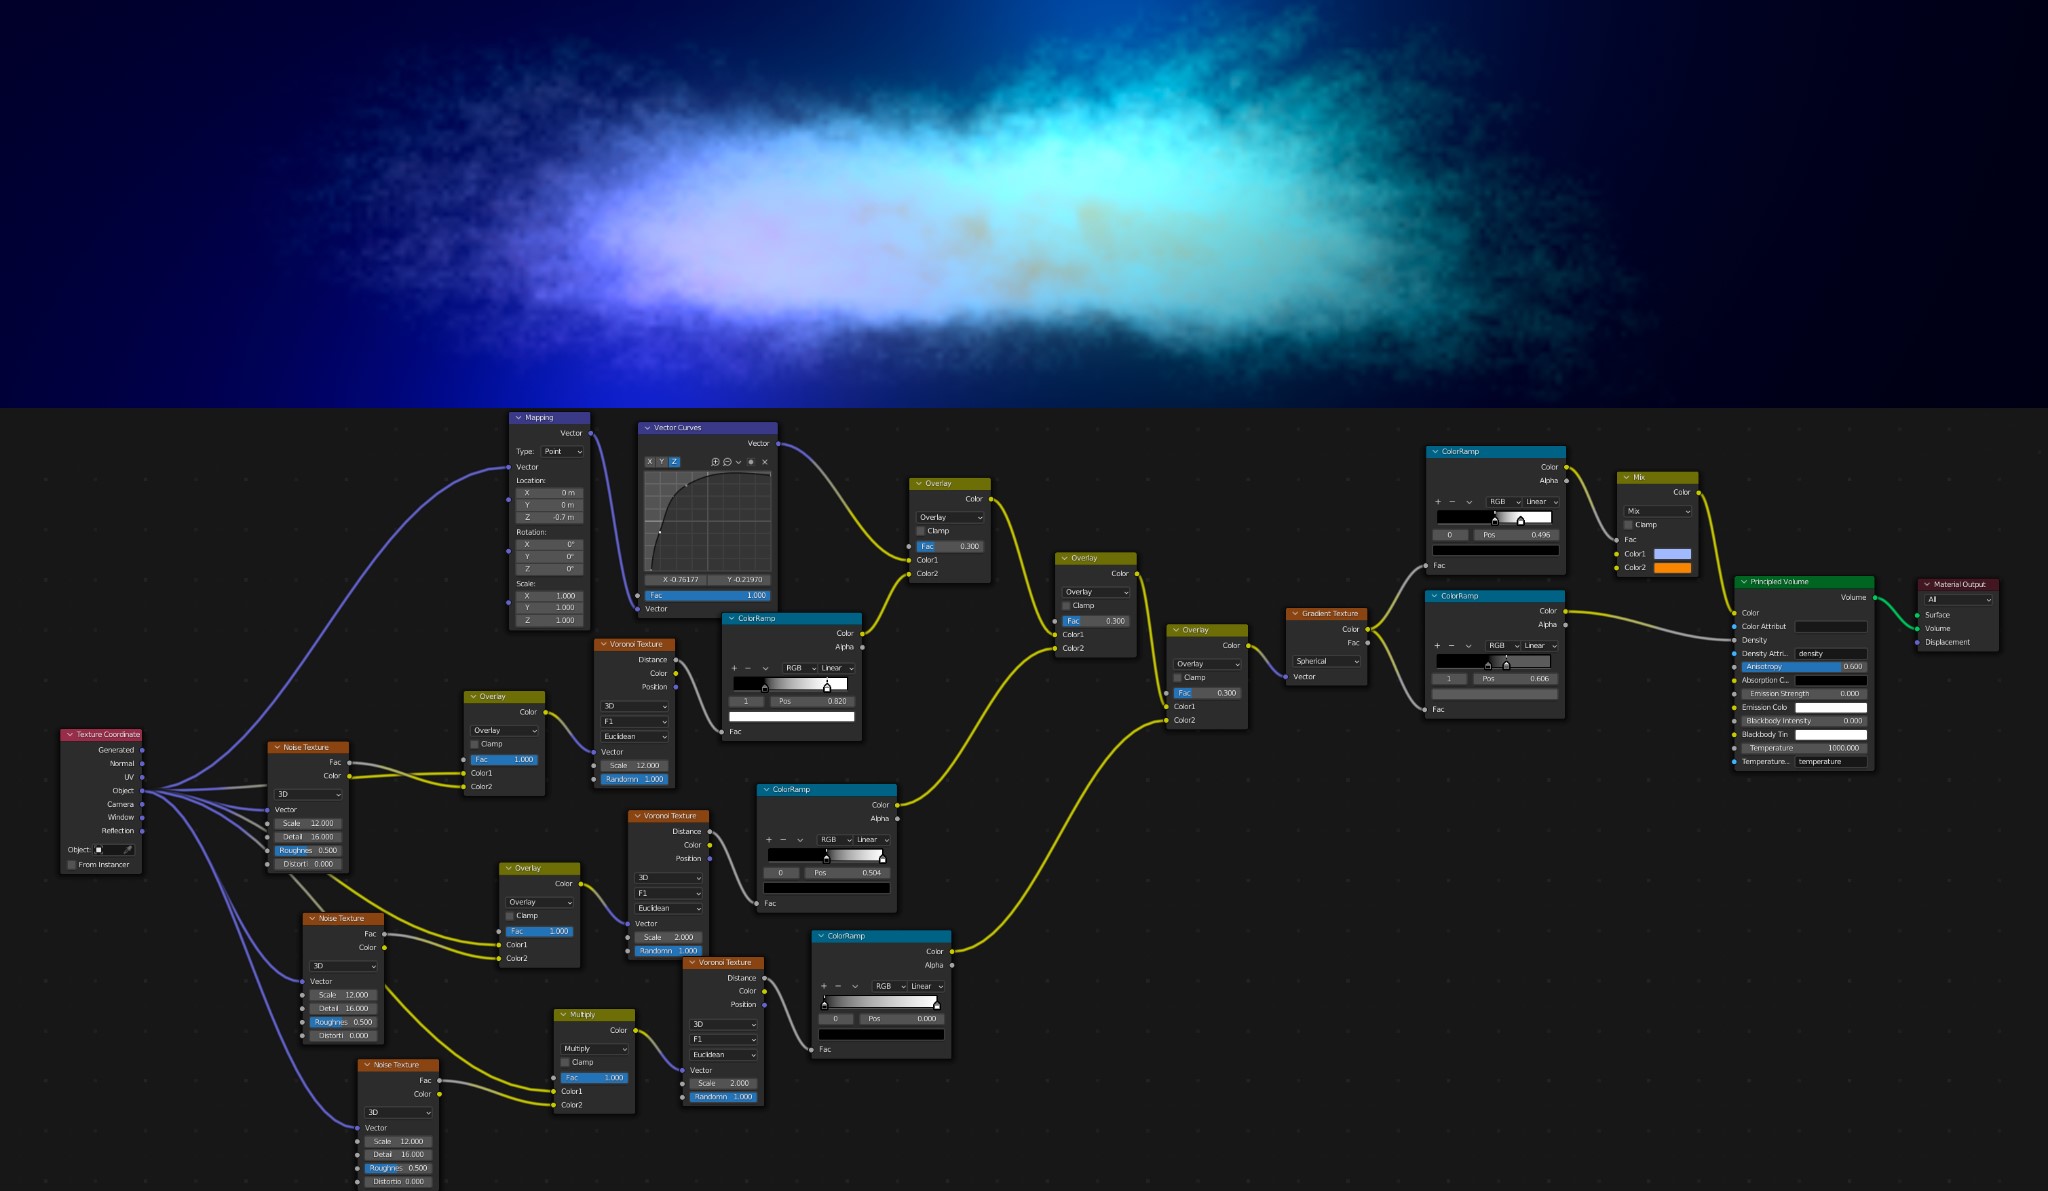
This is the preview of the fog coverage:
OTHER ELEMENTS
I’ve used Pro-Lighting: Skies and Nebula Generator addons to make the background.

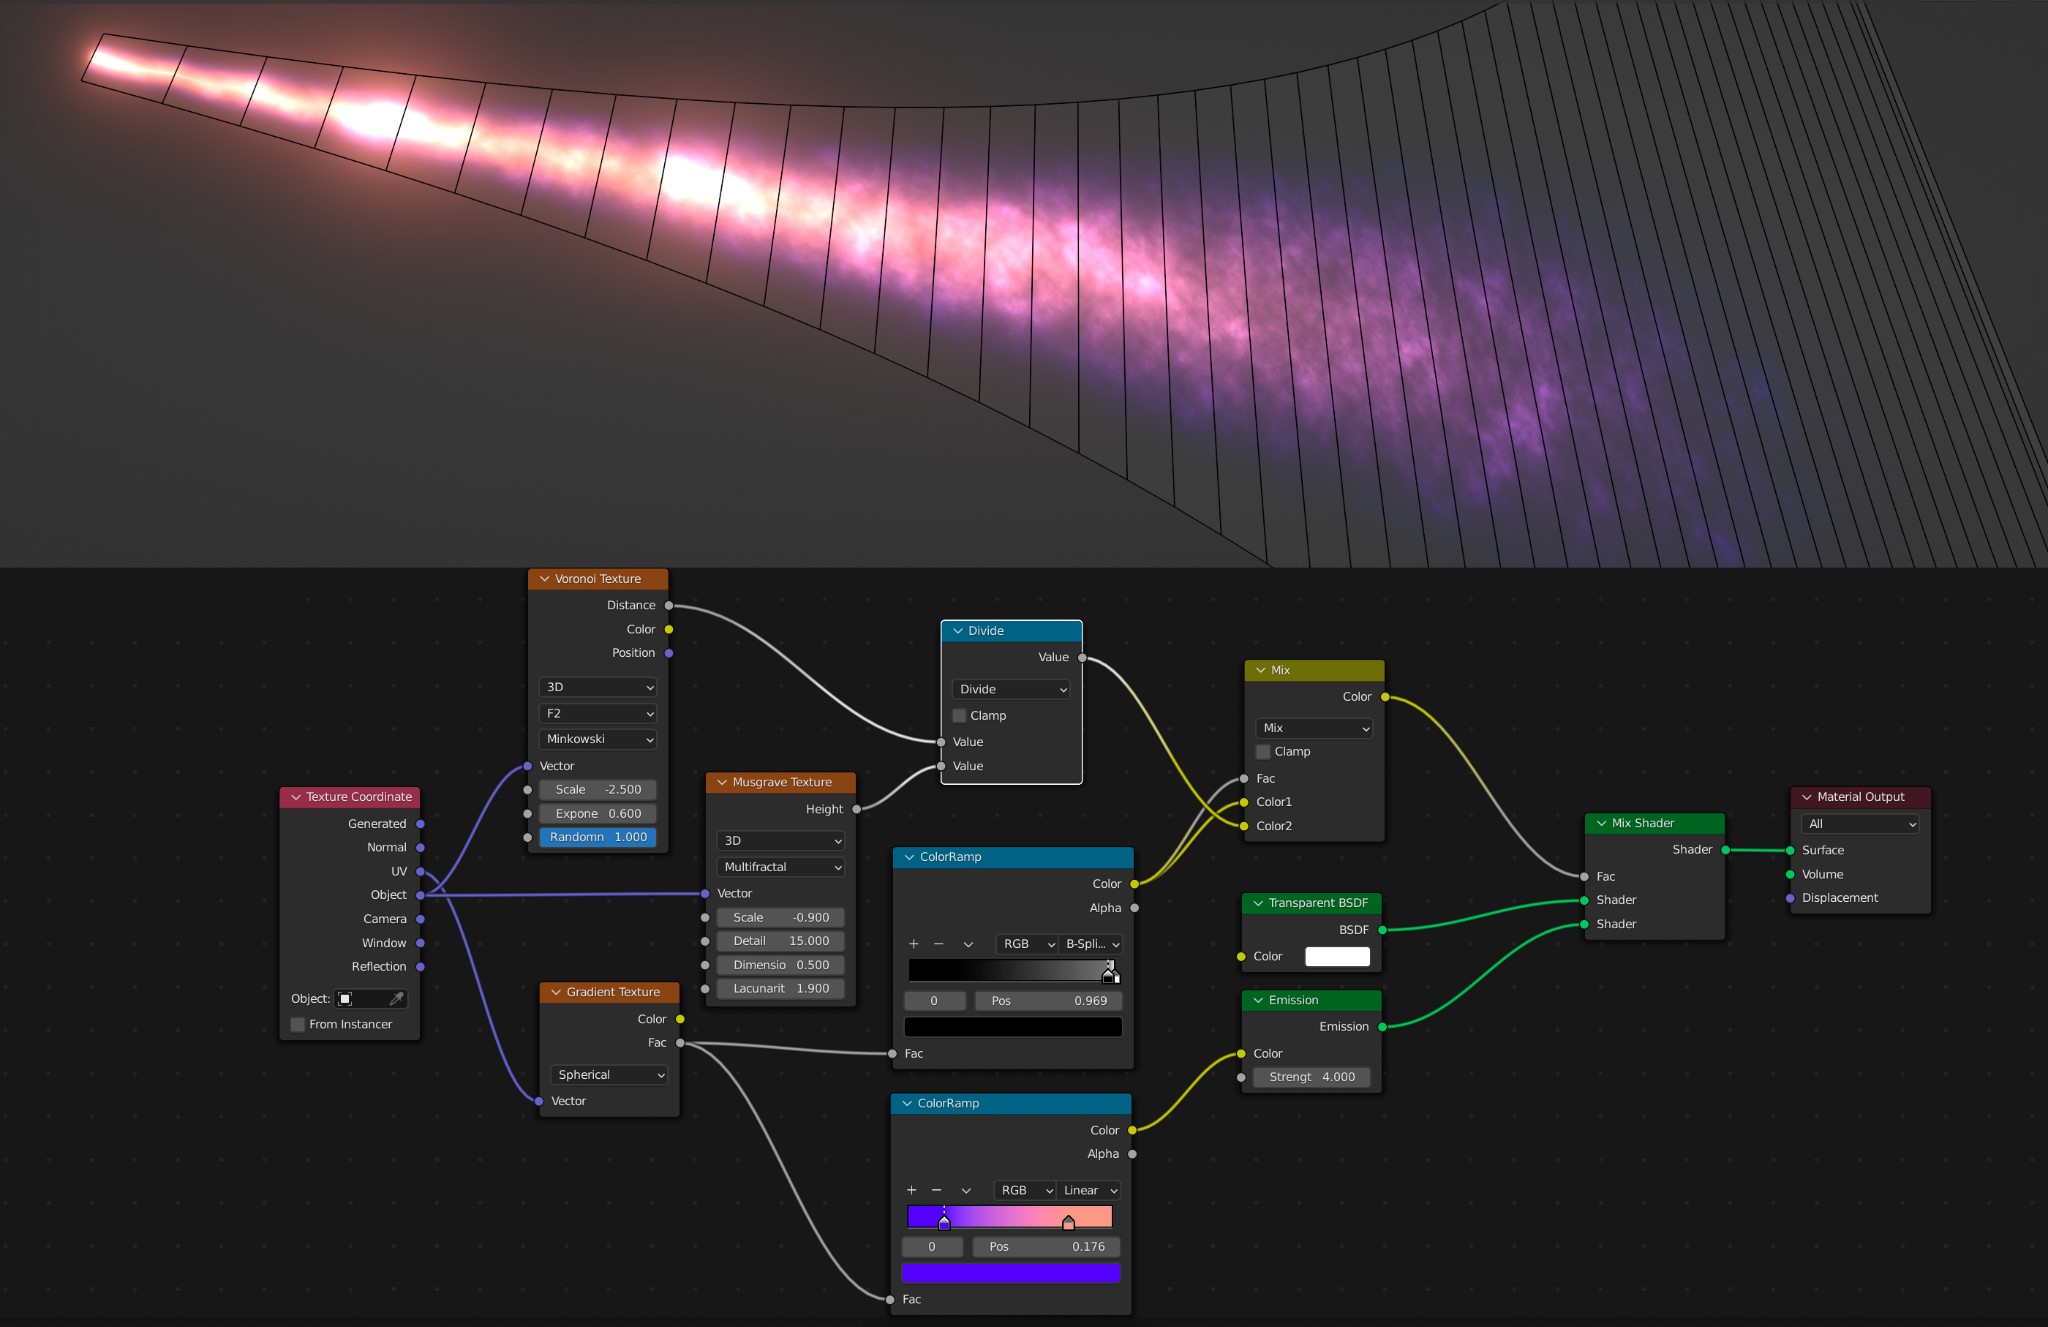
I made a procederal material for the space comets. It consists of a voronoi and a musgrave texture joined to a Math (divide) node which is connected to the Mix shader via RGB (mix) node. There is also a gradient texture linked to two Color ramps, one connected to the RGB(mix) shader, and the other to an Emission node attached to the Mix shader. A Transparent shader is also attached to the Mix shader.
I made a procedural materials for the spaceship beams too. It consists of a gradient texture attached to two Color ramps which are both connected to the Mix shader, but one via an Emission node. A transparent shader is attached to the Mix shader too.

I’ve also used Flares Wizard add-on for the sun flares and to make the bright spots for stars and comets.
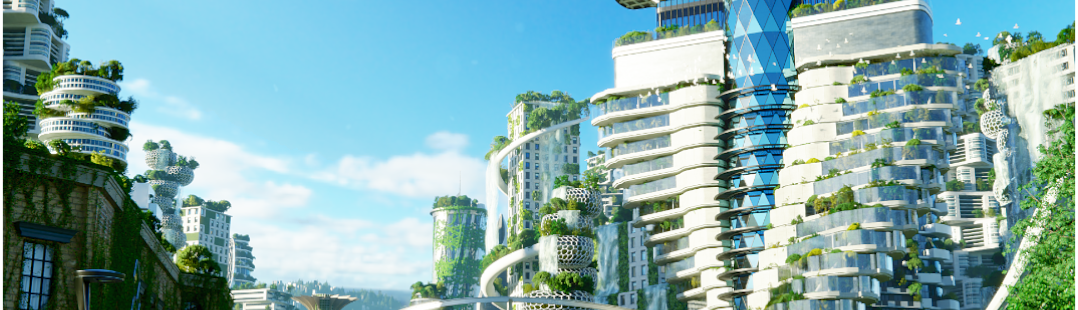
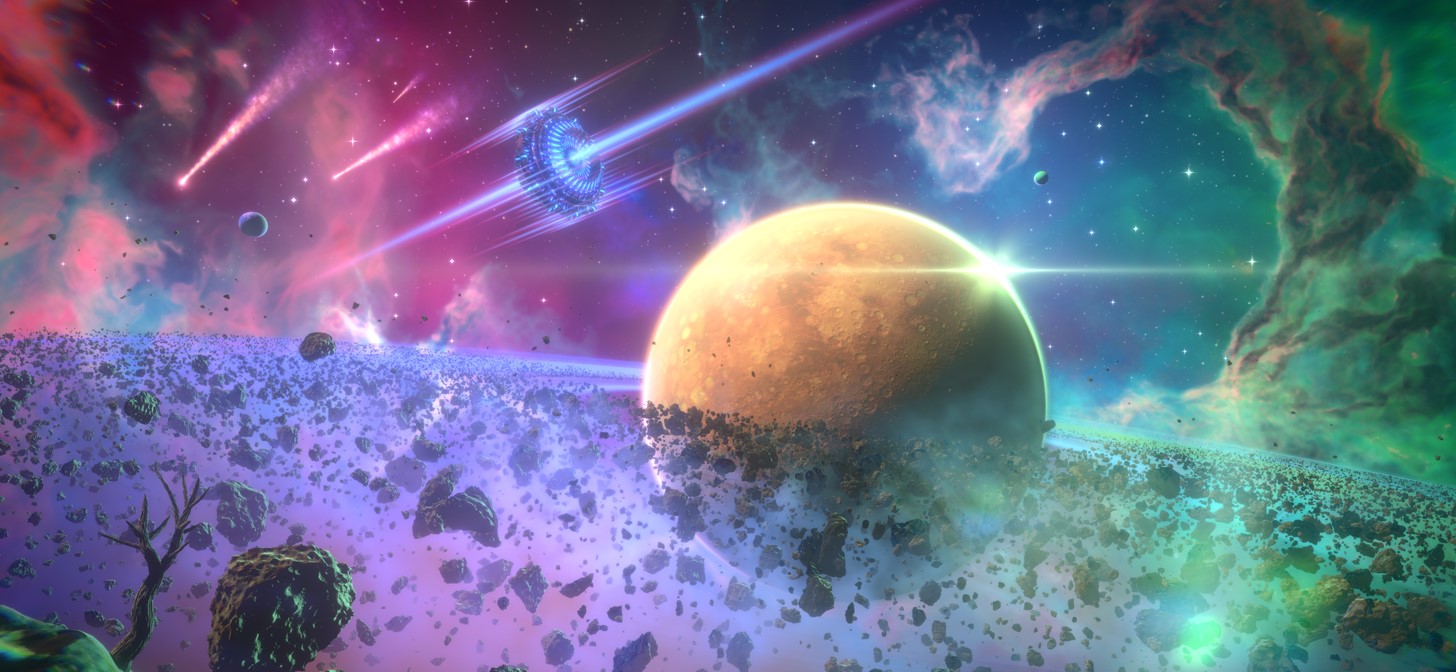
BEYOND GALACTIC PASTURES
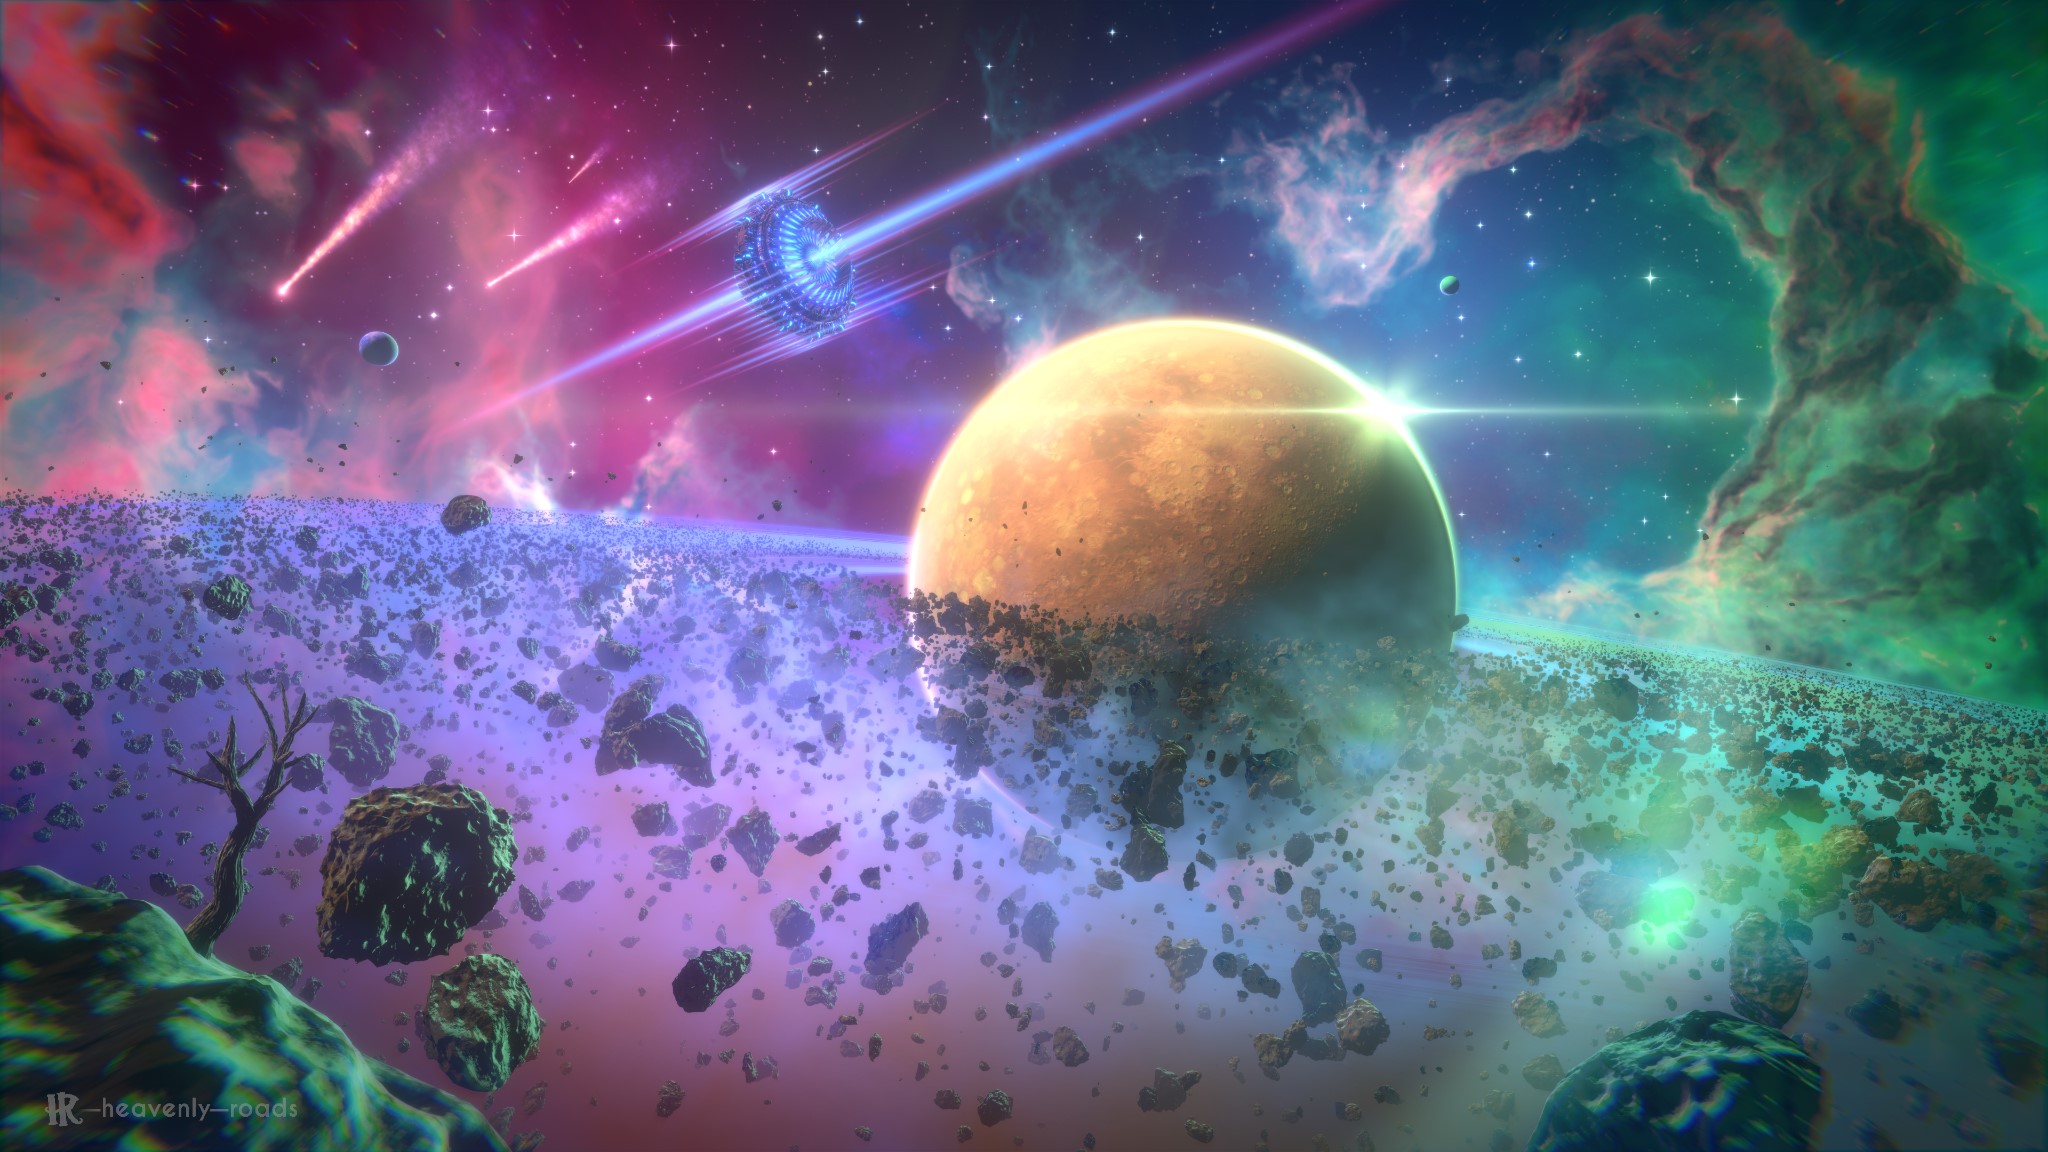
Raw render without post-processing:
About the Artist

Jairo de Ara (heavenly-roads), a varied artist from Spain. He is currently working as a self-employed designer and developer.


