Behind the Scenes: The City of Blackhelm


INTRODUCTION
Hello friends! My name is Özgür. I am a 24-year-old self-taught 3D artist from Eskişehir, Turkey. I am actually a medical student and want to be a cardiologist someday.
Whenever I watched a movie, played a game or read a book, I always made some changes in my mind. Sometimes I changed the environment, the characters or the timeline. I always used my imagination to change it how I wanted it to be. This revisualization is my biggest hobby.
So, two or more years ago, when I discovered Blender, I wanted to learn how to create my own story and my own environment. I didn’t have any experience in 2D traditional drawing or any kind of 3D experience before. I watched the “Donut Tutorial’’ of Blender Guru on YouTube. After that, I watched more tutorials, finished some of the courses on Udemy and started to build my own environments and stories.
I always wanted to create subjective thoughts in my artwork. My goal is to create art which people can alter the timeline, events or environments to their tastes like I do.
INSPIRATION
Now, let’s talk about this project, “The City of Blackhelm.” In the beginning, I had an idea about creating a large environment city but I didn’t have any details about it. It could be a cyberpunk city or a medieval city. It could be a war scene or a peaceful city. So, I started to research about my idea by checking some reference photos on Pinterest.
I learned the city dynamics. I checked house models and a lot of other things. In the end, I decided on the “lovely peaceful medieval city” idea and thought it would be great. Then I started to develop the artwork. So, let’s begin.
HOUSES
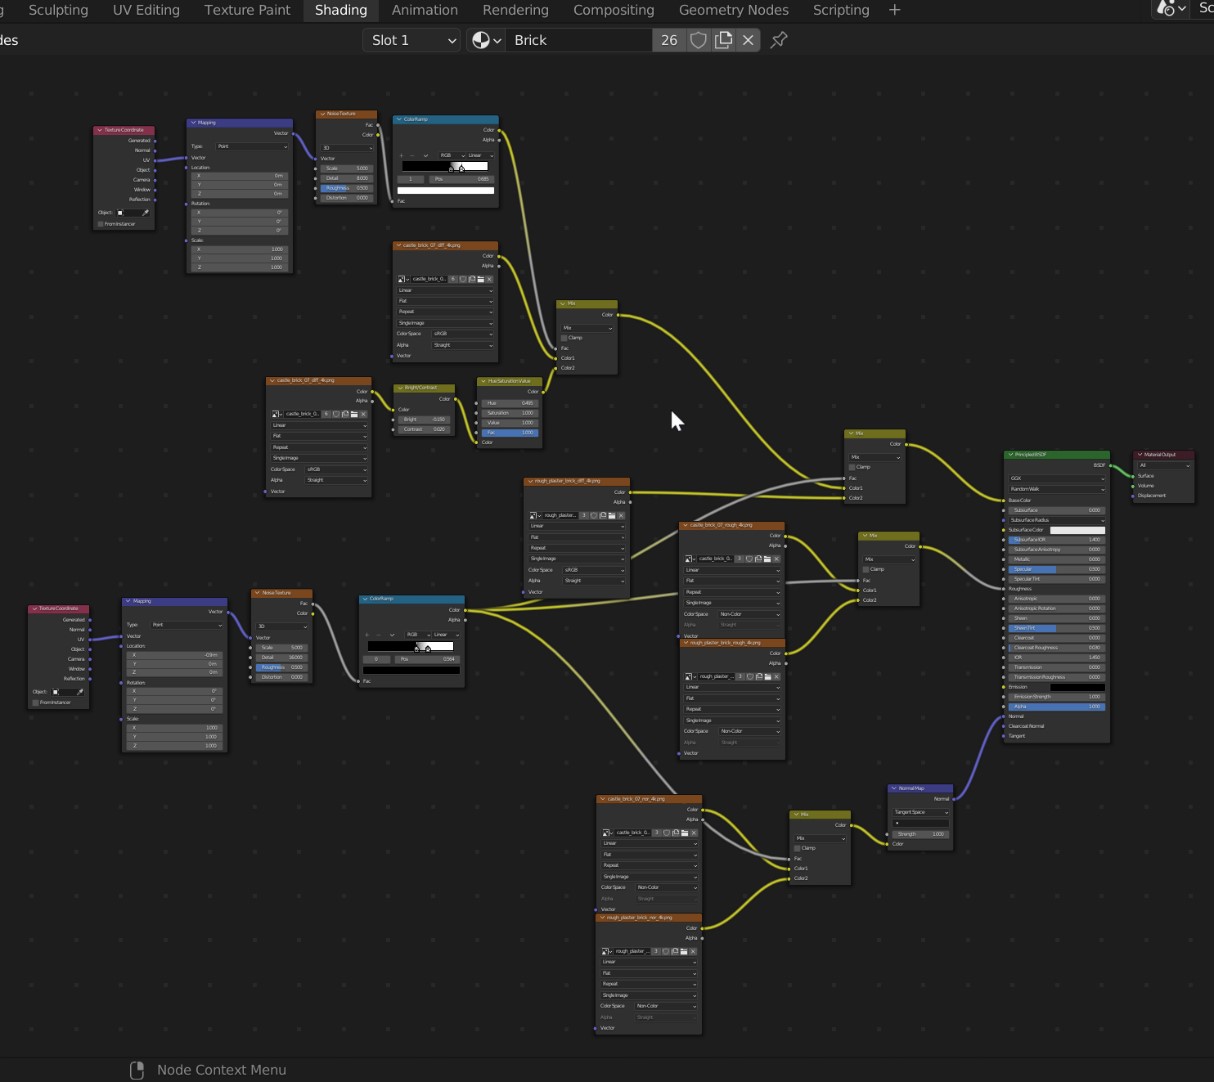
First, I found some references about medieval houses and then started to model my houses by blocking them out. When I finished that, I added some cubes to the scene and used Boolean modifier to create holes for windows and door. I modeled some old medieval windows and doors, and placed them into the holes. I added a brick material to the house. This is the brick material:
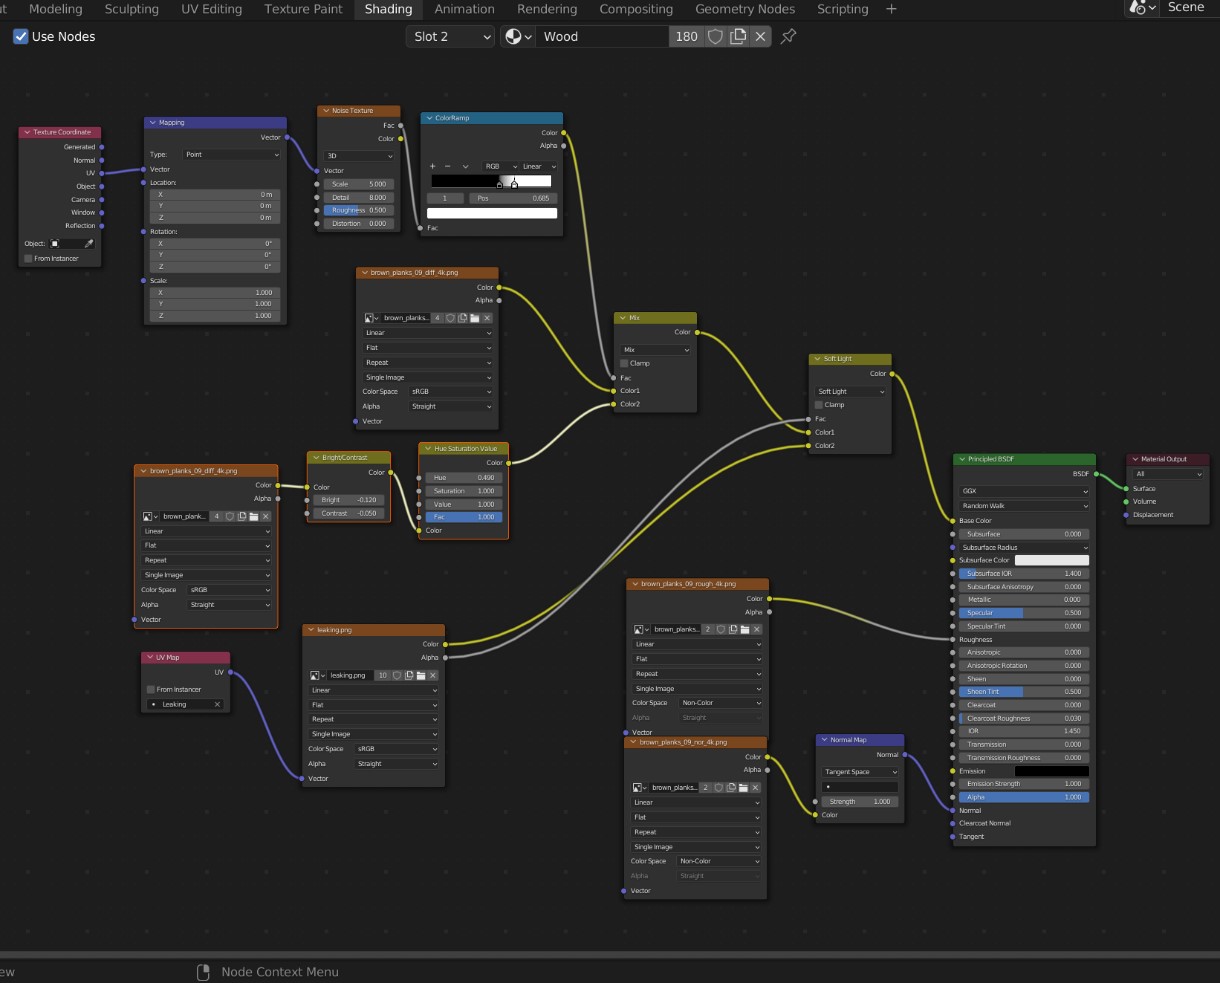
I added some basic rectangular shapes and gave them a wood material to make them look like wooden columns. This is the wood material:
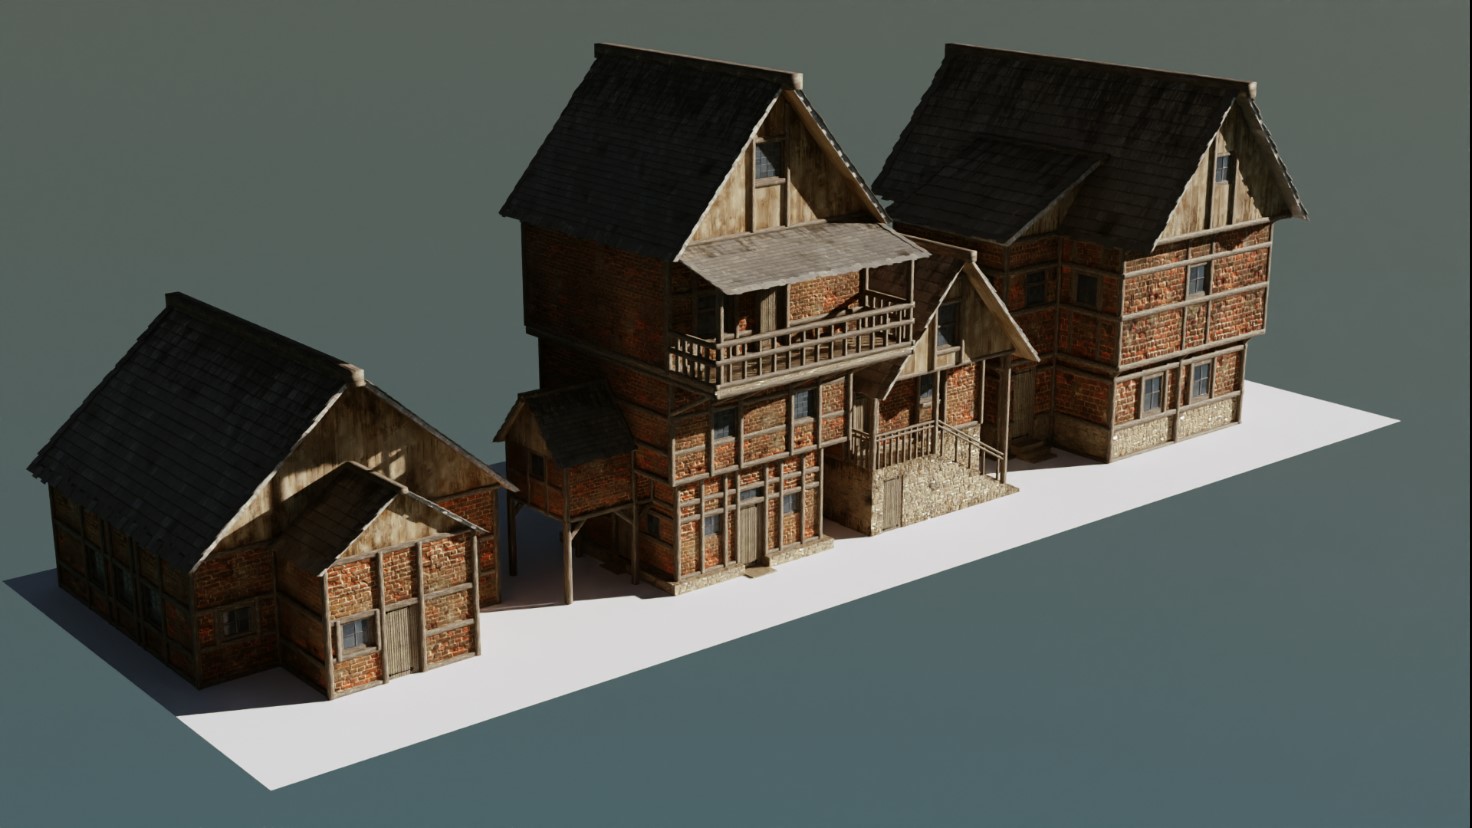
I added these wooden columns in my house model. Then, I added some roof material and planes to make the roof. In total, I created four different variants of the house.
BAZAAR
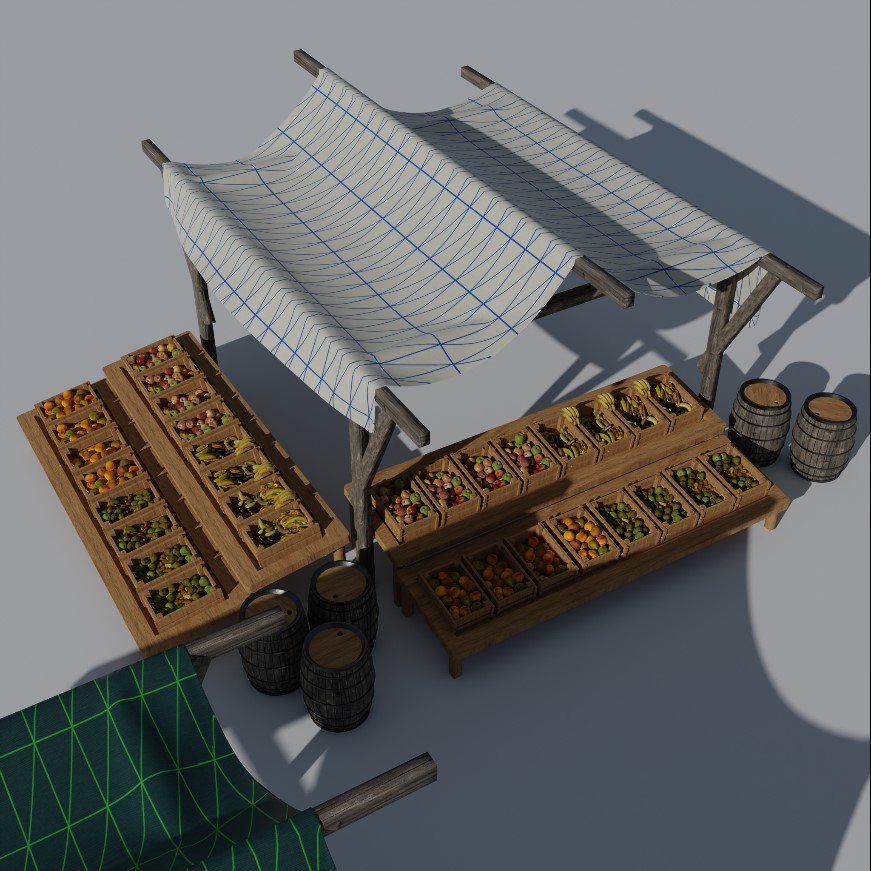
First, I modeled some rectangular shapes as woods. Then, I gave collision to them. I added a plane to the scene and subdivided it. I gave cloth simulation and a fabric material to it, while uniting it with the woods. Next, I modeled the little details like apples, barrels, crates etc.
BLACKSMITH
First, I blocked-out the blacksmith, added some cubes to the scene and used Boolean modifier to create holes for window and door. I duplicated the doors and windows from the house asset and placed them into these holes. Then I duplicated the wooden columns too and united it with my blacksmith model.
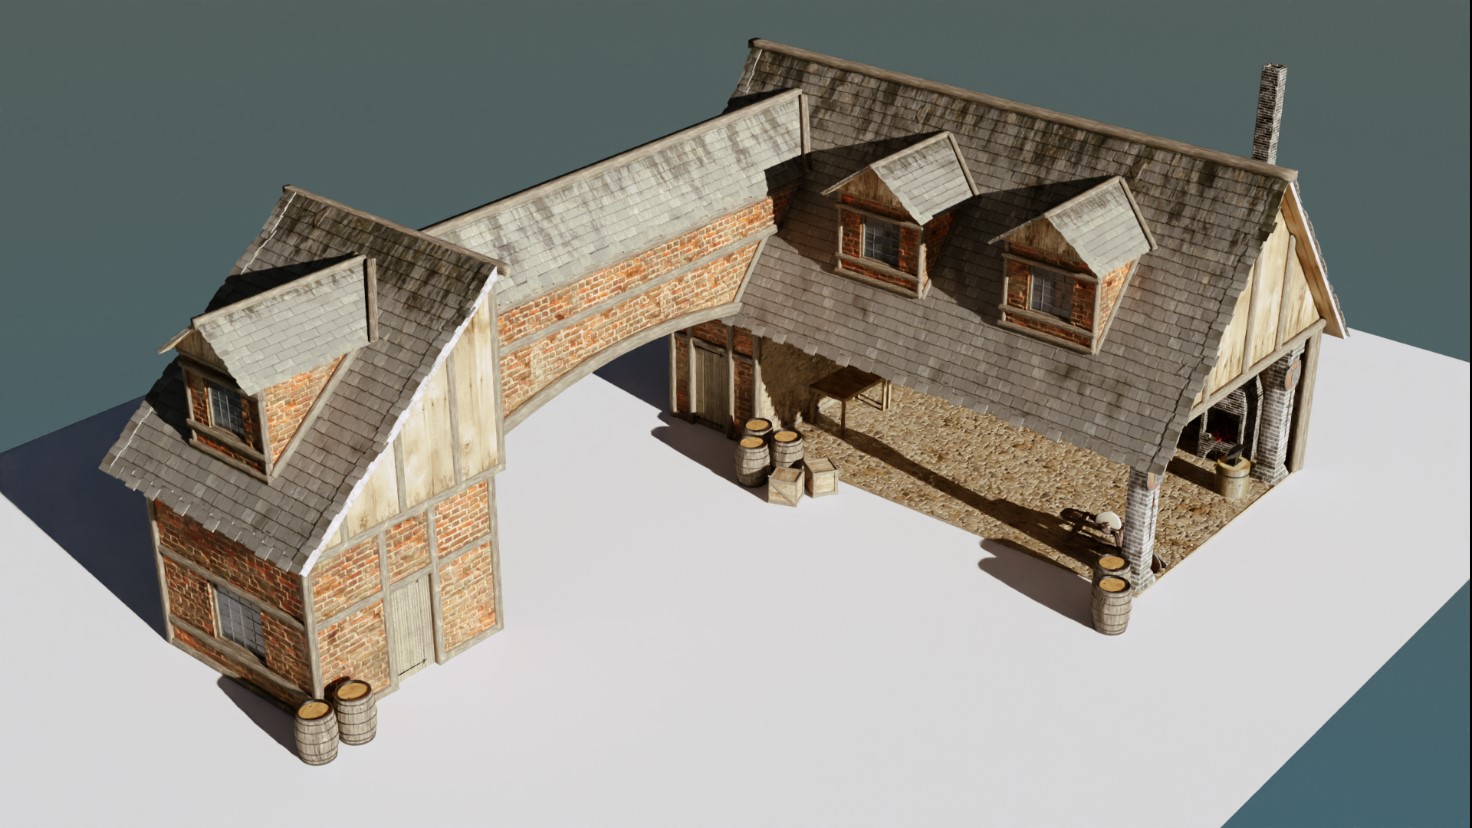
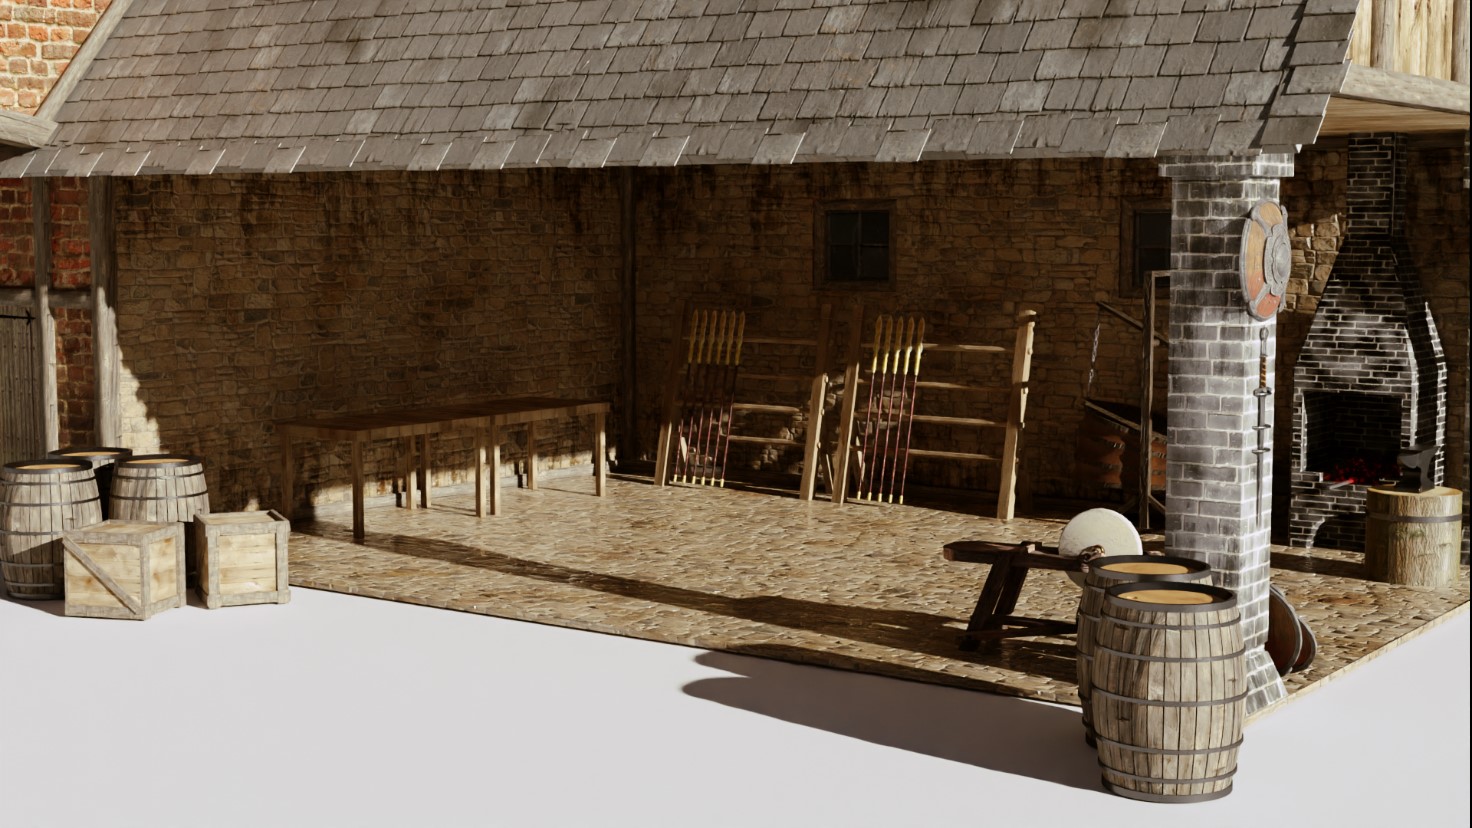
After that, I imported models of swords, spears and shields from Sketchfab. In the end I duplicated the bazaar’s little assets like barrels and crates.
STABLE
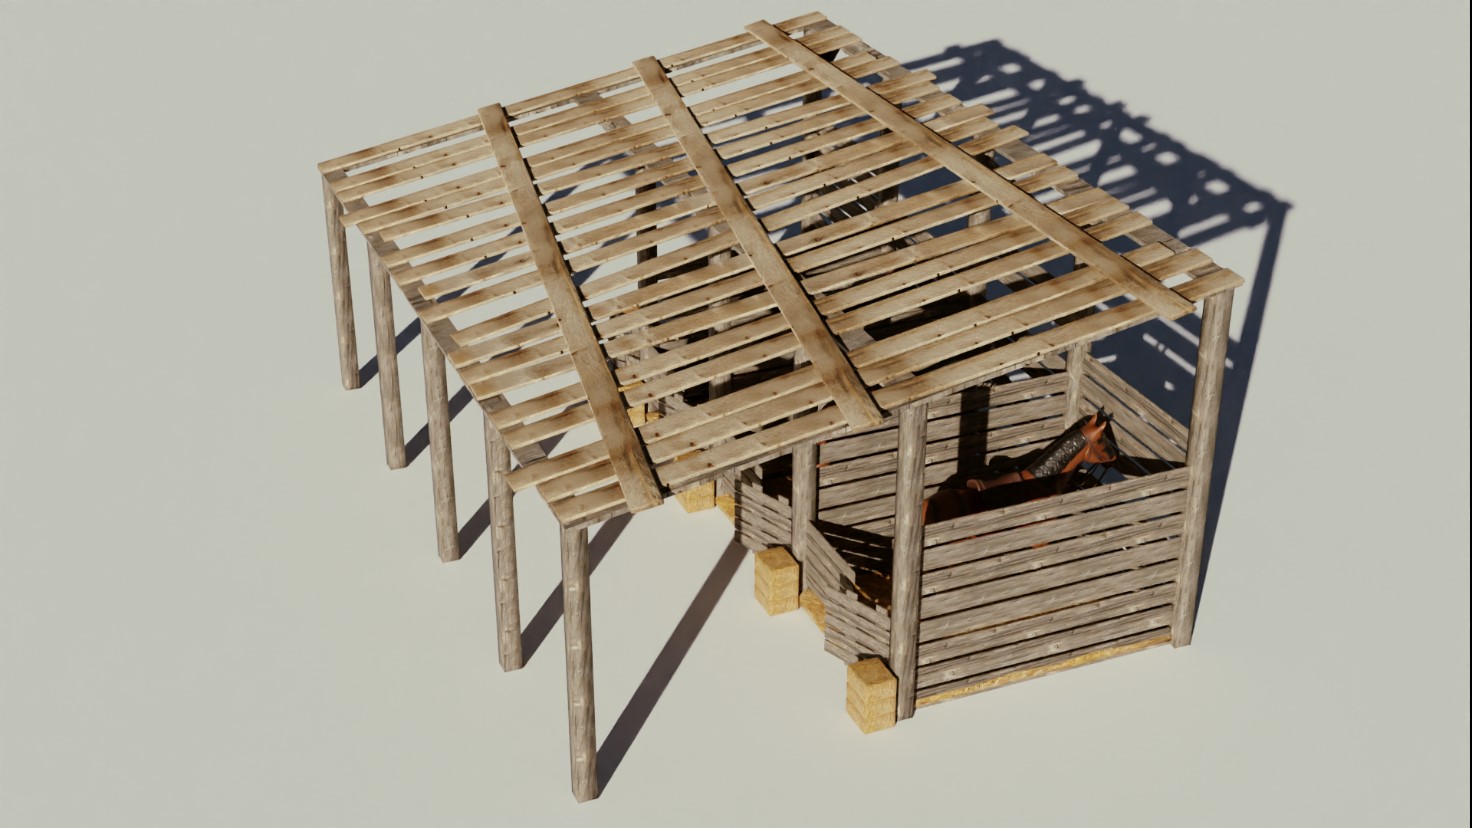
First, I modeled some wooden planks and randomly rotated them to create a realistic stable roof. Then I imported a horse model from Sketchfab. I added a plane to the scene and gave it a straw material. After which, I added some barrels and straw bales.
MAKING THE TERRAIN
For the terrain, first, I added a plane to the scene and set the dimension to 785×465 m. After adding a subdivision modifier, I set the level viewport value to 6 in simple mode and applied the modifier, later subdividing the plane one more time.
Then I selected some vertices in this plane and smoothly created higher and lower areas to give some realism to the scene. I added a dirt material to it and also, a grass path material too.
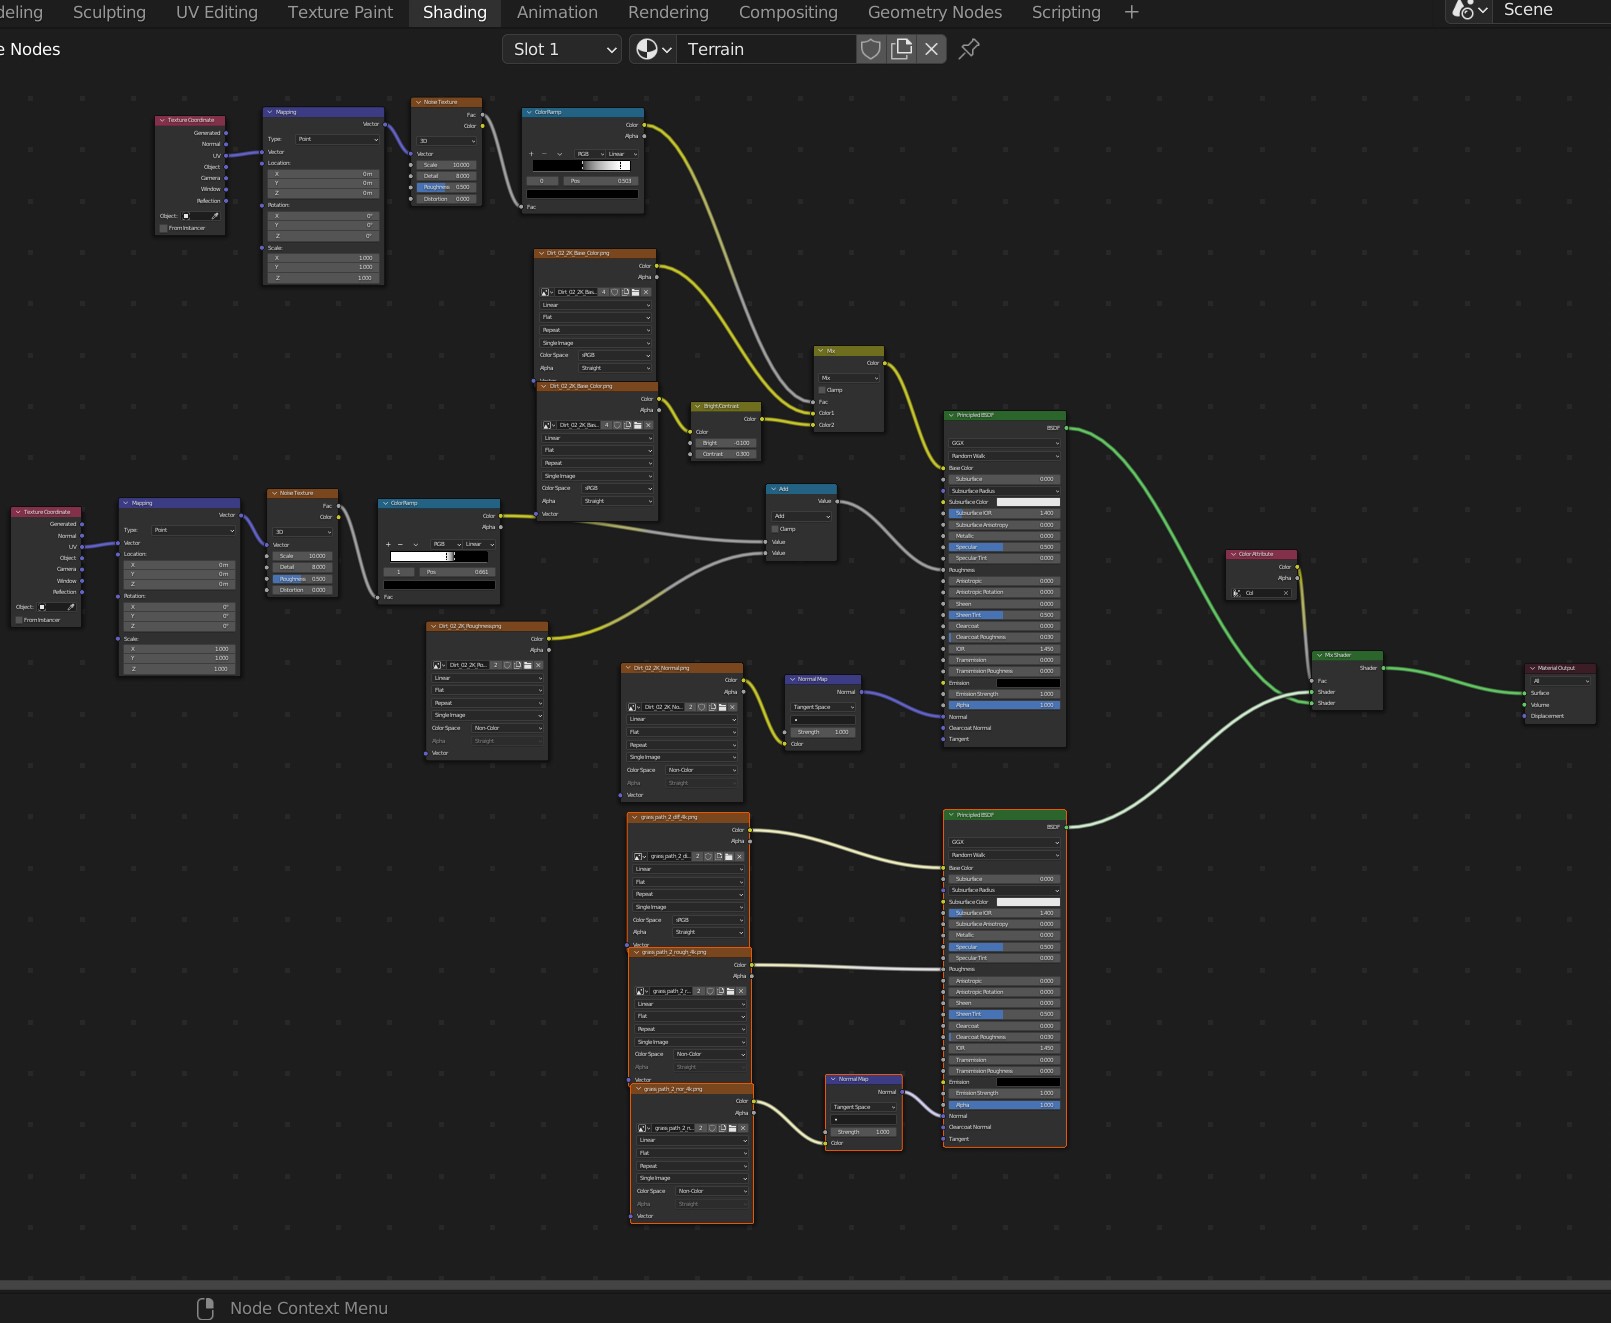
After that, I opened the vertex paint mode and dyed some areas with a blue color to determine the grass path area. You can see grass paths in the artwork where the carriages stand. In the shading tab I added a color attribute input node and united this node with the dirt and grass path material node system. You can see the terrain node system below:
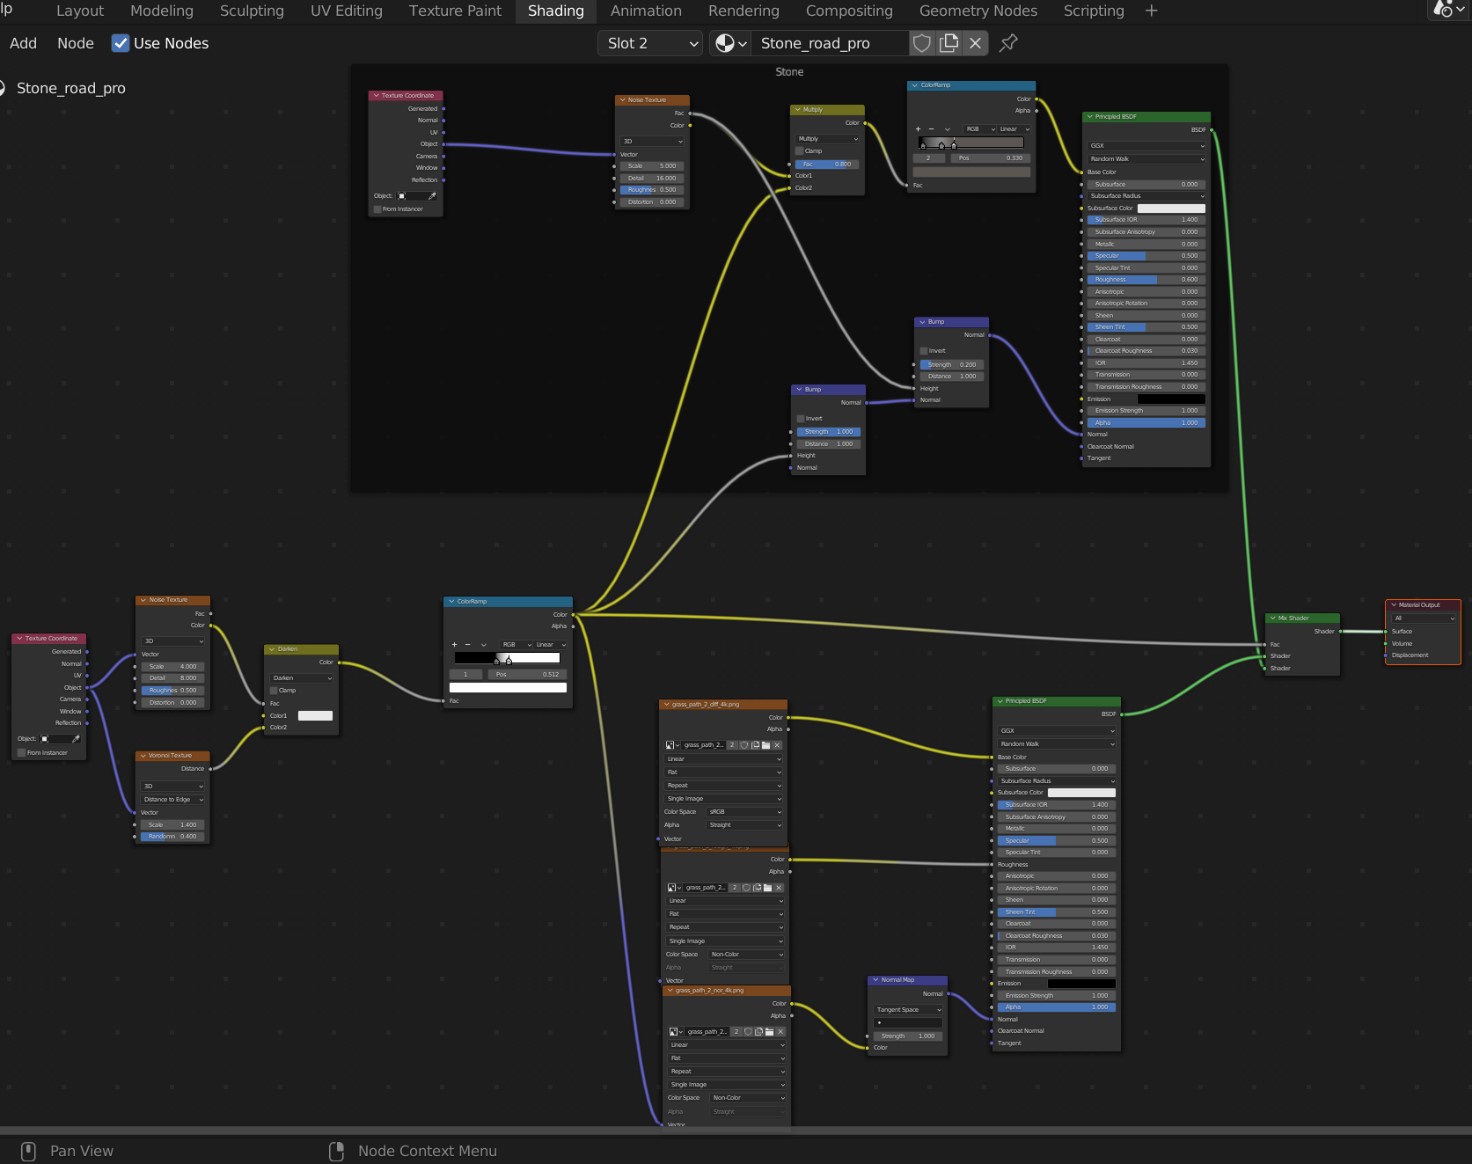
This terrain material is the first material of the terrain. I added another material to this terrain, which would be the stone road material of the city’s ground area. I placed some noise and voronoi textures to determine the soil and road parts.
After that, I created a procedural stone material. For the soil part, I used the grass path image texture of the first terrain material. In the end I united all of them and got the stone road material. The shader can be seen here below:
MAKING THE WALLS AND THE INNER CASTLE
When I looked at the medieval tower preferences online, I saw some cylindrical towers as well. So, I decided to model these types of towers to catch the realism. After I made these towers, I modeled a basic medieval wall and added an array modifier to it. Later, I corrected the array value, united these walls with the round towers and applied the array modifier of the walls. I then deleted some vertices of the overflow of the wall model. I added some stone columns, a gate and some ornaments to the wall as well.
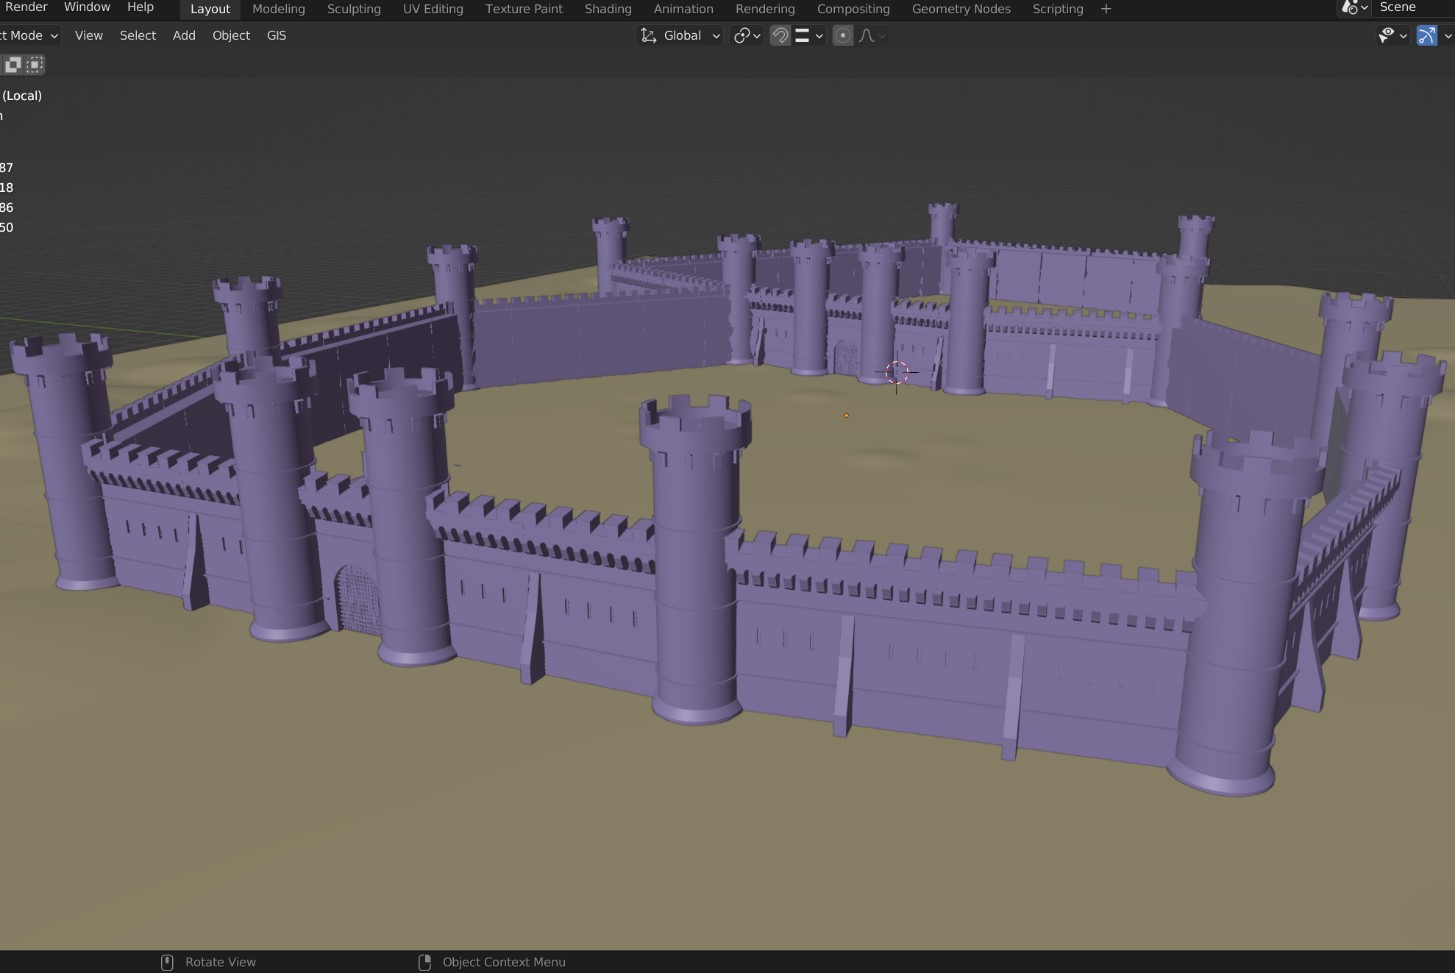
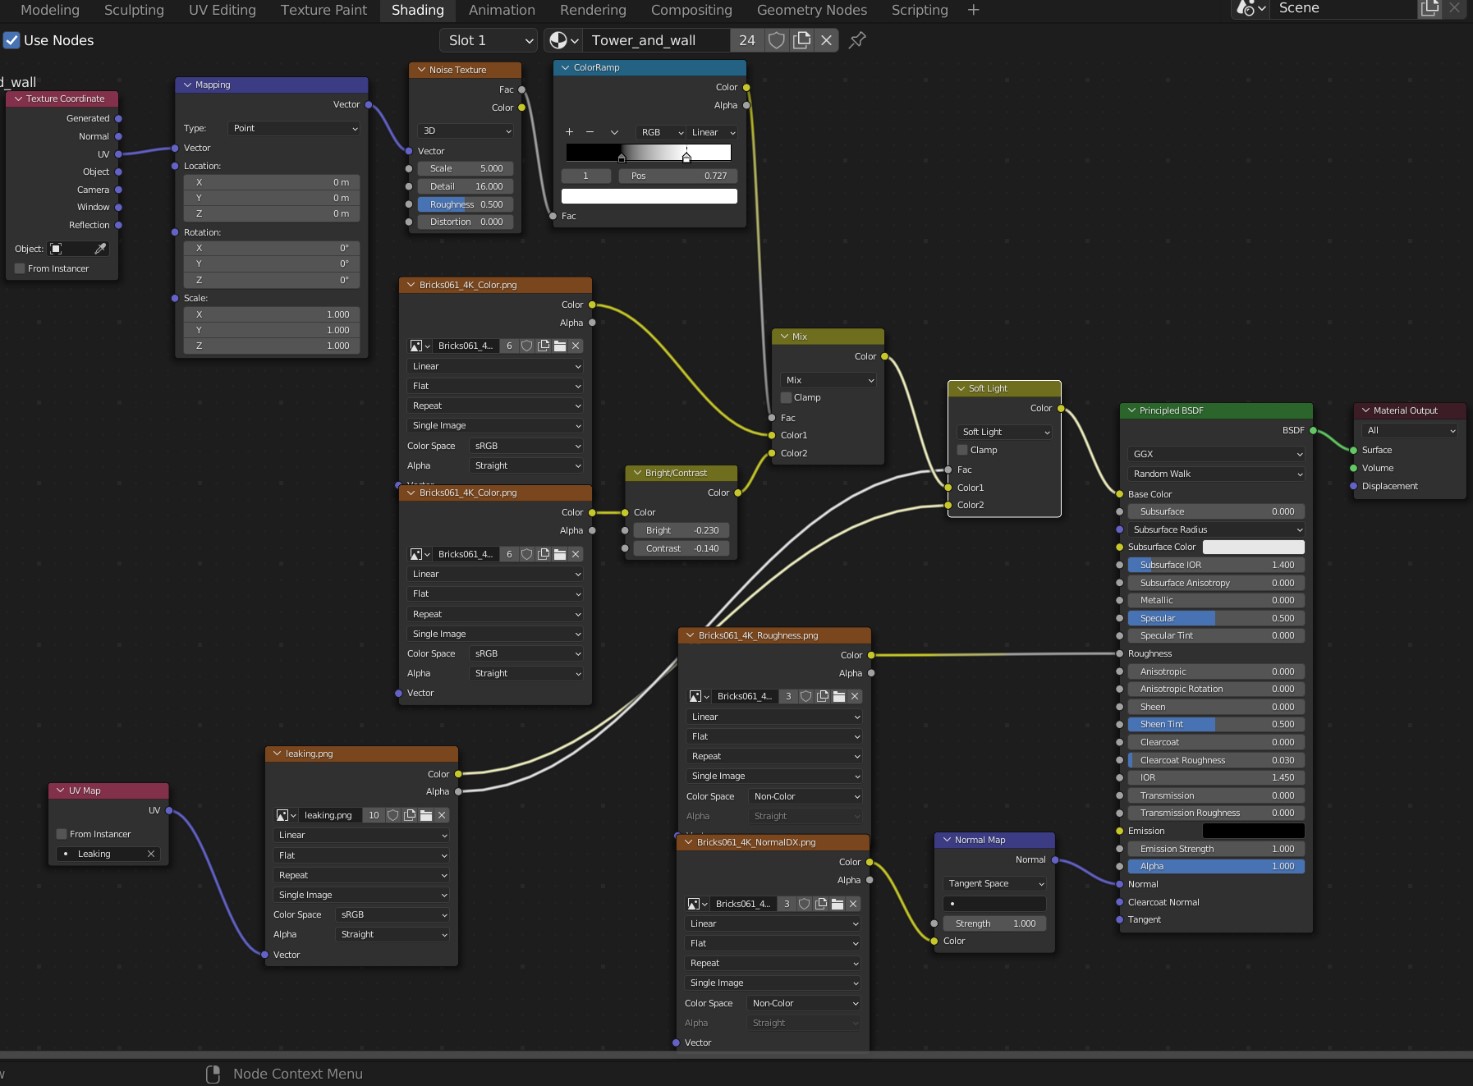
When I finished modelling, I gave a stone material to the wall and inserted a leaking image texture to create some dirty areas on it. I used that leaking image texture on the houses too. After I finished shading, I placed this wall to the terrain.
For the Inner Castle, I made the block out with cubes and cylinders. Then I duplicated the tower and placed them at the edges of the block out. I modeled some rectangle towers and placed them too.
Afterwards. I started to give some details to this block out by creating areas where the ballista would stand. When I finished the modelling, I started to add materials to them. I added the same wall material to the walls and towers.
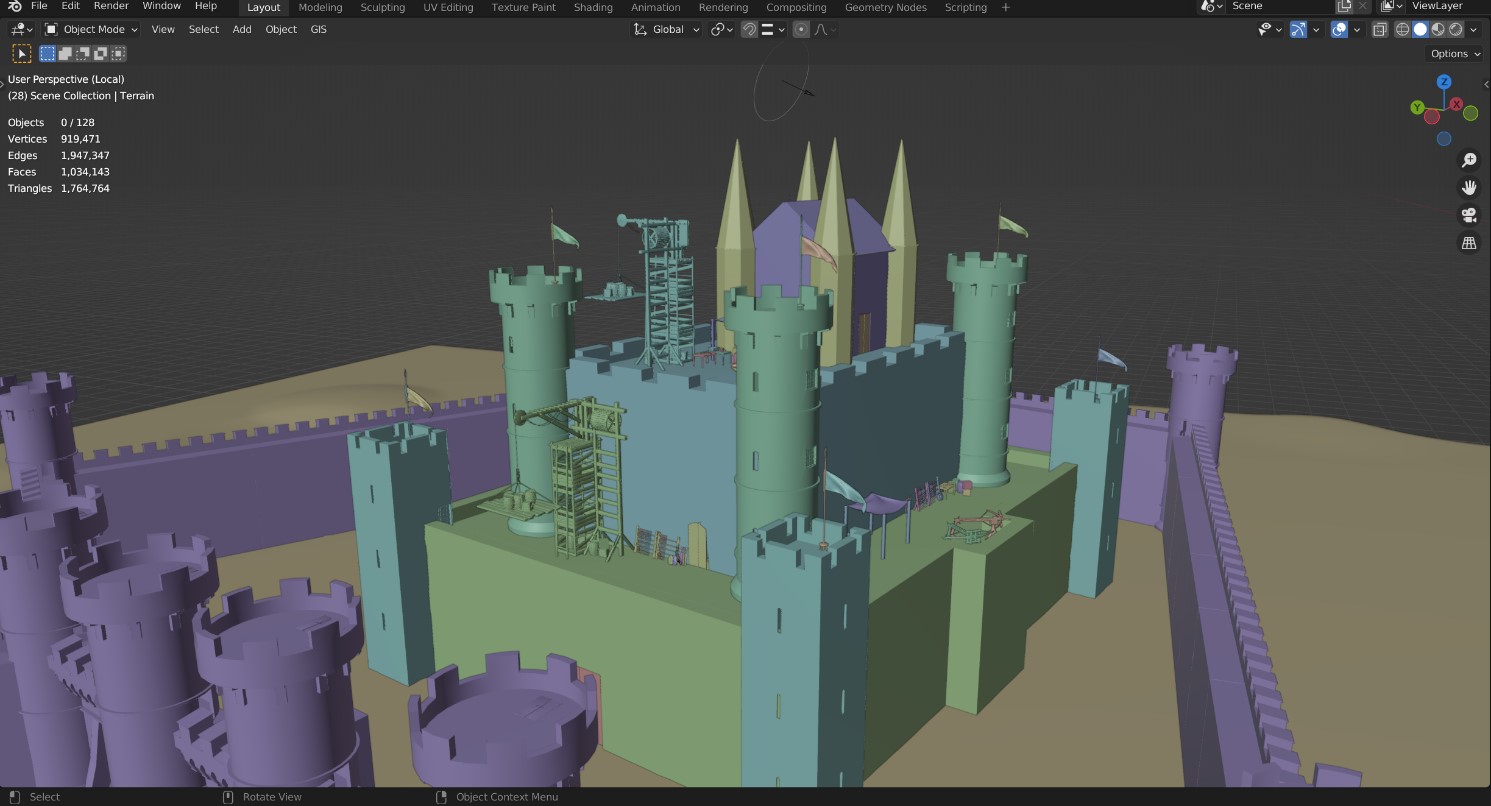
After I set the material, I added a plane to the scene and subdivided it while giving it cloth simulation. I selected the short edges in edit mode and made a vertex group to this edge called PIN. This PIN group allows to create an area which isn’t effected by anything so I could get a constant edge to create a flag. Adding a force field to the scene with animation, got me the wind effect on the flag.
In the end I added little details to the inner castle by scattering barrels, tents, weapons etc.
I modeled a wooden crane from scratch. The process of the crane is shared on my YouTube channel. After I finished the inner castle, I scattered the wooden cranes and barrels on the wall.
MAKING THE SCENE
In the beginning I added a camera to the scene, then placed the walls to fortify the ground area. After that, I placed the inner castle and all the other buildings inside the city.
Then I selected the faces of the terrain within the walls and gave them the road material to create a realistic medieval city ground. When I finished placing all the assets, I duplicated the terrain to the left to cover the empty areas in the camera’s perspective while adding another plane to cover the background.
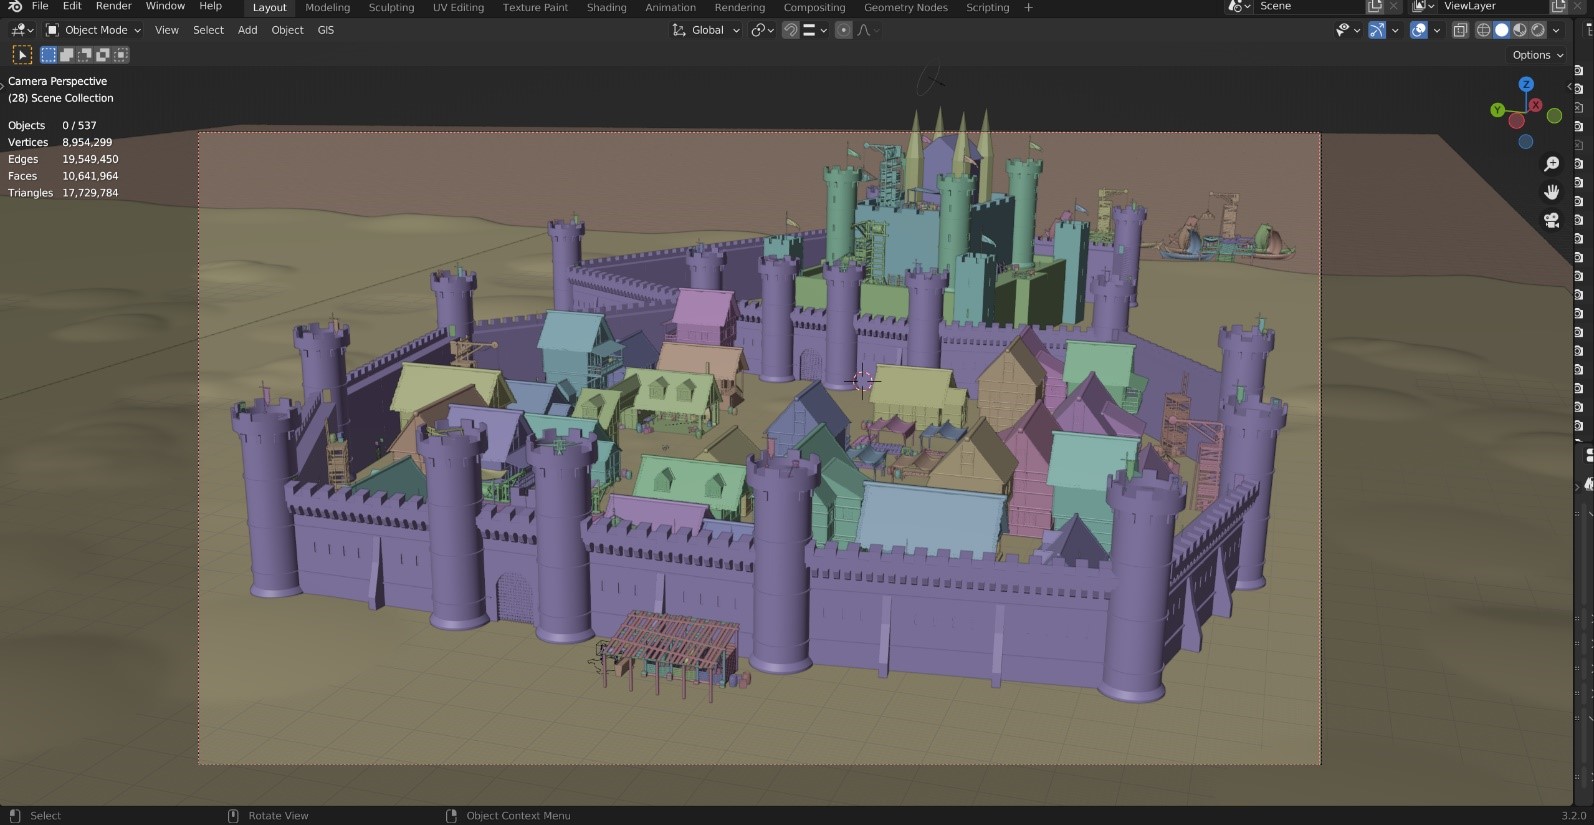
I modeled the background plane like the terrain but with little bumps. I gave this plane a water material and displacement.
After seeing the pre-renders I saw that the water material didn’t seem correct, it needed a bottom. So I duplicated the water plane and placed it at the bottom while giving it a dirt material.
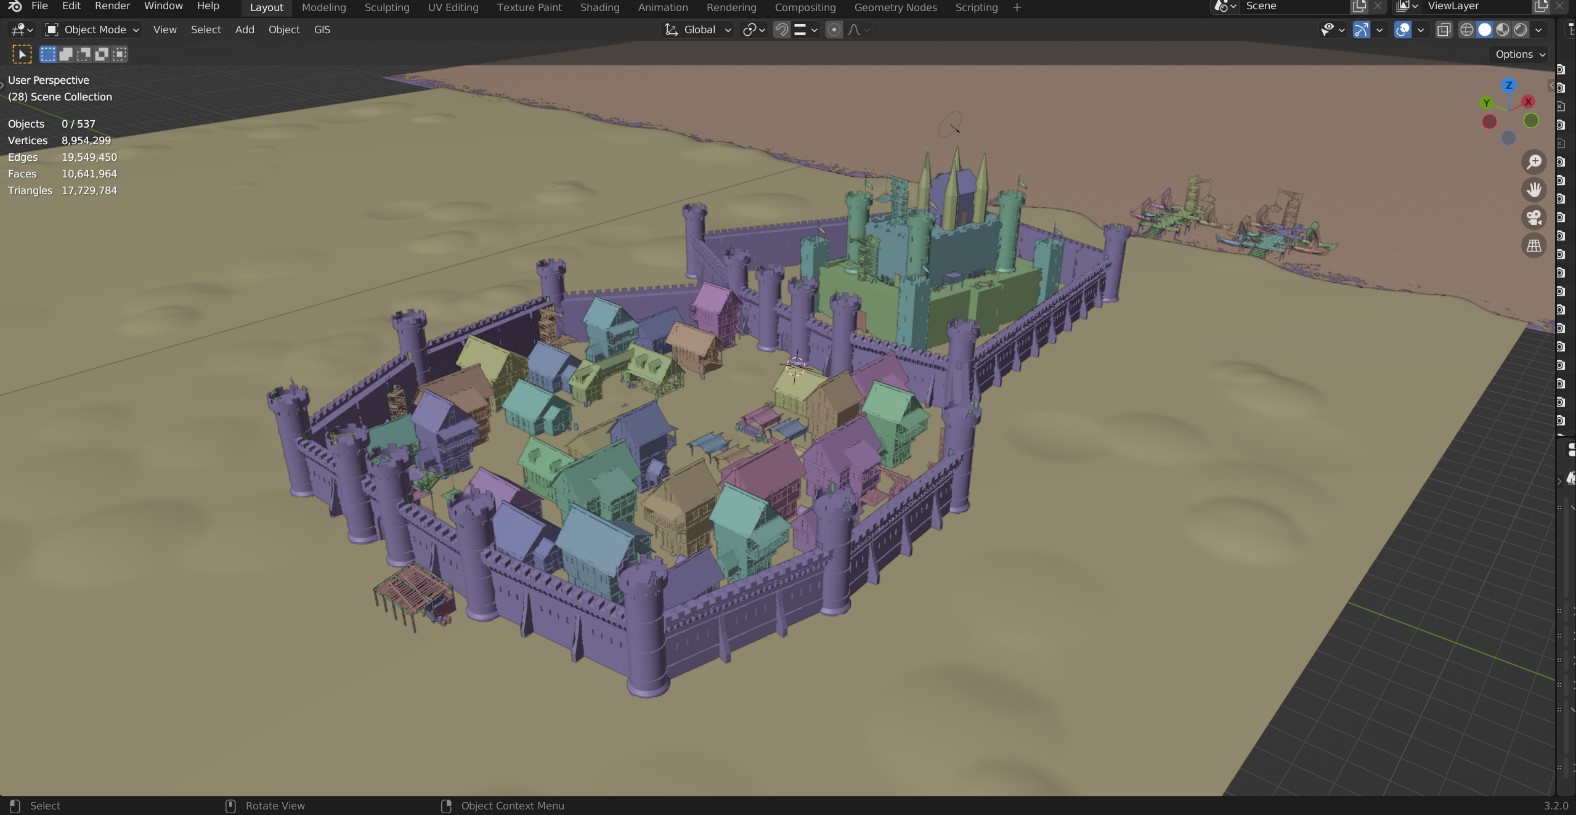
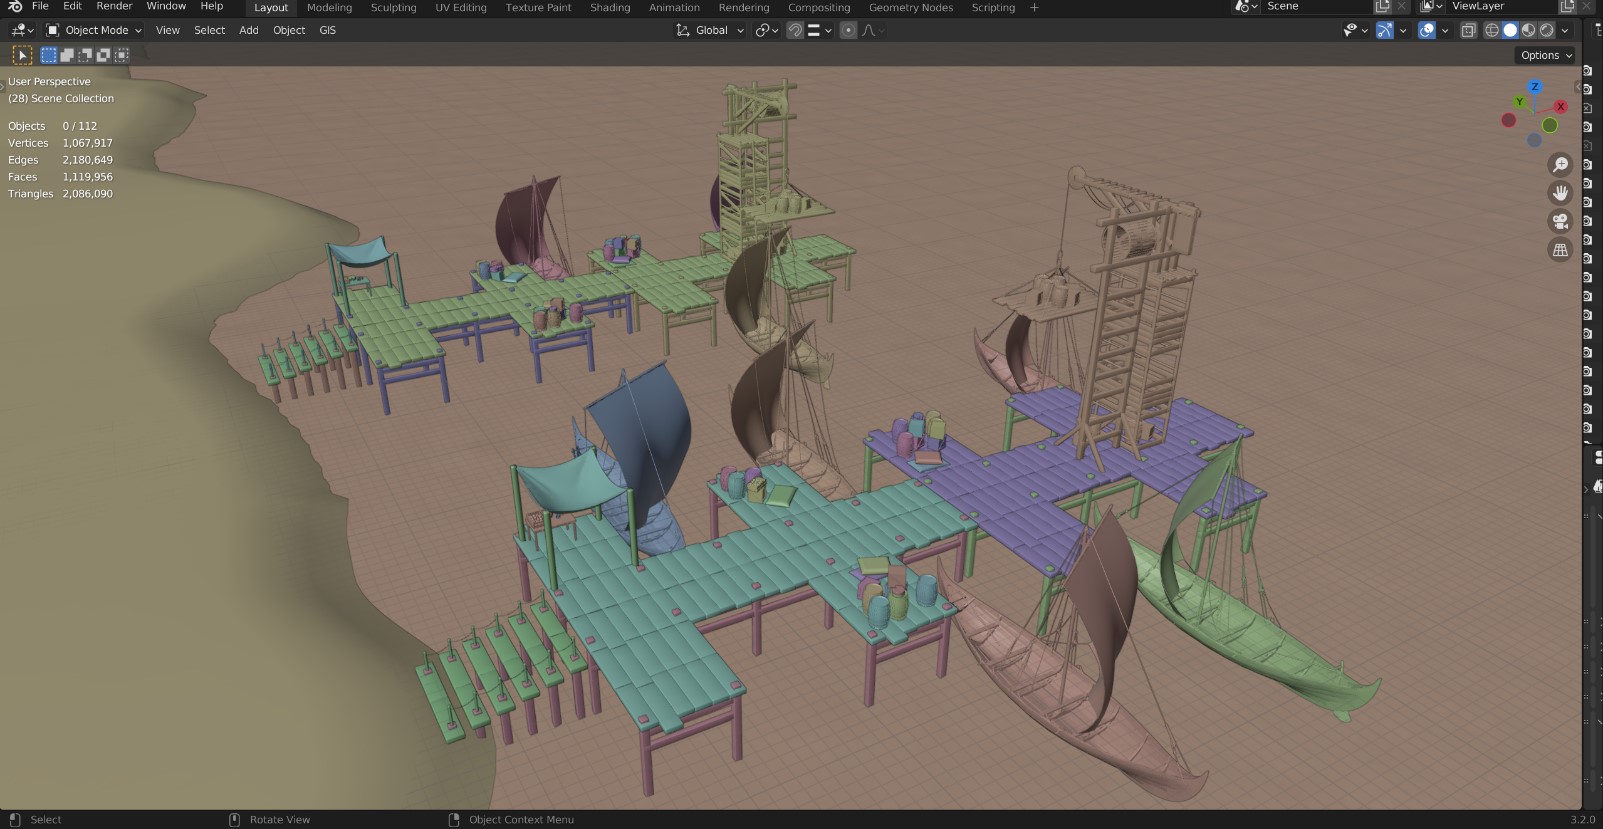
After I set this scene, I wanted to model a nice sea port on the water in background. I modeled a simple dock with barrels, tents and wooden cranes. In the end, I imported some ships from Sketchfab.
NATURE AND FOG
To begin with, I modeled some nature assets (grass, plants, nettles, reeds, dead leaves). After that, I used the sapling tool to model the trees without twigs and leaves. I modeled the leaves and twigs by myself to make the trees look more realistic. Then I gave these trees a weight paint and a particle system to add the twigs and leaves. In the particle setting system, I opened the vertex groups tab and selected the weight paint as density.
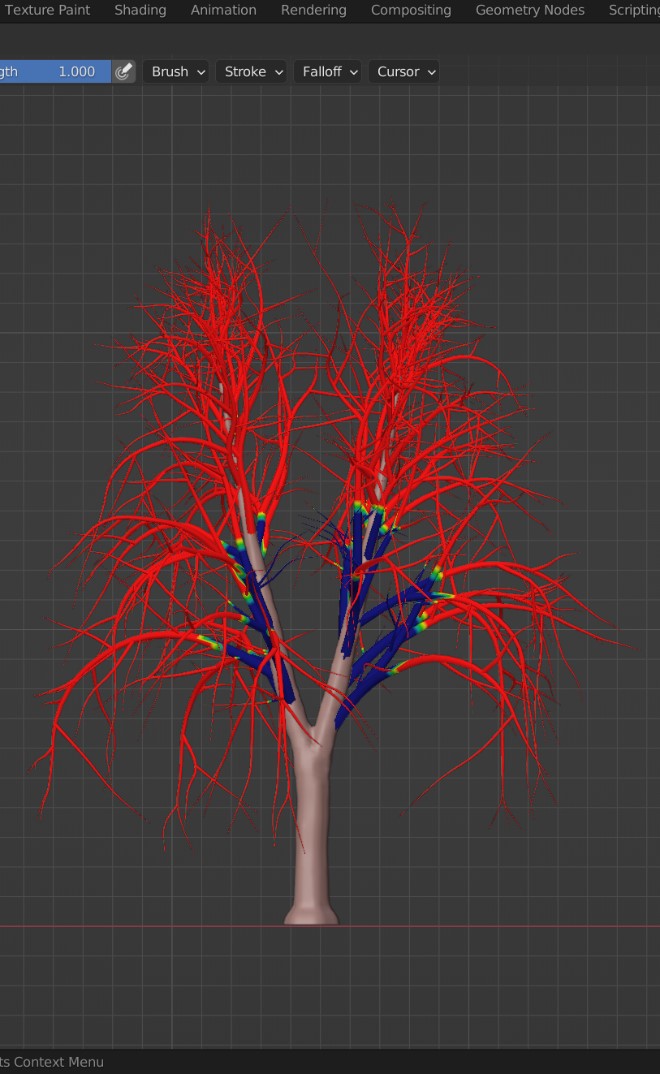
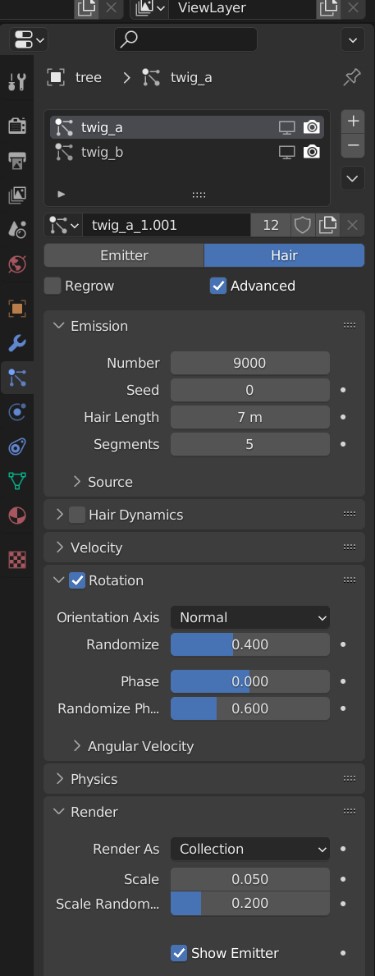
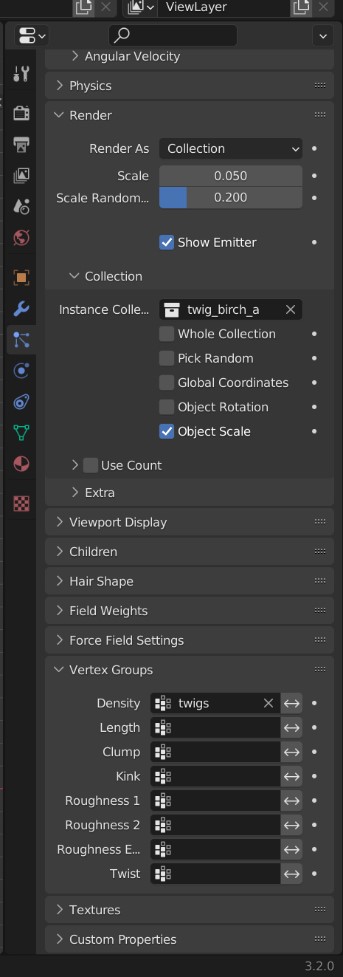
When I finished creating nature assets, I added a particle system setting to the terrain as well. I created separate particle systems and vertex groups, using weight painting for each nature asset (grasses, plants, dead leaves). Then I took pre-renders to decide on the number and density of the foliage.
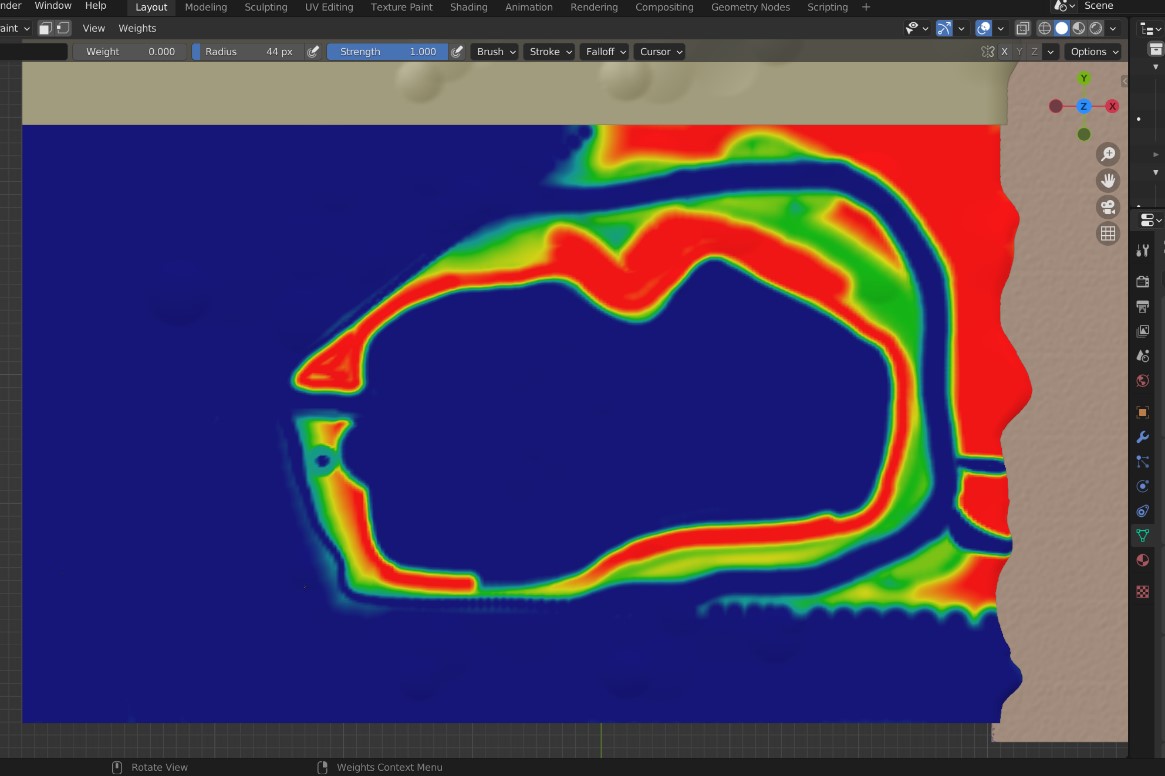
At last, I duplicated my tree assets and placed them into the scene to get a lovely look from camera perspective. For viewport display, I kept the grass density to 2%.

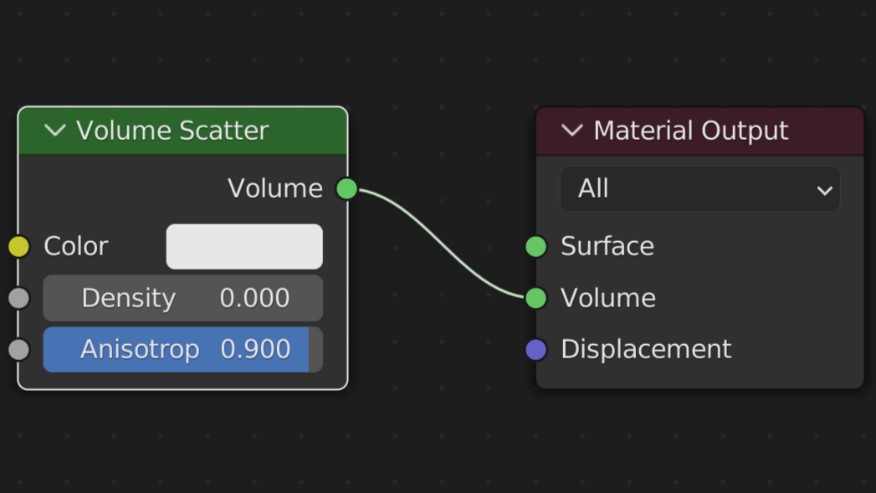
In the end, I added a cylinder and gave it a volume scatter shader to make fog for increased realism.
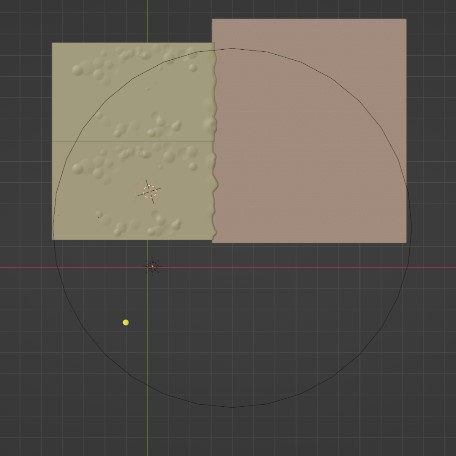

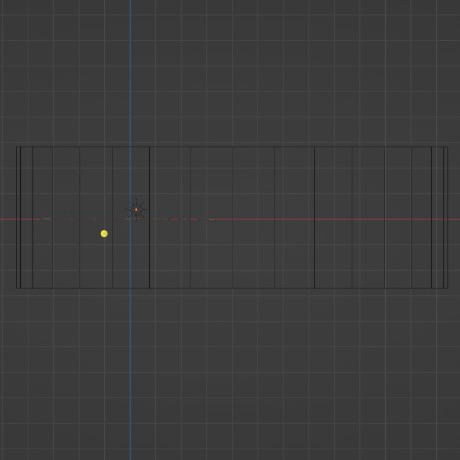
Here is the fog shader, fog material (Density 0.0001).
HORSE CARRIAGEs, FENCES, ANIMALS AND HUMANS
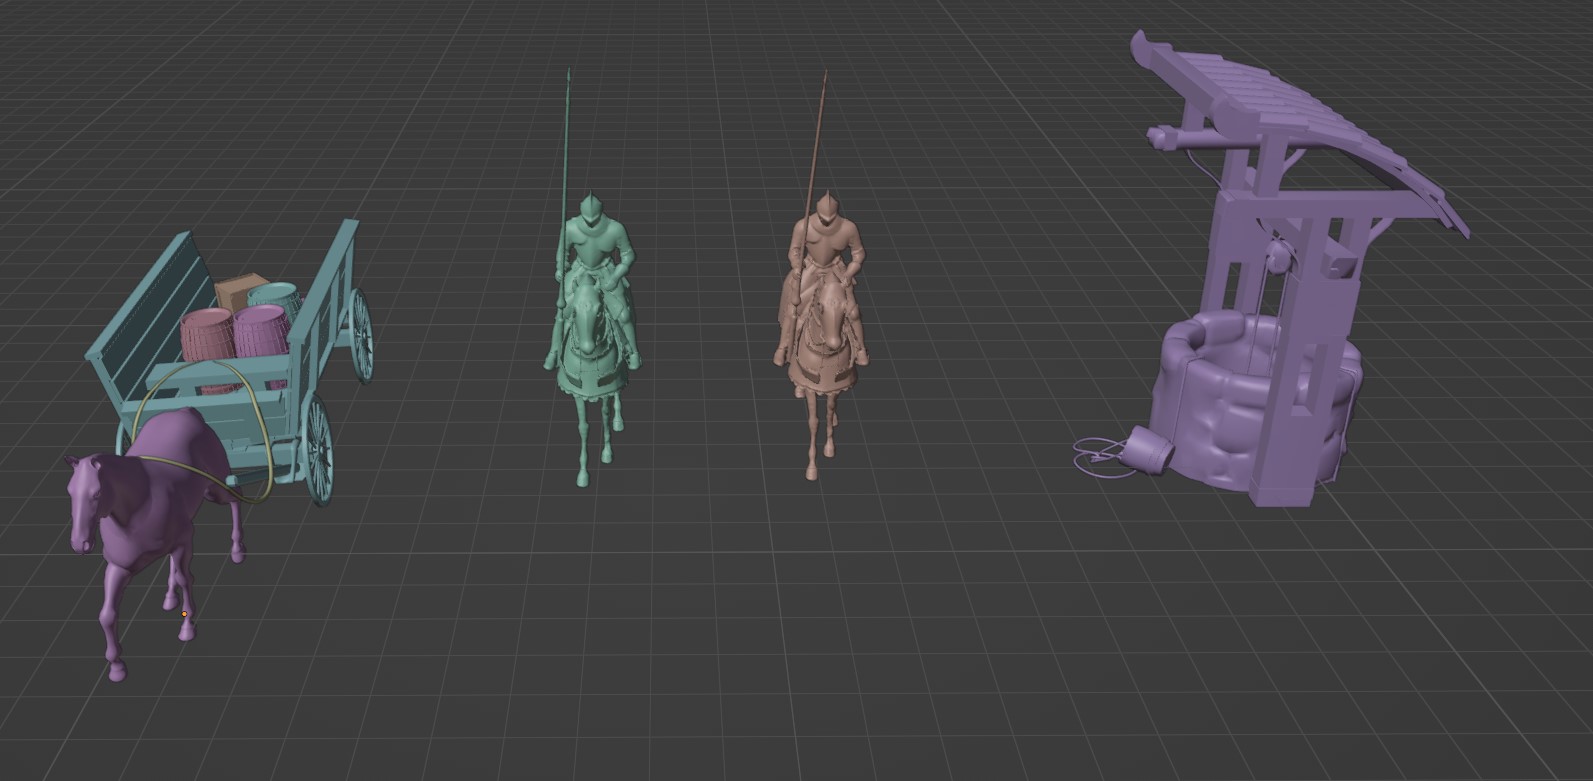
For this part, I imported some low poly birds, a horse carriage, a well and some cows from Sketchfab. I also imported some walking/standing archer and knight models from Mixamo and low poly villagers from Sketchfab. I positioned them all in the scene. I modeled some low poly fences and gave them the wood material as well.
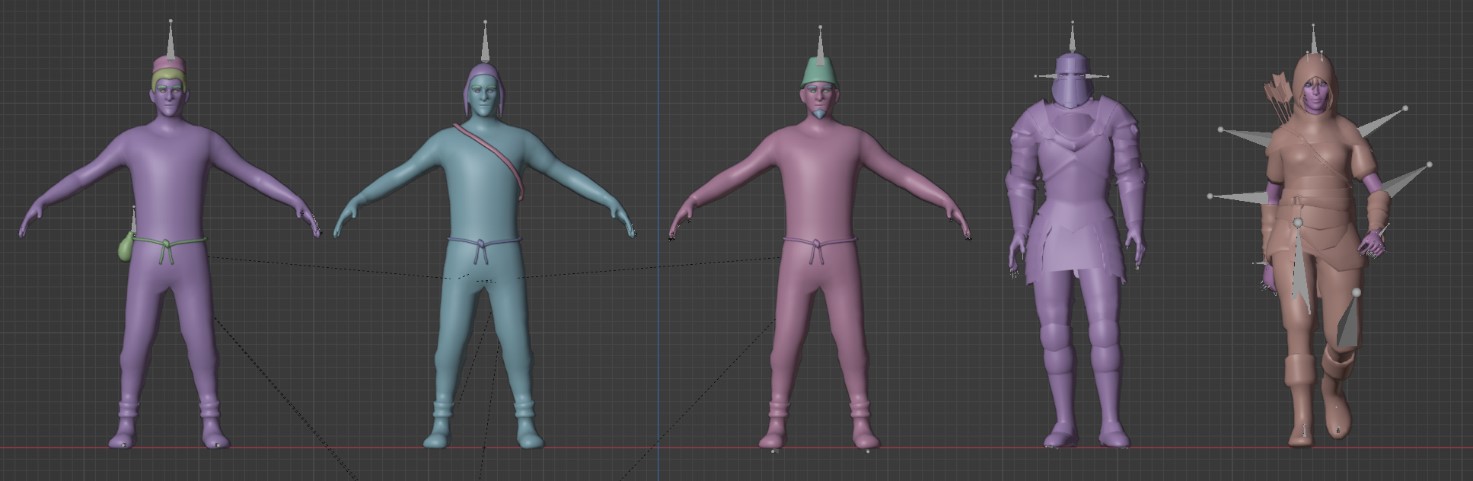
These are the horse carriage, knight, bird and well models from Sketchfab.

RENDERING AND COMPOSITING
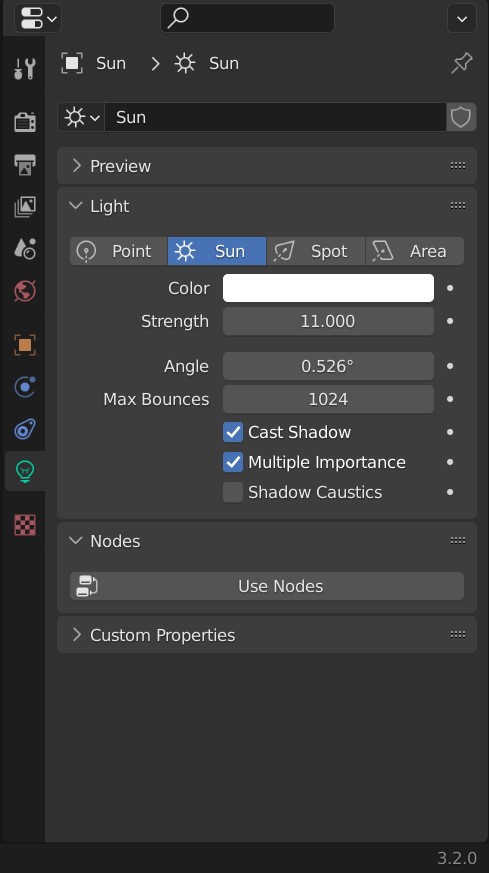
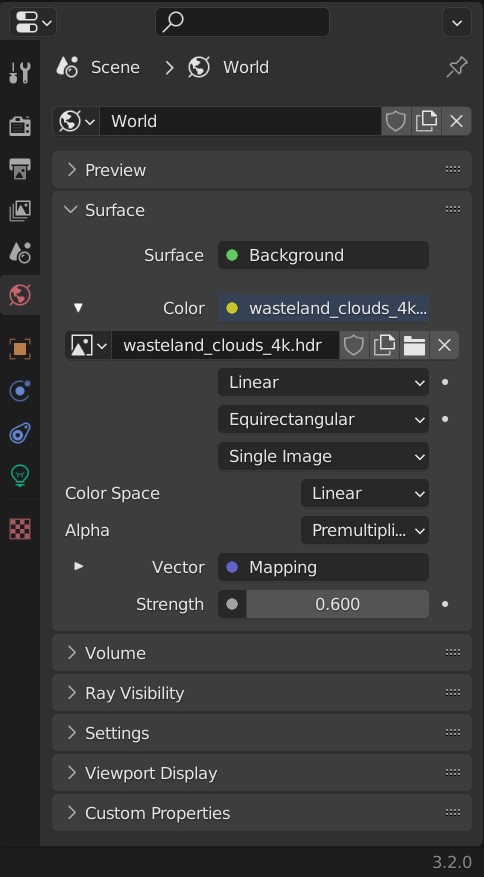
I added a simple sun light to the scene and rotated it for some shadows. For a nice camera perspective, I got an HDRI from Polyhaven, and rotated my sun light to the place of the light source in the HDRI to get a correct relation between the shadows and the light.

Here is the sun and HDRI settings.
In the end I added a simple composition to the scene with a denoiser connected to a RGB curve shader via a color balancing shader.

THE CITY OF BLACKHELM
That’s all, thank you for reading my article!
I hope you have a great day!
About the Artist
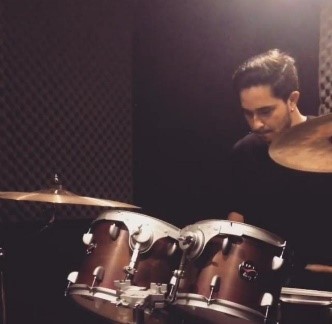
Özgür Ermiş, a self-taught 3D artist from Eskişehir, Turkey. He is currently working as a freelancer.

Really Fantastic work — do you happen to have files with your materials available for download?
Hi!
I downloaded all image textures from Poly Haven and after that I combined them with each other. You can download these textures from Poly Haven and follow the shader node system to make the same material as well. You can also download any kind of alpha masked leak image texture to make dirty areas on the texture. You can find the alpha masked leak image texture from textures.com.
Thanks for your comment,
Özgür Ermiş