

Pats_Lab writes:
Concept
I don’t remember the moment when I came up with the idea but once I had the concept in mind, it stuck with me: the three rhythms of a runner (heartbeat, steps, and breadth) synced with the machine on which he runs. The first pieces of it came with the desire to learn more about animation constraints and mechanic movements in Blender. Combine that with running being my main sports and an affinity for industrial/grungy environments and you end up at “The Rhythm”.
Planning your scene ahead
The industrial hall, which was at the same time the inner part of the treadmill, was supposed to work as an imaginary, mechanical inside of a treadmill. However, sticking to realism and executing on the vision of the three rhythms turned out to be very difficult as the mechanical objects that would do the proper movement for the treadmill, don’t make the appropriate sound of the three rhythms.
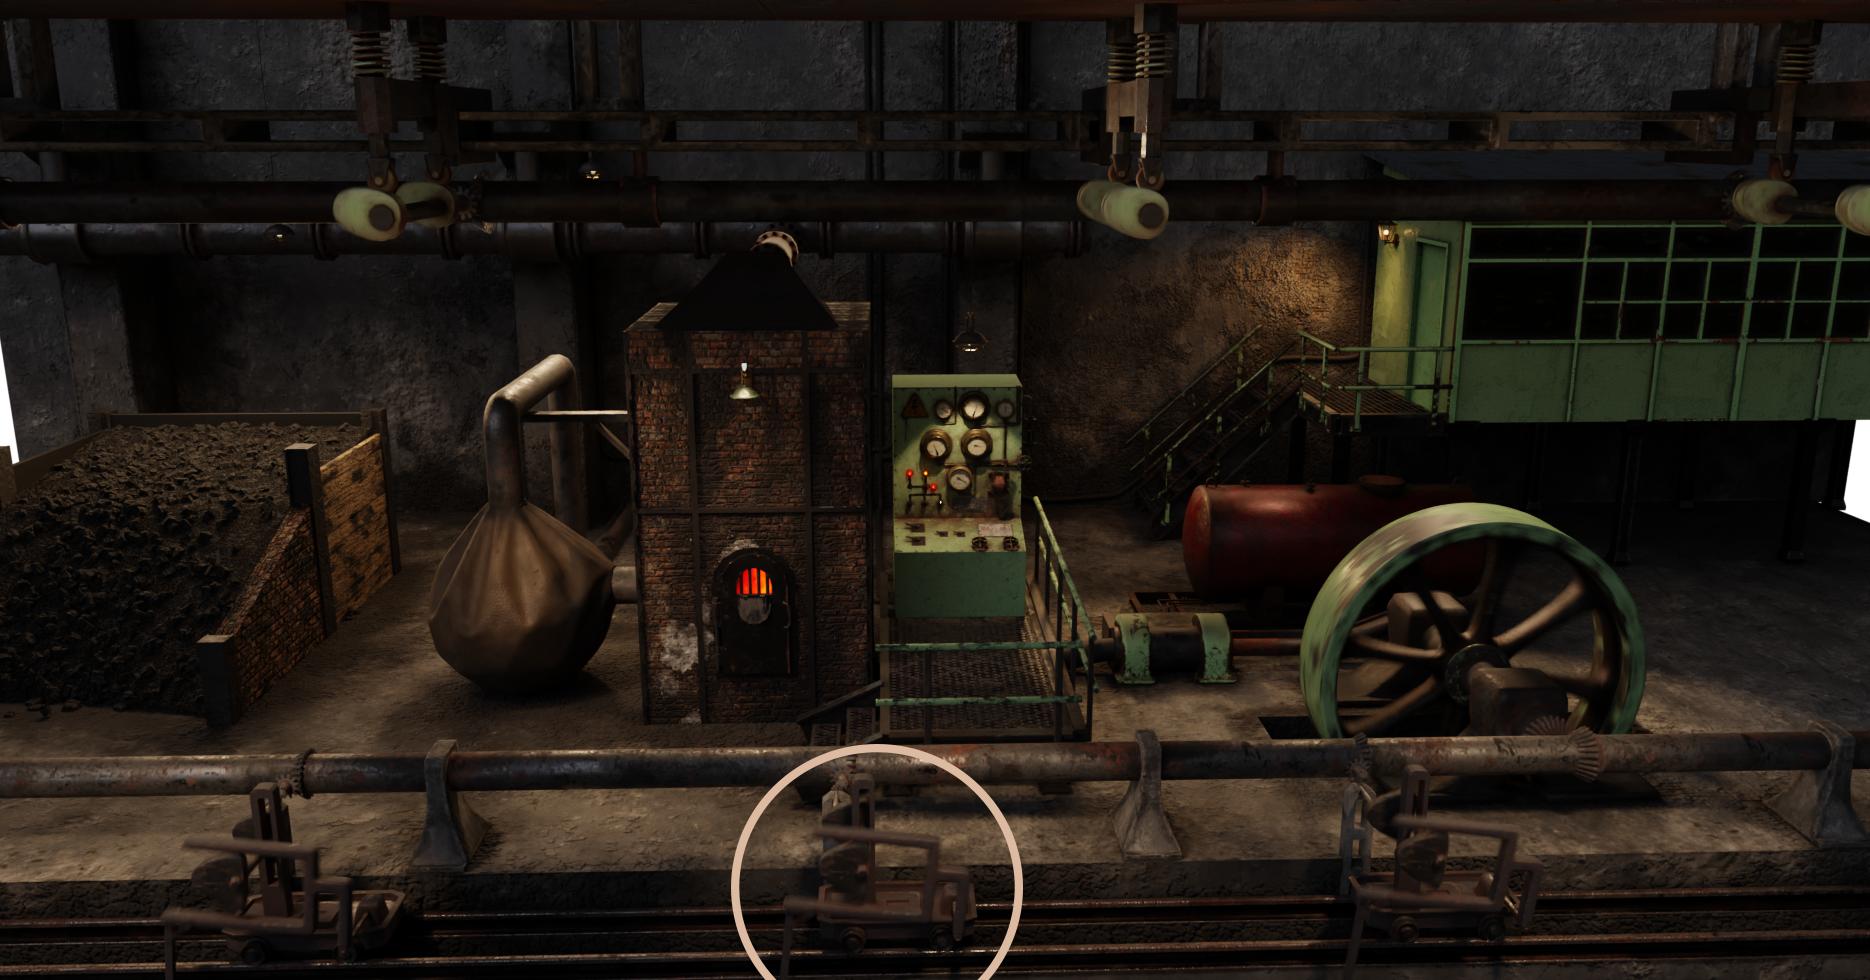
For example, the “puller” (highlighted above) was designed to pull the floor that is wrapped around the treadmill and thereby create the movement that makes the floor on the treadmill run backwards. I spent hours designing the mechanical movement just to realise that it doesn’t do any of the needed sounds. In the end it is seen only for a few seconds at the bottom of the frame and was certainly too much work. Nevertheless, its’ mechanics work and it is linked via gears to the cylinder’s movement. In Blender I achieved that by using drivers for variables. (e.g. the x rotation of gear 1 turns gear 2 on its x rotation by -1 times)
Blender - Substance Painter workflow
One thing that worked out well for me was to use vertex colors to create a material mask for Substance Painter. Thereby I didn’t have to use different Blender materials per object. Instead, I could export a single texture set per object from Substance Painter and save greatly on scene size.
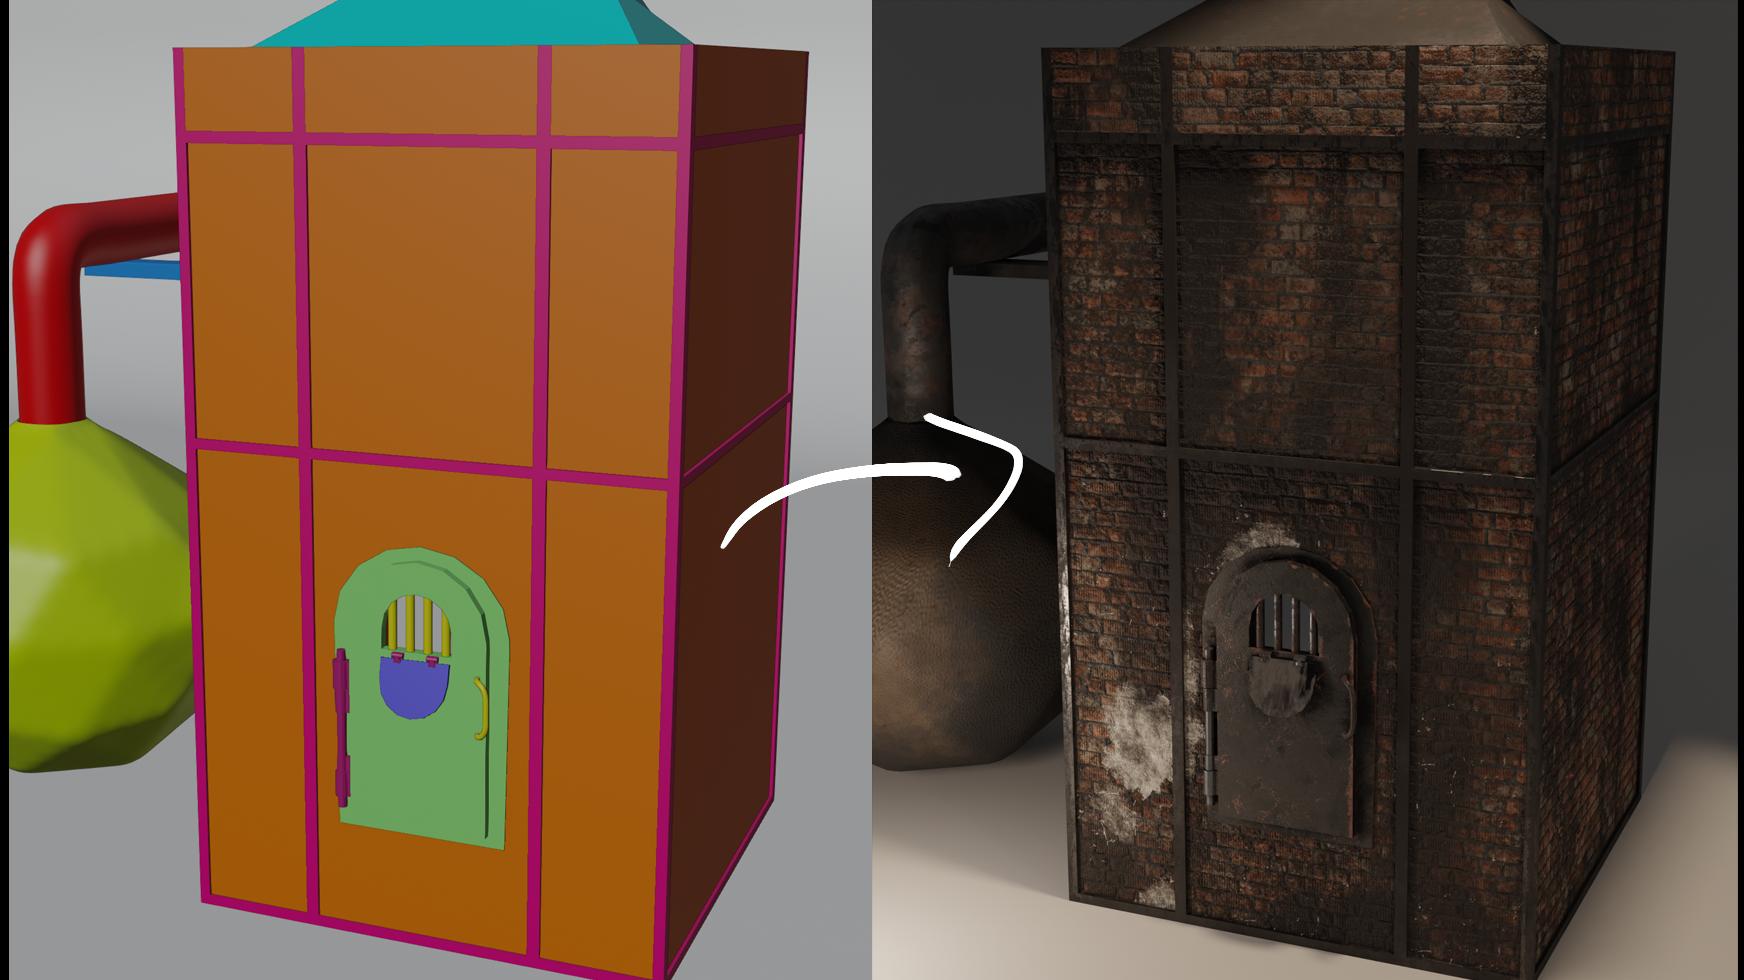
I would first figure out on which parts of the object I would need which material and then assign a vertex color to the mesh for each material. For example, the chimney has an orange vertex color on all the parts that will be brick and a pink color for the metal areas. Then I create a single material for the entire object and save it as an .fbx to import it in Substance Painter.

In Substance Painter, I bake the mesh maps (1)(2) and select for the ID map (3) as the “color source” the “vertex color” (4) rather than the default “material color”. As a result, I have an ID map with each of the vertex colors.
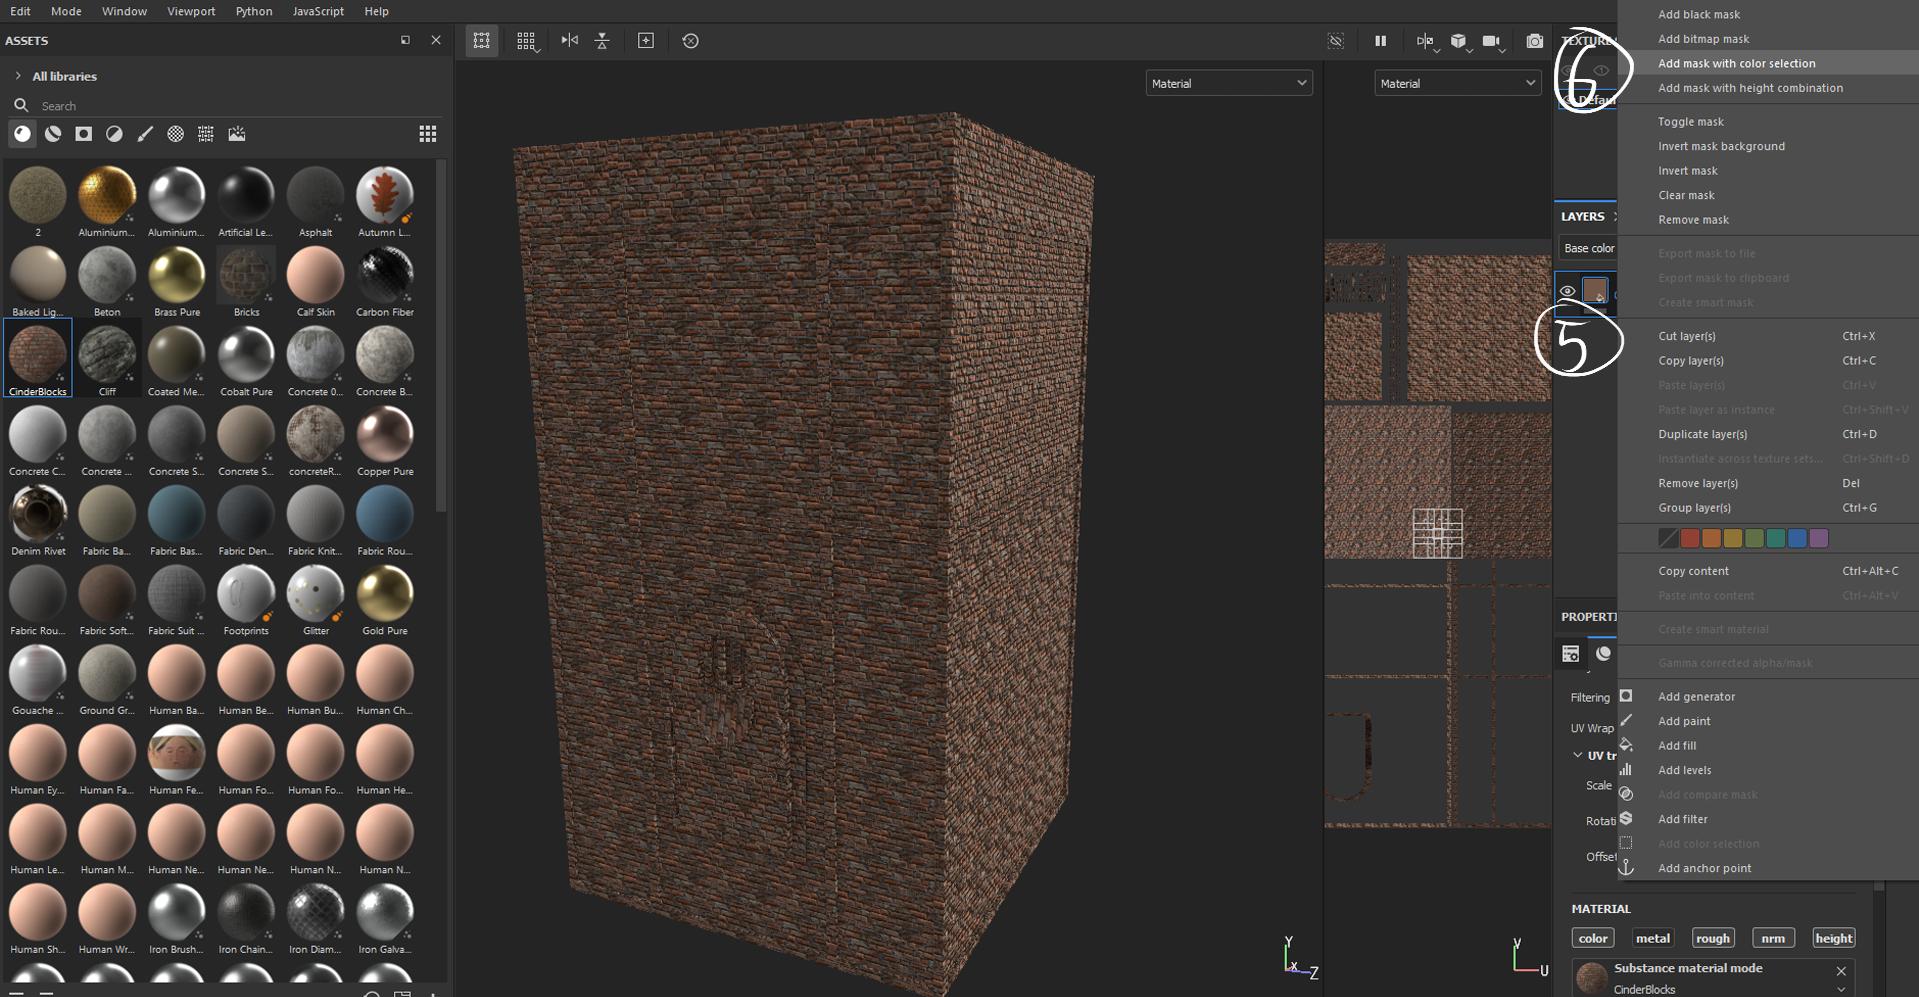
In the layer menu of Substance Painter, I could add a mask using the ID map by right clicking on the material (5) and selecting “Create mask with color selection”. (6) (Works on folders as well).
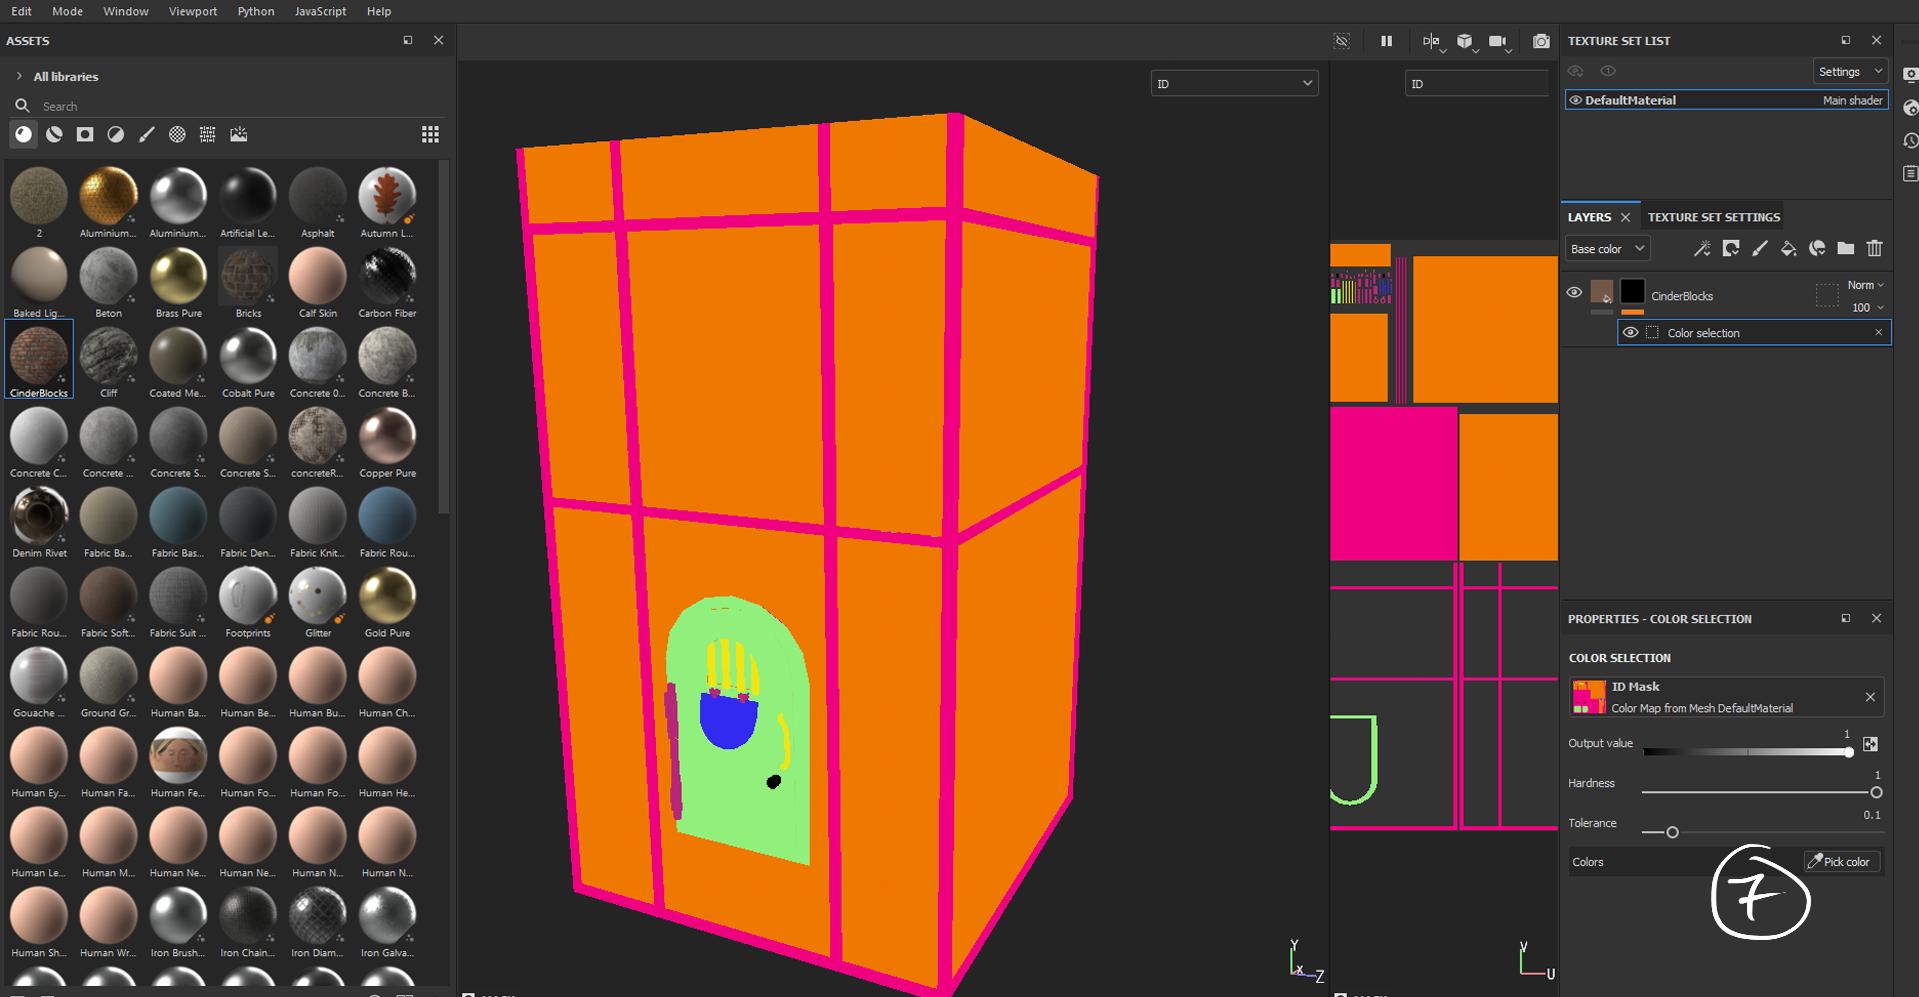
In the property menu of the new mask, I can select the color with the color picker (7) directly from the 3D preview window. Voilà, I got a perfect mask.
I hope the workflow breakdown helps you and you enjoyed “The Rhythm” as much as I enjoyed creating it. If you want to see more behind-the-scenes content or support my future work, head over to Instagram: @pats_lab.