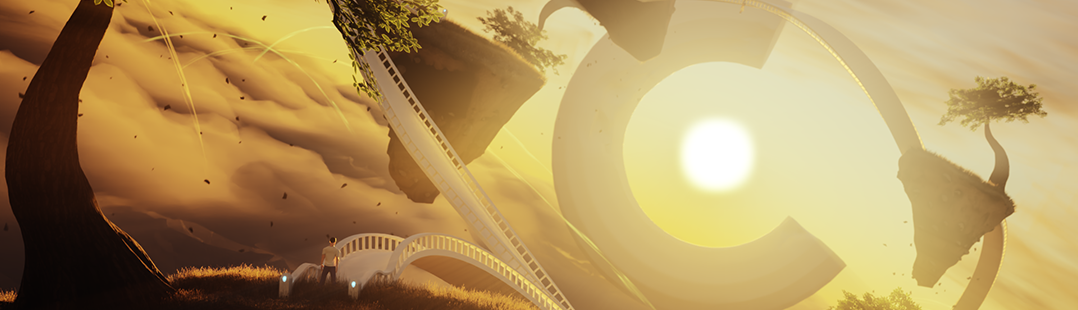
Behind the Scenes: Sensei Protecting Shiva
Introduction
Hi, we are Damsel Studio (Damselfly Studio), a small startup media company located in the heart of the Philippines, the island of Cebu. Damsel studio is made up of 3 friends with a passion for animation and art.
All our art and animation backgrounds stem from our passion, and we are all self-taught.
Our favorite software is Blender, but we also use Gimp, Krita, Quixel Mixer, and DaVinci Resolve for some editing. We also have experience in using UE4/5 and Autodesk Maya as well as some programming and web dev with Python, C#, HTML, CSS, and JavaScript.
Our studio uses a mix of hardware. We recently received, thanks to the Art Star program; a set of 3 XPPen Artist 24 Pro, for which we are very grateful.
Inspiration
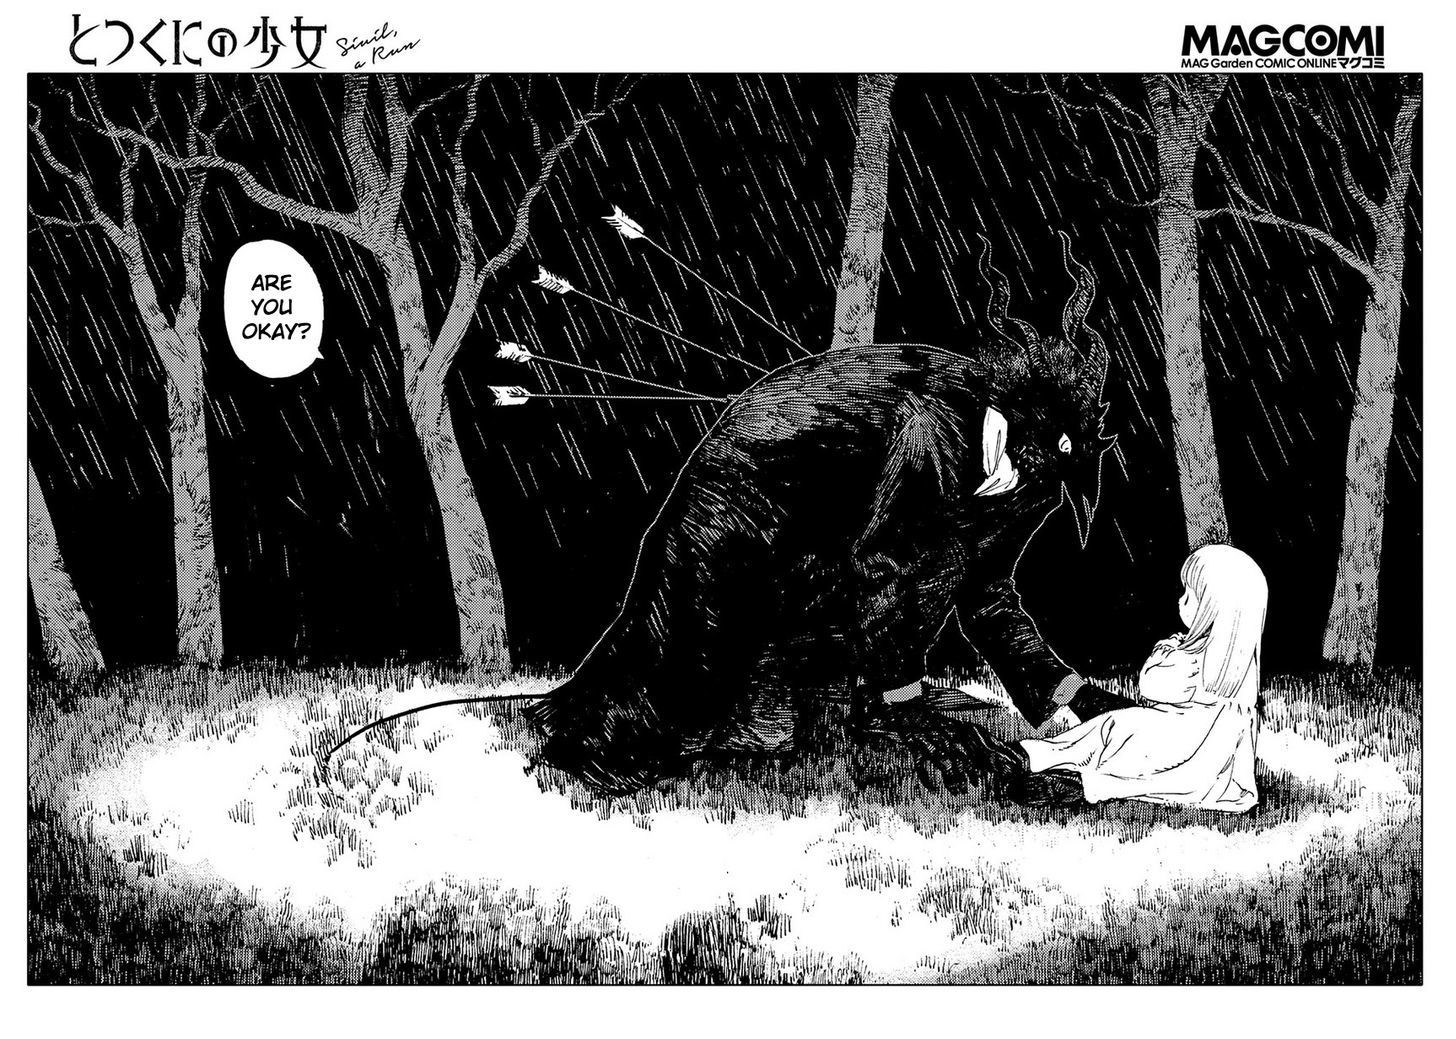
We have been big fans of anime and manga (a type of comics originating from Japan) since we were kids. We recently finished reading “The Girl From the Other Side” manga and instantly became fans of Nagabe’s work. We knew we wanted to mimic his printed-dots shading style.
Making something from 2D into 3D has been done a lot of times but making something 2D into 3D to look 2D is quite difficult. We learned a lot from talented artists like Ruki and Yoolie, and the guys at Lightning Boy Studio. We also watched behind-the-scenes of the Peanuts movie creation, and took what we learned from them, and started creating the models.
The Peanuts movie gave us the idea to make multiple models of Shiva based on the change in the number of details. Although time-consuming, this allowed us to make changes to Shiva and Sensei based on the distance.
We ran into some limitations that Blender and the general 3d medium had. Due to our lack of experience in the technical side of Blender, we had difficulty finding a workaround to get what we needed. We ‘frankensteined’ the concept that somehow worked out okay. We learned a lot from our first test with the cottage of Sensei.
This test allowed us to refine the process of hash shading. We got the idea from the website, lateasusual. We continued to experiment with the idea and got the first iteration of Sensei, which can be seen in this YouTube short.
We kept improving it and got the second iteration of Sensei.
We have made some improvements to our demo.
We have added hash shading on Sensei.Sensei from #TheGirlFromTheOtherSide #blender #Blender3d #shading #animation #indie_anime #BNPR #CGI #manga #sketch pic.twitter.com/opCrn6GLg3
— Damsel_Studio (@DamselStudio) March 30, 2022
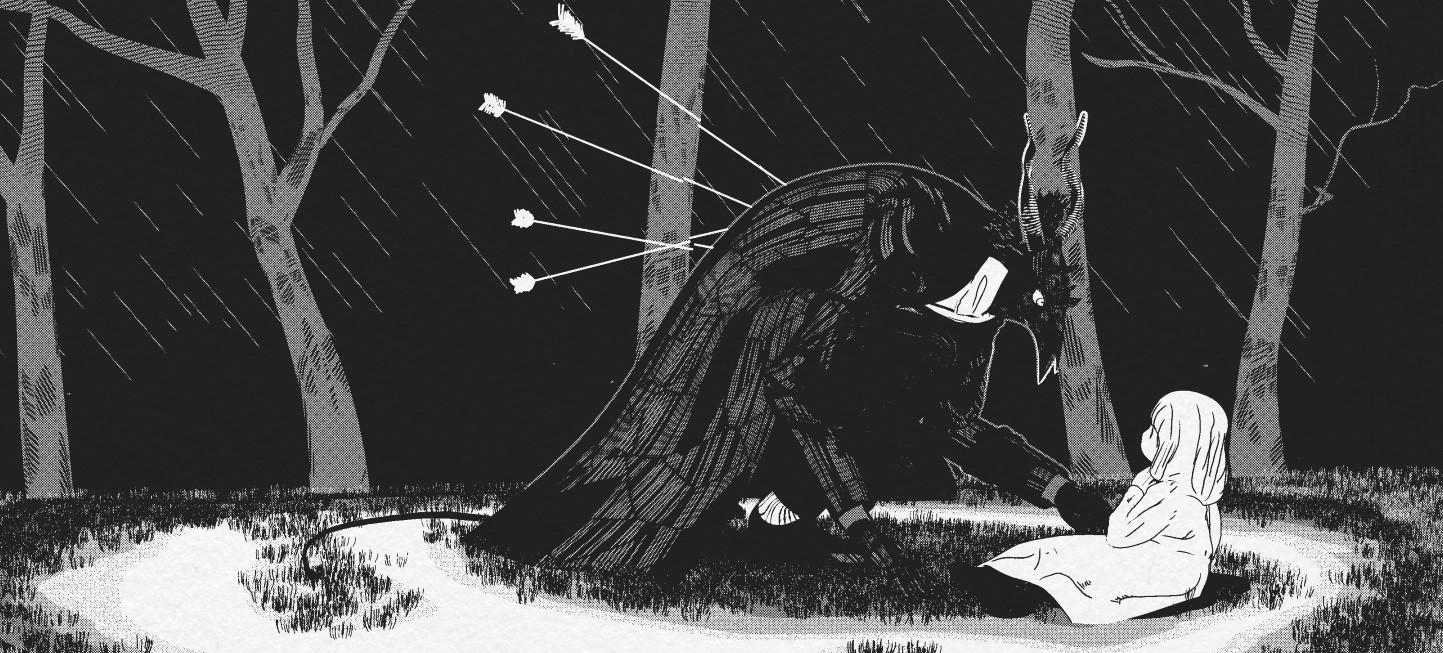
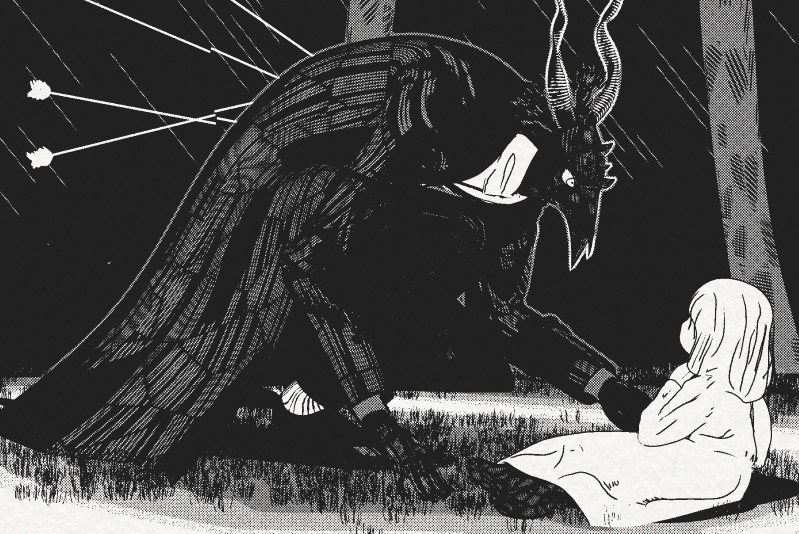
So we knew we wanted to create a scene that moved us from the manga with it. Hence, we created our favorite panel “Sensei Protecting Shiva.”
Process
When you start a project, feel free to focus on one aspect of the creation (e.g., modeling, texturing, animation), but be sure to address the other parts as well.
The first thing we have to do to make a successful project is to make a SACRIFICE TO THE ANIMATION GODS!

Modeling
Once we start with the modeling process, we have to decide the best option for creating the model––either sculpting or poly-modeling.
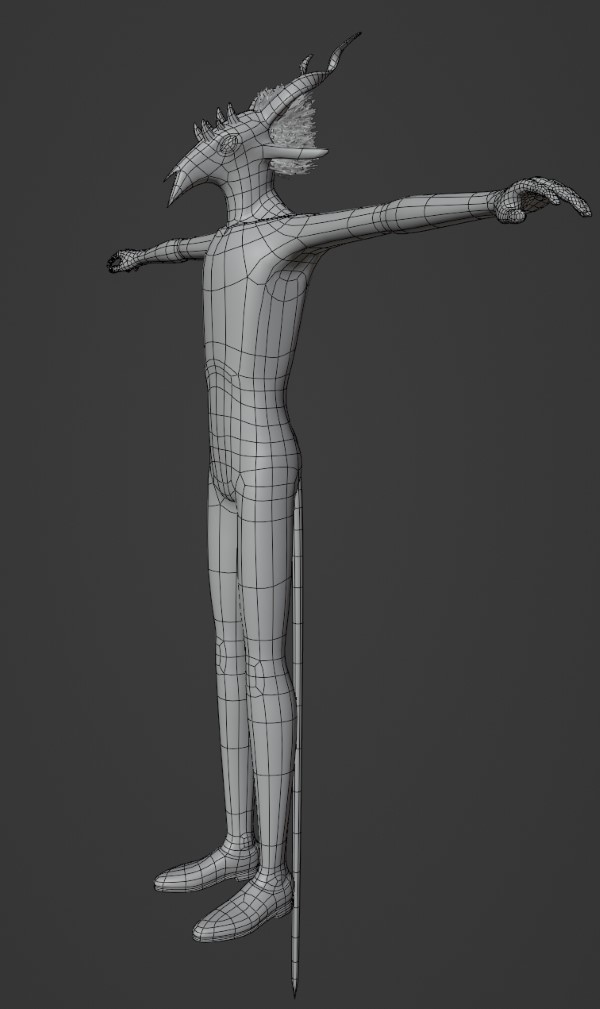
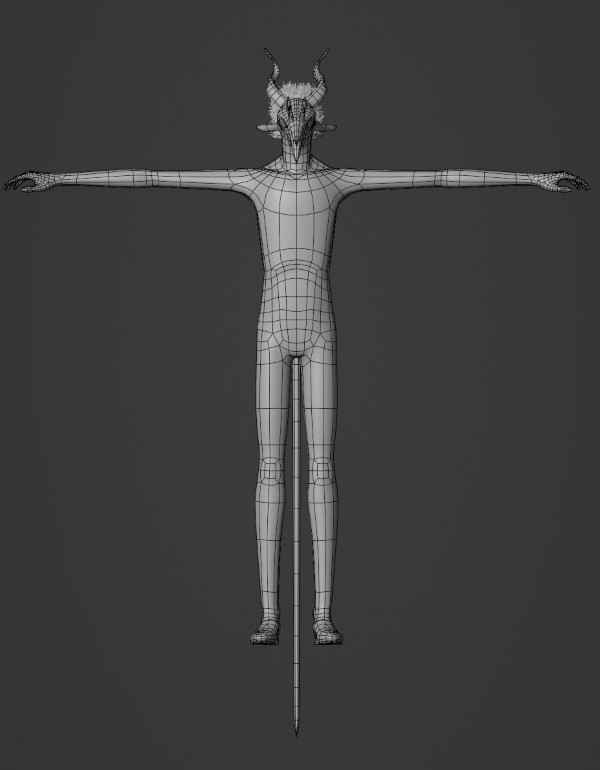
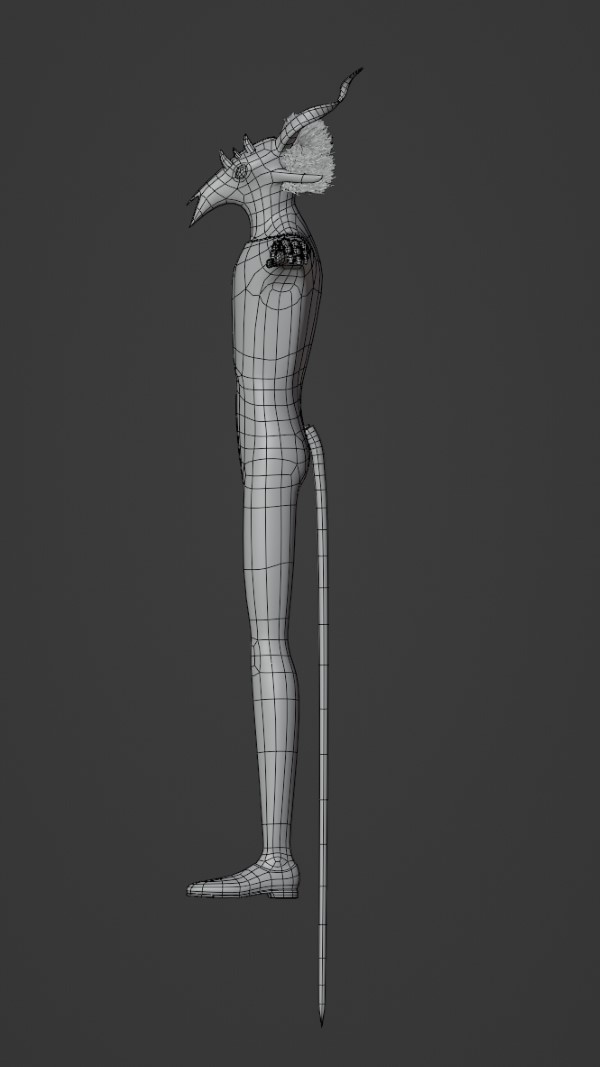
Sensei and Shiva are both poly-modeled, based on the characters we are trying to create. Poly-modeling works well with characters from anime and manga.
When making a 2D-like character in Blender, we primarily model from 3 key points of view. (We learned this from Ruki so credits go to Ruki)
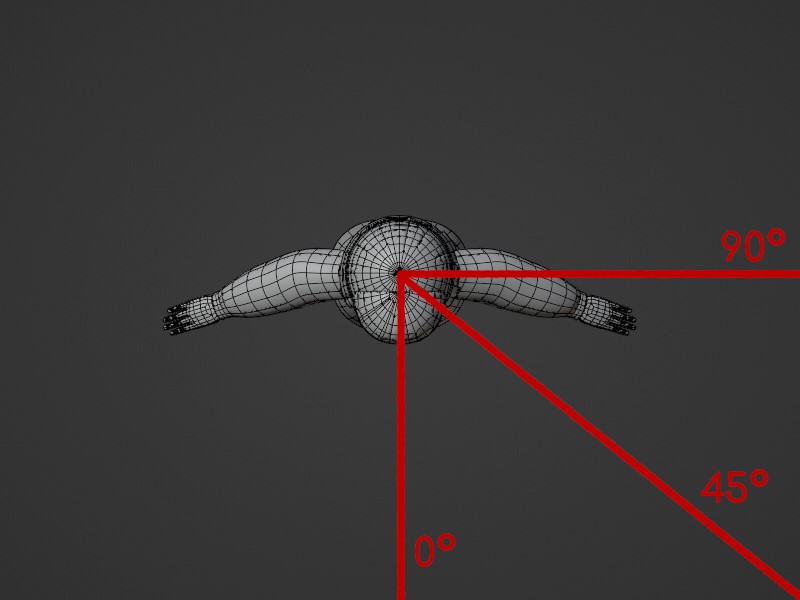
One has to take special care in modeling the front, the side, and the 45-degree view of the model to make this style work.
The most important part of the course is taking as many material references as possible. Sometimes, like in this manga, we couldn’t get clear references for the characters due to this style’s abstract nature. You can always create some of your own references.
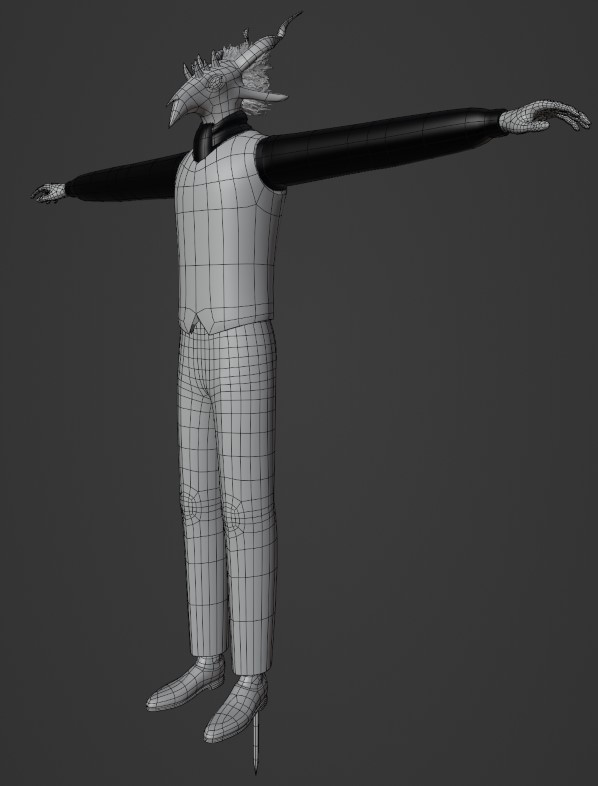

We are sure most people know this: something that can come quite useful to speed up the modeling process is to have premade parts that you can use over and over again like hands, body, feet, and sometimes just clothing items from failed projects can be recycled.
Composition
The pose of the character sets the mood and the intention of the character. One thing we had to do was break down the pose of the scene. We tried to follow the artist’s intention. This is quite difficult to explain but the pose is quite deliberate by each artist.
We hoped we would give Nagabe’s art justice, and we take homages quite seriously, so we did a couple of iterations on Sensei’s and Shiva’s poses till it felt right.
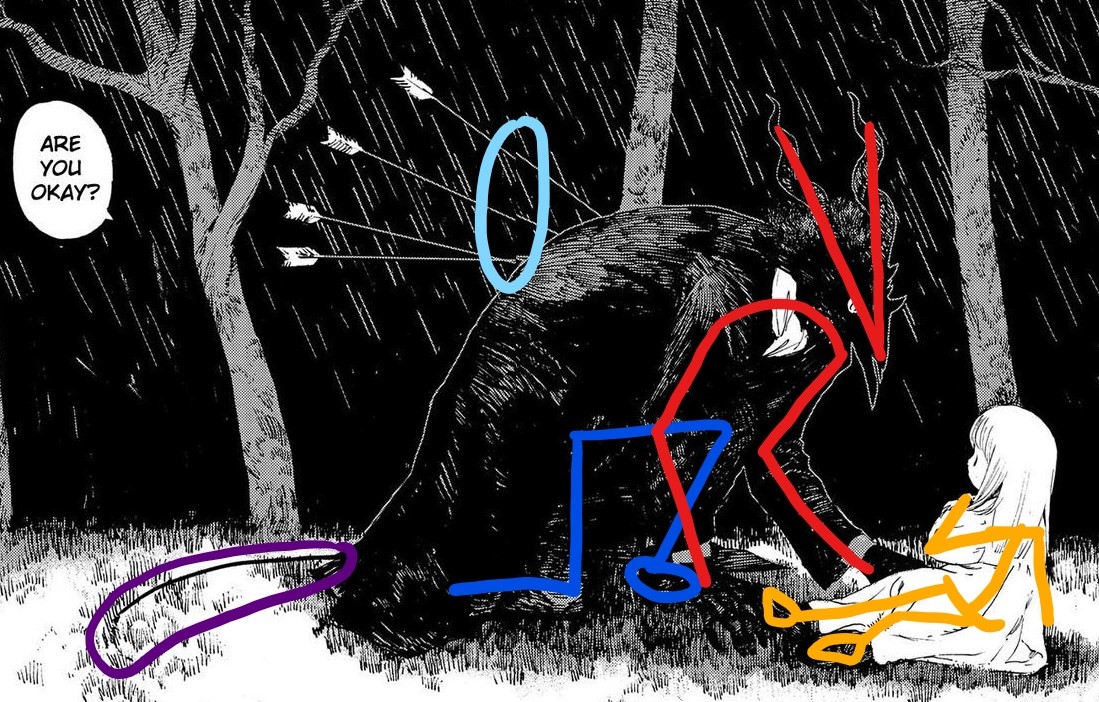
These are some things we took note of.
- Blue: We had to get the position of the legs right but it was quite difficult because of the coat obscuring the other leg, and the art style.
- Red: The upper body was quite self-explanatory.
- Yellow: The position of Shiva. We had difficulty finding a way to put Shiva close to Sensei to match the panel so we took some liberty there.
- Light blue: We encircled the arrows that showed a minor accident. We first thought it was part of the art style but it was just a page-scan error. However, we decided to keep it in.
- Purple: It’s …..a tail, it’s just a tail.
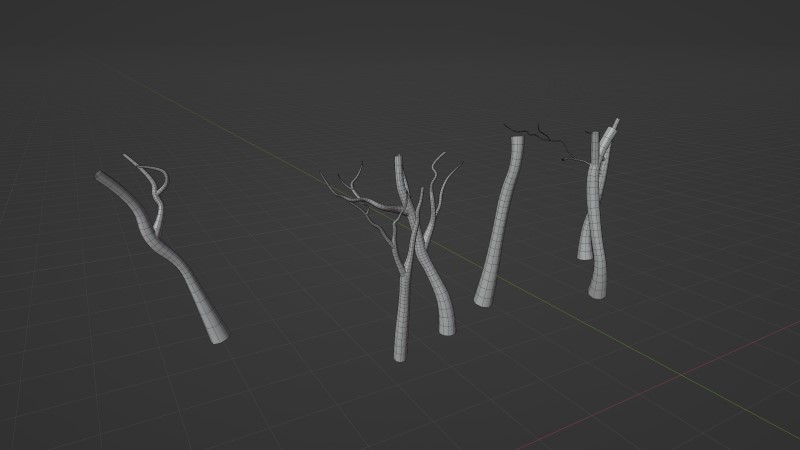
We generated the trees with a sapling tree generator, converted them into a pruned mesh, and gave it a simple flat shading.
The floor is just a flat subdivided plane. We made the grass with hair particles and painted it with vertex paint.
Here is how the scene came up about.
This project was a practice piece for us and it taught us a lot of lessons. This ends the breakdown of what we have learned from this project. We hope you enjoyed our little article. Have a nice day!
Sensei Protecting Shiva

Here is a small animation of the scene.
About the Artists
![]() Damsel Studio- a merry band of 2(+1) animating misfits with a noble goal, to revolutionize the industry––15 seconds of fame.
Damsel Studio- a merry band of 2(+1) animating misfits with a noble goal, to revolutionize the industry––15 seconds of fame.


