
Behind the Scenes: Sleeping Monkey
Introduction
Hi, my name is Aswin Anand. I’m a 19-year-old artist from Kerala, India. I started learning Blender in mid-2021. Before that, I had little knowledge of 3Ds Max. Currently, I am doing a degree in BSc. Animation and VFX.
I started learning Blender to do Sculpting. Because of the knowledge that I had with 3Ds Max, it was a little bit easier for me to learn blender. After a while, I started to learn Zbrush. It was a life changer as I can now create highly detailed models using Blender and ZBrush at the same time. Now I have a little bit more interest in texturing and look dev, and I’m working to improve my skills in these.
The main concept of the work “Sleeping monkey | Japanese macaque” was from a video that I found on National Geographic’s YouTube channel.
References
The first and most important stage in creating 3D work is collecting enough references for the scene, from the anatomy of the monkey to the hair and fur references. These are the references that I used.

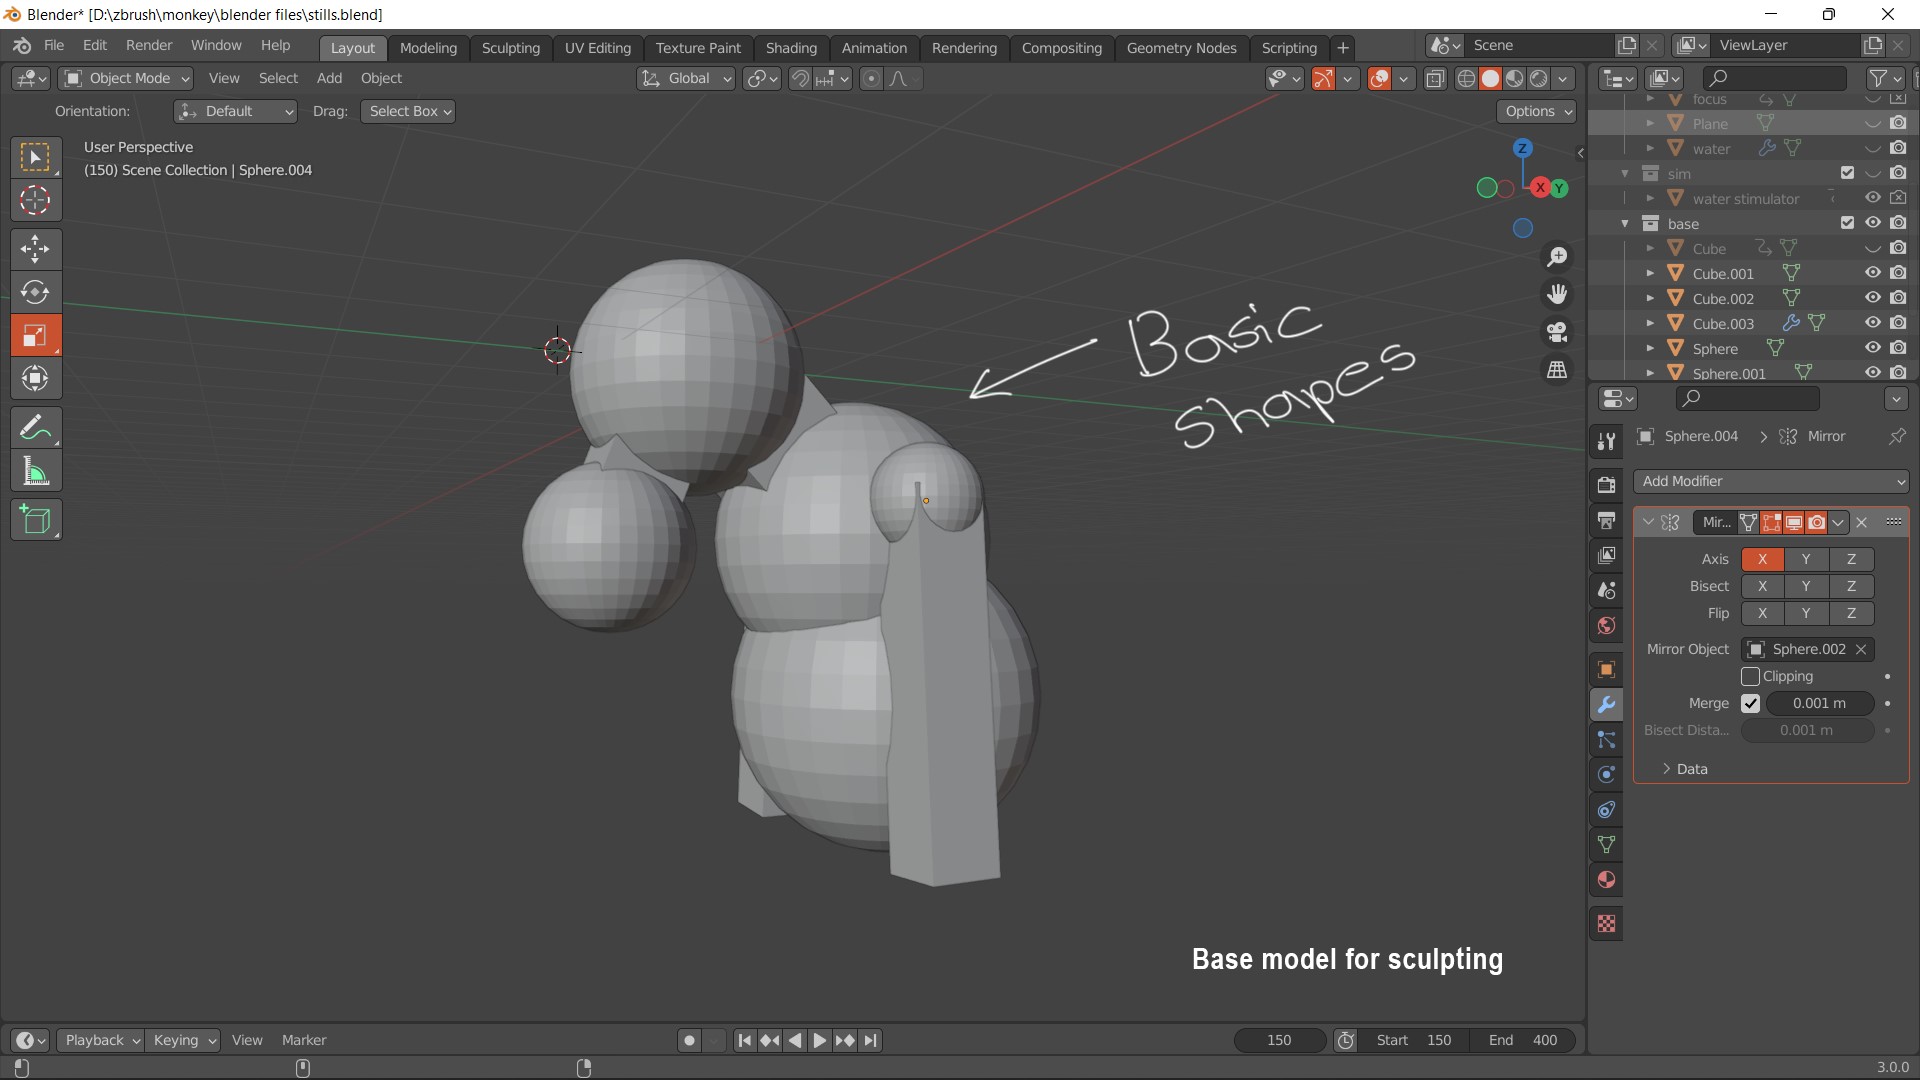
Creating the Model
I used Blender to create a model using some basic shapes and started sculpting it.
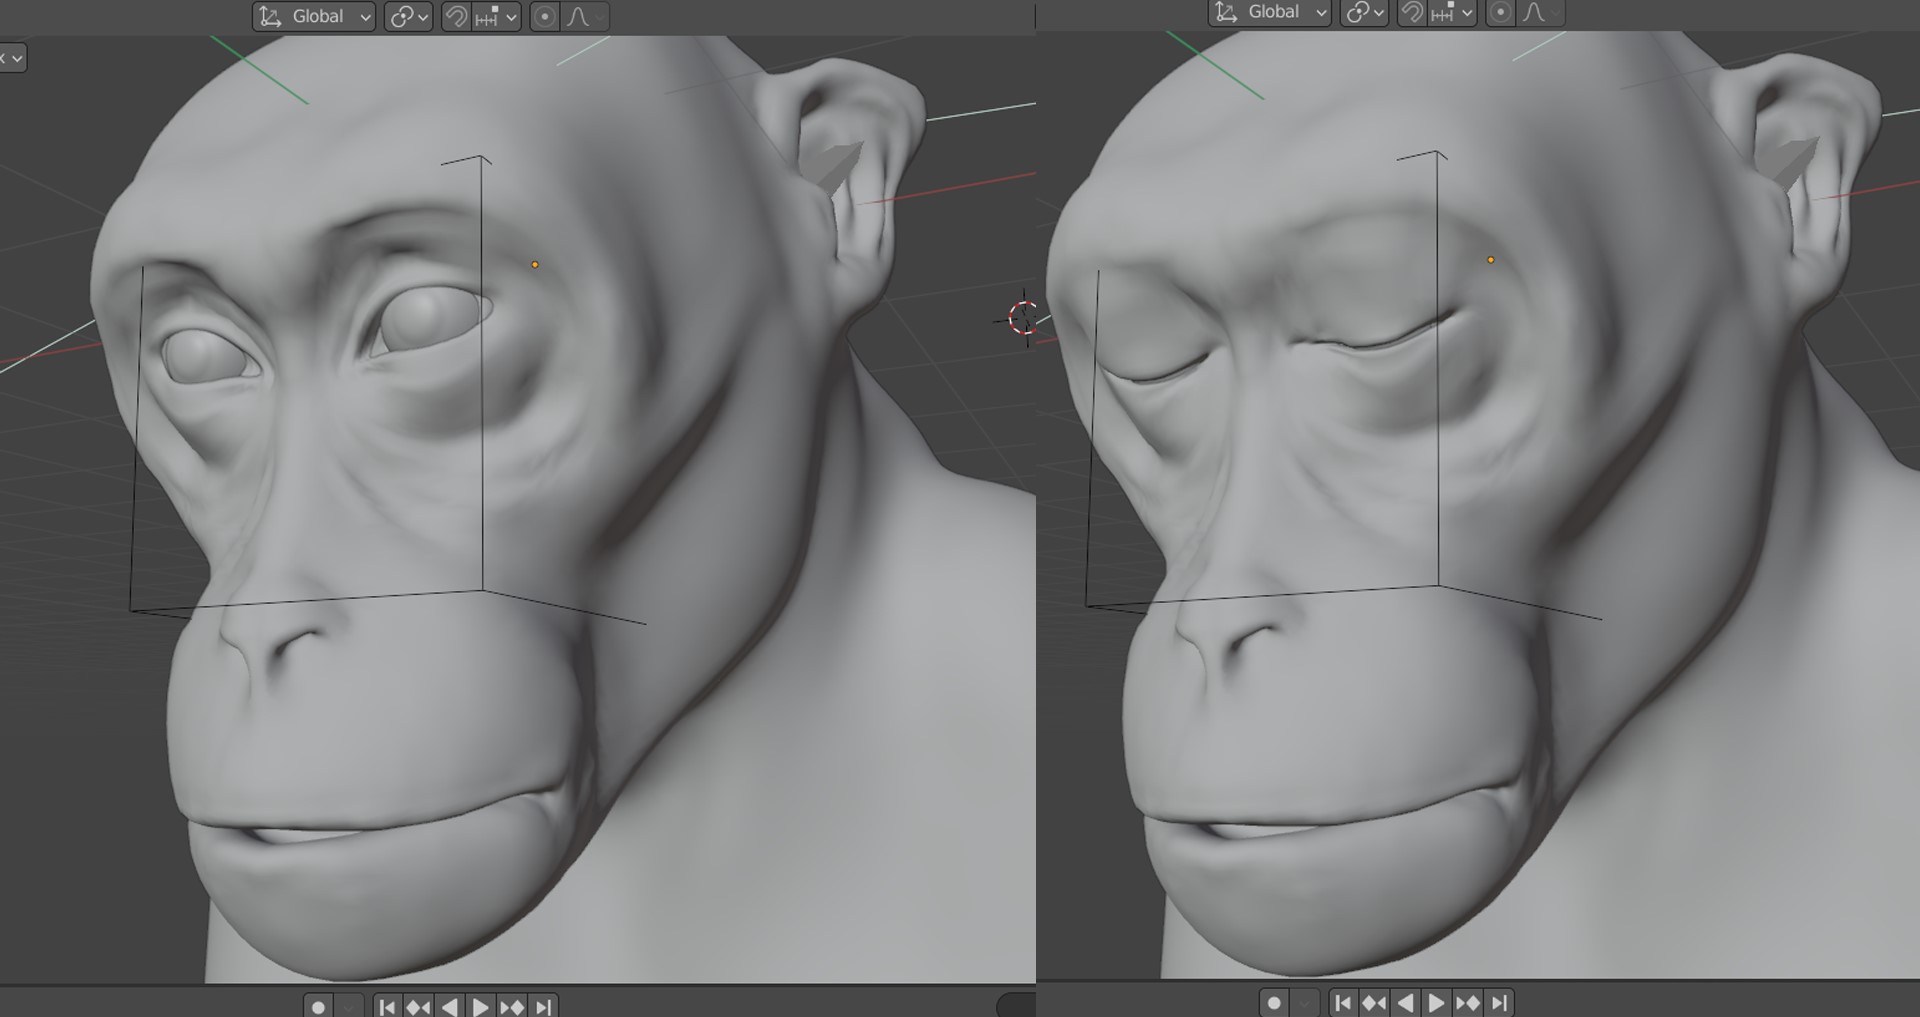
After creating a basic sculpt, I moved it to Zbrush in order to correct some anatomy and add some high-frequency details to it. These are the various stages of sculpting the anatomy and adding the details.

Texturing
Once the modeling stage was finished, I created a simple UV in Blender. Then I moved towards the texturing process, for which I used Substance Painter.
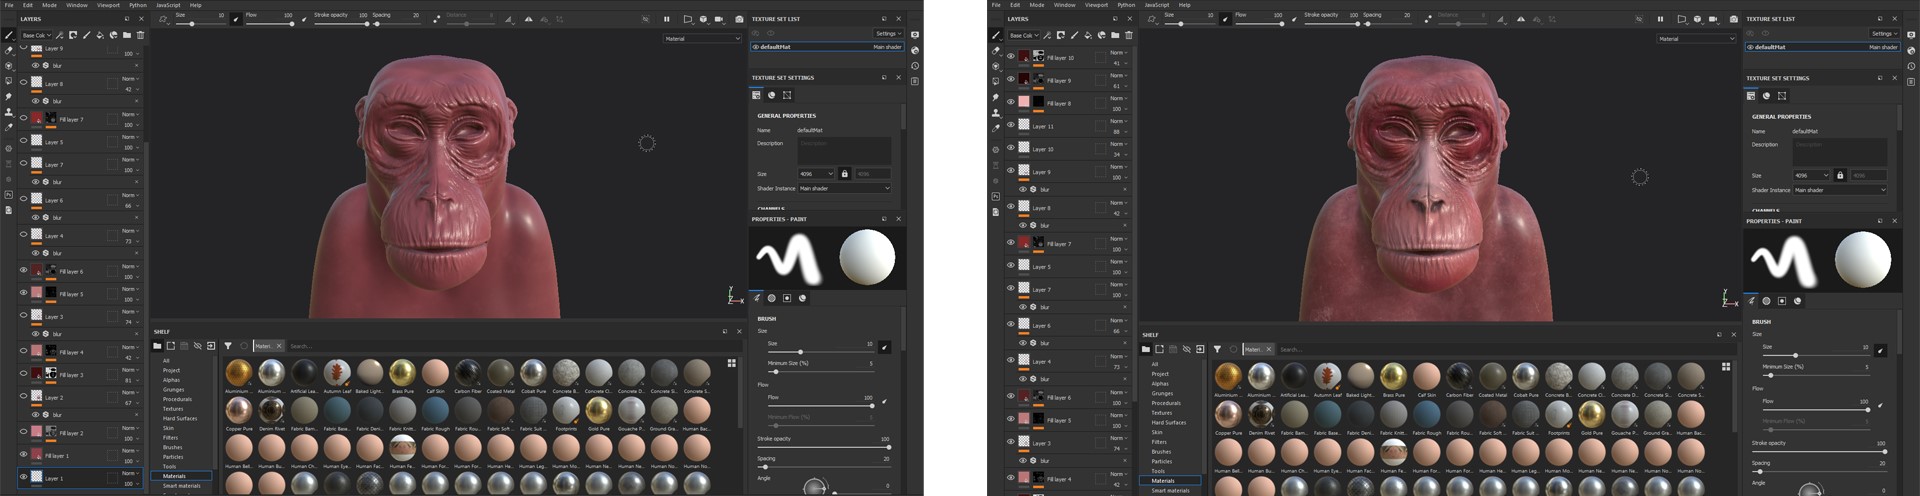
I exported every texture and displacement map after creating them. Then I imported the model into Blender.
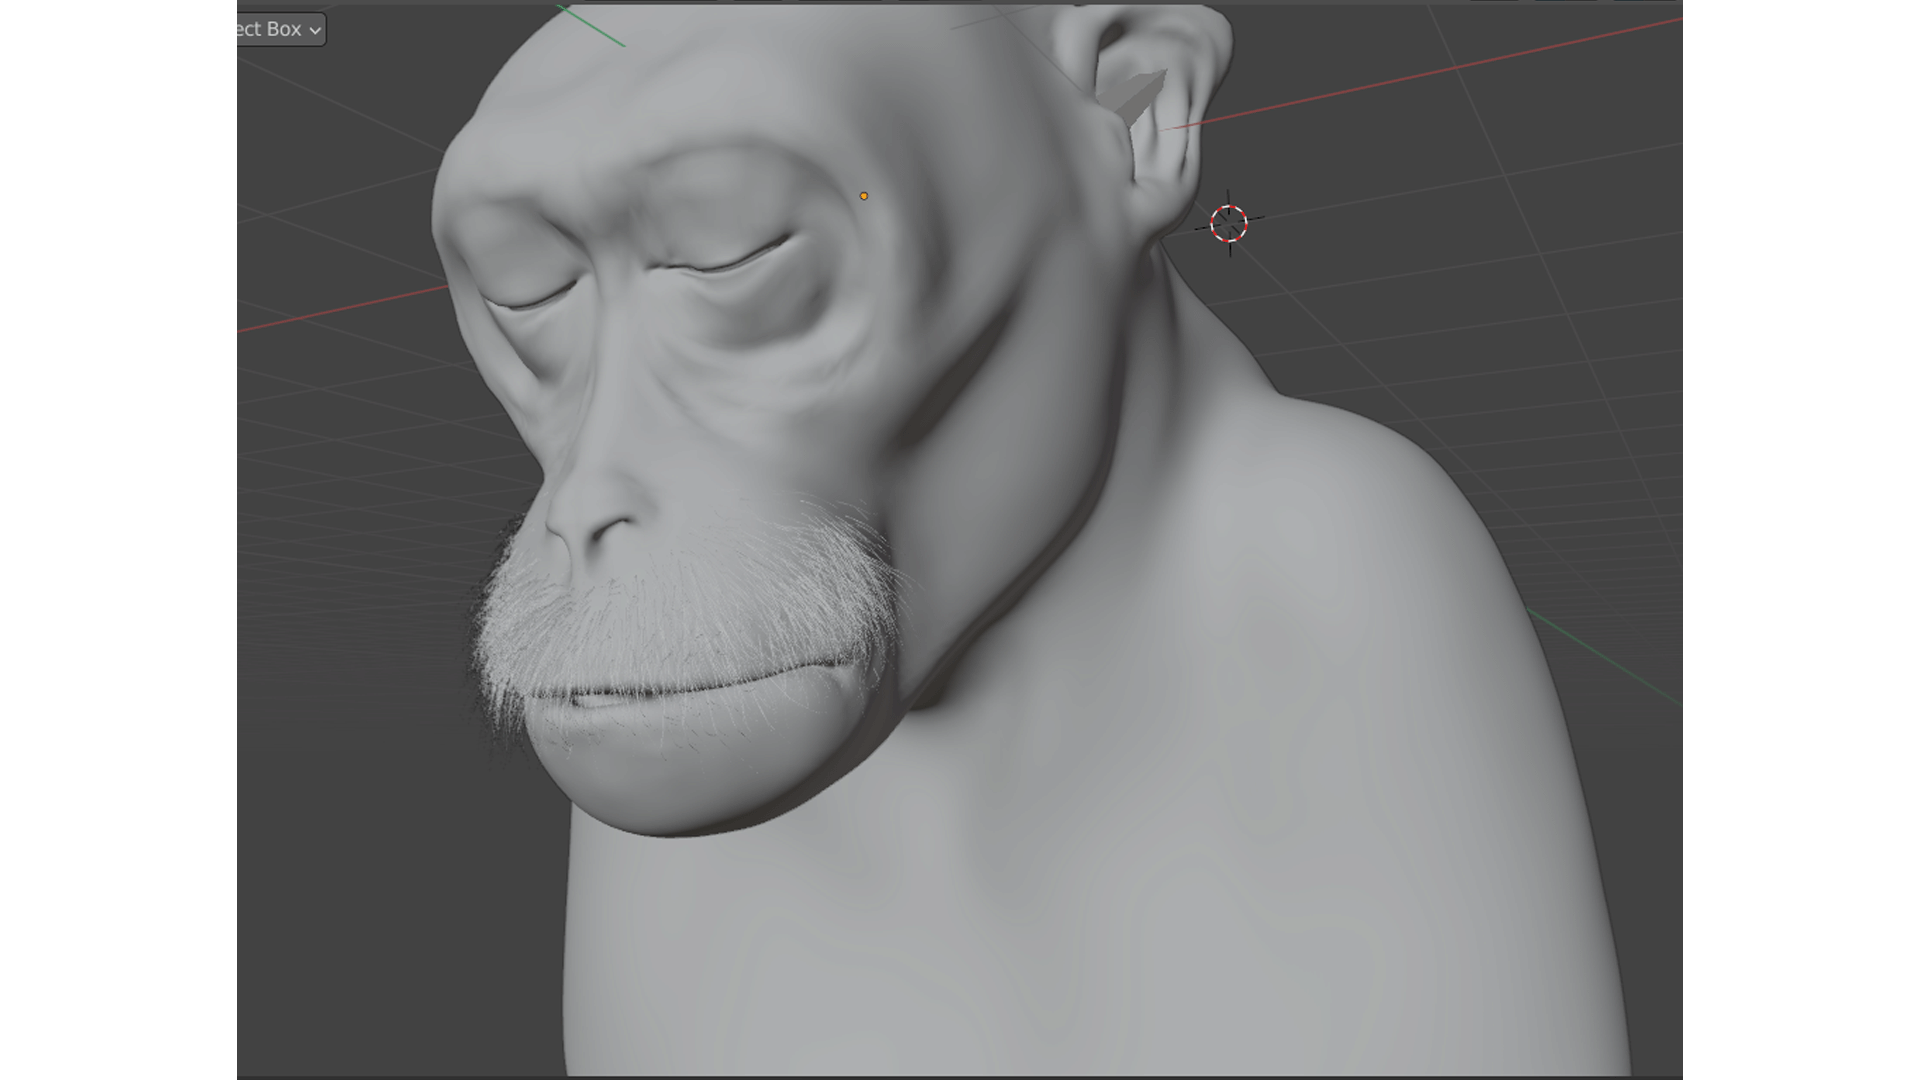
After importing the model, I had to do some sculpting in Blender too. At first, my idea was to create the model with open eyes but then I changed my concept. So to create the closed eyes, I used Blend shapes.
Grooming
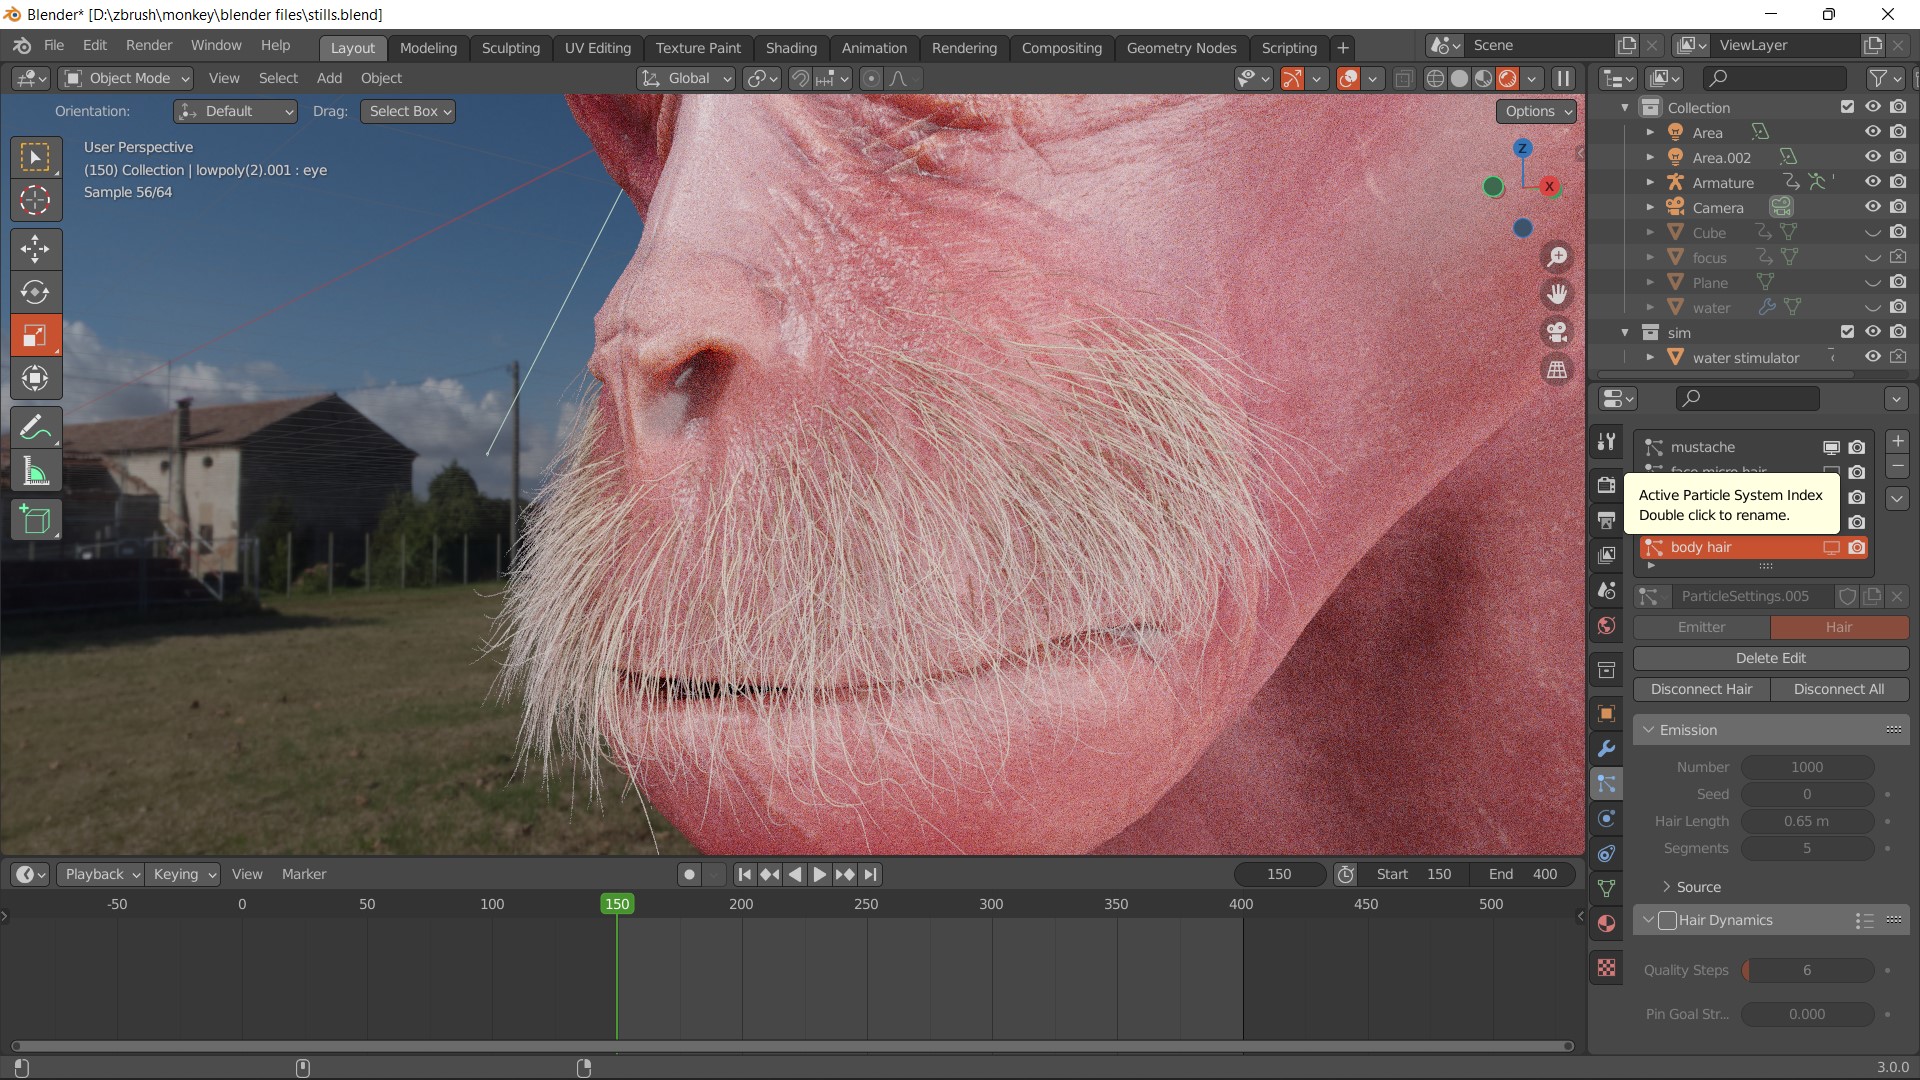
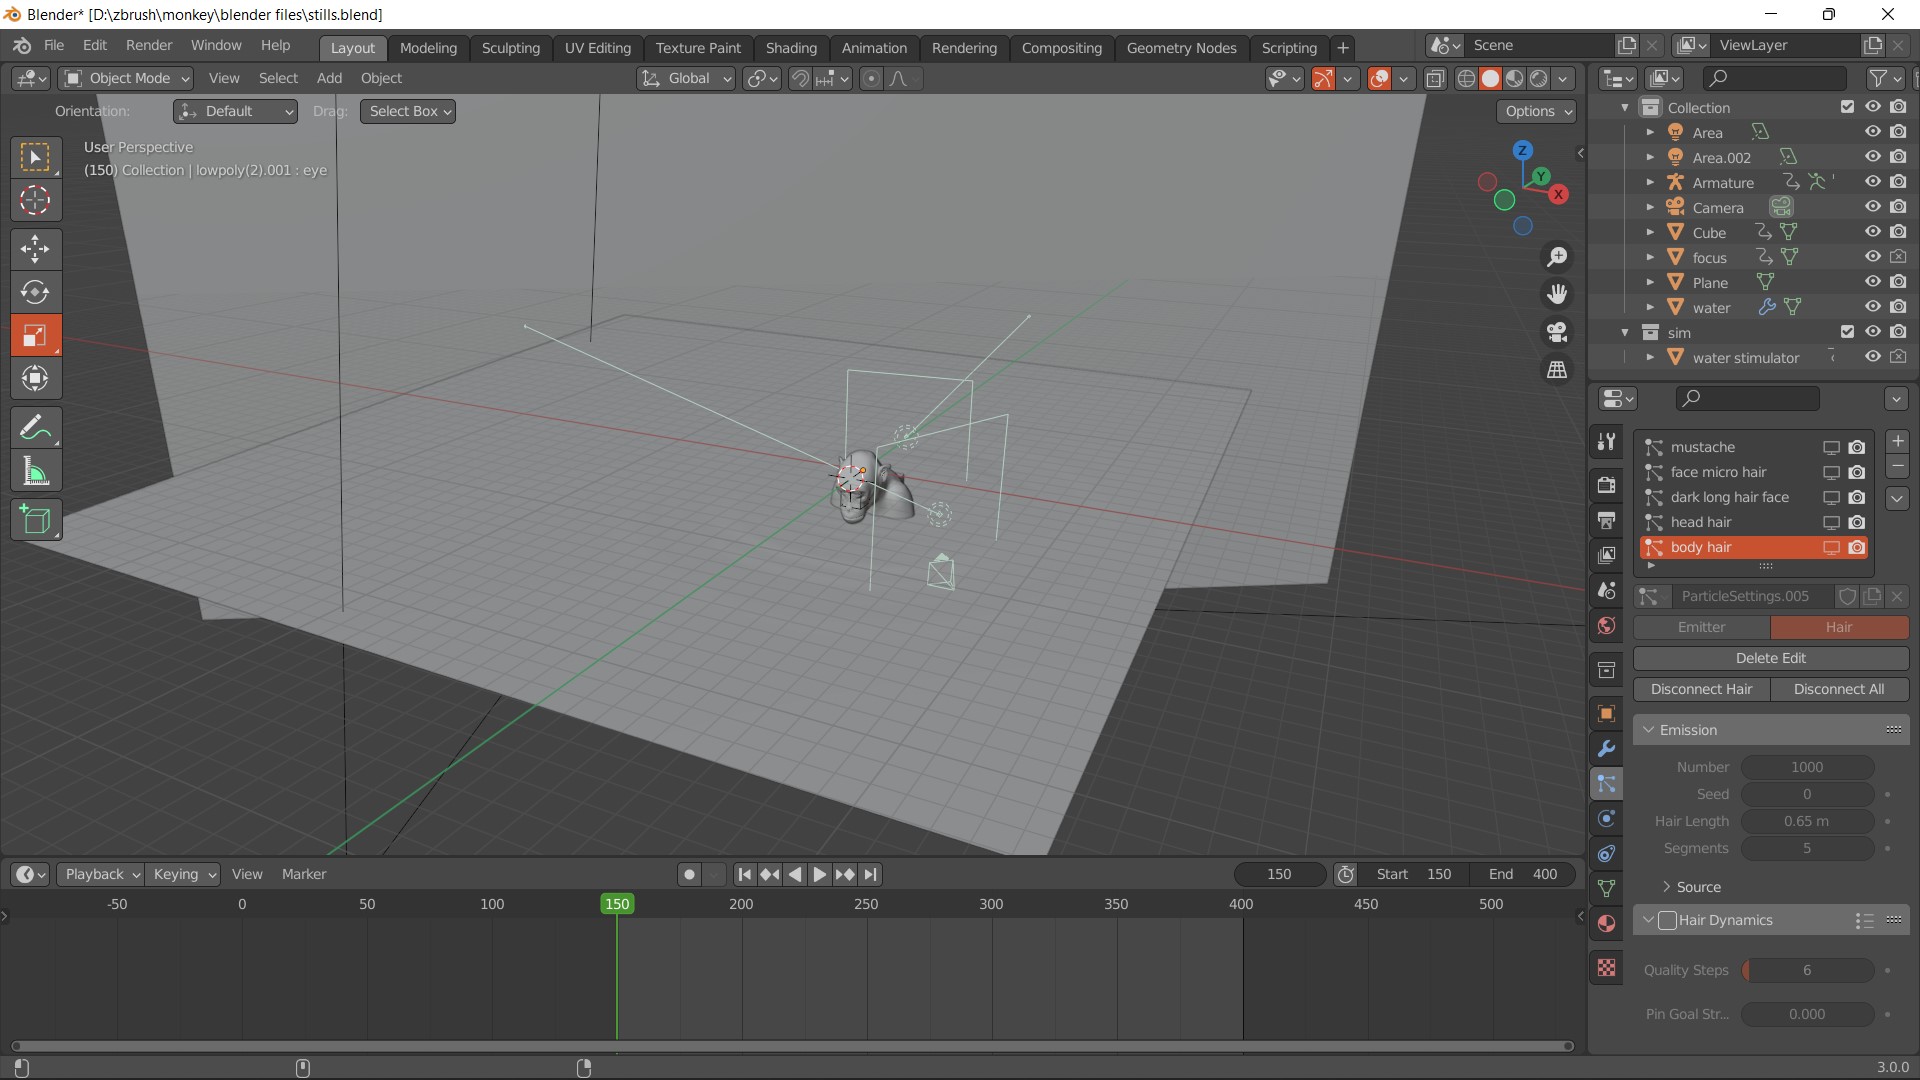
Once the modeling process was fully completed, I started to work on the grooming process. I created 5 particle systems for the hair and fur.
Shading
Once the grooming process was complete, I moved to the shading stage. I had already exported the displacement maps and textures, so I imported them in Blender.
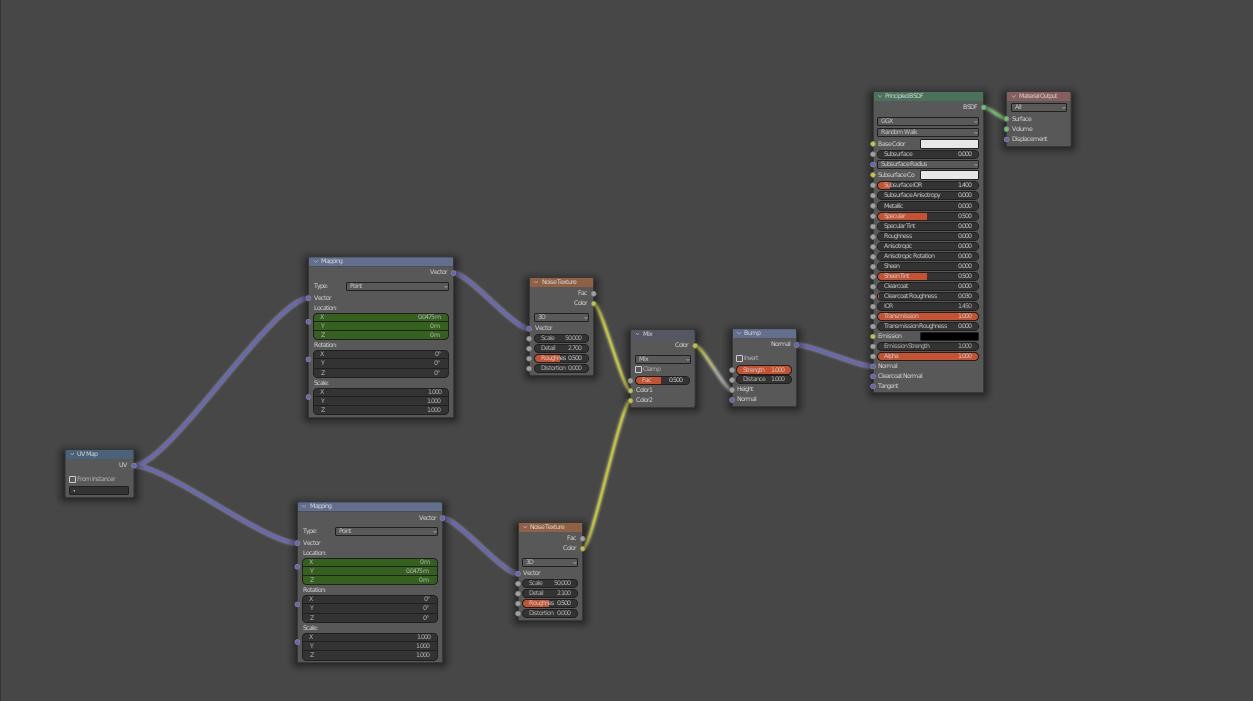
I created a basic material for the skin, using an albedo connected to the Principled BSDF through a Hue/Saturation node, and connected the displacement map to the material output.
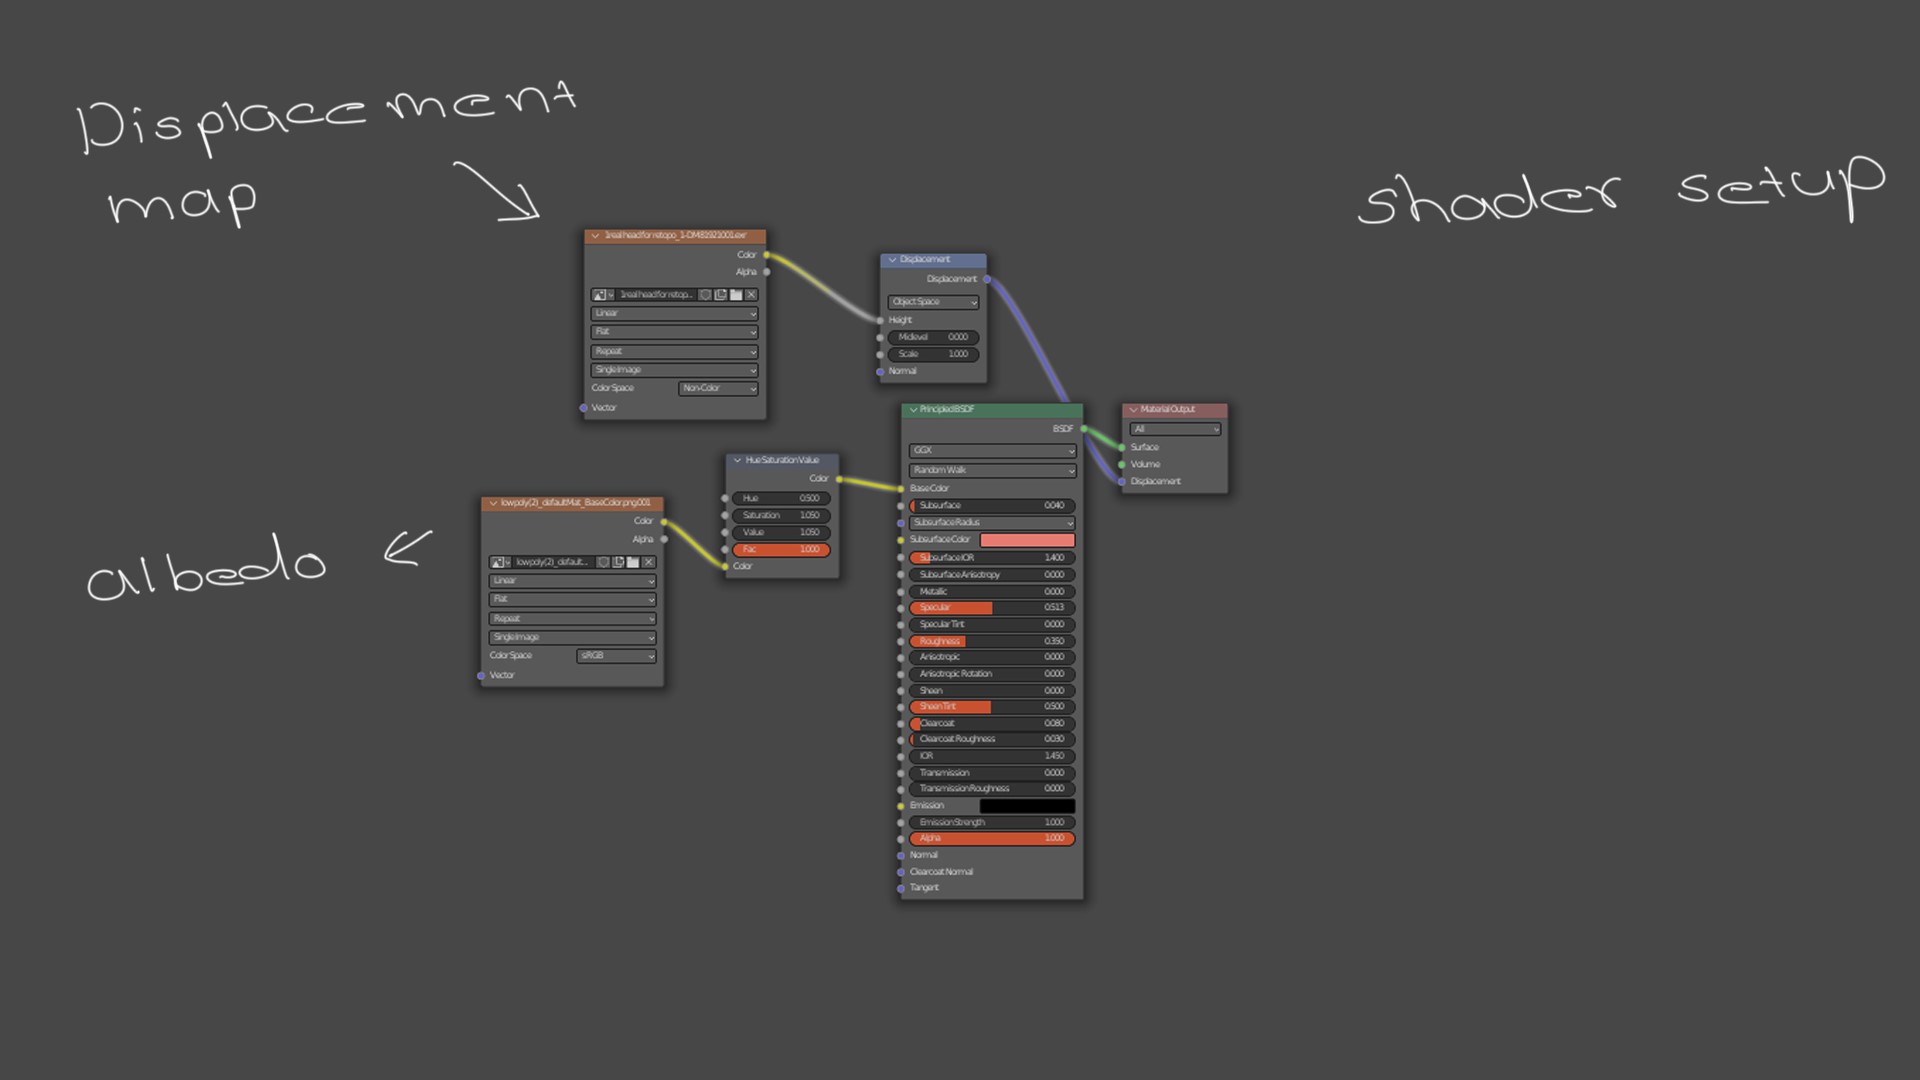
Here is how the skin shader looked like.
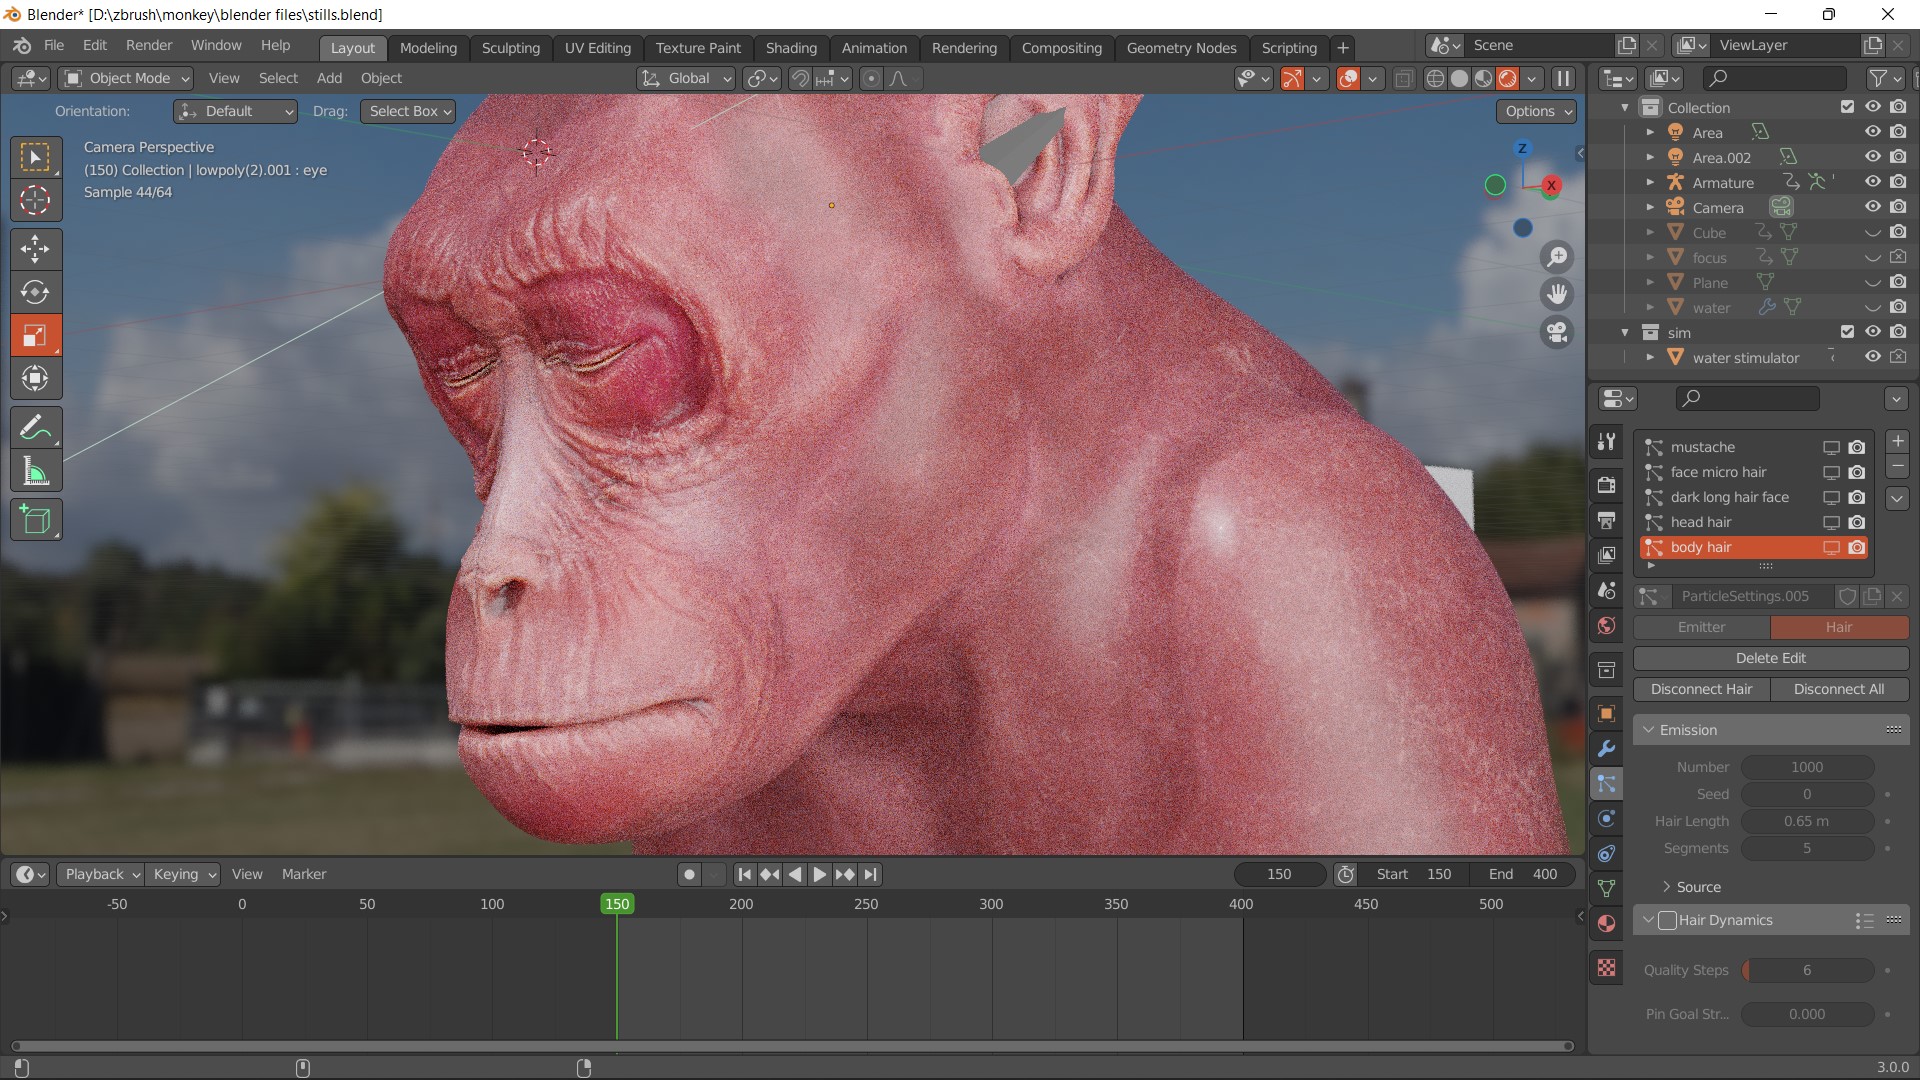
I created a hair material using Color Ramps, Mix RGB nodes and diffuse BSDF nodes multiple times. This shader gets the same result with both Eevee and cycles renders.
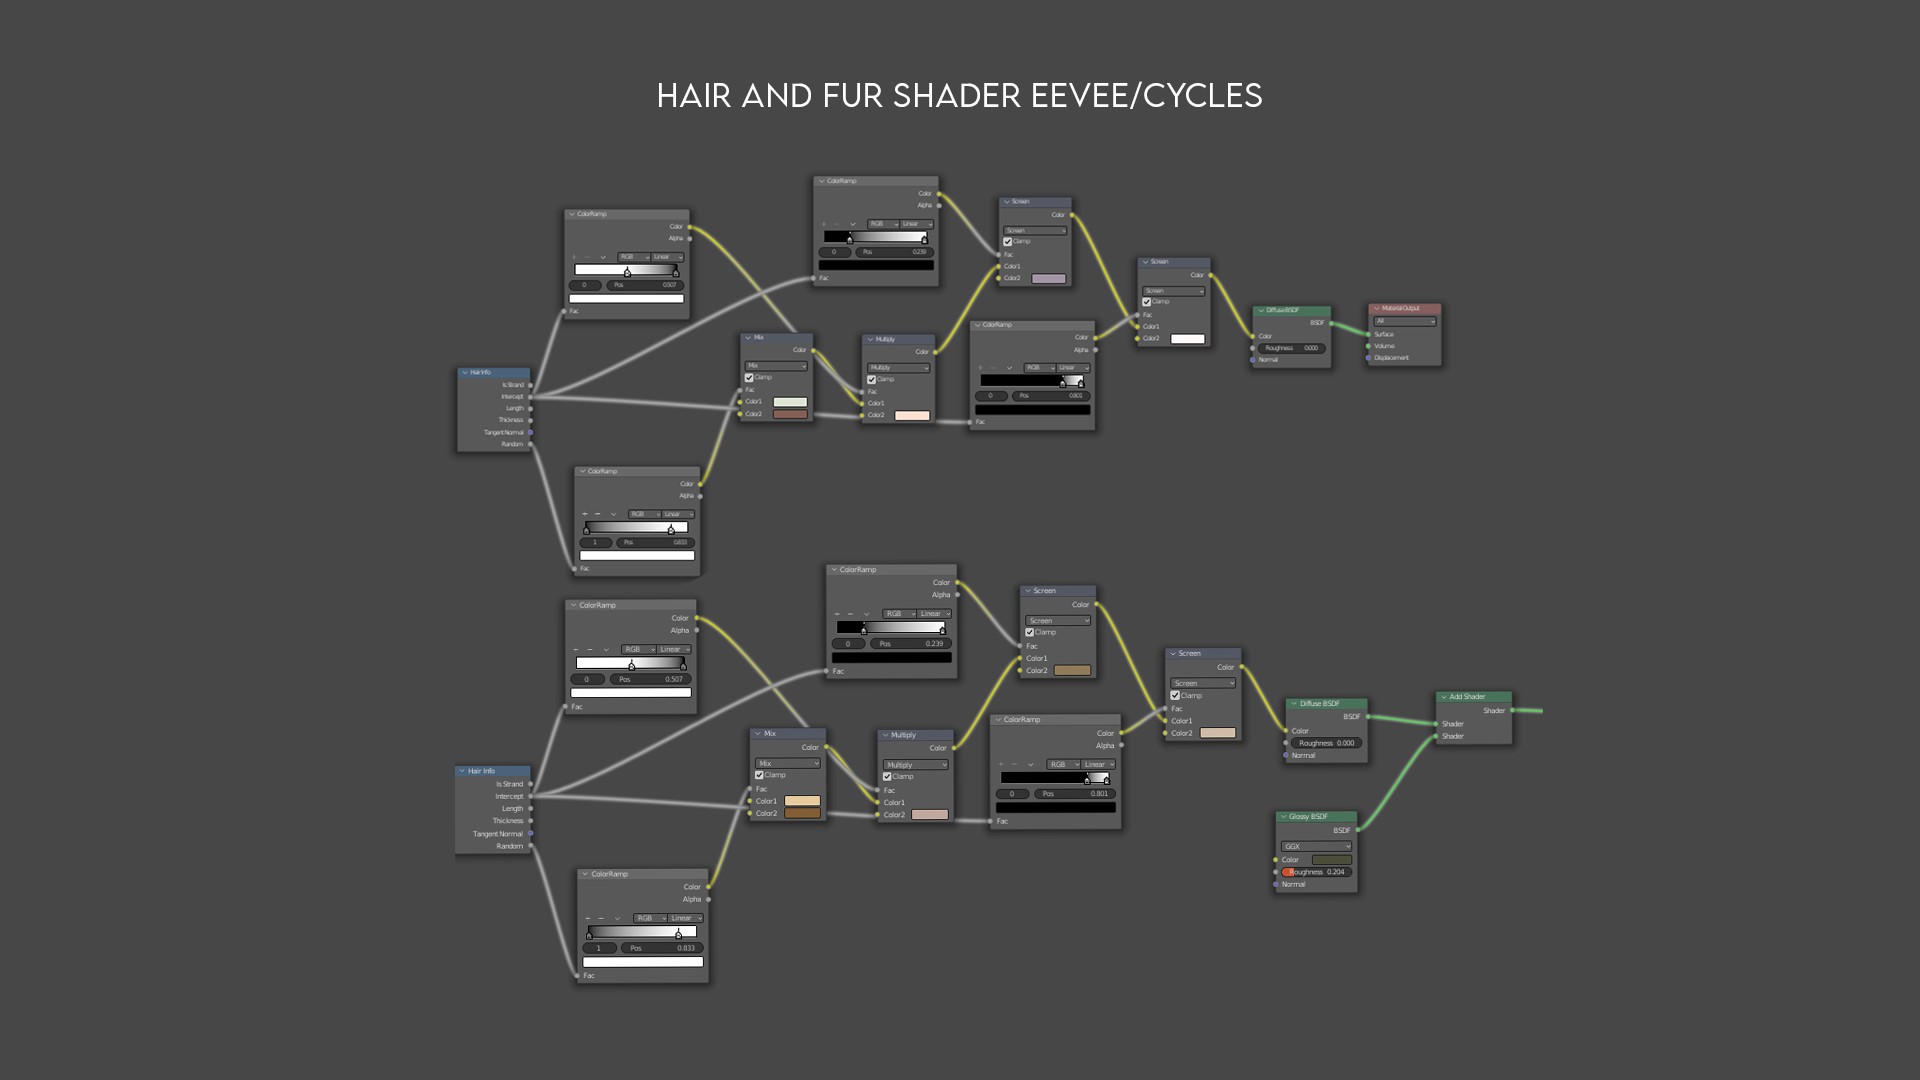
Here is how the hair shader looked like.
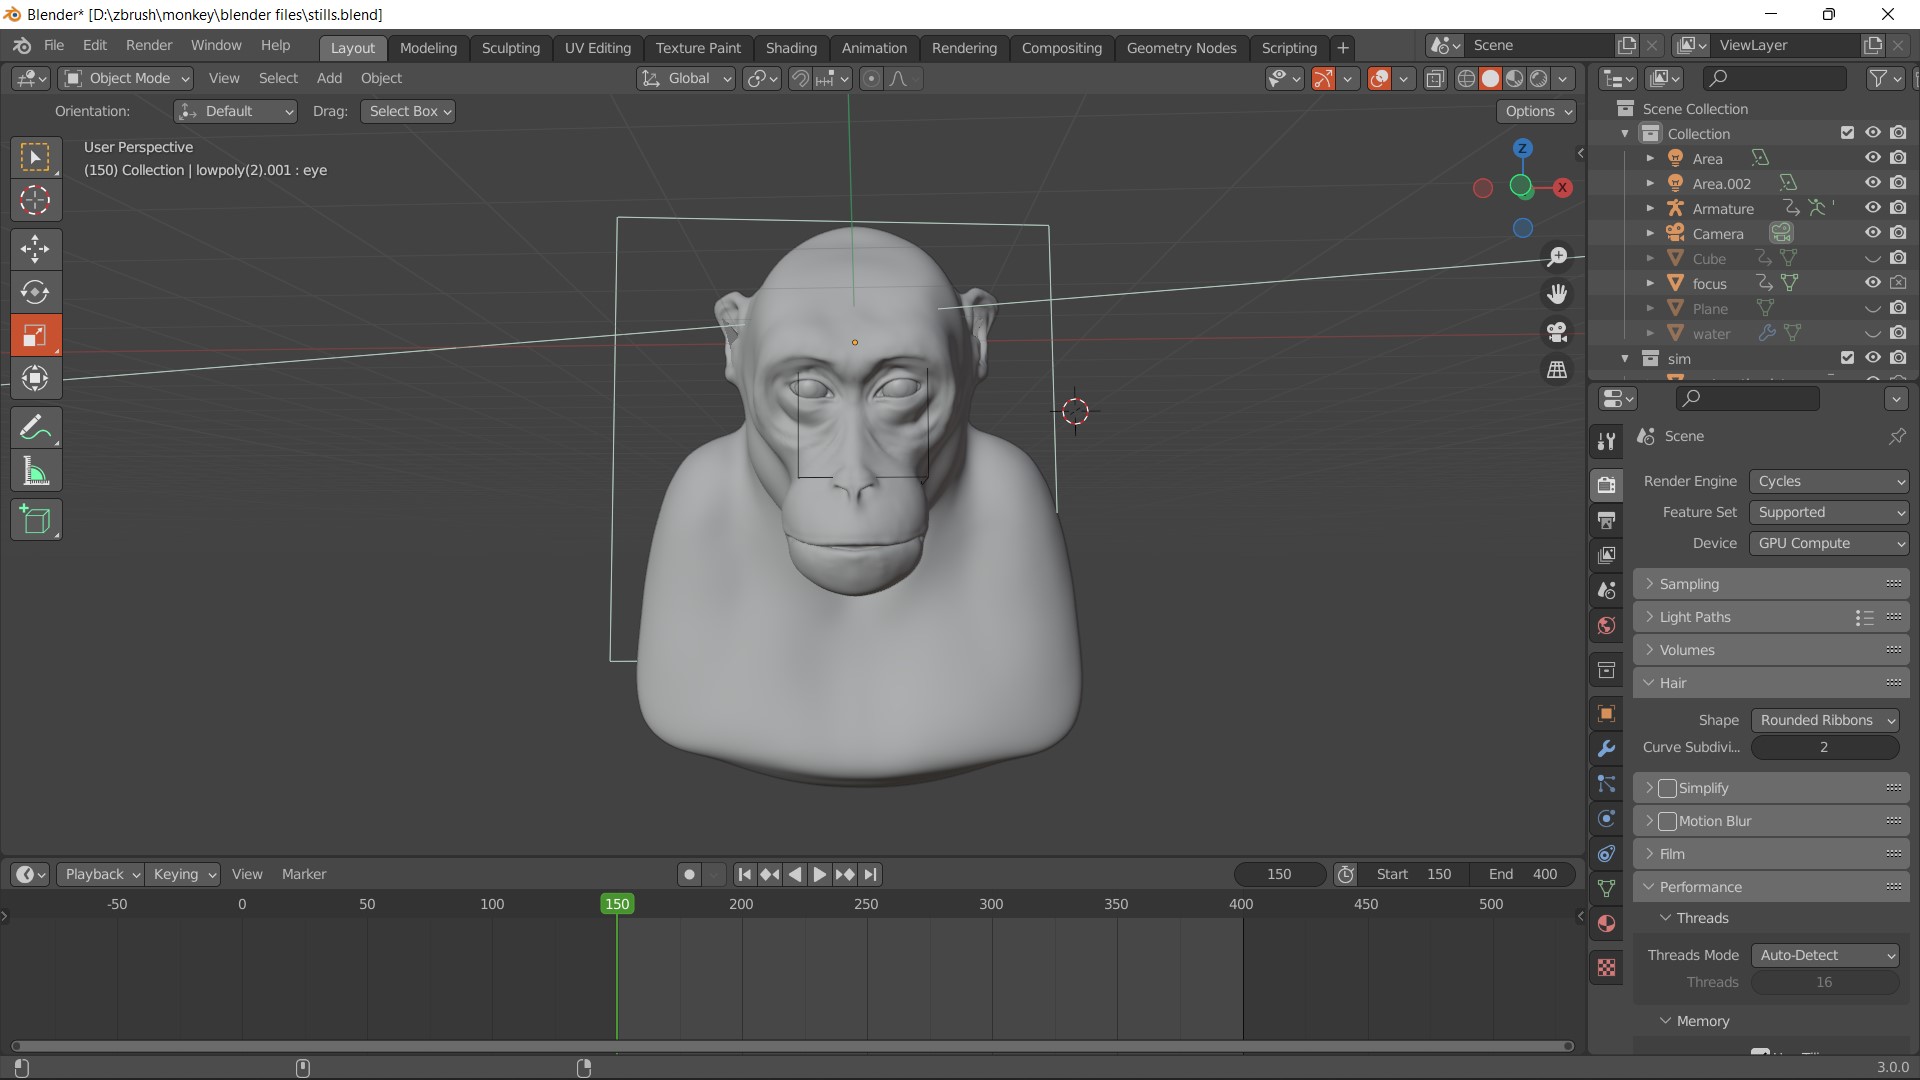
Creating the Scene and Lighting
While the shading process was going on, I created a scene according to my own concept.
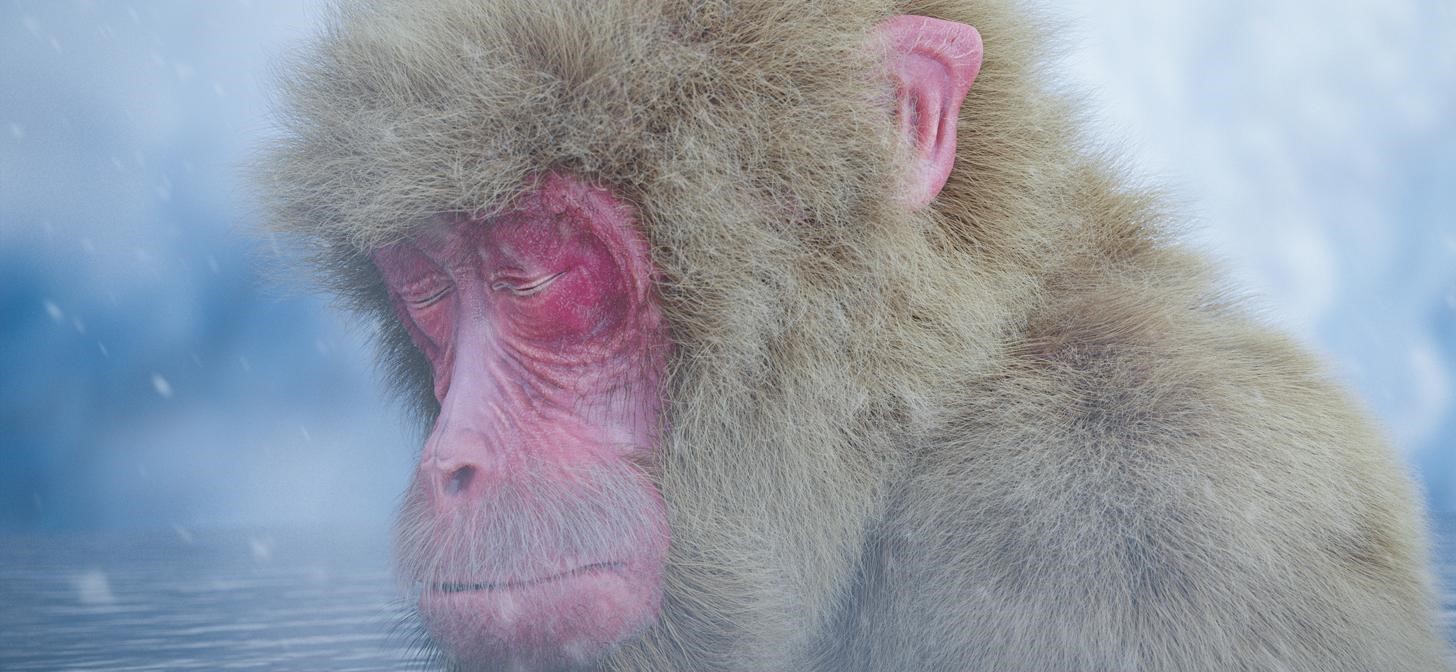
The scene is simple: The monkey is taking a bath in a hot spring.
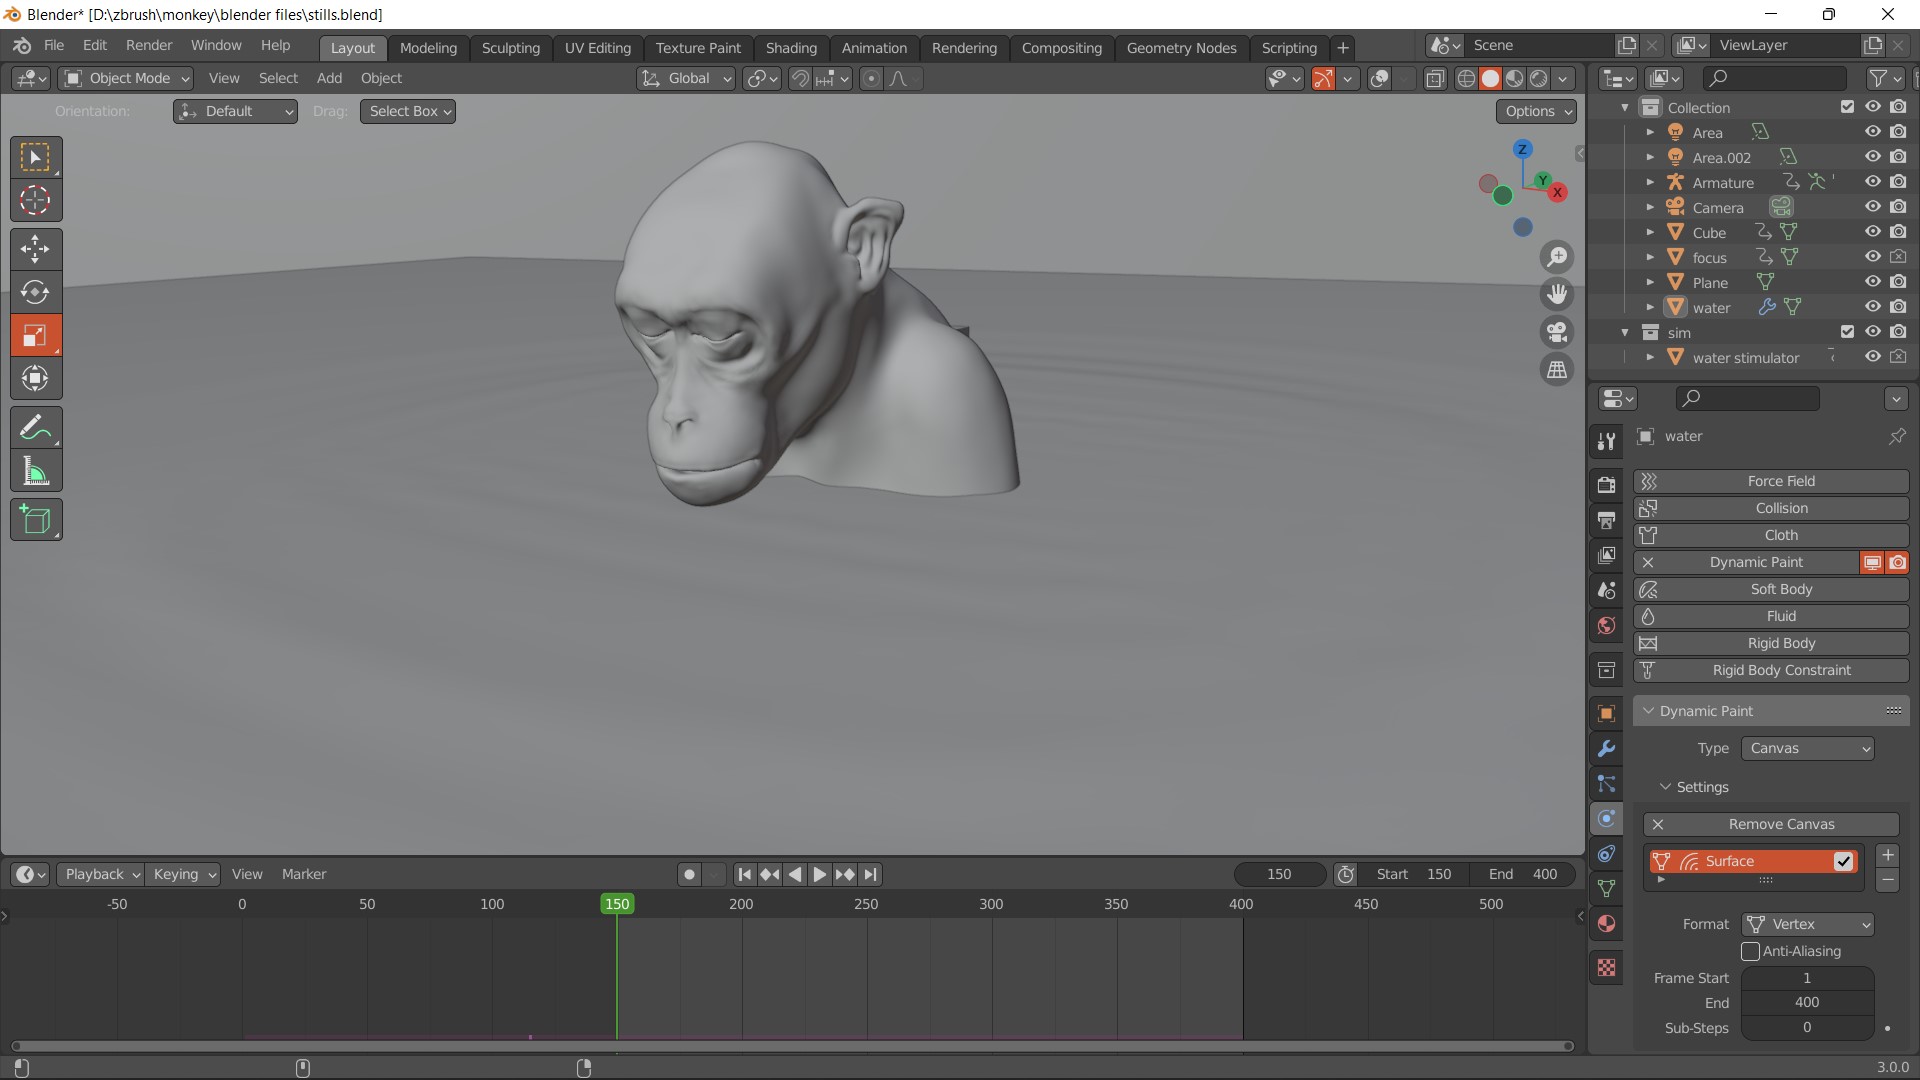
So I need to make water and fog in the scene. I used dynamic paint for creating a ripple in the water and made fog using a simple volumetric shader.
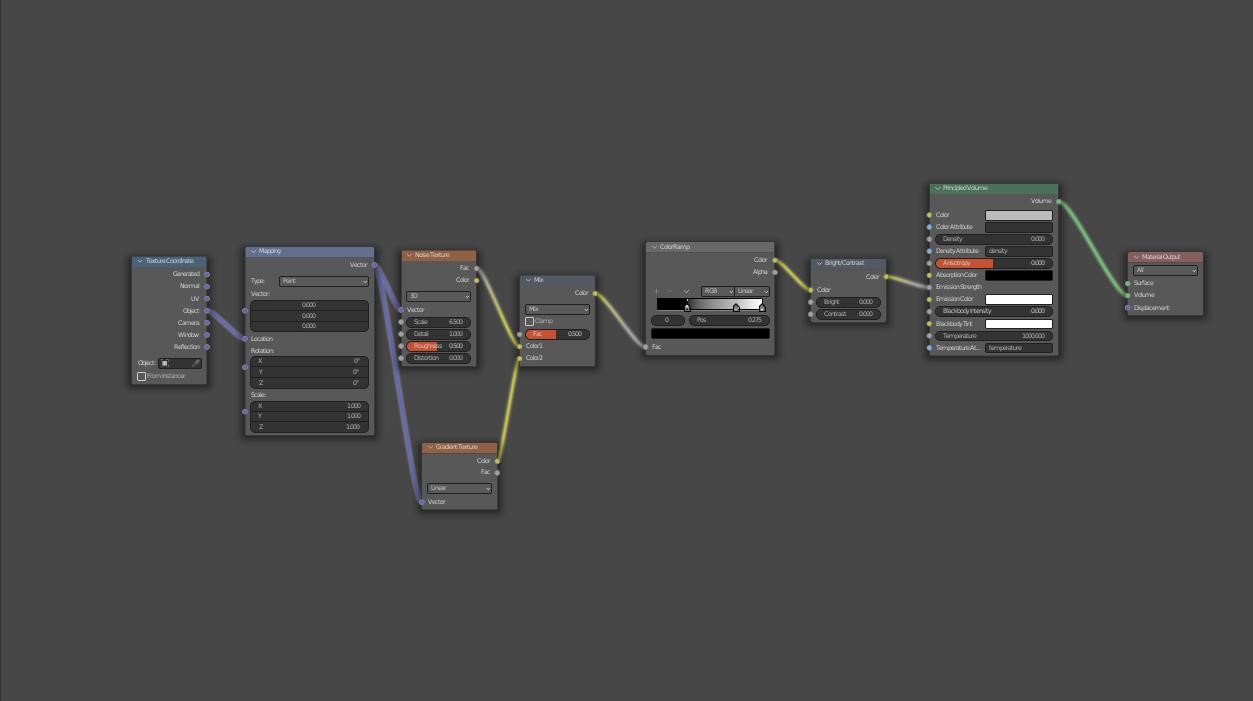
For lighting, I used two area lights and an HDRI. Once the scene was completed, I set a camera angle, added depth of field, and rendered the image.

Scene rendered with the lighting (hair and fur are hidden to increase the render speed).
Finally, I did some color corrections in Photoshop. And that’s it!
I hope this breakdown was helpful. Here is a quick timelapse of the scene on YouTube.
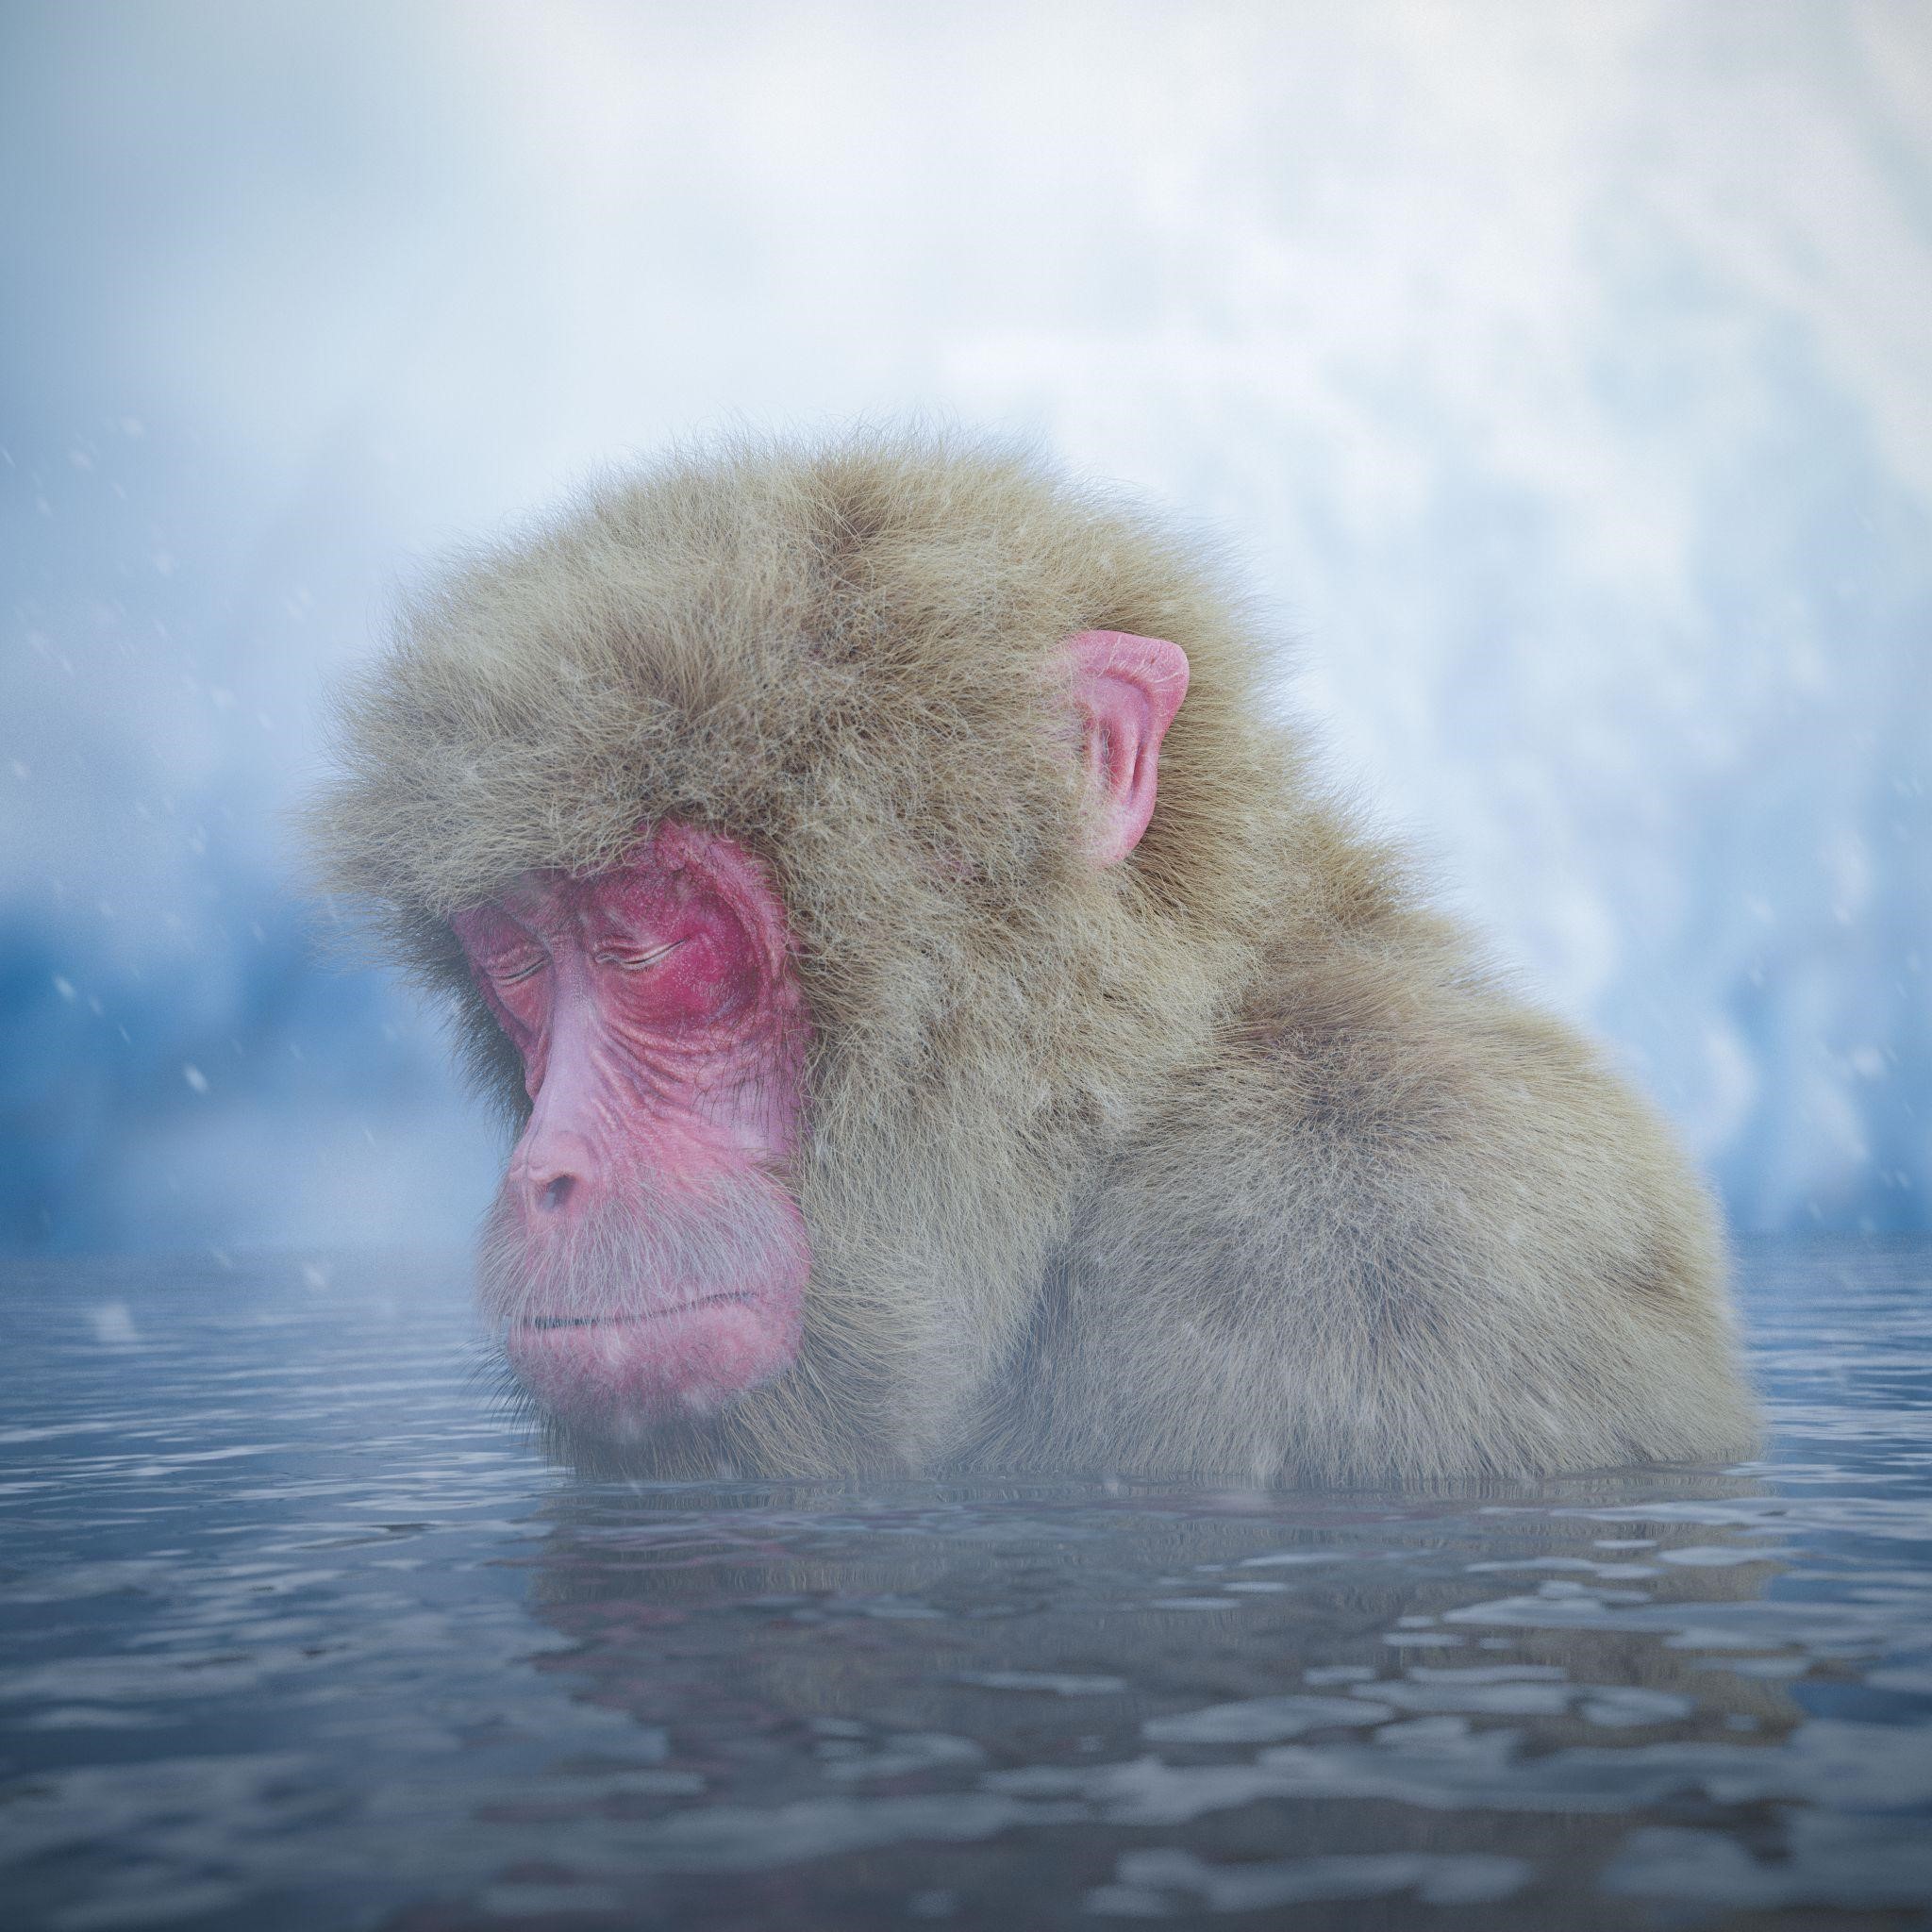
Here is the final render:
About the Artist
Aswin Anand, is a digital sculptor and a texturing artist.


