
Introduction
Hi, my name is Tom, I am 21 and live in Western Australia. I have been an artist for 7 years now. I come from a graphic design background, working on brochures, using Cinema4D for some of the artworks in those designs. Eventually, I completely switched to using Blender, as it became way more reliable than Cinema4D and I’ve never looked back.
Other hobbies include Photography for I love going around, finding photos, and it has not only hugely benefited my 3D work in terms of composition but also in things like post composite work in Photoshop. From that, people come to know me as a “Photoshop God” when it comes to cleaning up and making renders along with photos to look awesome, though I don’t feel like a “Photoshop God” haha.
I will be going into some cool details on my tools of how I make my painterly look. I put on a lot of my renders to make them feel a little more organic.
My Inspiration
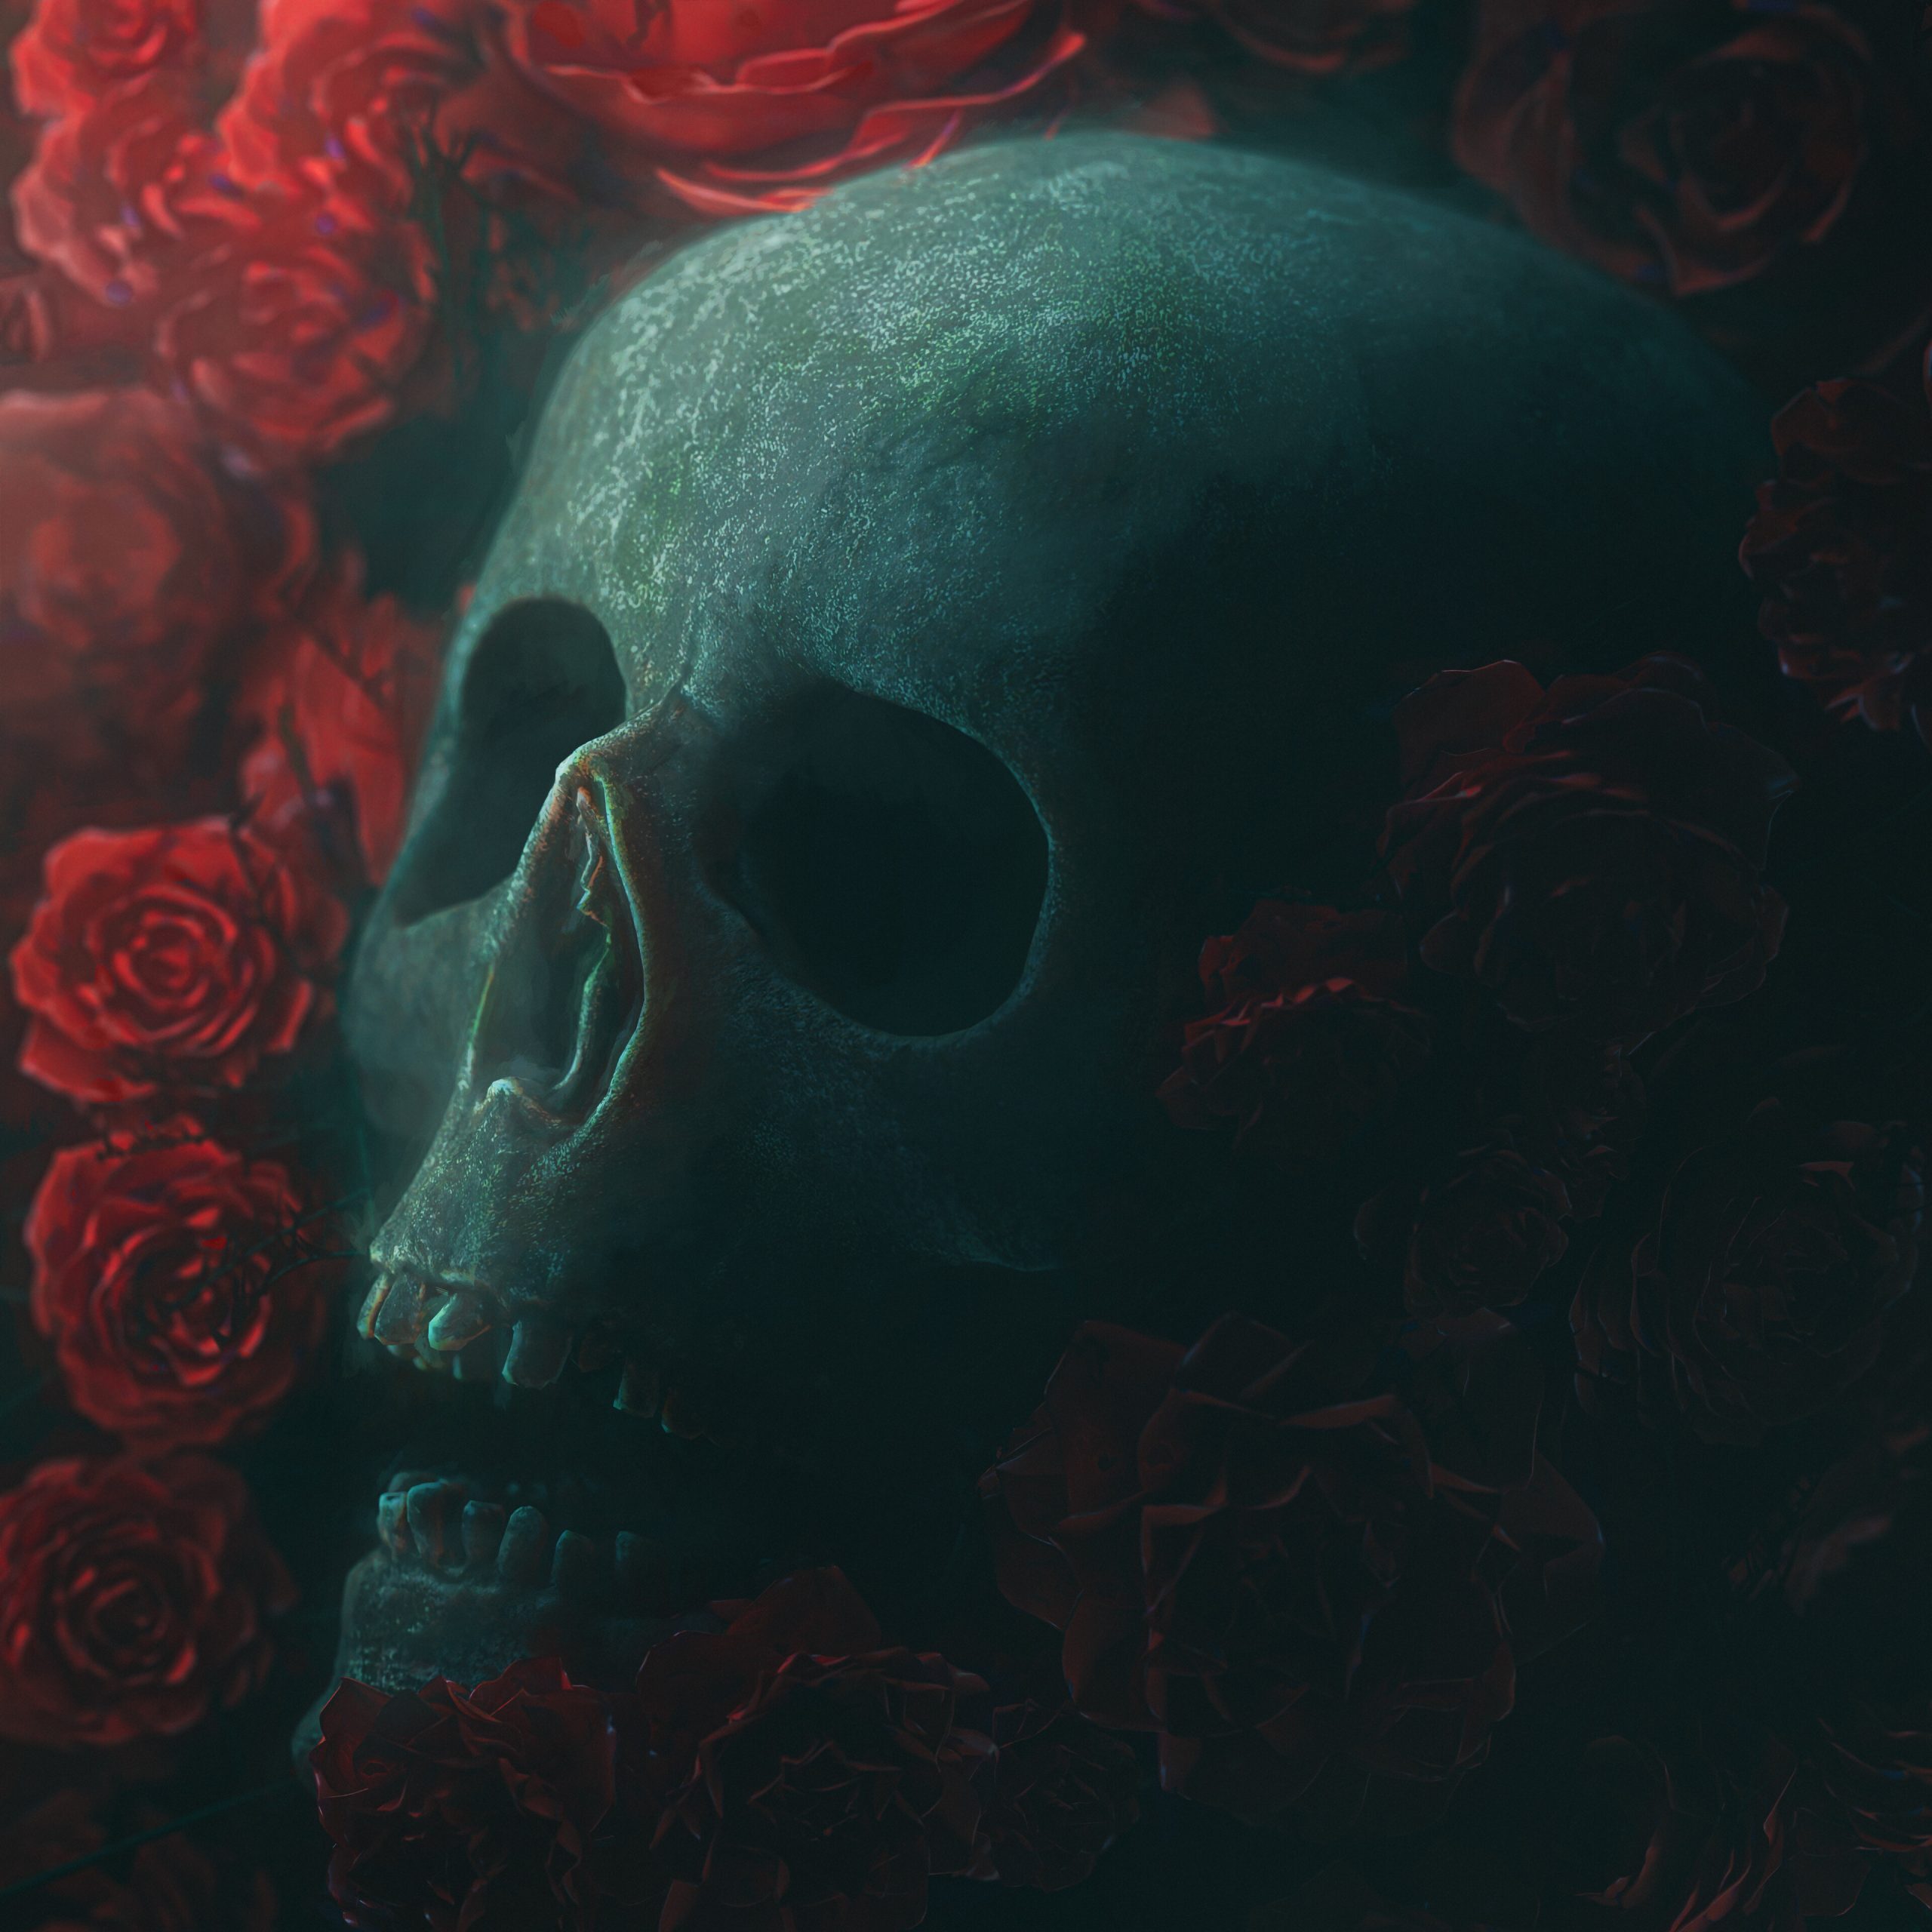
So I love skull art, mainly because lots of emotion can be conveyed with a skull and so on. But in design, what I always wanted to get perfect is including skulls and flowers. I did this before with my first skull and flower artwork but it never really felt right, so I wanted to take a shot at the idea again.
The Making of my “Flower Skull” Artwork
Blender:
So my flower-skull artwork is a part of my larger Skull Art Collection, and for this specifically, I always wanted to perfect my idea of "a skull among flowers" but I never really had the time to make a flower. So one day, I went into Erindale’s Patreon and he has an awesome geometry node flower. As soon as I saw that, I immediately went into Blender and put it all together.
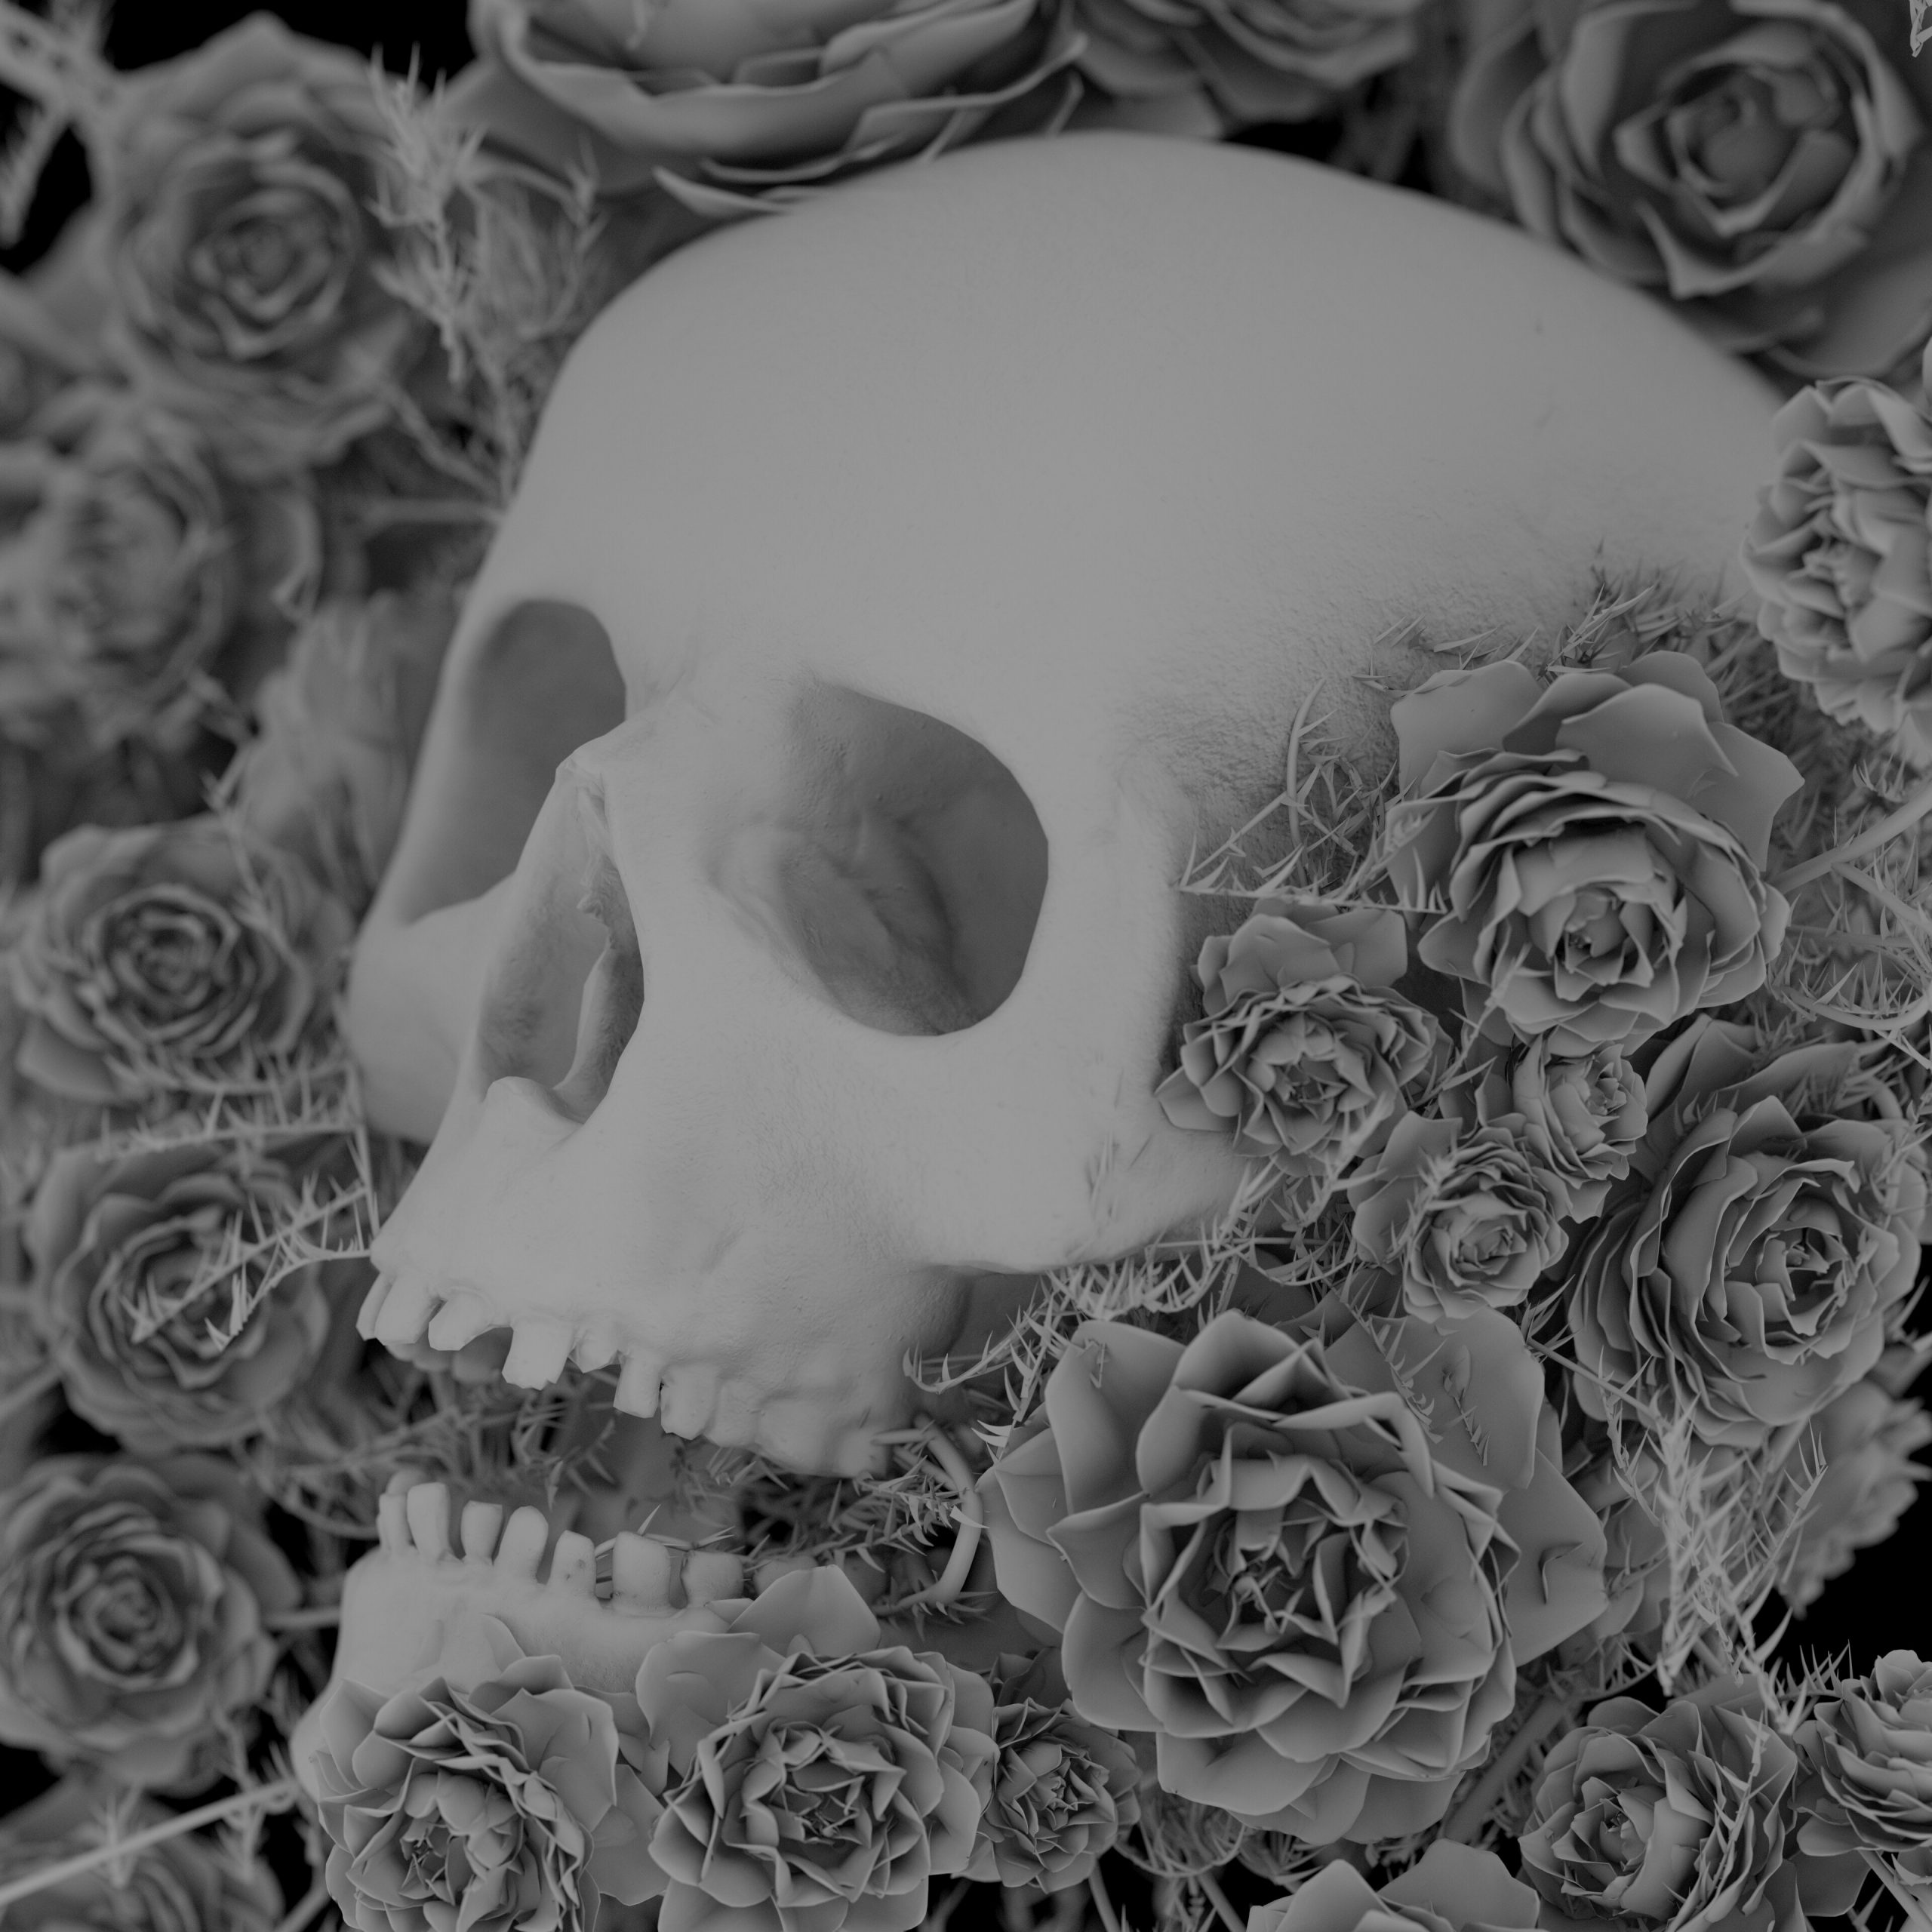 You can grab the flower asset from Erindale’s Patreon. A while back on Artstation, I came by an awesome Skull Pack from which I got the skull asset.
 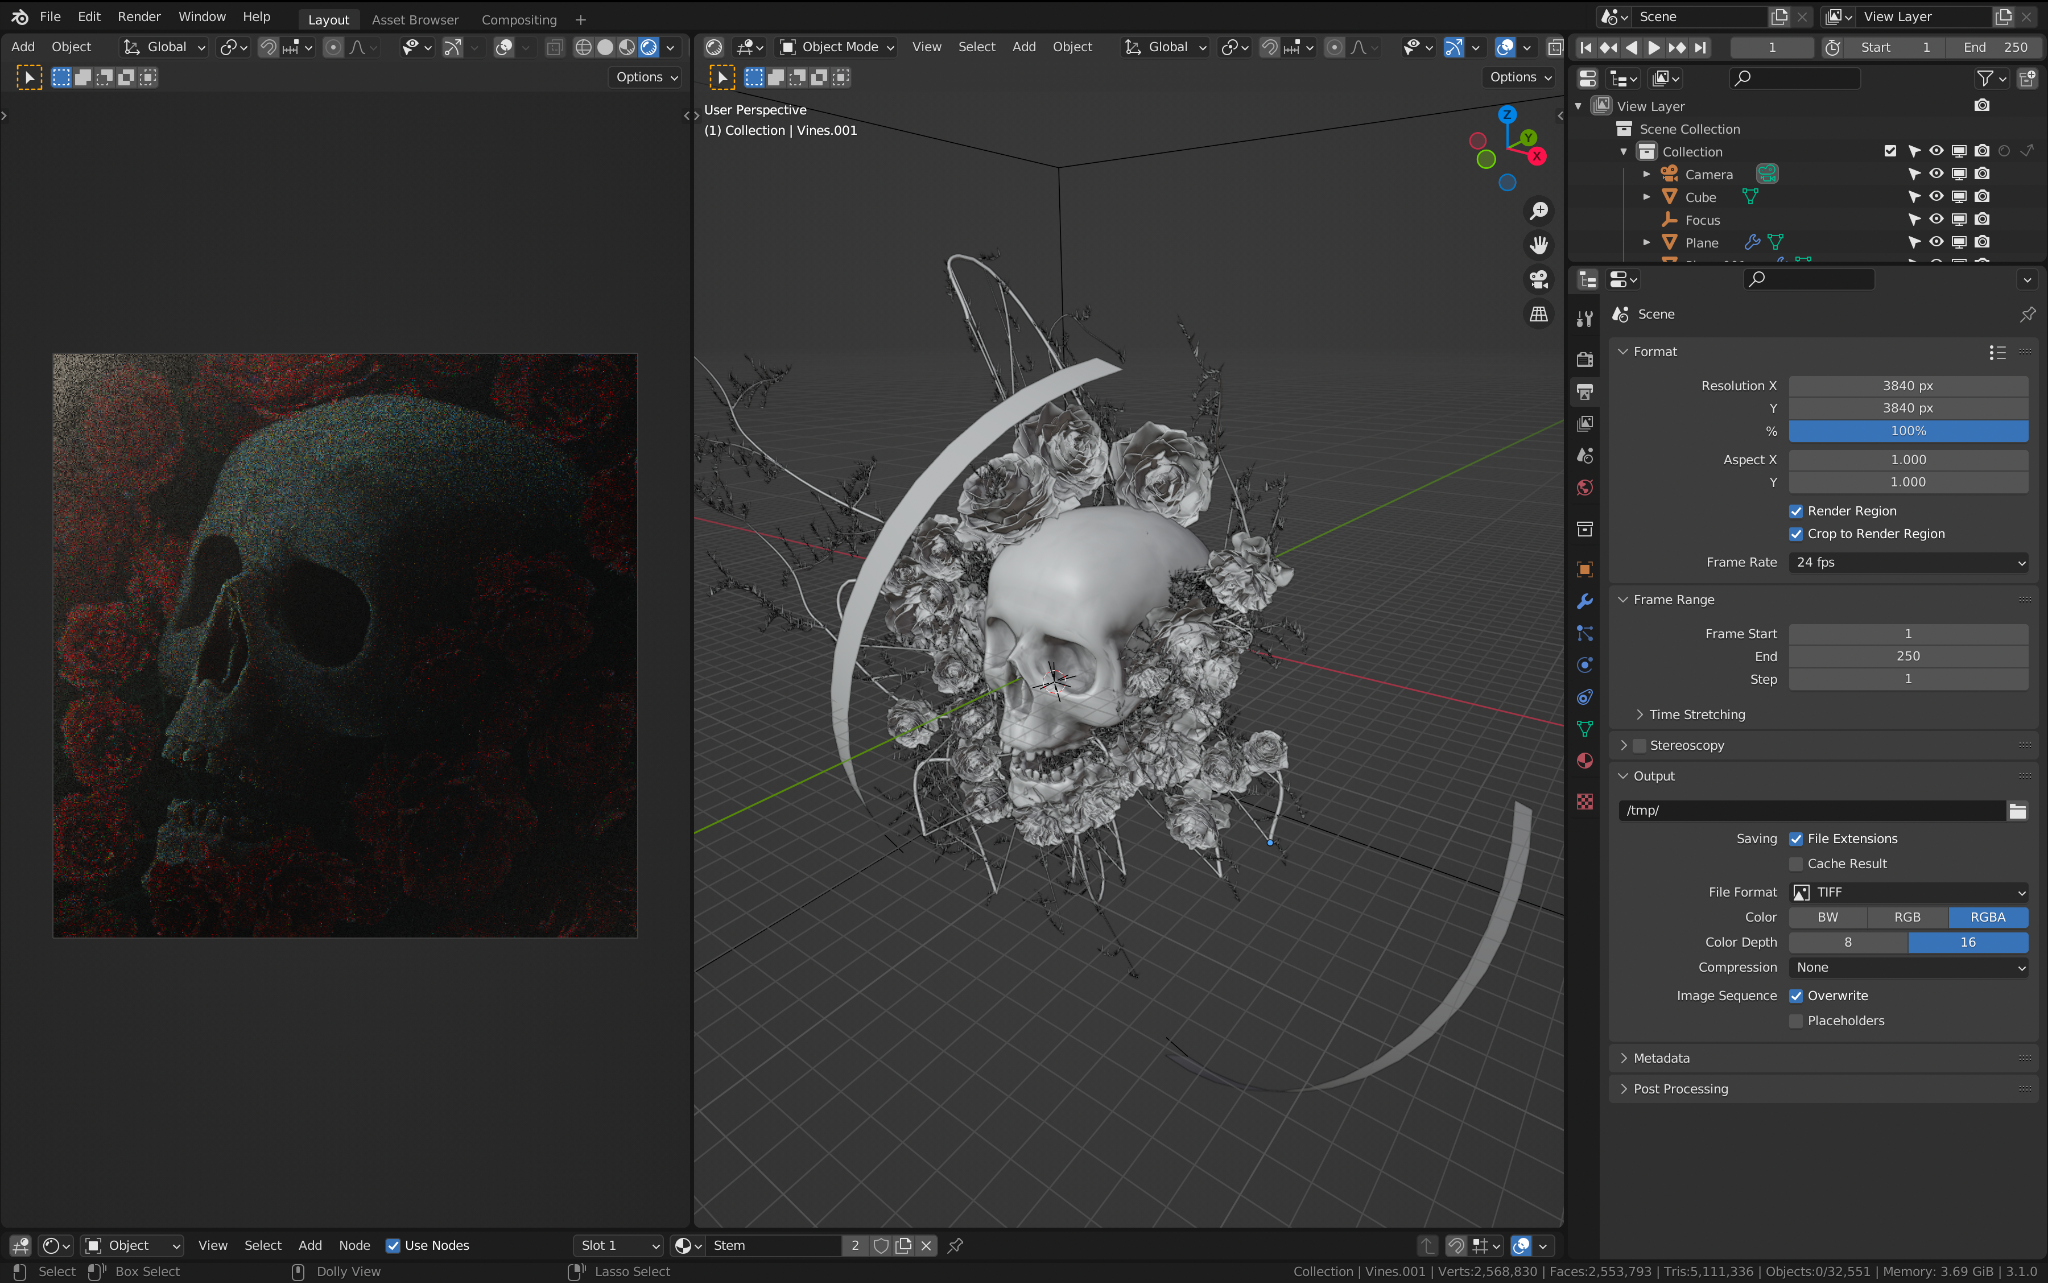 Nevertheless, back to the artwork itself. One thing you may notice that's different is the top left of the artwork, because of two things, 1: the volume that I added to help the light cover the scene a bit better, and 2: the huge arch light that I made by adding in a curve and extruding it, giving it an emissive material, is super helpful for being a general big light but not effecting the flowers as much as an area light would. Anyways, that top left part, I painted out in photoshop.
Photoshop:
So I rendered the image as a TIFF with no compression and set it to 16 bit and brought it into photoshop. I have a small time-lapse video that shows the process of my edit in a basic form.
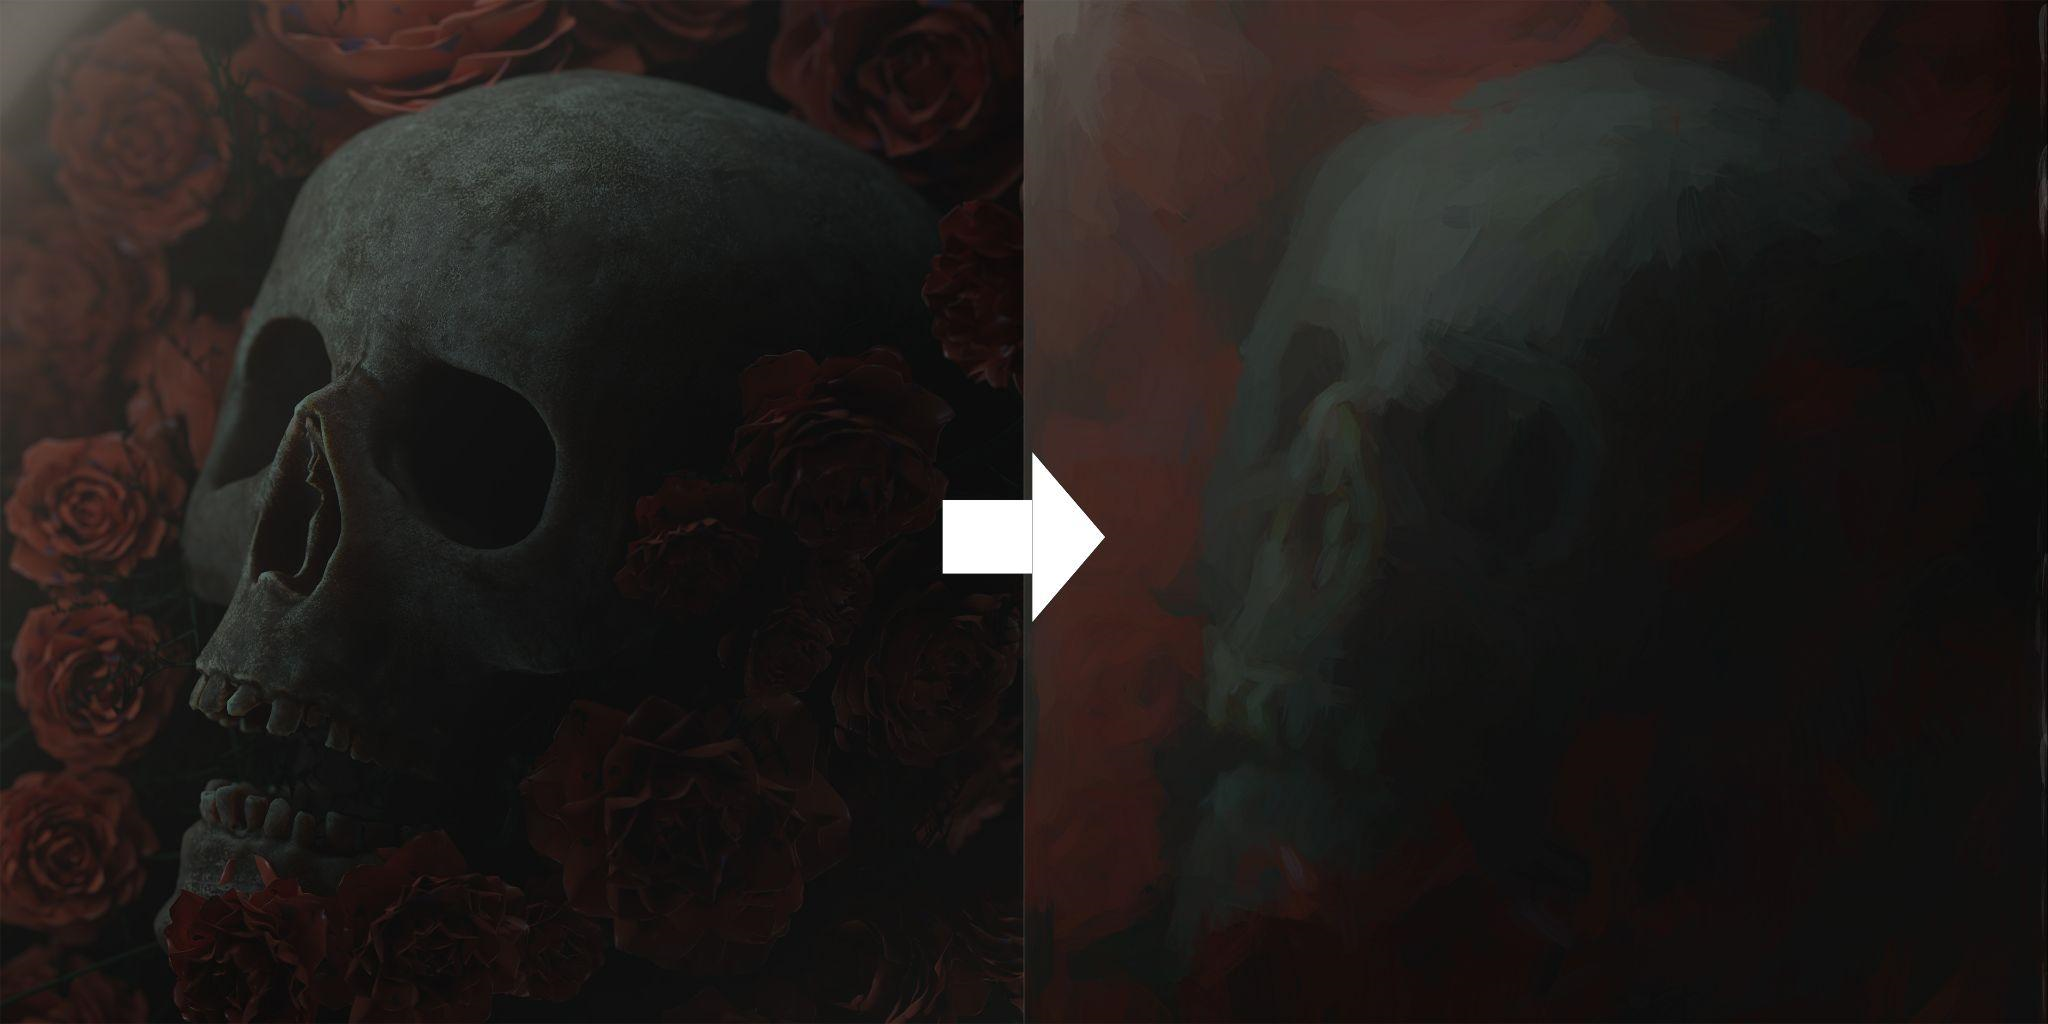
Okay, let’s get into more detail of what happened in that video. You can see the first thing I do is color grade it using Camera Raw but after that something odd happens––it seems like the artwork got a bit cloudy and splotchy afterward. What I do is duplicate the image and use a software called Topaz Studio 2, and within that software, you can use an “impression filter” that does what it says really: it gives an impressionistic look to an image. Below, I have a quick recreation of what that effect does:
Now that the effect on its own looks bad, what I do is set the blend mode of that layer to Lighten and put the opacity at around 50%. From there, I clean up the areas where I don't want that effect, inside the eyes and the mouth.
People who use Photoshop see this as a quick way to get that Art History Brush effect, but without the work of brush sizes and changing the image mode to 8bit. I don’t use it here but on my latest artworks; I have used it alongside the method you see here. Here is the effect of Photoshop on the render.

From there, I add some effects. The dust I used was from ATMOS Bundle that I set to Color Dodge, which lightens the colors of the base layers and reduces the contrast, letting those mid-tones seem more saturated. I bring the opacity down so the effect is not too harsh. And there you have it!
Hope you like it!
Flower Skull
About the author

Tom Pleysier, Graphic Designer/3D Artist.