
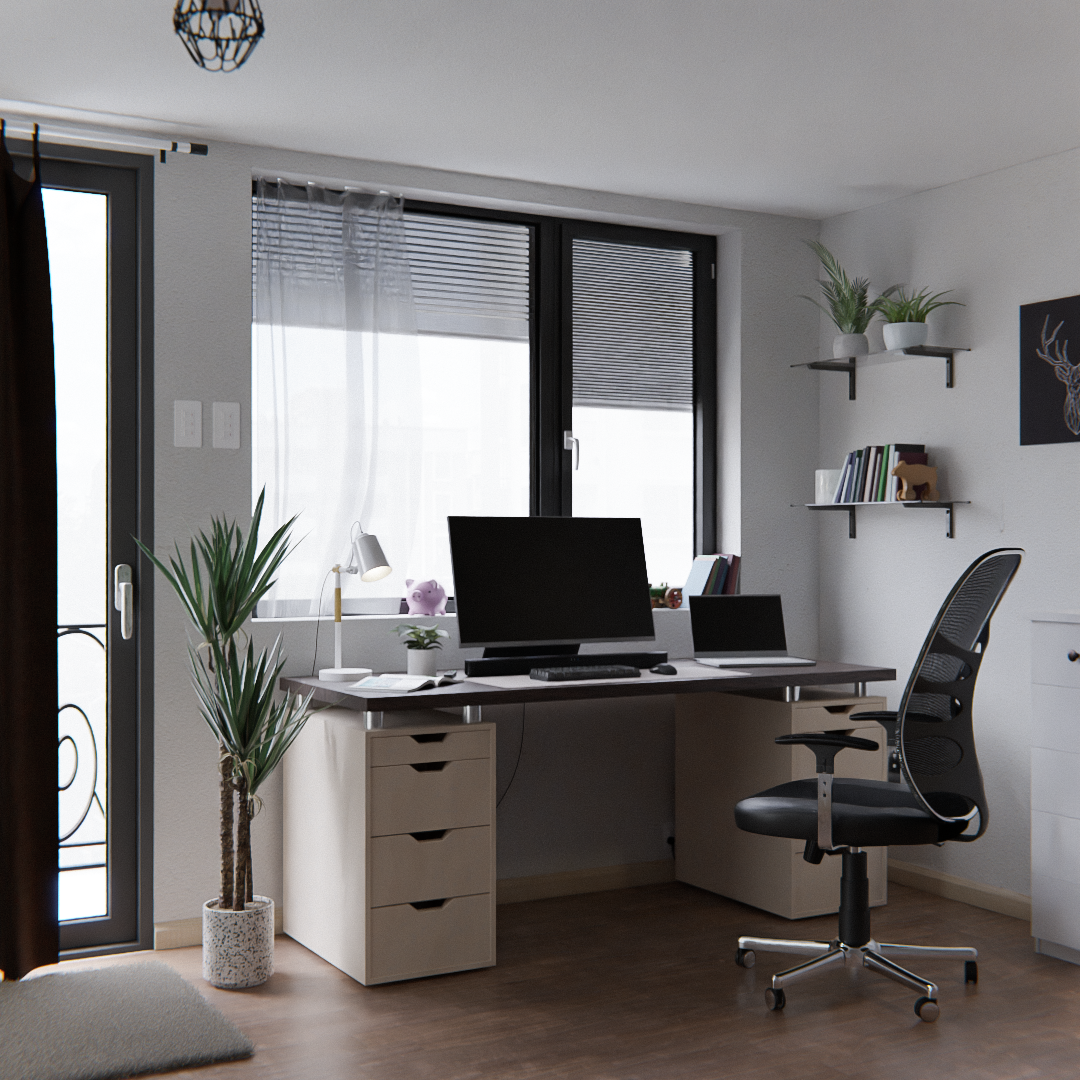
Behind the Scenes: Working Corner
About me
My name is Minh Phạm, I’m 22 years old, a 3D hobbyist, and a graduate student from Ho Chi Minh City University of Law, Viet Nam. Despite my career path, I found myself interested in 3D stuff during my second college year, and that’s when I found Blender.
For the past two years, I have enjoyed every process, from moving each vertex, to texturing and lighting a scene. Thanks to the Blender community, I can learn 3D any time, anywhere, by following tutorial videos on YouTube, or learning through paid courses. Blender is not just a software, but a part of my lifestyle. I hope one day I will become a true 3D artist.
Working Corner
I think that architectural visualization is an essential skill for anyone who is learning 3D. By researching, I have found that iMeshh is one of the best archviz YouTube channels for Blender, with many tutorial videos on how to make a professional room scene. Therefore I decided to make one following their tips and tricks. My goal was to make an archviz scene but mixed with an organic style, making the scene look like someone just stood there and took a photo of the room.
Inspiration
Minimalism is my inspiration. I really love a tidy, well-organized, modern-looking setup. This sort of setup increases productivity and is suitable for home, office, and gaming. They can be pricey and not easy to achieve in real life, but definitely can be done (and for free) in 3D, so I asked myself, why not just design a dream setup for my messy room?
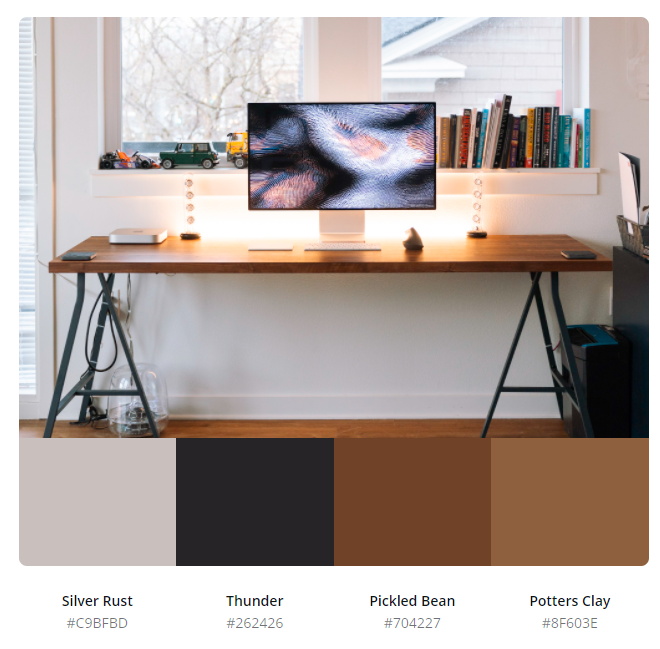
With that idea, I started gathering references. I found Unsplash really useful, with tons of high-quality photos.

I also chose a particular setup to establish my scene’s color palette.
Modeling
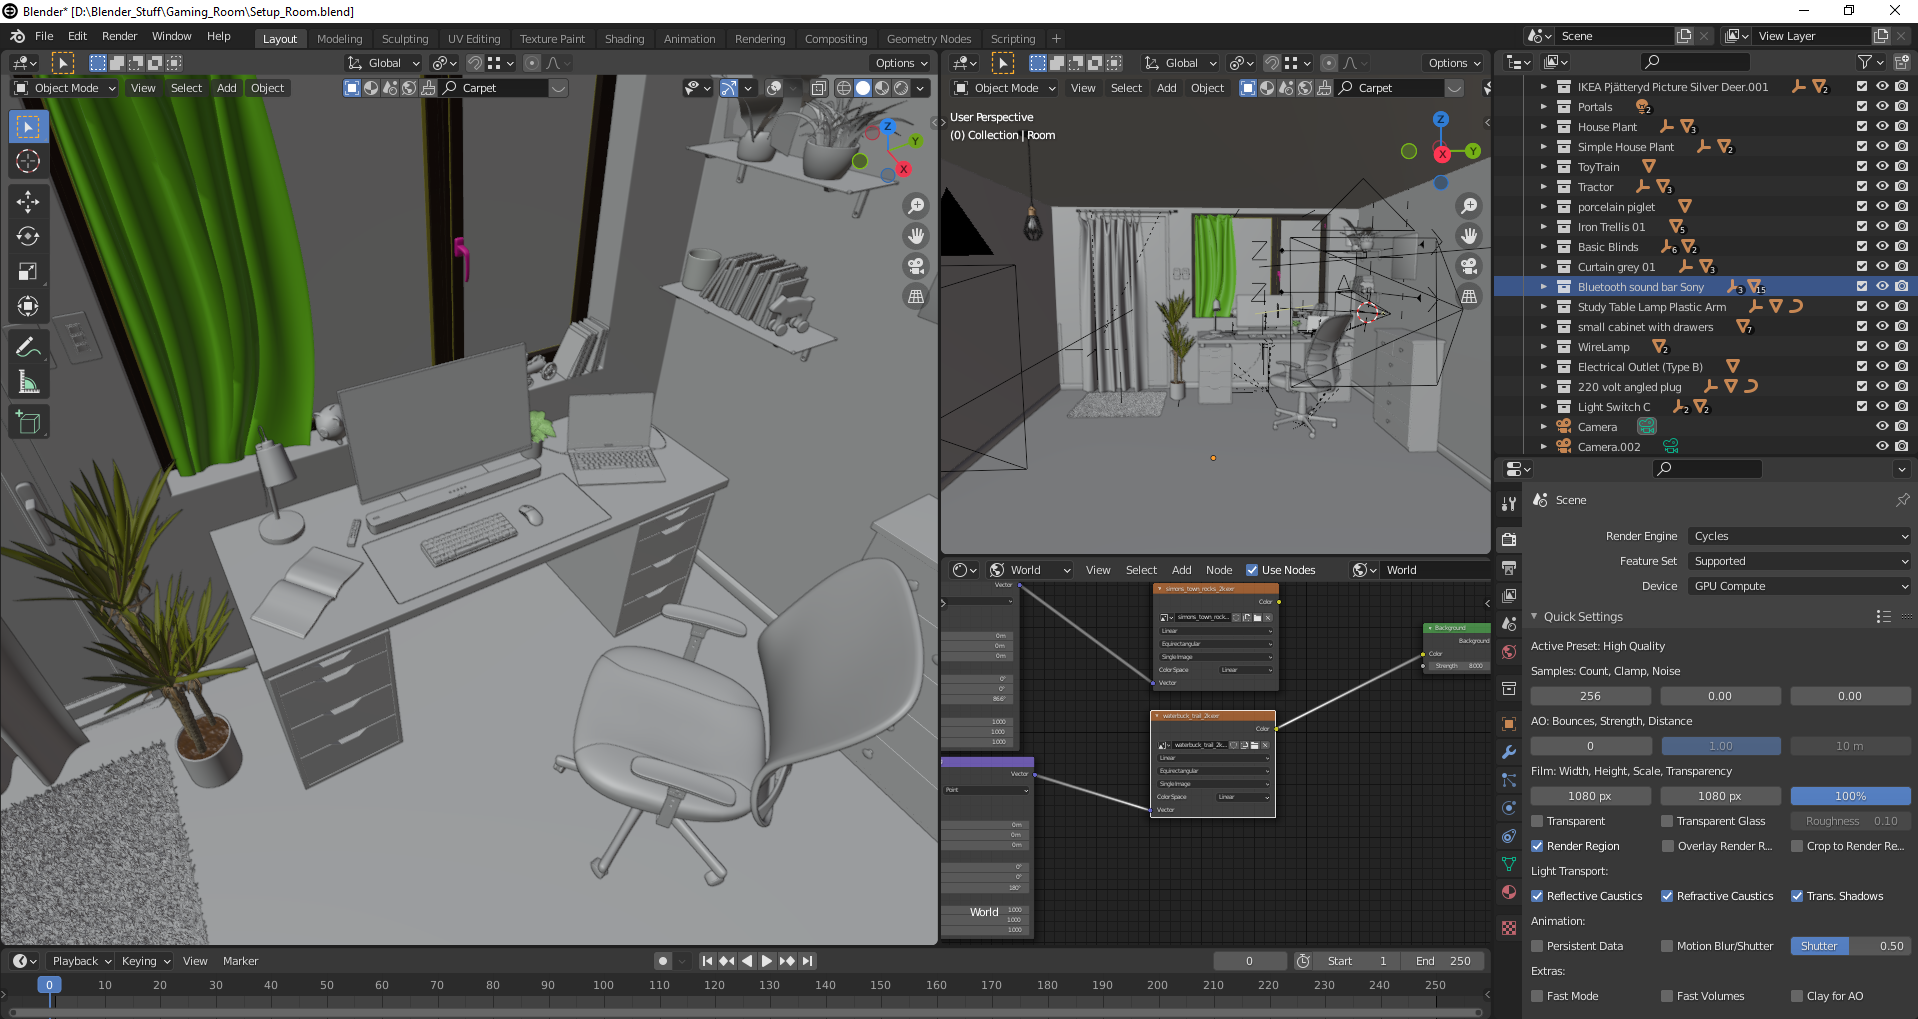
After opening Blender, I immediately deleted the default cube (one of my habits). I didn’t use any specific measuring method to create the room, just extruded a 5×5 meter plane, cut out the door and the windows, then extruded the door and the window to give my room a bit of thickness, and separate the floor from the wall.
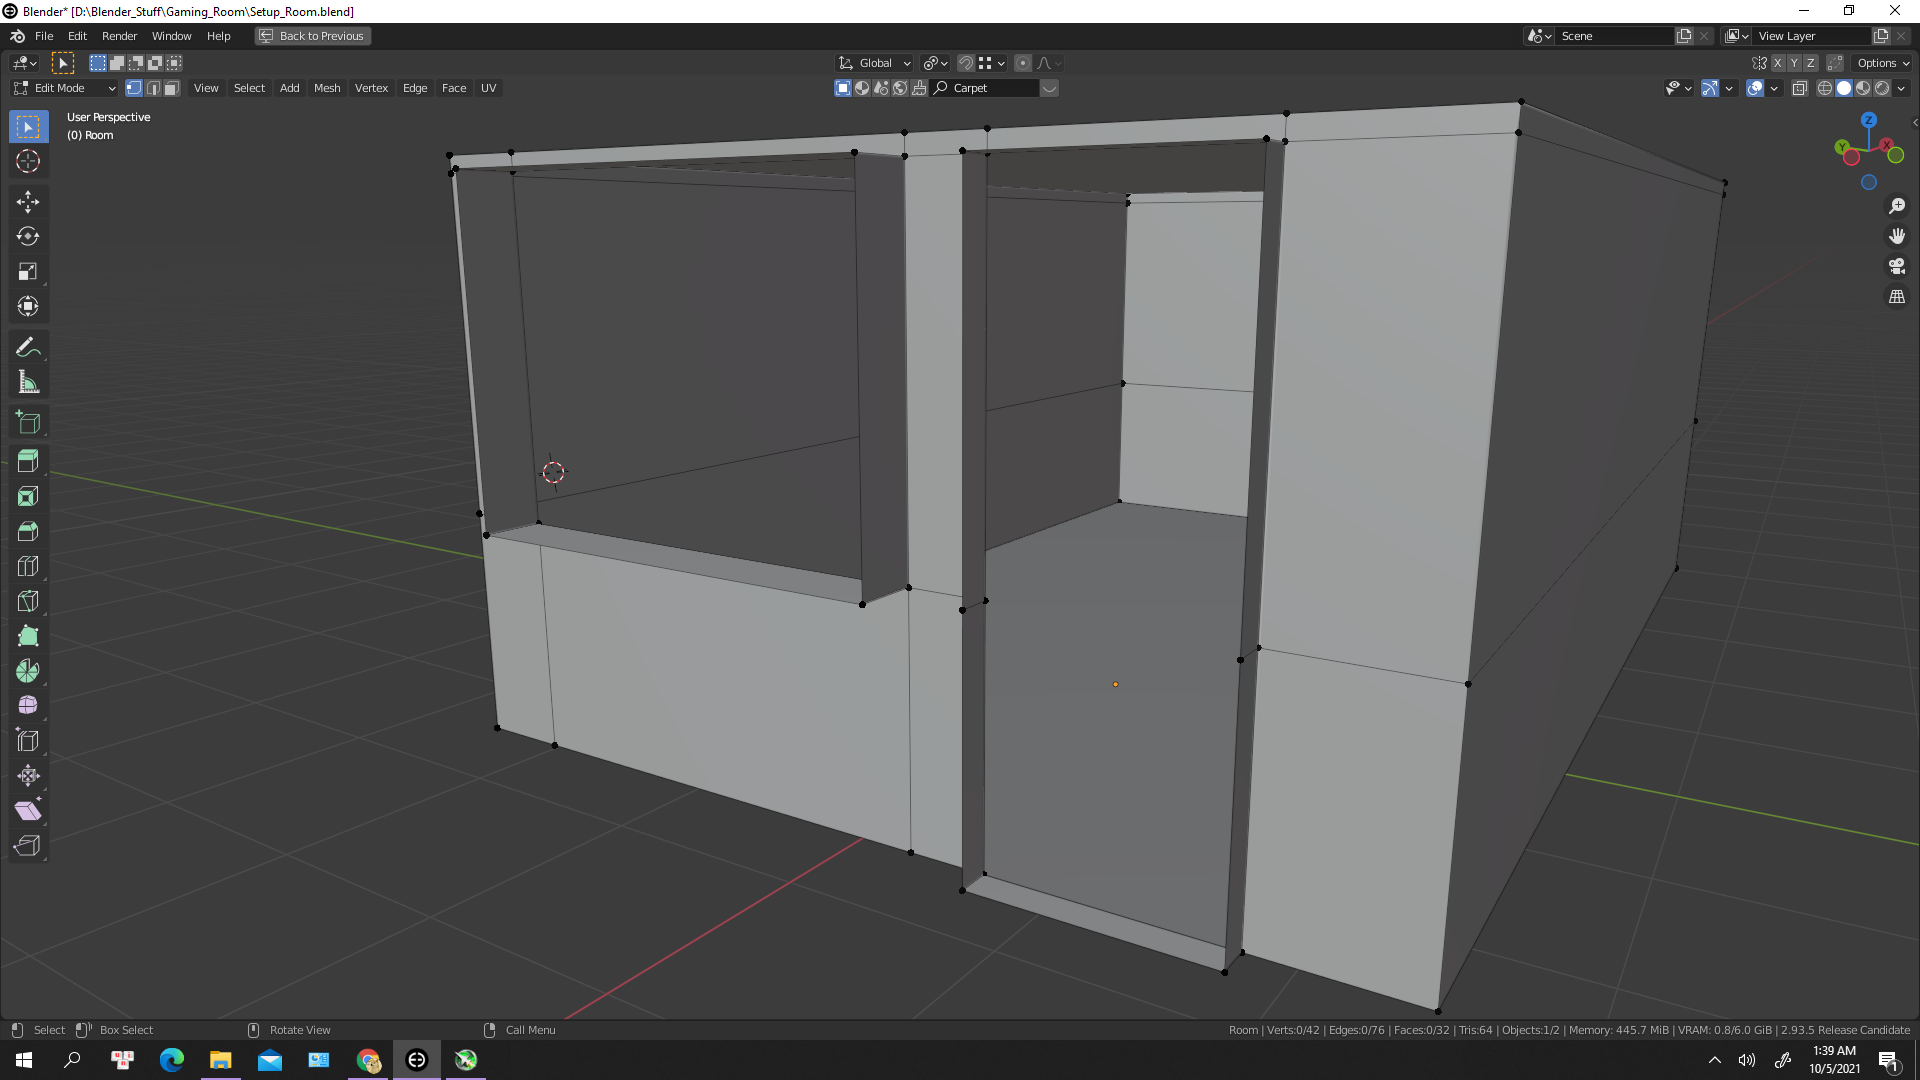
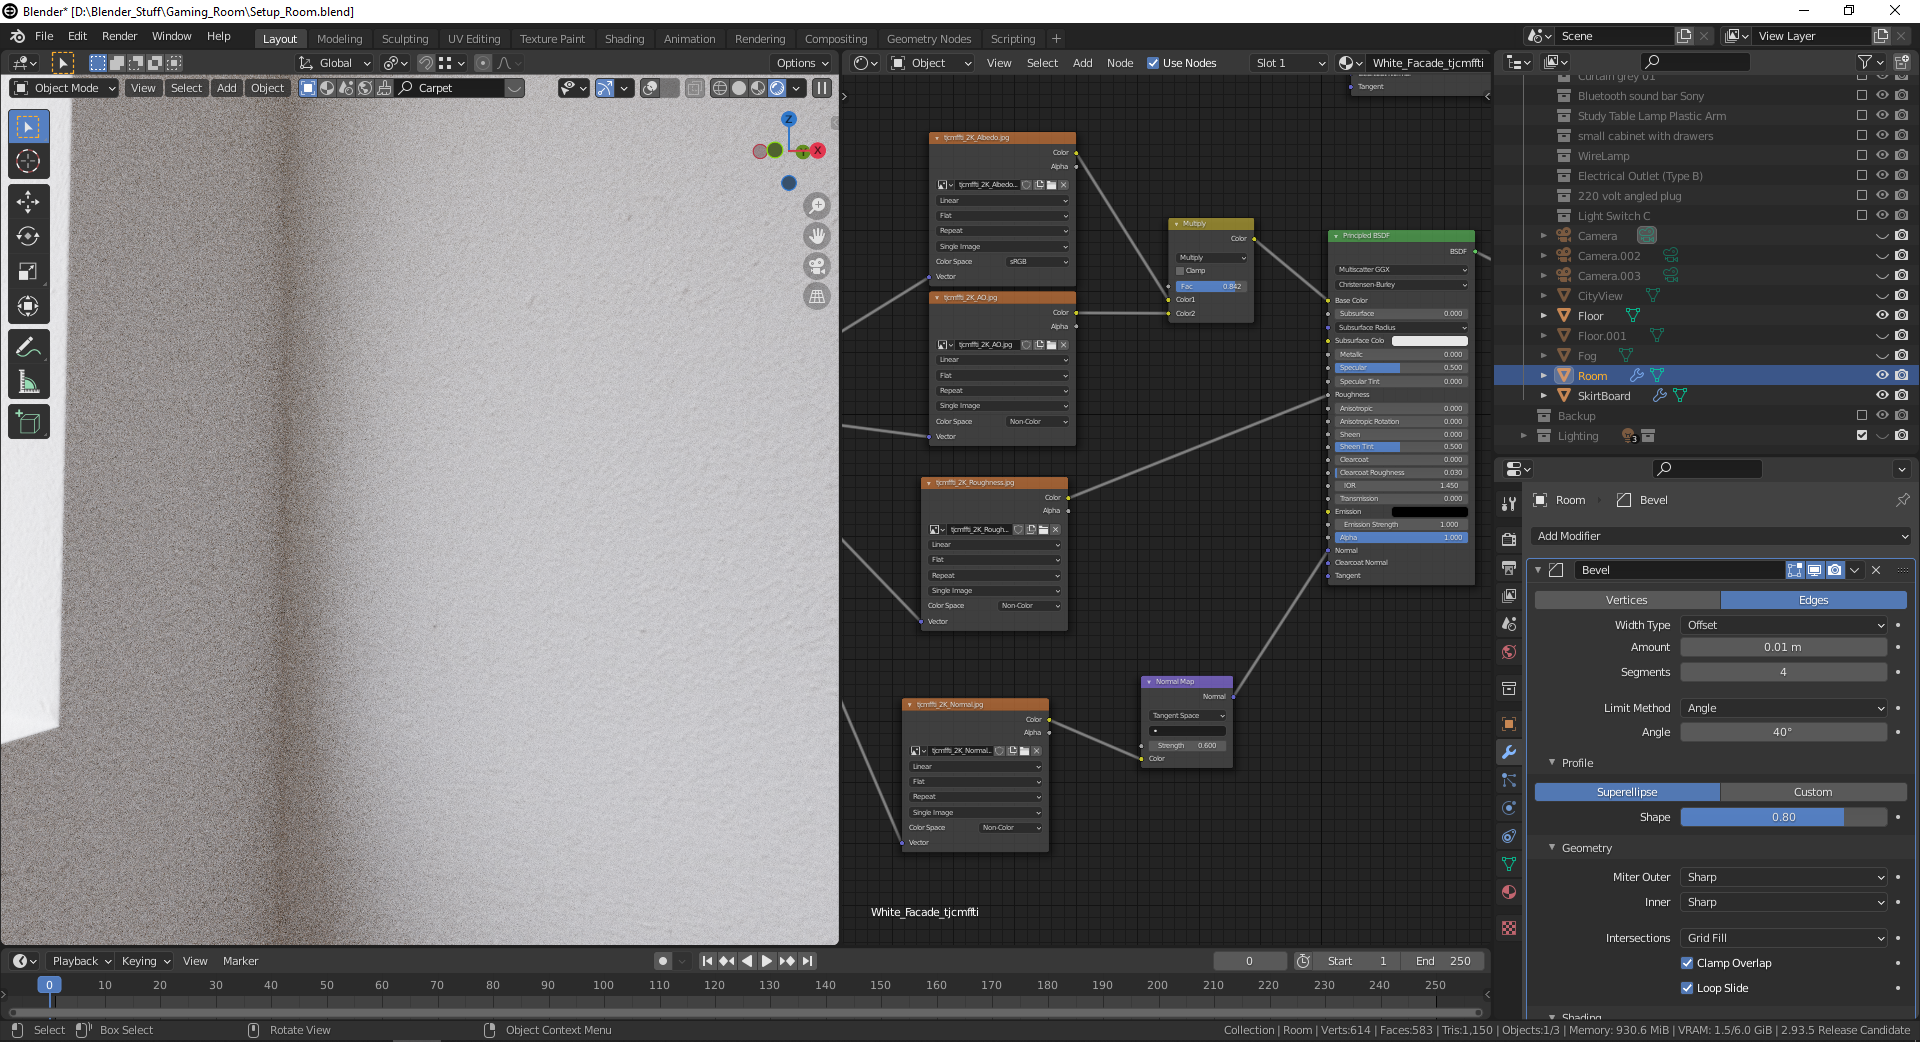
Next, I added a bevel modifier, because it wouldn’t be realistic if the wall edges were razor-sharp (who would dare living in that room, though). My tips for beveling are: use the angle limit method with angles greater than 30 degrees, check “harden normals”, and auto smooth with the same angle as the limit method angle.
One small but very important detail that I see many beginners are missing when making a room scene is the skirtboard or baseboard, which gives much more realism to the scene (I also bevel the skirtboard, I try my best not to leave any sharp angles in my scene).

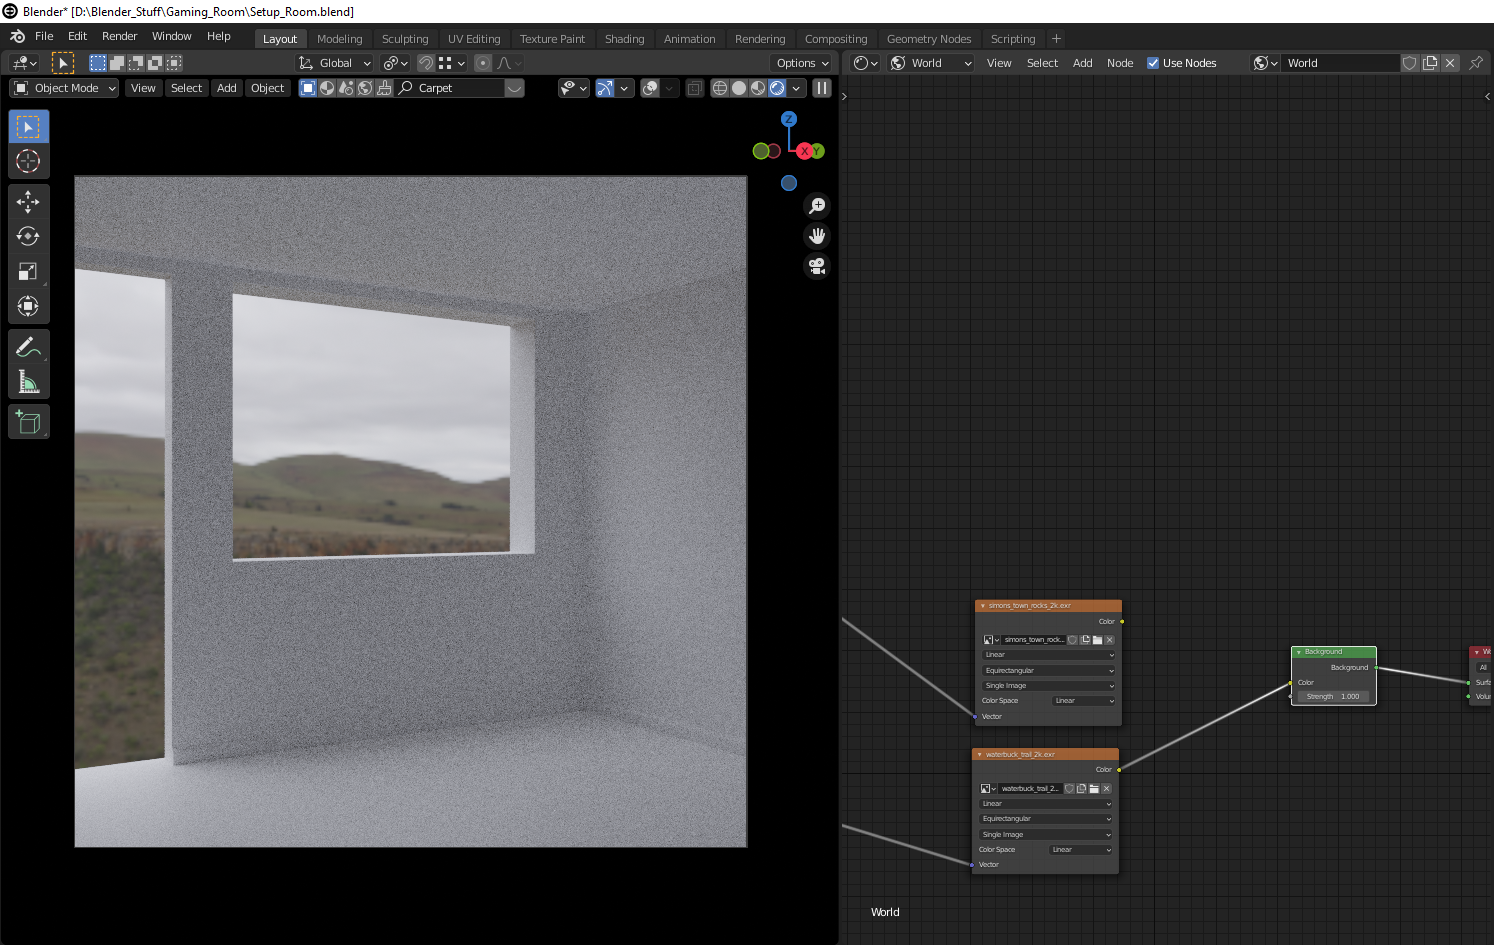
At this stage, I moved on to texturing the wall and the floor, adding some lighting, to establish an overall look for my scene.
I tried out a couple of HDRIs from Poly Haven to see what lighting suited my scene.
For the floor and wall materials, I used the Quixel Bridge add-on. All I needed to do was find a suitable texture, then click download and export; the texture immediately went into my scene.
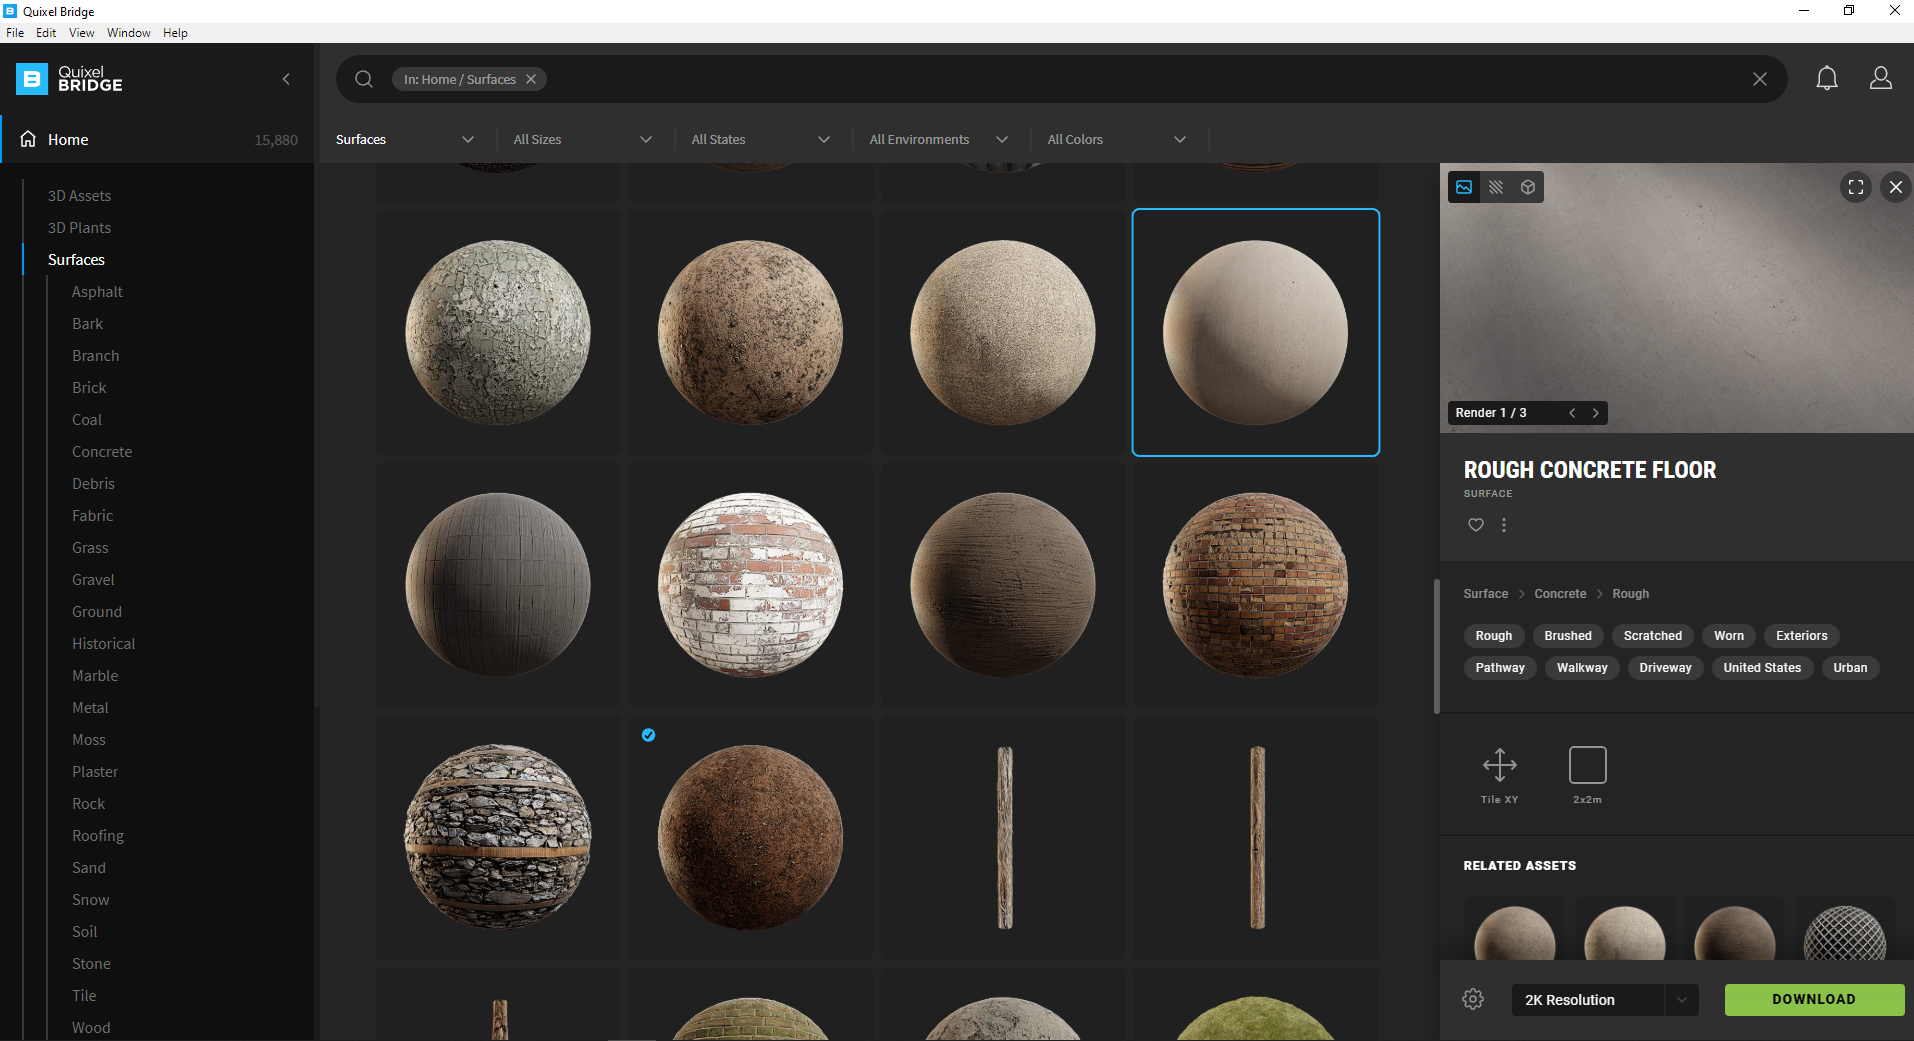
I also added some imperfections to the floor, which made the scene much more realistic.
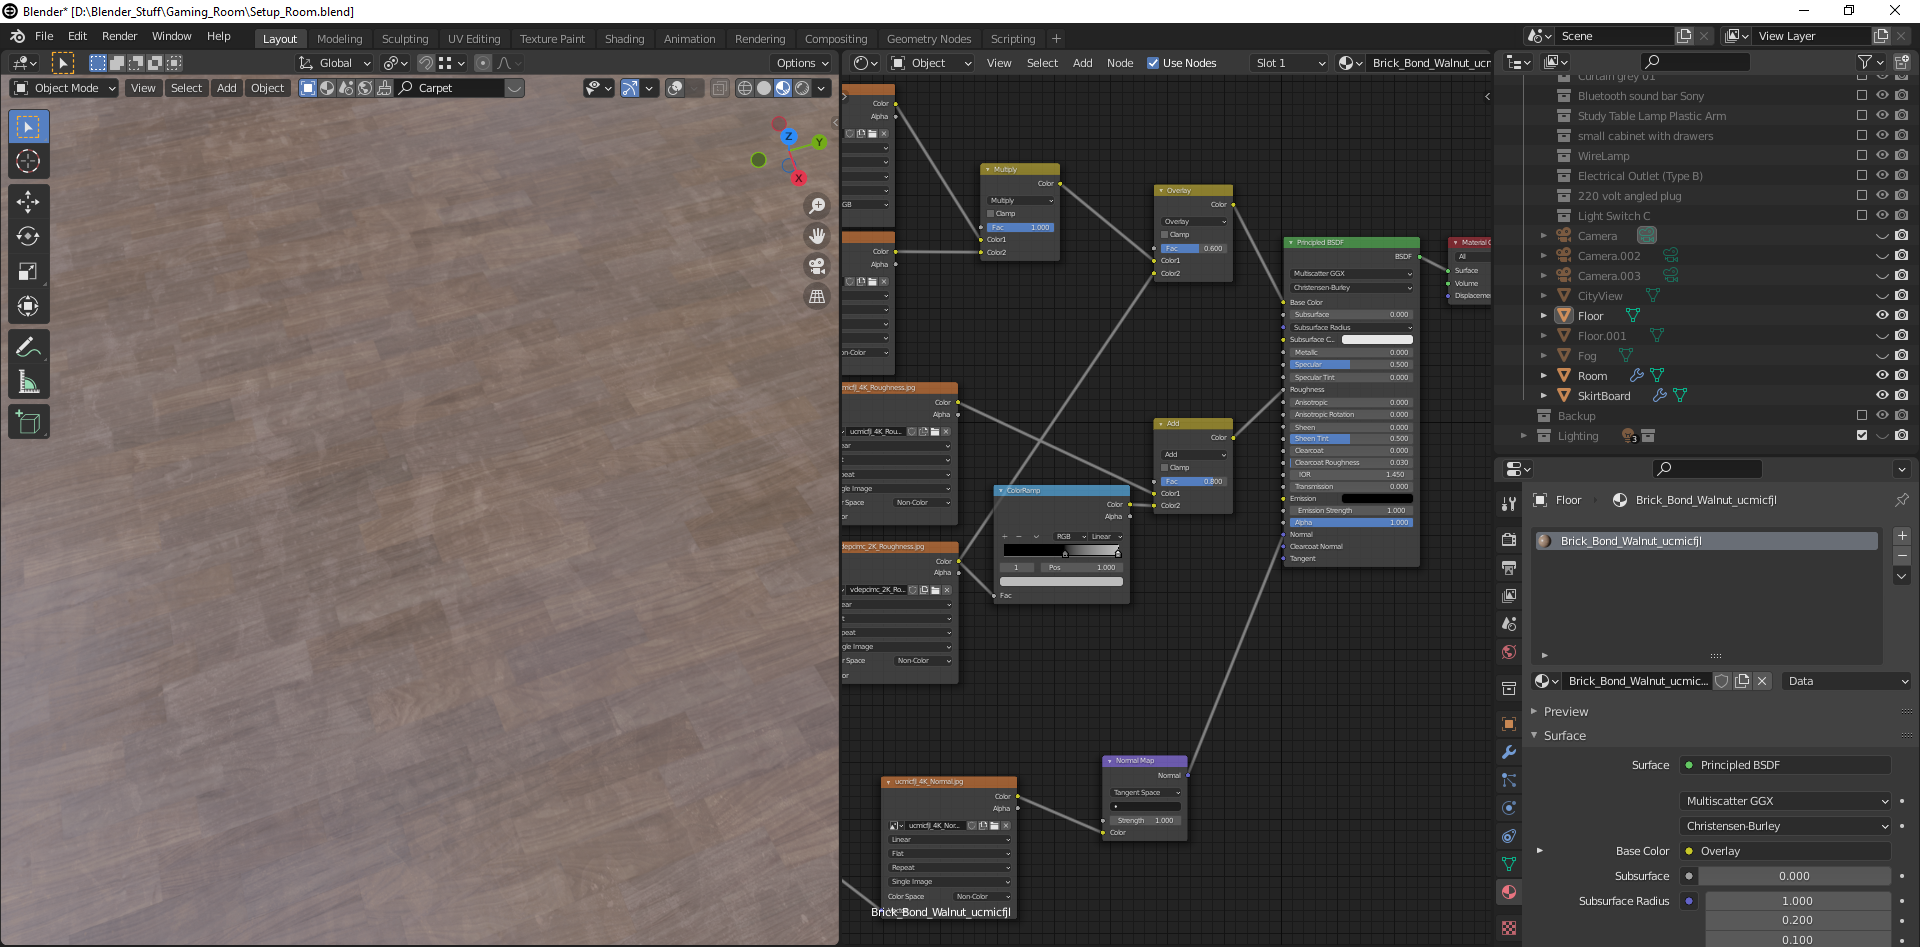
When texturing walls, I used to think, The wall is flat, just throw a plank principled BSDF in and I’m good to go. I was wrong. There are a lot of small bumps when I take a really close look at the wall. Maybe I didn’t pay attention to these bumps, but such small details will trick our unconscious mind that this looks 10 times more realistic. That’s why sometimes I can feel one photo is better than the other without pointing out why.
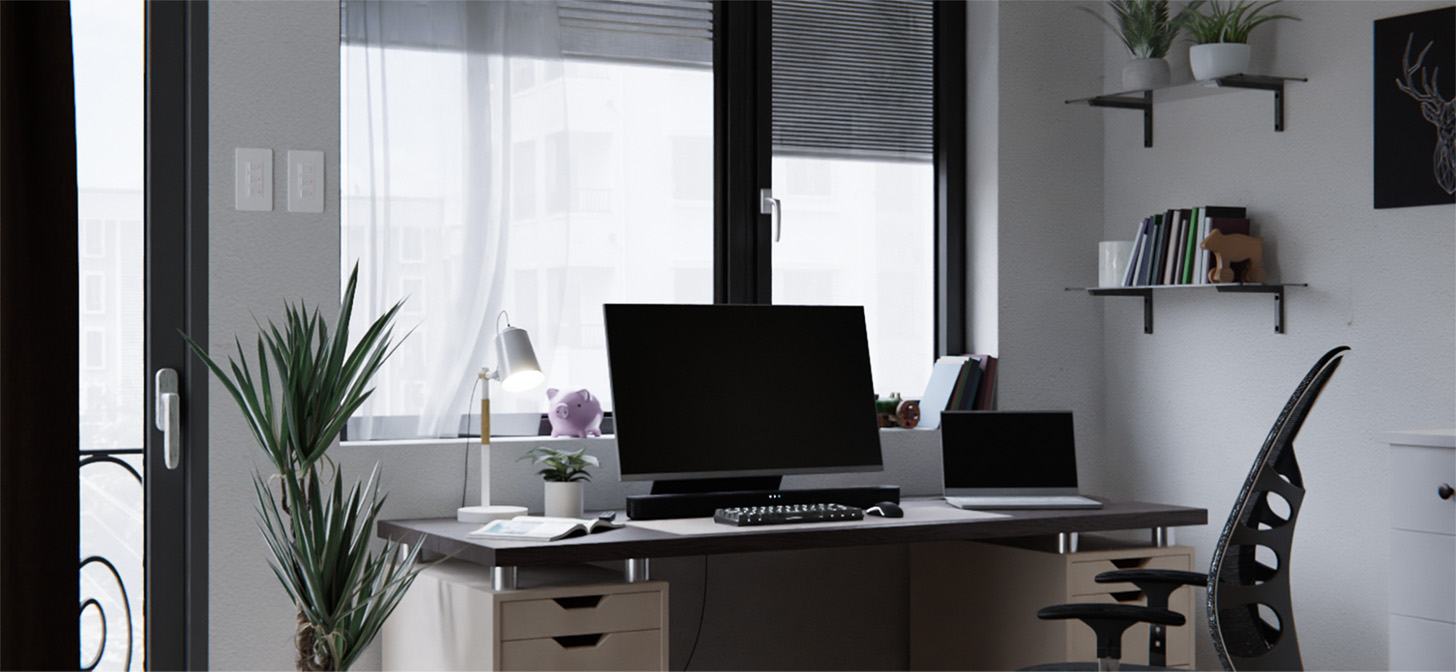
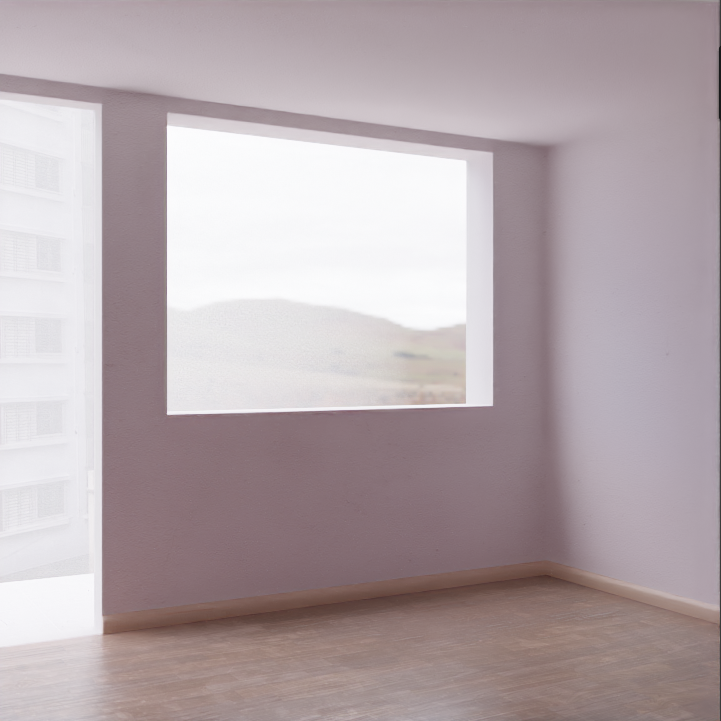
After giving my wall the texture it deserved, this was how my room looked.
The second step was also the most time-consuming one: adding furniture, decorating the room. I wanted to make my scene more natural, like someone actually lived in it, not a CG scene. I used assets from the BlenderKit add-on. My rule, however, is only to use assets once I know how to create them from scratch. That’s why I also modeled most of the furniture in the scene, such as the IKEA desk, wireless mouse, and laptops.
UV unwrap and texturing
Since I have already mentioned above how I textured my room, and most of the furniture were assets (which means they have already been textured), I will share how I textured my IKEA desk. It’s really simple, to be honest.
I used two different methods of mapping. The tabletop is basically a cube, which is unwrapped with the cube projection method, and shaded with just a set of free wood textures from Poly Haven. I set Color Space for the Roughness map and then set Normal map to Non-Color Data. I decided not to add any imperfections to my tabletop because I thought it looked good enough. Too much of anything is not good.
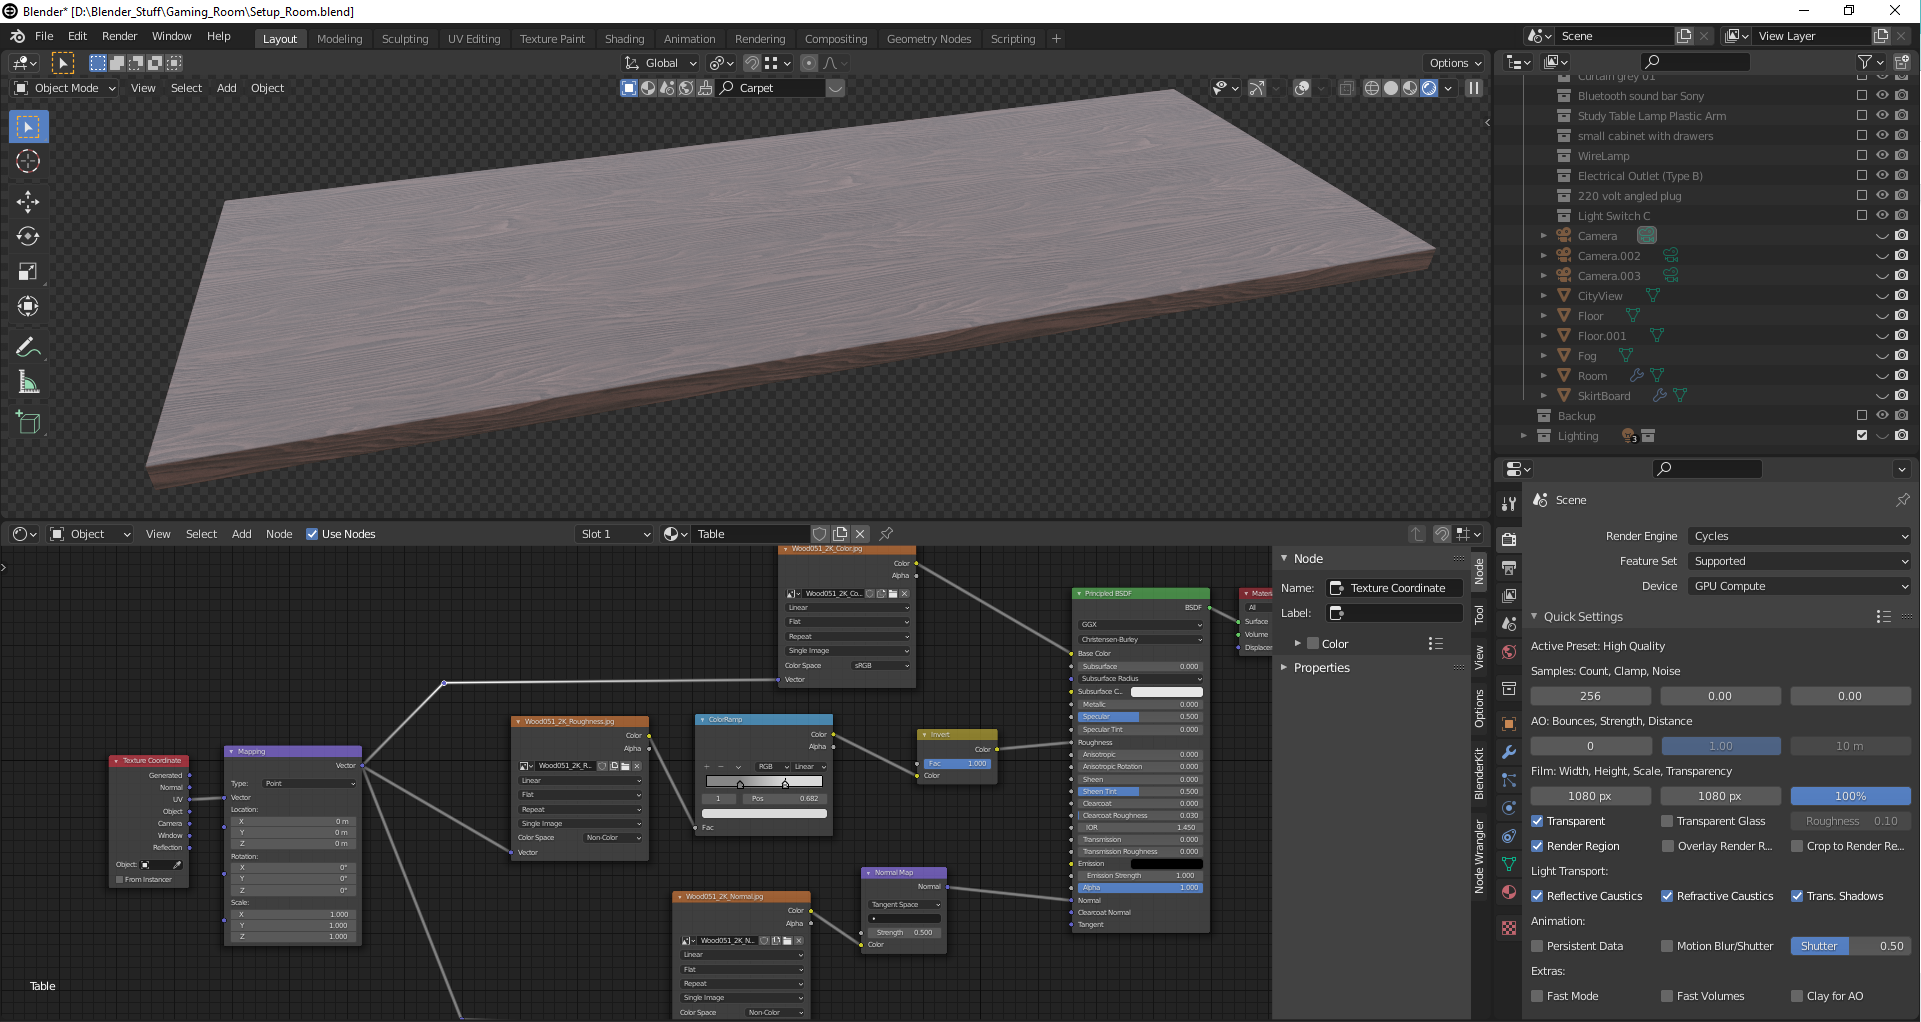
The drawers, however, are a bit more complicated in shape. I was too lazy to UV unwrap them, and I was not using this desk as a game asset anyway. With the Node Wrangler add-on, I just pressed Ctrl+T after selecting my texture node to choose my mapping method as object, changed the texture projecting method to Box, with some blend to remove the seams. Then I just played around with the nodes shown below.

All these steps took me roughly 5 minutes, and I think I had a decent table to put my stuff on.
Lighting and rendering
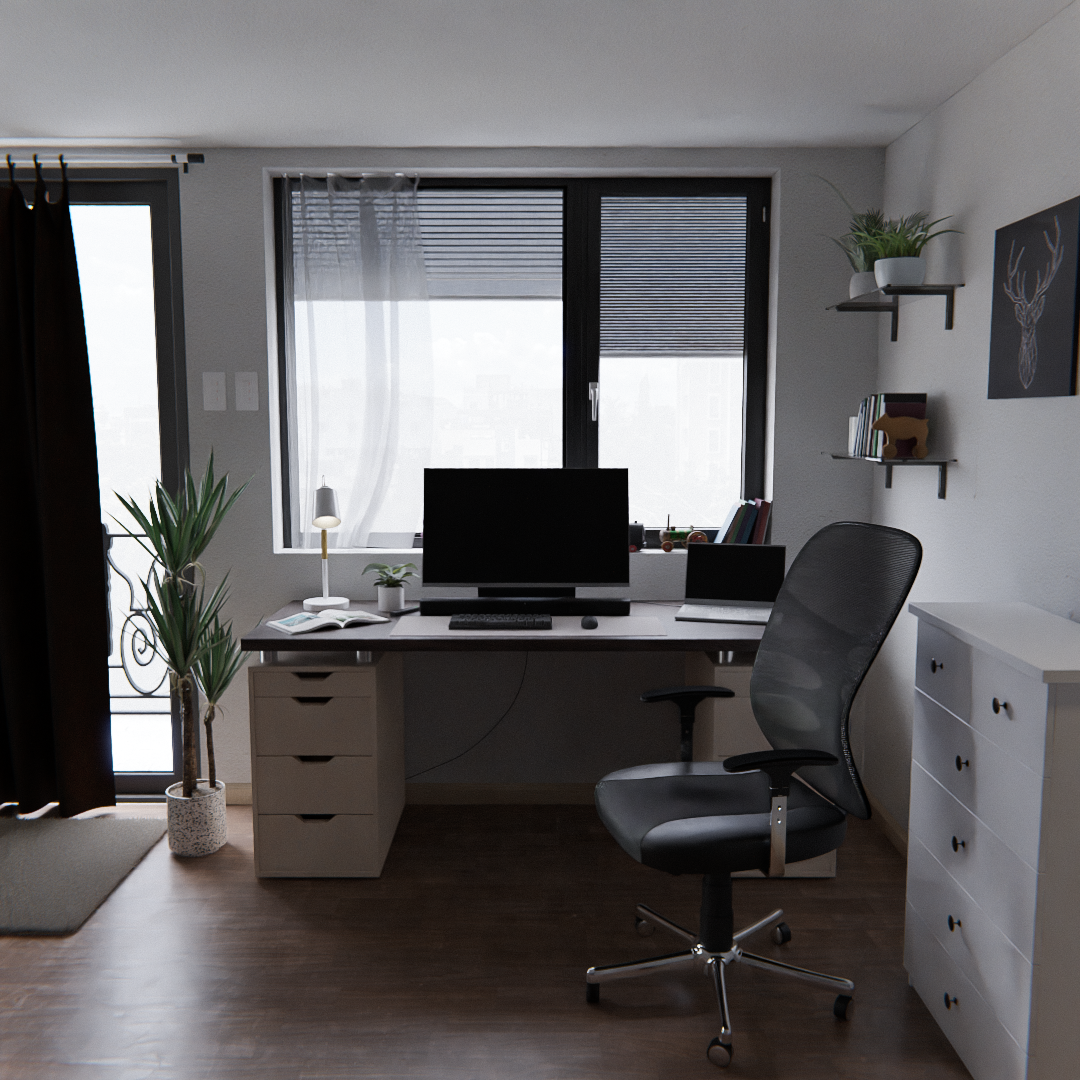
By the end of the day, I had put a lot of stuff into the scene. I also added some lighting behind the scene. However, I still felt like something was off. Following Blender Guru’s tips, I took a quick render, uploaded it on Reddit, and asked for feedback.
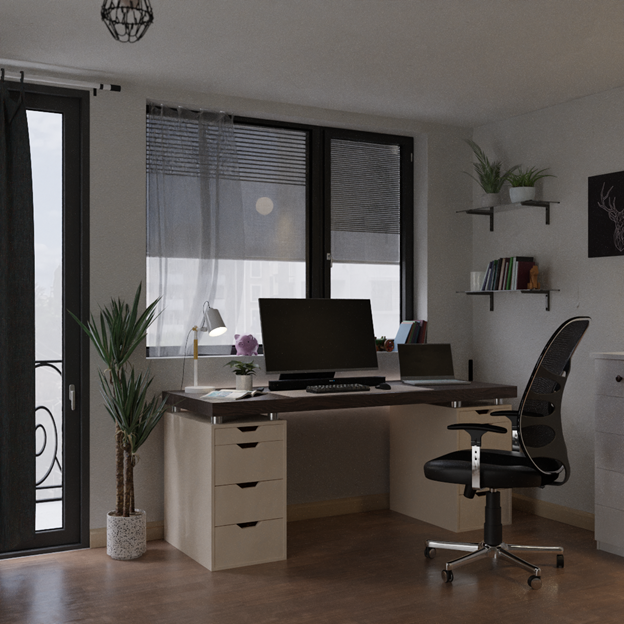
Thanks to all the feedback, I improved the scene by adding more small details, like the cables behind the desk and light switches. I also increased the background strength to have more light coming into the scene.
The final stage was rendering and compositing. I used E-Cycles for denoising and faster render time. For compositing, I only used Glare and Lens Distortion to make my scene more realistic.
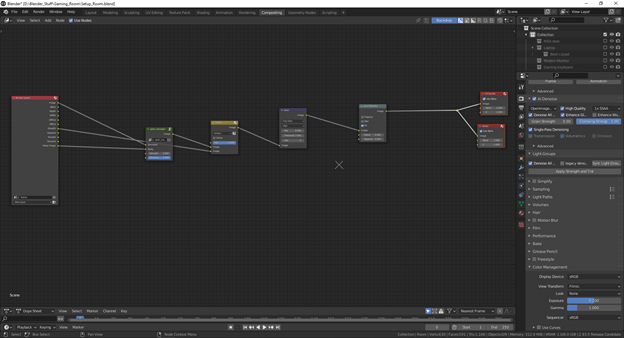
Last but not least, I color graded the image using Photoshop.
I could improve more but I’m really satisfied with how my room turned out. The scene took me about 3 days, with 3-4 hours of working per day.

It might look complicated but the process is that simple: add a room, add some furniture and light, and render it out. The key is experimenting, you need to keep trying. If it fails and the scene looks weird, then try again. Eventually, your art will be refined.
About the author
 Minh Phạm, 3D hobbyist with Bachelor of Law based in Viet Nam. As a 2-year Blenderer, I mainly focus on automotive and environment creation.


Wow, keep up the good work dude.
I’m also from HCM city, hope we can get to know each other!
Nice work. Keep up creativity.