Behind the Scenes: Passing Through
Greetings! My name is Oleg Rybin and I’m the creator behind Bespoke Cube currently based in the Niagara Region of Ontario, Canada.
I am actually a web developer by day and Bespoke Cube (named in opposition to the infamous default cube) is the side project that I started to reconnect with my long-neglected creative side.
Over the years I’ve made several attempts at learning 3D, gaining more and more understanding of the concepts and processes but invariably running out of steam before producing anything worth sharing.
It all changed a couple of years ago when I got my hands on Blender and firmly decided to fill the gaps in my skills to finally be able to produce finished projects. After countless Udemy courses, Youtube tutorials, and searching for my place in the vast world of 3D, I settled on making CG art and sharing it with the world via various platforms such as Instagram and Reddit.
The concept
My creative process normally starts with settling in front of my computer, pulling a random idea out of my mind, and figuring out whether I have the skills, time, and motivation to make it into a finished piece.
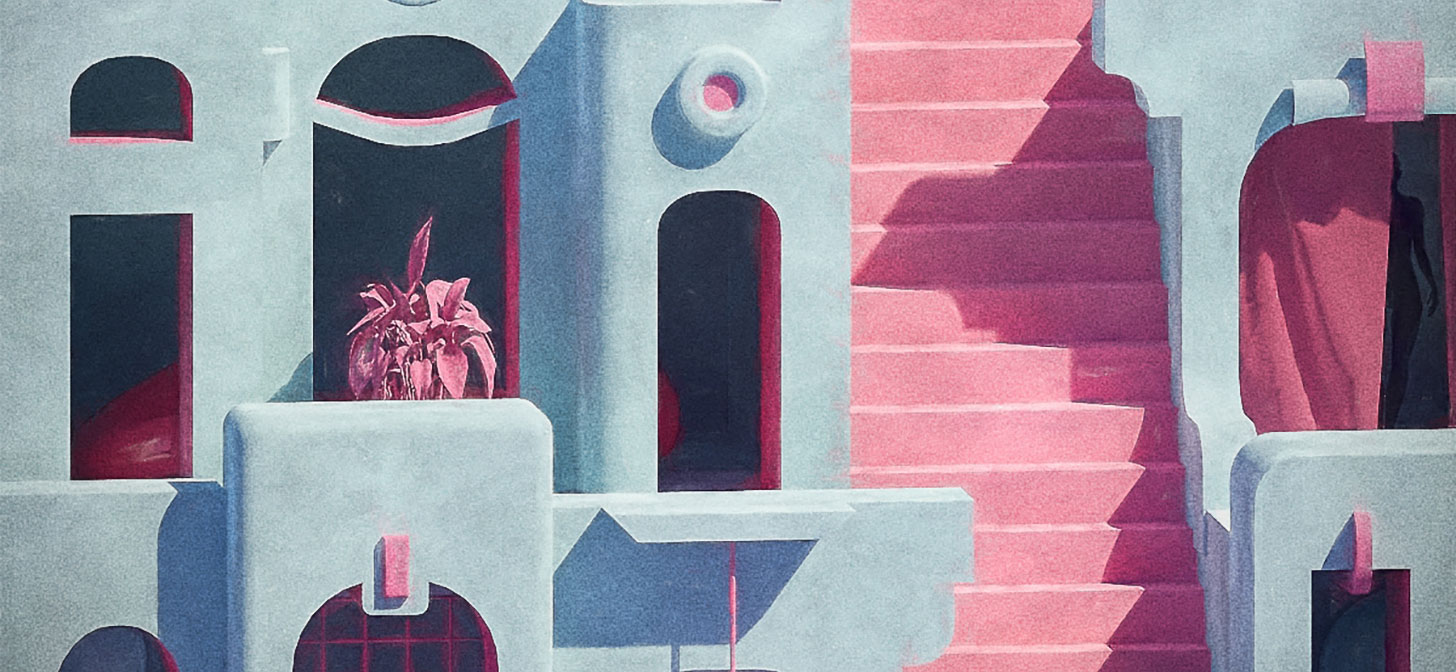
When I sat down to make “Passing through”, the first thing that came to my mind was the image of a floating garden, then a structure similar to Mesoamerican pyramids and Mesopotamian ziggurats. On it, I superimposed the elements of style that I enjoy working in: pastel colors, rough stucco look, high-contrast light, and a touch of surrealism.
Modeling
From the modeling perspective, the scene is absolutely unremarkable. It’s mostly just a pile of cubes extruded and beveled many times to create a variety of simple shapes that give the illusion of complexity.
Since I was not doing any animation, deformations, or exporting to game engines I could afford to be really sloppy with my geometry. I didn’t bother to maintain good topology or optimize poly counts. My main goal was to create a visually pleasing composition.
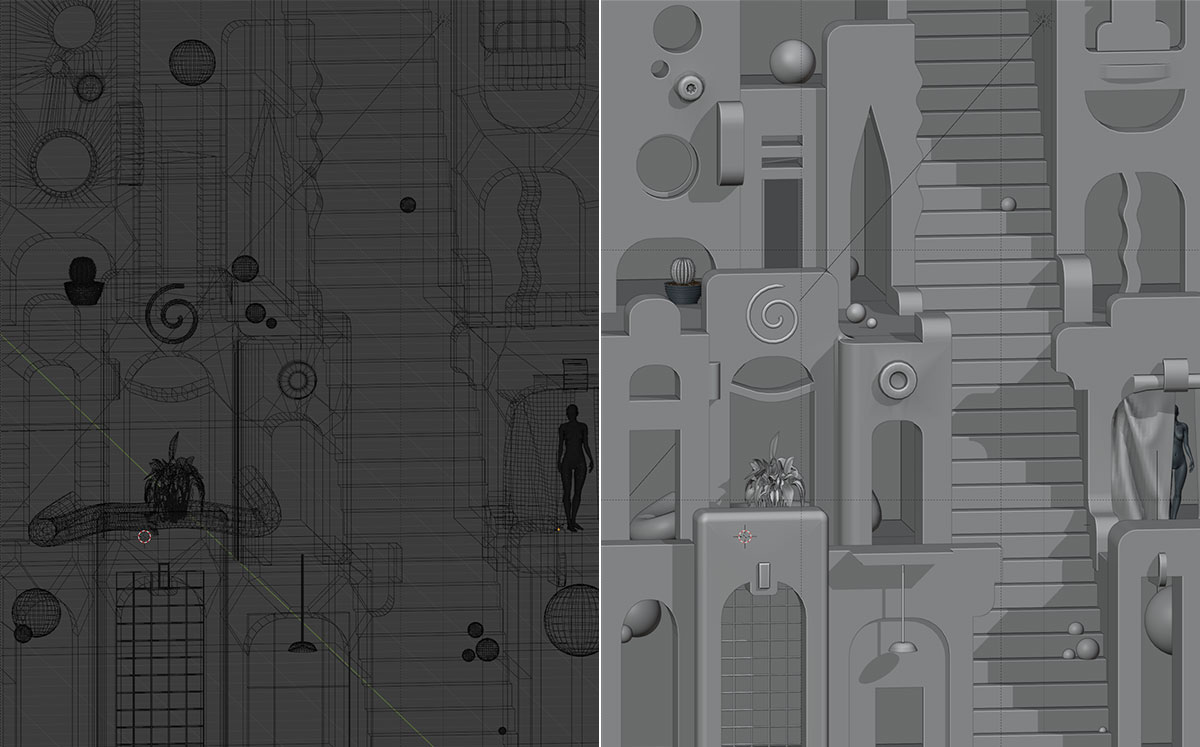
After creating the stairs and the various windows and arches, I added a few more details to reward the viewer for paying closer attention.
One of those details is the female figure, which I imported from Poser, behind the curtain. There are also a couple of plants from the awesome Botaniq add-on and a hint of a red snaky creature that is just a beveled curve.
Materials
In my scenes I prefer using procedural materials as they seem to work well with my style, are highly reusable, and generally do not require UV unwrapping, which can be time-consuming.
This scene is no exception and mostly uses a simple stucco material that I created a while ago and have been dragging from project to project with small variations.
It is basically just two Musgrave texture nodes at different scales, mixed together to add slight unevenness and variation to the solid color. The more fine-grained of the two Musgrave textures is also used to add a bit of a bump.
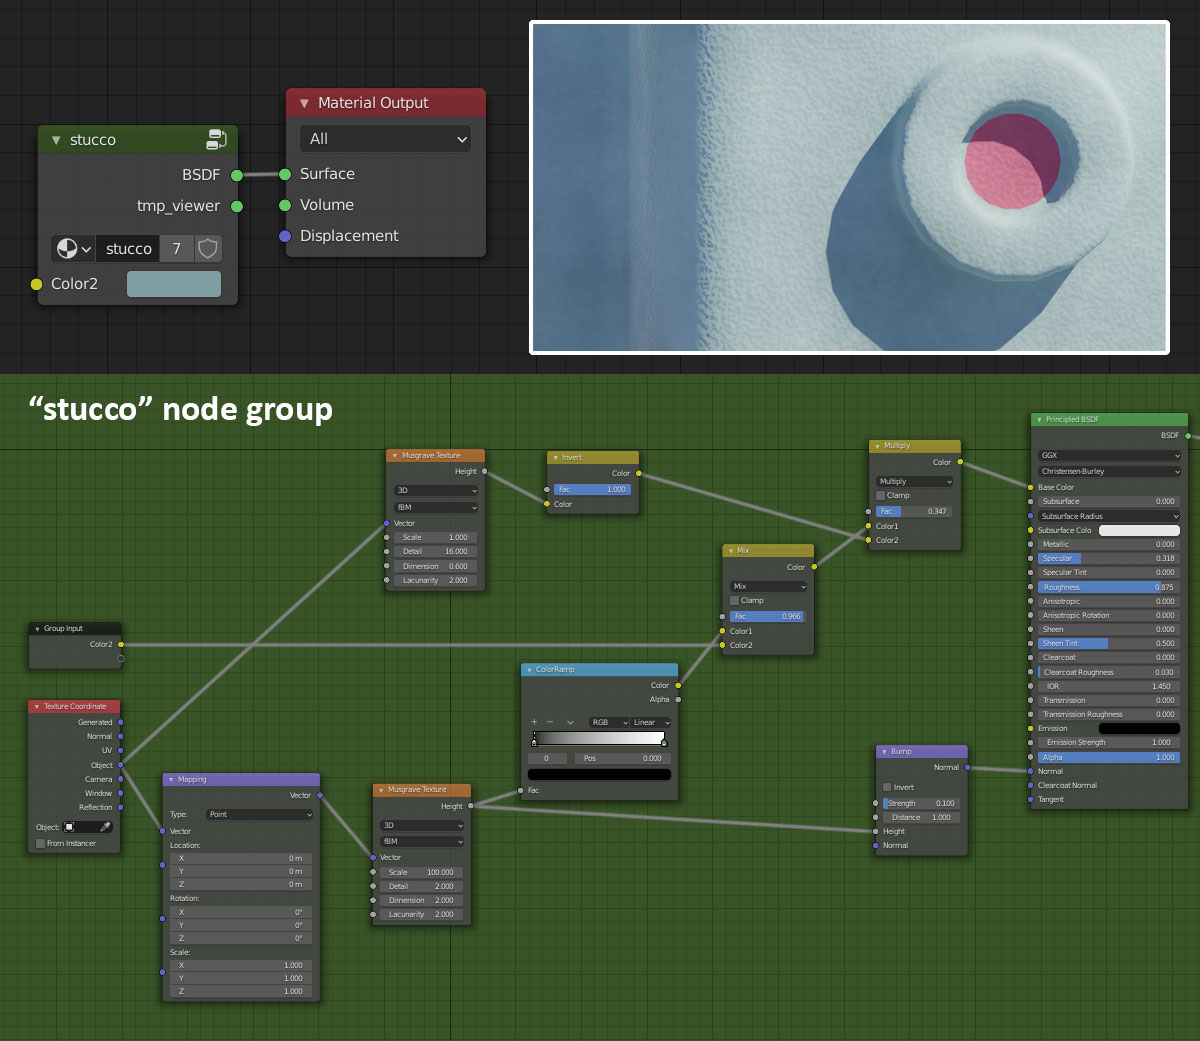
To avoid duplicating all of the nodes across different materials when all I needed was a different color, I created a node group called “stucco”.
Both teal and pink materials in “Passing through” use instances of the “stucco” node group with different colours in the Color2 slot.
Lighting
In my opinion, lighting is what really makes this scene work. Shadows and highlights create main focal points, highlight small details, and break up even surfaces.
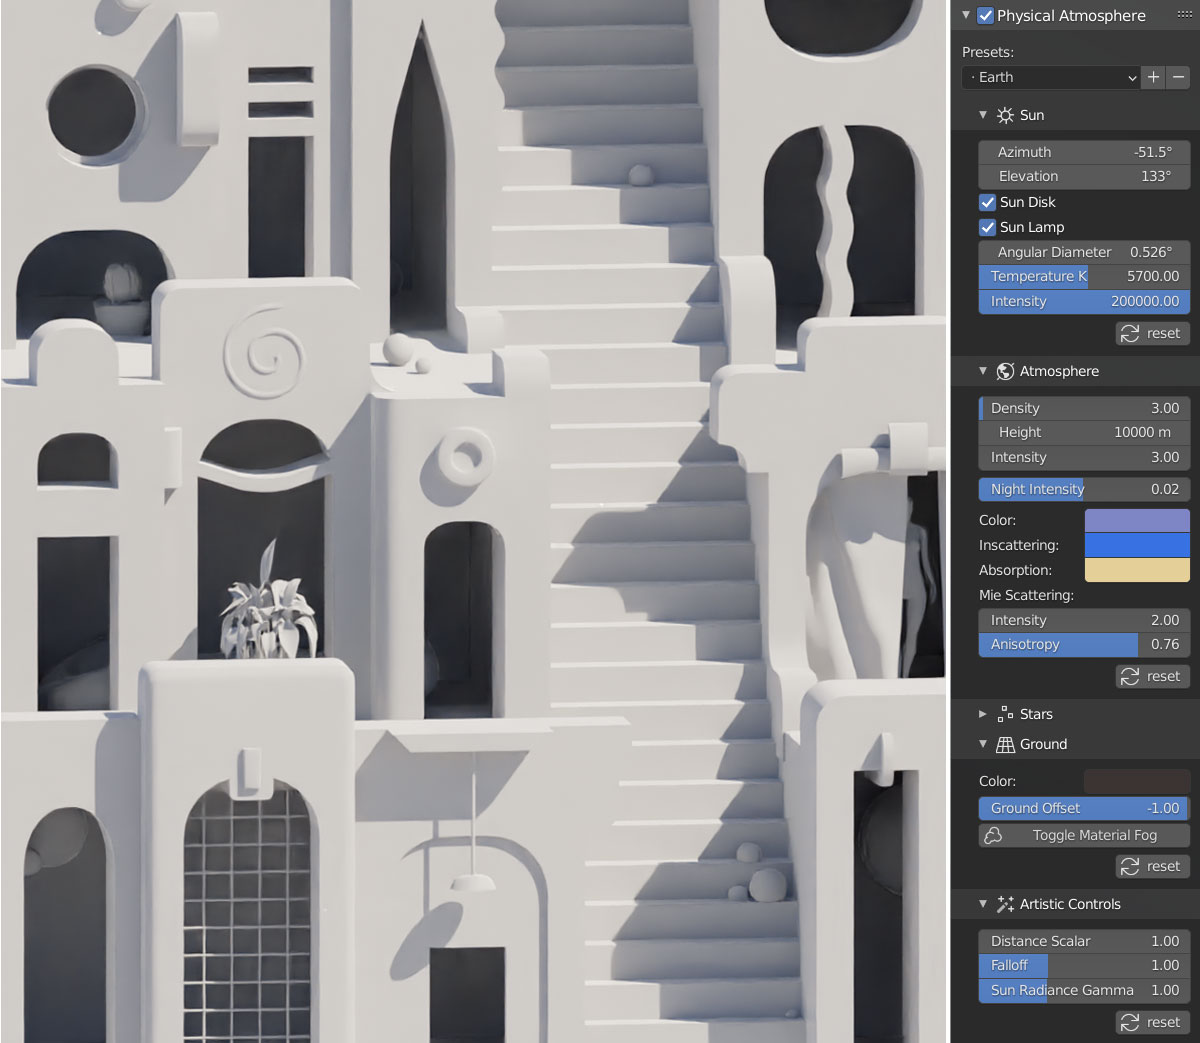
For lighting in my projects, I use an add-on called Physical Starlight and Atmosphere. It provides intuitive controls conveniently grouped together as well as other functions that are not as relevant in this particular scene but which come in handy in other projects which require outdoor lighting.
Post-processing
The importance of post-processing is hard to overestimate. Despite all the detail and a popping color scheme, my final Cycles render came out somewhat dim and sterile as is often the case with CG renders.
To address this, I took my render to Topaz Studio 2 to apply some color correction, vignette, film grain, a small detail boost, and a subtle smudged paint effect.
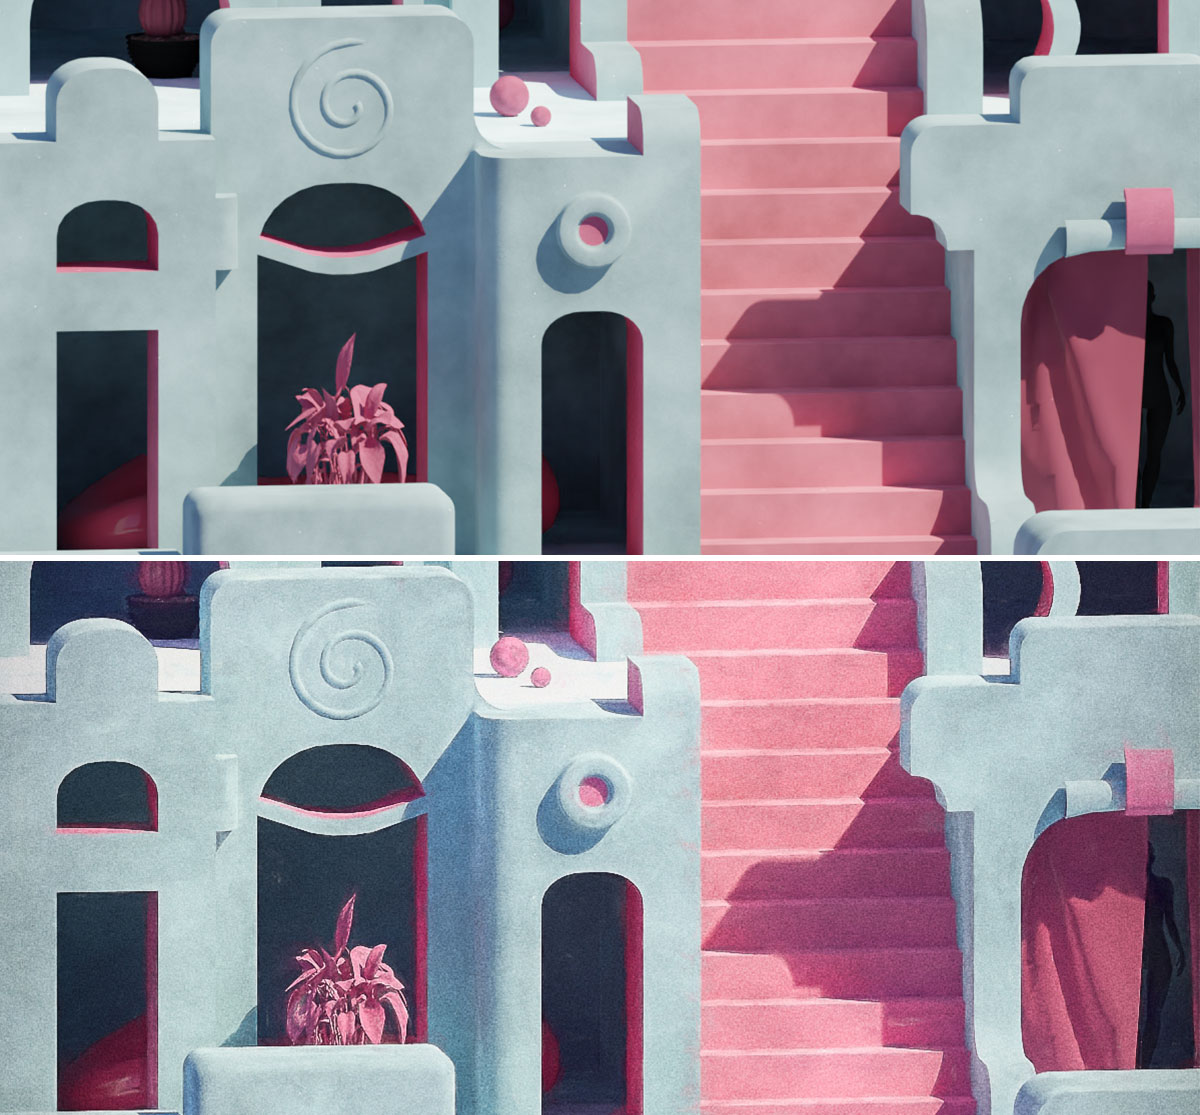
Below: Same render with post-processing applied
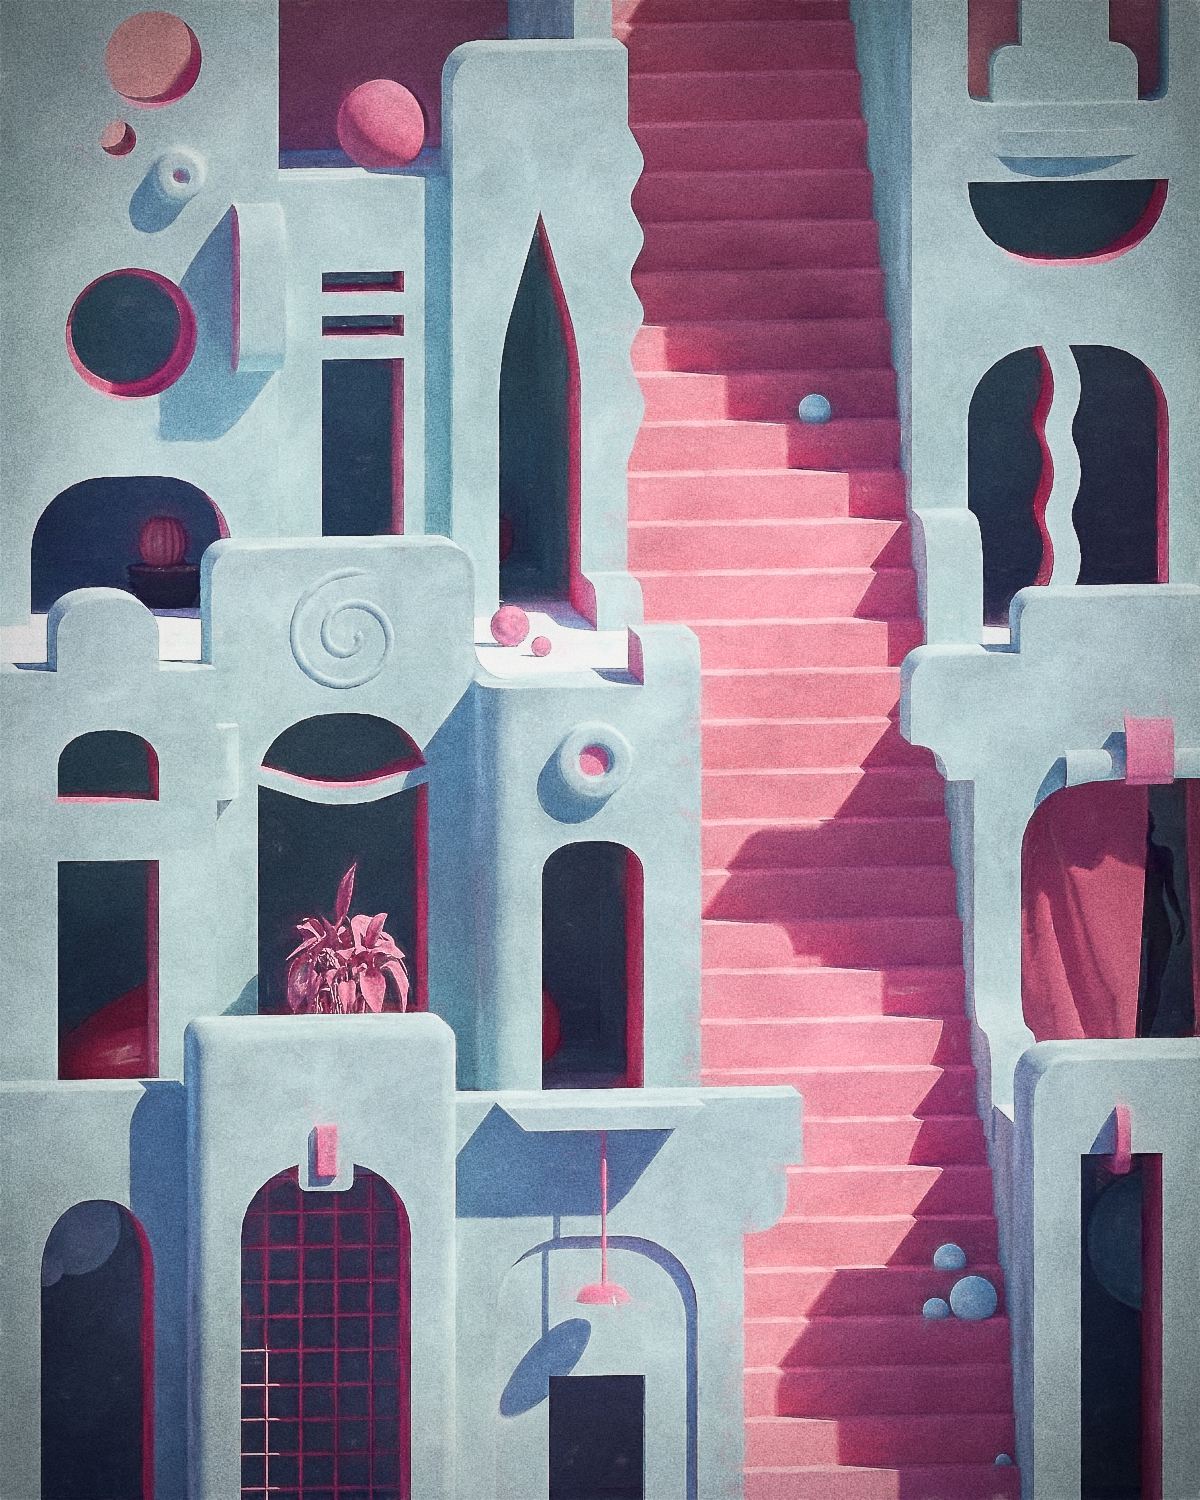
And here is the final render! Much better if you ask me, and finally ready for posting.
About the author
 Oleg Rybin, 3D artist and web developer, creator of Bespoke Cube


