Behind the Scenes: Knitted Cloth Leather Texturing Practice
About me
Hi all! My name is Thijs de Bruin and I’m a 3D artist from Rotterdam, The Netherlands. Currently, I’m working full time at an architectural visualization company called De Beeldenfabriek in Rotterdam. Besides my full-time job, I’m working as a freelance 3D artist for my own company Bureaubruin.
Since I was a little kid I always liked to draw and put my imagination onto paper. This interest in drawing and creating made me decide to study Industrial Design. During my Industrial Design studies, I had to learn 3D modeling (we used SolidWorks) and this opened up a whole new world of possibilities. I could now create 3D models out of my 2D Drawings.
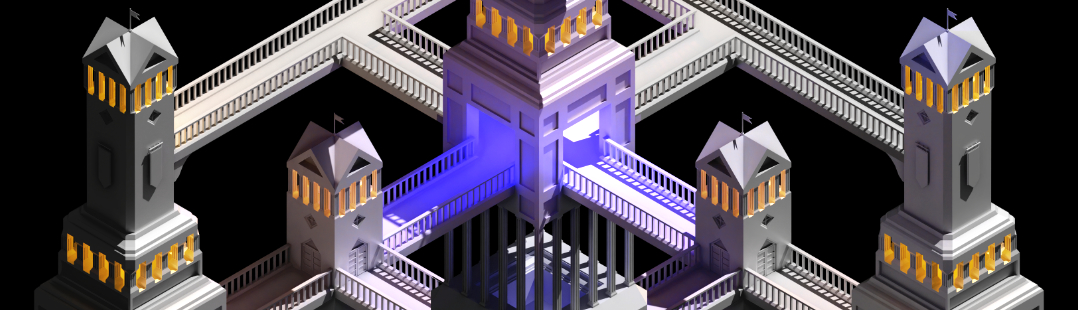
After I became familiar with 3D modeling, I found out about 3D rendering software and started to learn Keyshot. I was amazed by how photorealistic some images were and I decided that I wanted to do the same. This would give me the ability to make photorealistic images from the ideas in my head, something that I could not imagine possible when I was a little kid! Inspired by 3D artists like Esben Oxholm, Will Gibson, and Liam Martin, I started to follow every tutorial I could possibly find online. After quite some time I was able to create some decent images:

After my bachelor’s I decided to leave Keyshot behind as the software license became quite expensive after graduating. I started looking around for alternatives and stumbled upon Blender. I could not believe it was a free piece of the software as it was so extensive in its features! I installed it and decided that I should learn Blender the same way as I learned Keyshot: follow along with every tutorial I could find.
I started with an introduction course by Grant Abbitt on YouTube. By following along with his tutorials I became familiar with the user interface and basic modeling and rendering skills. After I felt comfortable moving around in the Software I switched over to the tutorials by Blender Guru and began with the Blender beginner modeling tutorial. This tutorial series taught me new modeling techniques and my first rendering techniques in Cycles. I really like Andrew’s way of teaching and later followed along with all his tutorial series, including the series about artistic theories.
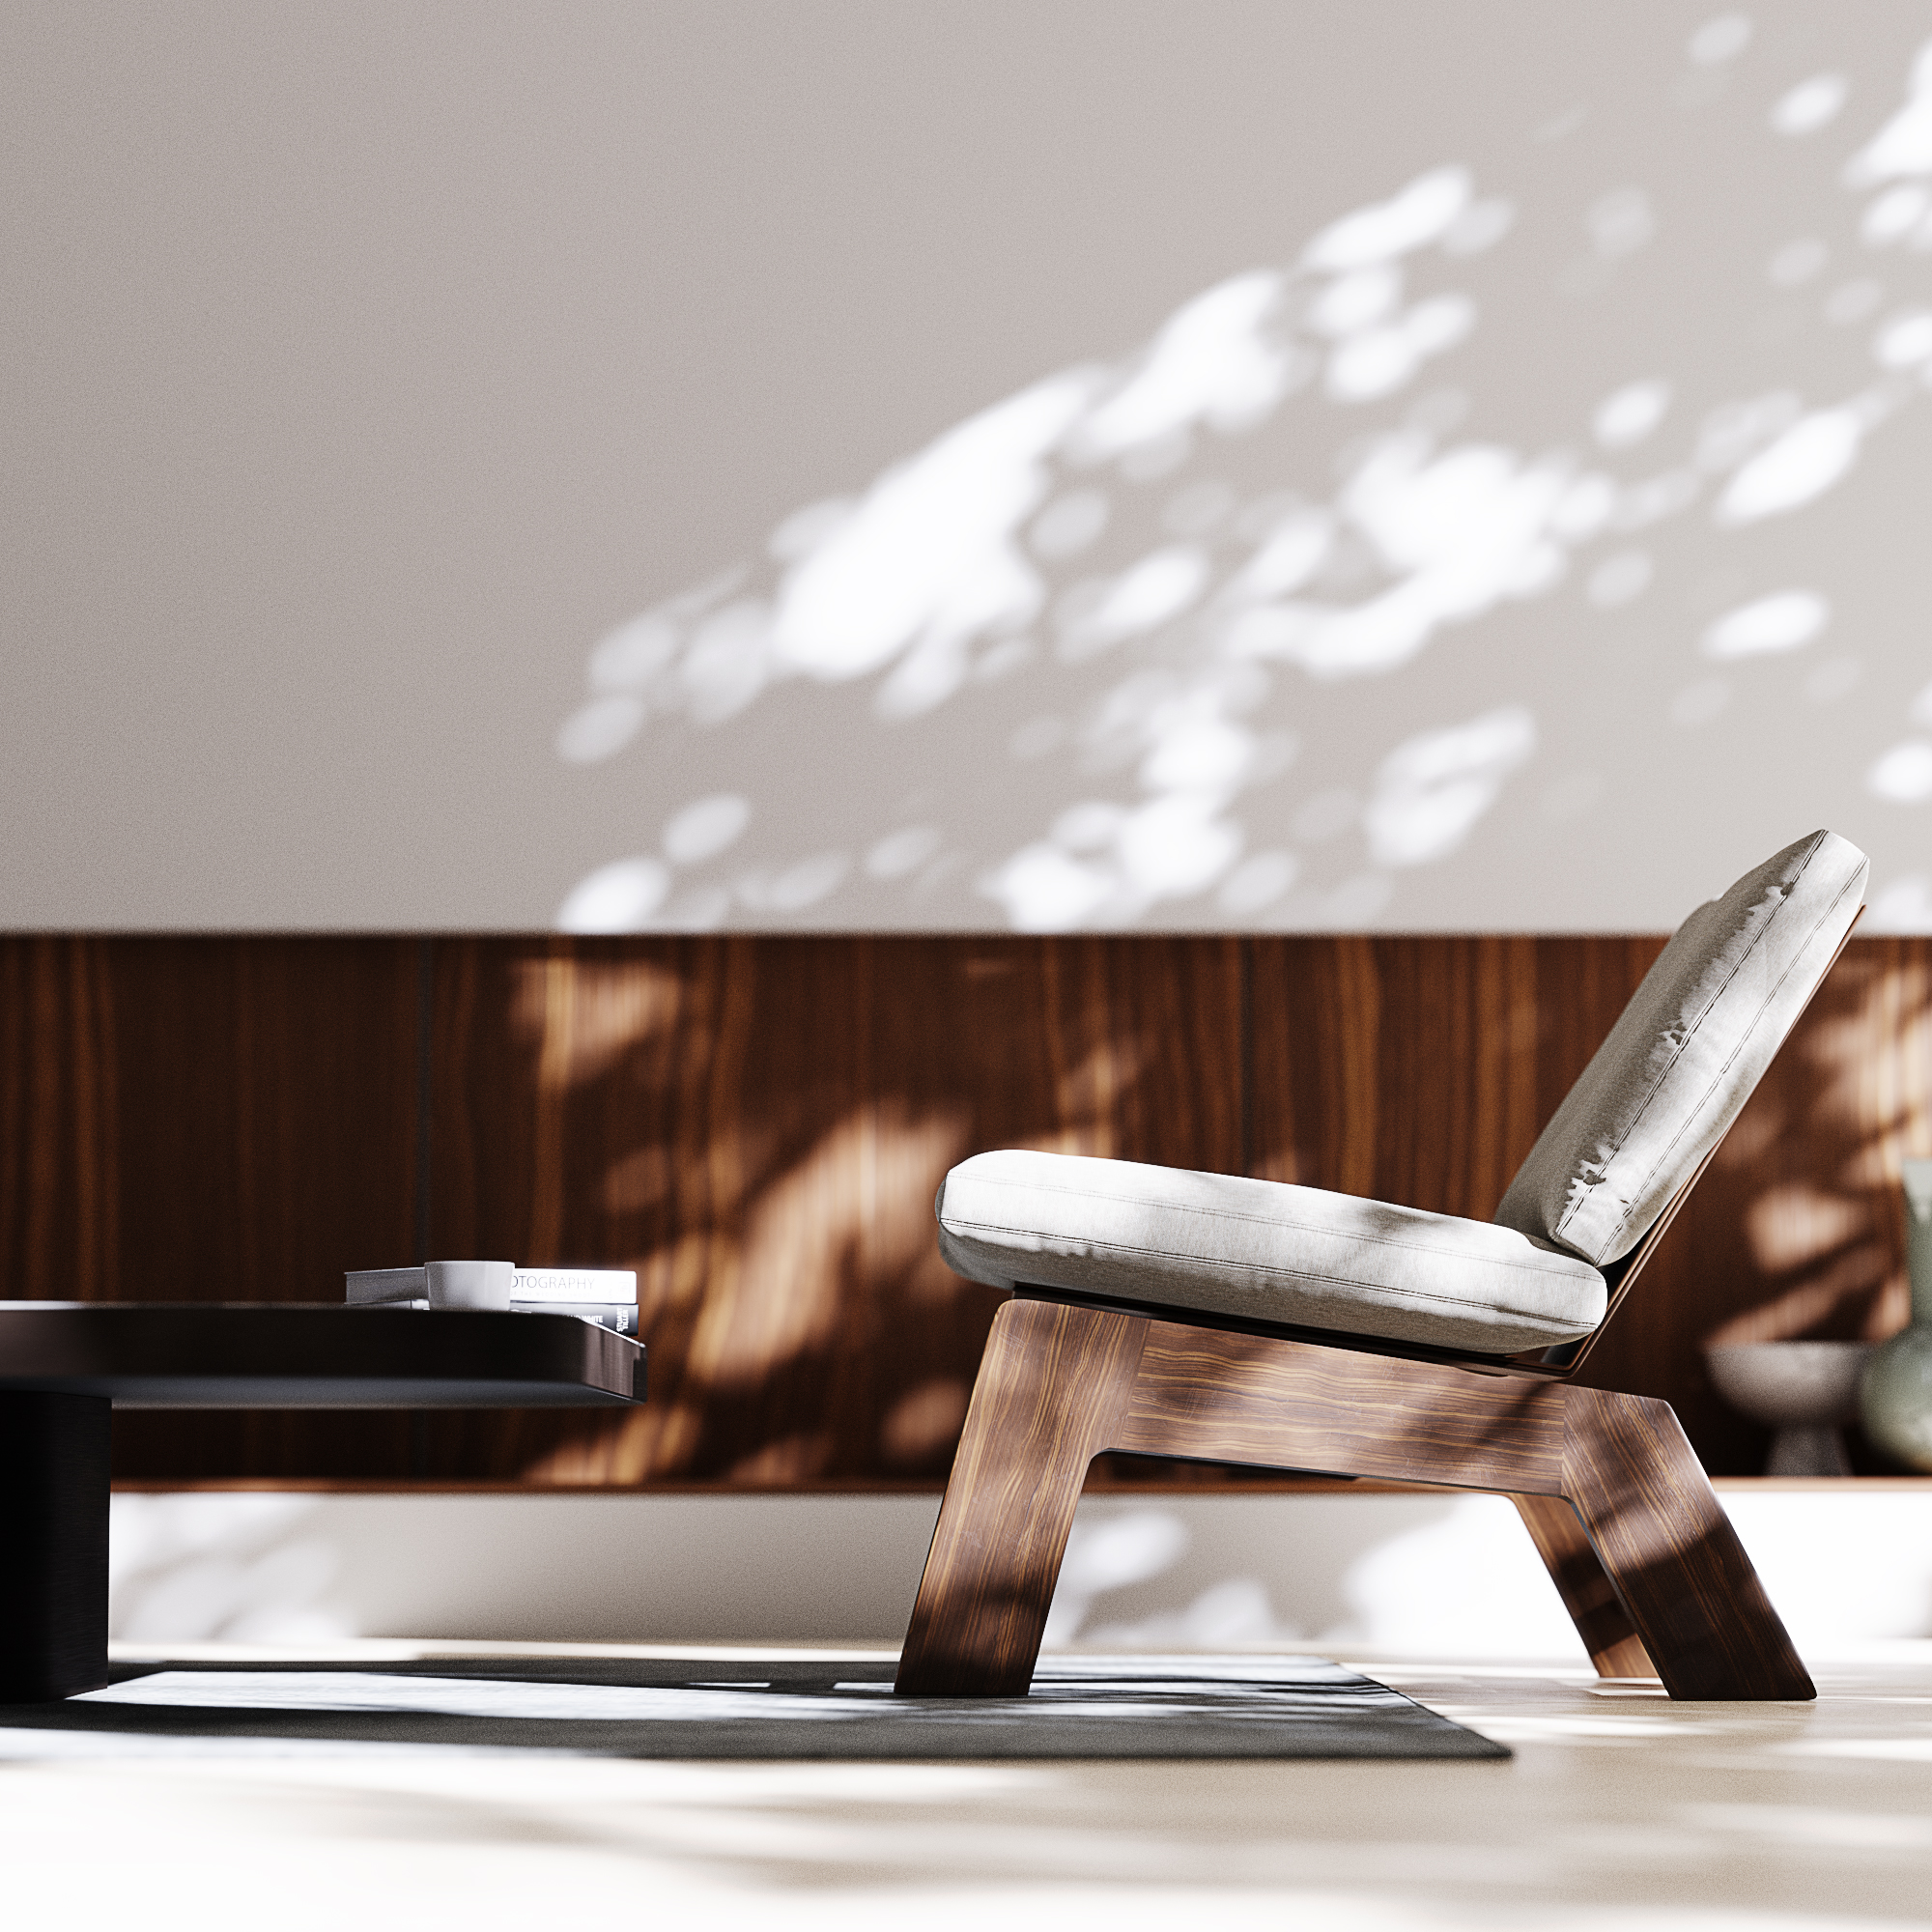
I always used the techniques shown in the videos but tried to use them in personal projects. This was the perfect way to learn the software and to create some personal content for my portfolio. The next images, for example, were made using the following tutorials.
- Couch tutorials for the cushions
- Beginner modeling tutorial for the wooden frame
- Interior lighting tutorial for the lighting
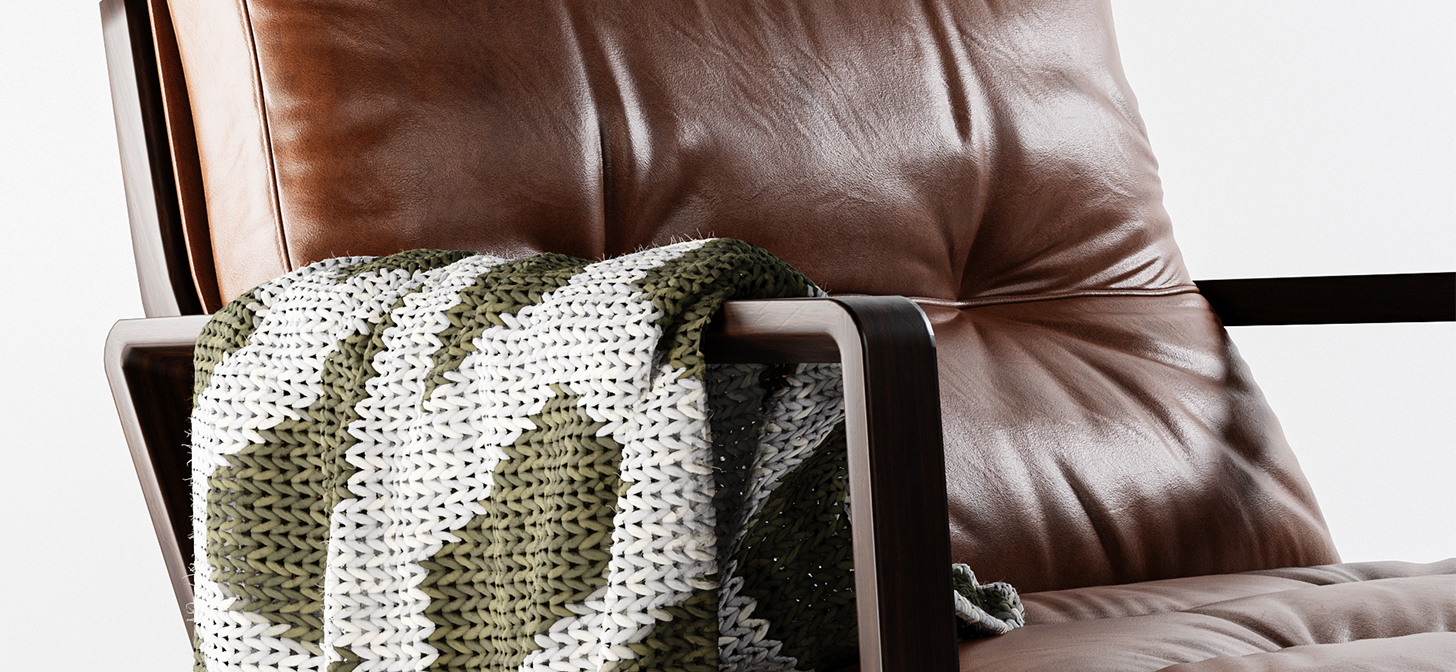
This way of making images kept the drive going to learn new things with every project. This knitted cloth and leather material study was no different.
Inspiration
Since I started focusing on 3D rendering, I began to post my work on Instagram (@bureaubruin) to receive some feedback from other 3D artists and designers. After some time, I came across the weekly render challenges from @colourweekly. They release a color or material scheme for the week, and 3D artists can submit their work that corresponds with the challenge. The challenge that week was Leather.
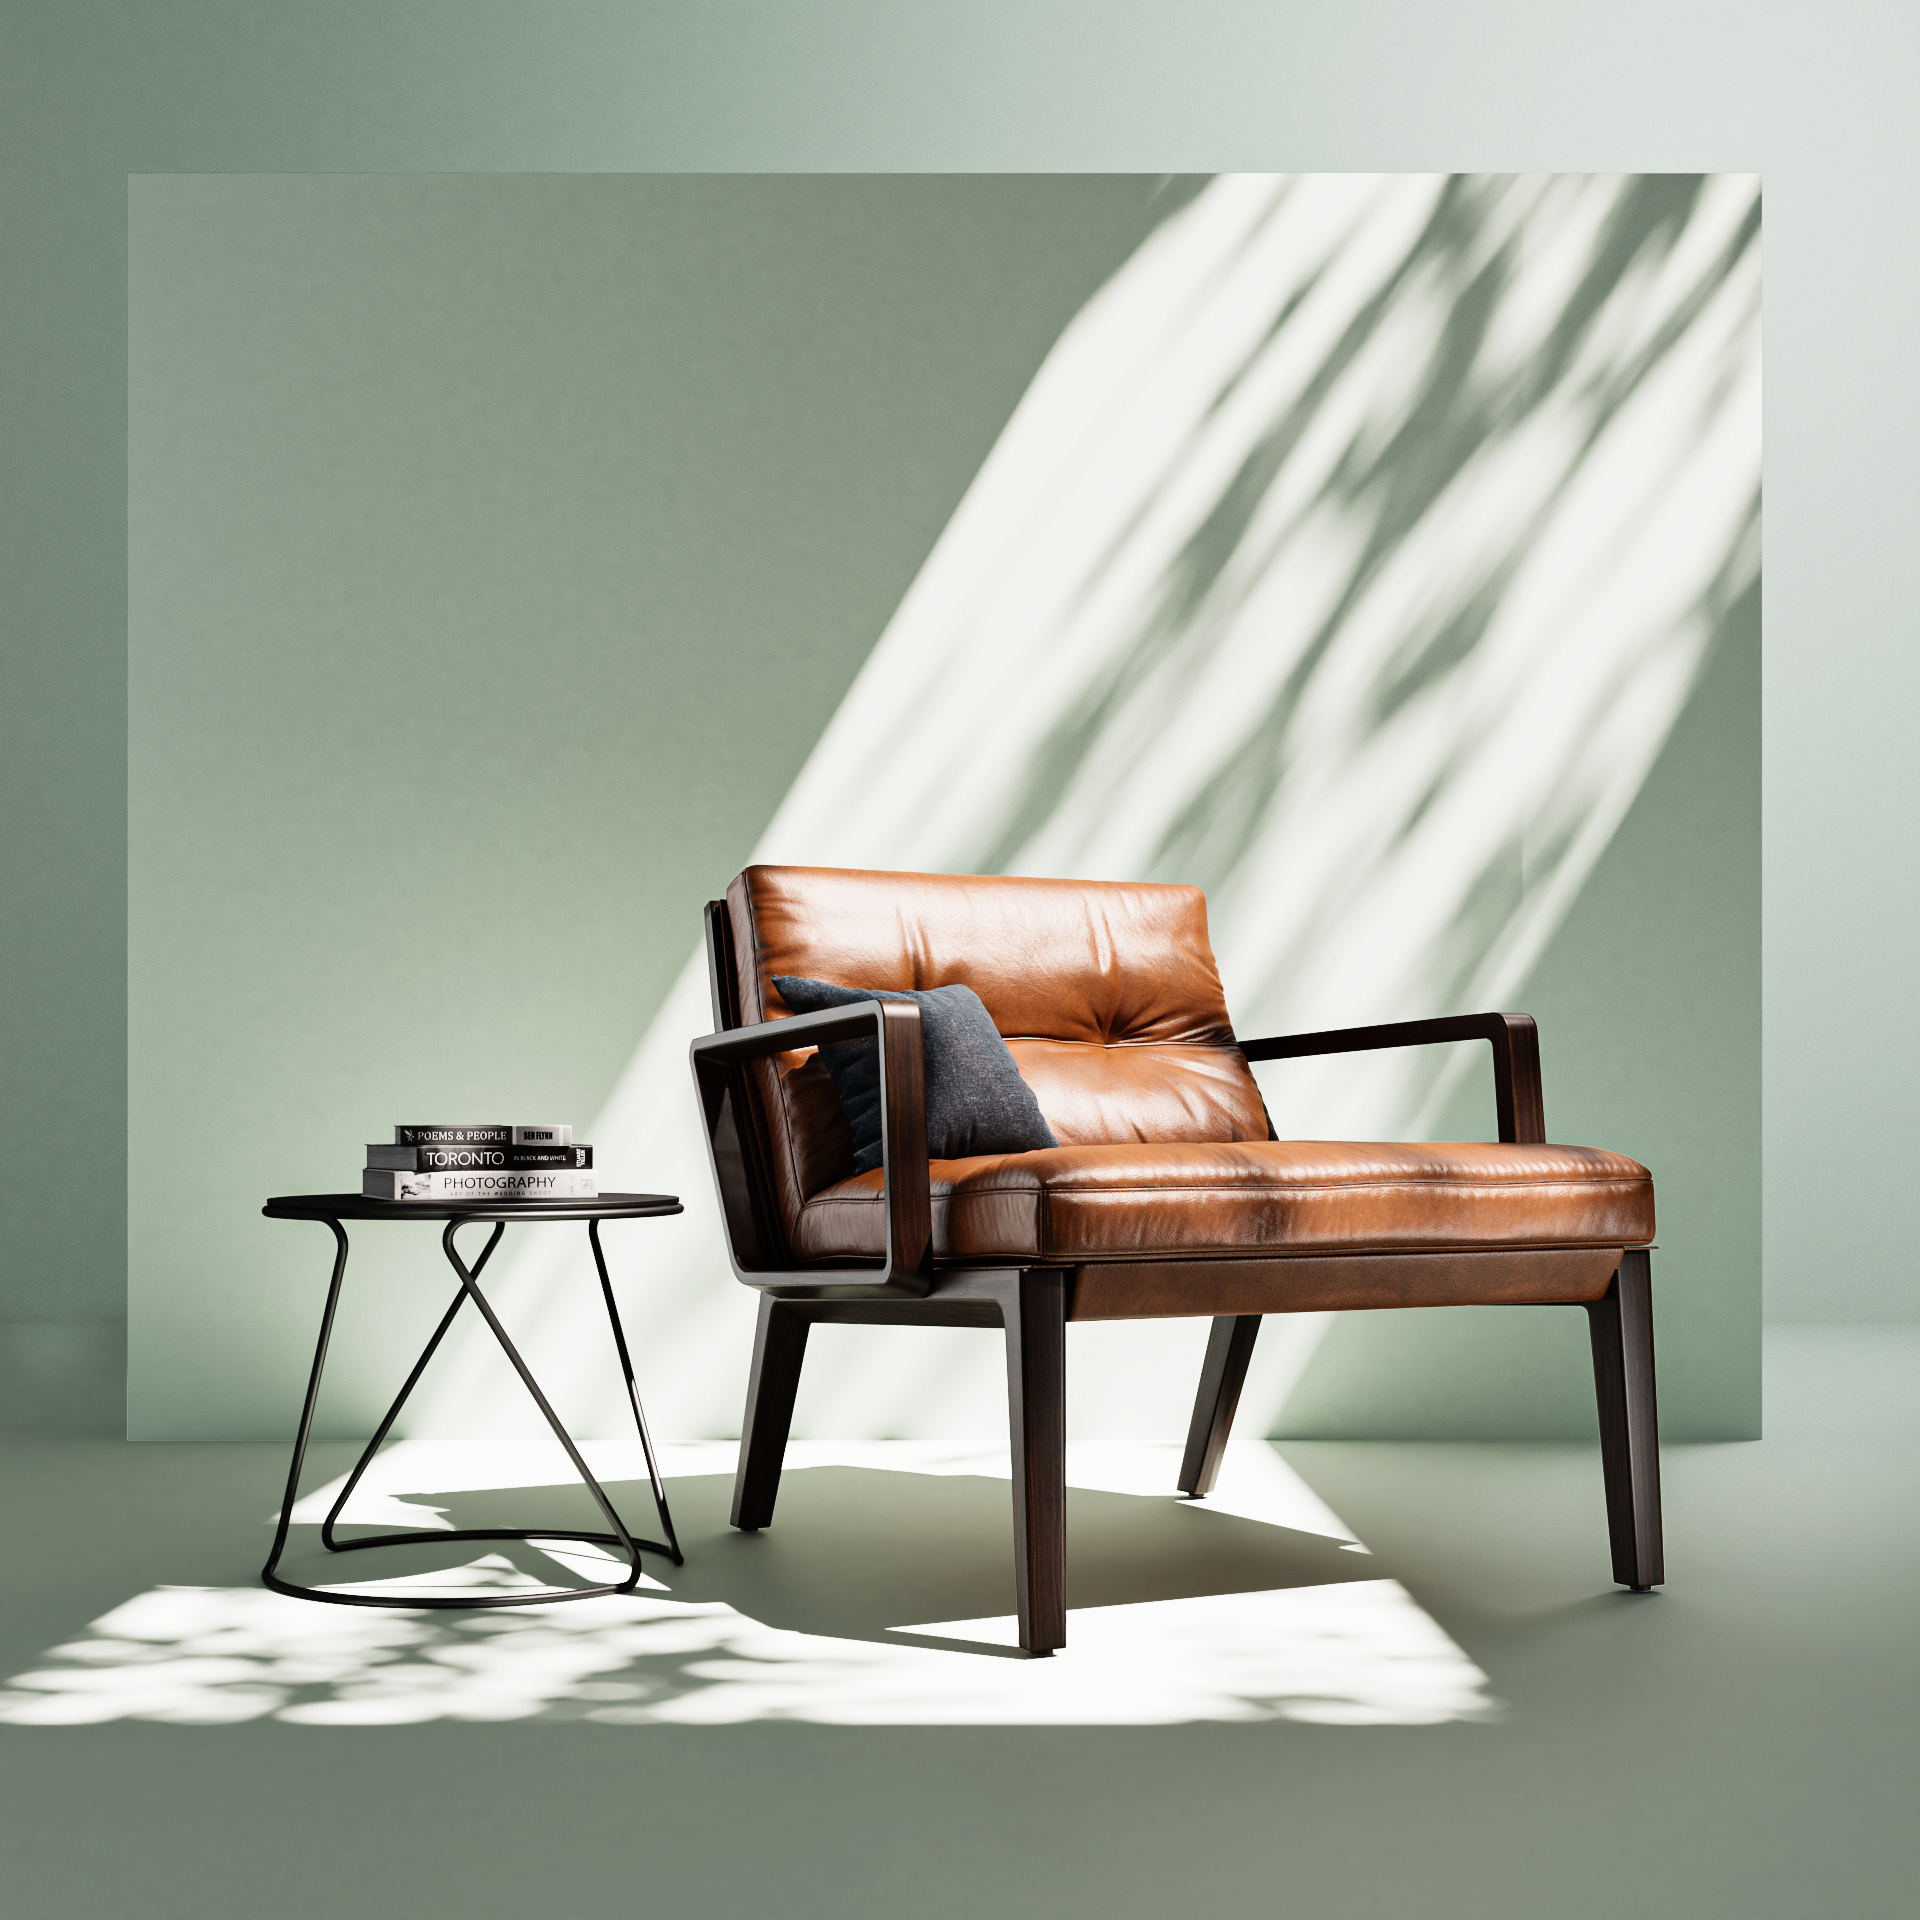
For the start of my project, I looked around in my library of 3D models. I’ve recently downloaded a lot of high-quality models from dimensiva to use in my archviz work. Some were paid, but they also have a great selection of free models. These models are highly detailed with ready-to-use UV mapping so the leather chair was perfect as a base for this project.
I decided to create my own leather textures by using the leather generator from Poliigon. After I created some textures, where I spent a lot of time on the little imperfections, the texture was still not entirely to my liking. Therefore I decided to combine the texture maps of two materials in Blender to achieve the desired results.
Once the textures were made, it was time for the lighting. I like to keep my lighting setup simple and try to not overcomplicate things. There is no lighting solution that fits all of your projects so I always try out different lighting techniques with each project. For this project, I only used point lights with different strengths.
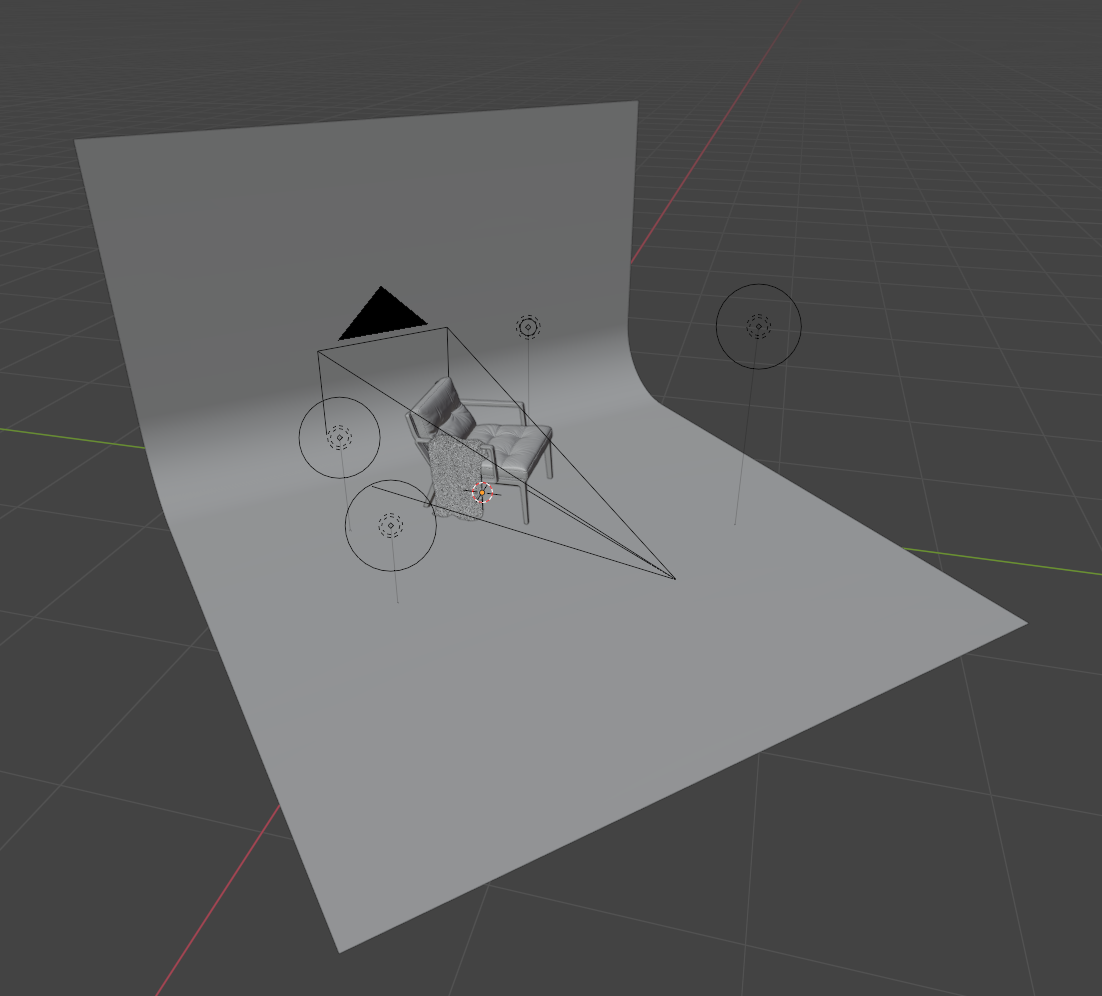
I always try to remember the lighting theory by Blender Guru explained in this video. The other videos about lighting theory are also really interesting. I highly recommend watching them all as it greatly helped me improve my lighting skills. Another great way of creating interesting lighting set-ups is to learn from actual photographers, like Karl Taylor, and try to recreate his lighting set-ups in 3D.
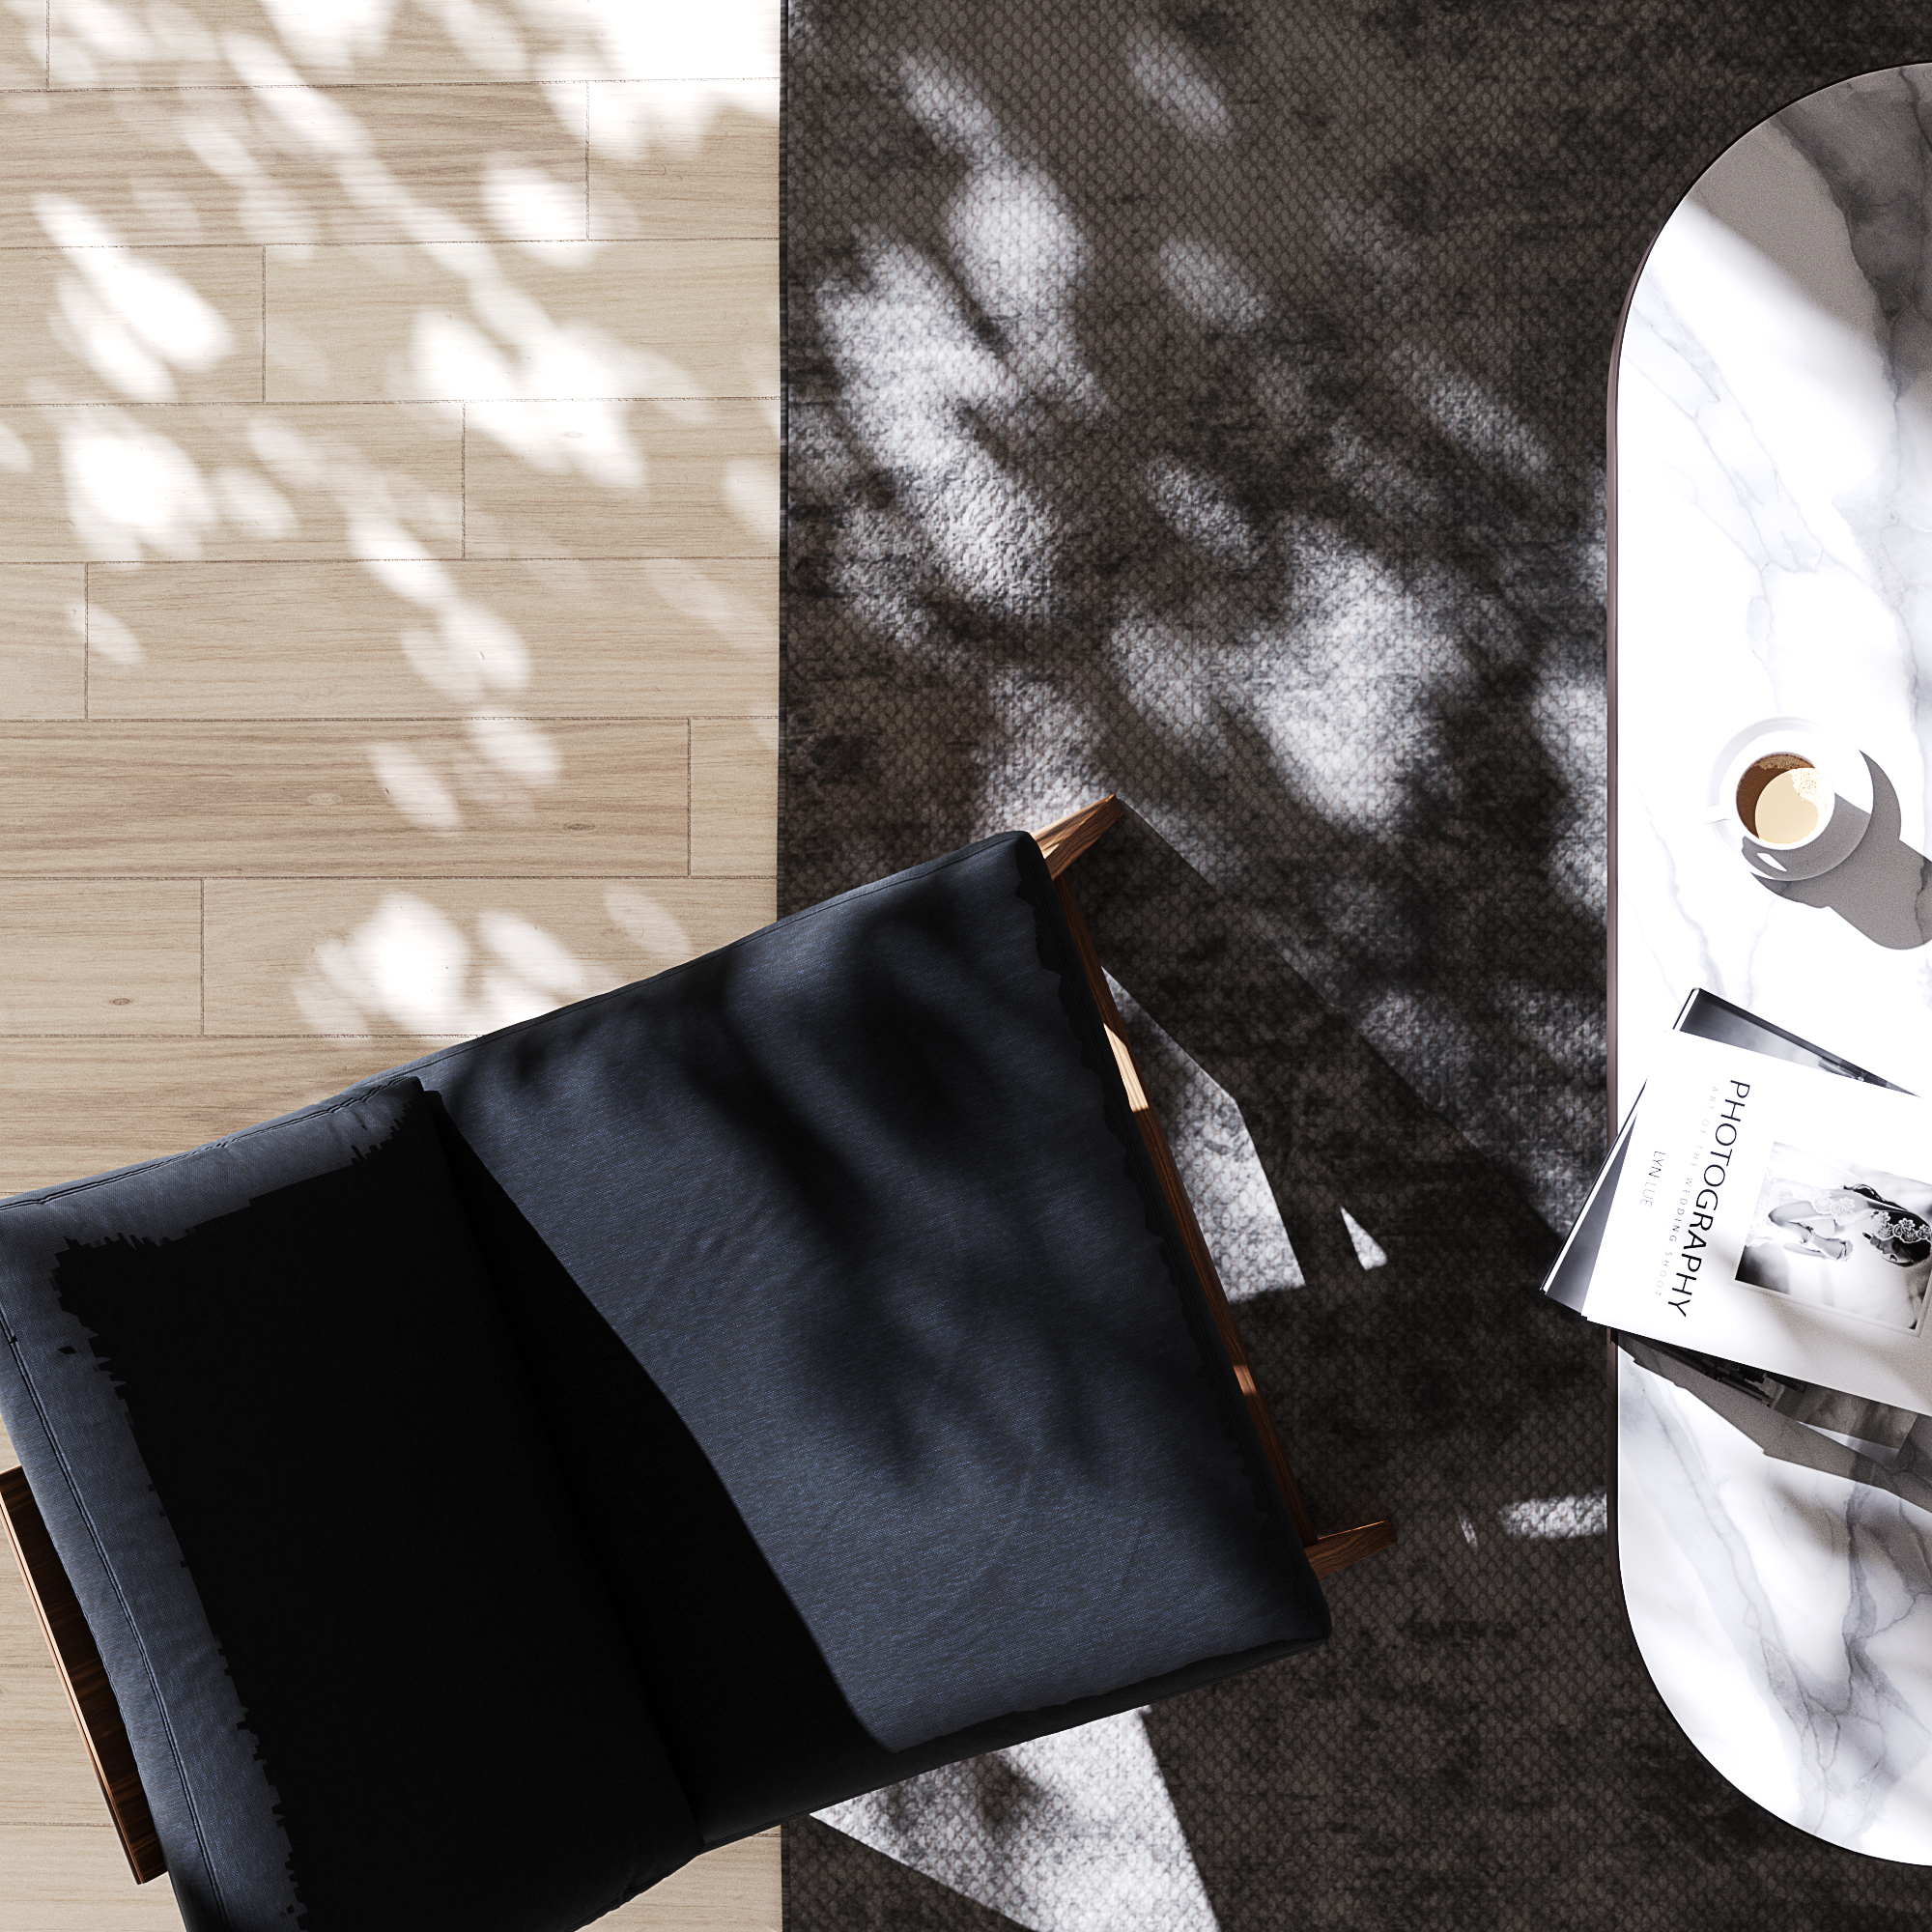
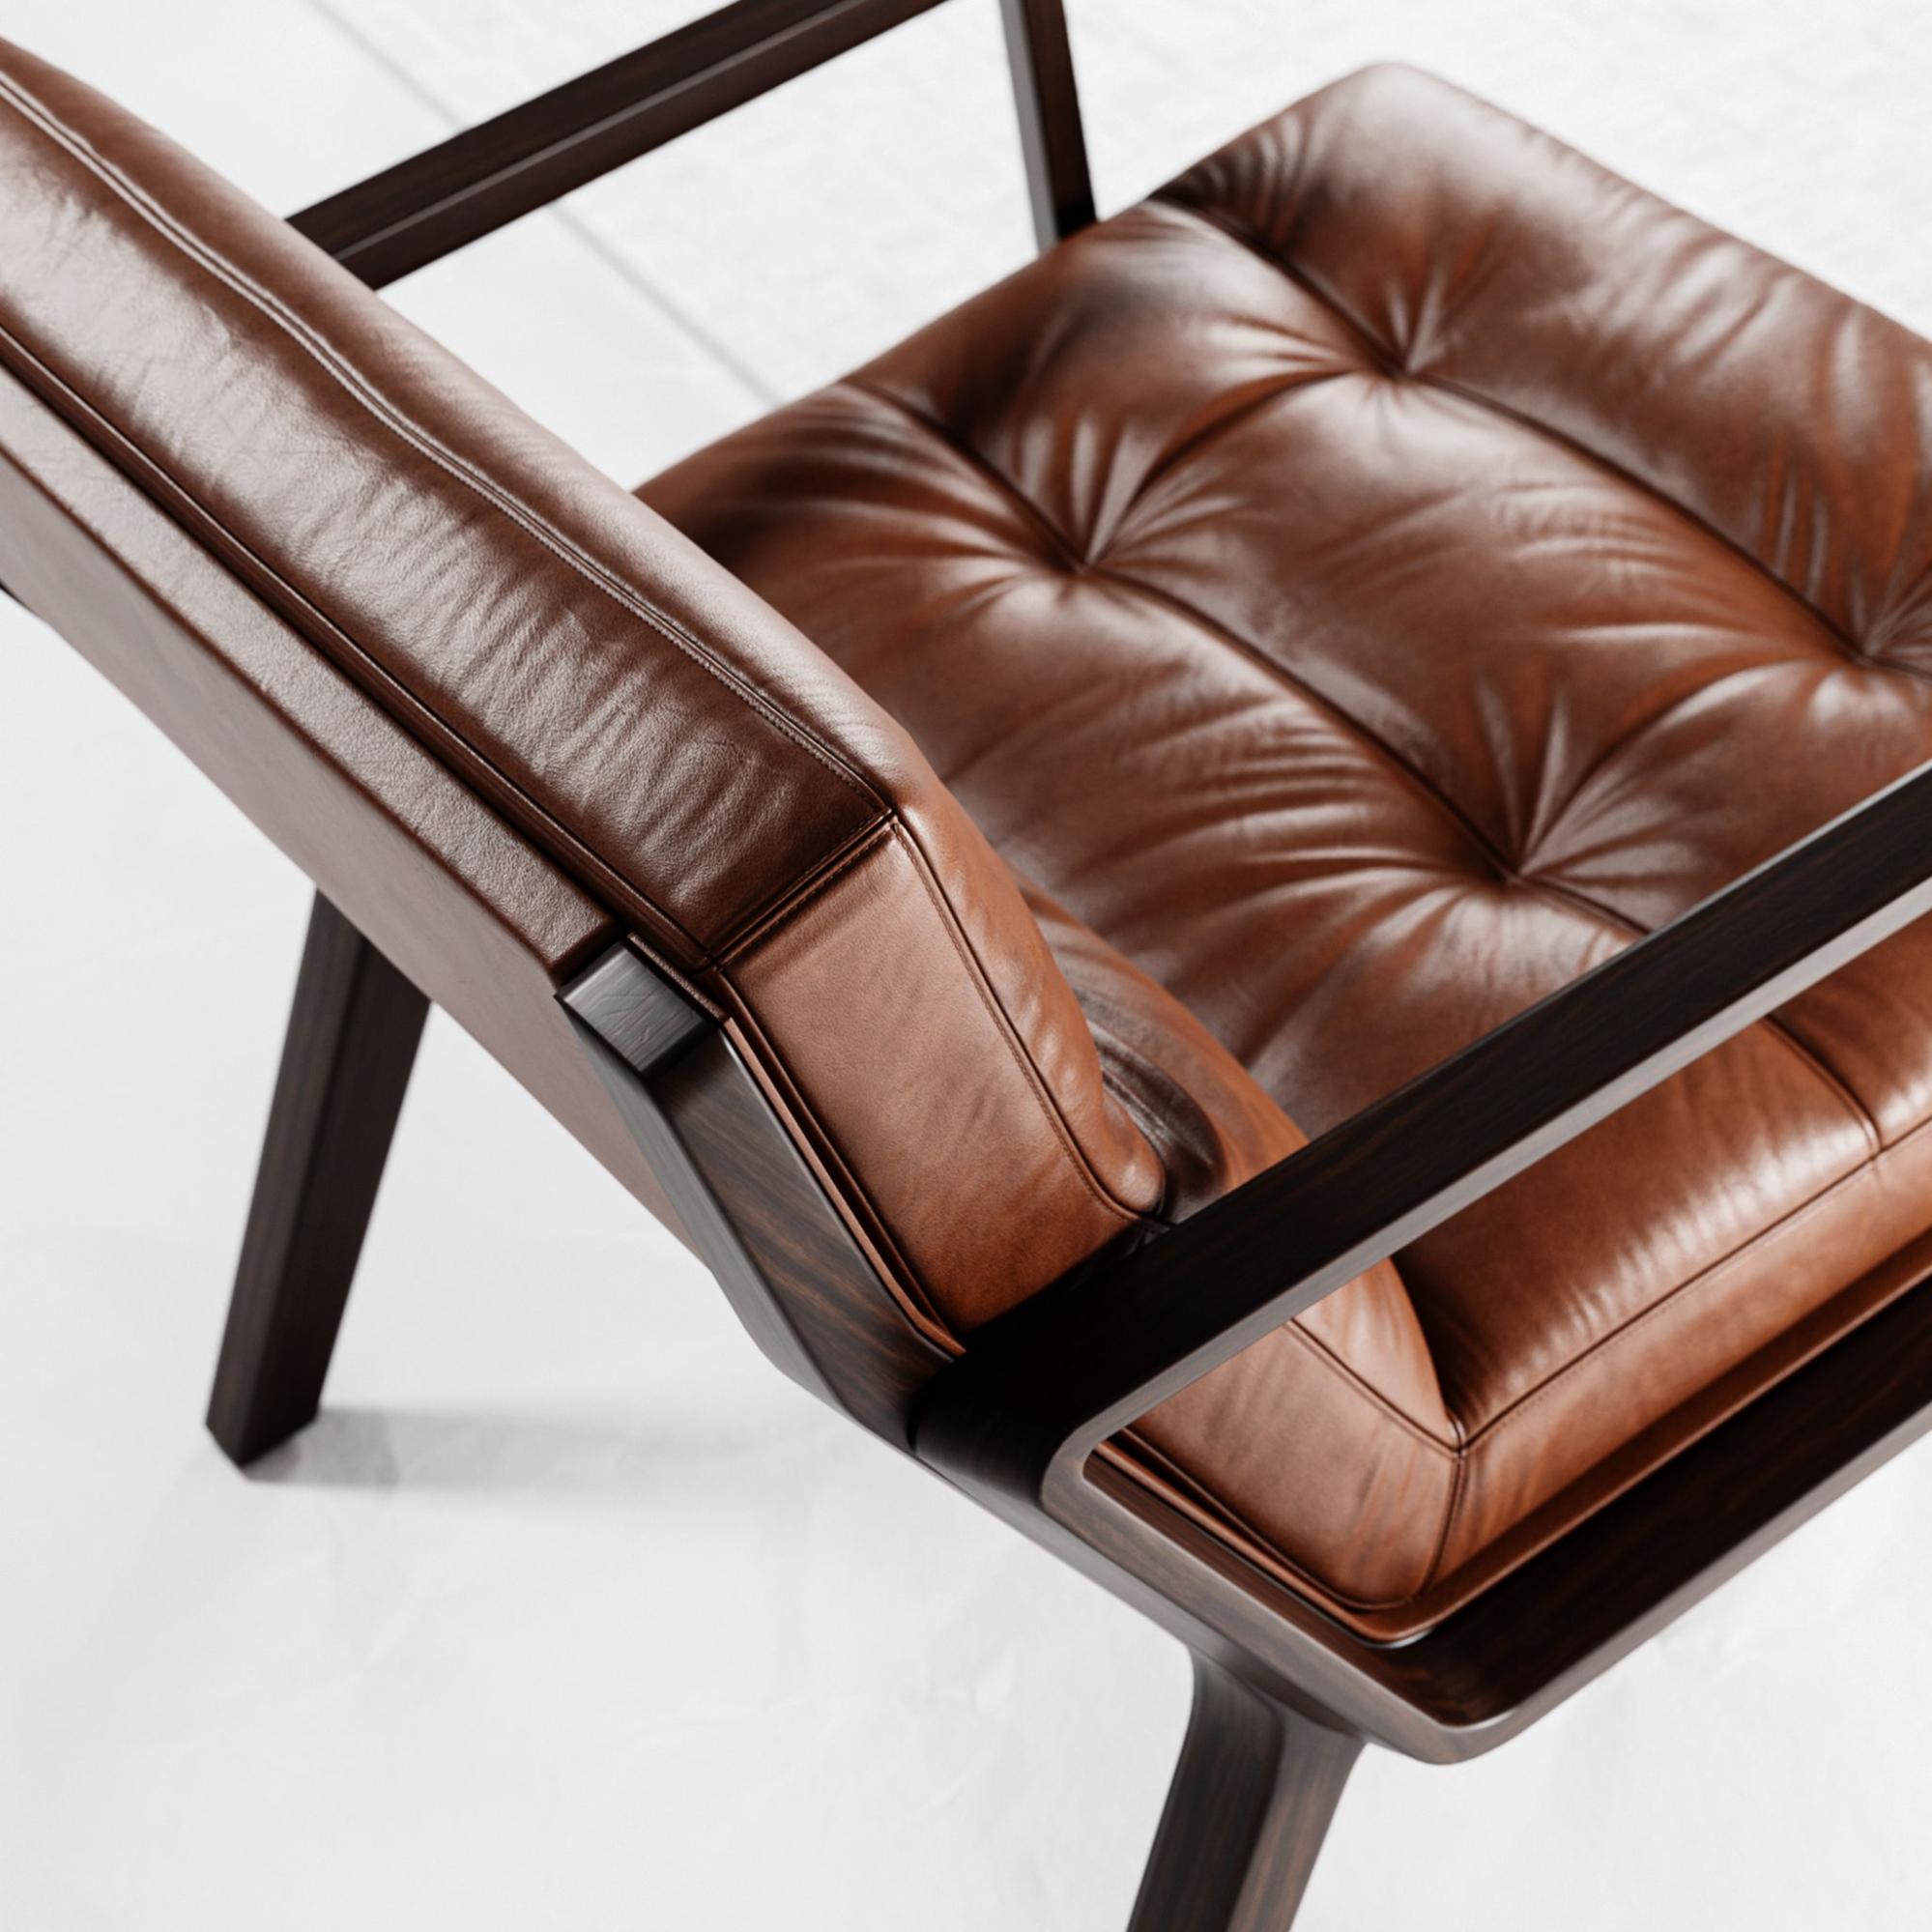
After I finished up the materials and the lighting, I rendered out the two images below for the render weekly challenge.
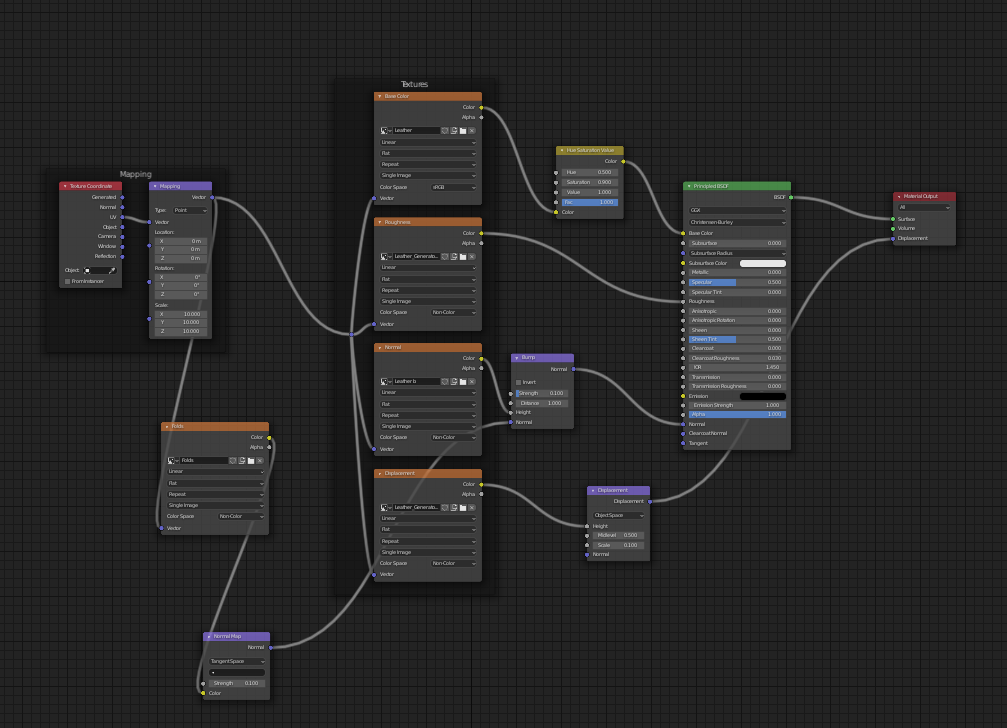
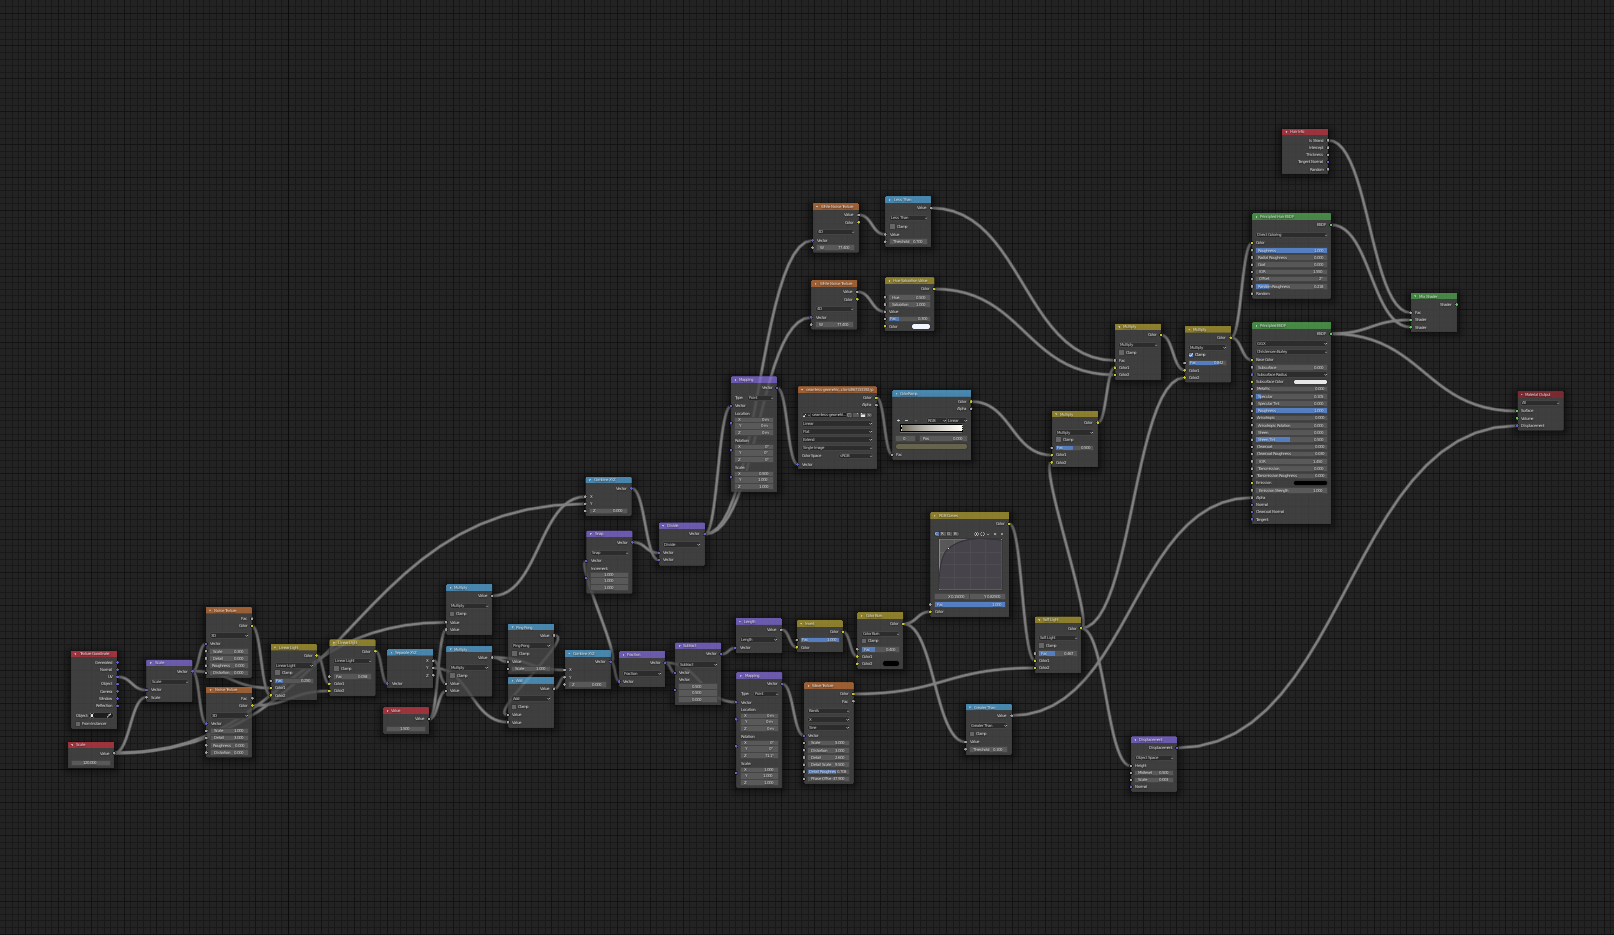
As I was working on the leather challenge I found another interesting tutorial by Erindale while browsing on YouTube. He explained how a knitted cloth object could be procedurally made. This baffled my mind and I had to give it a shot in my leather project as this matched perfectly with his tutorial. His tutorial covers the complete theory so I will not cover that in this article. If you are interested in creating a similar type of knitted object I recommend watching his tutorial. An overview of the node setup that has been used can be found underneath.
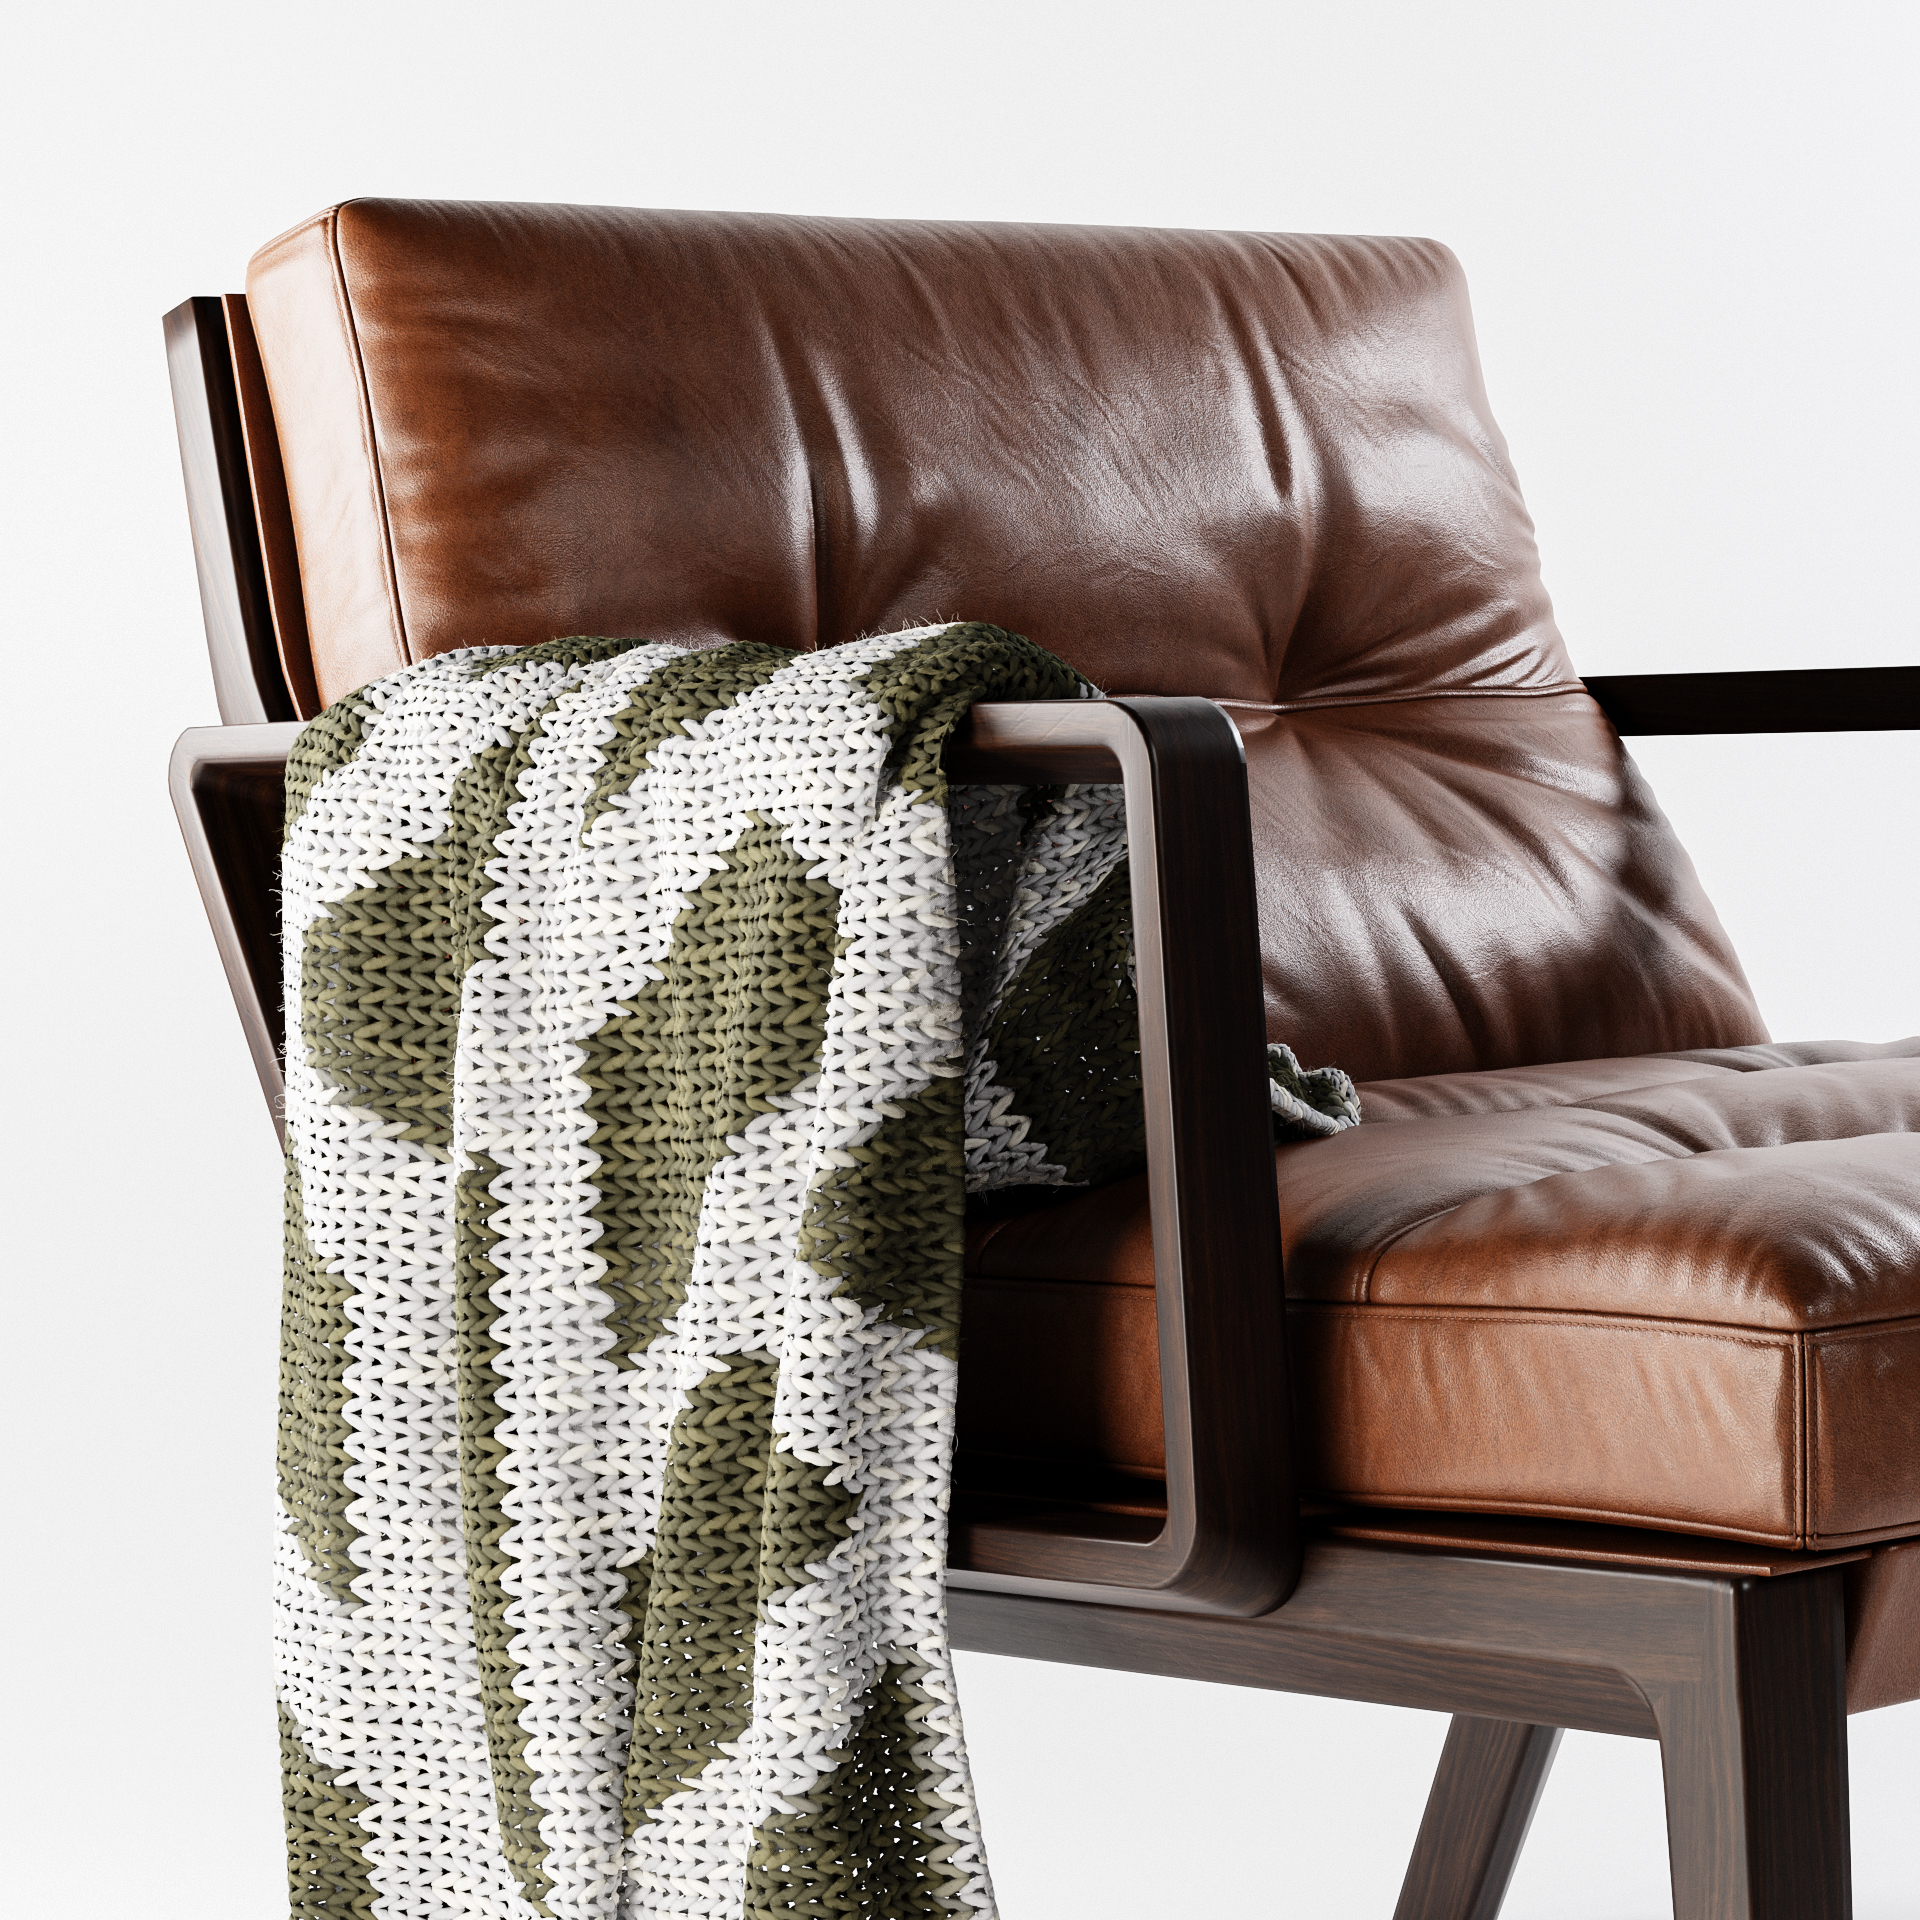
Combining the leather chair project with the tutorial by Erindale, and some minor adjustments to the contrast and the colors in Photoshop, resulted in the final image below.
That was a brief story about my 3D journey and my leather and knitted cloth study. Hopefully, this article gave you some new insights to incorporate into your own design process. Check out my Instagram page if you’re interested to see more of my work and don’t hesitate to reach out, I always like to help others and share my gained knowledge in Blender!
Peace, Thijs
About the Author
 Thijs de Bruin, Architectural Visualiser and 3D artist from Rotterdam, The Netherlands.


