
Behind the Scenes: Lapierre Road Bike
About me
Hello everyone! I am Yunus Emre from Istanbul, Turkey. Currently, I study Economics in Berlin, so right now I live in Germany. Even though I am not studying anything related to art, 3D design has always been a huge passion of mine. For that reason, I started to learn Blender in March 2020 during quarantine. I am self-taught and I have learned a lot, especially from YouTube and from people who share their work online. I can describe myself as an “aspiring Hobbyist” 3D artist.
Idea of the project
The idea of modeling a road bike came to my mind when I was looking for a new road bike for myself. I googled a little bit and, after a while, found this high-end road bike—my inspiration source—the Lapierre Aircode Drs 8.0 with Ultegra Di2 Groupset. I knew that I actually couldn’t afford this kind of bike, but I was sure that I was able to model it!
Preparation
Bikes, especially road bikes, have very different kinds of components that have to be modeled one by one. Therefore, I put together some of the images that I downloaded online in one PureRef file. These are the ones that I imported into Blender. But I must mention that I used tons of images as reference, I just didn’t download all of them. Here is how it looked at the end of the journey.
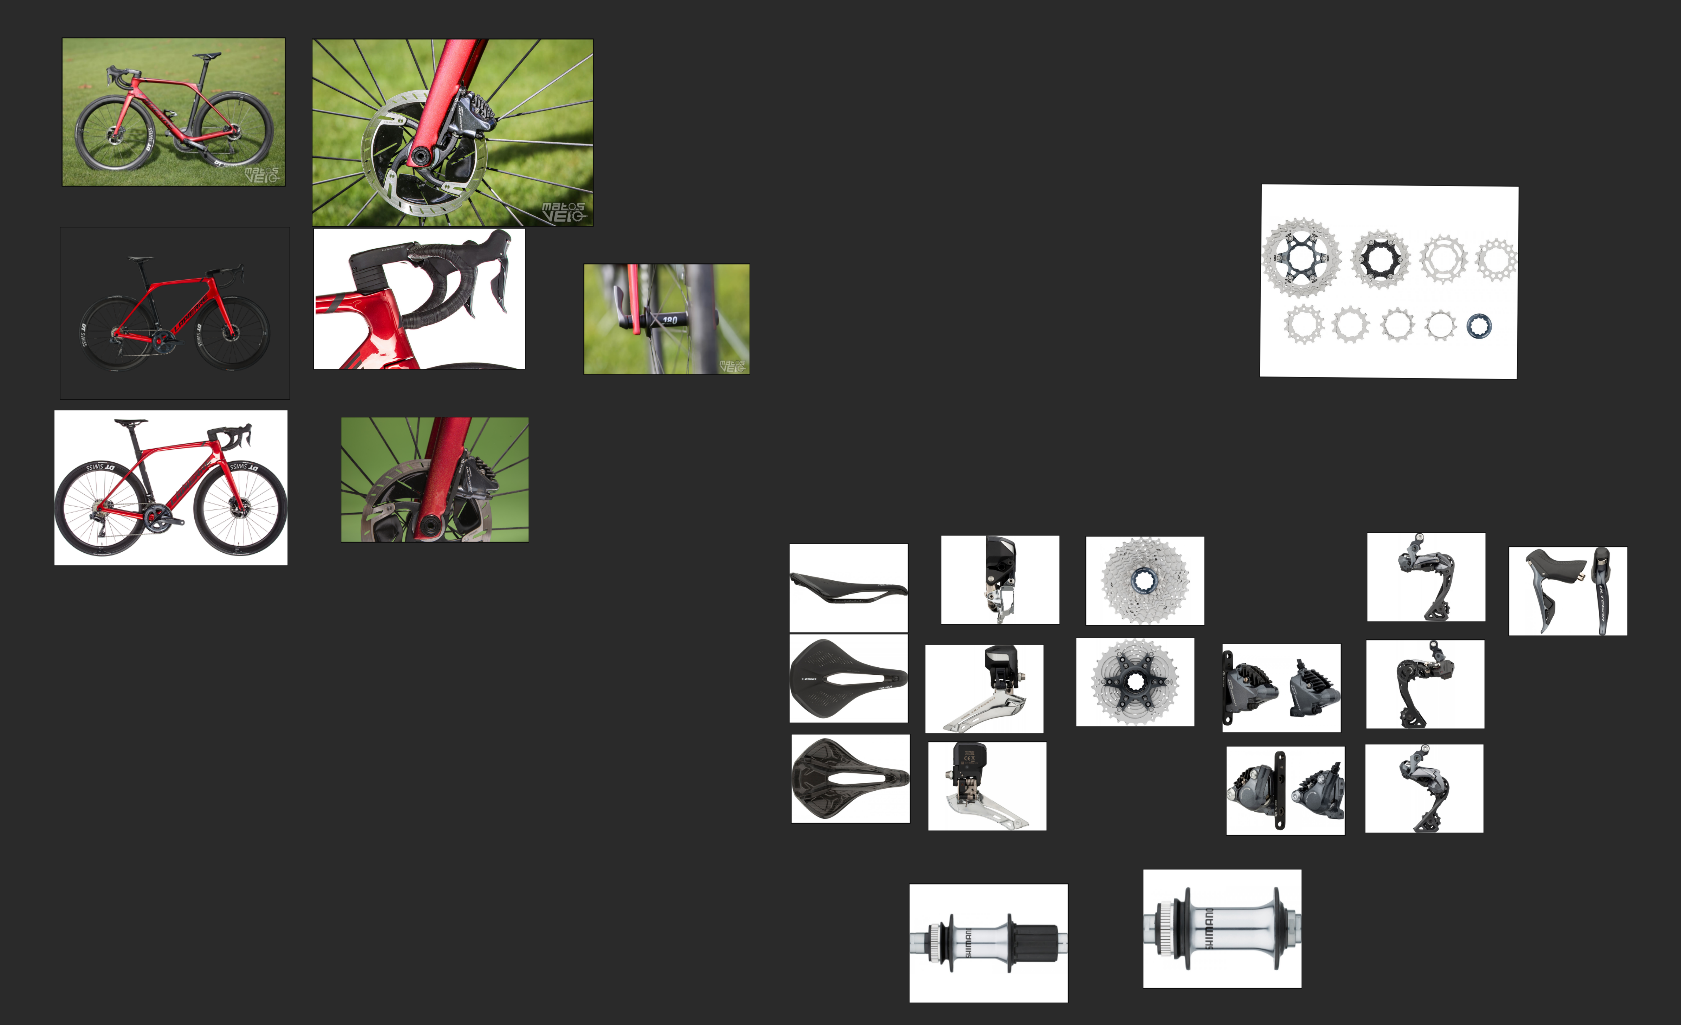
And it is, of course, necessary to be familiar with road bike anatomy in order to get the correct scale and form. I used this diagram mainly, but along the way I often went to my own bike and measured some distances or went online for important measurement information about components that I modeled.

Modeling
While I was modeling this bike, I learned, practiced, and used different kinds of techniques. I will try to explain shortly some of the interesting and important parts.
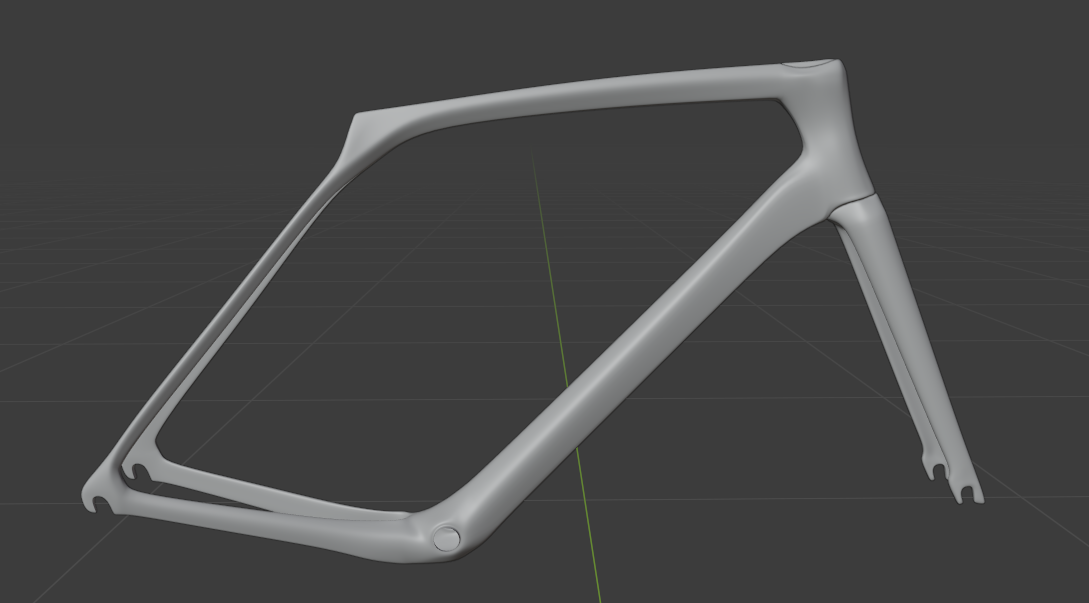
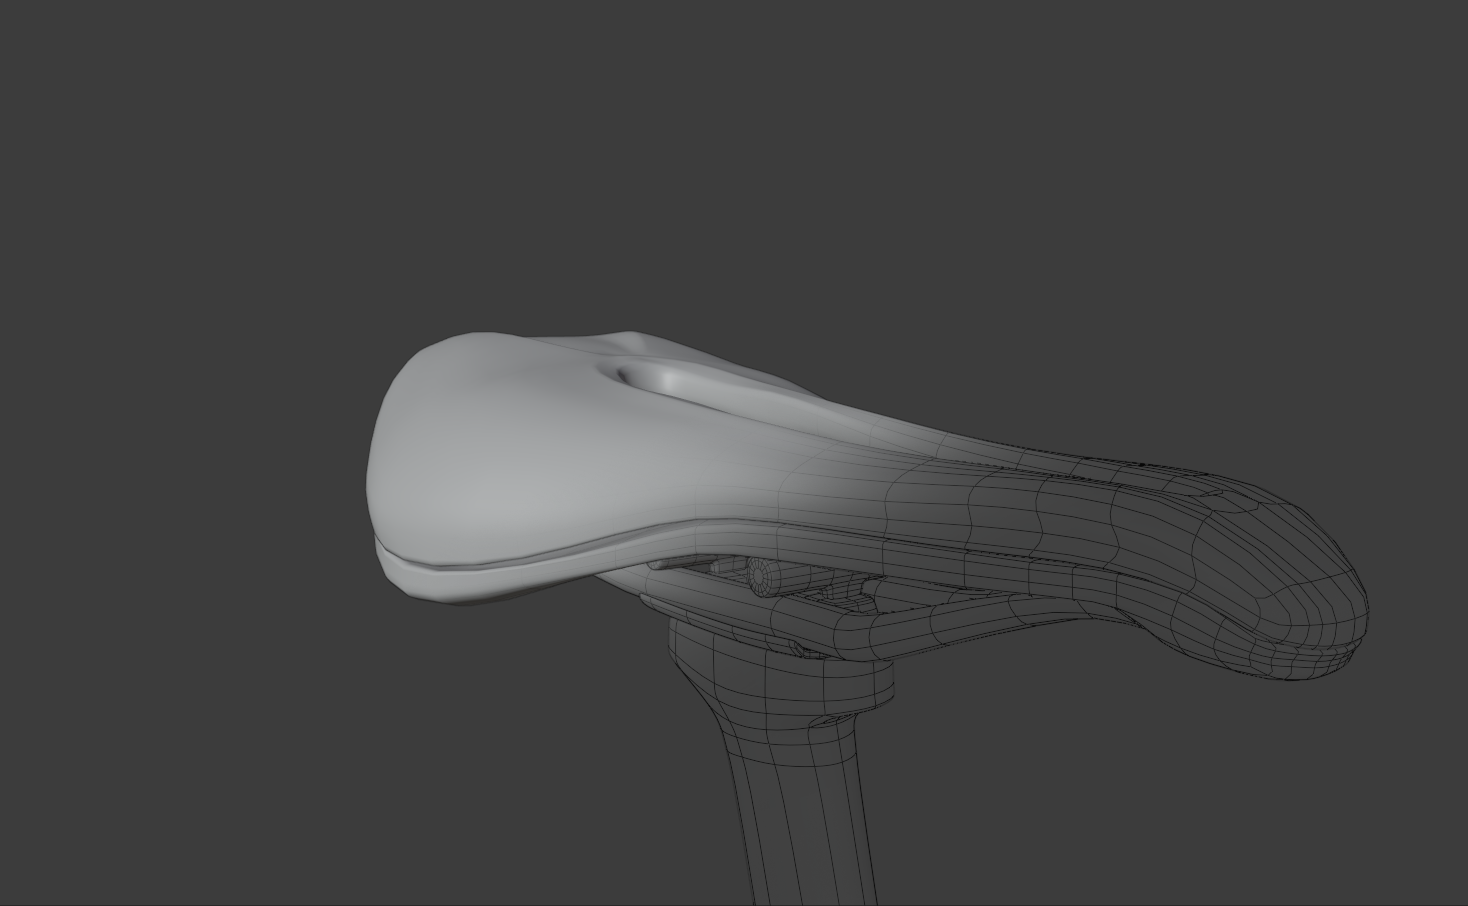
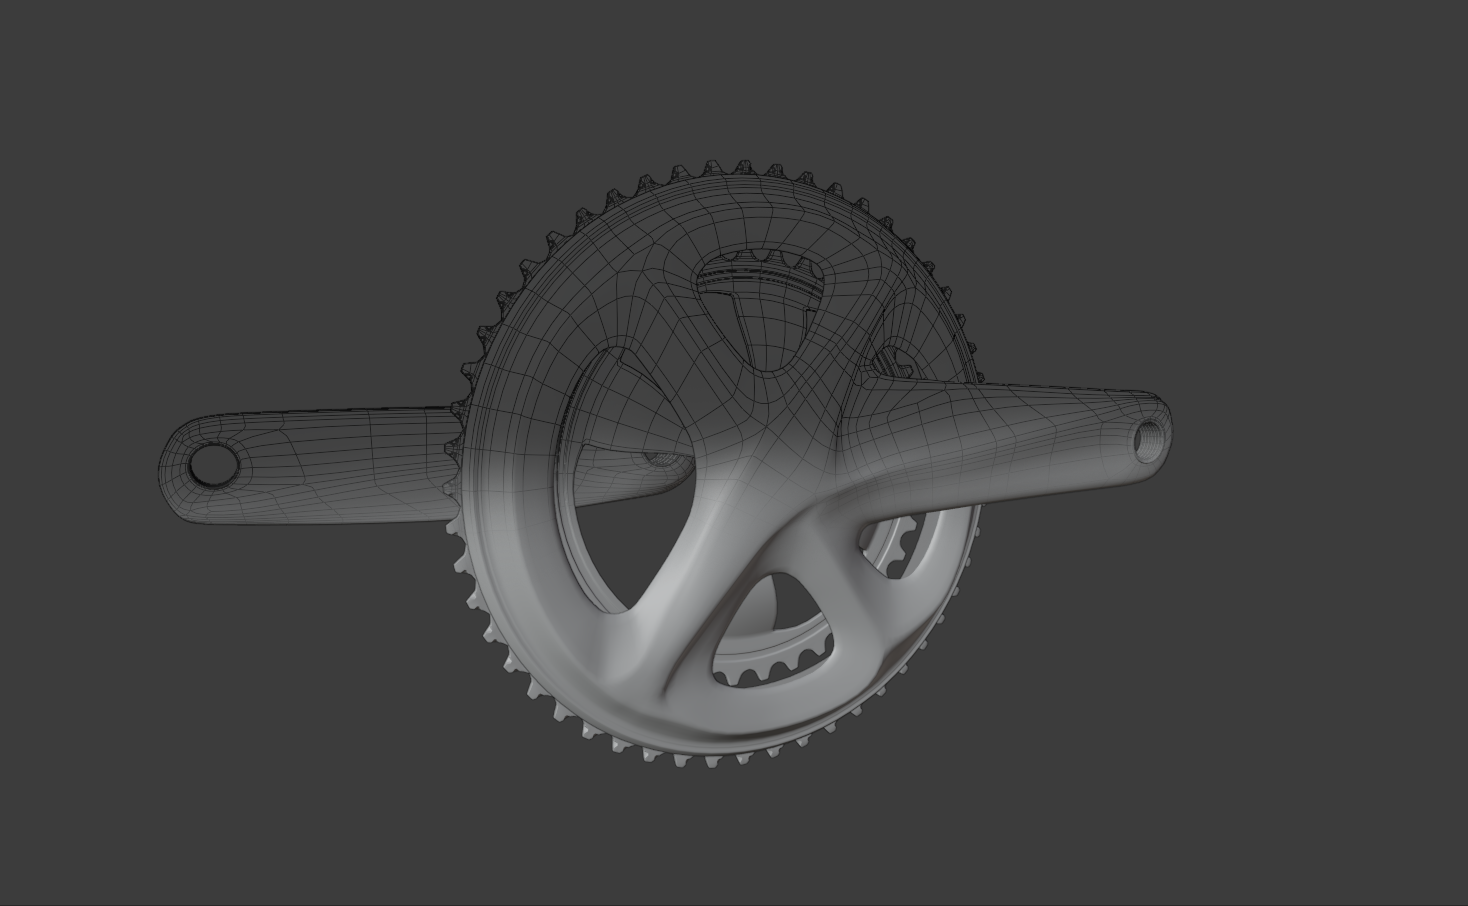
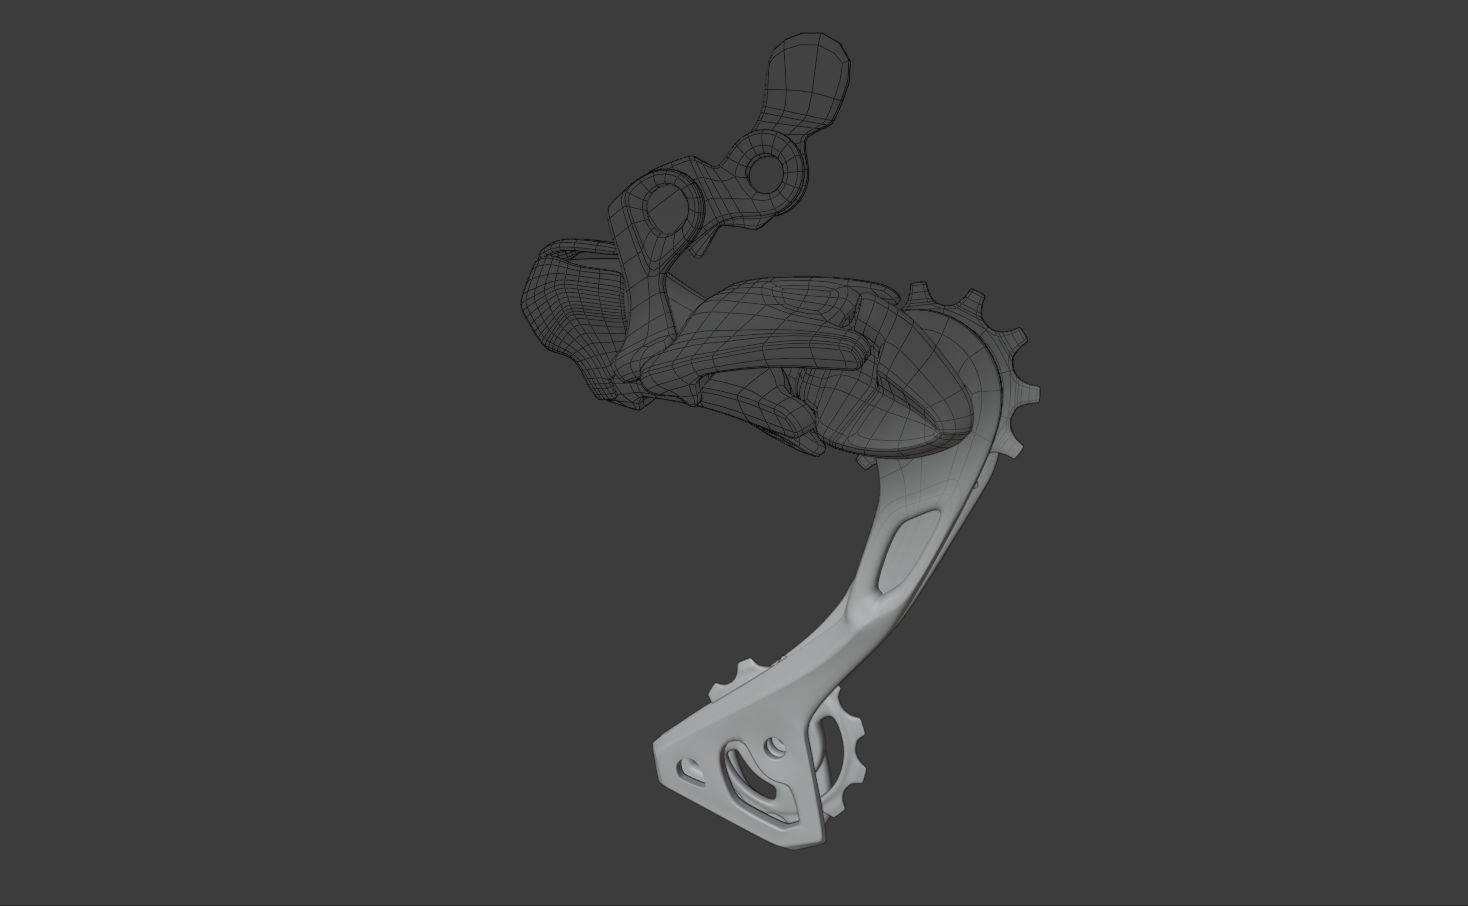
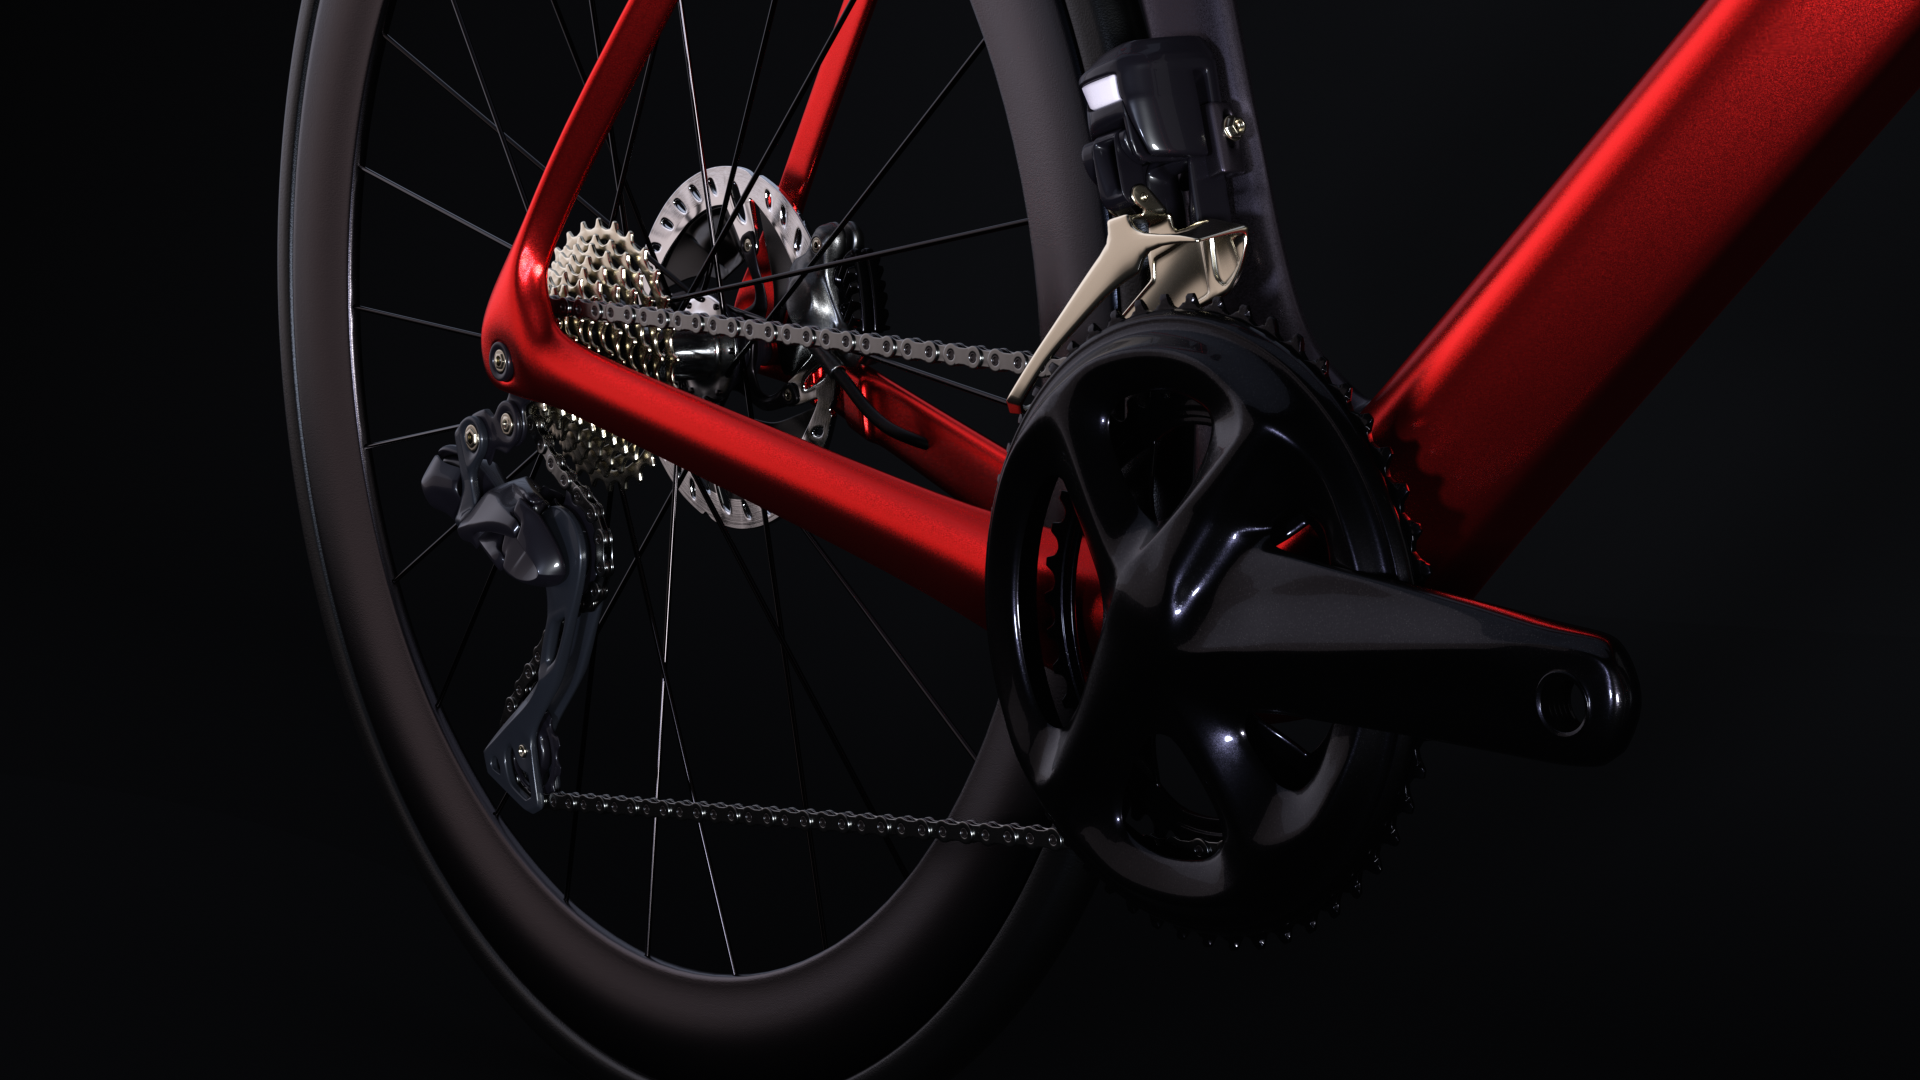
As I said earlier, there are many components, but the main part is, of course, the body. Therefore I modeled it first. It was pretty straightforward, only a basic mesh with subdivision and mirror modifiers.
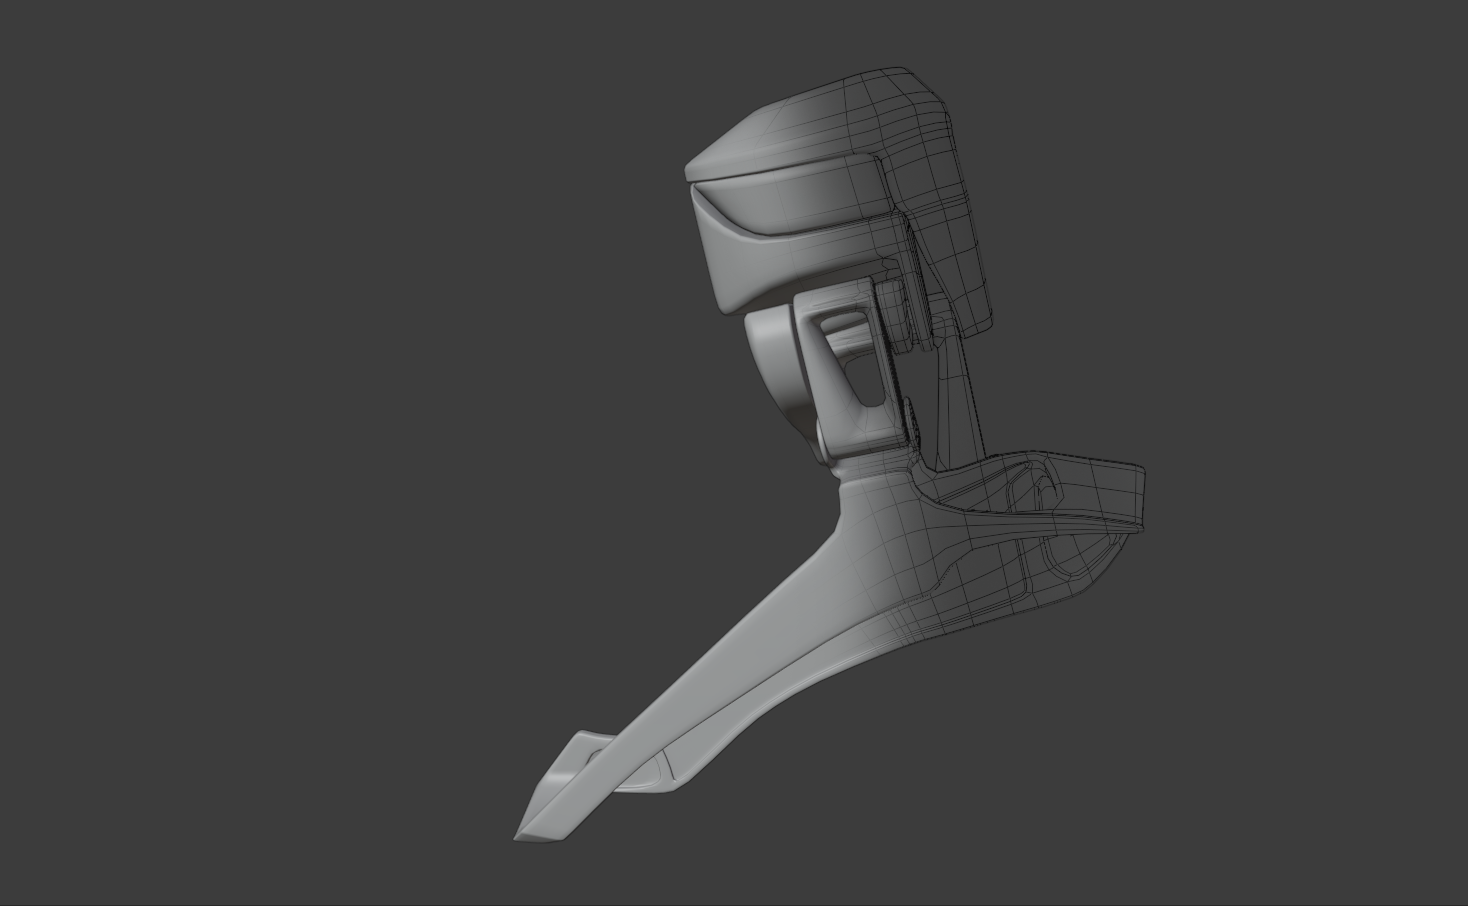
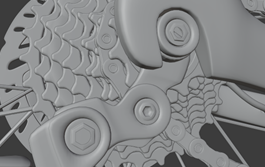
Some of the parts I modeled with polygon modeling and, of course, followed basic modeling principles. Base mesh first and then details based on loop cuts that I determined before modeling, based on the real product. I tried to keep my loops and meshes as clean as possible. Here you can see some pictures of different parts.

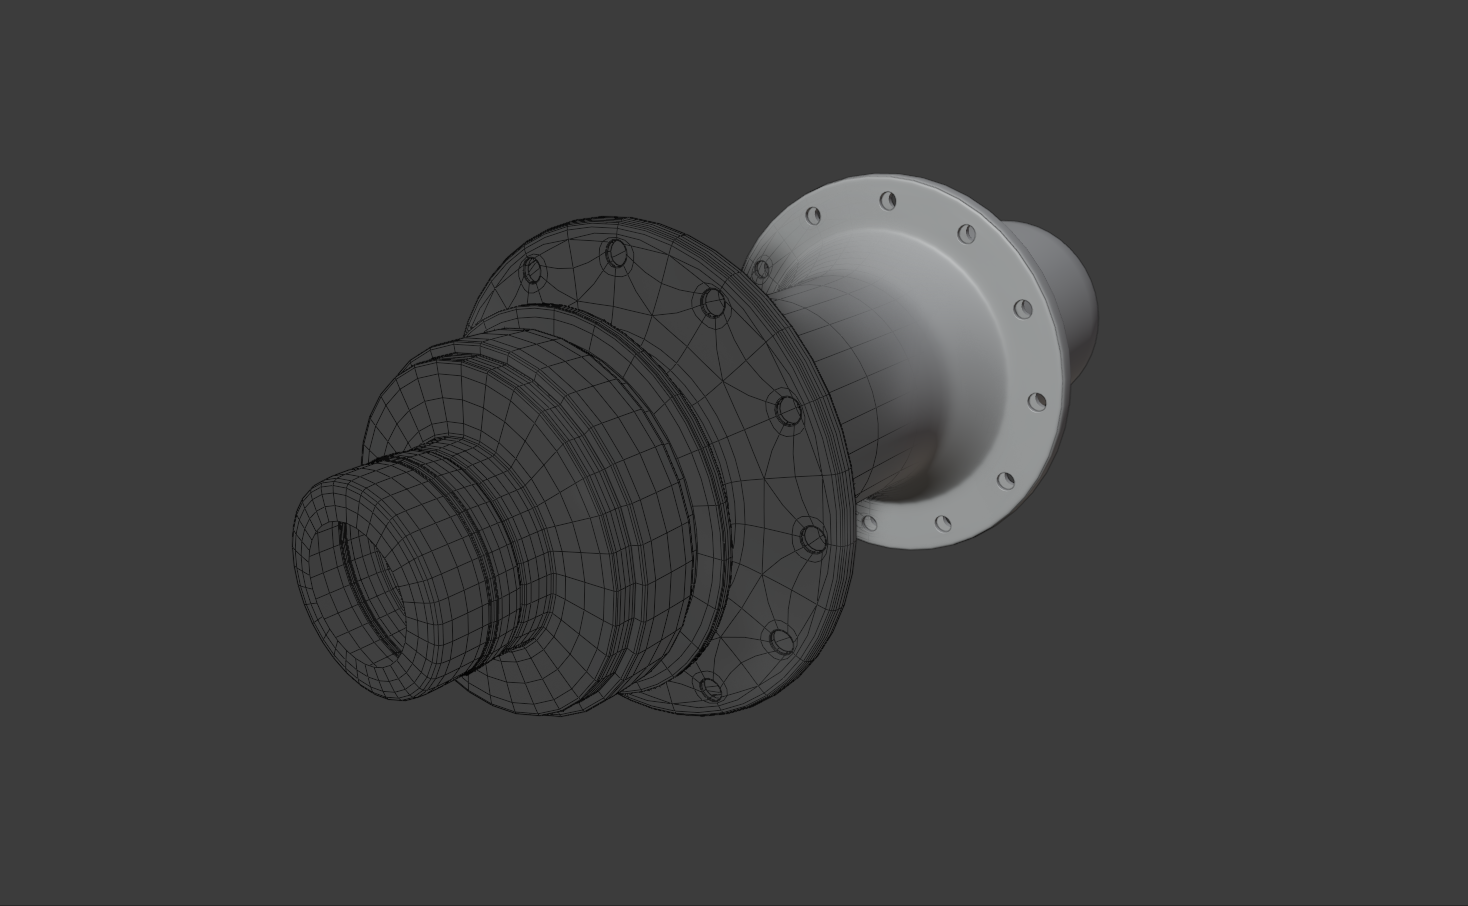
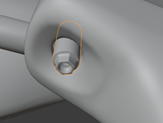
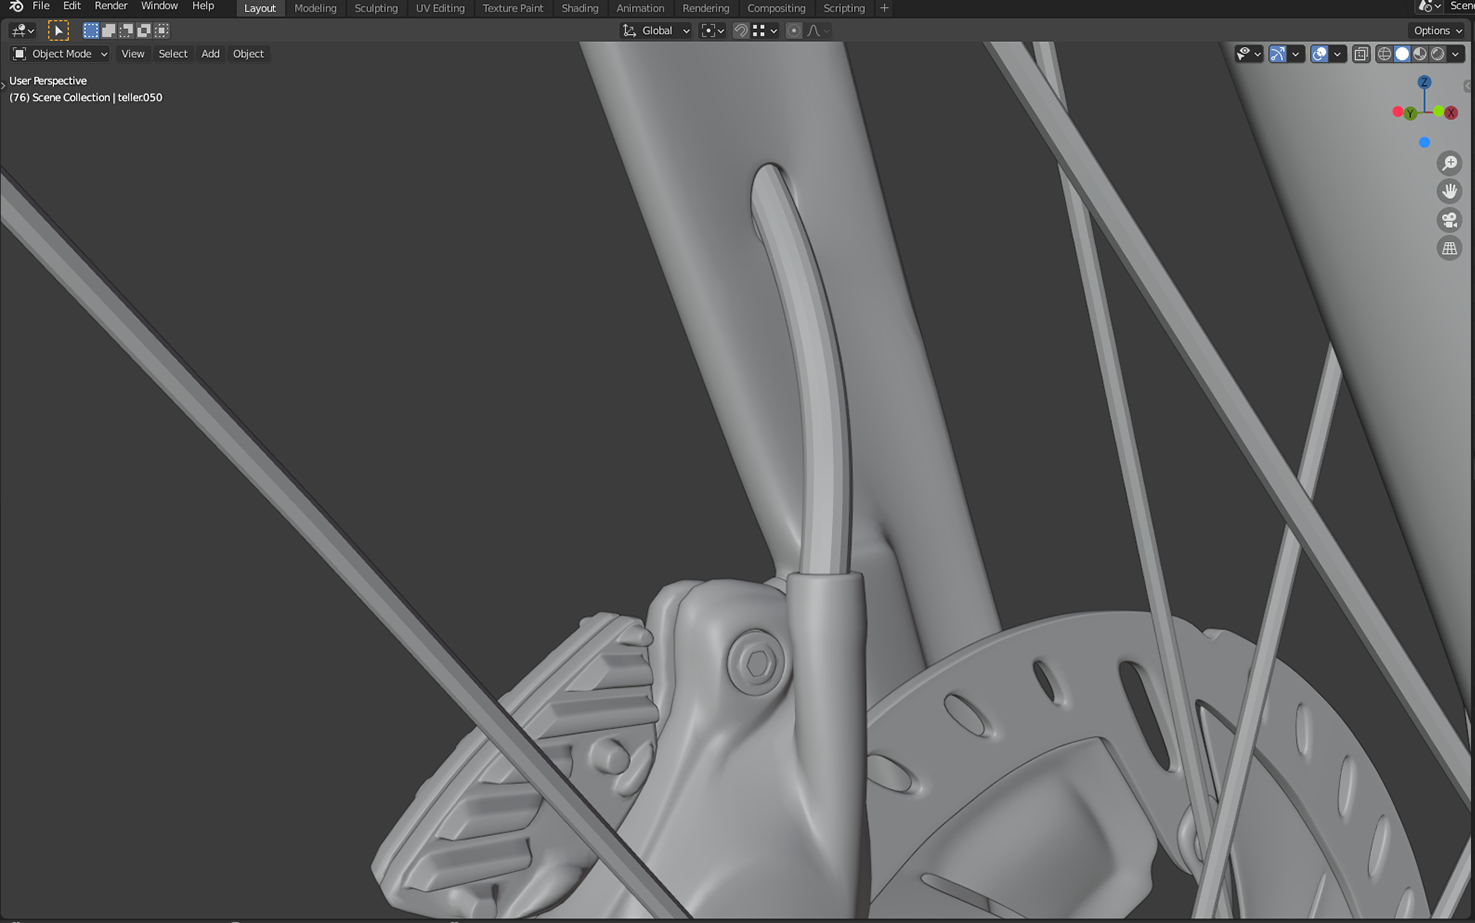
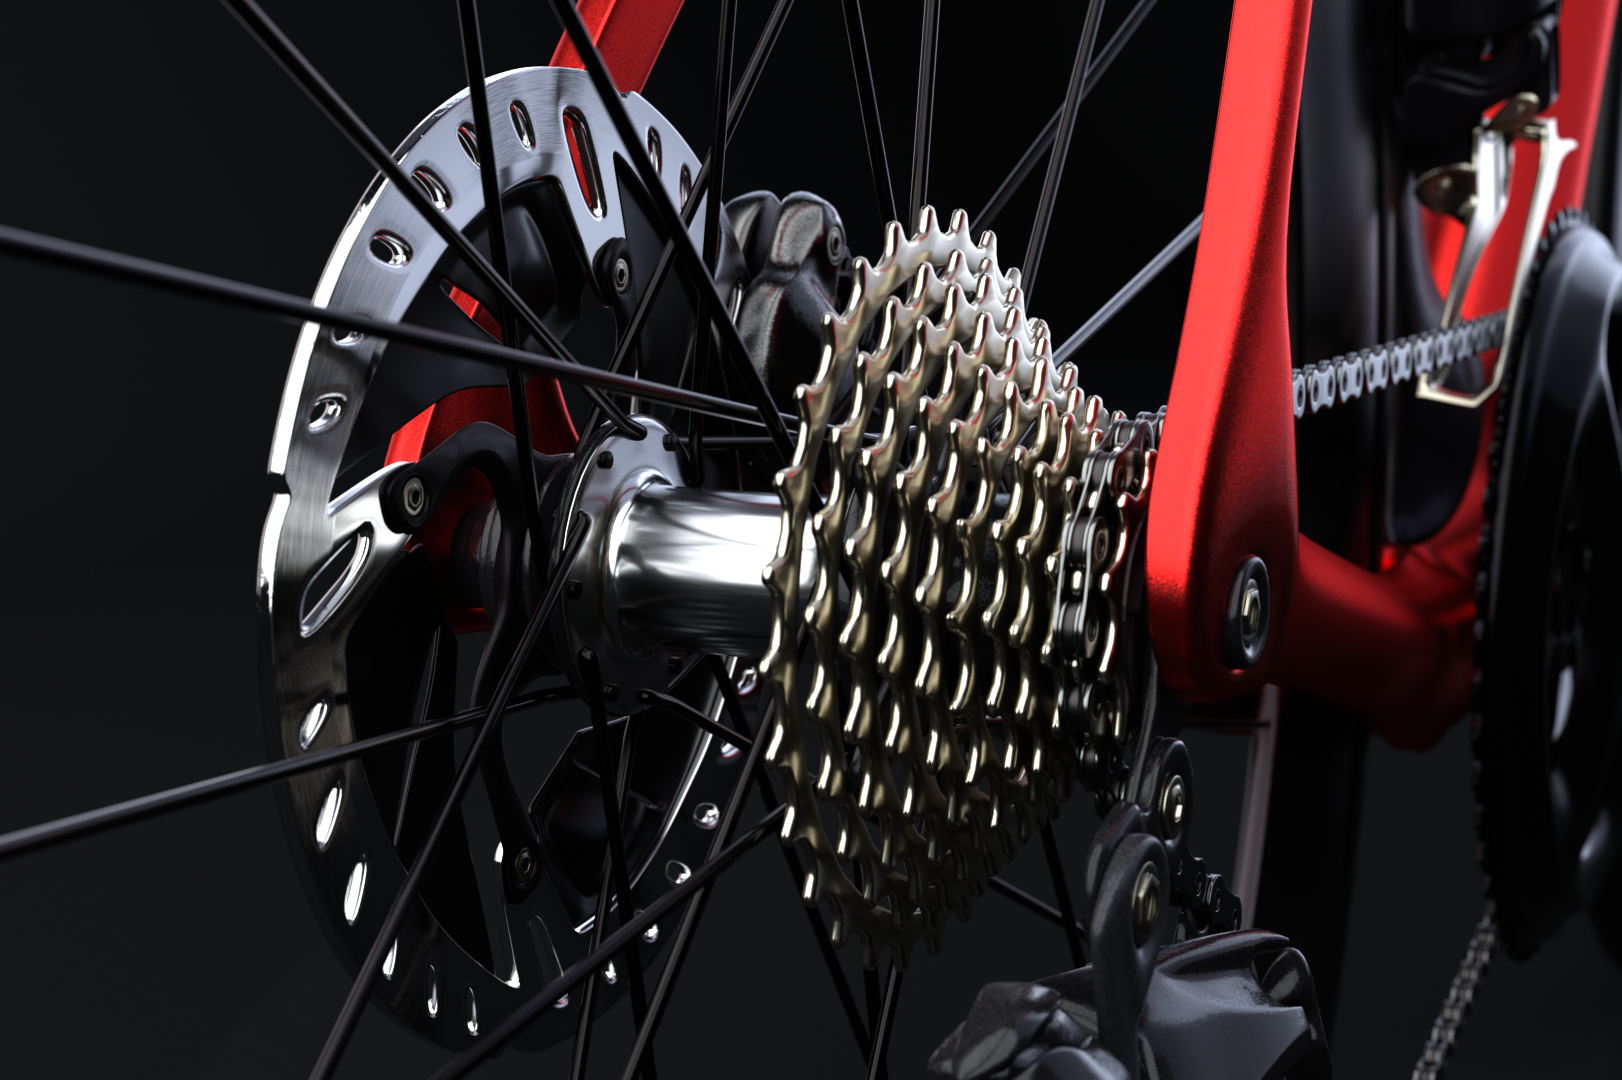
Some parts were modeled with modifiers such as screw, skin, solidify, or a combination of different kinds of modifiers. Here you can see the rear hub that was modeled with a screw modifier at the beginning.

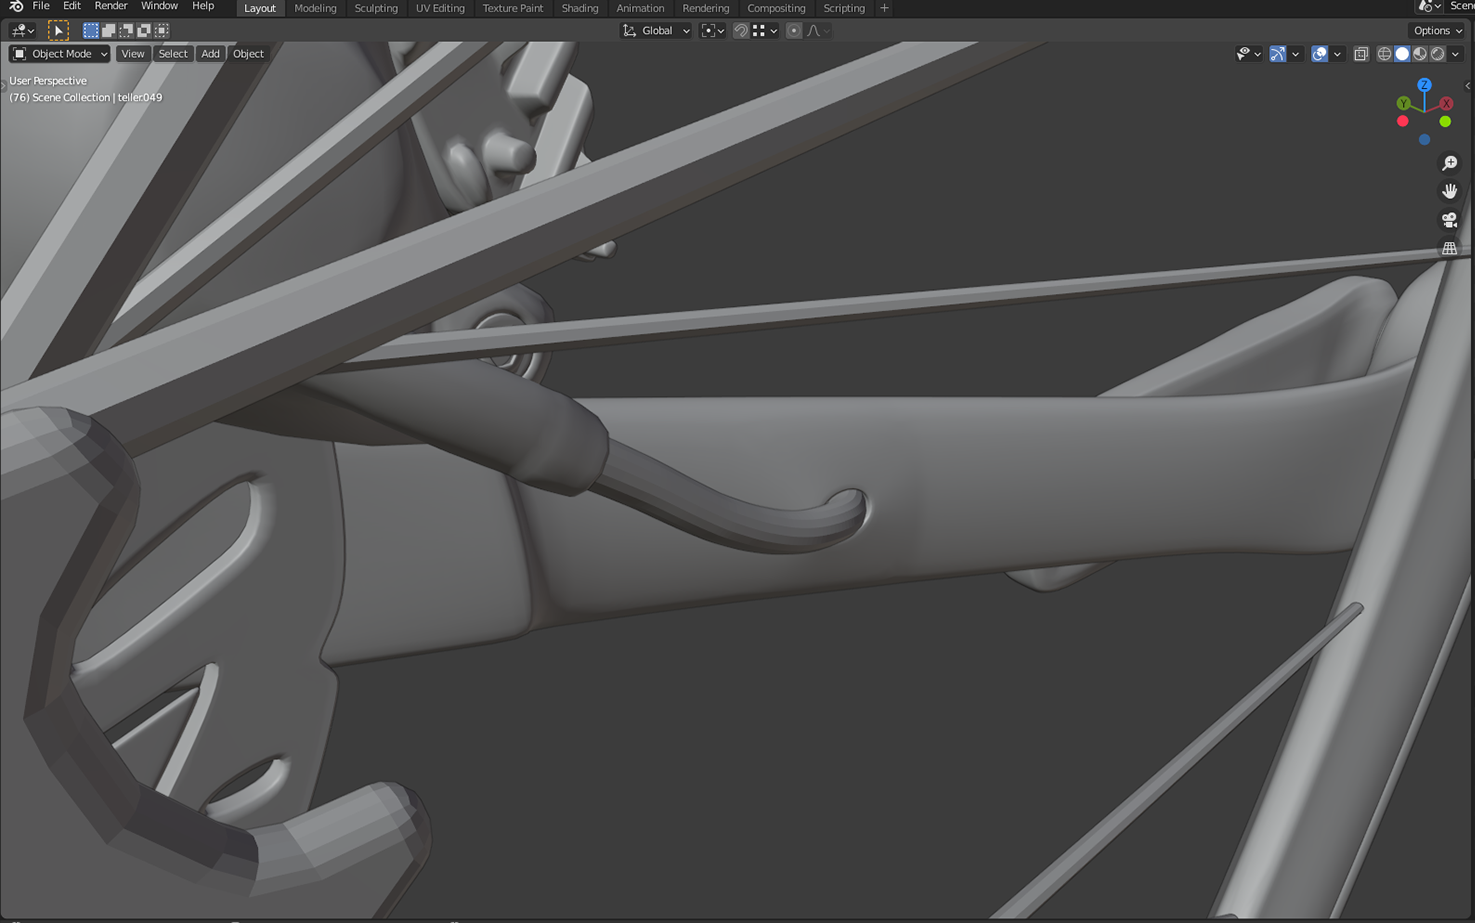
And here is the handle tape, only one straight line but full of modifiers.

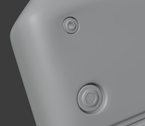
Then lastly it came to the smallest details, one of which was the screws. I modeled two main screw types and then created variations by scaling those up. I added some holes, too, where the screws go in.
Another small detail was the cables and there was not much to do for them. Luckily this bike’s derailleurs are fully electrical and all of the cables are buried into the body. So I had to add only two visible cables, one for the rear brake and the other for the front brake.
Materials
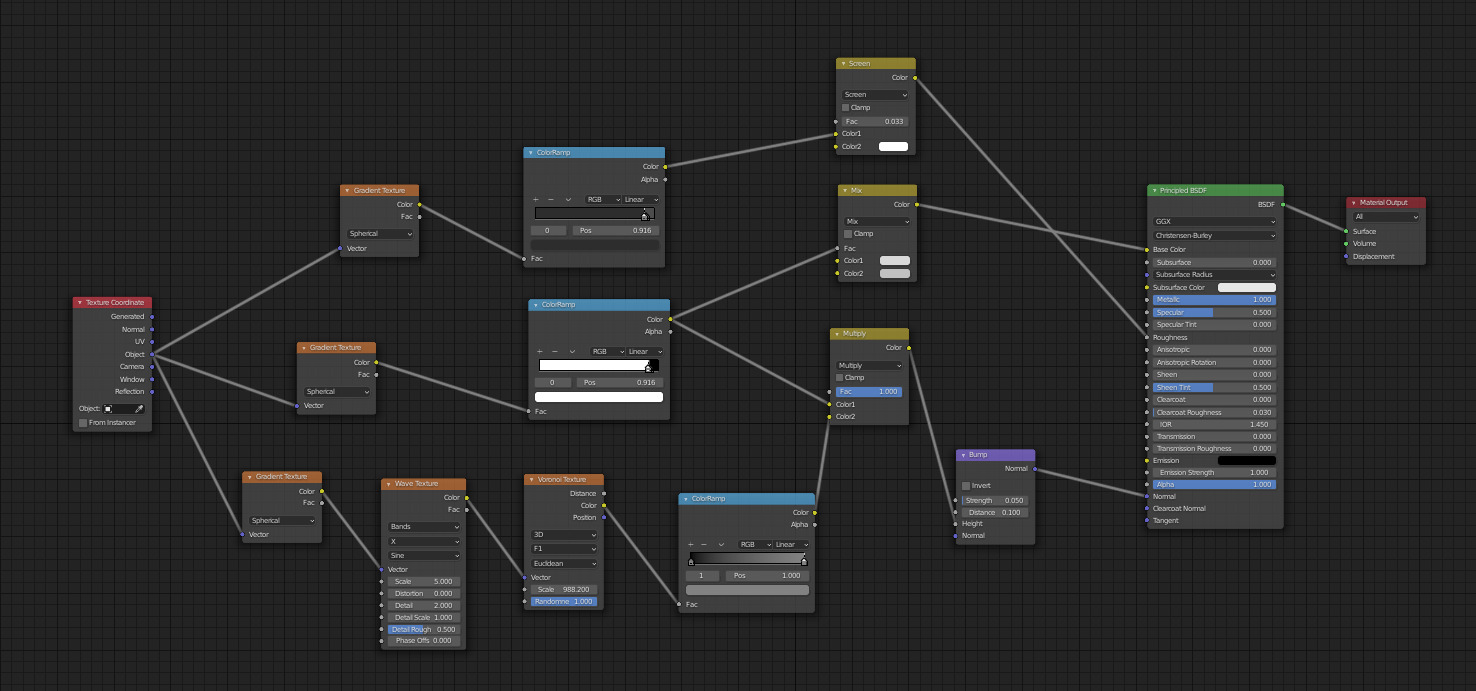
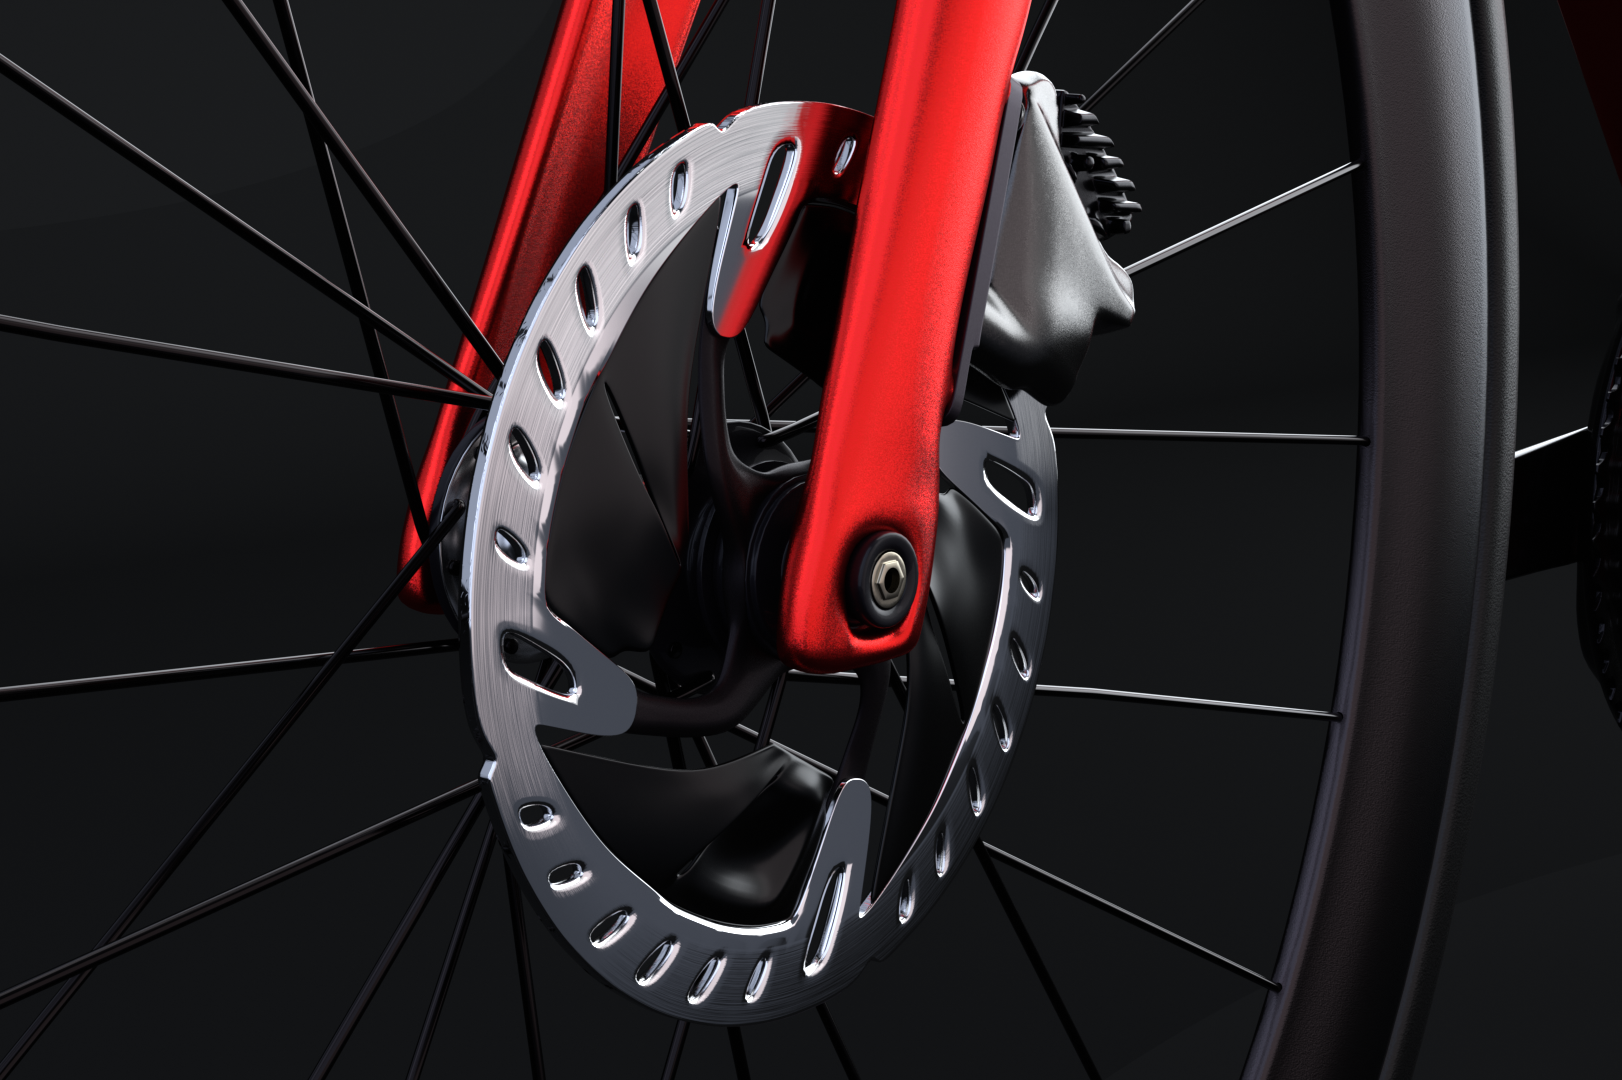
All the materials are procedural and actually, and they are neither fancy nor complicated, they are pretty simple. But I would like to show one of them that I used for disc brakes.
Lighting and rendering
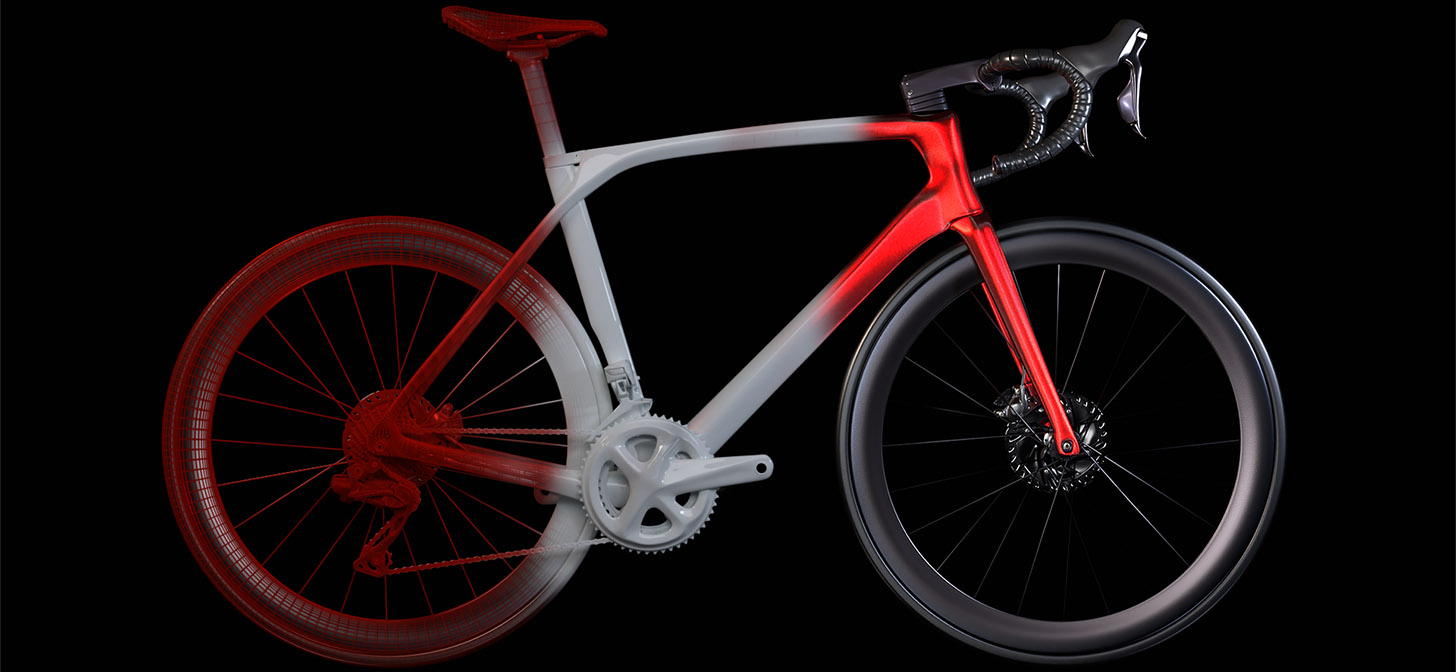
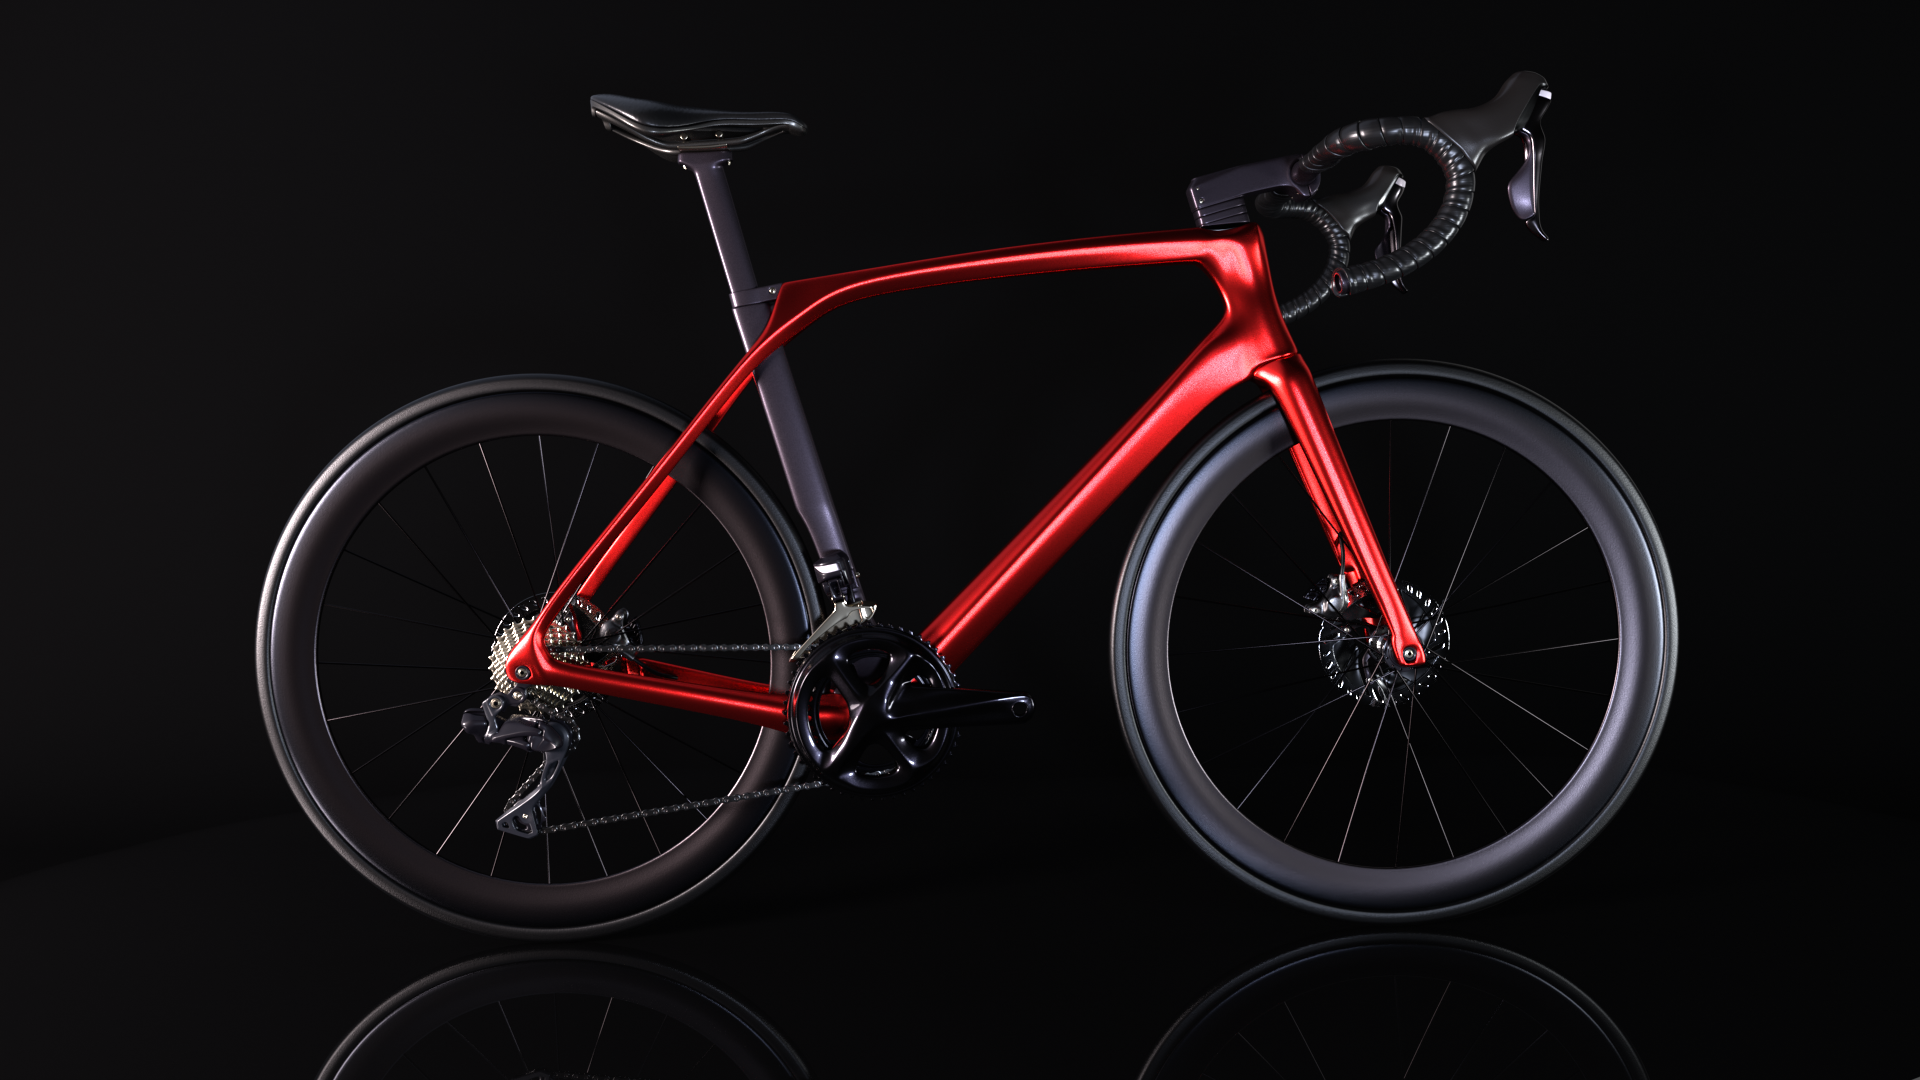
Lighting in general is one of my weakest skills. That’s why I tried a few combinations and decided according to the results in viewport rendering. For the lighting of the main render, I put one bluish light on the right and one reddish to the left. These were my key lights. After that, I added some other lights in order to get nice reflections in some sections. I also used a specular mask for the ground with the aim of controlling the reflection. In the end, it looked like this.
For other renders, I tried to implement 3 point lighting but because I broke these lighting setups up earlier, I don’t have any images of them.
The rendering was done in Cycles at 1500 samples, with OptiX denoising, and with a resolution of 1920 x 1080 pixels. Each image took about two minutes to render. Because I liked the raw results, I didn’t need to do any post-processing. Here are the results. I hope you liked them and enjoyed reading this.
About the Author
 Yunus Emre, Just an economics student, who is passionate about 3D Art


Ouahh super work