Darkfall writes:
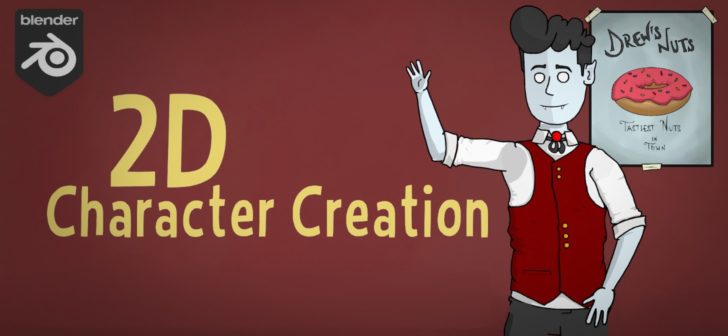
In this series we will be creating a 2D Character for an animated Podcast, Vlogging with Vlad.
Part One - Character Design
In Part One, we will be designing our Character. First I wanted to jot down some things about Vlad. He would be a Crazy Haired, Friendly Vampire with a slightly old fashion sense. We also need to set up a Construction and Detailing Brush. With our Brushes set up we can then draw three Variations of our character.
We first create some Construction (or sketch) lines to block in the shapes. Using our Construction Brush we can keep the lines messy. The main focus is to make sure the basic shapes look good. Then with our Detailing (or Inking) Brush we can go back and draw the details with much more precision.
If (unlike me) you have any kind of drawing skills, you will find it much easier to design your character. Since my drawing skills are lacking I had to go into Edit mode and play around with some of the strokes. We can also use a bunch of tools from Sculpt Mode (though in this video we didn't use it much).
With the the Three Variations done, I decided to mix and match some features of each character (except the Boris Johnson Looking guy at the end) to create the first draft of Vlad. Then with some Color Fills he was ready for Mobility.
Part Two - Rigging
In Part Two, we will be taking our Character and creating an Armature (or Rig) and adding some Constraints, giving our character the ability of movement.
We will need to add the rest of the Body Parts and each of them will need to be a separate stroke. Now we have a couple of options when doing this. Instead of adding a new stroke each time (wasting our time needing to set everything up again) we can just use the original Head Stroke.
Simply add a new layer and draw a body part. Then (in edit mode) select only that part and press P. This will bring up the Separation Menu and we can Separate by stroke. You can do this for all the body parts.
We will need a Neck, Torso, Upper Arm, Lower Arm, Upper Leg, Lower Leg and foot. We can duplicate the Arms and legs to make things even easier. Once we have our pieces we can then add an armature.
Starting with a single bone, we can extrude out the part that we need. Then by adding some rotation, transform and Inverse kinematic Constraints we can make our Armature move more fluidly. IK constraints are really easy to set up and only need to do so once.
Then we can parent each of the Body Parts to each of the bones. Add a few empties for control and we are done with the Rigging. It's also a good Idea to add everything to a collection.
Part Three - Lip Syncing (and more?)
In Part Three, we will be taking a look at my new favorite Modifier in order to not only Lip Sync but it can be used for a number of other things such as Blinks, Eyebrow Articulation, Hand shapes and more!.
With our character rigged and ready to go we just need to draw some Mouth Shapes. There are plenty of Lip Syncing Mouth Charts available online and I suggest using one of them as a guide.
Once we have our Mouth Shapes we can then use the Timer Offset Modifier. (NOTE: The Timer Offset Modifier is broken in Blender Version 2.92 In the video I am using Version 2.93 I believe the Modifier also works in Some Older Versions of Blender).
This Modifier is really useful, not only for Lip syncing but as I mentioned it's great for other things like Blinks, Expressions and anything else you want to quickly change the pose for.
When it comes to the actual Lip Syncing, you may need to "hold the frame" or extend the mouth position. It will always depend on how fast/slow your character is talking.
For example, in the Video the character says "Hello". We will first add the H shape and extend it for an additional frame. Then the L shape for two frames and then finally the O shape. The Character Extends the O so I think we can hold the position for three or even four frames. Again this will always depend on the speed of your characters Audio.
If we mess things up and the timing is off? Don't worry!. We can move keyframes around and add new ones really easily. It's not too difficult, maybe just time consuming and depending on how long your animation is, you may be there for a little while. In the Animation I had two characters talking for a couple of Minuets and it didn't really take that long.
So in the end it turns out the Grease Pencil is easier to use than I once thought. I enjoyed making these videos and I hope you guys enjoyed them too. If you did enjoy this series be sure to look out for more Grease Pencil Tutorials and thanks for Reading!


