
Behind the Scenes: Bathroom
Hi all! My name is Tomas, I am a 22-year-old 3D artist from Slovakia. I have been in 3D for around 5 years and I am self-taught. Currently, I am studying building structures and architecture at university and work as a freelancer, making archviz renders, 3D models, and creating product visualizations for furniture manufacturers.
Inspiration and blocking the scene
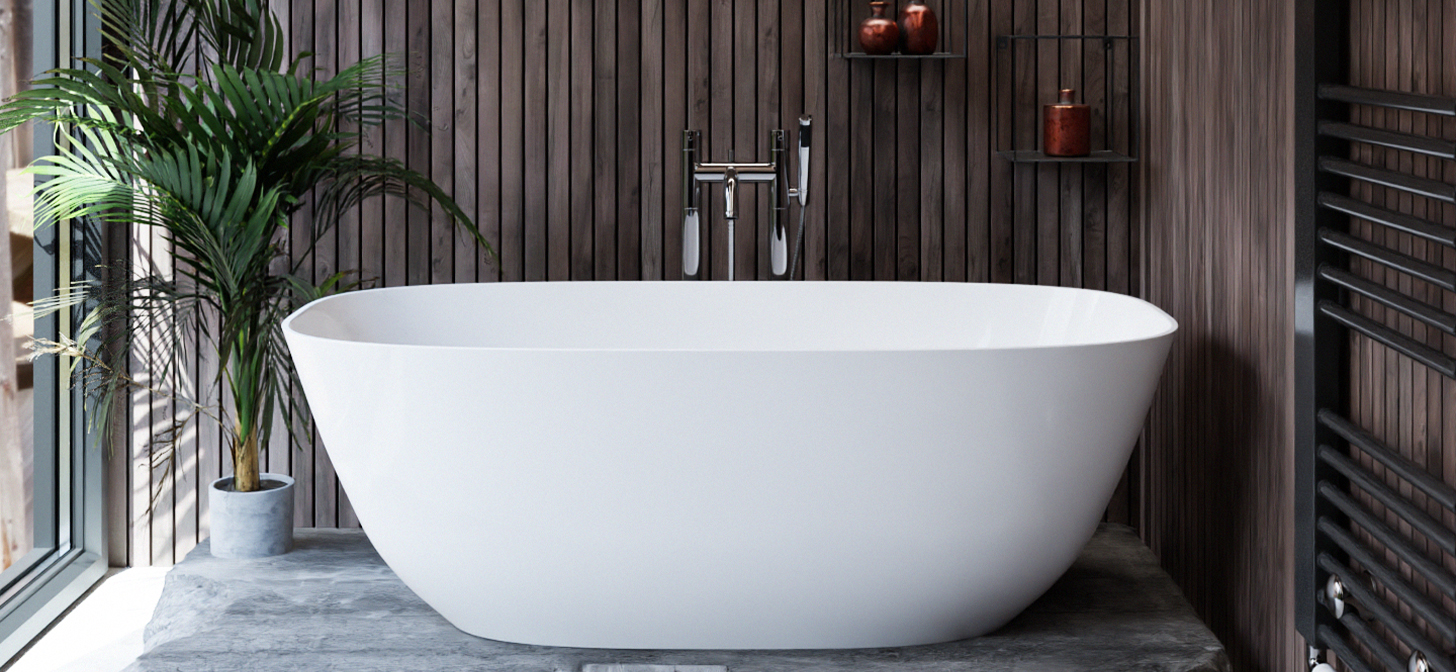
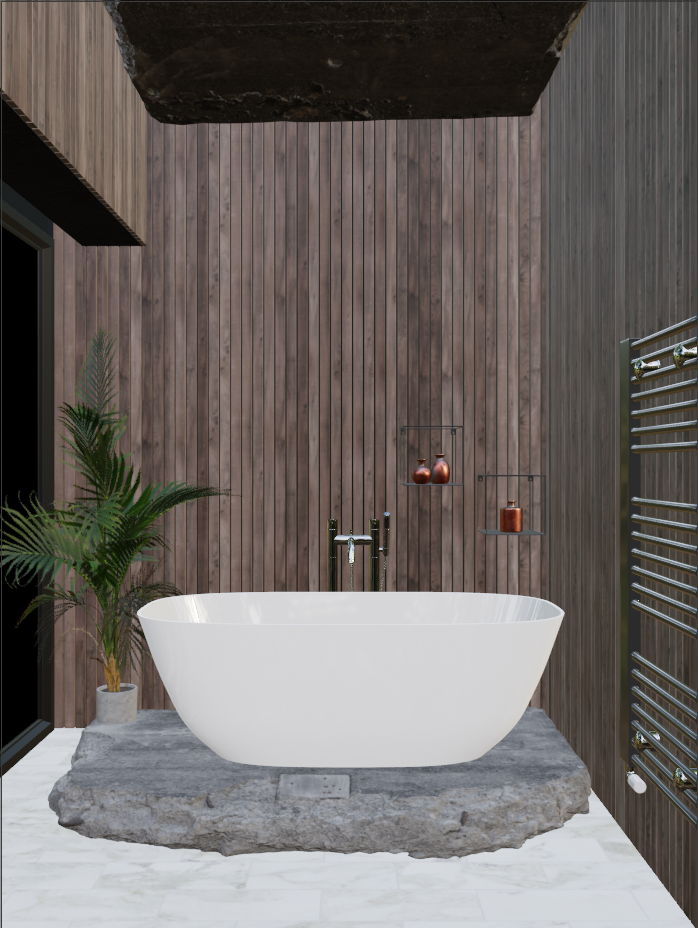
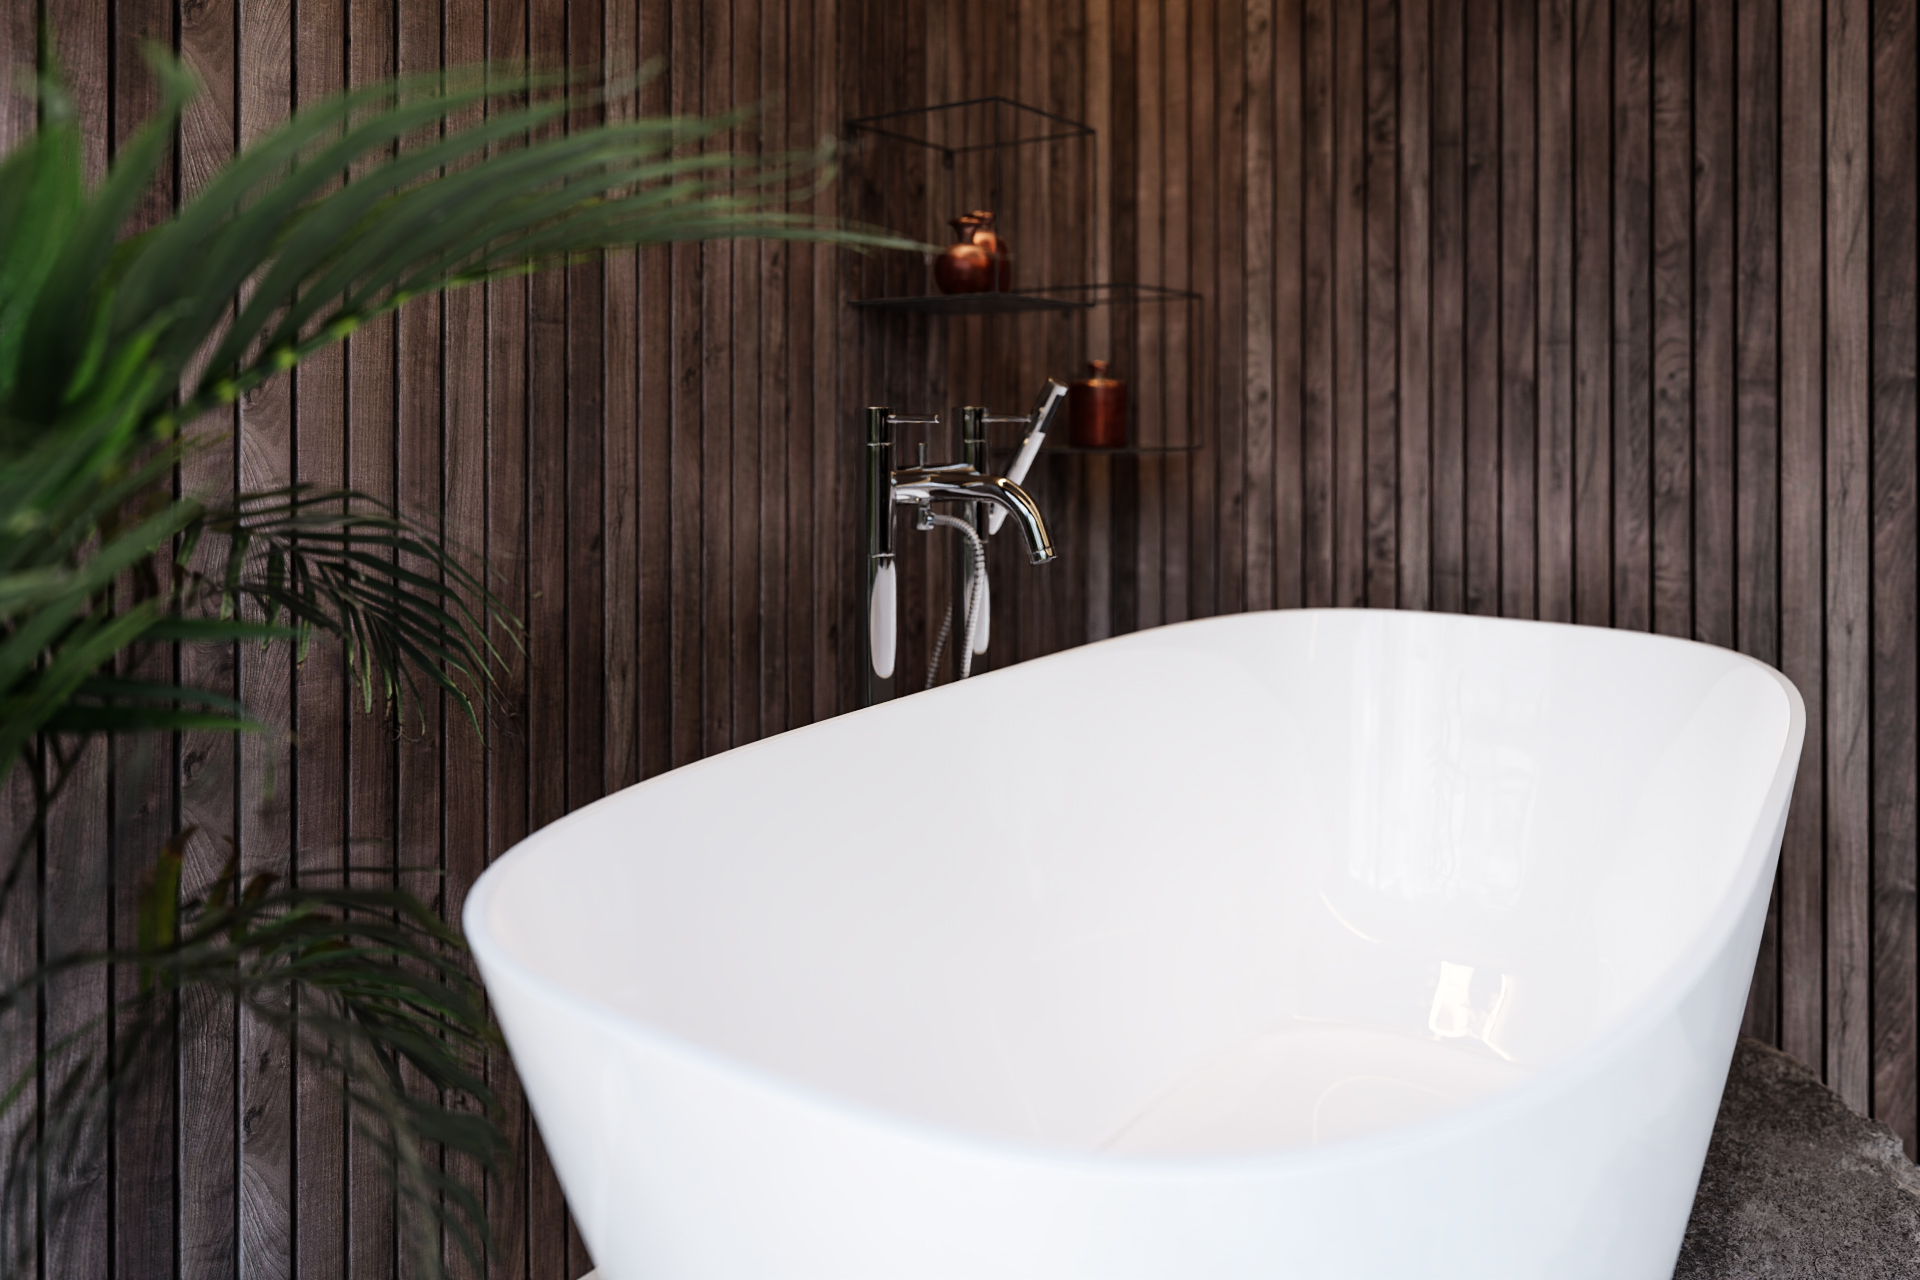
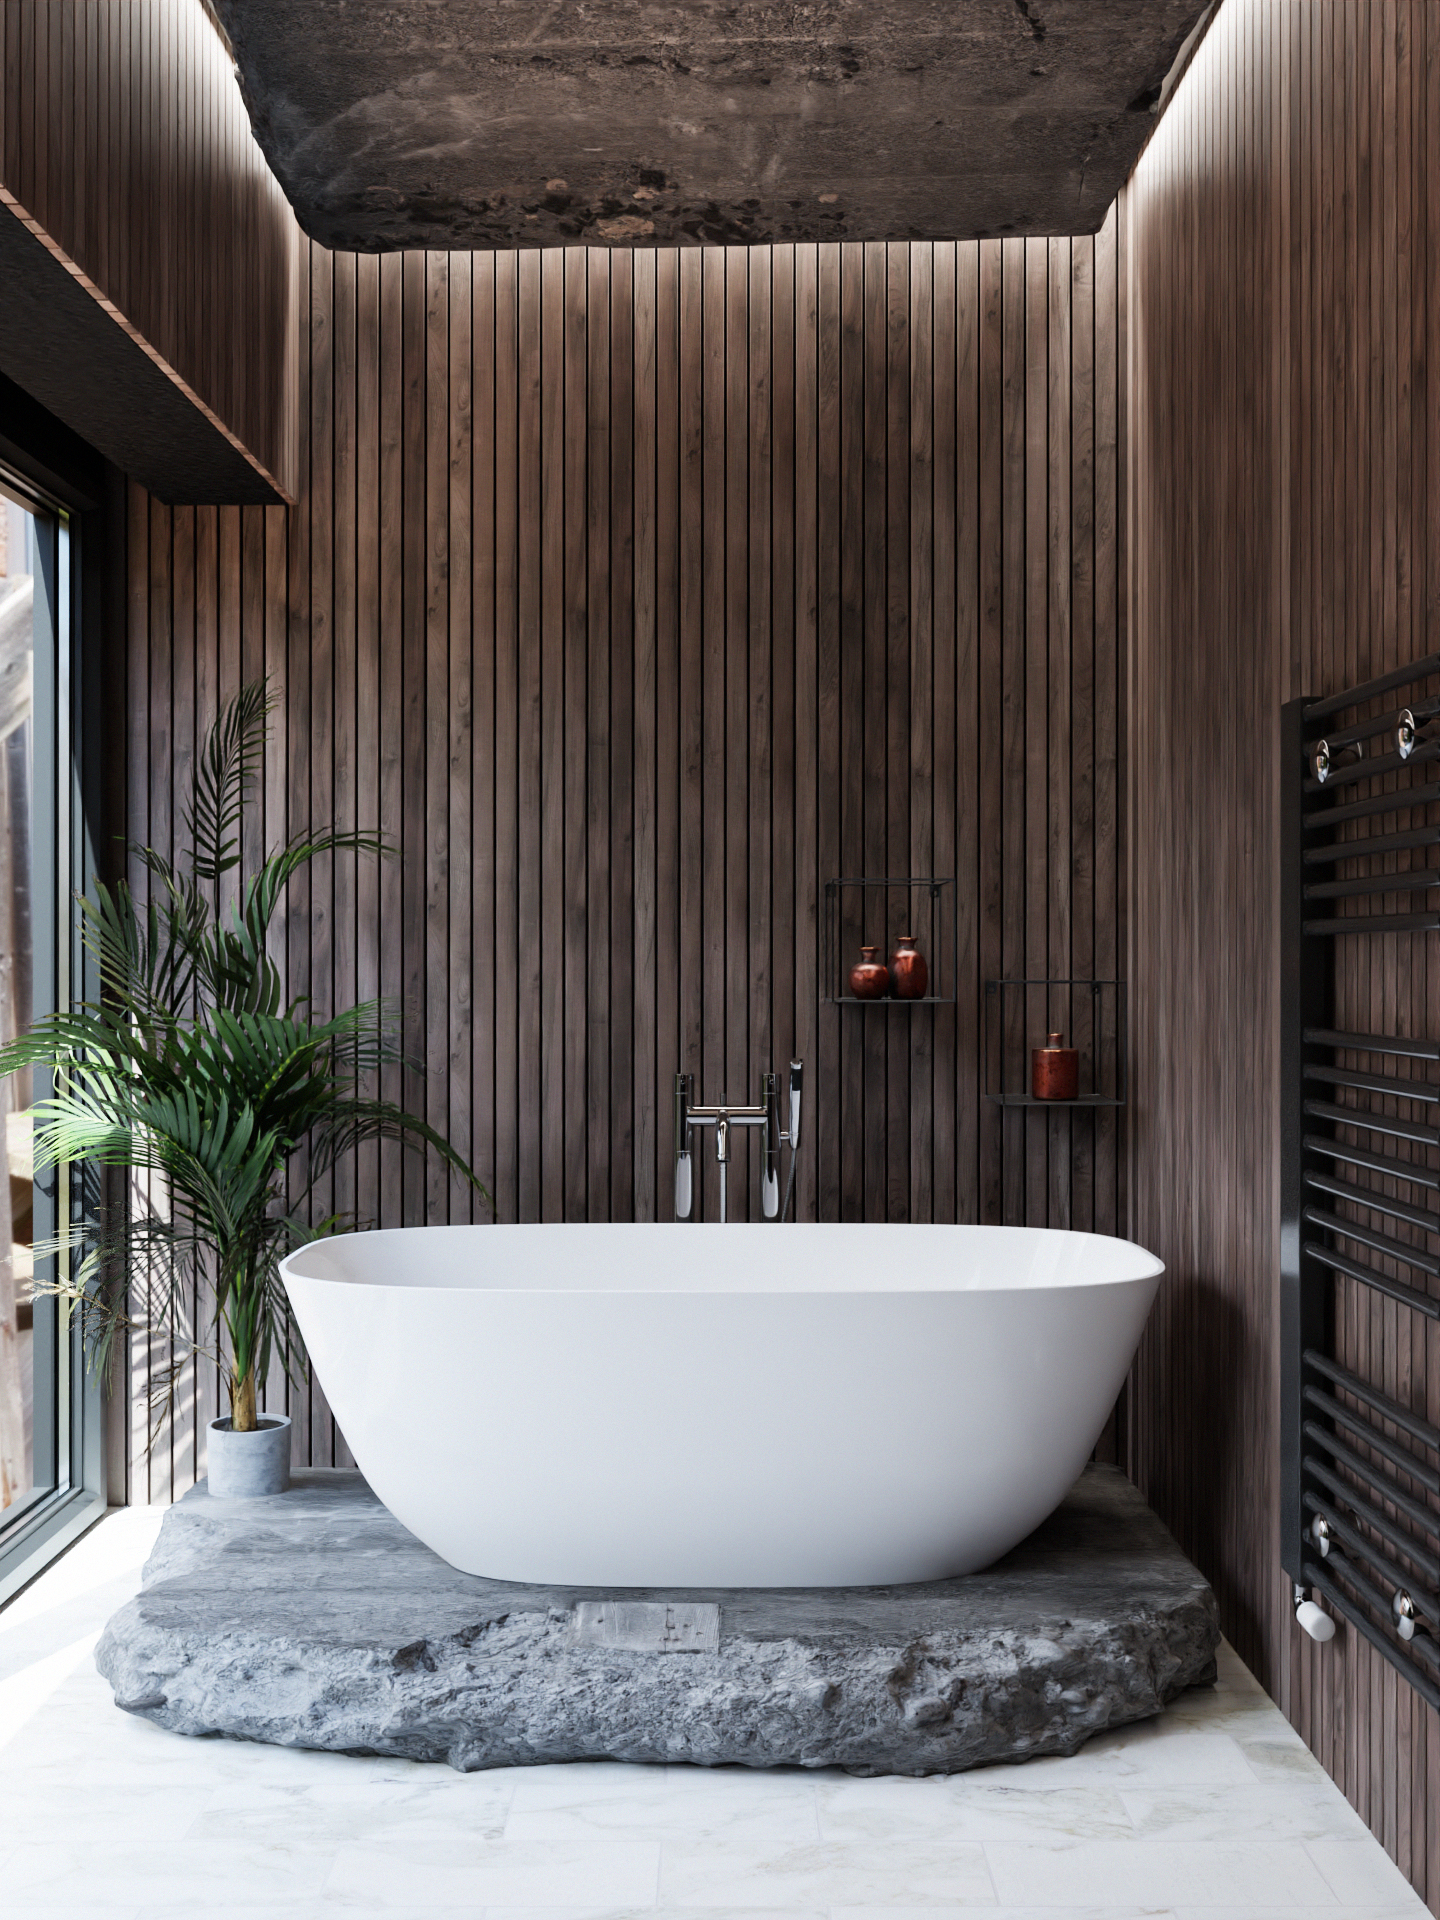
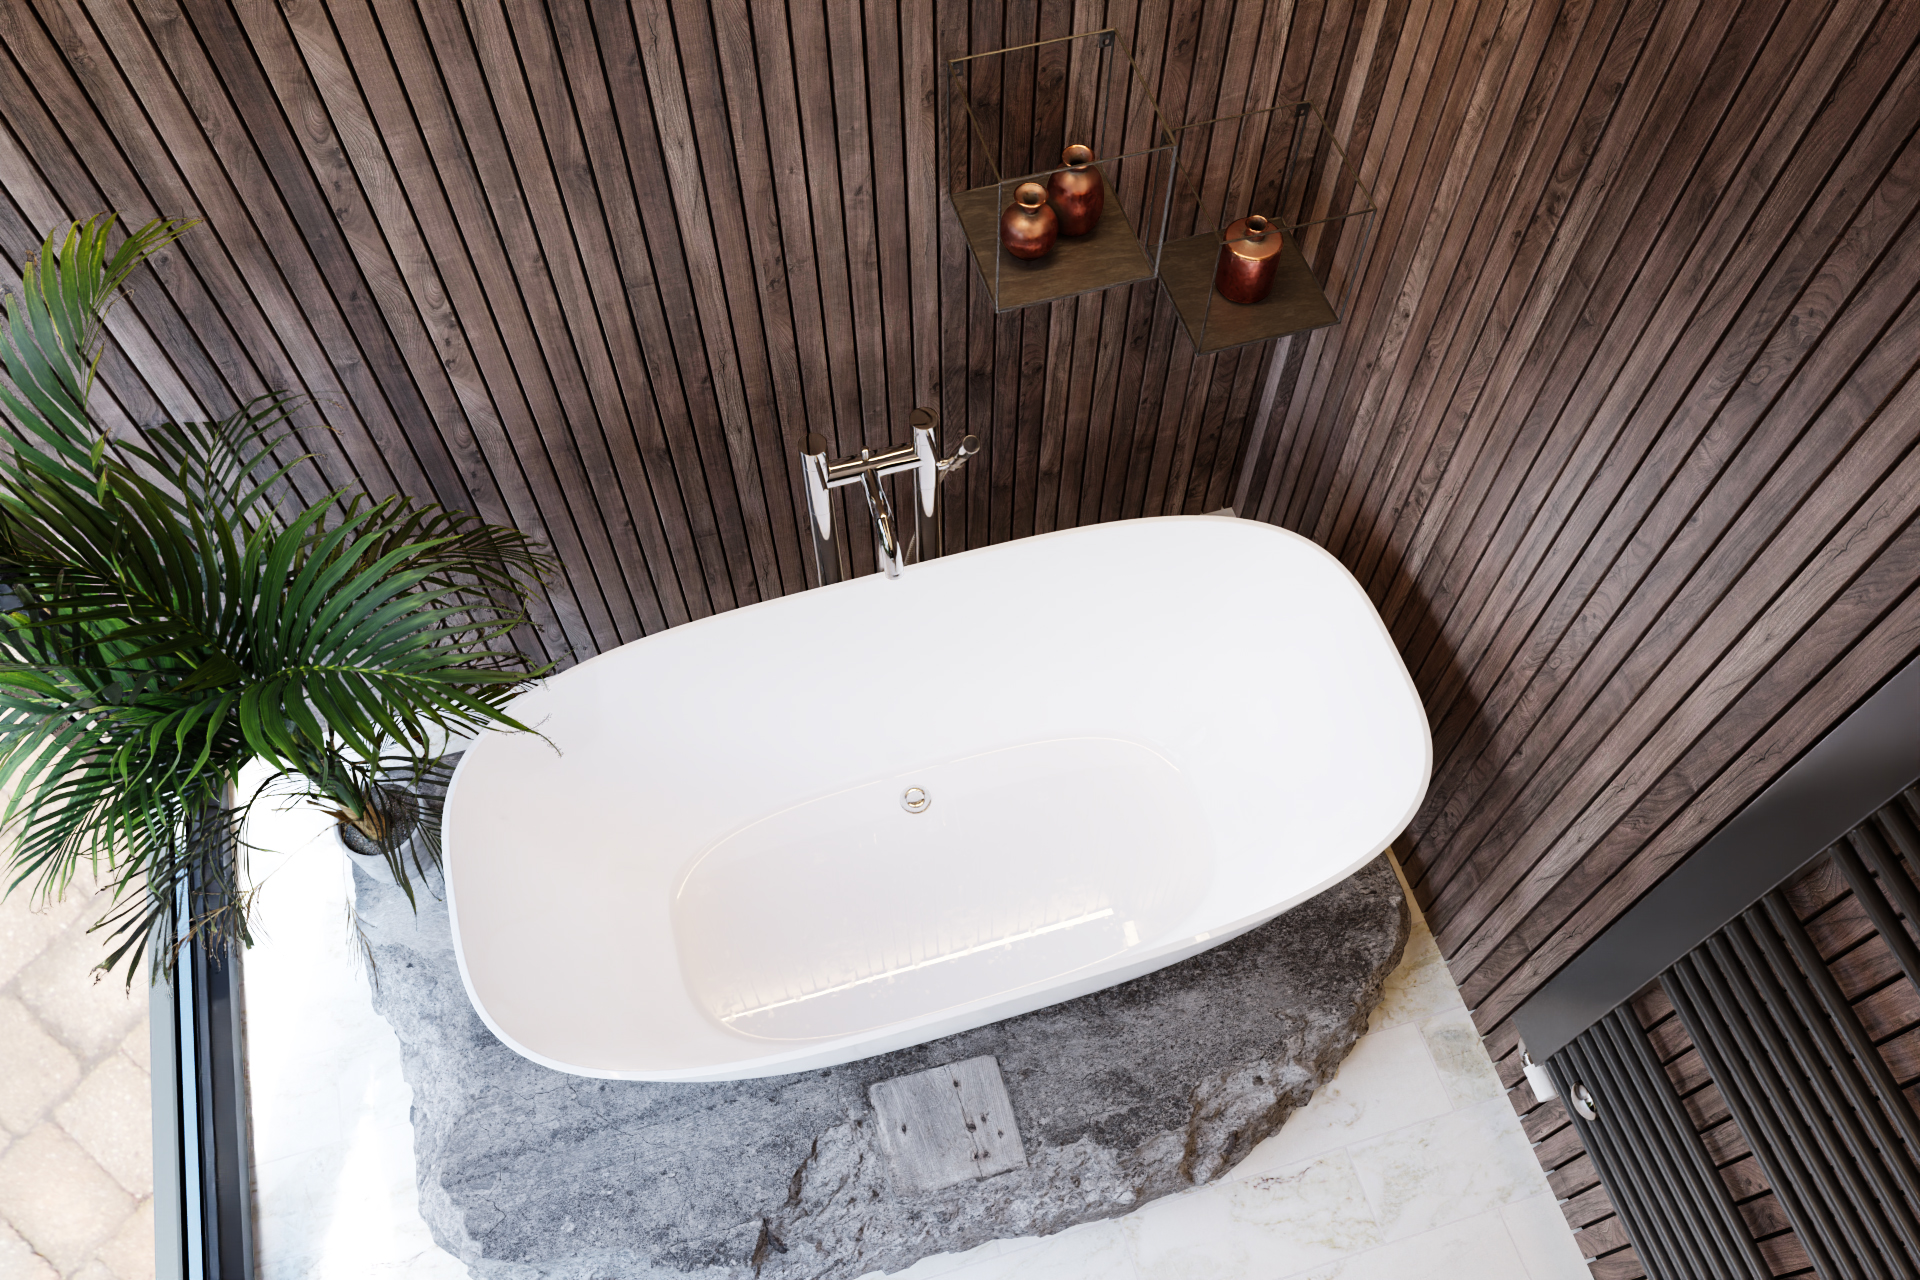
The idea for creating this piece came when I was looking at some nice interior pictures on Pinterest. I found this beautiful image of the bathroom and I fell in love with it; I wanted to recreate a similar piece for practice.
For this project, I was using mostly Imeshh and Interior Essentials models and Poliigon textures. I imported the bath into an empty scene, set up my camera, and started modeling the walls. It’s just 2 boxes, nothing special. (The first box is room, and the second one is on the left side under the ceiling).

When blocking the scene was finished, I imported the window and cut a hole into the wall using the BoxCutter addon. This addon is useful for hard surface modeling, but I find it very useful for archviz, too. I use it for cutting windows, doors, blocking scenes, etc.
Creating wooden planks
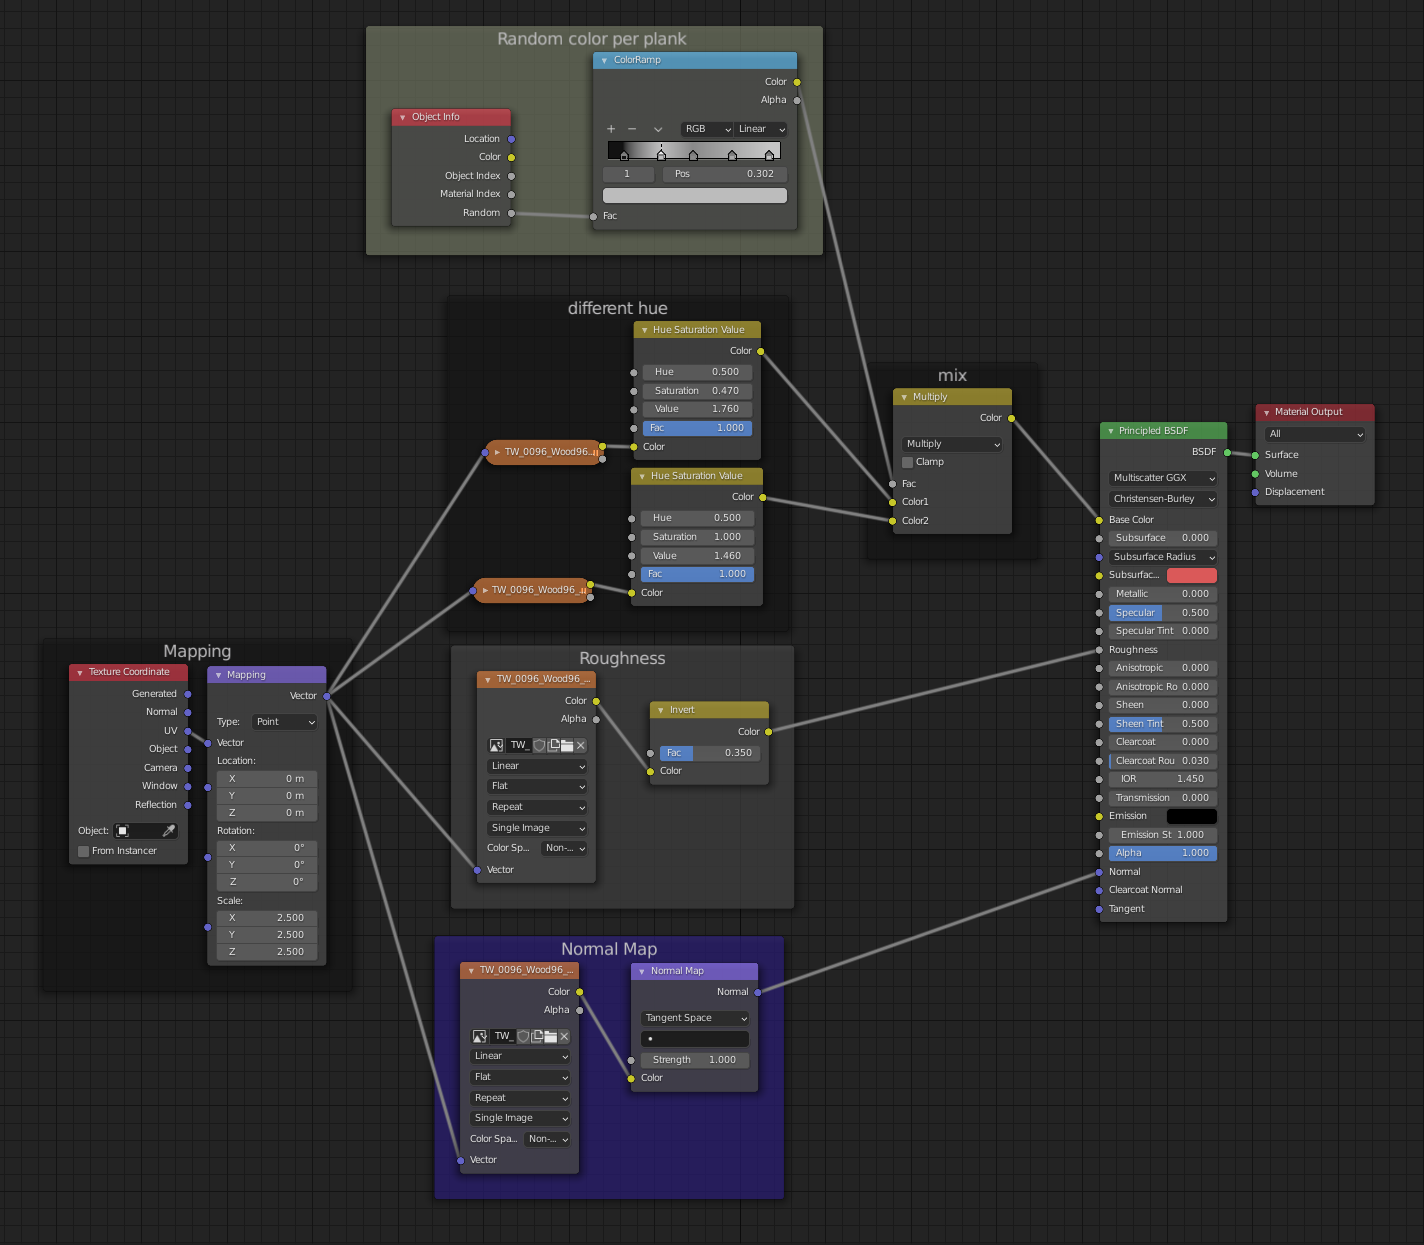
I created the wooden planks with an array modifier, then I applied an array modifier and cut holes for the window with BoxCutter. After that, I unwrapped all the planks to a UV map. To add a little bit more color randomness, I created this simple random color node to help me achieve the result that I wanted.
Lighting
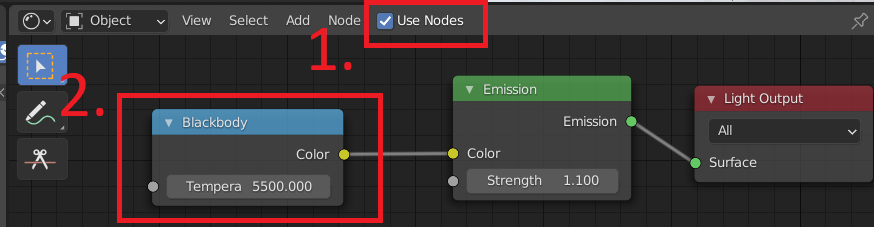
To create the LED strips, I added plane lights. This strategy contributes a lot to the atmosphere of the image. I used a blackbody color node for this. It’s basically a kelvin temperature scale, and it’s very easy and powerful to use. Here is the node setup for the LED strips. First, you have to select your light source, enable the “Use Nodes” checkbox, and then plug the Blackbody into the Emission node’s color slot.

You can adjust the temperature for different color moods. Here is a Kelvin Color Temperature Scale image (image source), and it shows how temperature on Blackbody works. It’s a way to describe the light appearance provided by a light bulb. Typically, Kelvin temperatures for commercial and residential lighting fall somewhere on a scale from 2000K to 6500K.
For the world lighting, I just used simple environment textures from HDRI Haven.
Megascans for archviz
Firstly, I wanted to create my own concrete slab by sculpting, but I didn’t want to spend so much time on it, so I found a good one in the Megascans library. Megascans is a large library of 3D models and textures—most of the resources are for game dev but you will also find a lot of useful stuff for archviz and other projects, too. In this project, I used it for concrete slabs and plants. You can import your models to Blender by using their Bridge app, and the models import with all materials applied.
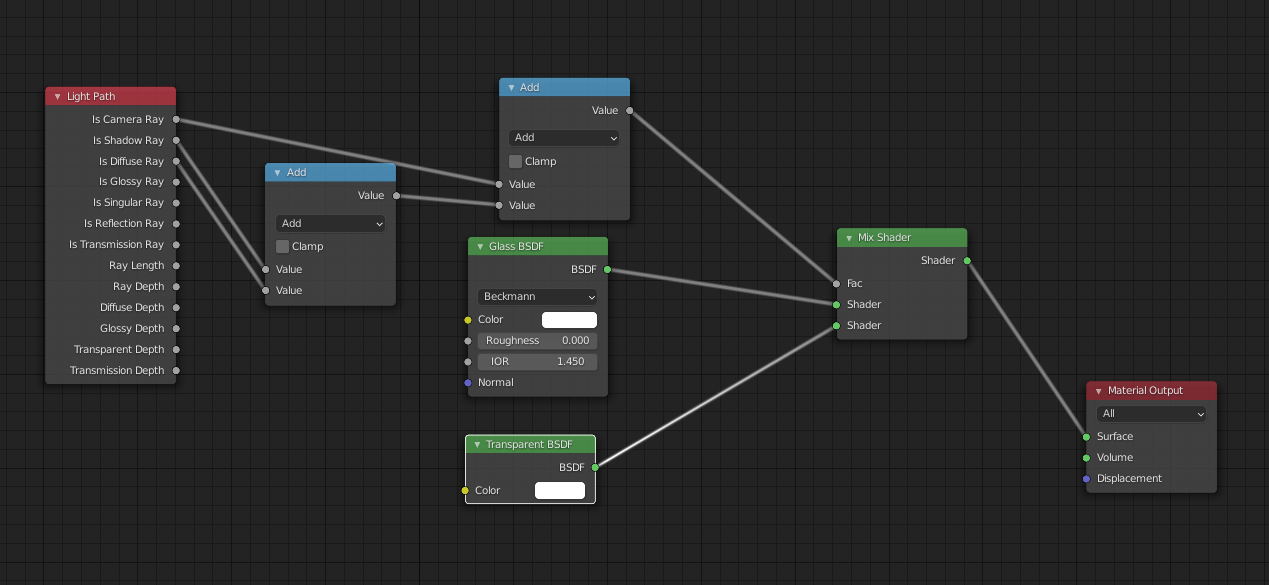
Glass material for the window
For the window material, I used the following node setup. I don’t know exactly the magic behind it, but it works perfectly for archviz windows and I use it almost every time.
Render settings and post-processing
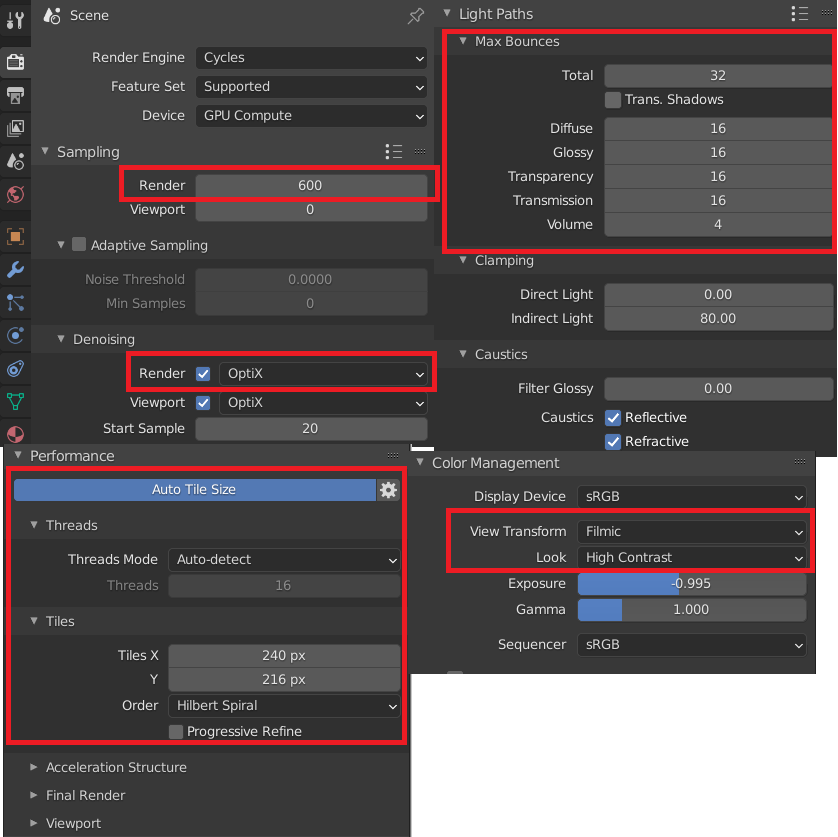
After the scene was staged, it was time to produce some renders. My render settings are not special. I used Cycles, rendering at 600 samples. In this case, 600 samples was enough and OptiX denoiser finished the job. I also used the Auto Tile Size addon, which comes with Blender and can be activated in your preferences. When you activate it, it automatically picks the best tile size for your PC specs. I like to change bounces a bit, but be careful—if you put them too high, it will make your render significantly slower. In my case, the render time took roughly 7 minutes. The final touch was using Filmic color management and setting the Look to High Contrast, or at least Medium-High Contrast. It’s like a cherry on the top of a cake for your render. You can see my render settings in the images below.
When rendering is done, I like to save the final image as a 16-bit TIFF file and import it to Photoshop where I do final post-processing. When doing post-processing, it is a good idea to save your images as 16-bit because that setting preserves more color depth in the image.
Conclusion

I hope you found this article a little bit interesting, and you found some good tips and resources here to push your productivity forward. It’s always a good idea to use asset libraries for your archviz scenes, because you will save a ton of time, and you can fully focus on the artistic side of things.
If you have any questions, feel free to contact me. You can also find more work on my Instagram. Also, thanks to BlenderNation for the request and opportunity to write this article.
About the author
 Tomas, 3D Artist


Super inspiring. I loved your workflow and aproach on using “game” assets for archviz in this scene. Freedom is the key to good and intriguing creation. Well done!