
Behind the Scenes: Chess Game
Introduction
Hello everyone! My name is Mirek and I’m a medical student and 3D hobbyist from Sandomierz in Poland. I’ve written more about my background in my previous article here, so if you’re interested go check it out.
[sponsor id=’qarnot’]
Inspiration
The idea to create this scene came to me after watching the latest Netflix series called “Queen’s Gambit”. I’ve always wanted to make a chess-focused project since I really like the game and finally the show gave me a proper concept for one.
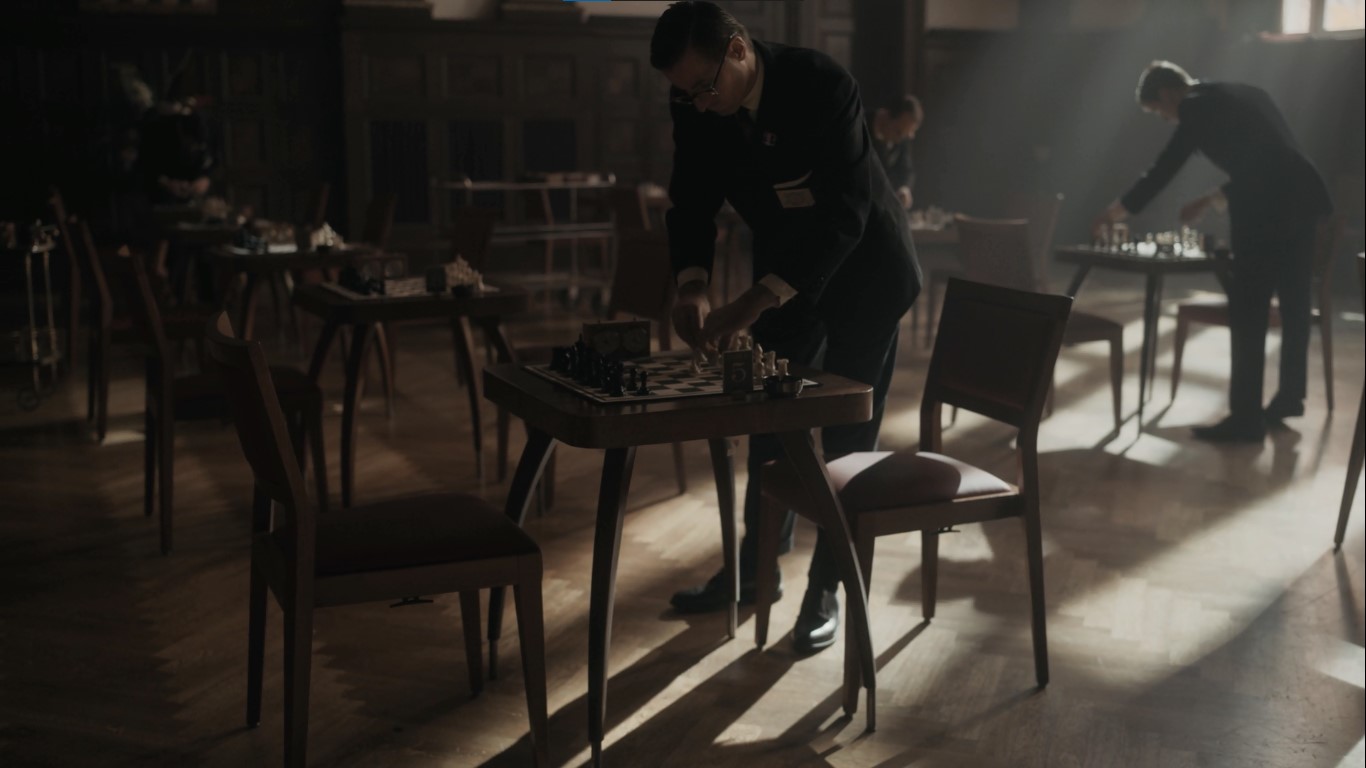
This scene from one of the episodes was the rough inspiration. Initially, I wanted to recreate this screenshot one-to-one, as close as I could. But after I started messing in Blender, I decided to step away from recreating it and make my own version.
Modeling
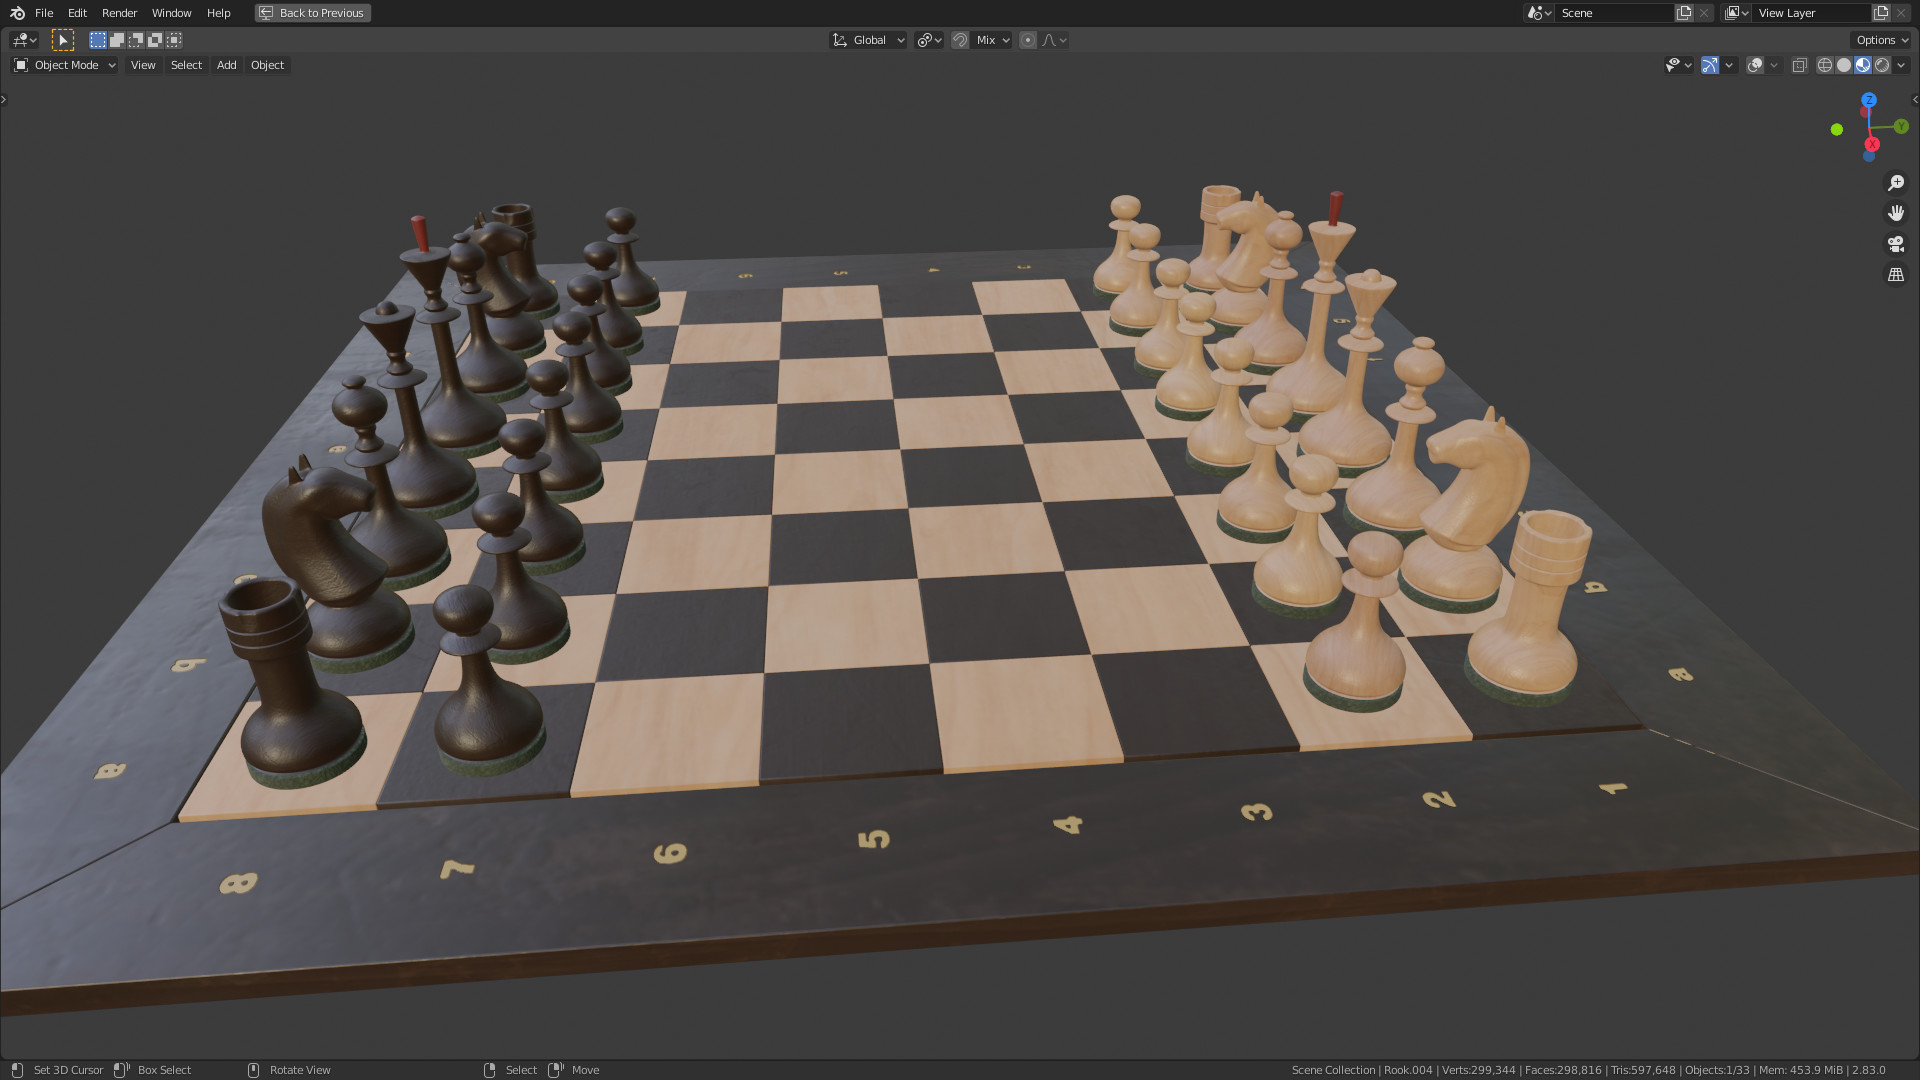
I started with the coolest part, in my opinion—creating all the chess pieces and the chessboard. I searched on Google for some images of nice and old chess sets. I found a couple that I really liked and decided to model my own based on them.
I imported them to Blender as background planes so that I could roughly match all the shapes and proportions. Since I couldn’t find my own chess set to check for pieces’ sizes, I found a guidebook online with proper dimensions for tournament pieces. Almost all pieces (excluding the Knight) are modeled using cylinders with lots of loop-cuts and subdivision surface modifiers to match the profiles of the reference pieces. The chessboard is usually a plank of wood, so it’s a cube.

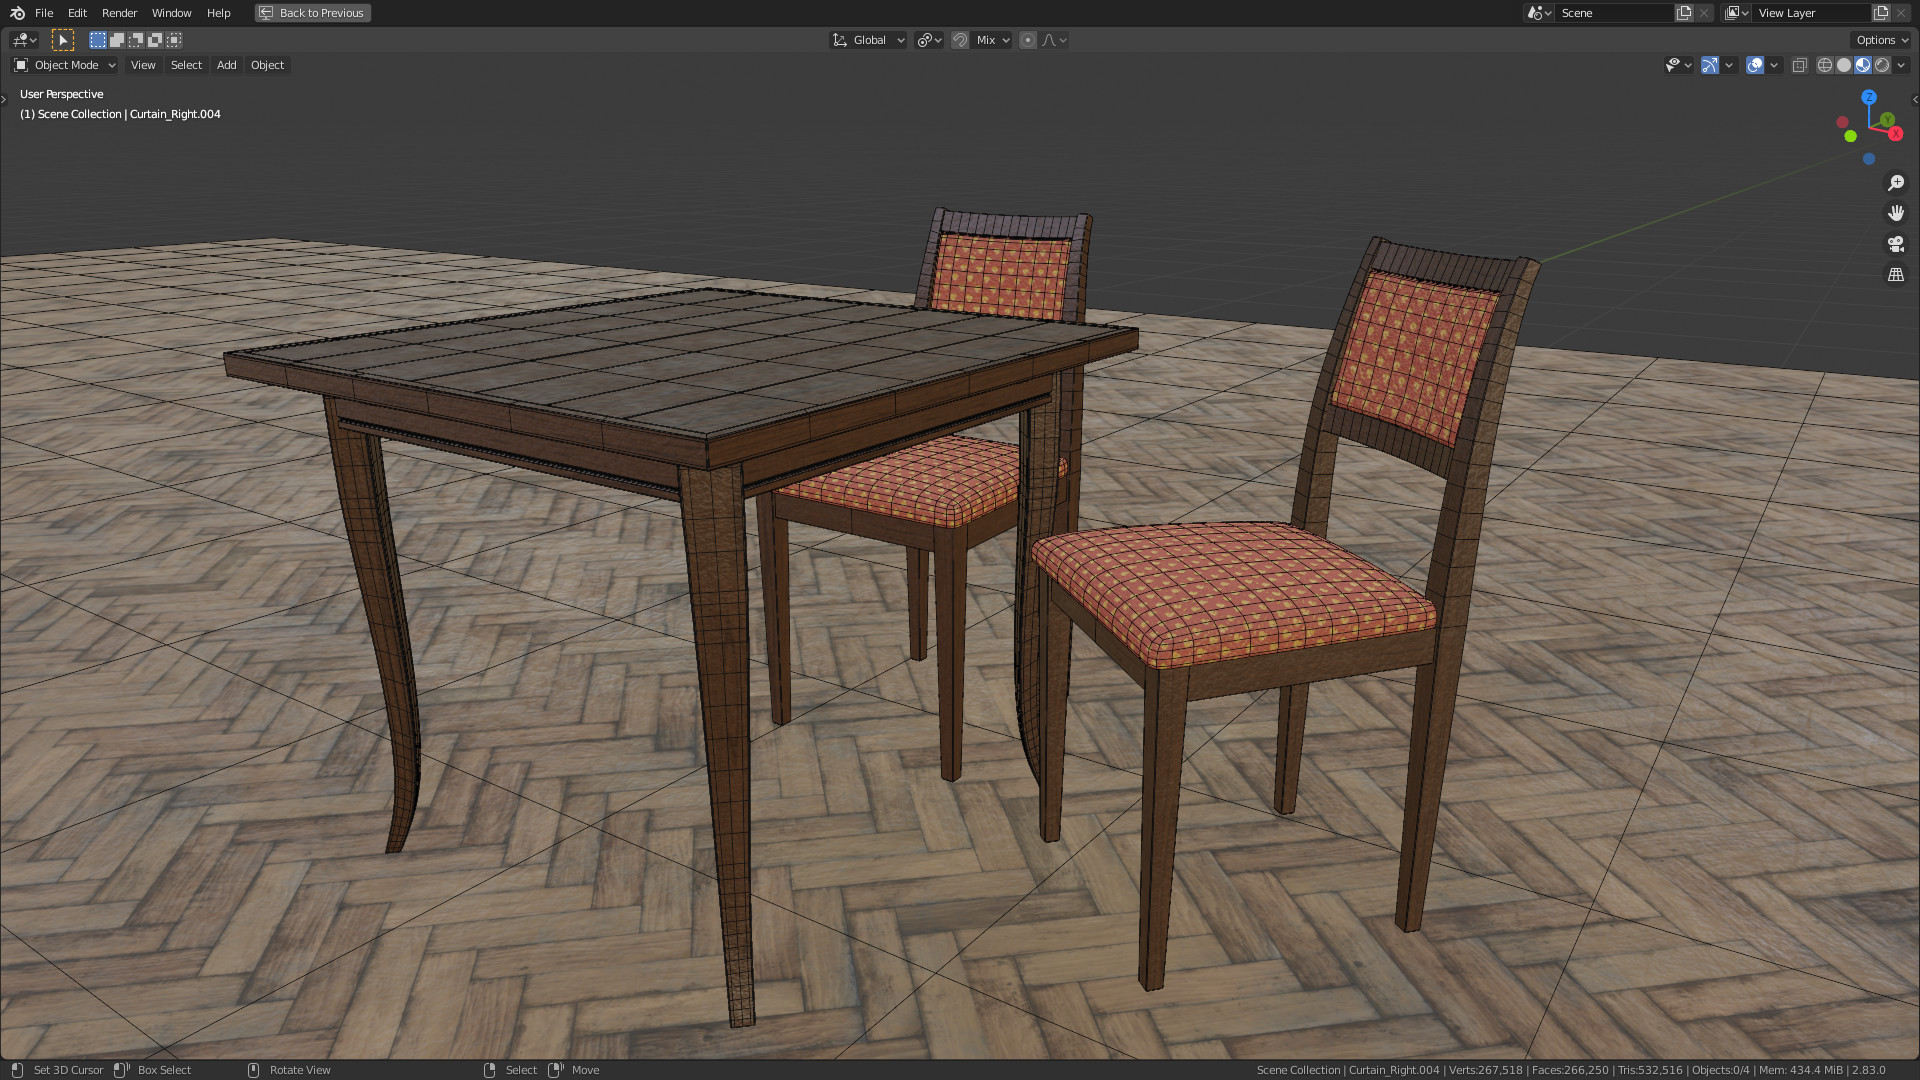
For the tables and chairs, I searched for some nice models online to save some time. I found some nice and free :) models on TurboSquid and imported them into the scene. After that, I tweaked the models to match my own versions and ended up almost remodeling them completely. So yeah, real time saver. ;)
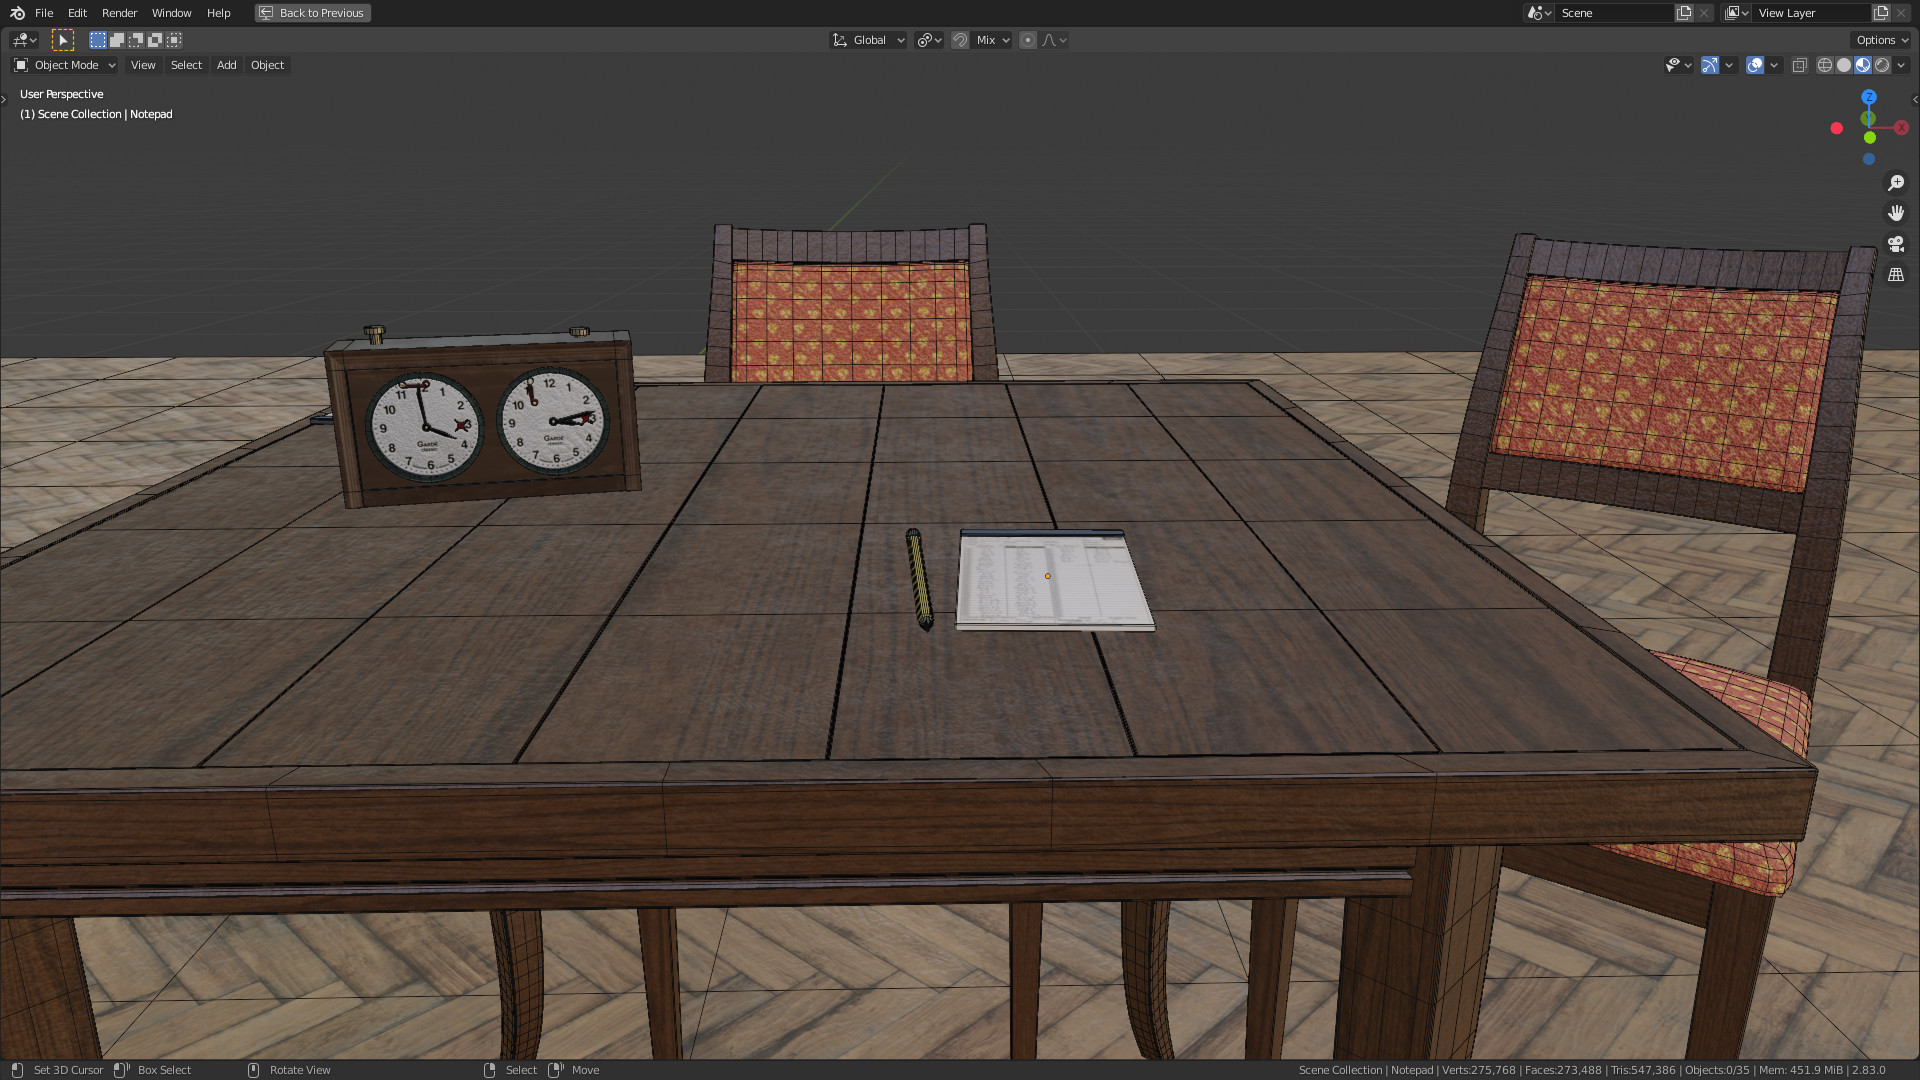
Next, I modeled extra objects, like chess clocks, pencils, and notebooks, to add on top of the tables next to the chess boards. Most of the objects are differently sized cubes, so nothing too complicated but it’s important to use some kind of bevel (modifier or in mesh) on all of them to avoid any super sharp edges.
The surrounding environment is constructed to represent the old hall, probably a school’s sports hall because they were often used for these kinds of events. It’s a big cube with some cut-outs for windows. :) I added decorated wooden panels so the walls weren’t too plain.
One important thing in making the hall were the windows. Their placement in relation to the tables was important to achieve a proper god rays effect later in lighting.
Materials
There are a lot of wooden materials in this scene. Probably almost all of them. ;) All of the textures in this scene are from three sites: CC0 Textures, Texture Haven and Textures.com. These three sites have been my main source of textures for quite some time.
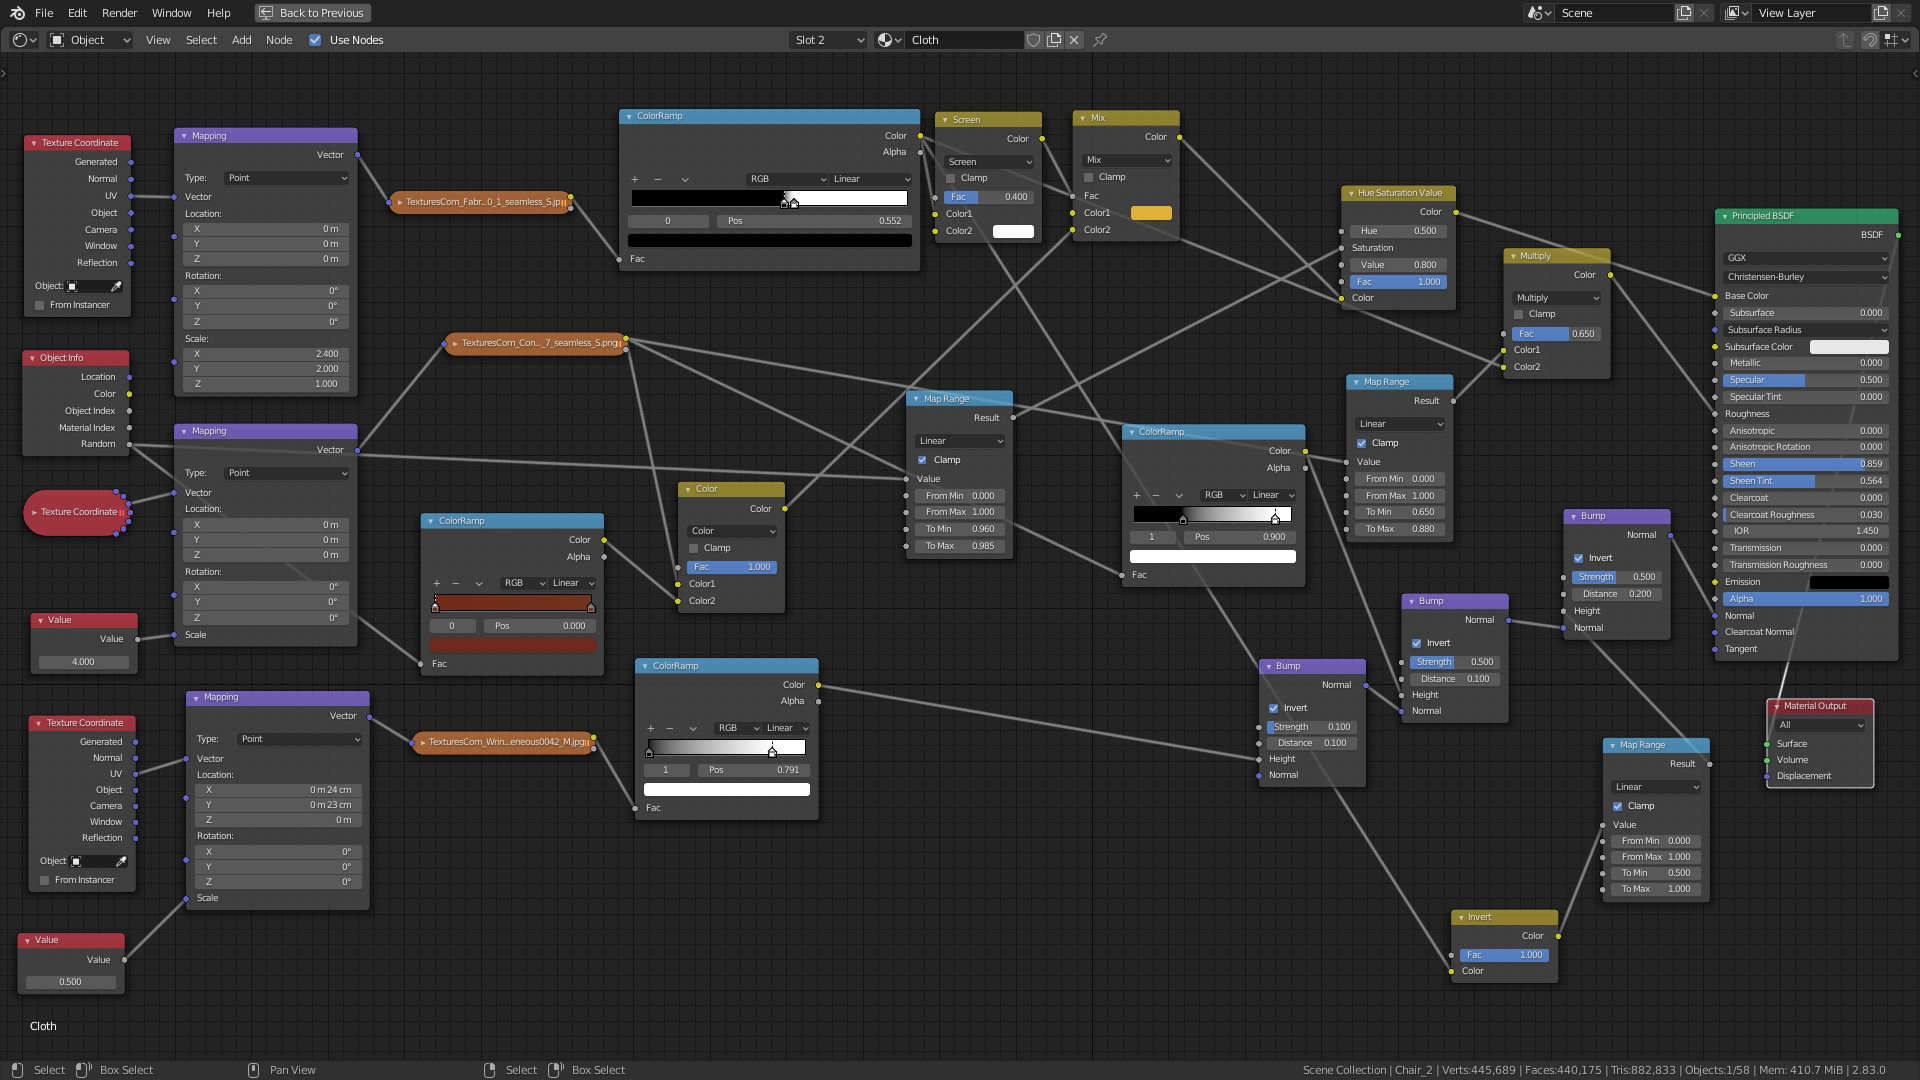
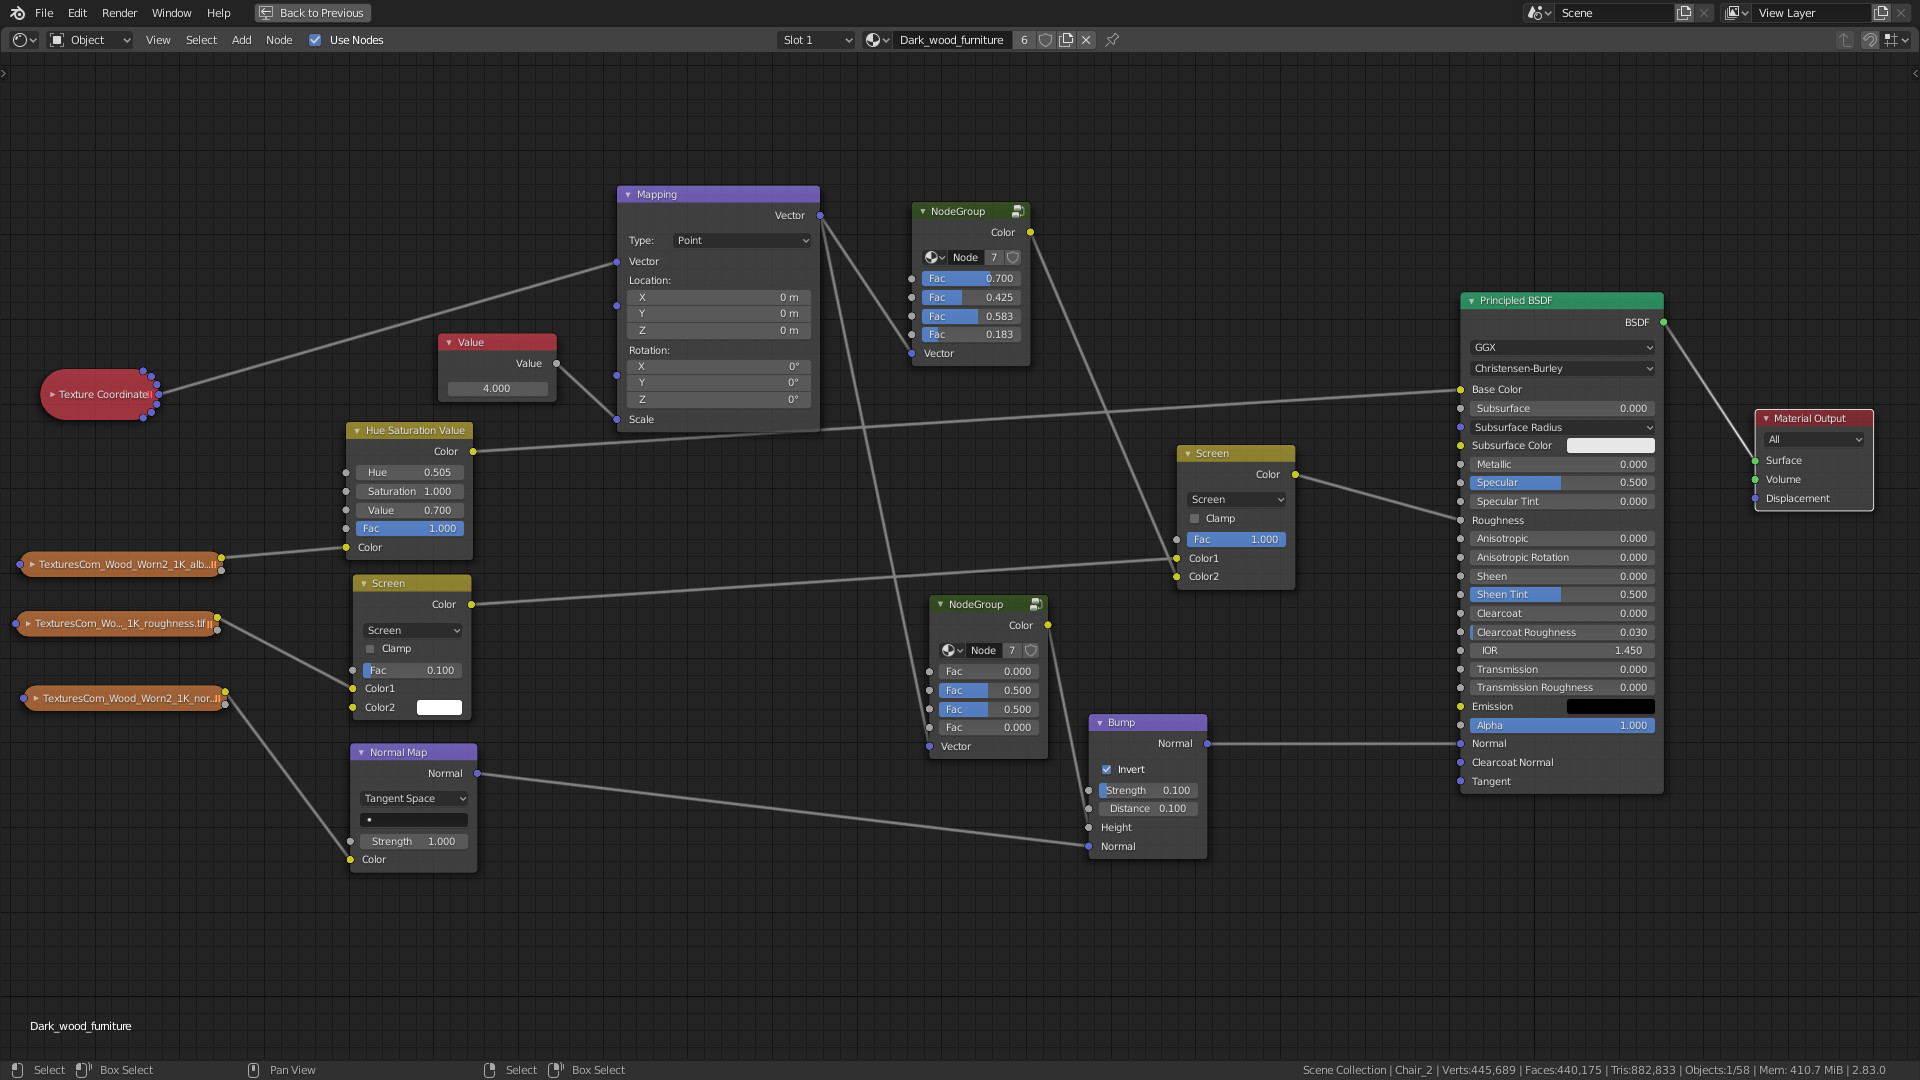
The majority of materials are basic principled shaders using colour, normal, and roughness maps from the previously mentioned sites. I vary materials on different objects that share the same materials by slightly changing the hue and saturation of the textures and adding different imperfections to roughness and normal maps.

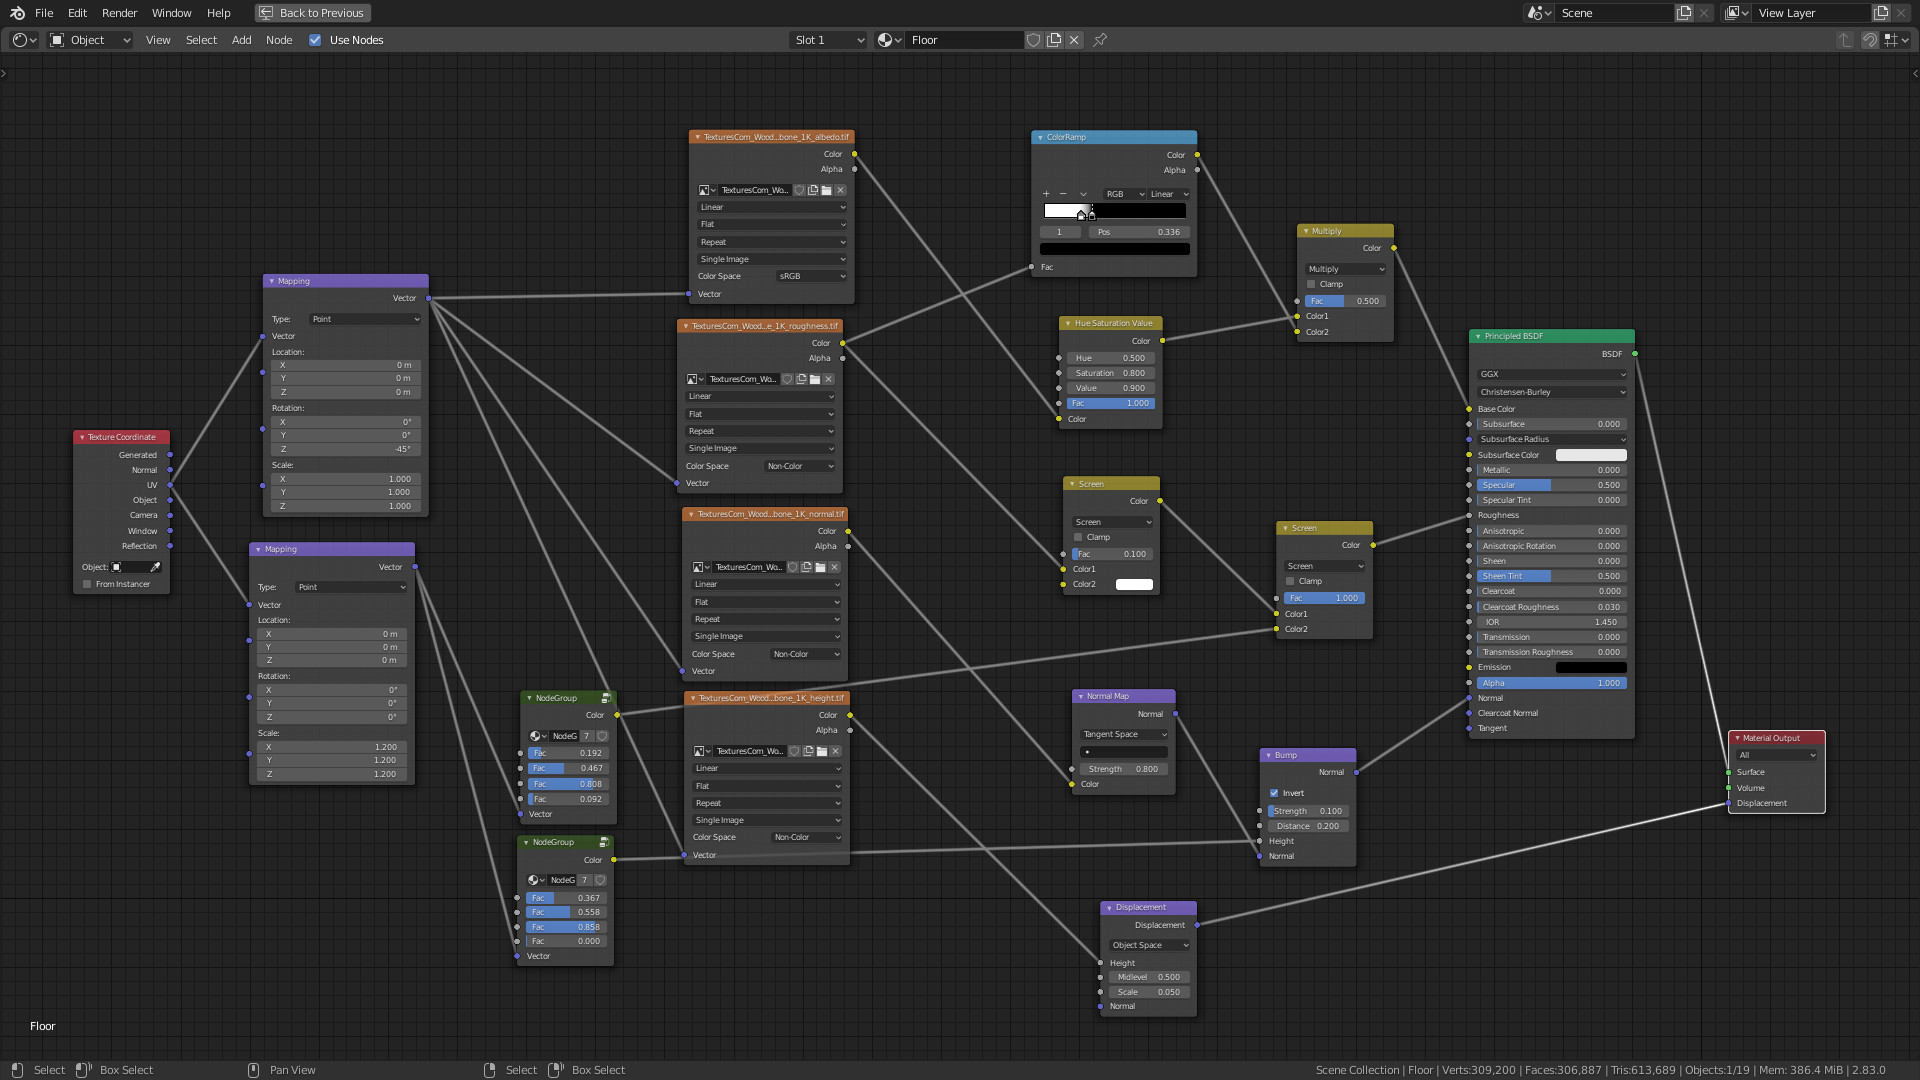
When applying textures using UV maps, I found that quick unwrapping by cube projection works really well, especially when working with objects made in real life with wooden planks.
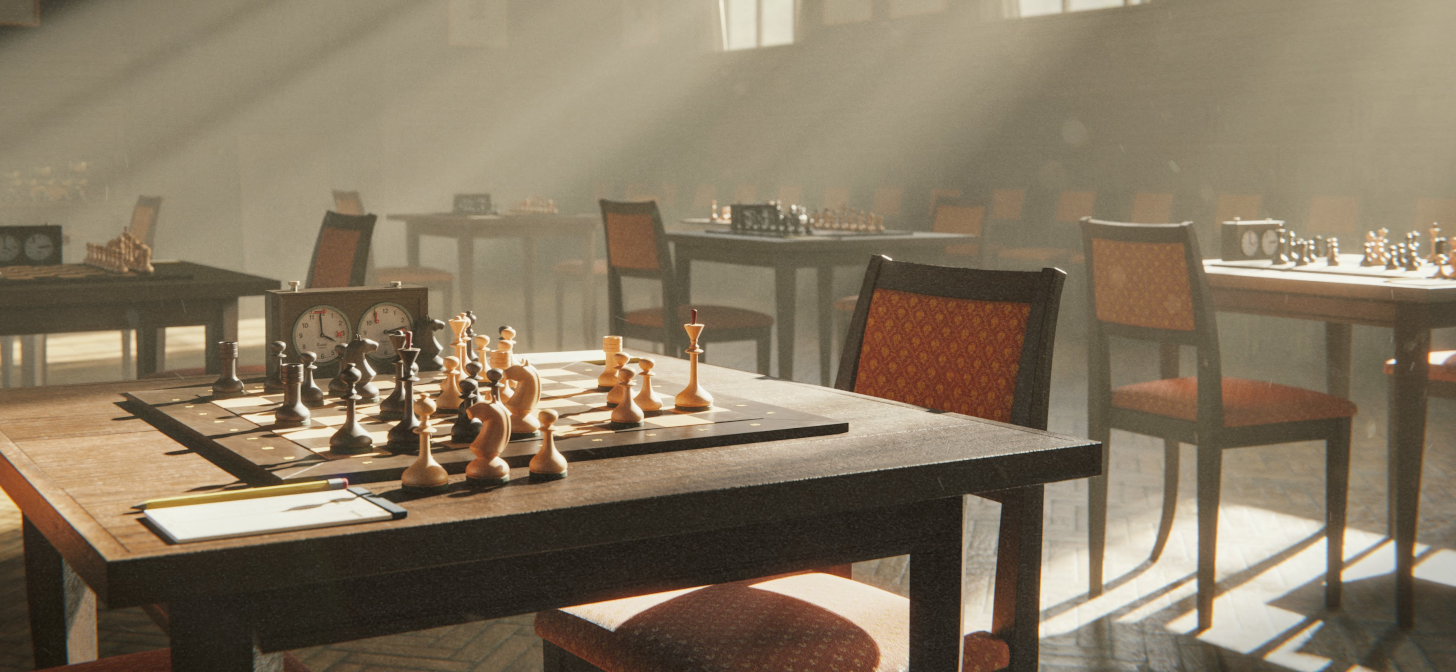
Lighting
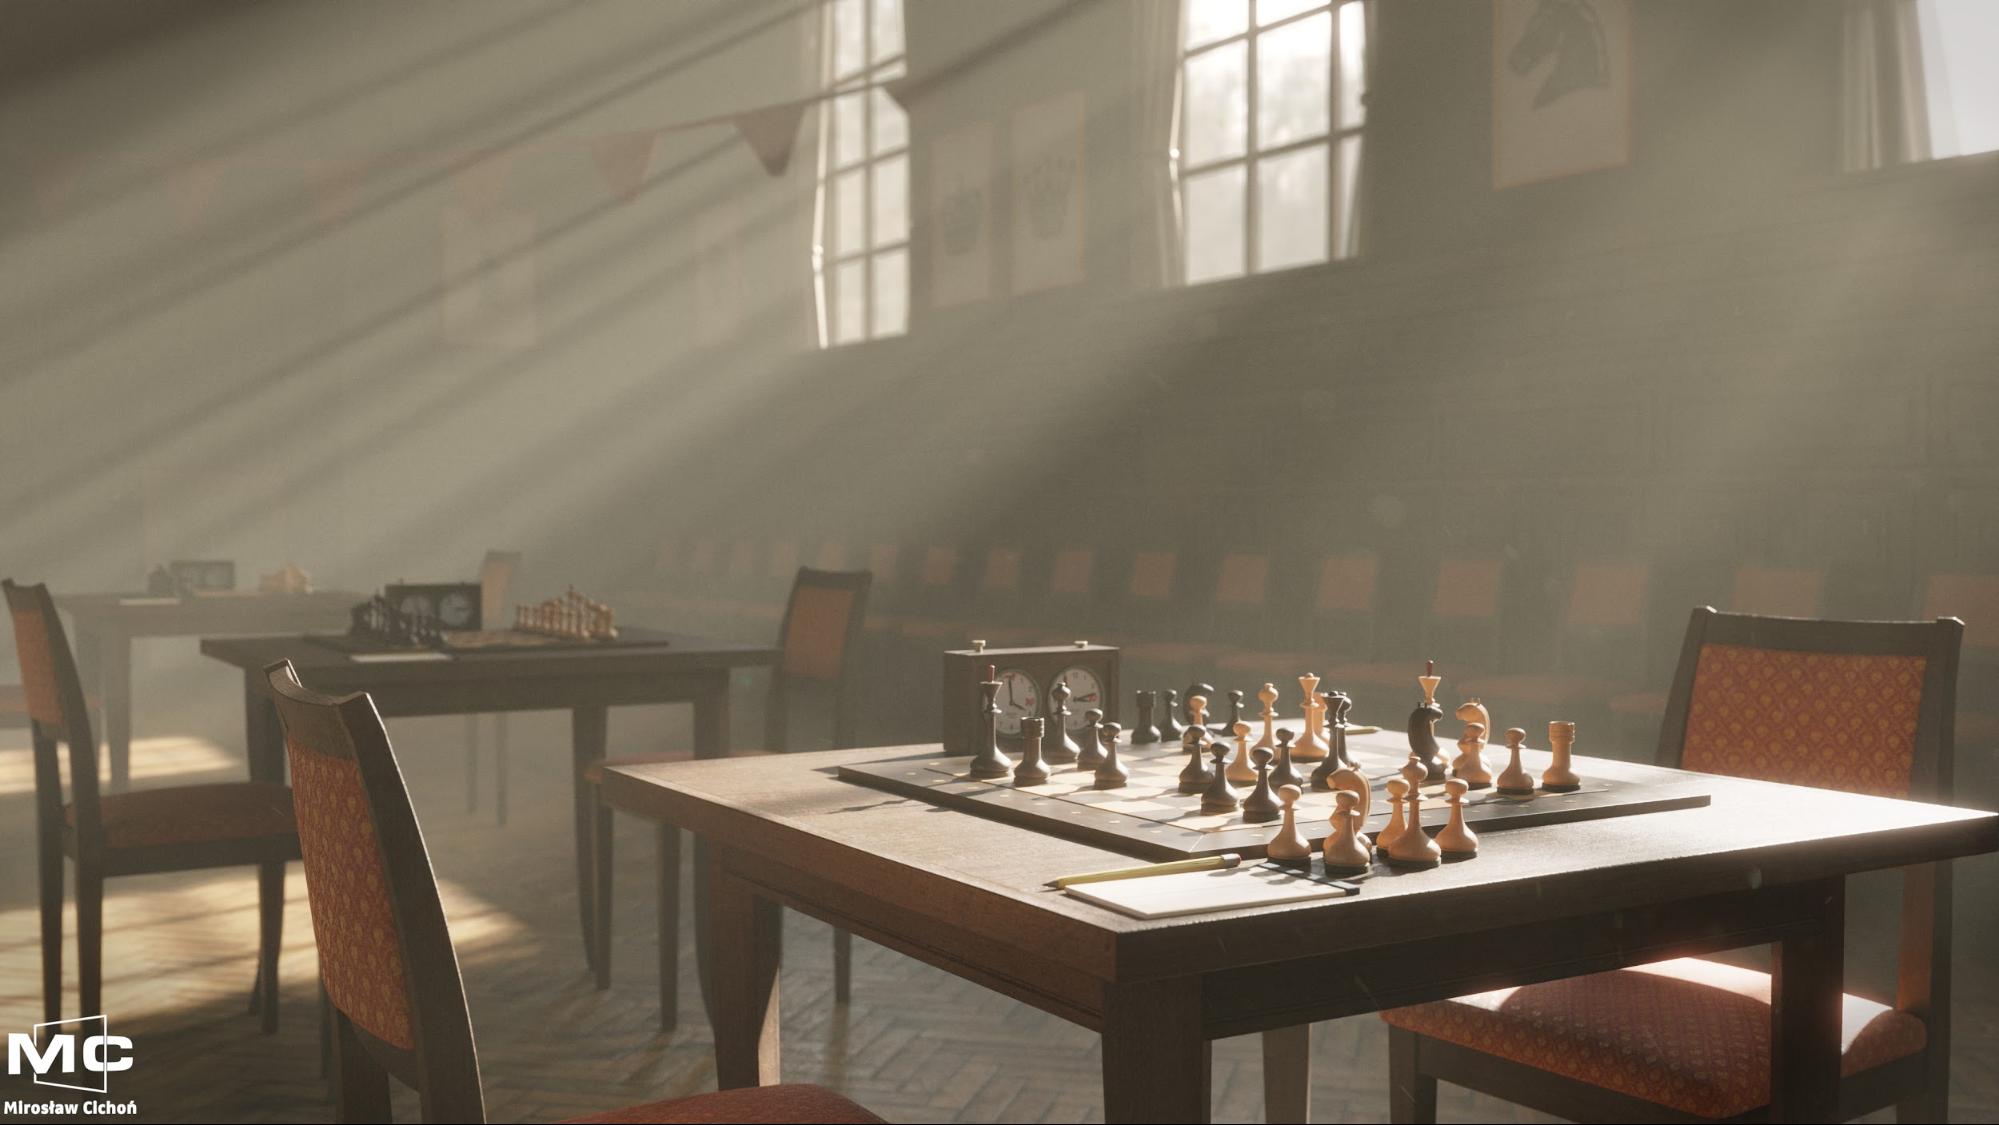
From the beginning, I knew that I wanted to achieve a look of a dusty room lit by sunbeams coming through the windows. I started with a sun lamp and a plain world background. I added a cube surrounding the whole scene with a principled volume shader.


Rendering and compositing
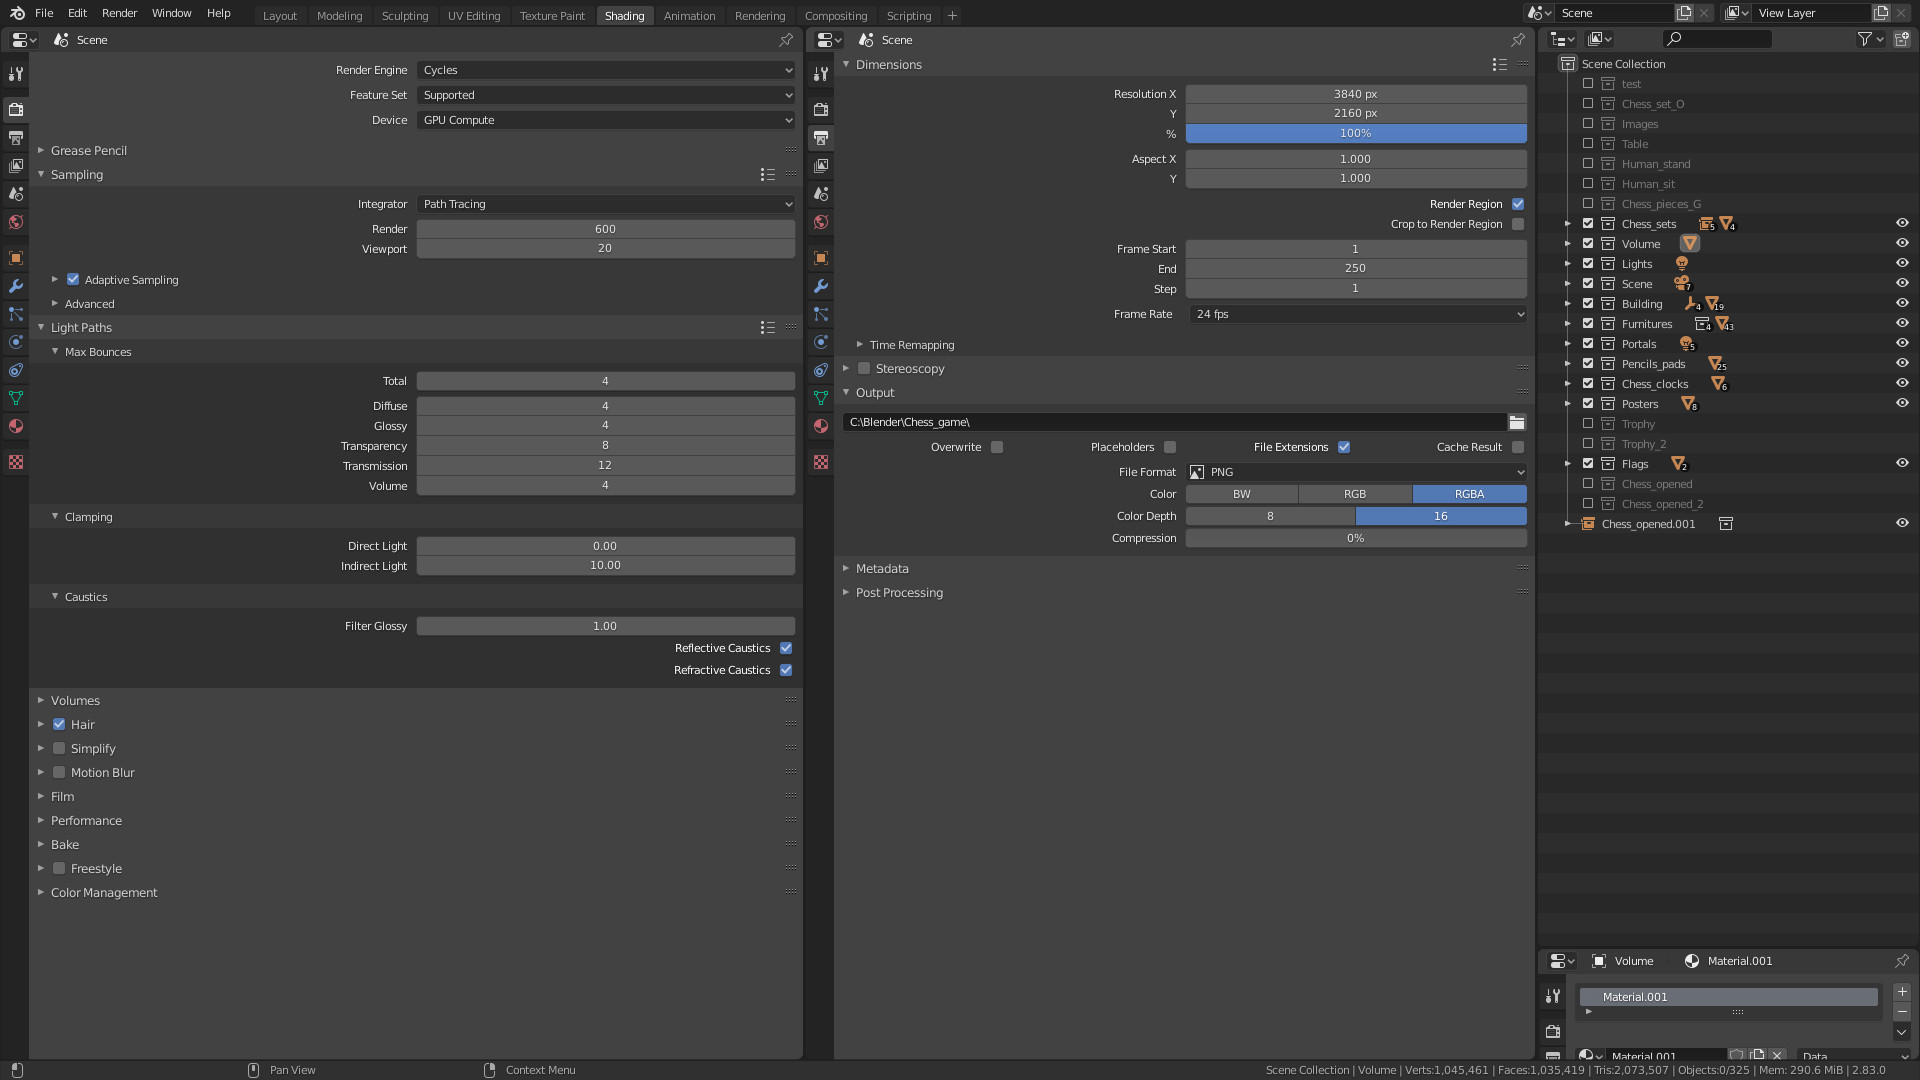
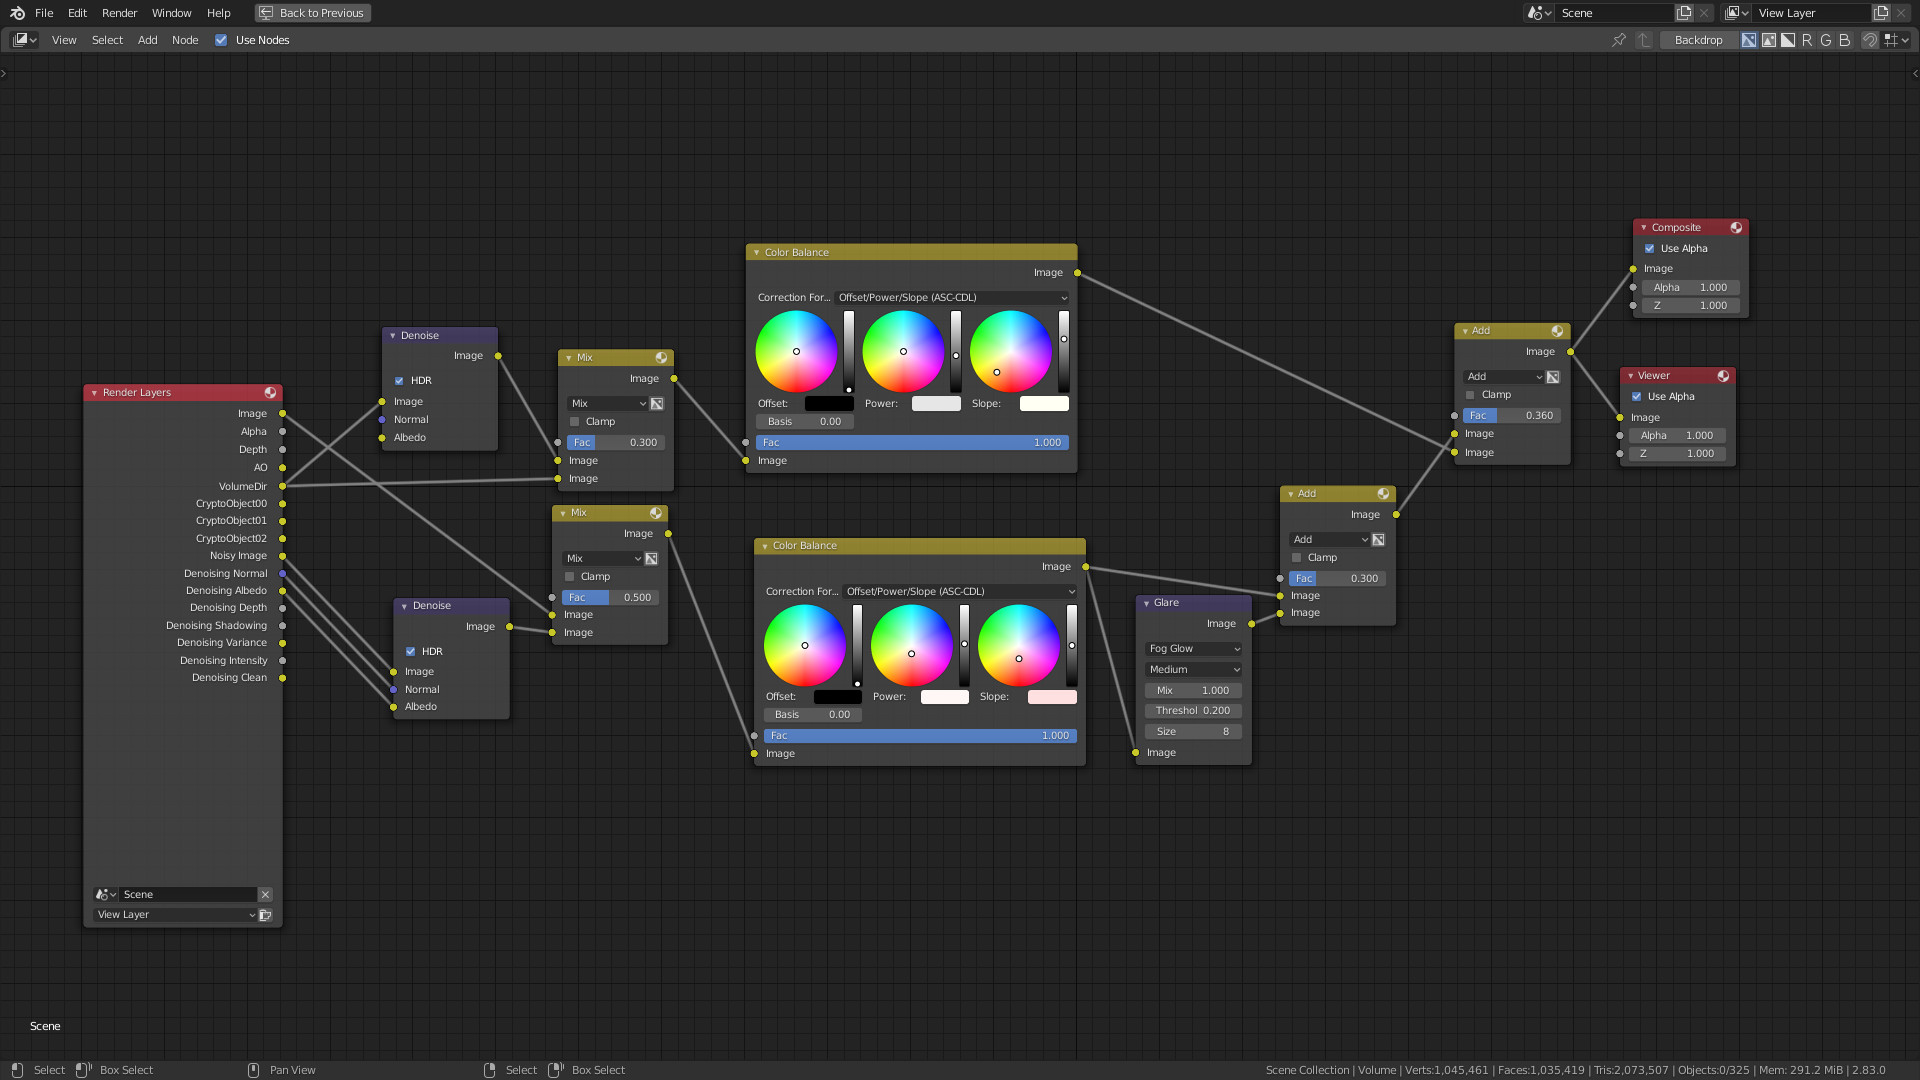
I’ve rendered the scene at 3840 x 2160 resolution with 600 samples using a denoise node in the compositor. For a single image, it took around 8 hrs to complete. Besides the finished image, I also save AO and VolumeDir passes for future compositing. I did some simple color balance inside Blender’s compositor and used some nodes to add a bit of glare to the image.
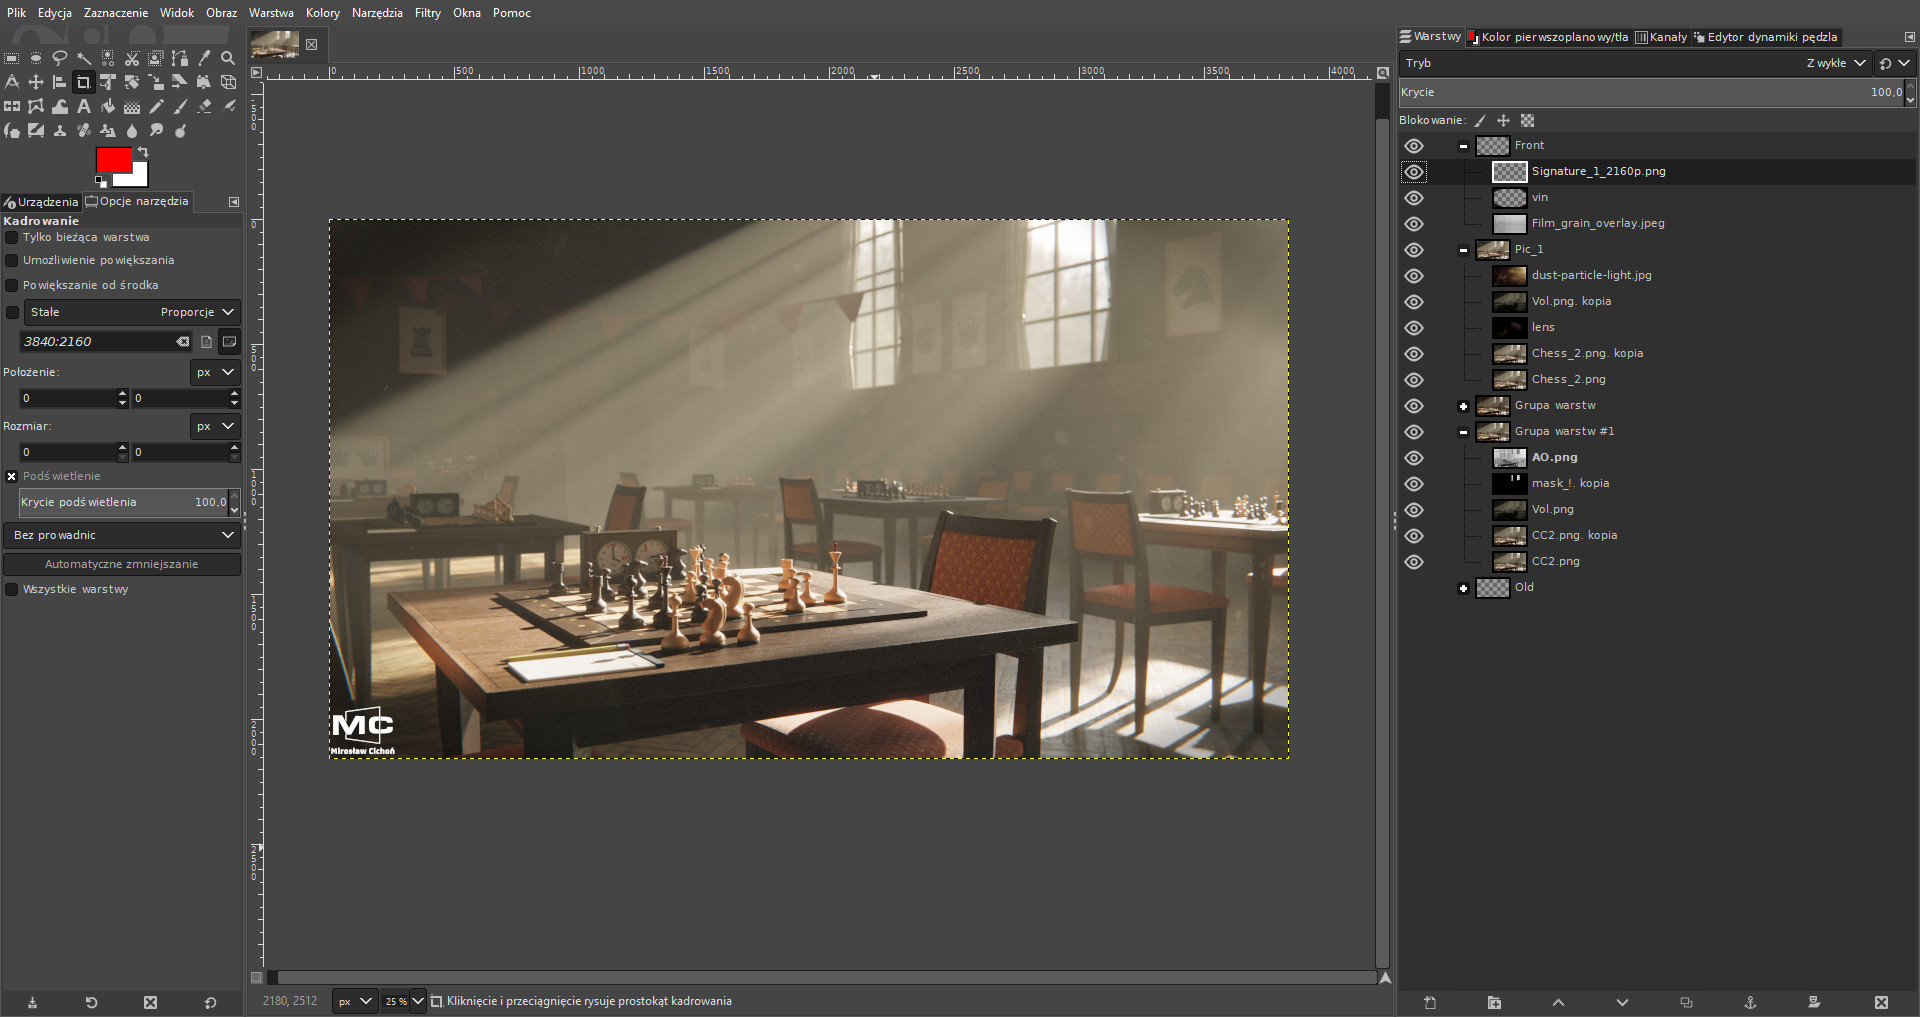
I imported all passes to GIMP and there added final touches. The VolumeDir pass helped me add more “light” where the god rays are. I added film grain, dust particles in the air, lens flare, vignette, and an overexposed image of some trees to the background behind windows to avoid it being too plain and fake.
Final images

About me
 Mirosław Cichoń, medical student, 3D hobbyist, and enthusiast.


