Behind the Scenes: Film SLR Praktica MTL 5 Model
About me
My name is Antonín Chod. I am a student of graphic design living in the Czech Republic.
I like photography—especially analog process, cinematography, classical art, and last year I started to learn CGI.
I was attracted to the 3D world by realistic product renders and a sense of detail that I saw in those images. I learned mostly by finding things and techniques I just needed to know. I have been doing 3D for only a year and I am already in love with Blender and I want to make a living with CGI someday.
I started in Blender with simple things I had around me so I could have a physical reference. For example, a Fender Stratocaster guitar head, or a bicycle light.
[sponsor id=’qarnot’]
Process
Inspiration and references
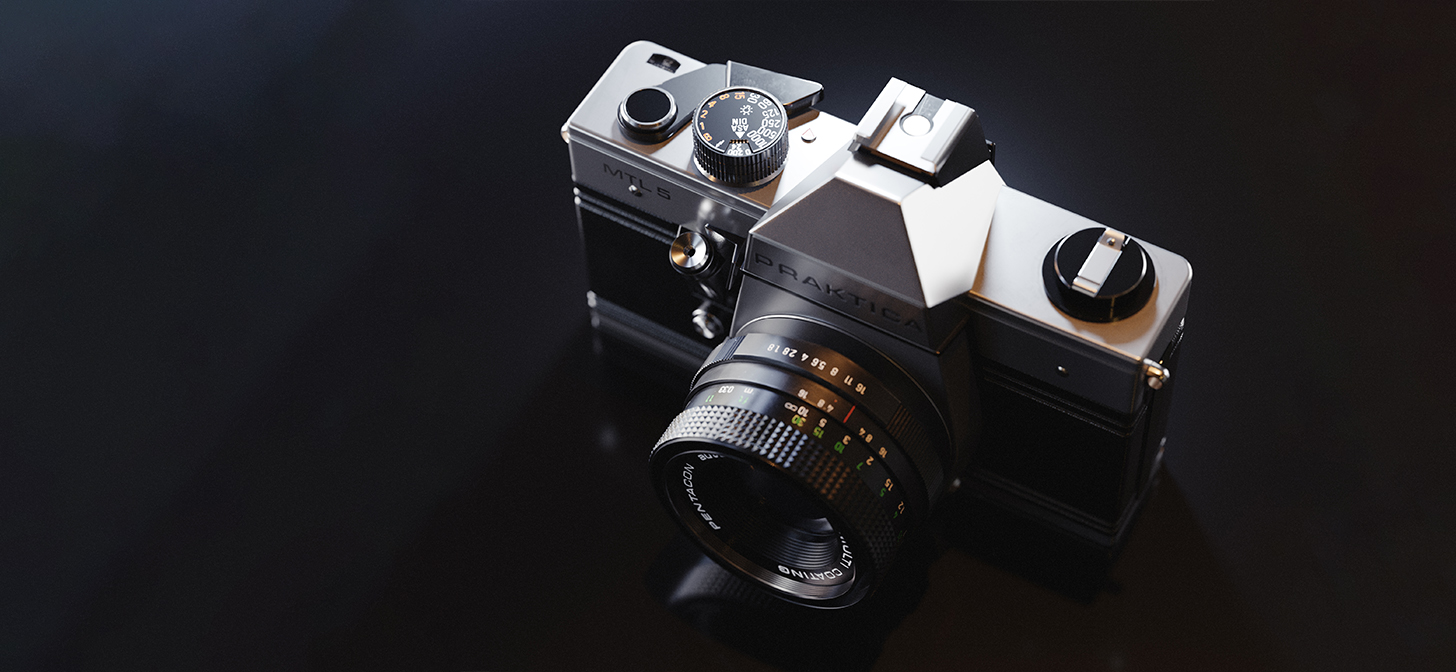
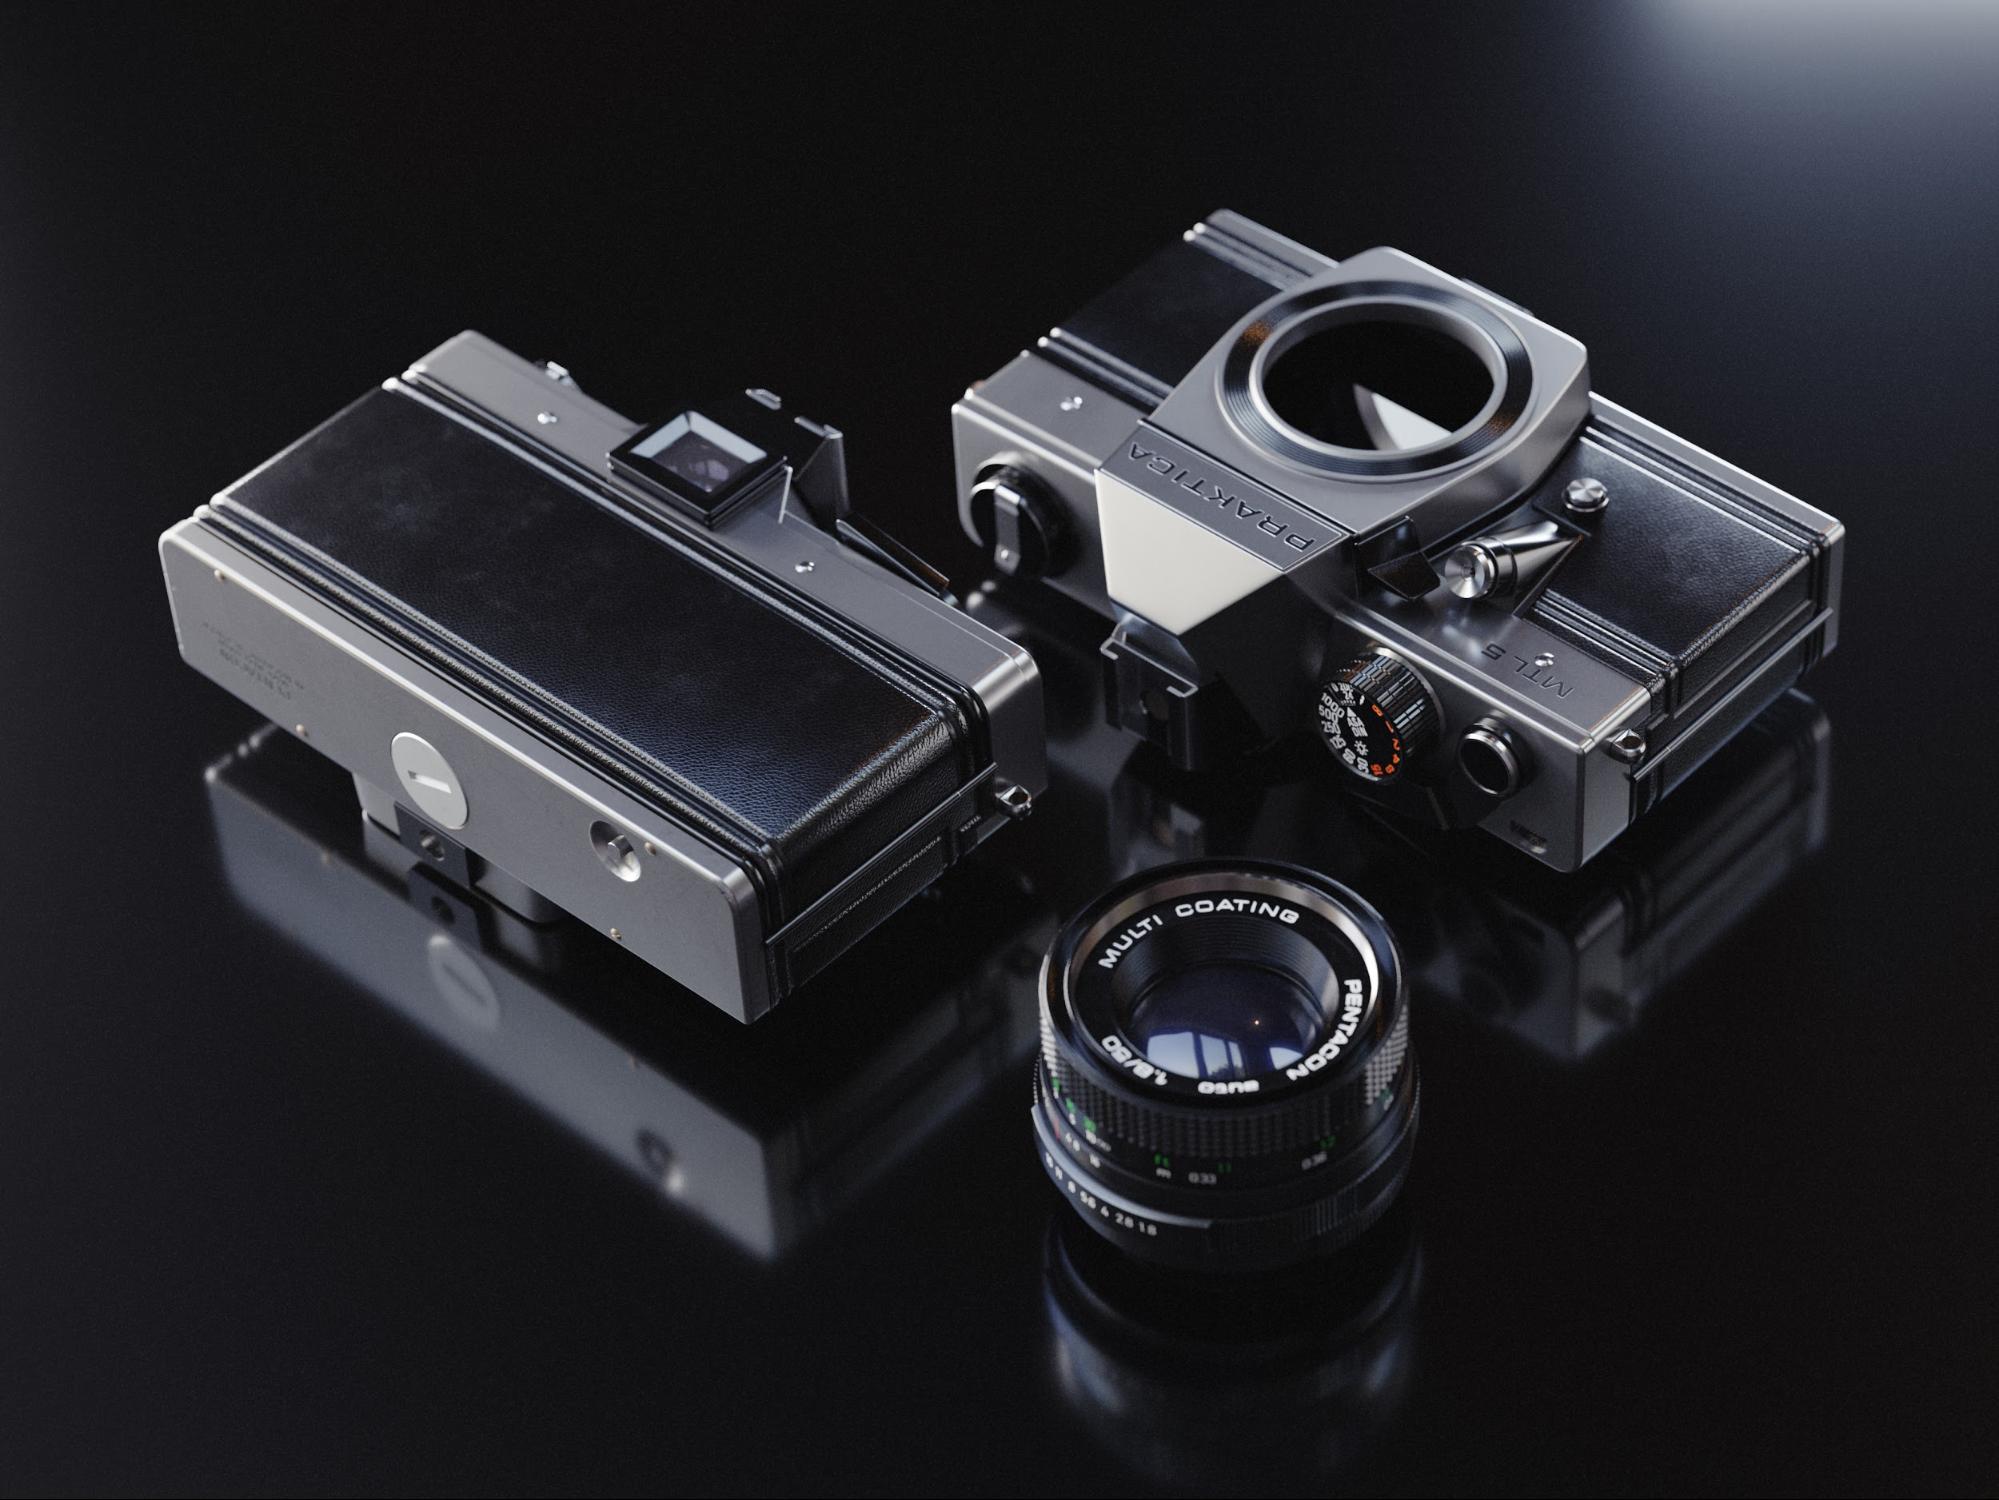
When I was looking for what else I could model after four months of learning 3D, I realized that an analog lens lying on my desk would not have to be that hard. Within a week, I had the lens finished, and then it only took a few days to commit to making the whole camera. I really love the sleek timeless design of that Praktica MTL 5 body. I was looking for material work and the vision of a realistic render could not let me sleep.
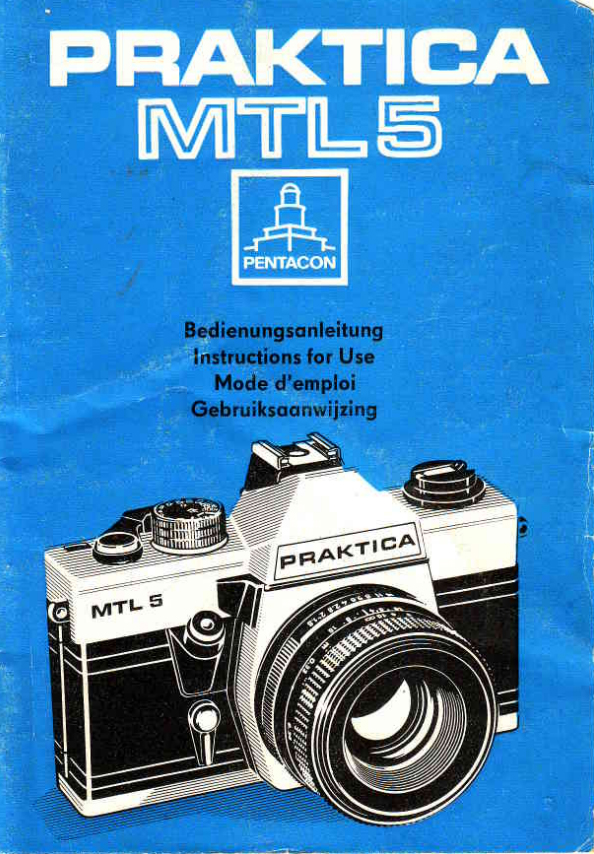
So I quickly found a photo of the Praktica from the front (I found a beautiful PDF manual for this camera), I set it as a reference and scaled it down to match the real proportion, which I measured the whole time from the physical reference (real Praktica) using a cheap plastic ruler. I was eyeballing the rest of the proportions. I mainly used the edge length overlay feature and ruler tool to measure in Blender.
Tools
- Blender 2.82 – Cycles (Nvidia GTX 1660 CUDA acceleration)
- Adobe Photoshop CC
- Canon EOS 200d for some textures
Modeling
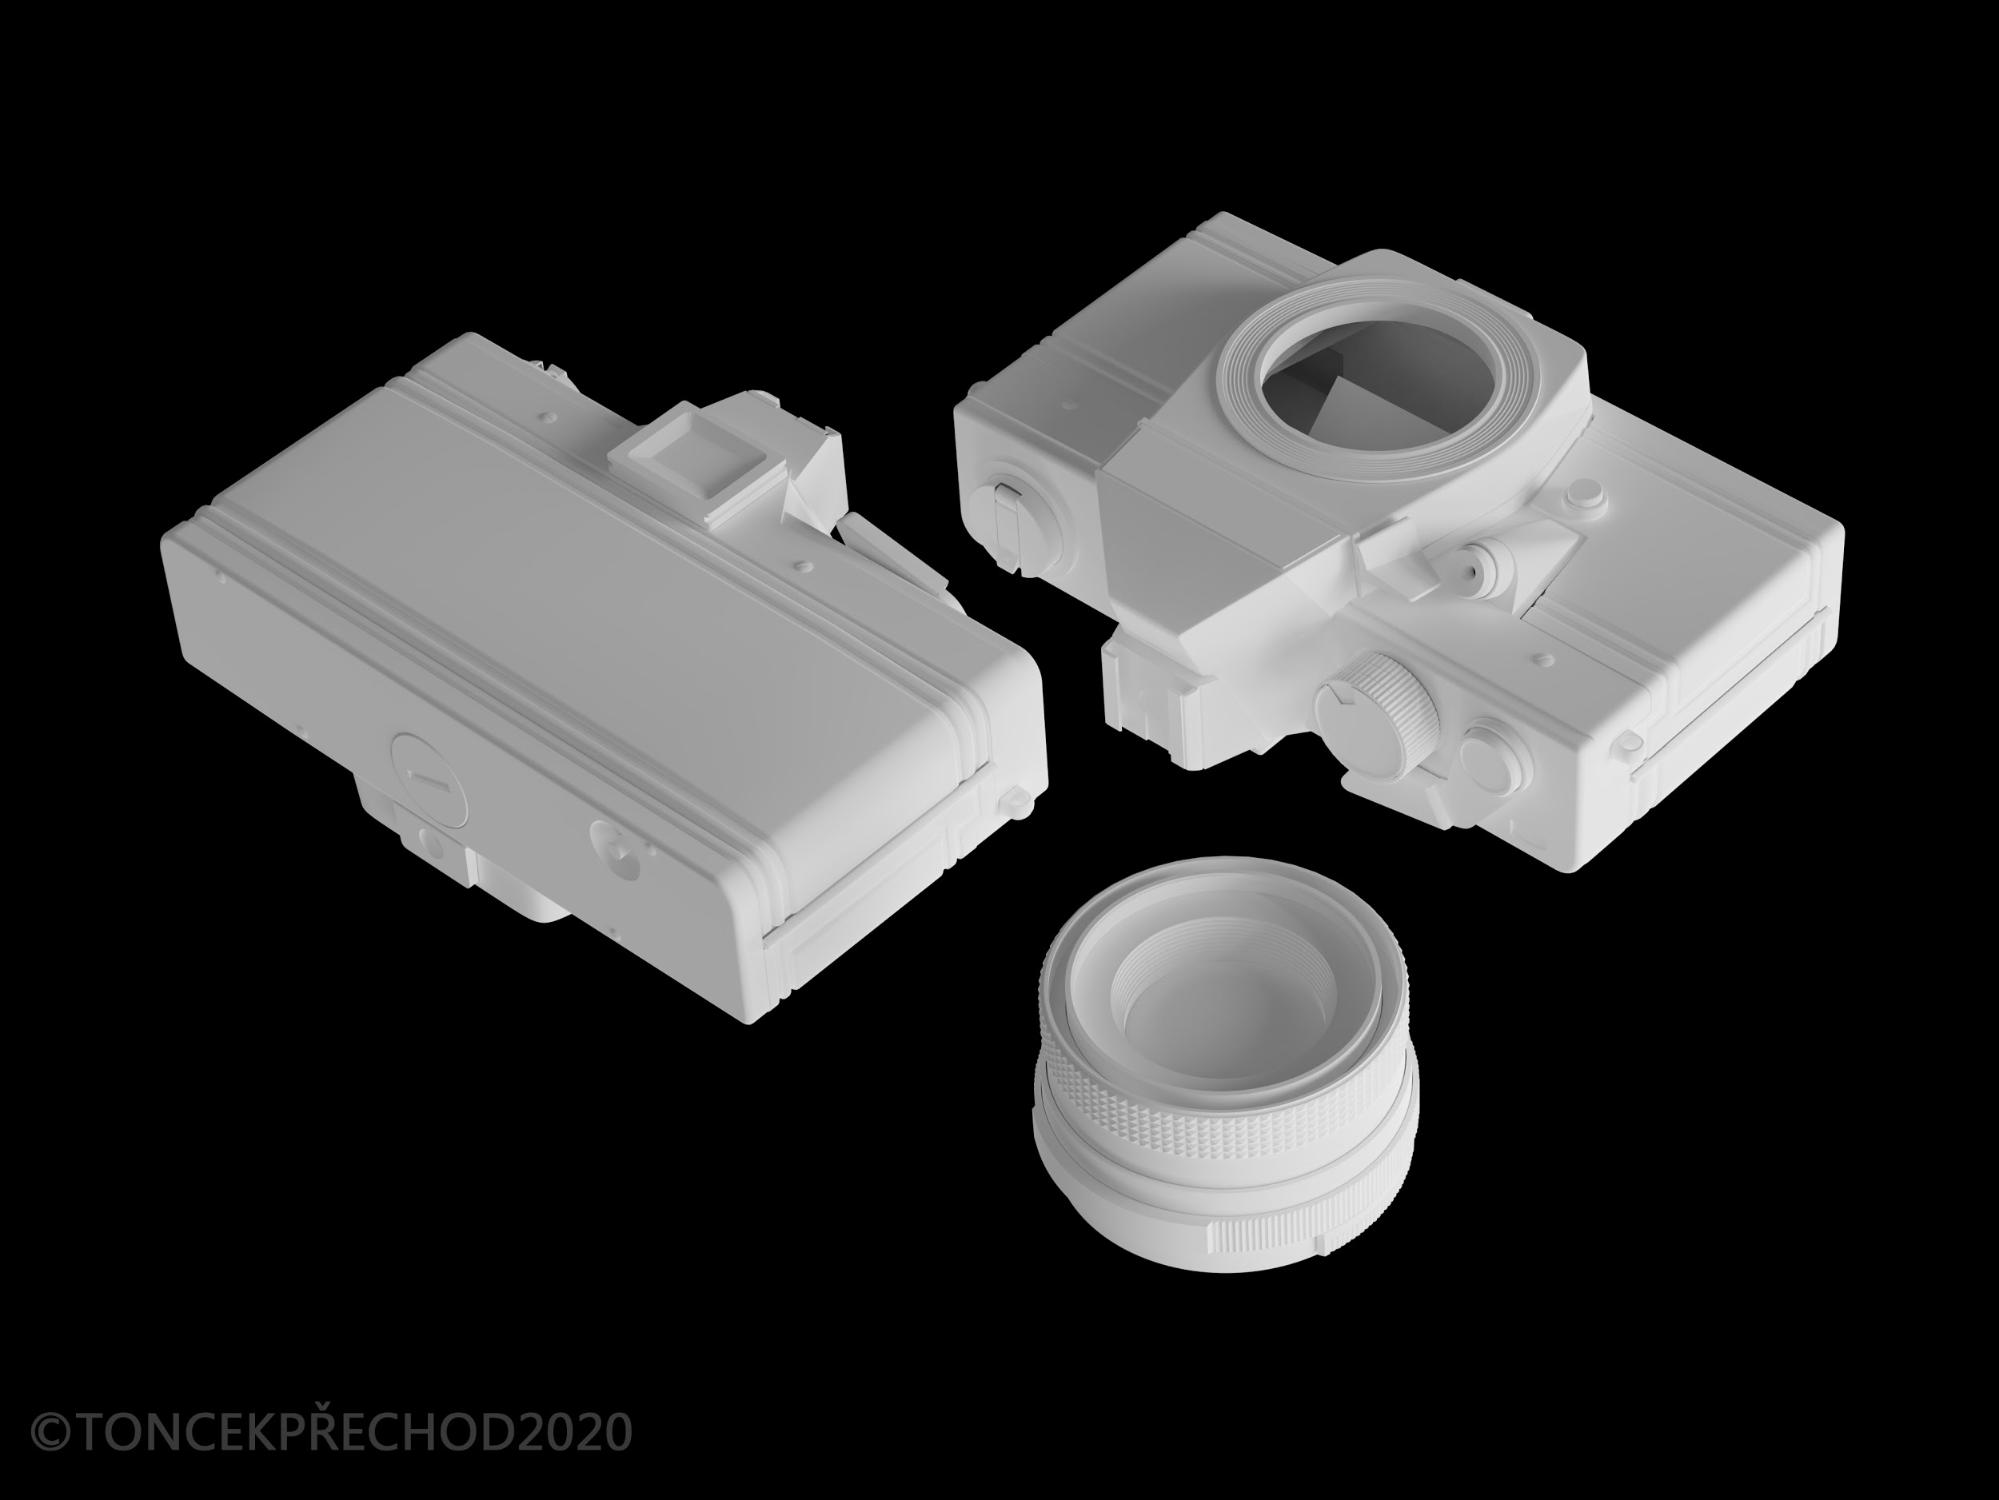
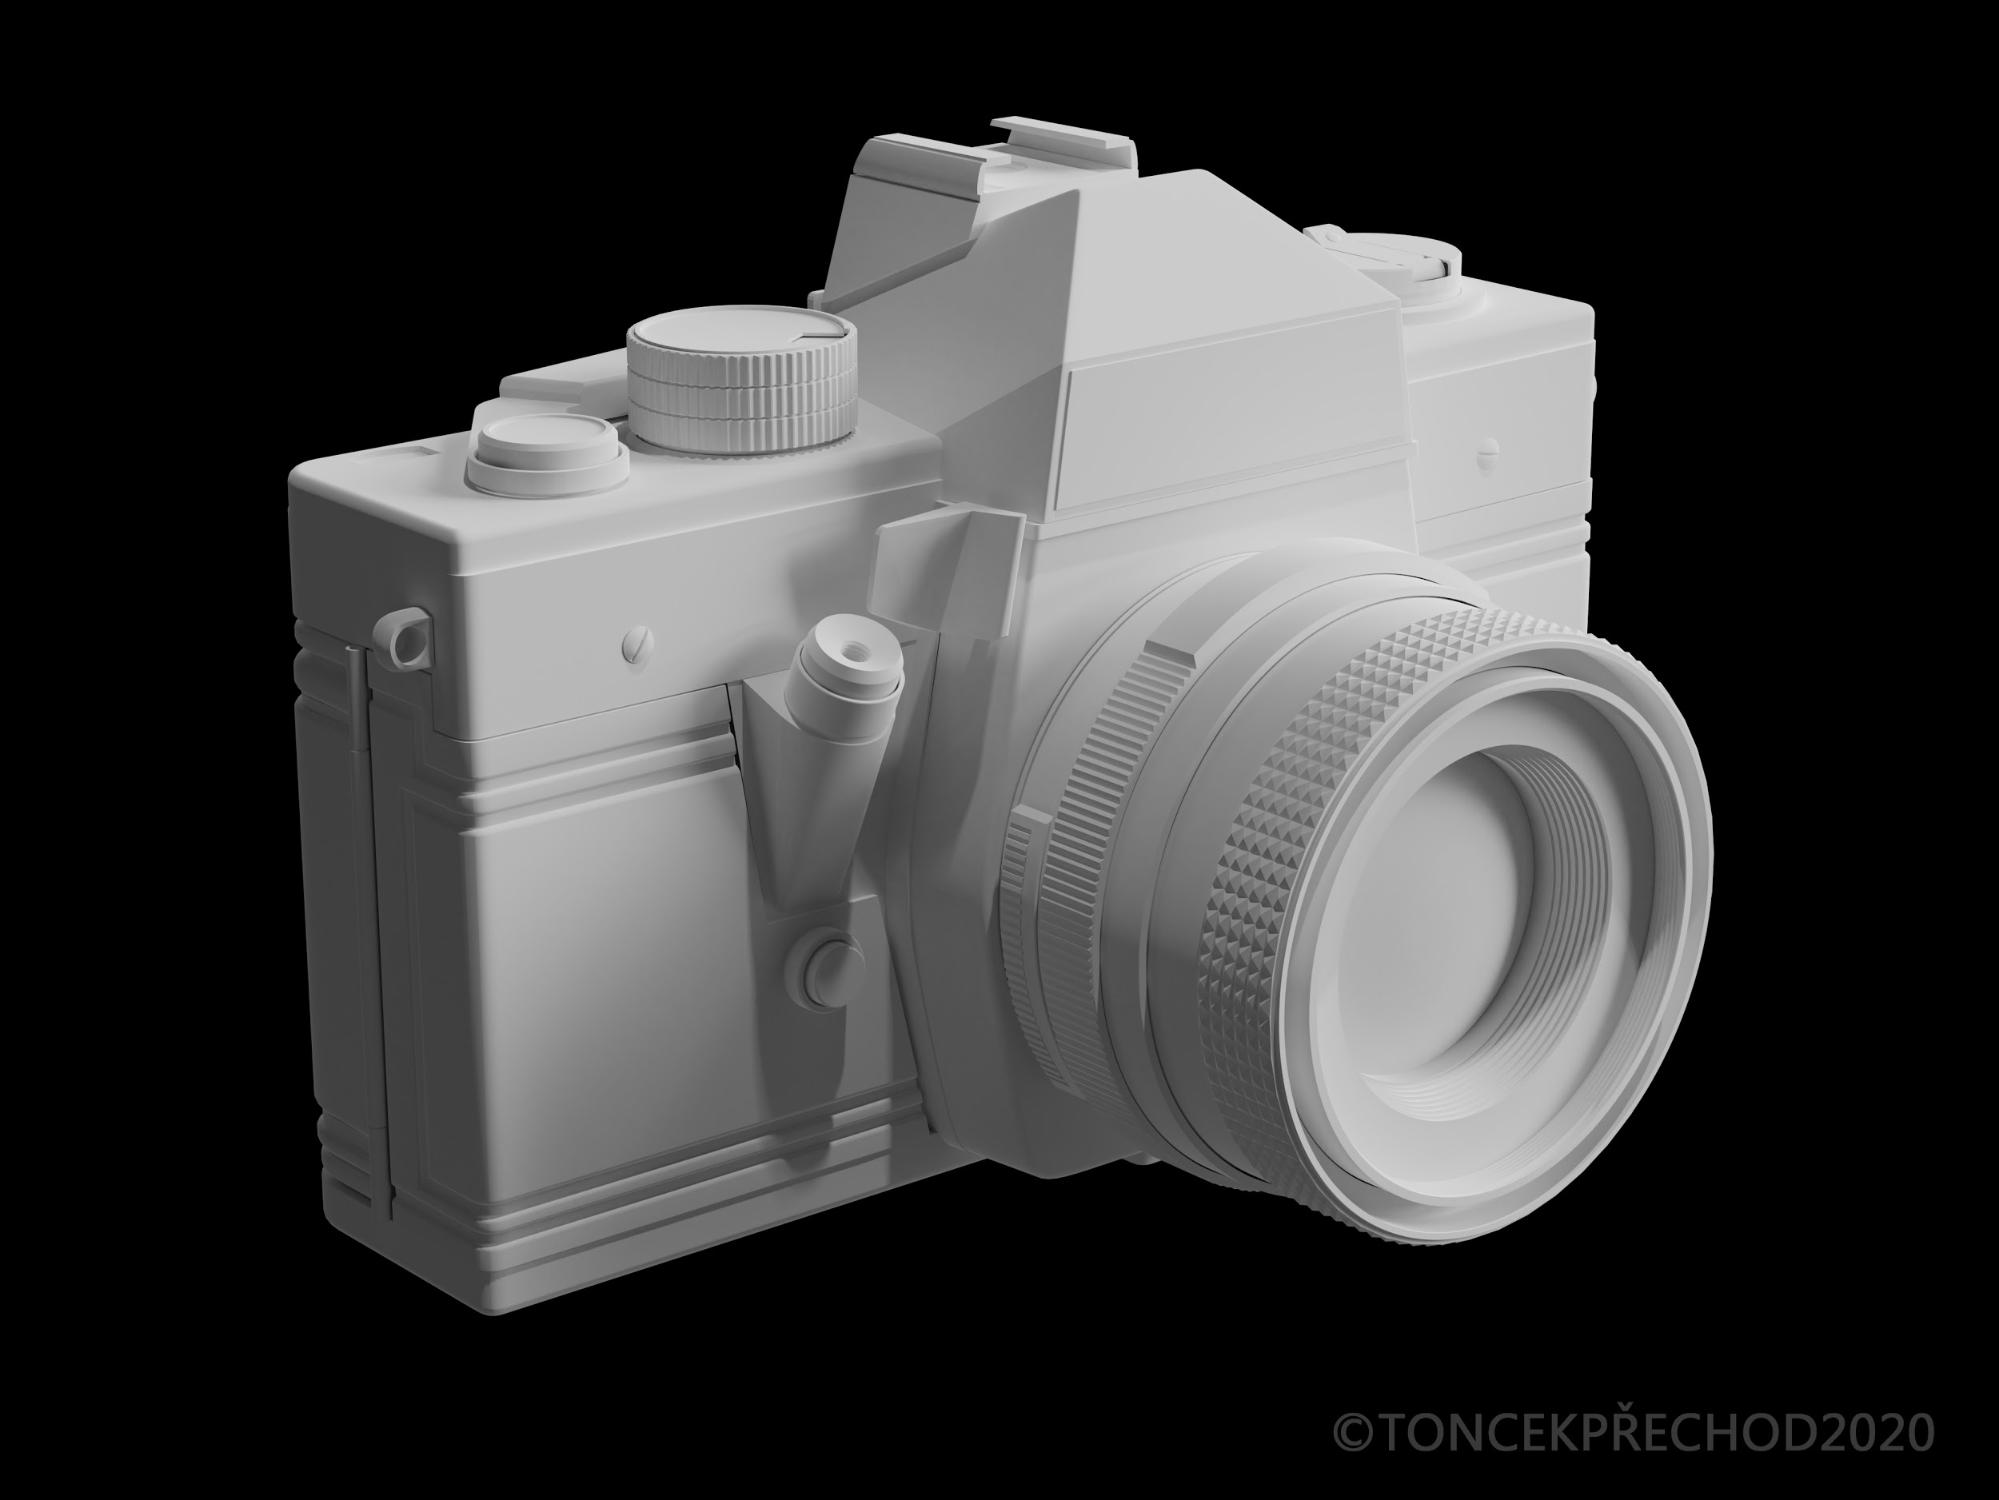
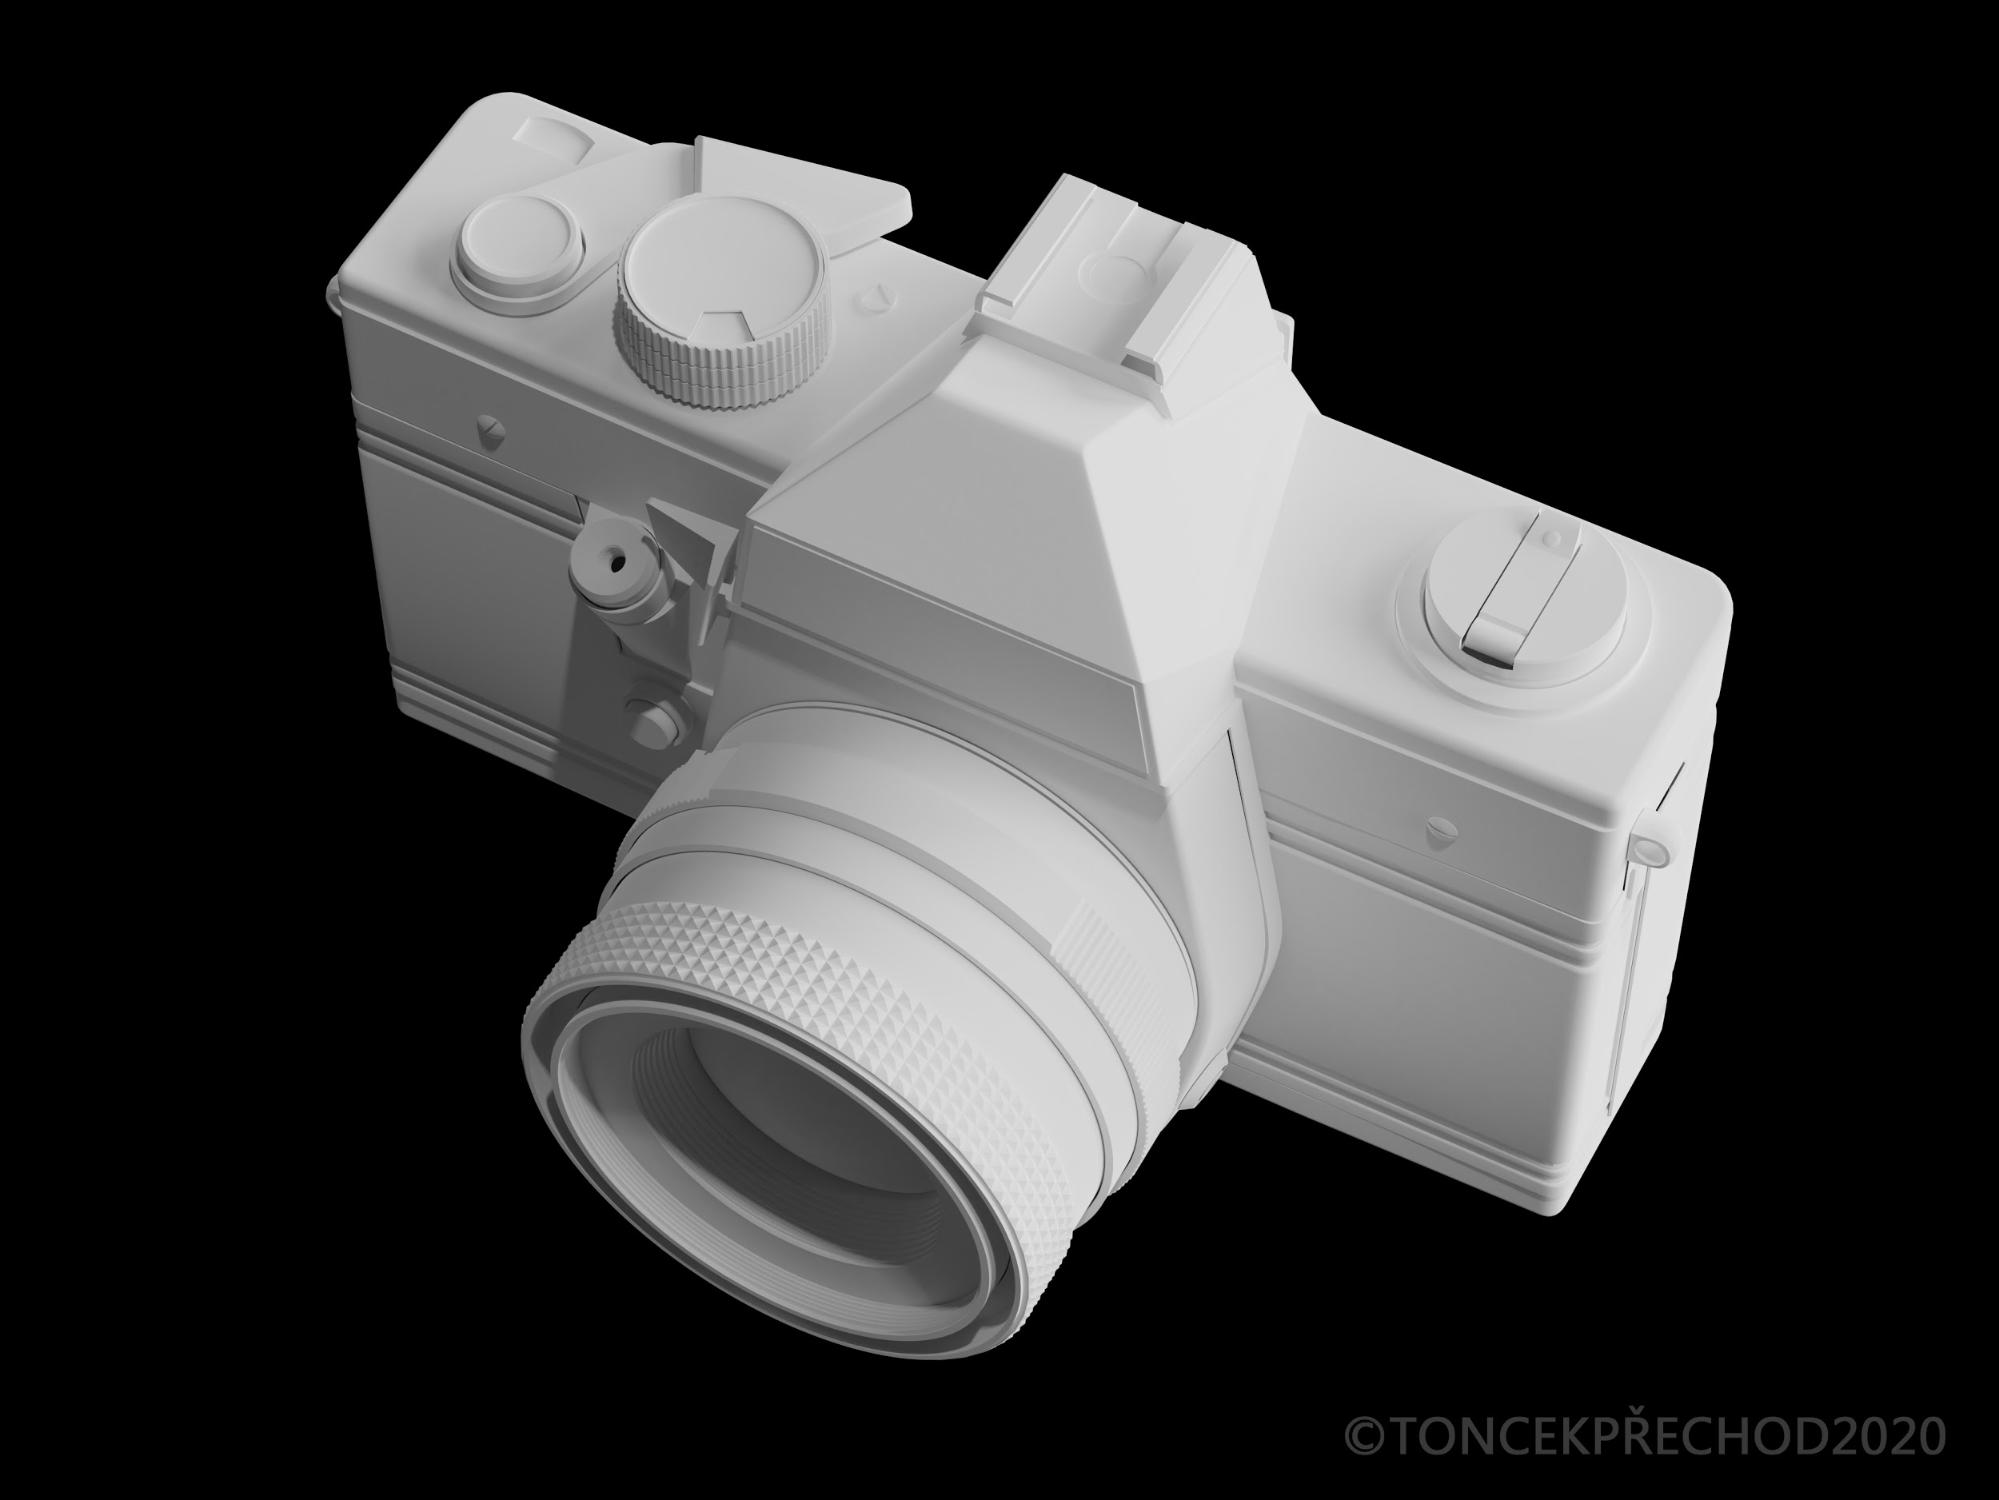
At the time, I didn’t understand topology that much and I couldn’t use modifiers much, so my workflow was very destructive and messy.
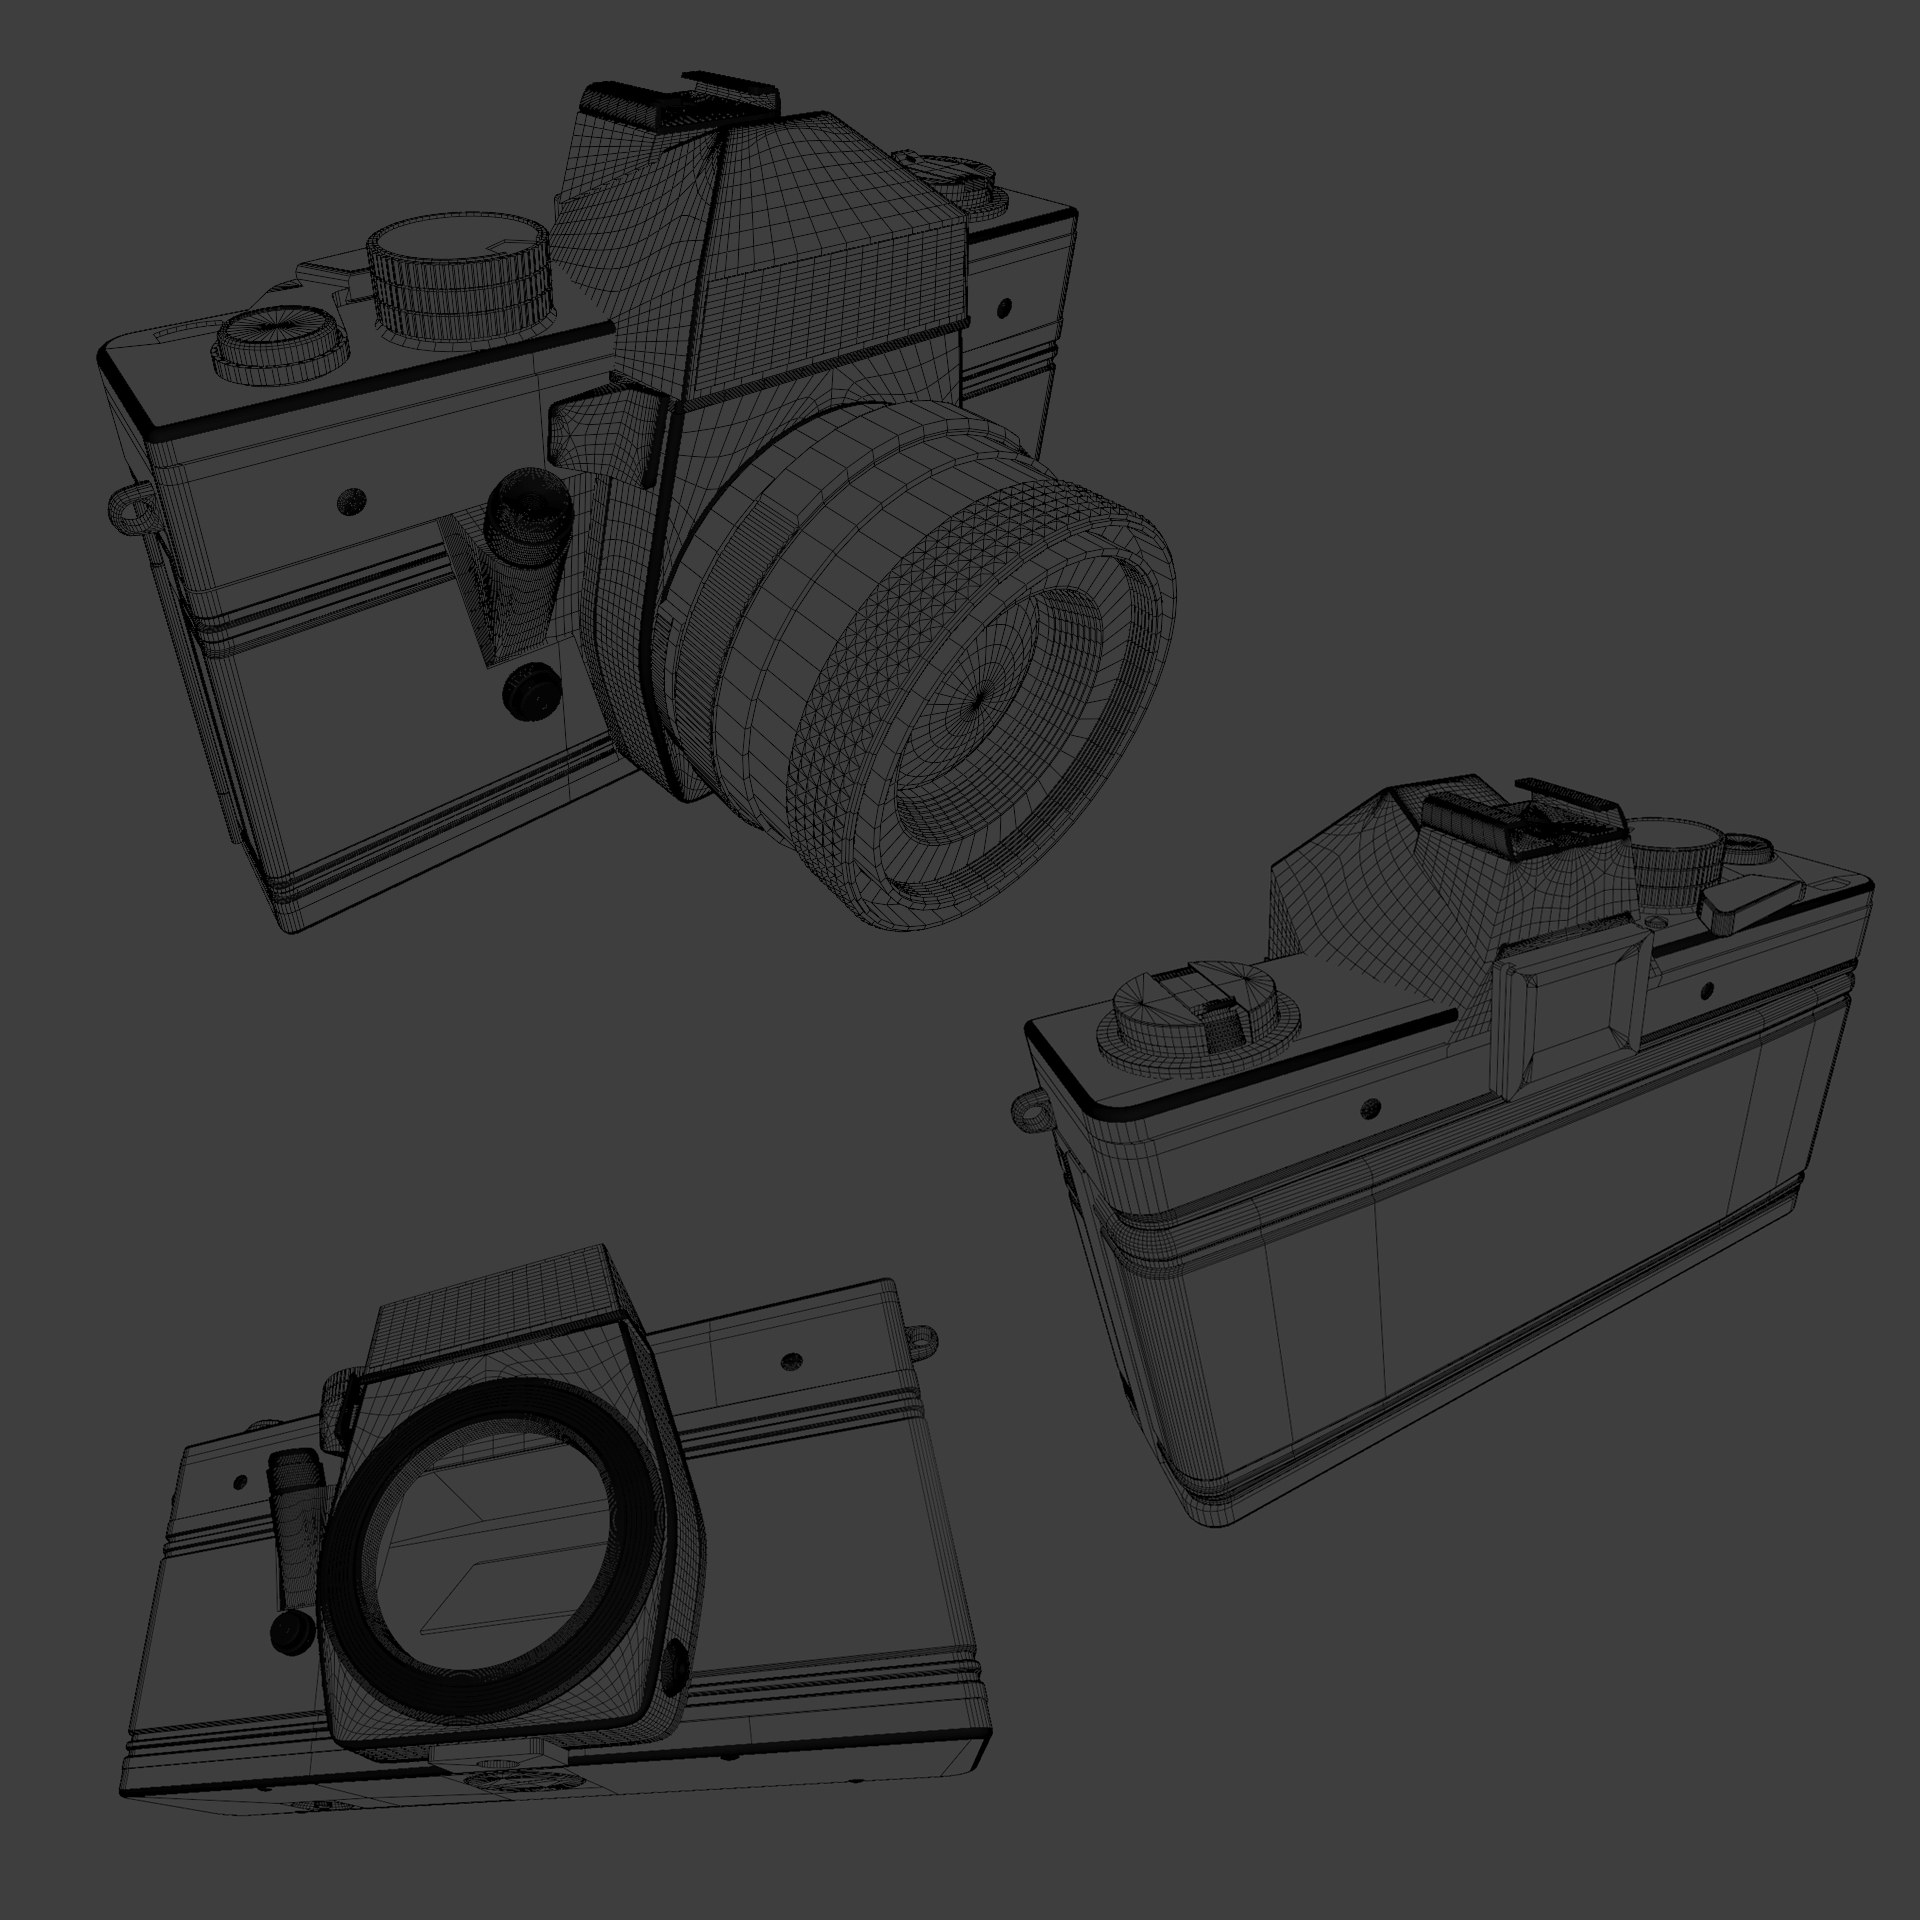

First I made a basic shape—a rectangle, flat faces, etc. Then I started to bevel the edges. The next pass was focused on modeling the shutter dial, film advance lever, and rewind knob. Then I began to assign basic colors for better orientation in the model.
I made almost every part of the model a separate object because I could not connect meshes to each other due to my lack of knowledge about proper topology and how to work with subdivision surfaces.
Complications occurred everywhere. Since I didn’t understand the topology, I had many problems, for example, how best to cut a hole into the body where the lens is mounted. In the end, I used a knife project command. Furthermore, I faced pinching with subdivided parts and accumulated duplicate or unconnected vertices.

UVs and texturing
However, I somehow finished the model and it was time to start making materials. I’m very lazy when it comes to UV unwrapping, so I ended up with a few big textures with overlapping parts. I created my textures in Photoshop.
Sometimes I took some pictures of logos and specific texts from a real reference and other times I created my own text, e.g., the numbers on the lens.
I used a principled BSDF for almost all materials. I made the stamped text and dents using bump mapping but otherwise, I worked mainly with roughness maps and image textures.
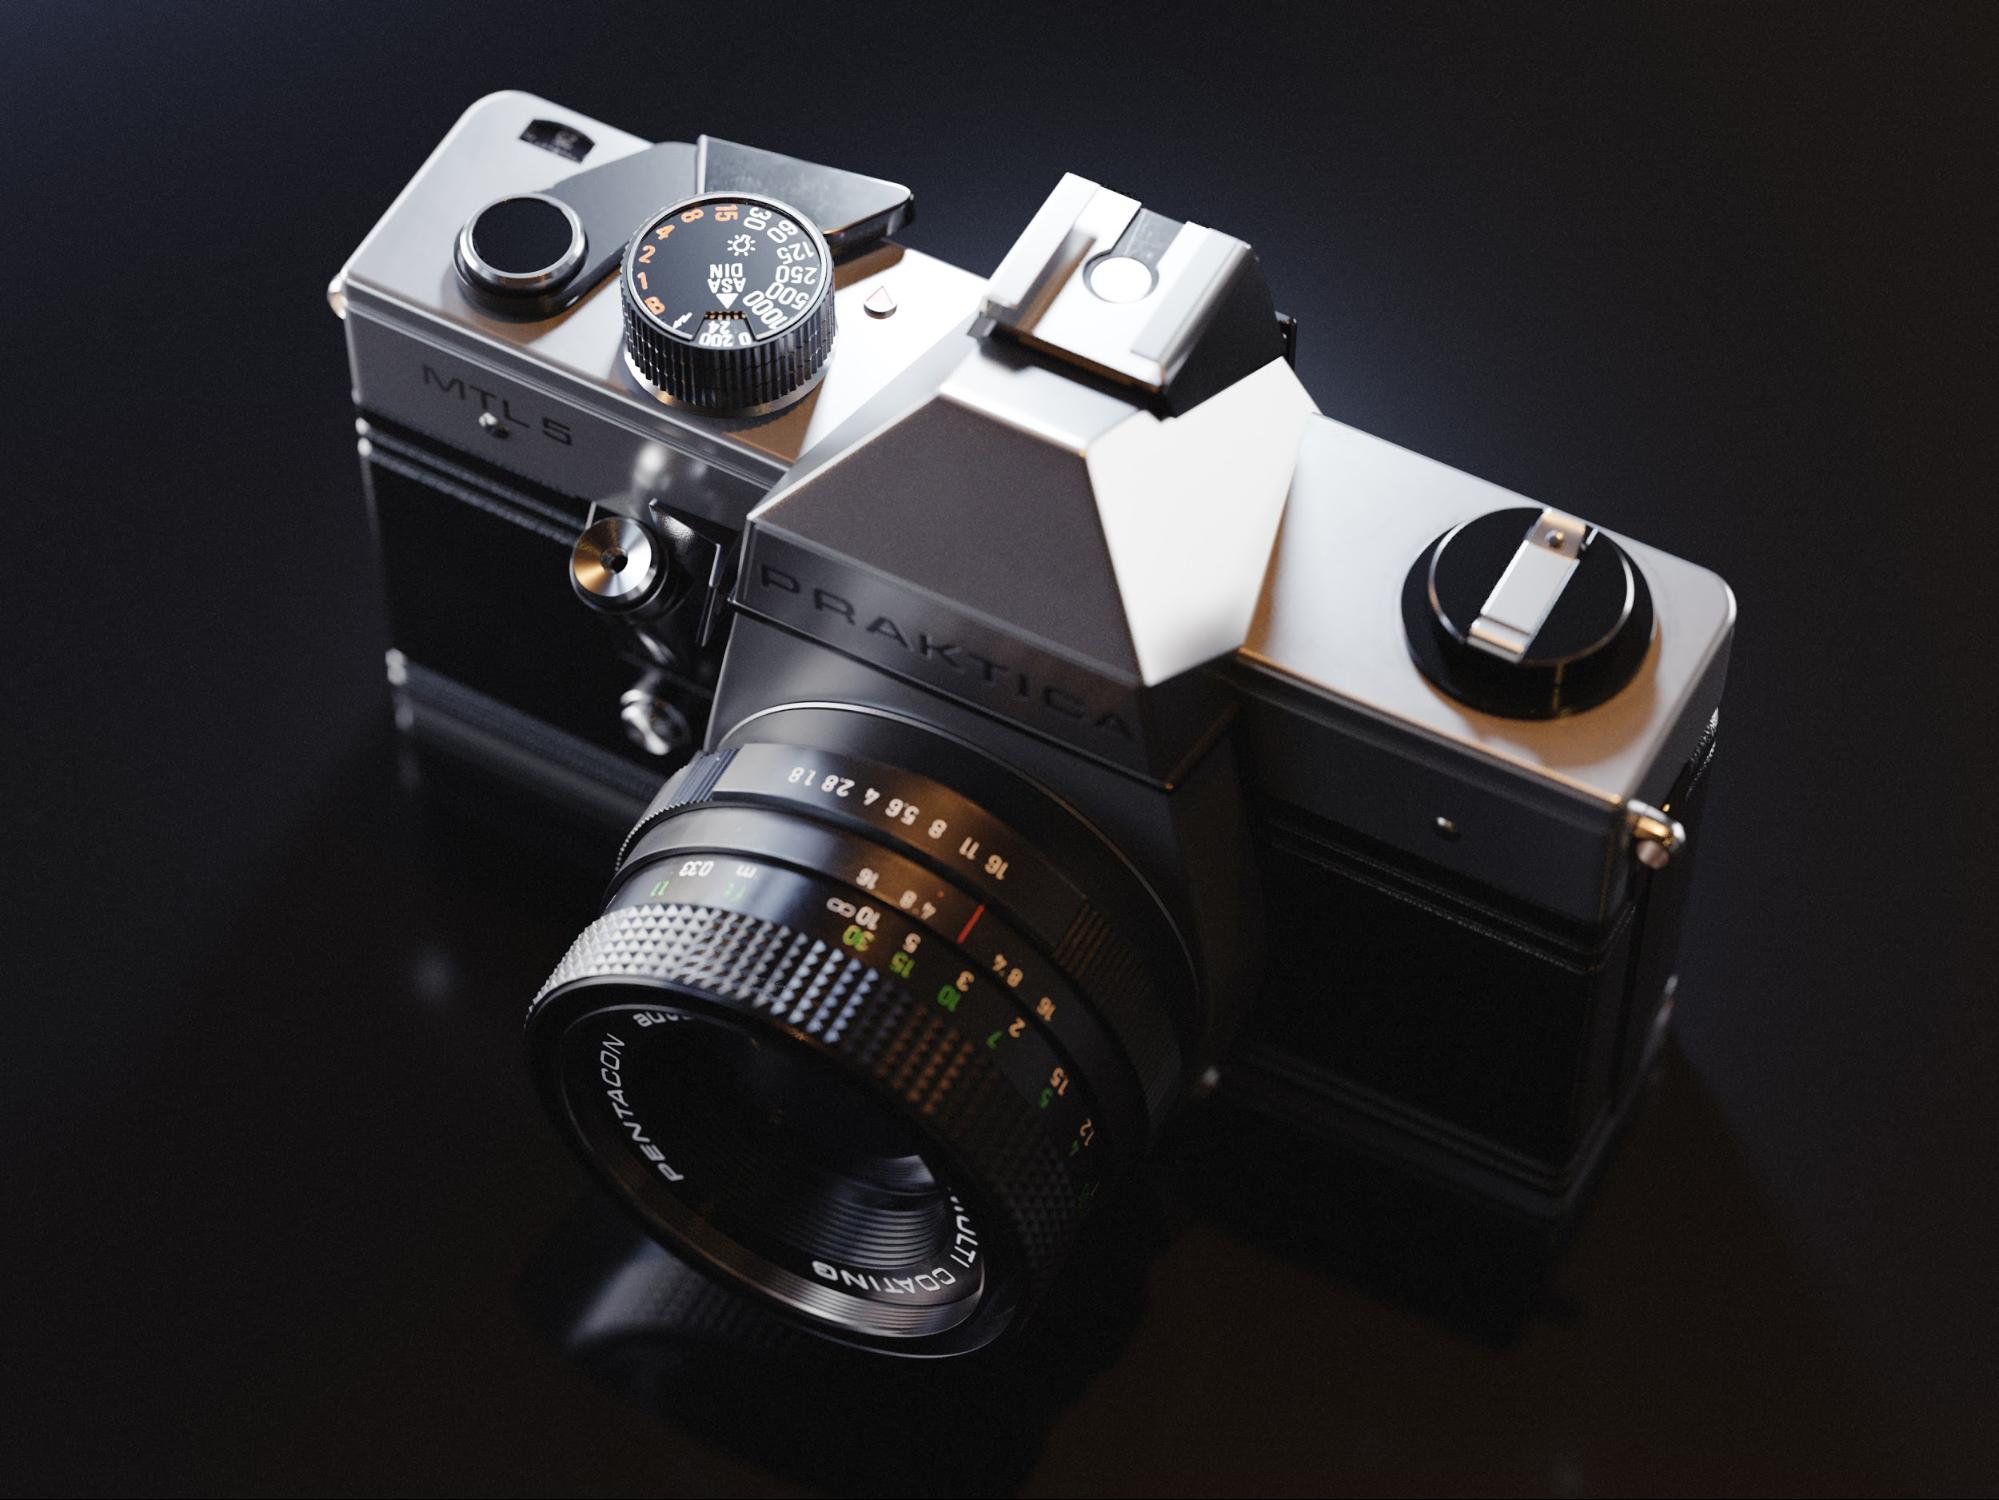
It was very difficult to match the look of the metal body with my real reference, to make imperfections visible but not distracting. The edge wear of the lens is made using a bevel shader baked into the texture that is used as a factor for shader mixing.
For plastic parts, I connected a bevel shader with a more pronounced radius to a normal input.
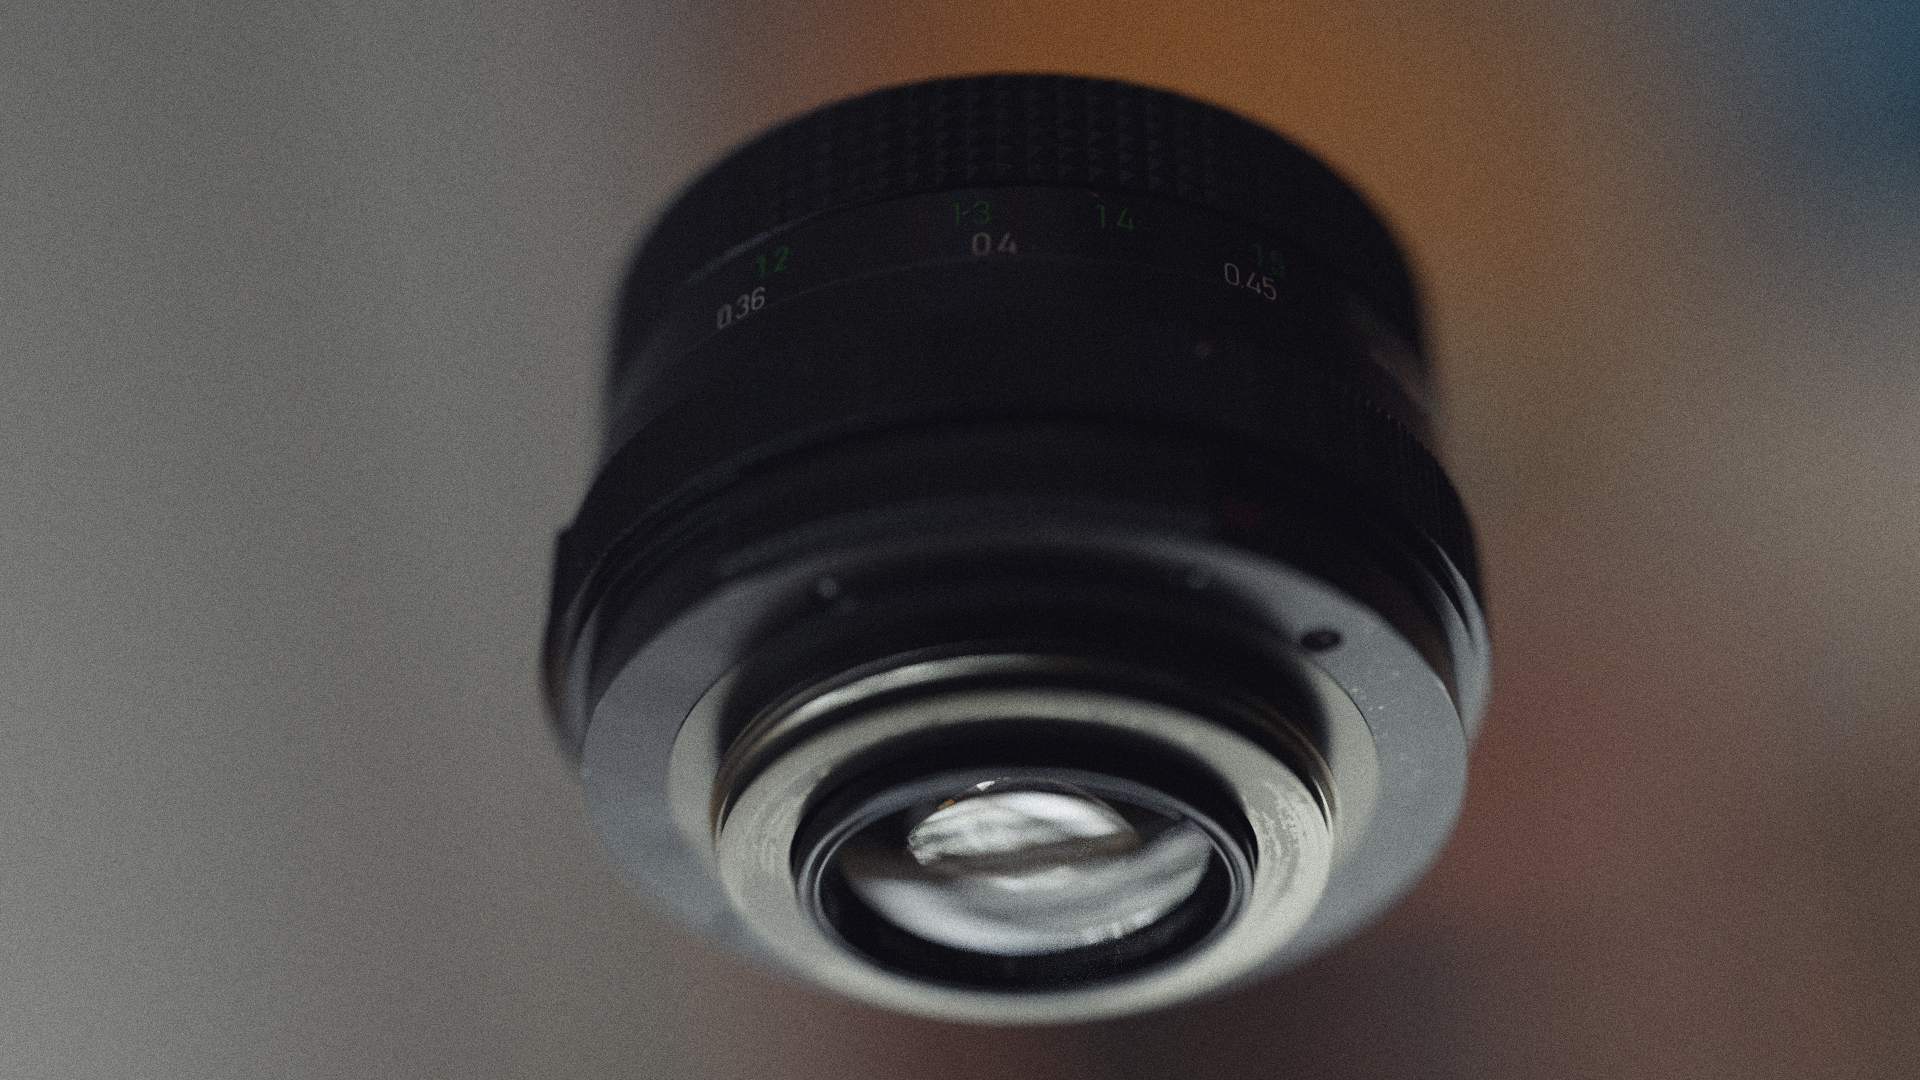
One of the hardest things was to make the front lens look real. Simulating the anti-reflective layers seemed impossible. Even though I modeled the whole optics inside the lens, it still didn’t look like my real lens. I ended up satisfied with the result I got from the mix of glass shader and a more rough purple-blue glossy shader controlled by a fresnel node.
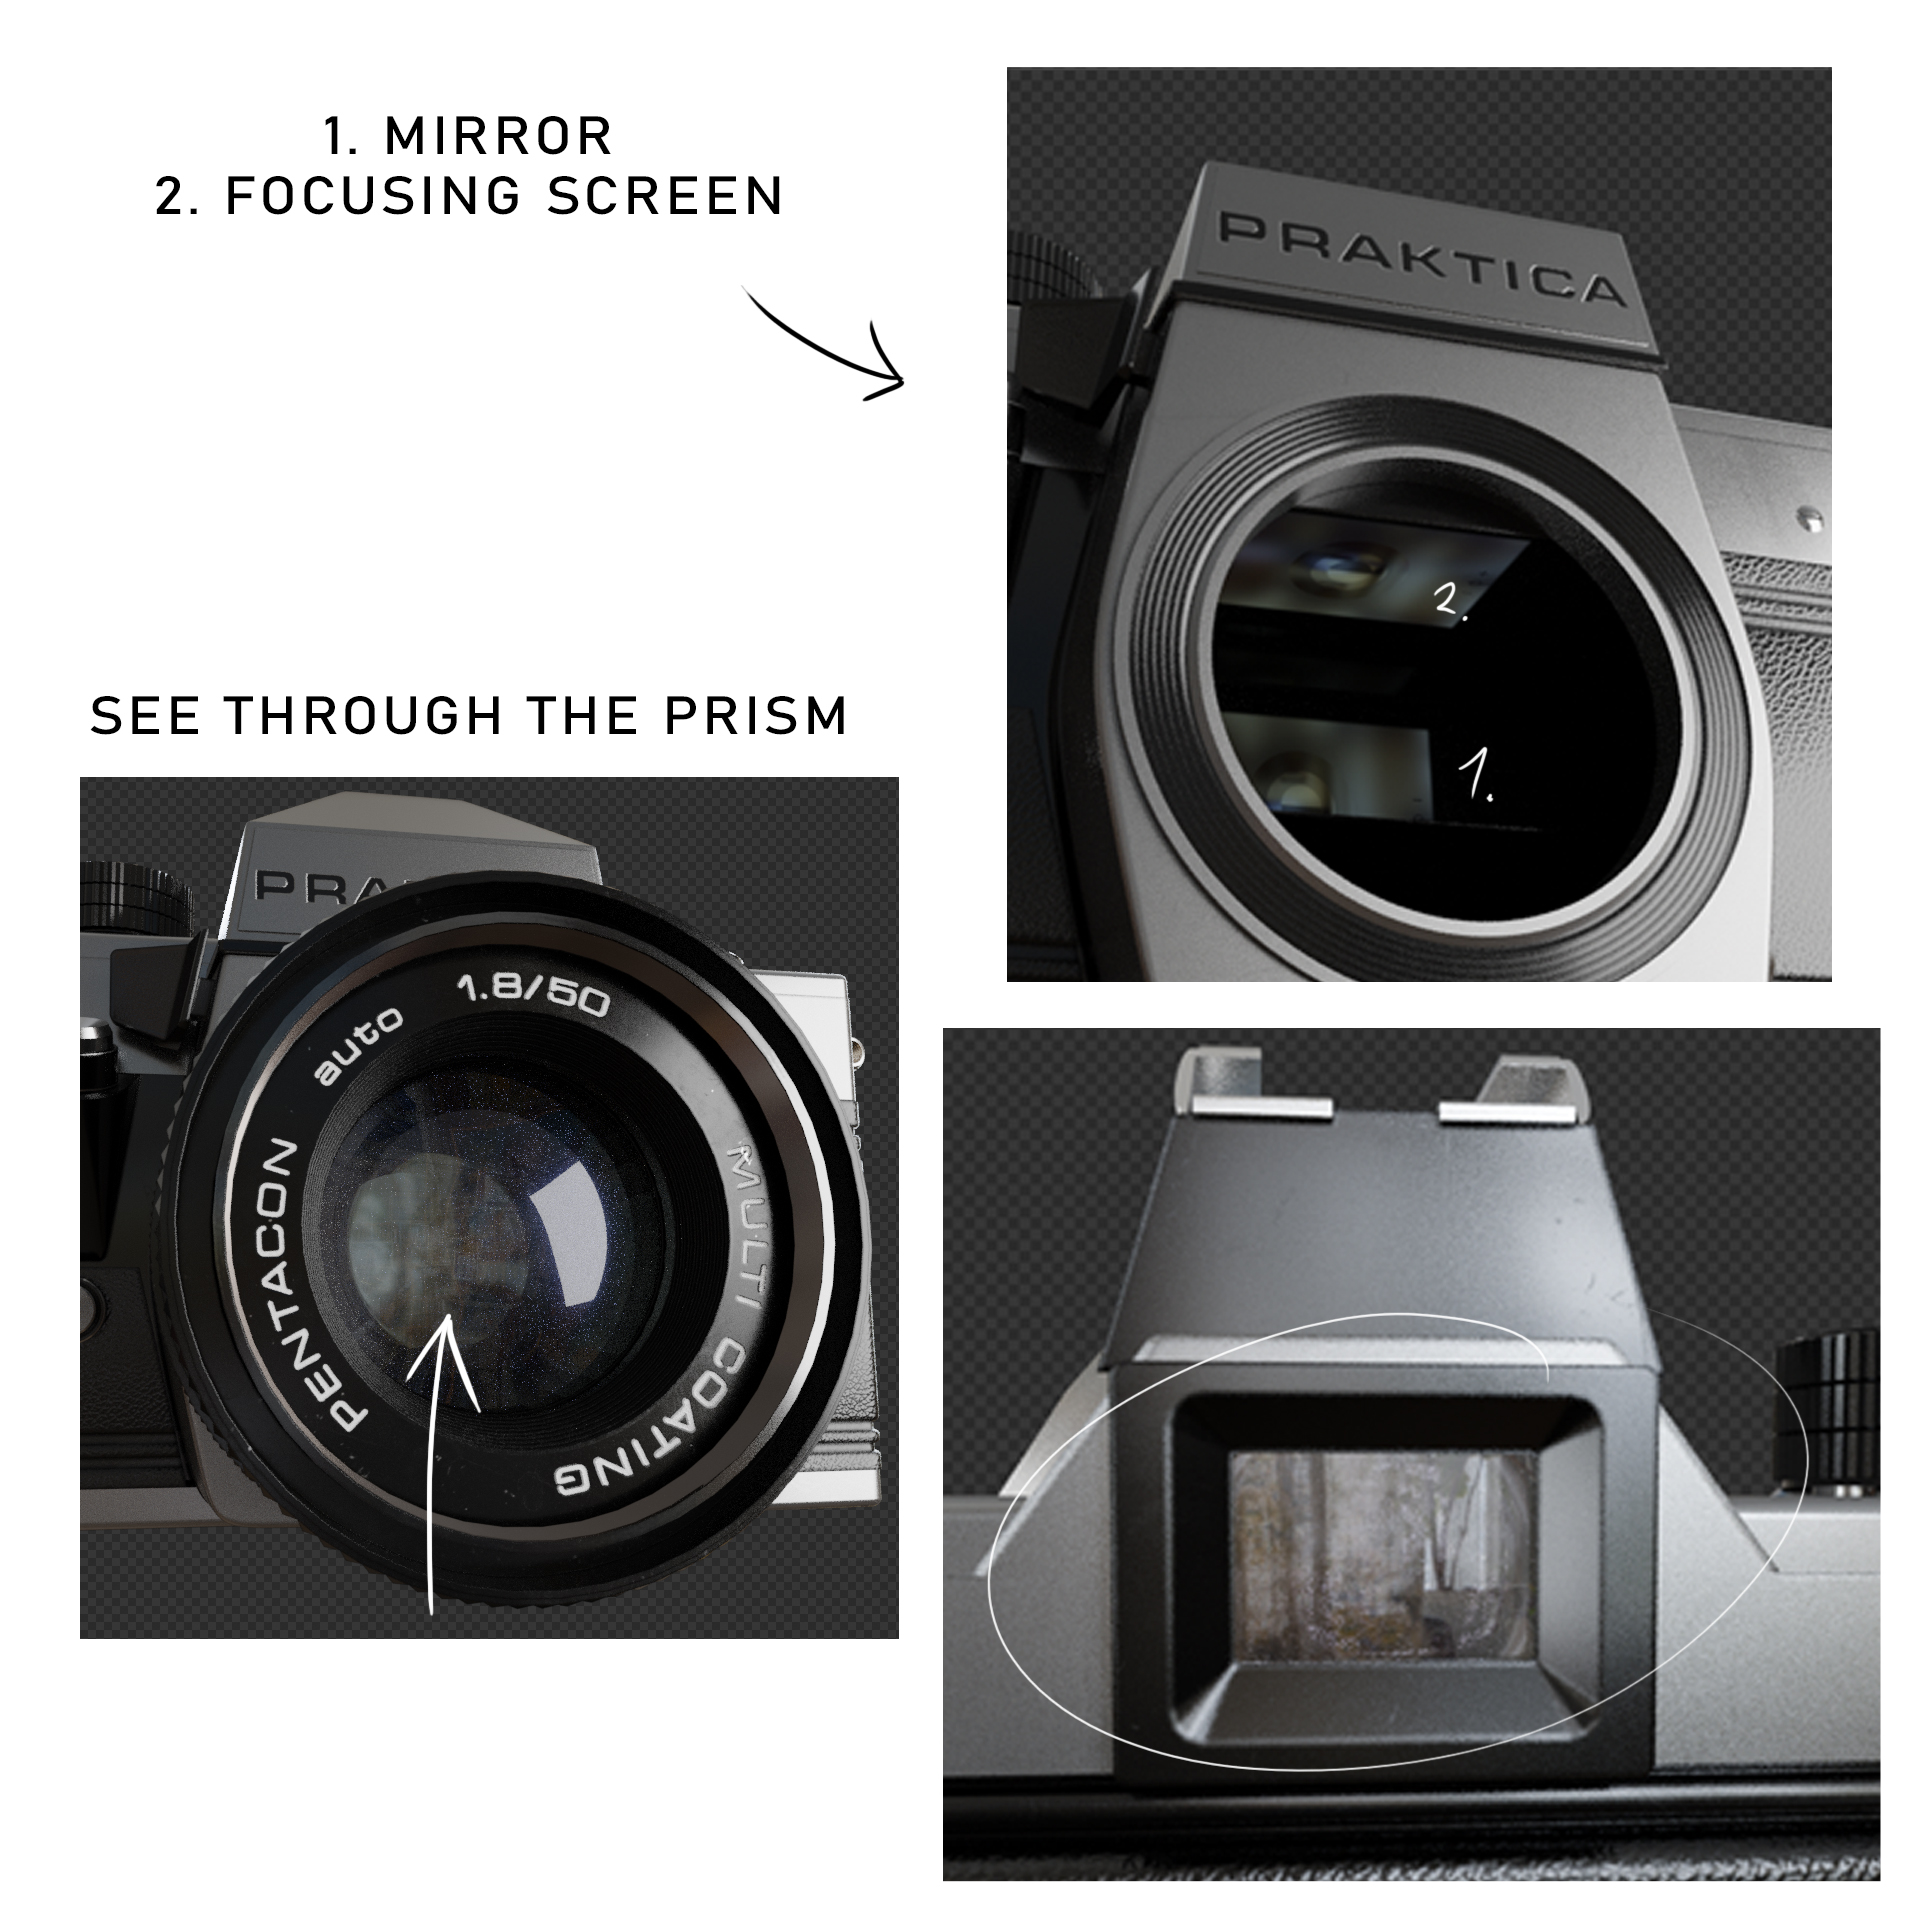
Furthermore, as for the lens, I wanted to point out that it is an SLR camera, so you should be able to see through the lens to the viewfinder and vice versa. However, I did not have the exact specifications of the prism, so I had to find another way to achieve this illusion. I settled on creating a screenshot of the HDRI, plugging it into an emission shader, and replicating it on three planes. The first plane with a glowing image is slapped on the rear element of the lens. The second is placed as a focusing screen to reflect in the mirror when the lens is not mounted to the body. The last one is the viewfinder one, placed behind the glass lens, which gives it a more realistic viewfinder effect. I think the result is worth it, but this feature is not visible in any of my final renders.
The imitation of a vinyl/leather grip was not so complicated. It is just bump mapping and a bevel shader with a larger radius.
Lighting and rendering
For rendering, I used 3 lights (key, soft fill light, and rim light) + an HDRI.
Images were rendered up to 6000 x 4000 with about 800 samples in Cycles.
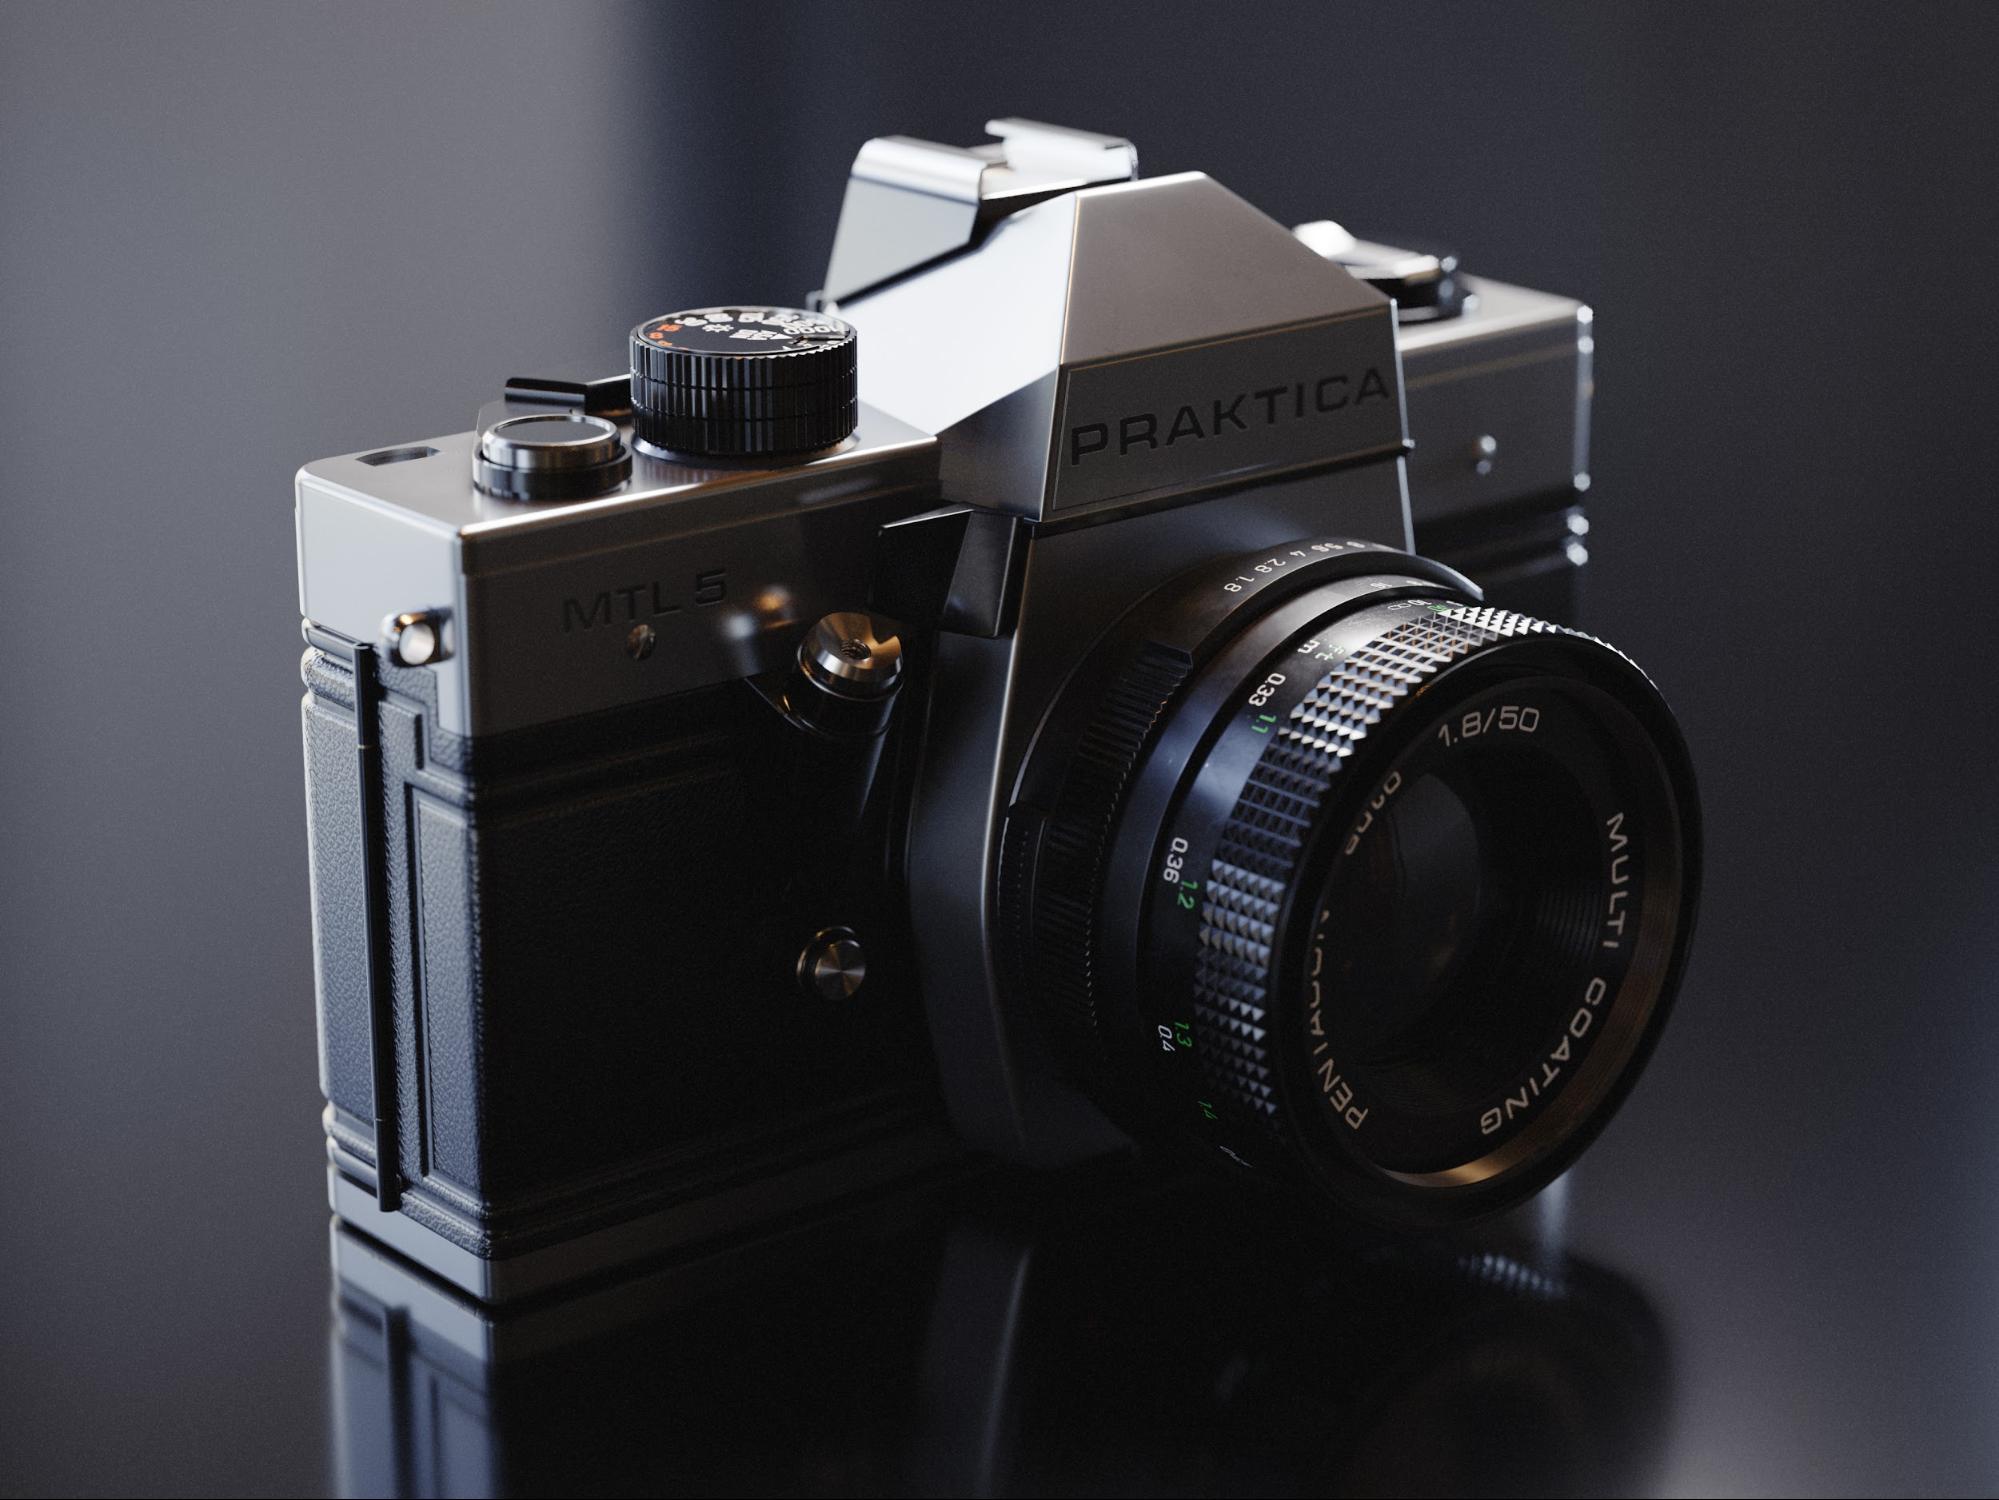

I tried to make the render look as realistic as possible and as simple as possible in terms of composition. I just slightly simulated the film grain, did some dodge and burn, and matched up color tones in Photoshop.
Over the course of my project, I was always searching for techniques to solve every problem that I faced. It was probably my most complex model and I learned a lot of things, even though I would do everything differently now.
I think the model deserves more renders, including some decent animation.
About the Author
 Antonín Chod, Student of graphic design, photographer, artist


Really amazing, what fine details. you are a real artist!
Stay safe