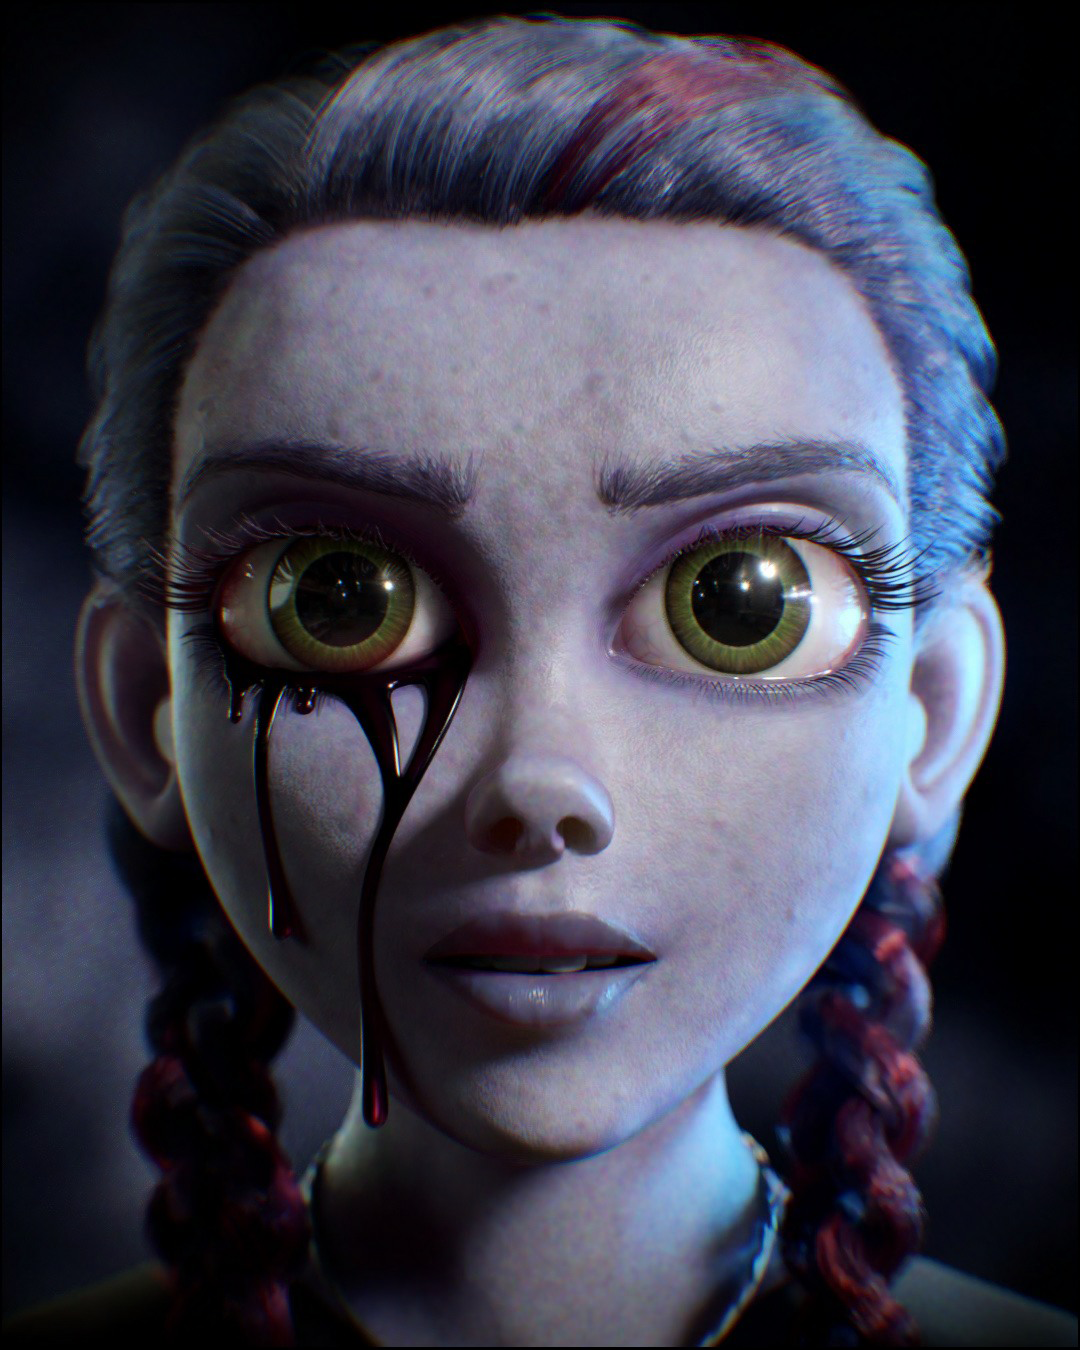
Behind the Scenes: Bloody Mary the Mirror Witch
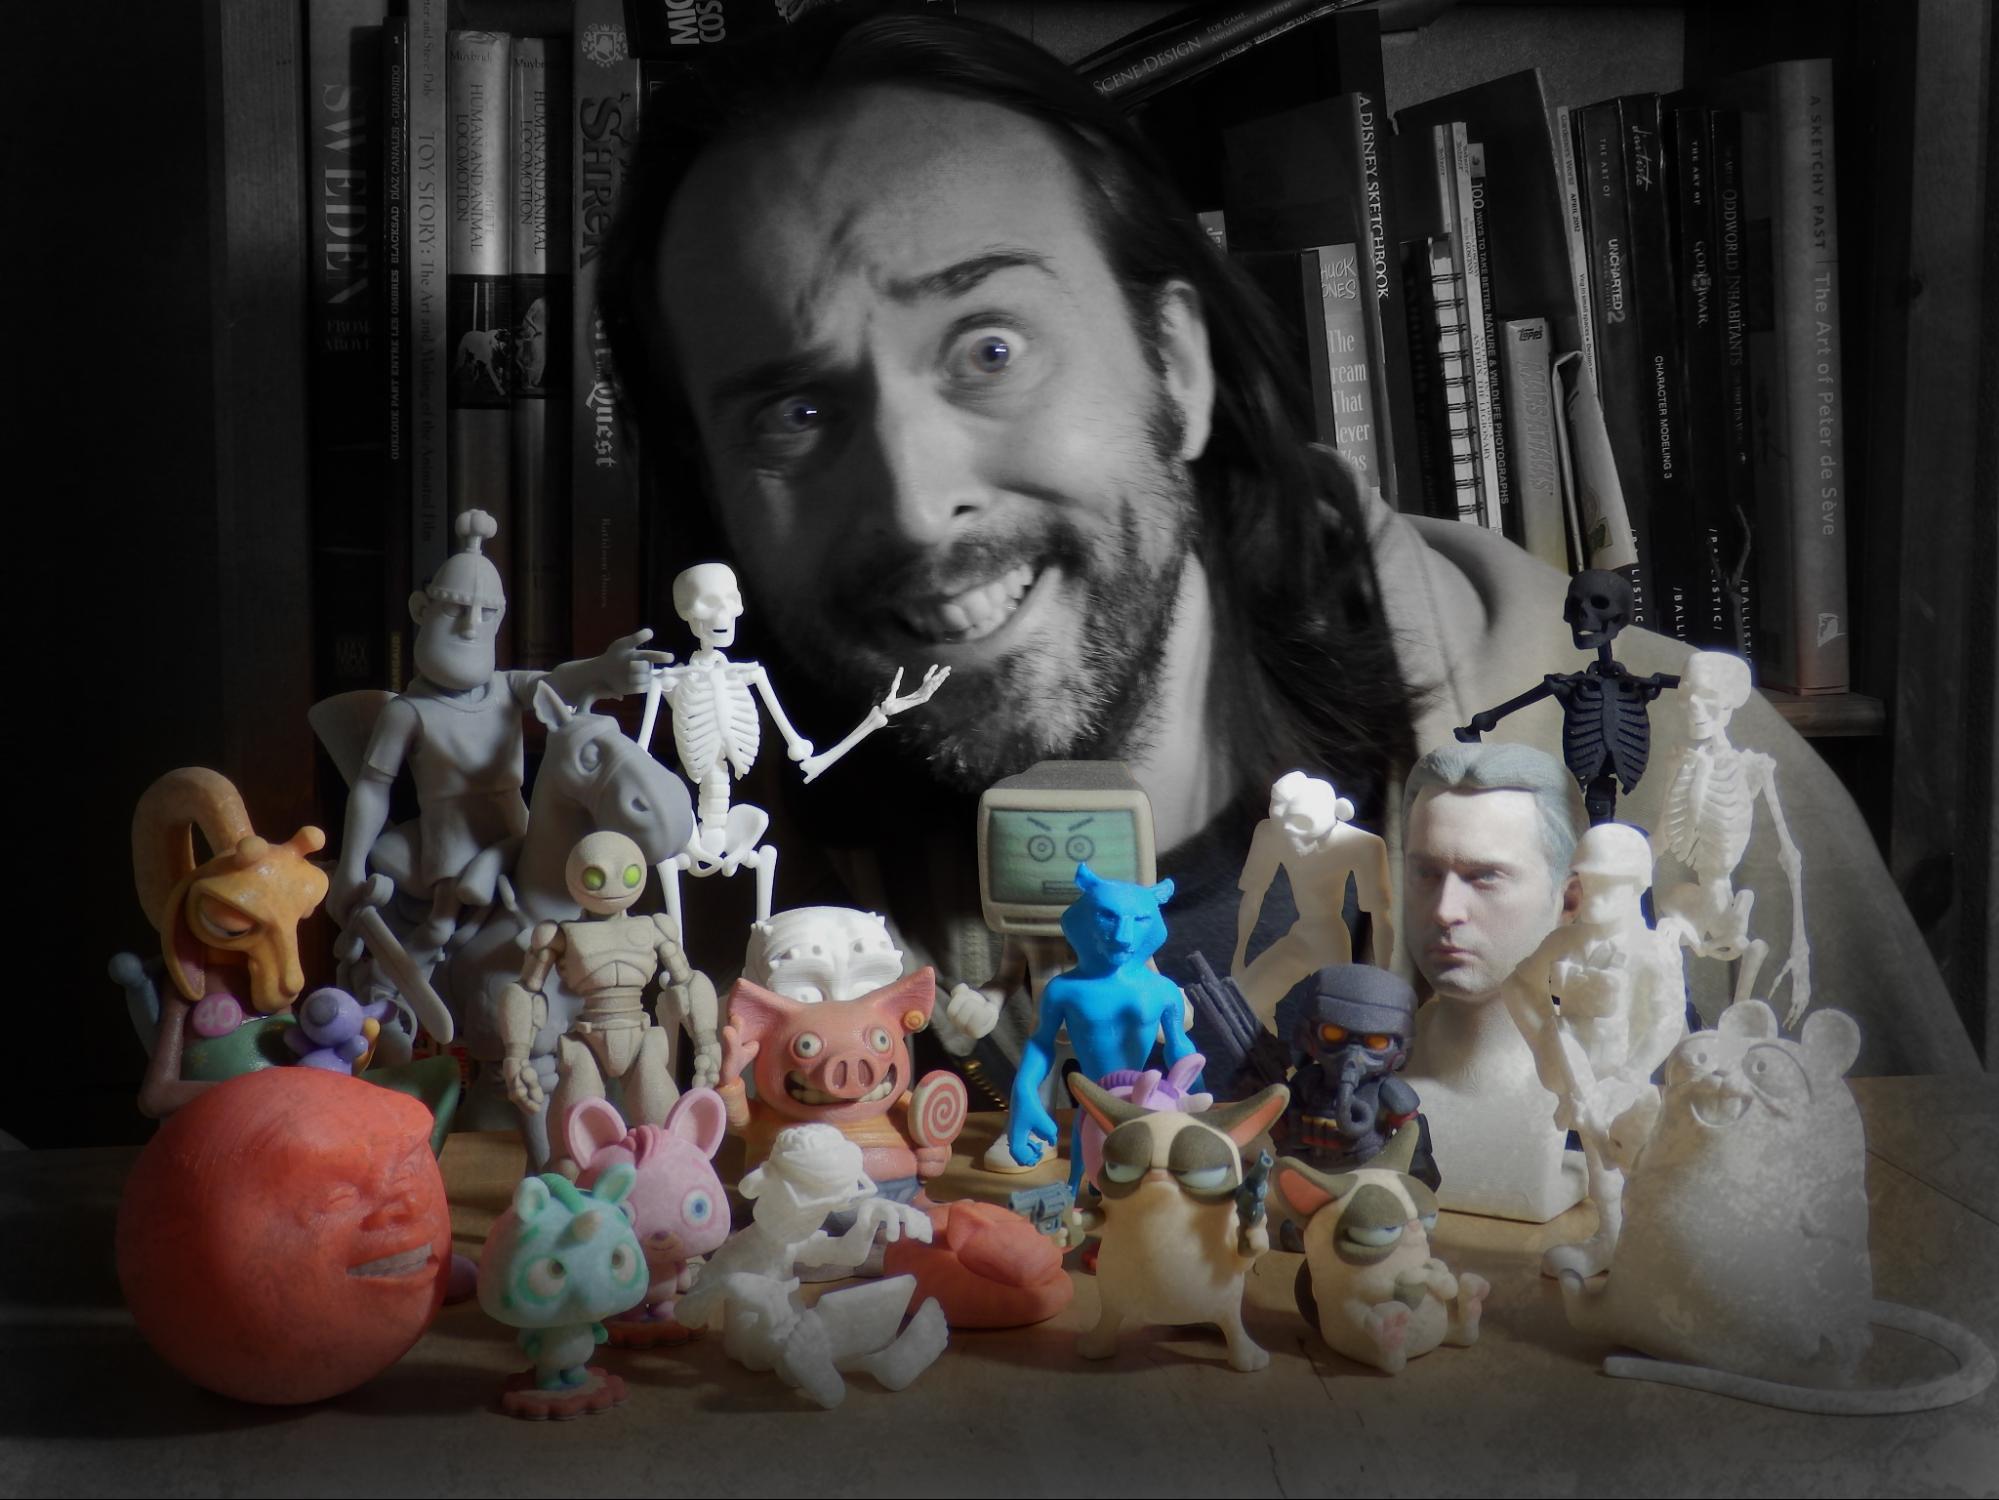
My name is Matt Bagshaw and I’m a British guy living in a small town in Sweden. I worked for many years in the UK as a 3D artist and animator in the games industry, predominantly for Eidos and Sony. After a long and happy career in games, I decided it was time for a change of pace and moved with my partner Lotta to her native country of Sweden where we now live and I work as a freelance 3D generalist. As well as my background in CG art and animation, I became interested in 3D printing 7 or 8 years ago, which has led to some interesting opportunities. My recent commercial work has included creating die-cast cars and marketing images with The Wand Company, a variety of other illustration and concept projects, and even helping out with design input and renders of a small scale nuclear reactor for the shipping industry!
[sponsor id=’qarnot’]
In my spare time I have been working to improve my CG art skills, predominantly using Blender, on a variety of personal character and animation projects. More details and artwork are available on my ArtStation webpage.
Inspiration and motivation
The Mirror Witch image was prompted by a challenge on Instagram to illustrate some storybook/horror characters following the hashtag #storytober started by @artbysteffani.
I’ve started to take on a few of these kinds of prompted challenges as a good way to try out ideas and learn new things while engaging with other artists—it can be a lot of fun and very rewarding creatively. I chose Bloody Mary as an interesting character that could make for a nice spooky image in time for Halloween.
The challenge to myself with this project was to try and cover 2 things: particle hair and procedural texturing. I’ve had close encounters with both over the years but never really explored either deeply enough. I wanted to create a simple ‘cartoon’ mesh and see how much I could do to give it realistic surfacing, without additional high resolution sculpting, while staying entirely within the Blender environment.
Modeling
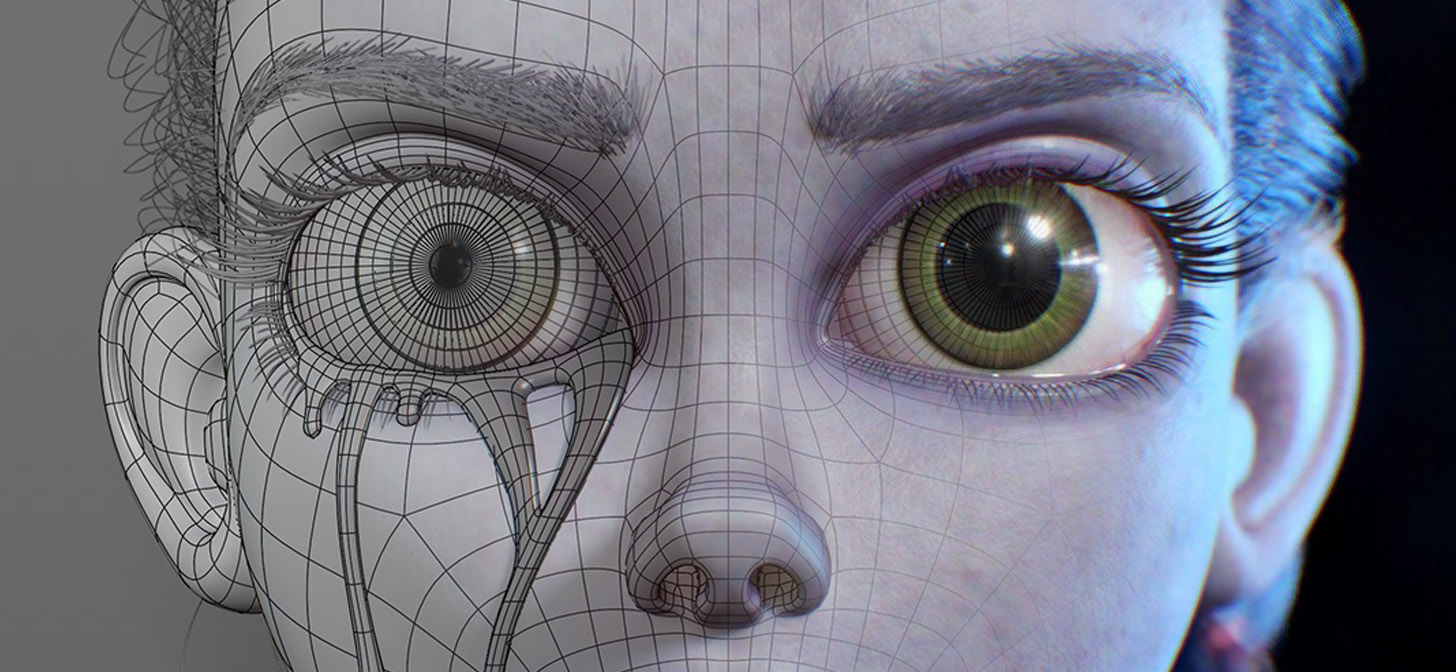
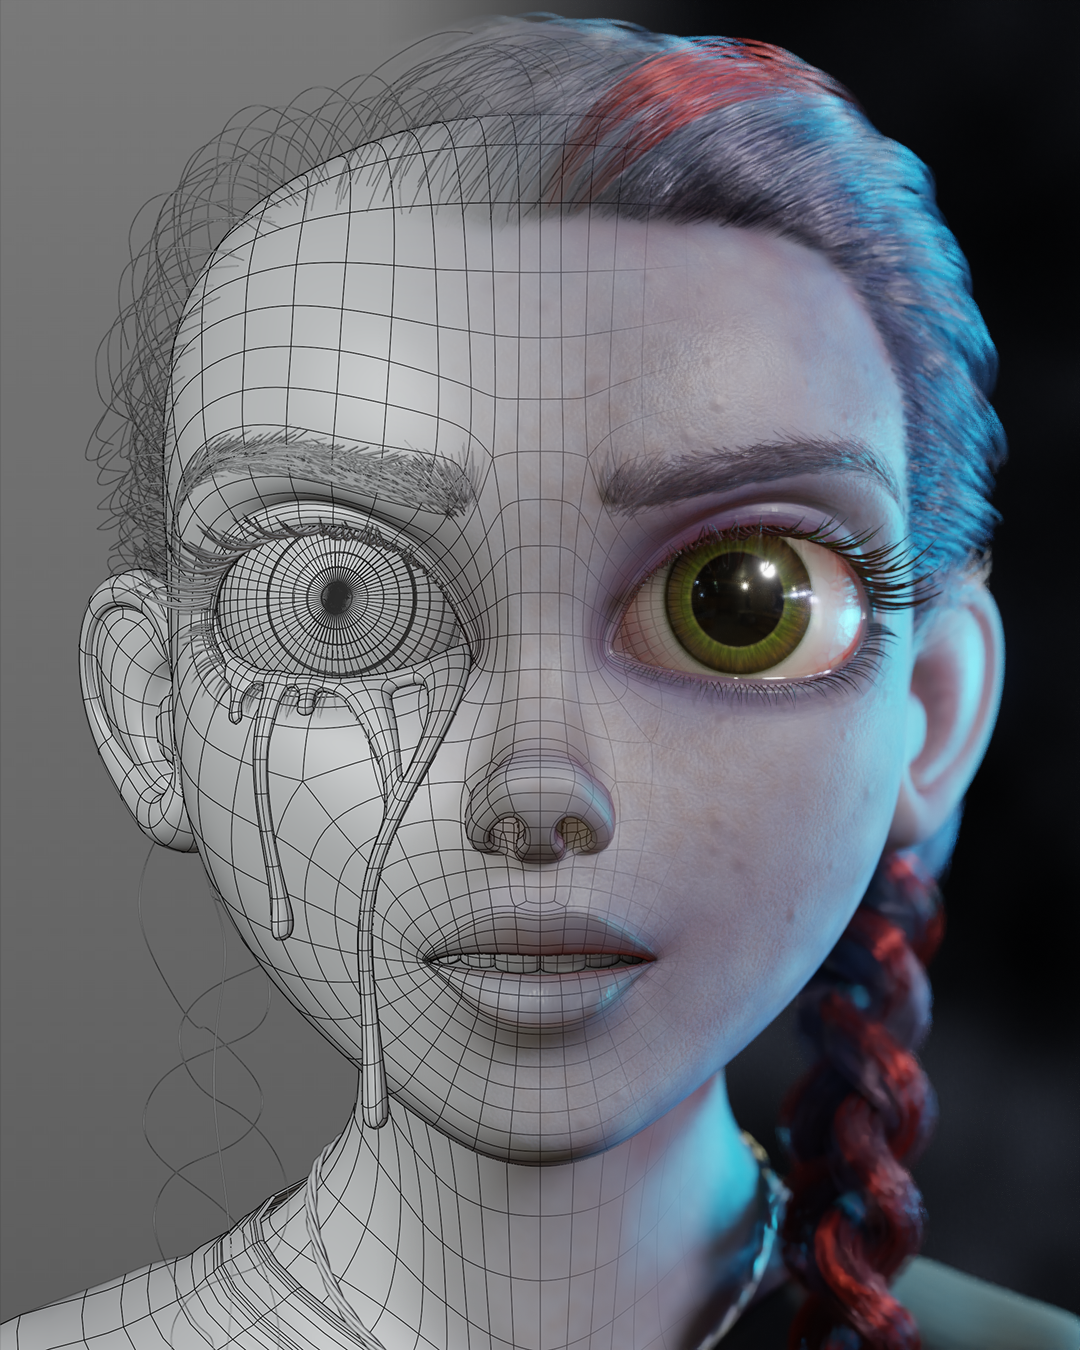
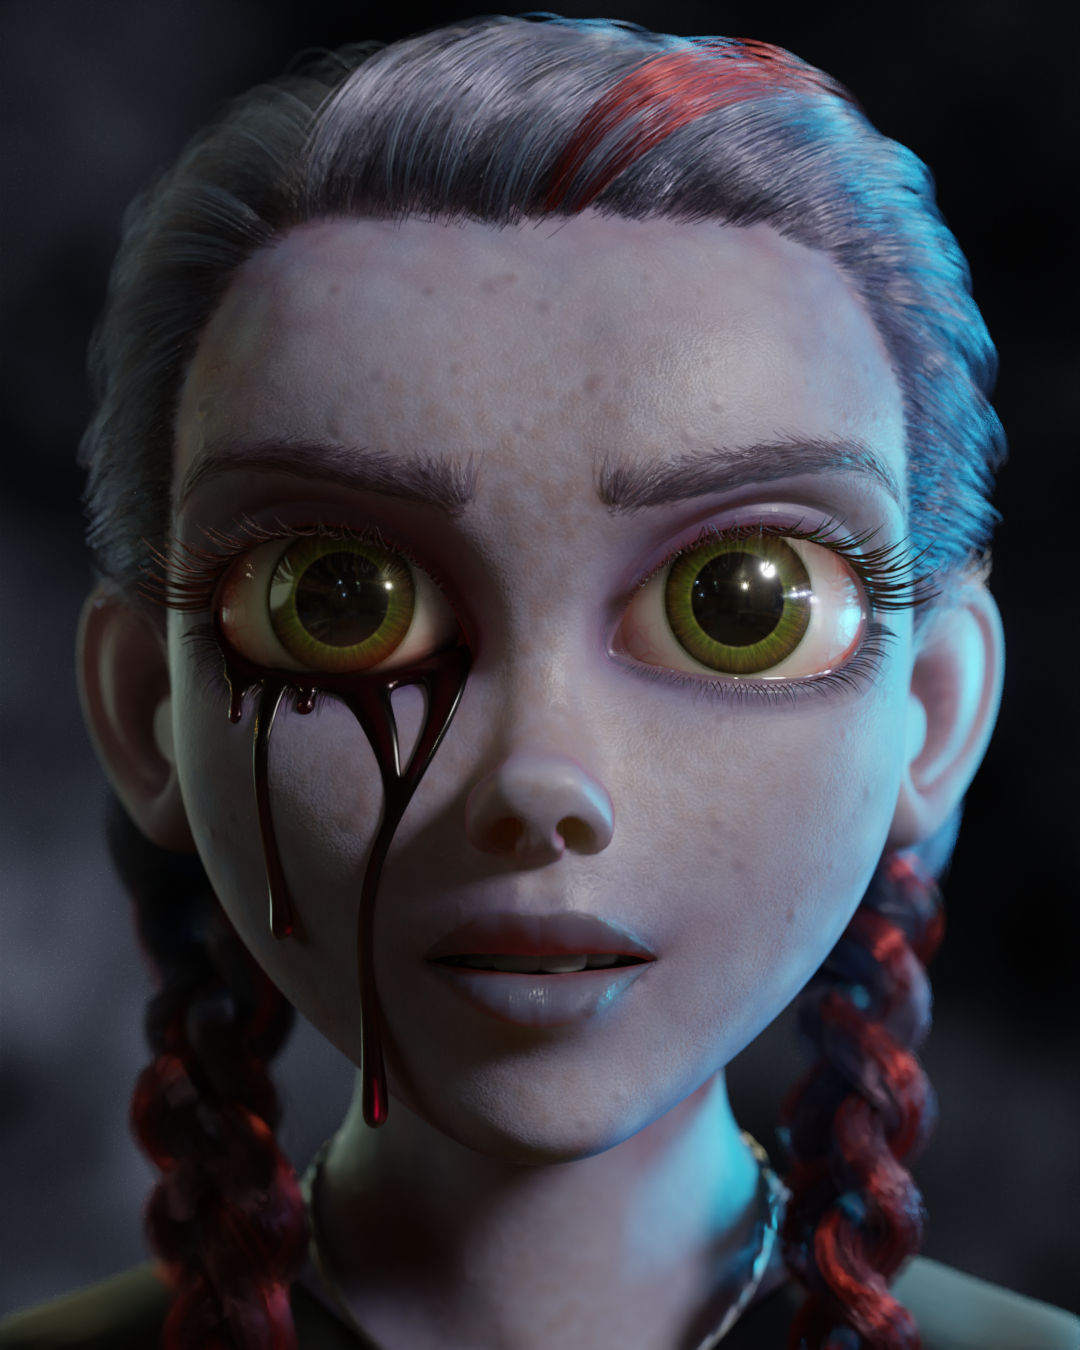
Knowing that I was aiming to create a creepy image, I wanted to take advantage of the ‘uncanny valley’ effect that is often achieved unintentionally in CG art, where your brain reacts to the wrongness of a portrait, making viewing it uncomfortable. I created the face with the camera dead on straight and with symmetrical geometry to add to the unnatural feeling and compliment the ‘mirror’ aspect of the character. The resulting cartoon character with undead skin and weepy eyes would hopefully achieve a healthy level of weirdness.
Texturing
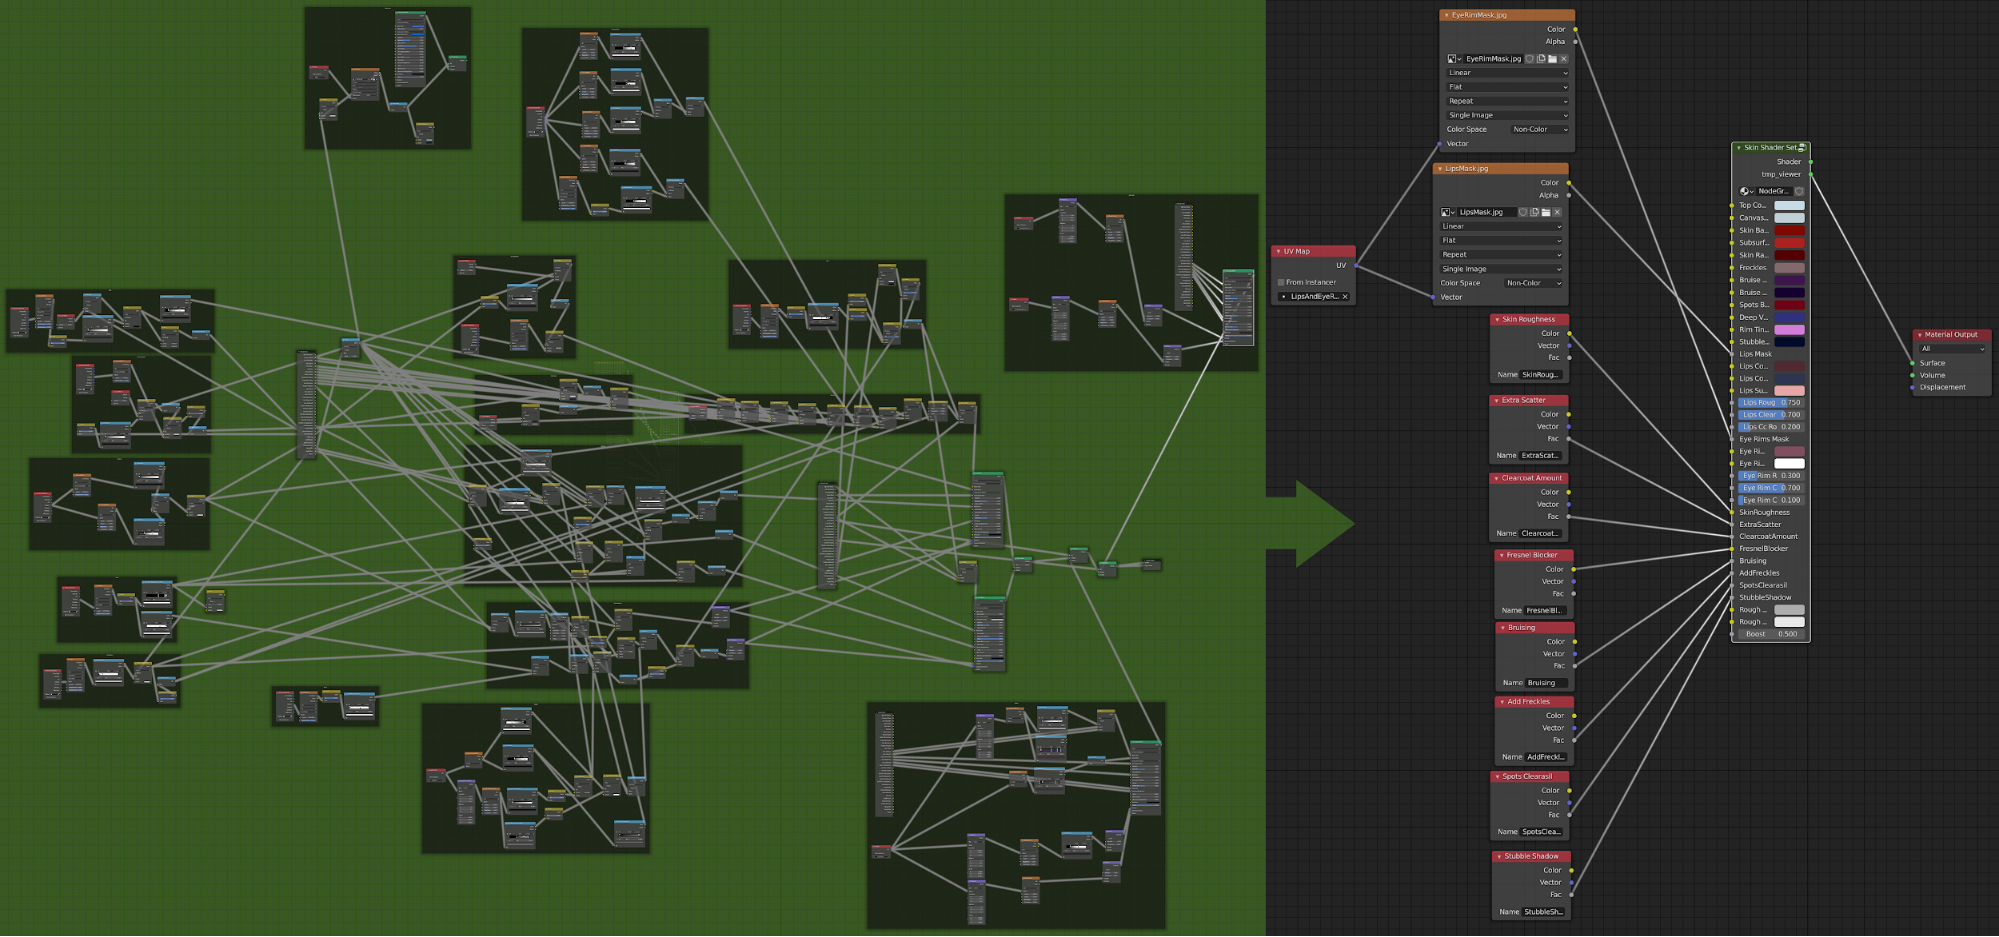
Having created my base mesh using traditional polygon modelling, I began to work on the procedural skin. The backbone of the texturing here was really the Voronoi Texture that I used in various ways to create everything from the skin surface texture to pores and veins. I used vertex painting to mask off areas for added subsurface scattering and to define the amount of skin roughness. The only UV unwrapping for texturing was around the eyes and mouth where I wanted to define wrinkles (created with stretched noise); for everything else the mapping was object-based and included veins, freckles, spots, blemishes, bruising, and wetness, which were refined with more vertex painting. Unfortunately, Blender only currently allows for 8 vertex paint layers and I would have liked more, but was able to use a mask texture to make up the deficit. I toyed with the idea of some kind of face tattoos but didn’t really like the result (and it kind of broke my ‘procedural’ self imposed rule by requiring a hand drawn tattoo template). I also created a basic stubble input and will probably add a make-up layer in future.

I packed the shader up a bit so I could control the main colour and roughness inputs easily with a mind to improve the ease of editing further in the future. For me, I think the scariest thing about the Bloody Mary image was the skin shader node web!
Ultimately, I’d like the shader to be a solid base for texturing characters—I’d really like to do fantasy Henson-like creatures (the kind you might see in The Dark Crystal or Star Wars series), but it should be OK for doing a more realistic human skin too.
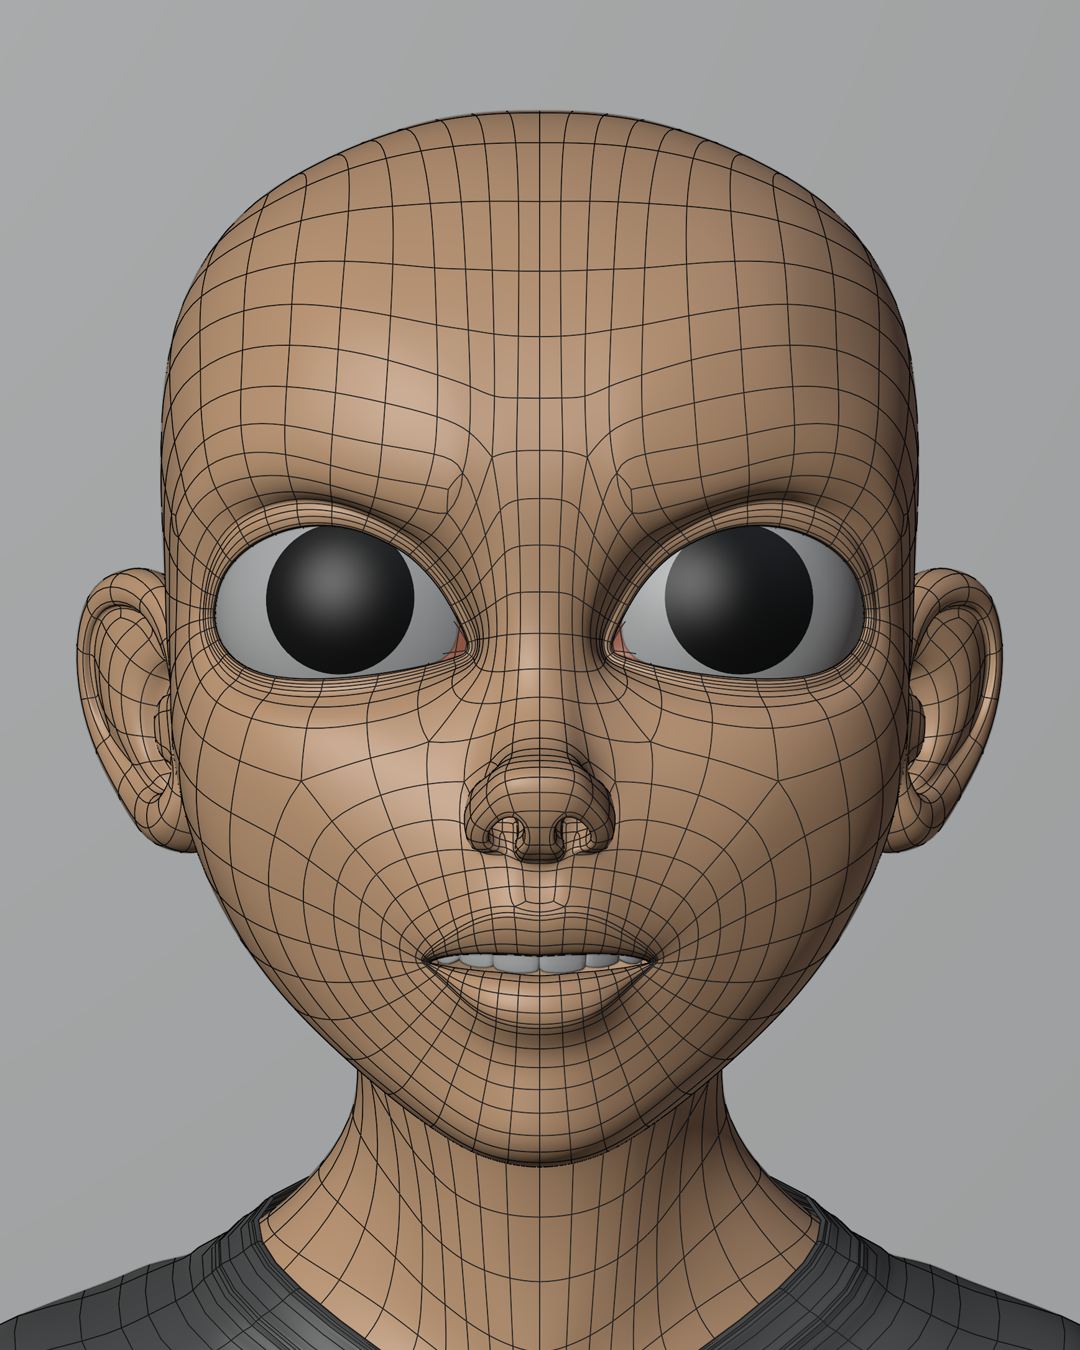
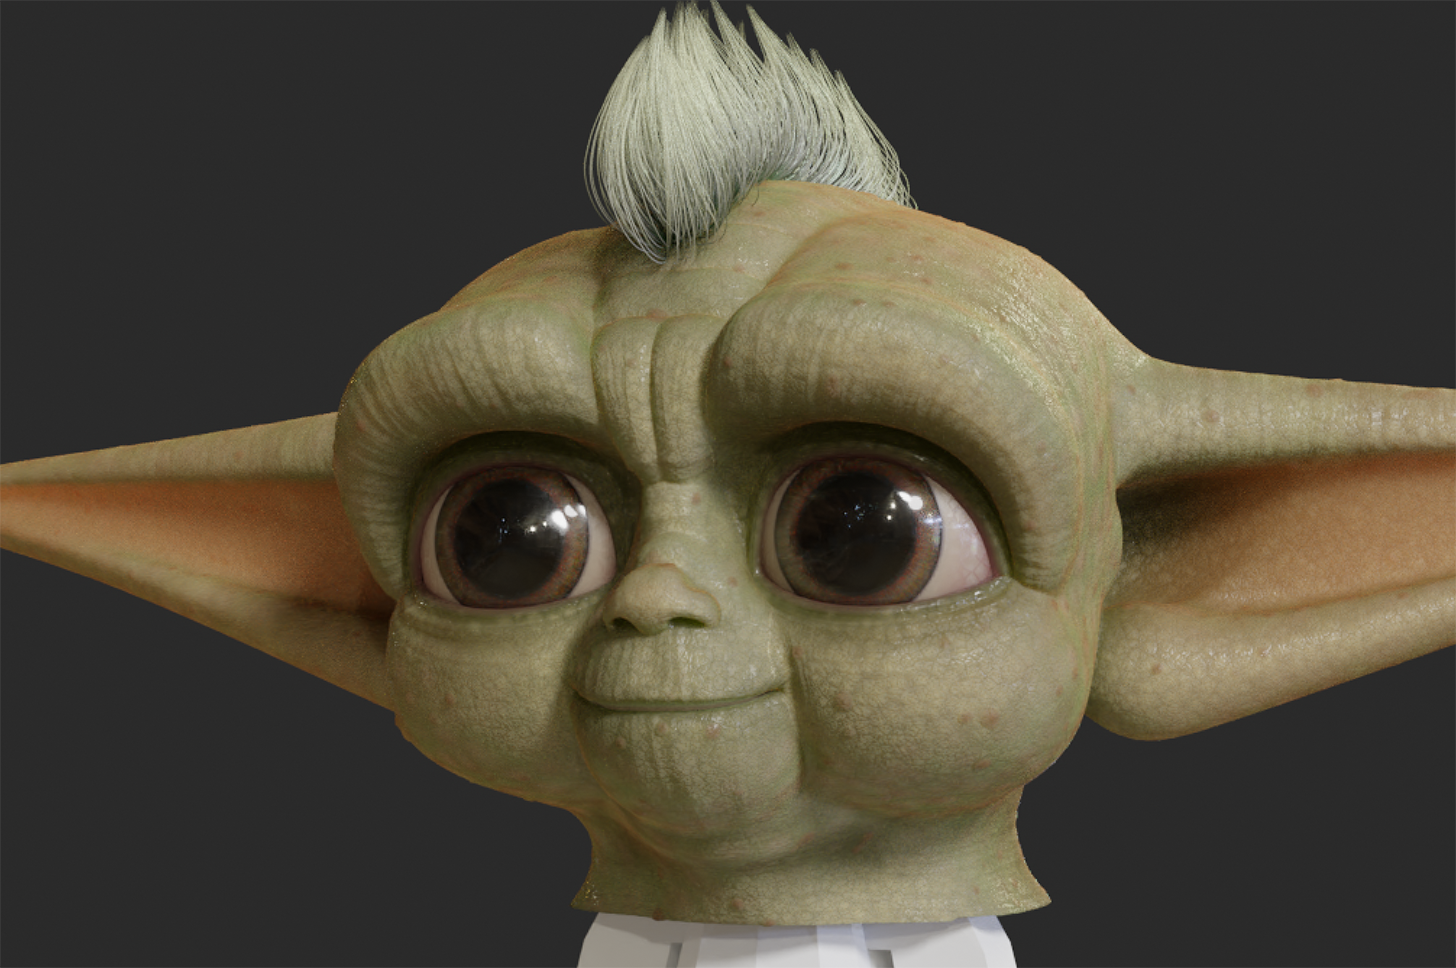
You can see that with my work in progress Yoda-inspired character (below) I was able to create a very different skin surface using a slightly evolved version of the Bloody Mary shader. Again, there is no surface sculpting used here, just a low polygon base mesh with the shader. In this case, I used the displacement node to add more 3D surface detail to the subdivided mesh.
Hair
Moving back to Mary, once I’d reached a point that I was fairly happy with the skin, I had to start on the hair. I’ve not had much luck with it before but I heartily recommend that anyone wanting to learn to use and style hair in Blender follow the tutorials by Nazar Noschenko on YouTube. After watching his videos, what had seemed utter voodoo when it came to hair and eyebrows actually made sense and, with some trial and error, I was able to finally get the results I was aiming for.
Post-processing
The only things I did outside of Blender were a little bit of tidy-up along the hairline and added a touch of film grain to the image using Photoshop. Then I did a final bit of colour balancing in the ‘Photos’ app on my iPad just to cool the image down a bit for more of a horror film look.
Many thanks to BlenderNation for giving me the opportunity to share my image and process as part of the Behind the Scenes series. I had great fun creating Bloody Mary and learned a lot along the way. Hopefully I can use and expand on these techniques to create a bunch more weird and creepy stuff in the future!
About the Author
 Matt (mattbag3D), Freelance 3D artist/animator living in a small town just outside Stockholm. For more details, please visit www.mattbag3d.com


This looks cool!
Thanks! I’m still experimenting with this kind of approach to texturing but it’s a lot of fun!