Behind the Scenes: Bathroom
About
My name is Dhananjay Sharma. I am a CGI artist and photographer. I am from India. I have been in this industry for the past 6 years.
I have worked in companies like Sparrow Interactive, HBA International and currently, I am working at Deckor International 3D Rendering studio.
I have achieved the title of Archviz Artist of the Month on Renderize.net.
I have done my B.A. degree in Animation and VFX from IGNOU University. Apart from the degree, I am a self-learner.
Before Blender, for a few years, I worked on 3ds Max and used V-Ray, Corona, and FStorm for rendering.
[sponsor id=’qarnot’]
Motivation & inspiration
I have been using Blender for archviz renders for the past few months but was using Octane for rendering. I check Blenderartists.org daily to see how many wonderful works have been posted. I was noticing that most of the rendering was done in Blender Cycles and it was awesome. I thought I could also achieve that kind of quality with Cycles so I started with this scene.
My inspiration was the Blender artist community. And I also needed self-motivation.
Tools
I used Blender 2.81 with the Cycles rendering engine. I used GPU-based rendering for Cycles as I have a GTX 2080 and Ryzen Threadripper.
References
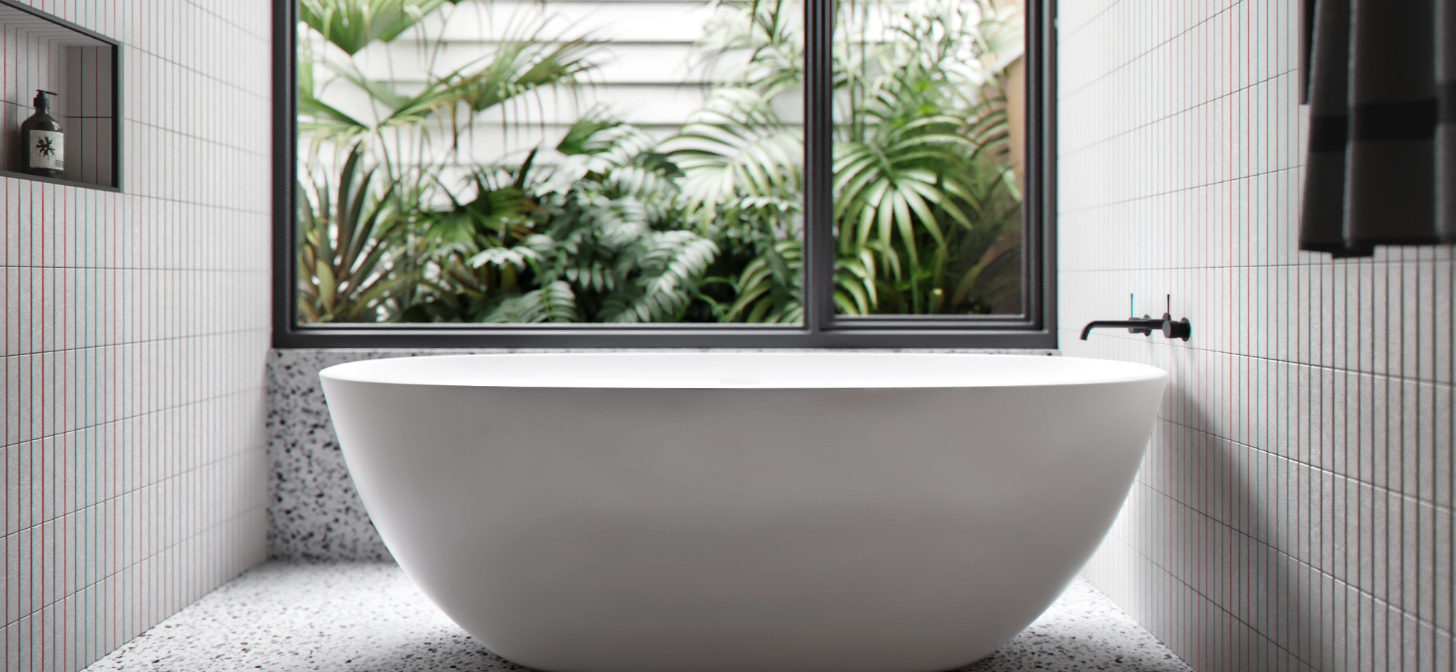
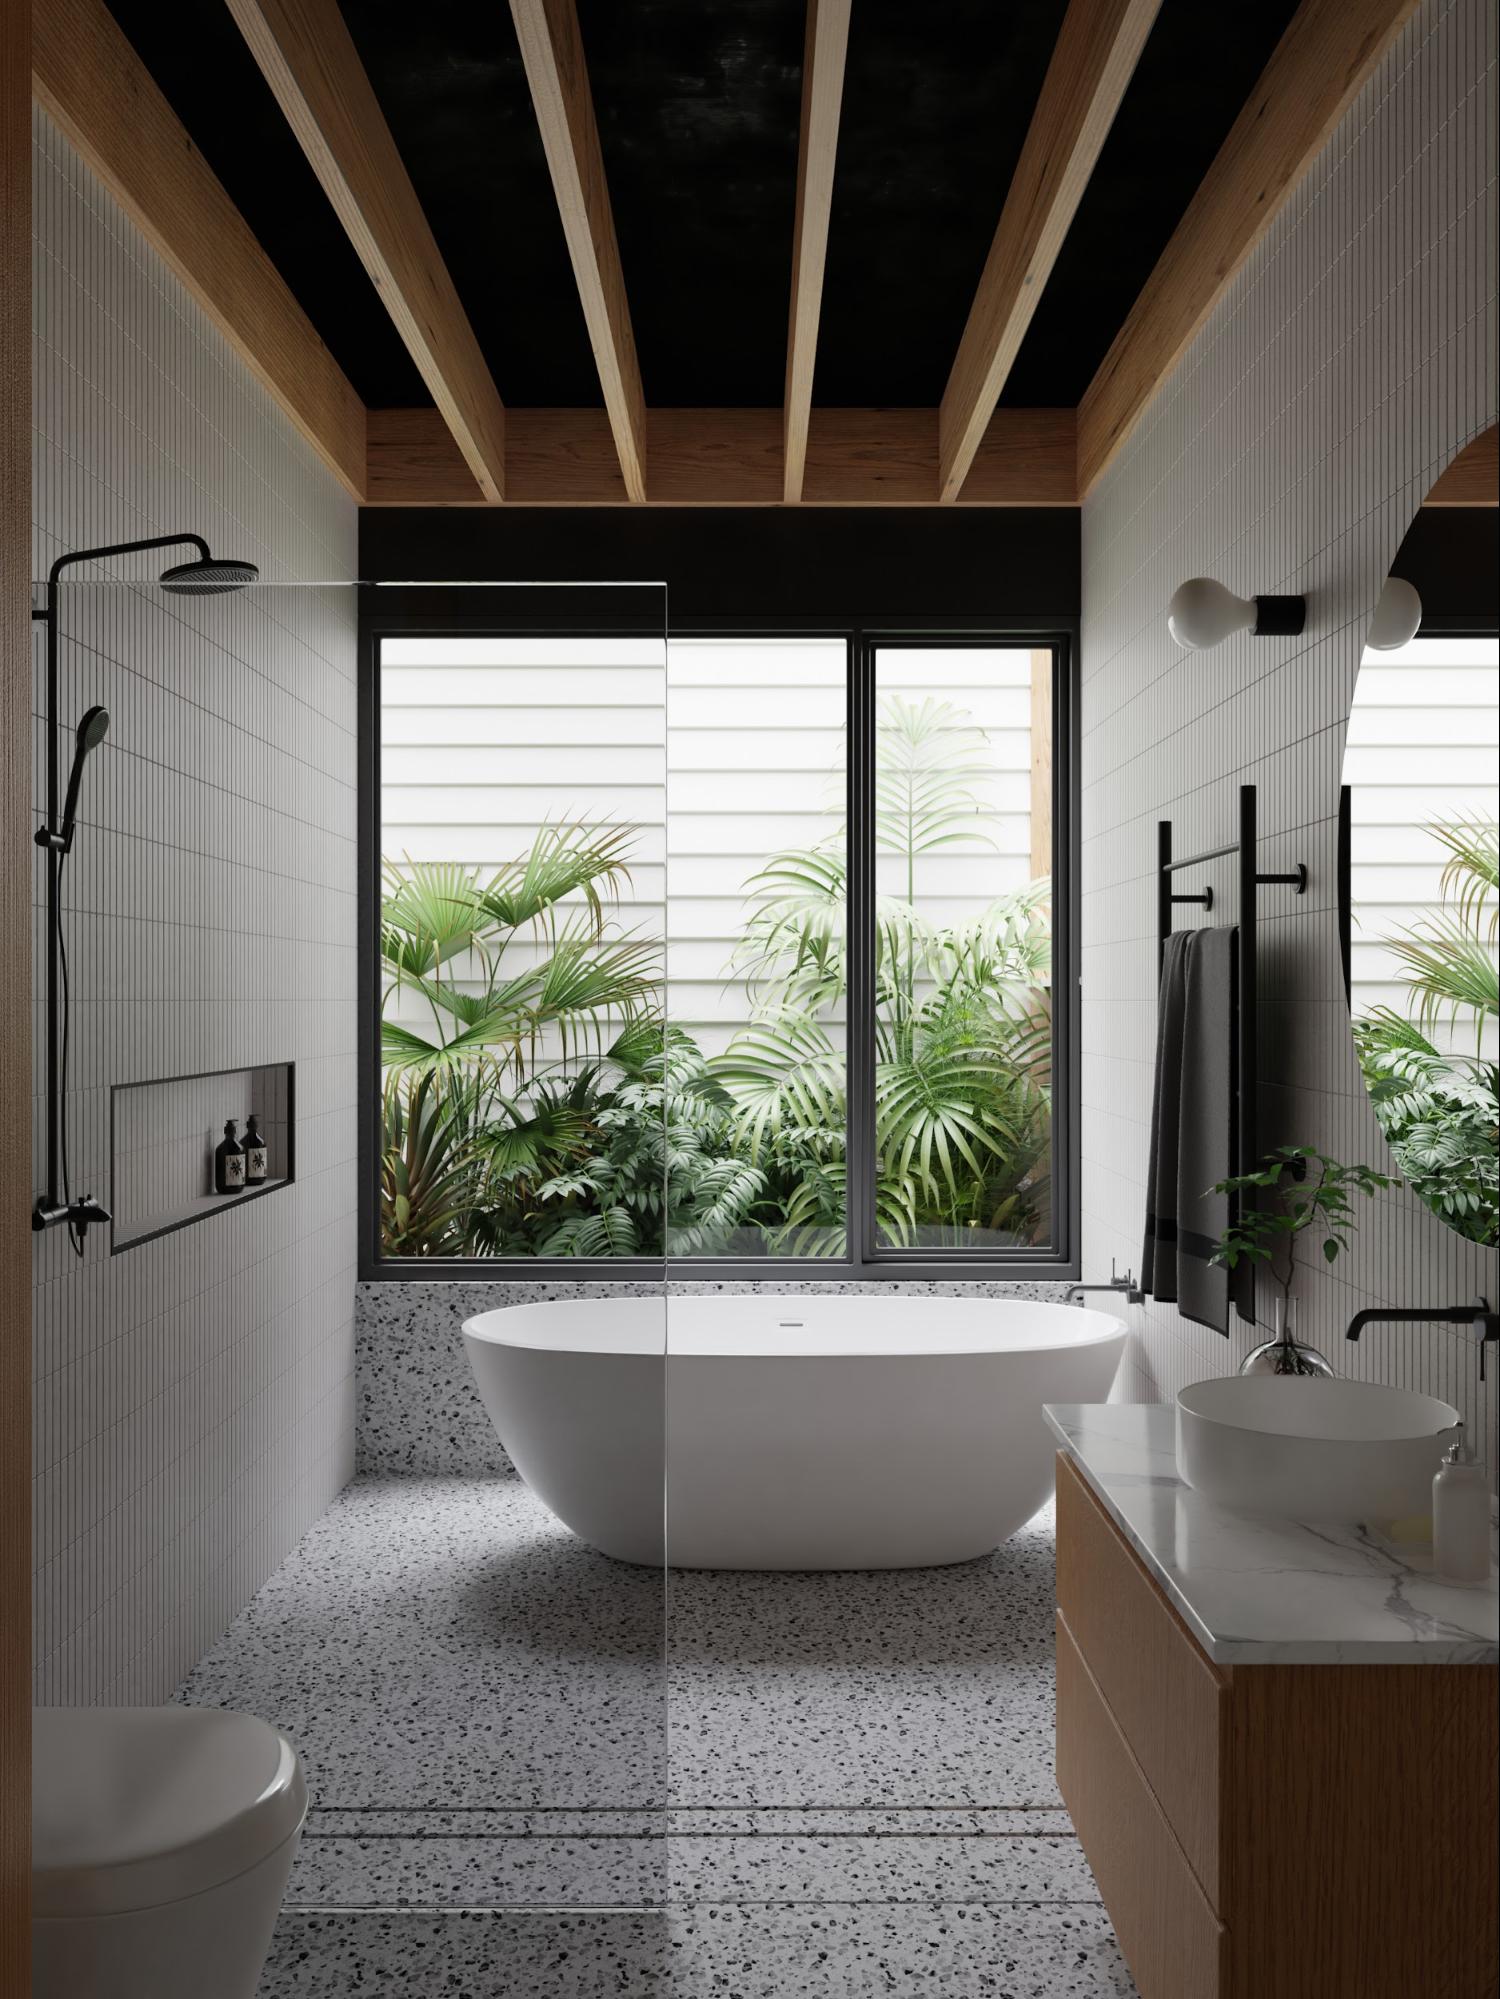
So the first step was to find a reference. As I have a permanent job and I can work on this only in my free time, I did not want a complex scene. I wanted a simple scene in which I could play with different materials.
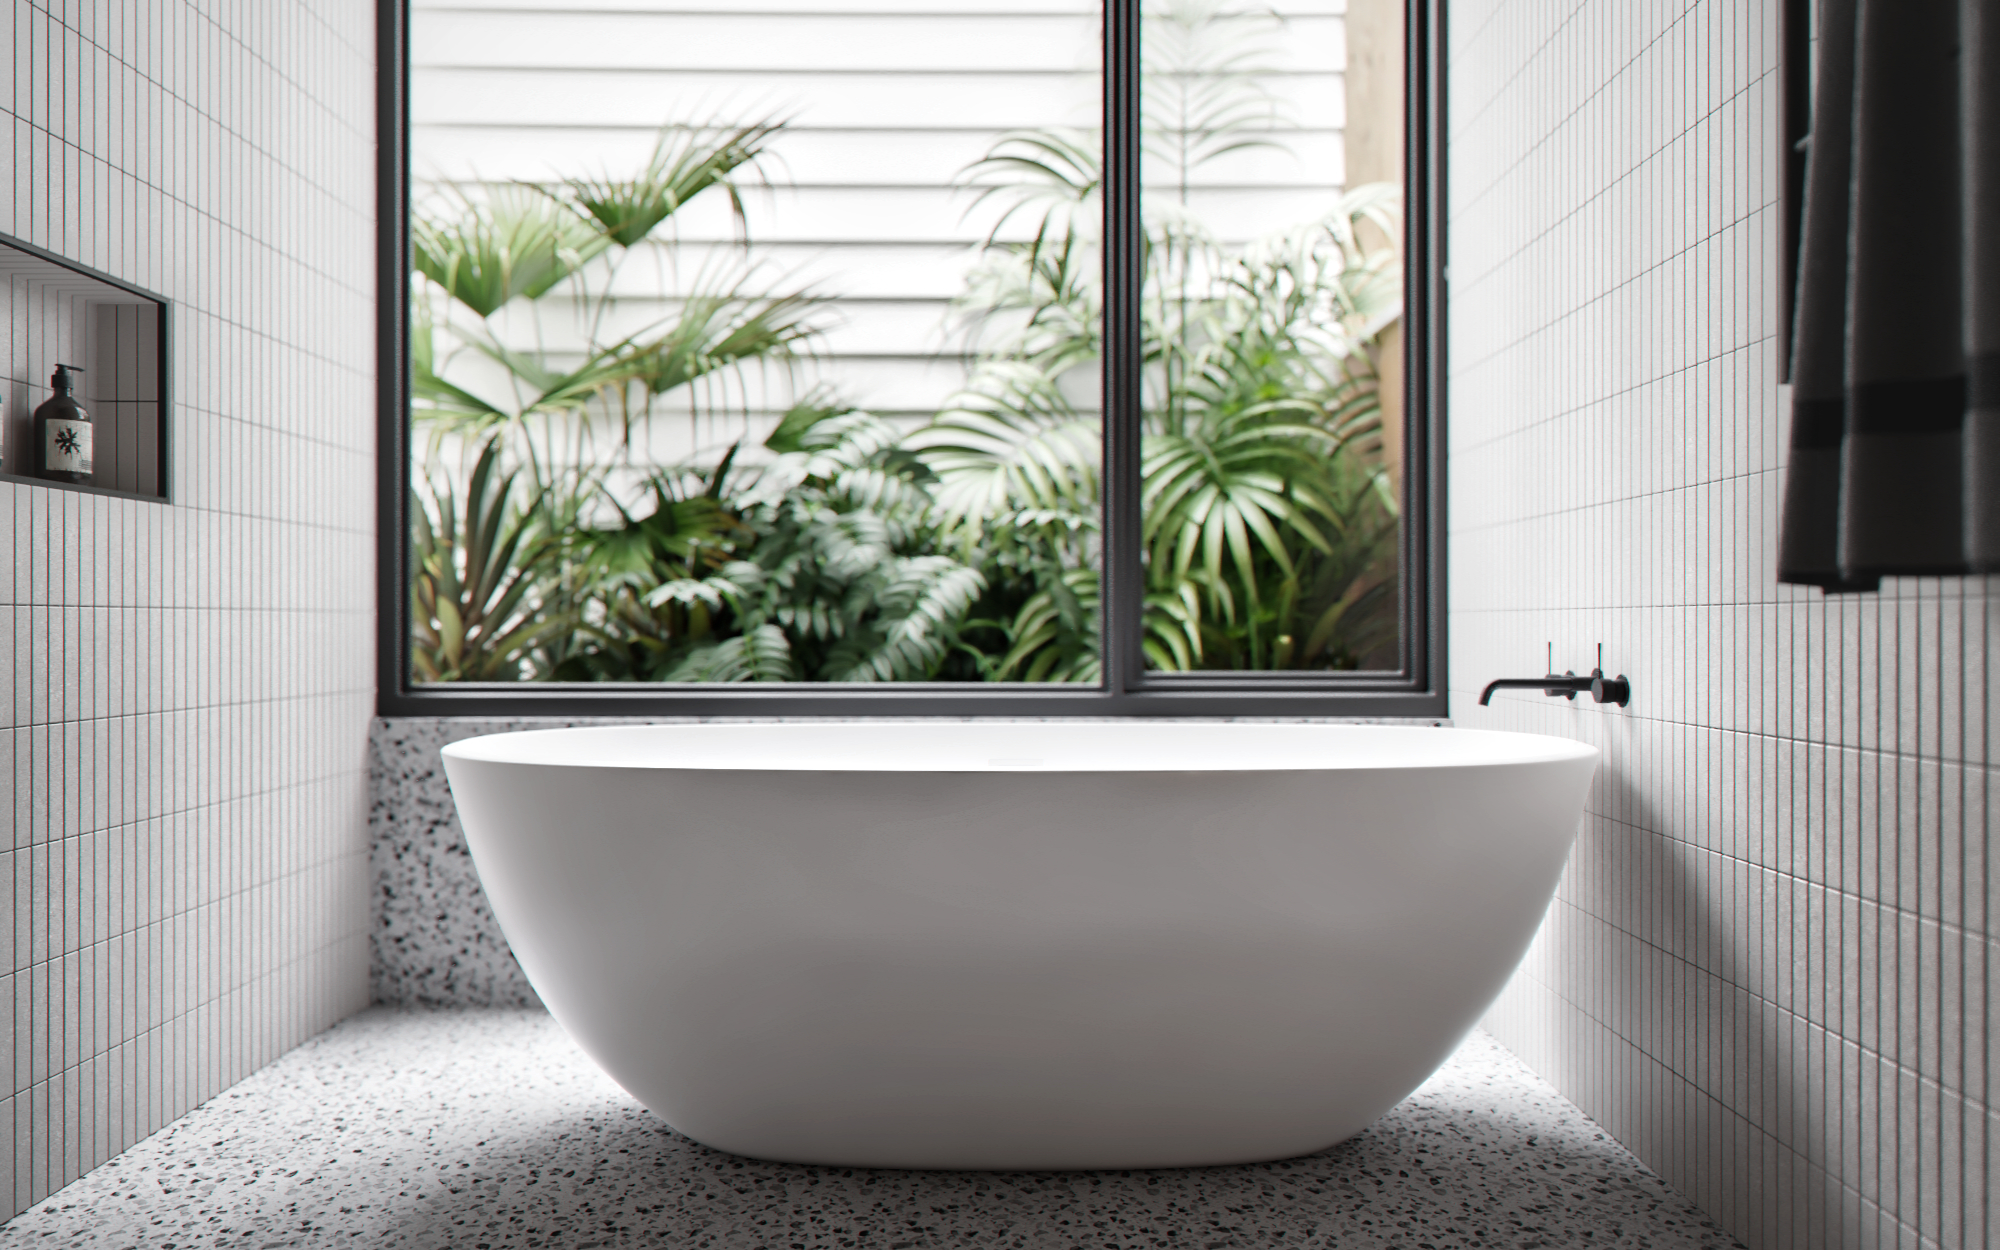
Modeling
After finding the reference, I started modeling. Modeling was not so complex. I tried to match the camera angle as much as possible from the reference image. After I finished with the basic structure, I started to add details like small wall bricks, flooring, a window, and the backyard. For the window, I used the Archipack add-on. After that, I started modeling the sink cabinet, mirror, glass door, wall light, etc.

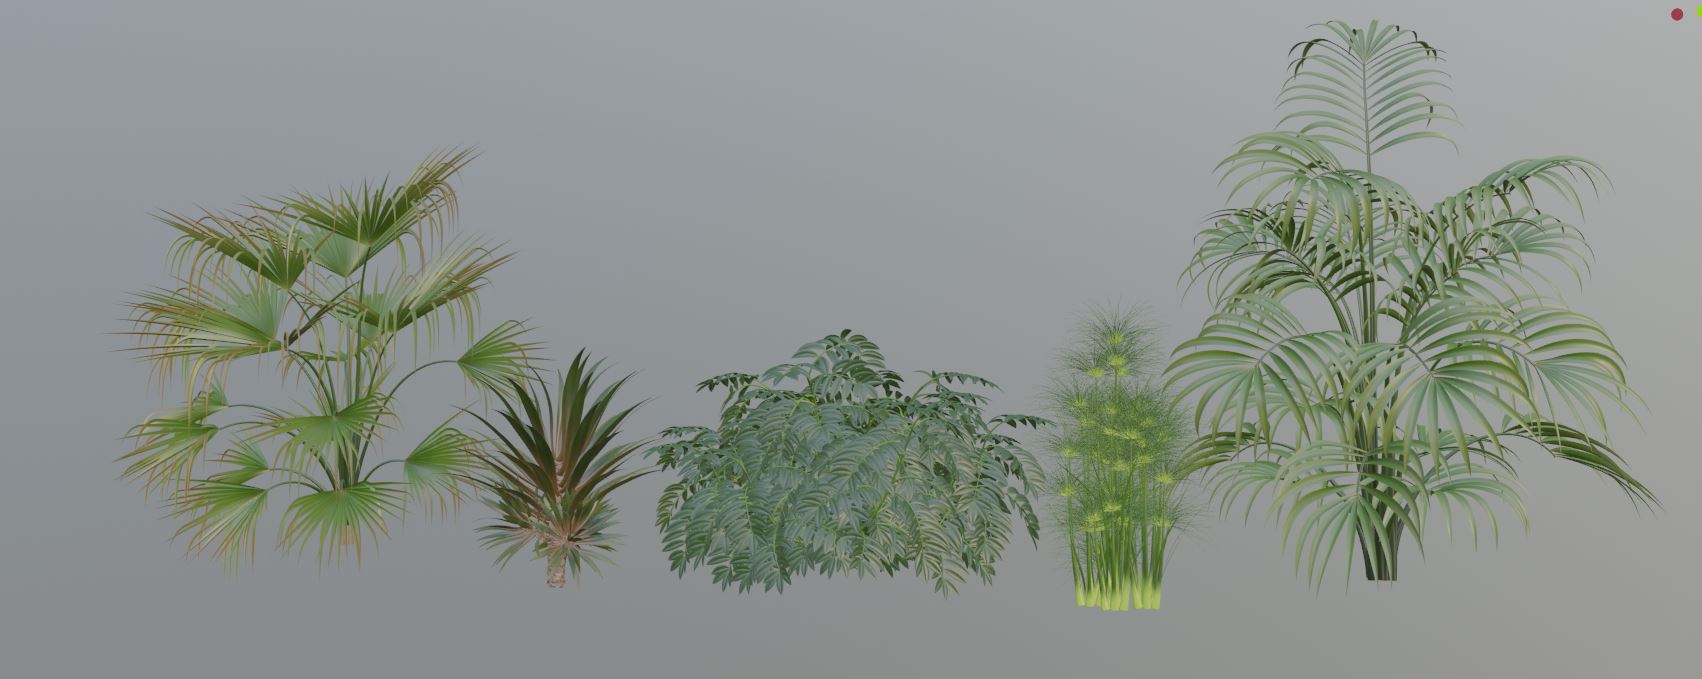
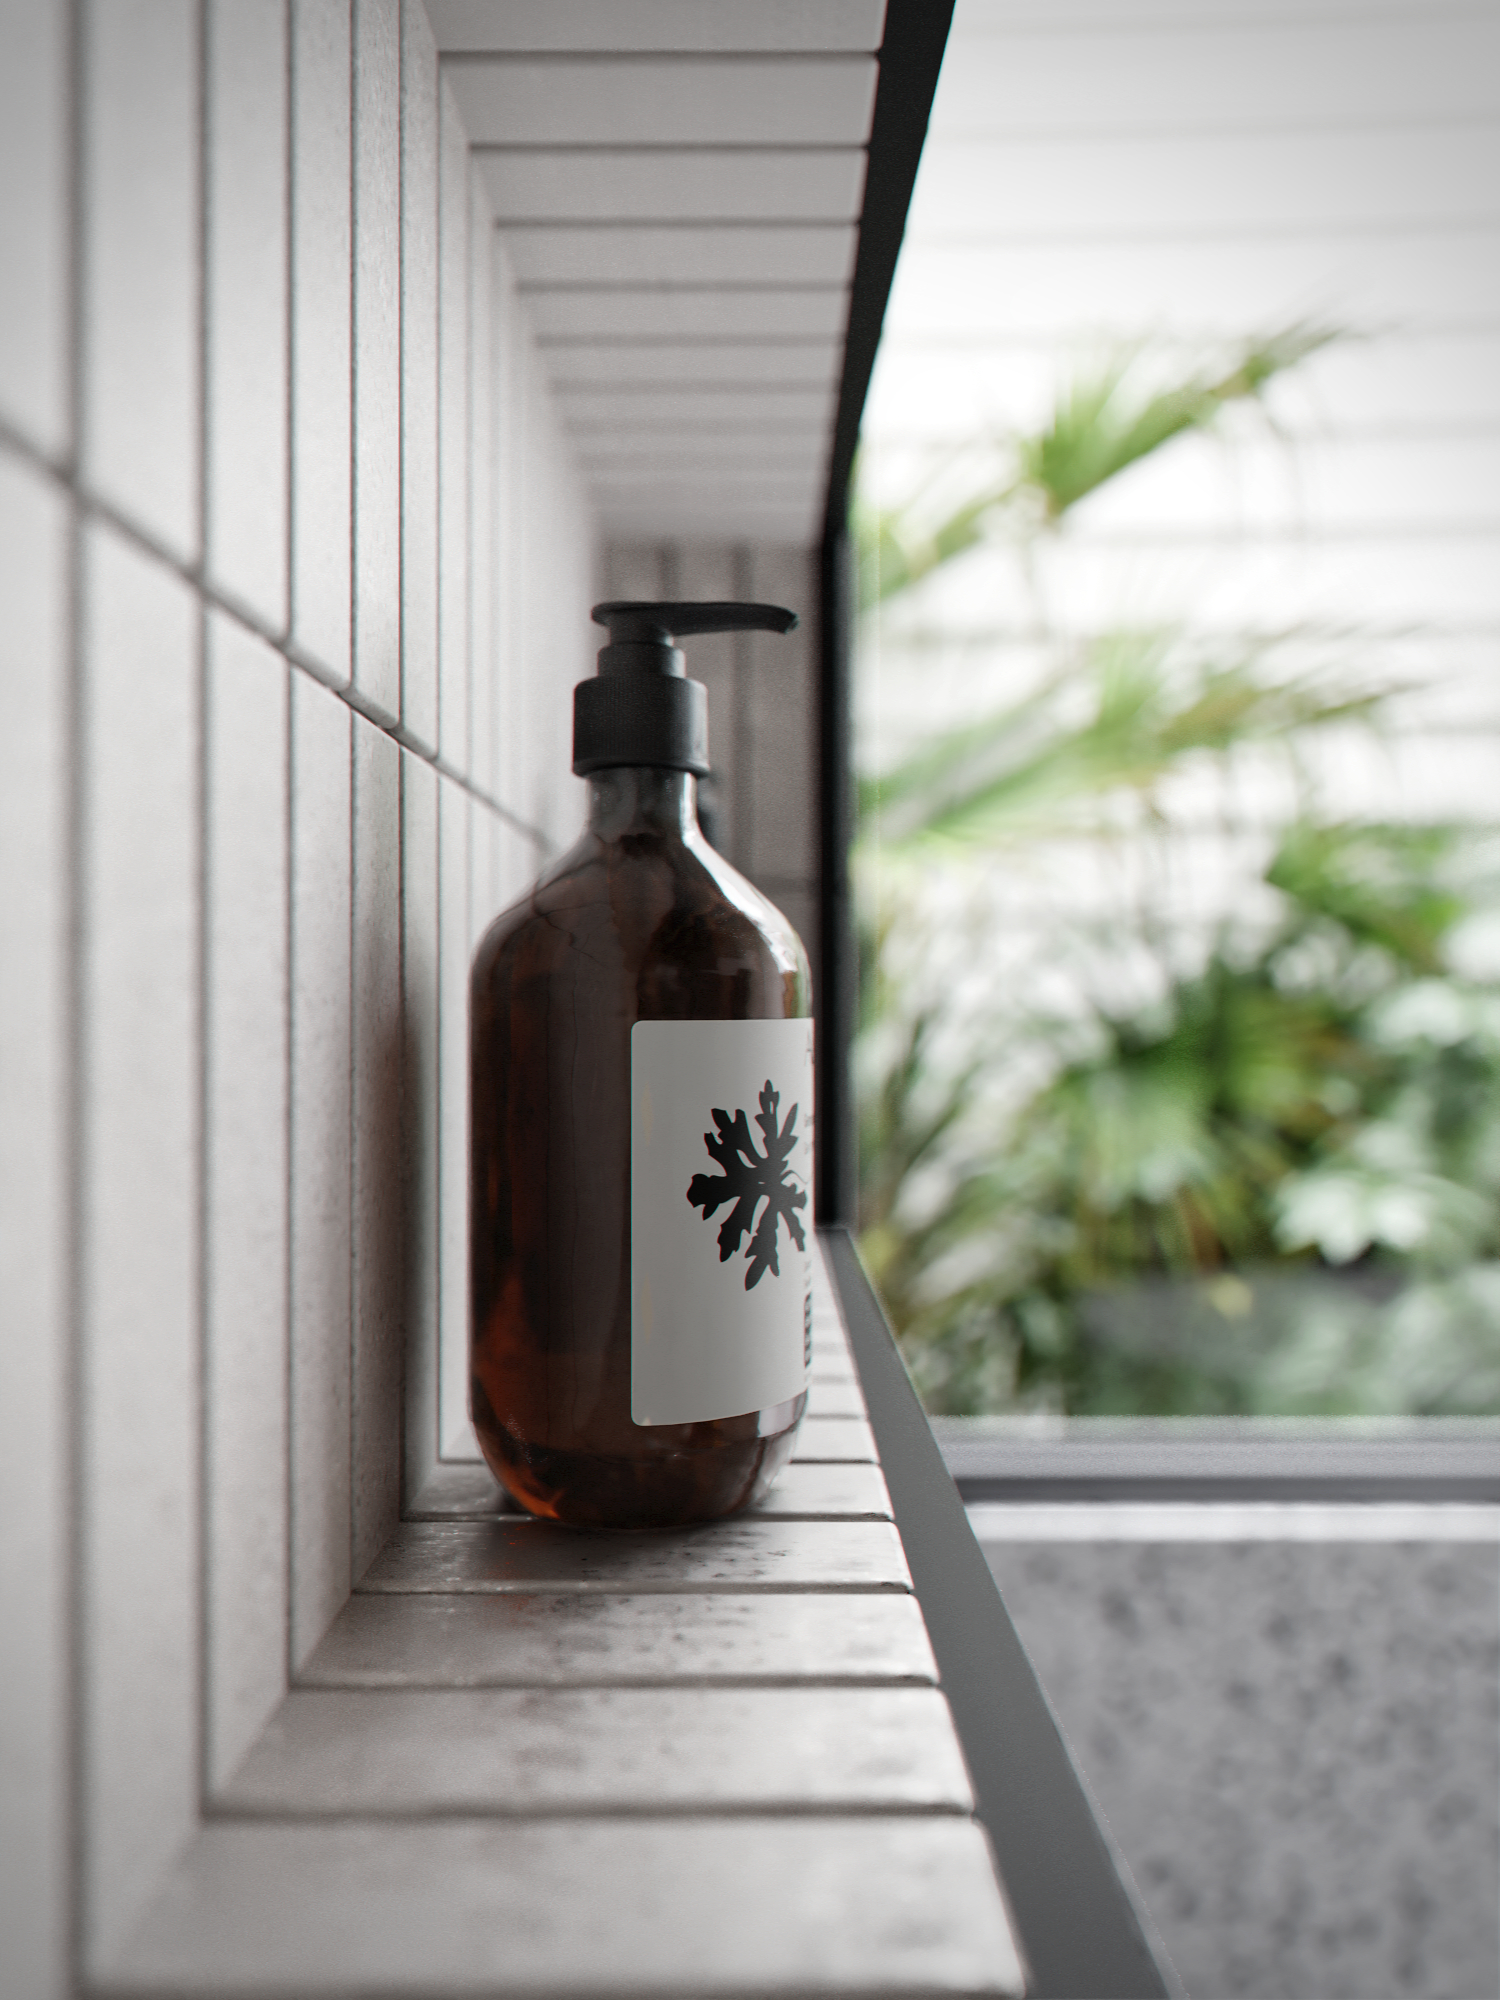
The plants are premodeled. I downloaded them, as well as the towel and those extra accessories like bottles, shower, wc, etc., from 3dmili.
Shading
The premade models were for 3ds Max so I was not able to directly use them in Blender. In order to use them in Blender, I exported them in FBX format and imported them into Blender. Once I had those objects in Blender and I had the textures and references, too, I could shade easily.
I used textures.com for some textures in my scene like flooring, ceiling wood, and backyard wood planks.
For the towel, I used a flat color and added some bump.
Lighting
For lighting, I used an HDRi image that I downloaded from HDRI Haven. I used a plane light as the light portal on windows. HDRI Haven is a great site for HDRIs.
Rendering
For final rendering, I used 1000 samples. I used only Denoise beauty and wire color for post-production.

Problems that I faced
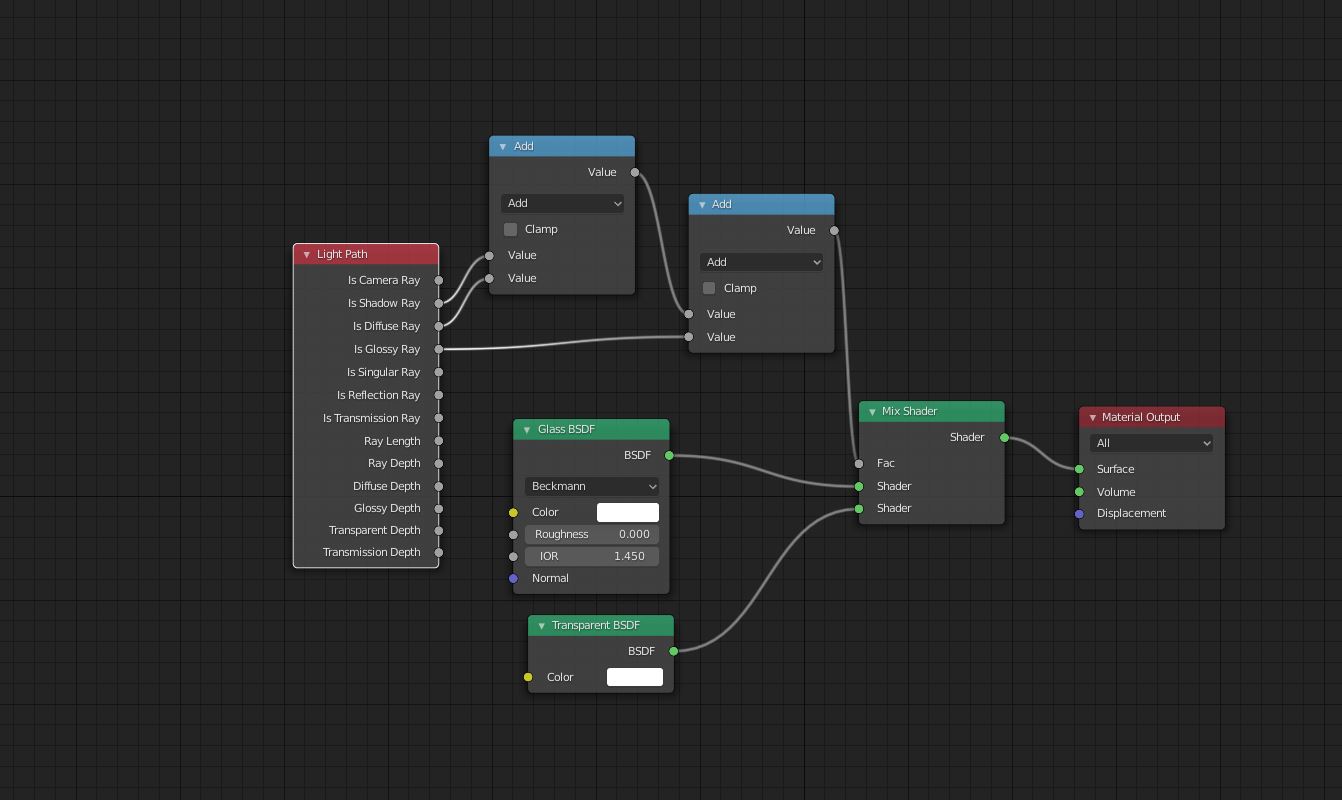
I did not know how to make a glass shader in Cycles. I was using only transmission. Because of that, I think the light was not coming into my interior because the glass was not letting light through itself. So I searched online to see if there was a solution and luckily I found help on Blender Guru’s website. For the vegetation, I did not have the exact plants that I wanted so I experimented with different plants.
About the Author
 Dhananjay Sharma, CGI Artist


