Behind the Scenes: Forgotten Childhood

Hi, my name is Svenja Strobel (“Icesturm” online). I’m a self-taught Blender user, live in Germany, and am 19 years old. I created this render together with my boyfriend Colin Behrens (“Colin00b” online). He’s a self-taught Blender user just like me, is 20 years old, and also lives in Germany.
I started learning Blender when I was 13 and it’s been an important and addictive part of my life for the six years since then. I discovered Blender through YouTube and I also ended up learning Blender exclusively through the platform and by experimenting on my own. There really are great resources available there, today even more than six years ago.
I just started studying computer science in university last year while continuing to freelance and do personal 3D projects in my free time. In the future, I hope to be able to find a job in which I can combine both fields. Seeing my ideas come to life in 3D really is great!
[sponsor id=’qarnot’]
I met Colin about 3 to 4 years ago through the Blender community on Instagram. We quickly became online friends and decided to meet up after about a year in real-life to do a Blender project together. A few months after that we became a couple and have been doing lots of Blender projects together since then. Working together has the benefit of having two pairs of eyes critiquing the image and spotting more mistakes. Also, you can motivate each other, which helps when you encounter frustrations in the workflow—and it’s just a lot more fun! I highly recommend trying collaborations!
Colin started learning Blender when he was 14. He also learned through YouTube tutorials and by experimenting on his own. Blender Guru’s and Gleb Alexandrov’s tutorials were especially helpful for him. I’d recommend checking those out on YouTube. Six years later Colin is now studying media production in university in order to broaden his knowledge of software and increase his 3D skills. He works as a Blender tutor at university nowadays as well as creating great, really complex shaders in his free time, such as a realistic glass shader.
We recently founded our own little “company” called Vertex Wizards. We’ve started creating asset packs and complex shaders that we sell on Blender Market in order to make artists’ lives easier.
Inspiration and Idea
Finding an idea for what to make is always difficult, in my opinion. In the search for inspiration, I usually browse Pinterest, searching for random things, always hoping to find images that really pique my interest. I usually end up with three to five reference images, which then lead to me coming up with my own idea. Often I then do a quick sketch to make sure that I don’t forget the idea—it never ends up being pretty, though.
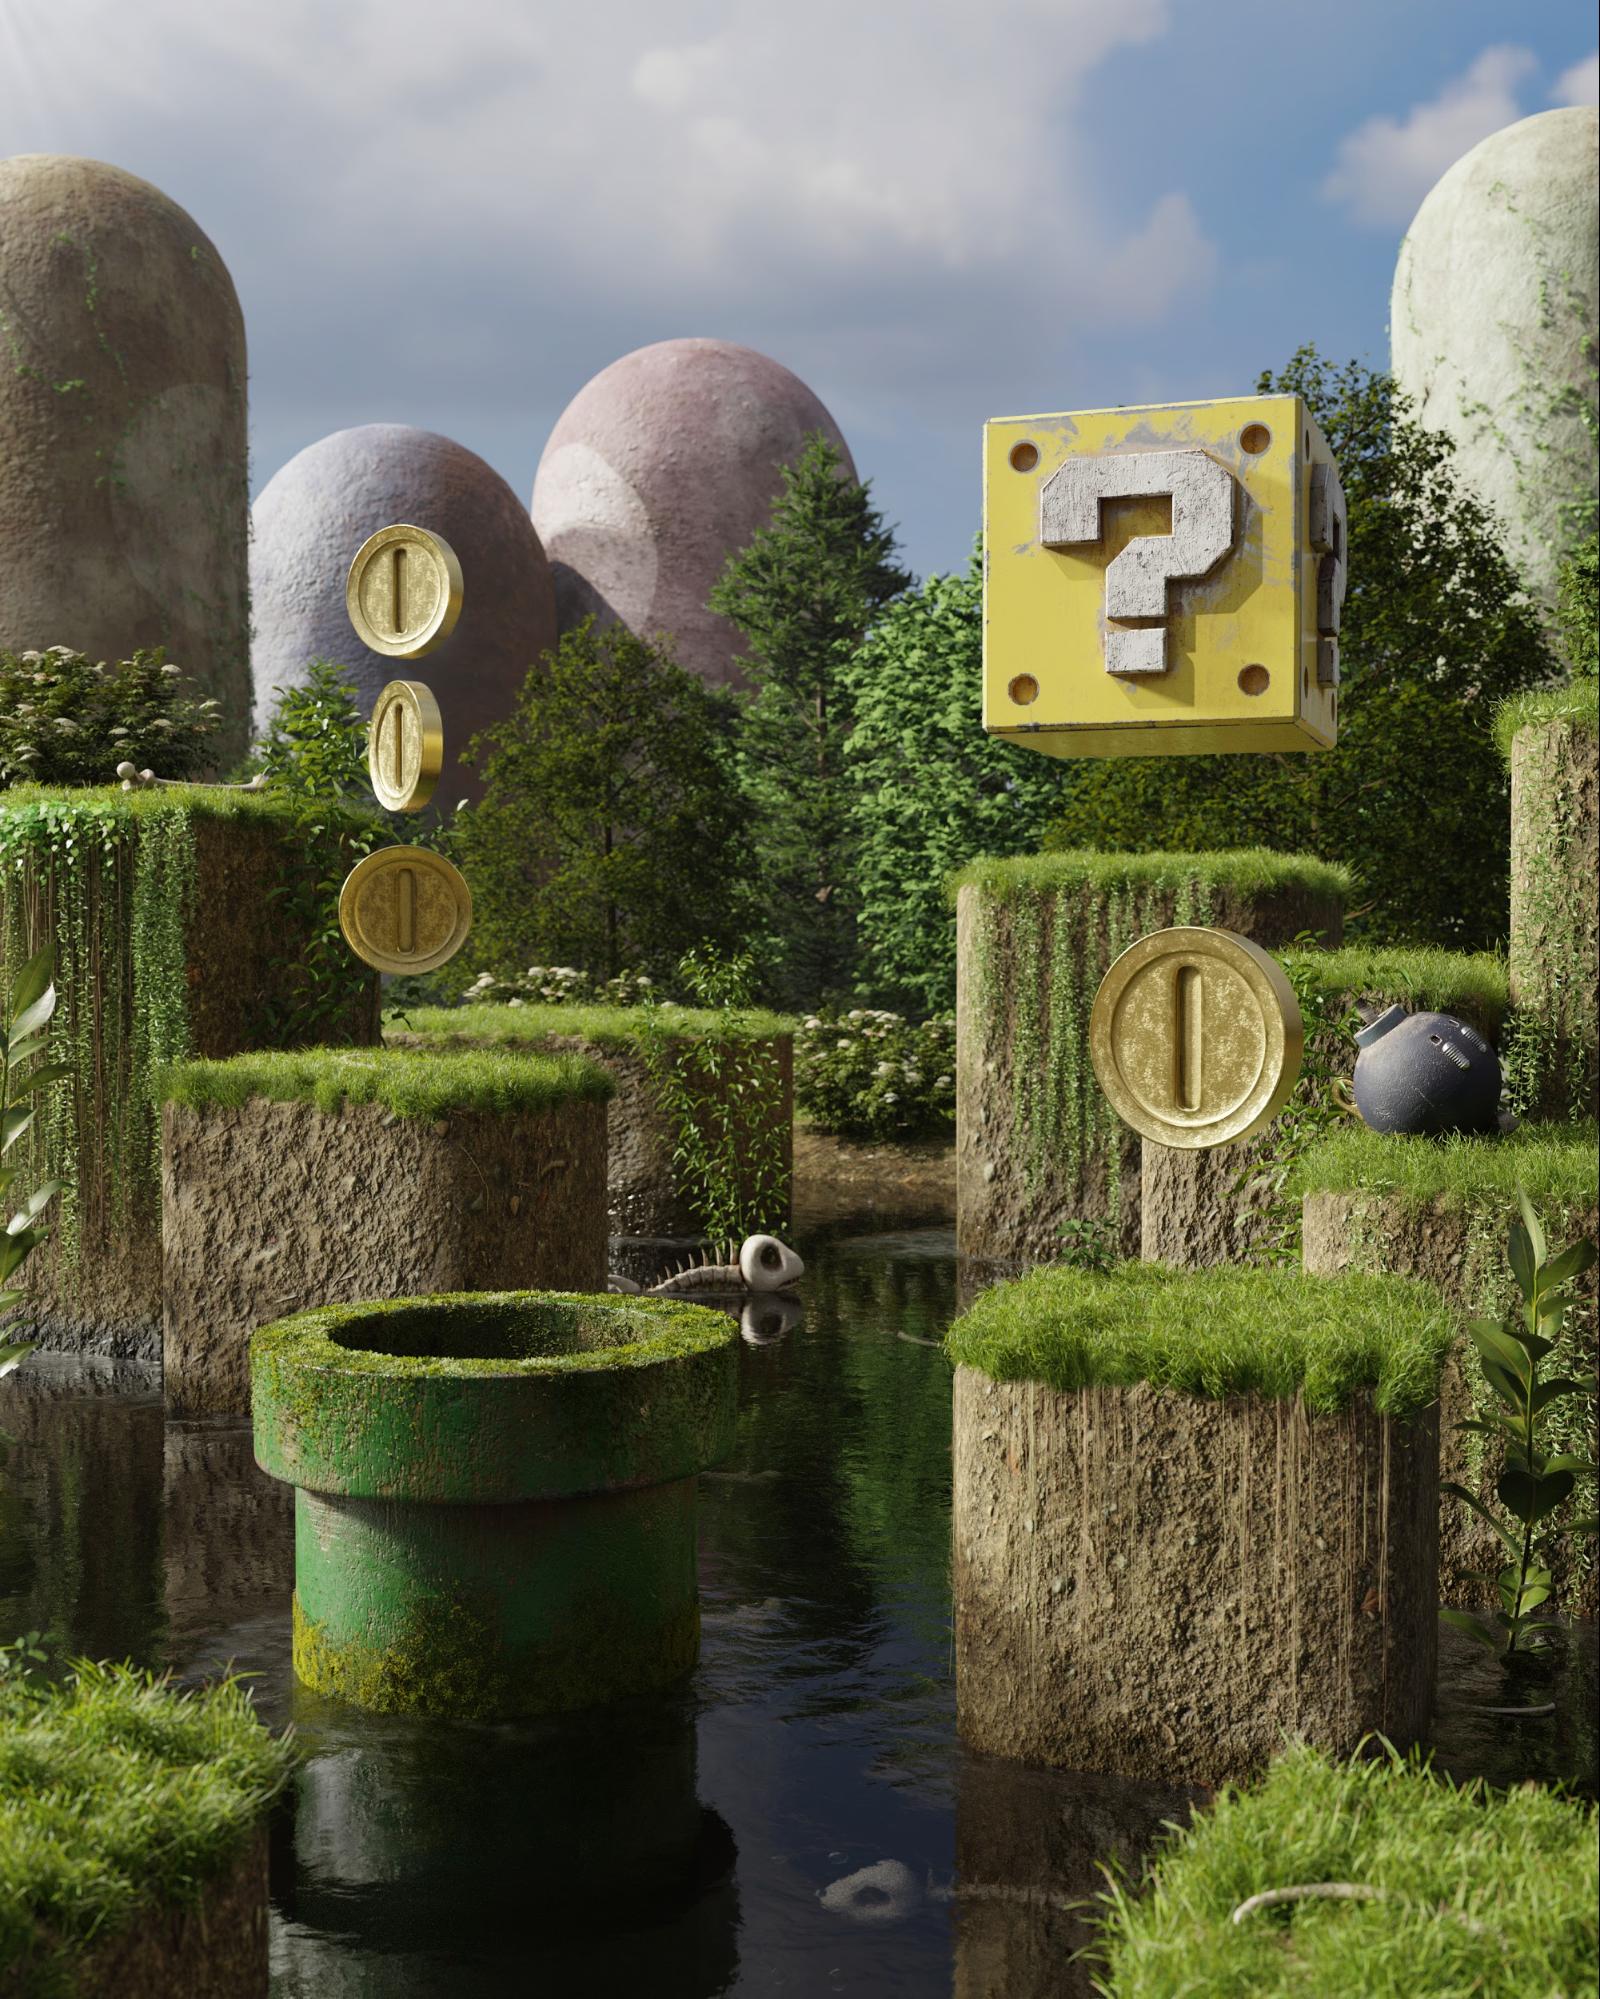
Our references for this project also came from Pinterest. I found a lot of images of realistic versions of video games and really wanted to try out that art style myself. As “Super Mario Bros.” was one of my favorite childhood games, just as it was Colin’s, we decided to do a realistic version of that.
Our goal for this project was to make our favorite childhood video game really come to life. We also wanted to challenge our texturing skills and tried incorporating Substance Painter into our workflow.
Modeling

For this project, we split up the modeling work. I worked on the smaller assets such as the question mark, coins, bob-omb, bones, bone fish, and the pipe. I used a very traditional modeling workflow to create most of these pieces. I looked up reference images online showing the objects from multiple sides and then used those for guidance. I only modeled the bone fish from imagination because I was unable to find any reference images online for this semi-realistic design online.

Colin modeled most of the environment: the platforms, the water, and the background pillars. He used my reference sketch and some in-game screenshots as guidance while doing this.
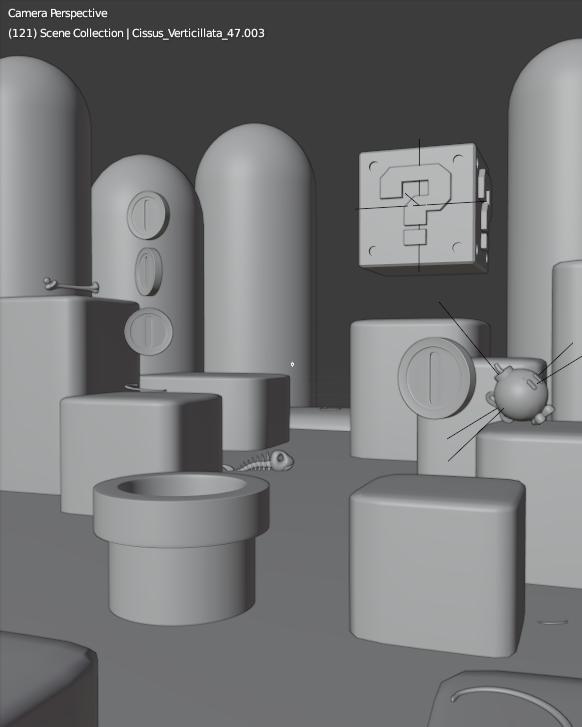
Once both of us were done with modeling we started adding the assets I had made to the environment that Colin had created. We ended up changing the position of the assets many times during the entire creation process, though, trying to find the ideal position for each one.
After the main modeling was done, we started adding smaller details to the scene such as plants and particle systems. Most of the larger plants in this scene are from botaniq, the hanging plants are from Creeper Scapes, and the grass and moss particles are from Graswald. The ivy on the pillars was created using the ivy generator addon that comes with Blender.

Using plant asset packs in your scene really is a great help to fill your scenes with details. If we had had to model all the plants ourselves, we would have never been able to complete the project in a reasonable amount of time.
We did a lot of weight painting on the platforms and pipes to add the small plants. For the pipe, we actually had multiple moss particle systems with different weight paints. There was a lot of experimenting and fixing issues during this creation step as well.
Lighting
What is a scene without light? Pretty damn boring right? Lighting can make or break a scene. For almost all outdoor scenes we always use HDRs as a part of the lighting setup. In most cases just finding the right HDR is enough to create a pretty realistic lighting setup for your scene. In this project that was not the case, unfortunately. We actually ended up using two different HDRs in the final render as well as additional lights. One HDR was used for the general lighting, the other was visible for the camera and looked nice in the background. We achieved this through a simple node setup in the world nodes:
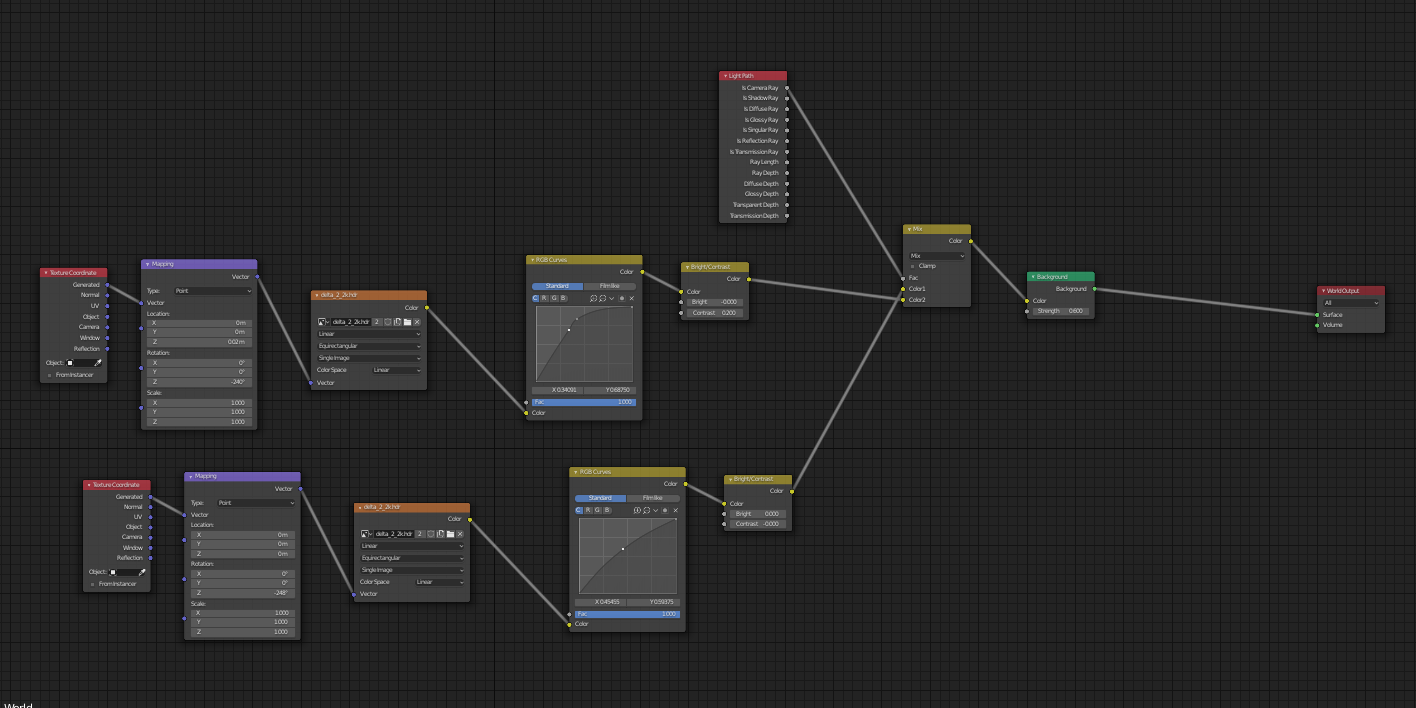
We’ve been using that simple trick more frequently in recent projects as it really makes it a lot easier to get good HDR lighting while also having full control over the visible part of the HDR in the background.
The additional lights in the scene were used to get rid of some ugly unwanted shadows and highlight other parts of the scene. So basically they were used to improve the composition of the image. Never underestimate how important lighting is for composition!
Texturing and Materials
As I mentioned previously, we wanted to incorporate Substance Painter into our workflow in this project. But of course, that doesn’t mean that we textured everything in Substance Painter. The water was created completely procedurally, for example. We had already used a similar node setup in our earlier project “Mystic Rainforest”. We find this water material to work extremely well for rather still waters, such as lakes, ponds, and slow rivers. We plan on improving the material even more and then maybe offering it on Blender Market for a very cheap price as the material is quite complex.

Other parts of the scene, such as the platforms, were also textured very traditionally using a PBR workflow with some textures from Poliigon as well as some self-painted ones.
For example, I painted a wetness map for the bottom of the platforms to make the soil darker and more reflective where the water would occasionally splash against it.

The pipe, background pillars, coins, bones, bone fish, bob-omb, and question block were all textured using Substance Painter. We tried out the smart materials incorporated into Substance for these objects, which worked out really well. Of course, we still had to customize all of the materials and in some cases also had to paint in details such as the dots on the pillars.

After we were happy with the material we had to export the textures. Substance Painter, unfortunately, doesn’t come with default export settings for Blender yet. So Colin adjusted those settings once and then saved those export options as “Blender export settings” in Substance Painter. That way we only had to do that step once.
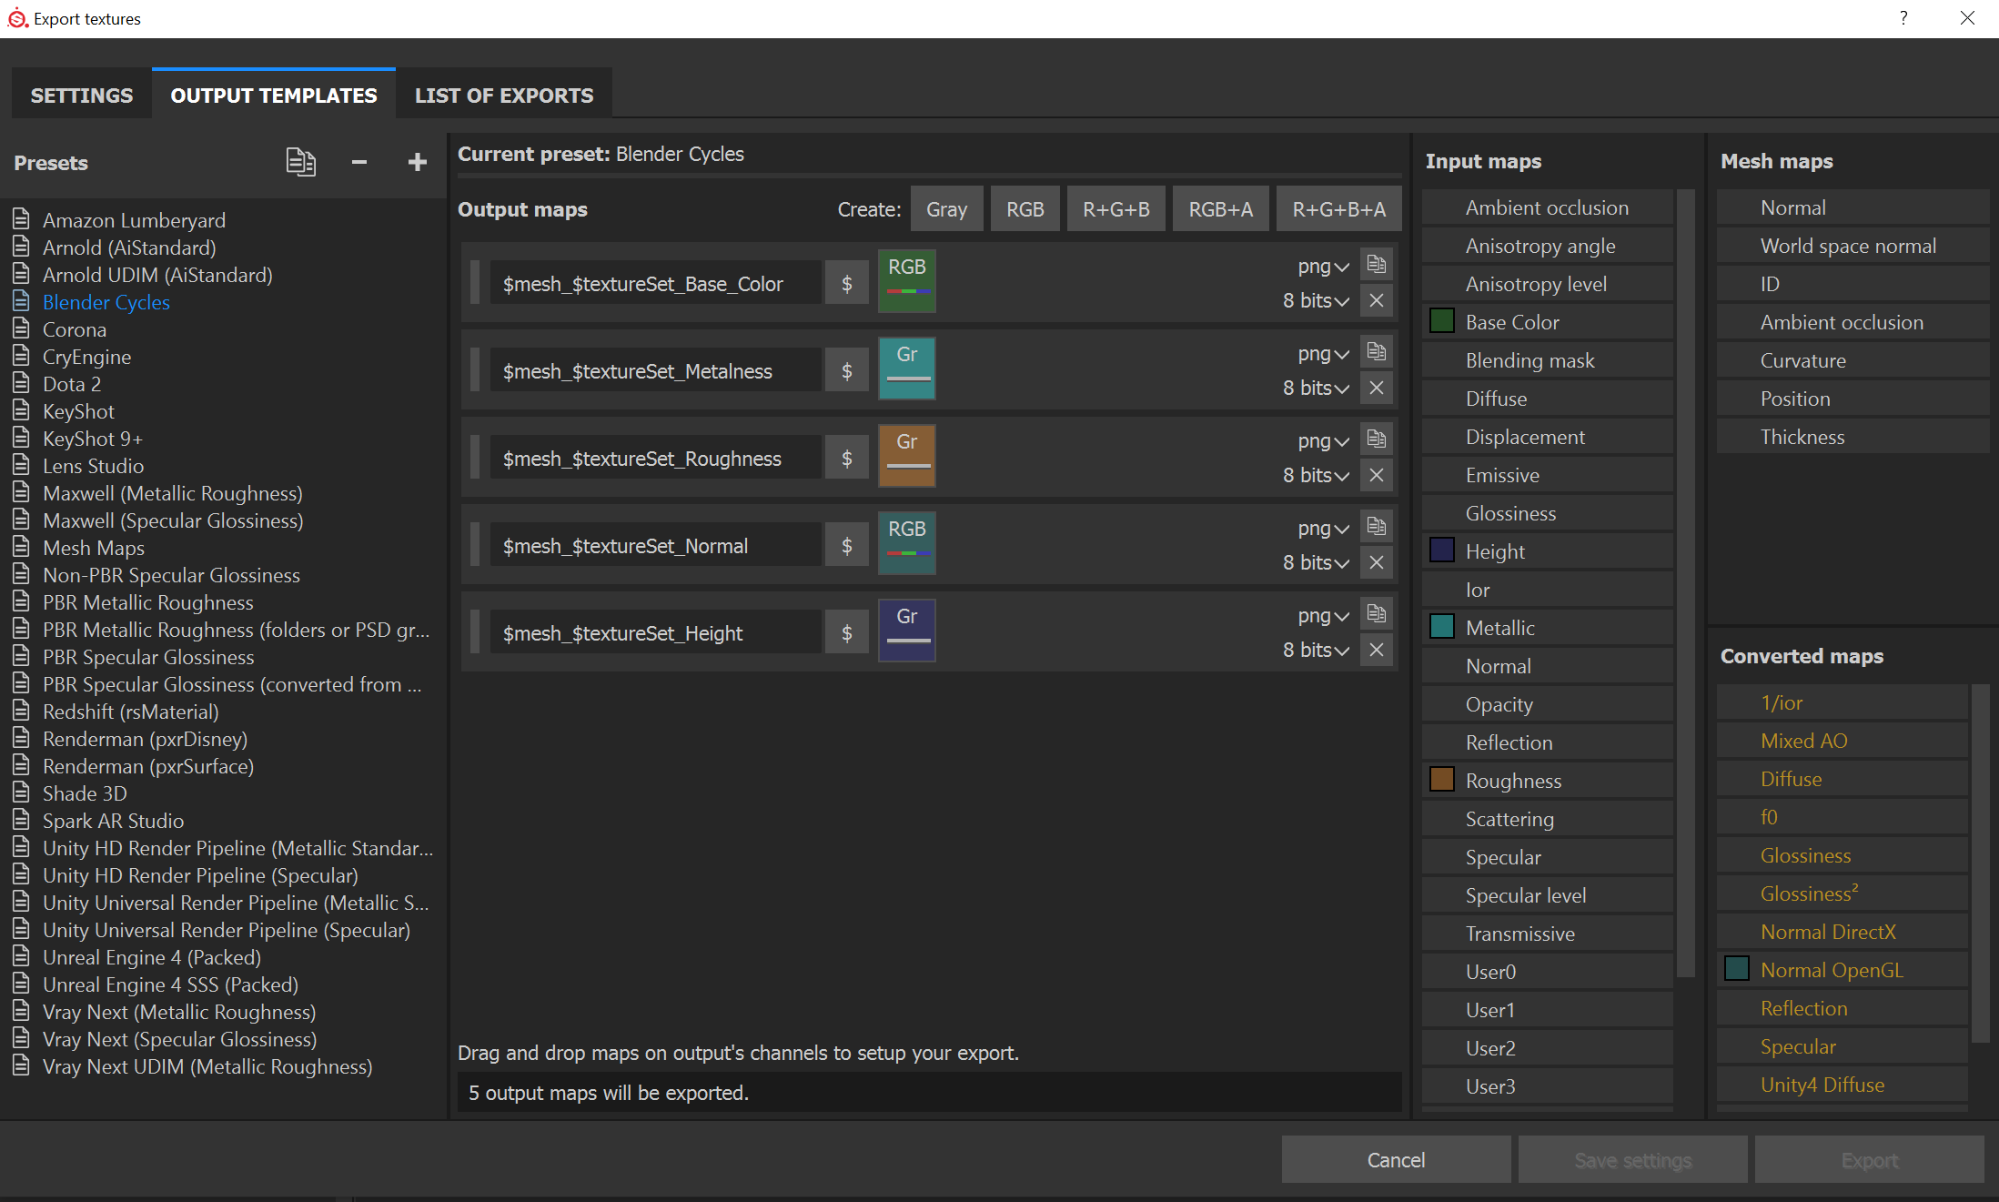
Then we just had to load in the textures in Blender and connect them to the principled shader, which was really easy.

I have to say that incorporating Substance Painter into your workflow with Blender is really easy thanks to the principled shader and makes complex texturing really simple and intuitive.
Rendering and compositing
Before rendering the image we made sure to make the camera use depth of field and to activate the mist pass. DOF is a really important setting in 3D. Images taken with real cameras always have a certain amount of DOF which is why you should try to recreate that look in 3D. Using the mist pass when you have vaster outdoor renders is also very important because if you’re going for photorealism your render will always look fake without it. In our scene, we made sure that the pillars and the trees in the very back had some visible mist on them.

We also activated the AO pass and the denoising pass before rendering.
The scene was rendered using Cycles on an RTX 2070 graphics card with 800 samples in 4k overnight. We also activated the new adaptive sampling option for rendering, which is one of the most useful new features added to Blender 2.83 in my opinion. It really helps to speed up render times.
Once the final render was complete we started adjusting the compositing nodes, adding some subtle effects such as Glare, Lens distortion, and dispersion as well as a vignette. We also denoised the image using the new denoise node.

After that, we only did some final color grading in Photoshop and then the image was finally finished.
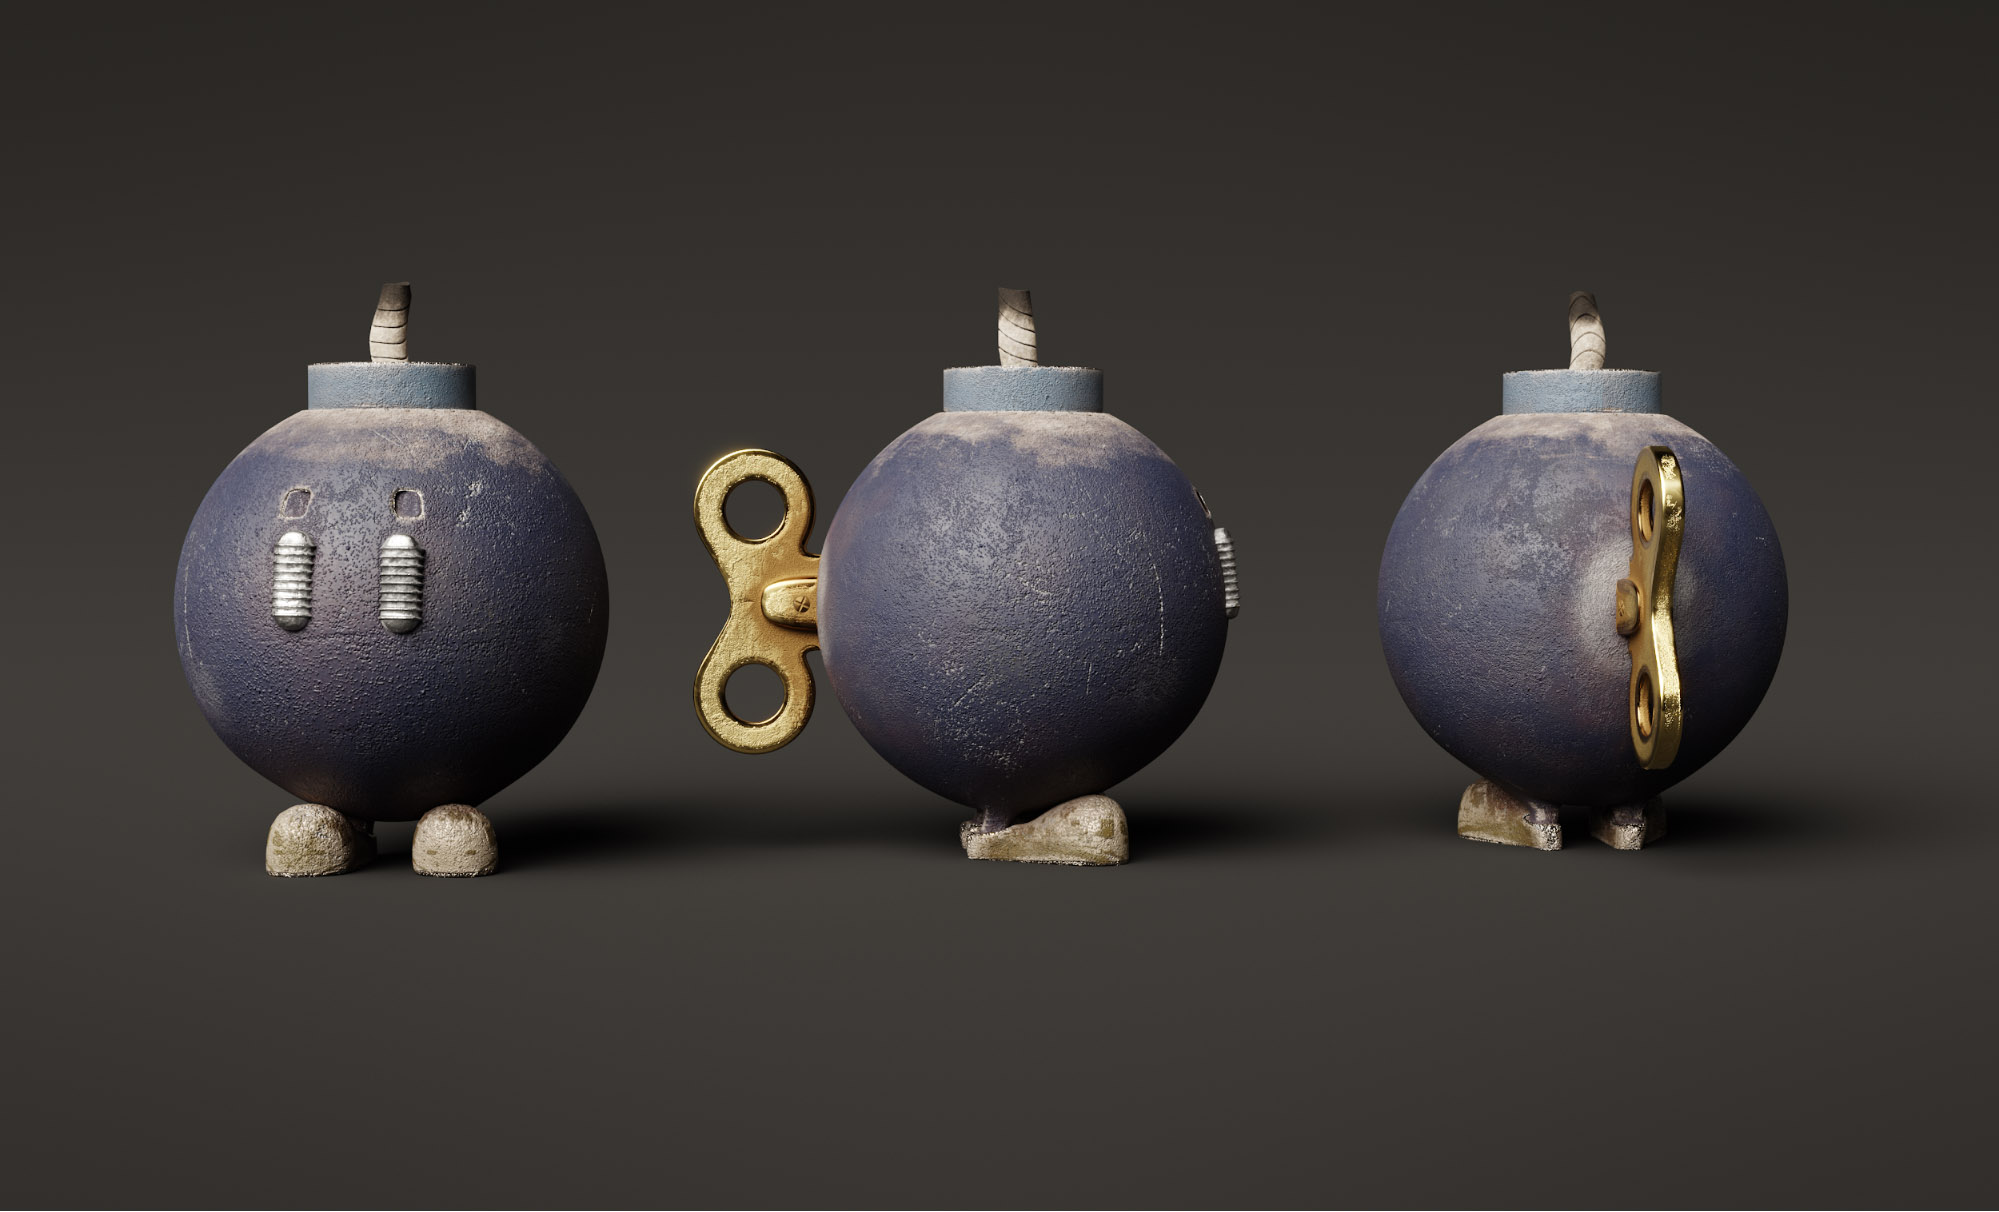
A few days after that we decided to do some additional closeup renders of some assets, such as the bob-omb:
I also made a quick rig for the bone fish and animated a very short sequence of them swimming, because I wanted to see them come alive:
Conclusion
This project was one of my favorite projects to do this year. We learned a lot during the creation of this scene, especially when it came to incorporating Substance Painter into our workflow. Doing that was a lot simpler and quicker than expected. If you’re a student as well, I’d recommend getting a free educational license for Substance and experimenting around with the program a bit. It works well with Blender. I hope you like the render as well and we’re always grateful for constructive critique to be able to improve in the future.
About the Authors
 Svenja Strobel, self-taught 3D Generalist from Germany
 Colin Behrens, self-taught 3D Artist from Germany


This is hands down one of my favorite blends ever. From the concept to the execution, it’s gorgeous.
I also appreciate the detailed breakdown.
Very, very well done. You two work well together.
Thank you very much! Your kind words made my day
So fond of it !
One thing is missing in the final render : your signature ! :-)