
Behind the Scenes: Princess Ariel
Intro
Hello! My name is Kevin Christian Muljadi, and I live in Indonesia. I work as a concept artist for character design and 3D character sculpting at UMN Pictures animation studio. I’ve worked here for about two years now.
I started learning digital sculpting at university in 2015. It was only for one semester; after that, I never practiced digital sculpting again until I had my full-time job in 2018. As a concept artist, I try to improve my digital sculpting in a stylized direction in an attempt to translate the 2D concepts from the concept artists like David Ardinaryas Lojaya and Max Grecke into 3D.
From 2018 until early February 2020, I had used ZBrush to sculpt. I switched to Blender as my primary software because my friend at work told me that Blender could be used as a sculpting tool, has 3D features like on Autodesk Maya, and it’s completely free! So I tried hard to learn about Blender software for sculpting, lighting composition, and rendering in March 2020.
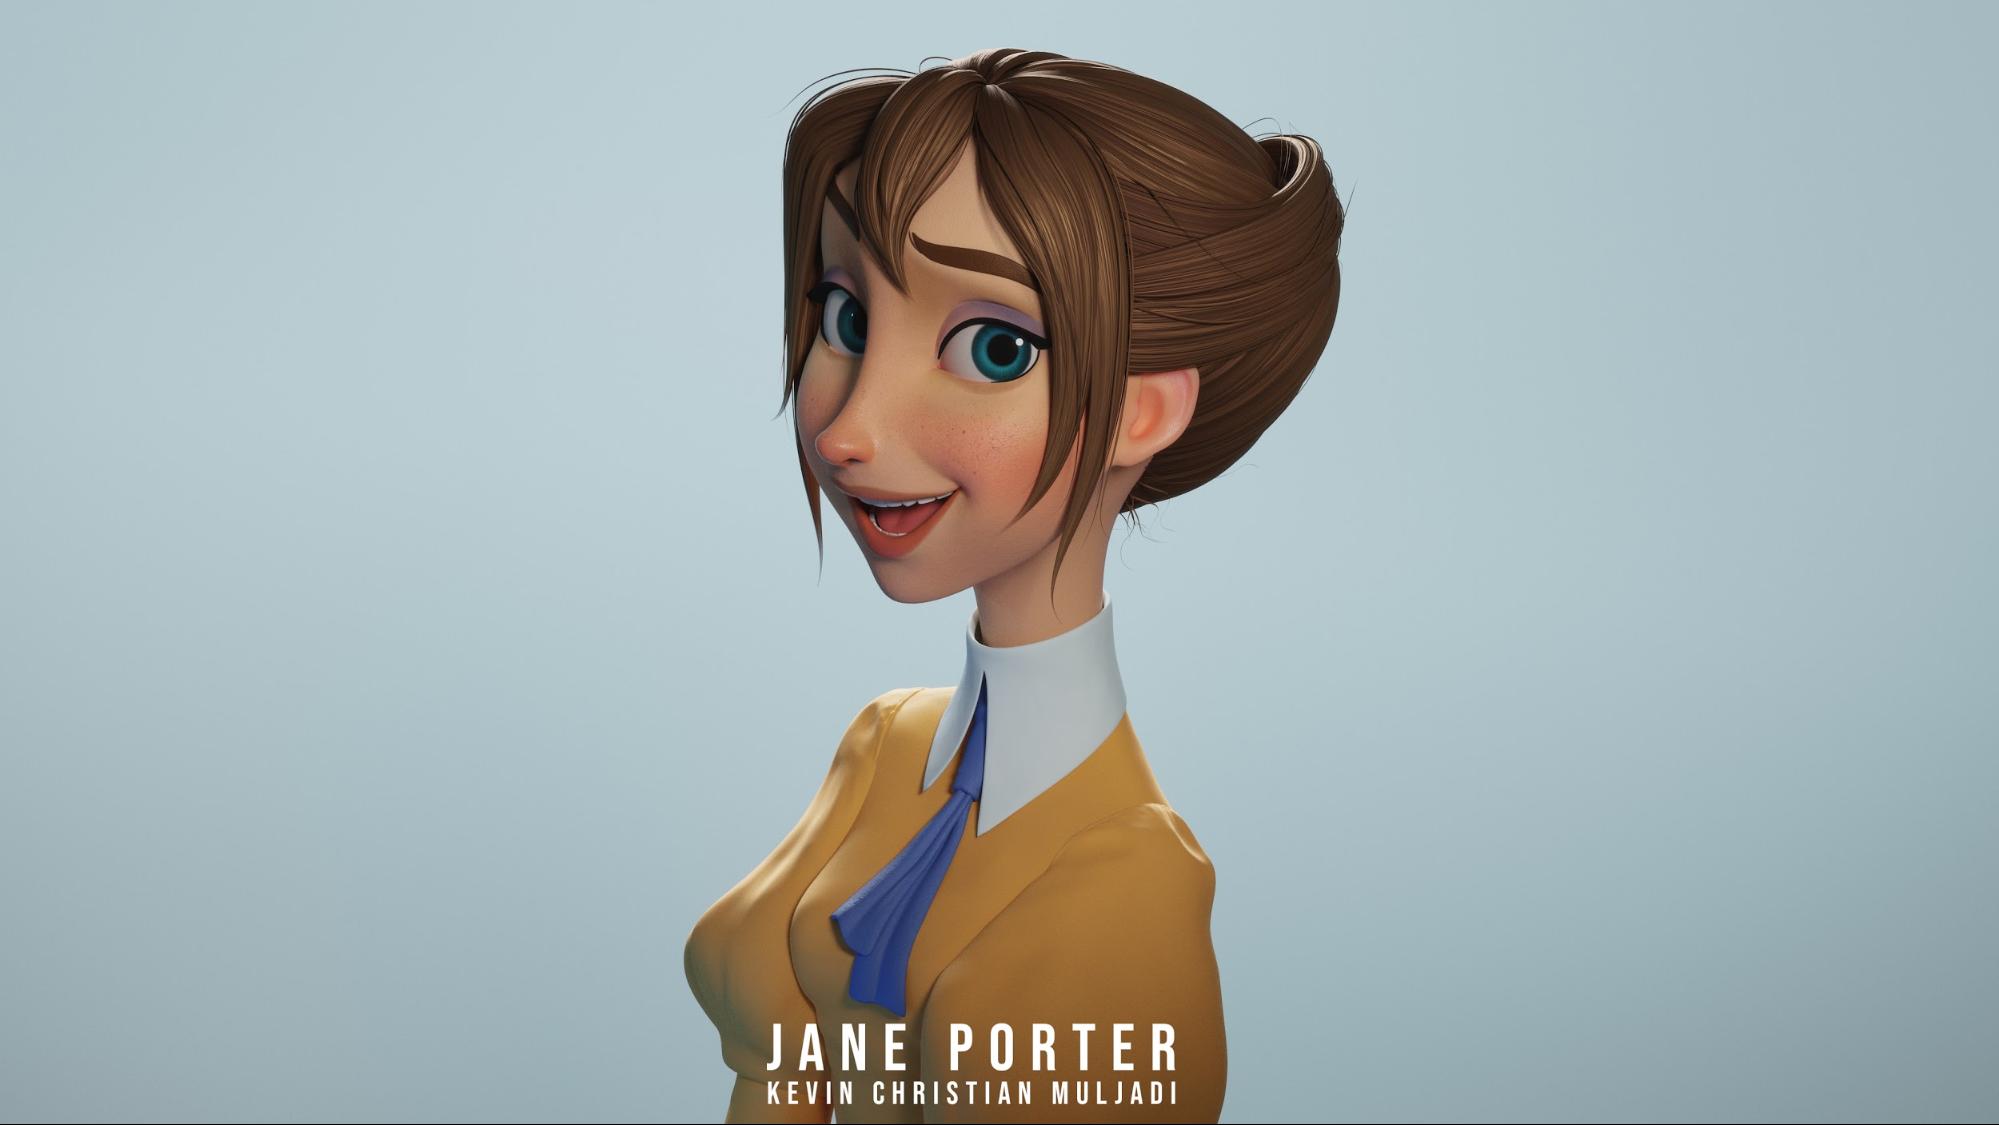
My first artwork with Blender was Jane Porter from the Tarzan 2D animated movie; I sculpted it based on David Ardinaryas Lojaya’s concept art. It took me around 2.5 weeks to complete it and learn the software simultaneously because I was too excited at that time!
This is my Jane Porter 3D sculpting work, and I was so happy about the result after I worked hard.
Motivation
I prefer stylization over realism because I think stylized characters always look more appealing. My favorite character artists are David Ardinaryas Lojaya, Max Grecke, Loish, and TB Choi; as for 3D sculptors, I like Follygon, Danny Mac, Yansculpts, and Julien Kaspar.
I love it when I see these 3D sculptors’ works on YouTube; their sculpts are very clean, and everything flows like magic! After watching their tutorials or timelapse, I also want to be able to make a very clean sculpt like they did. I always check some professional works from ArtStation for inspiration.
Making of Ariel
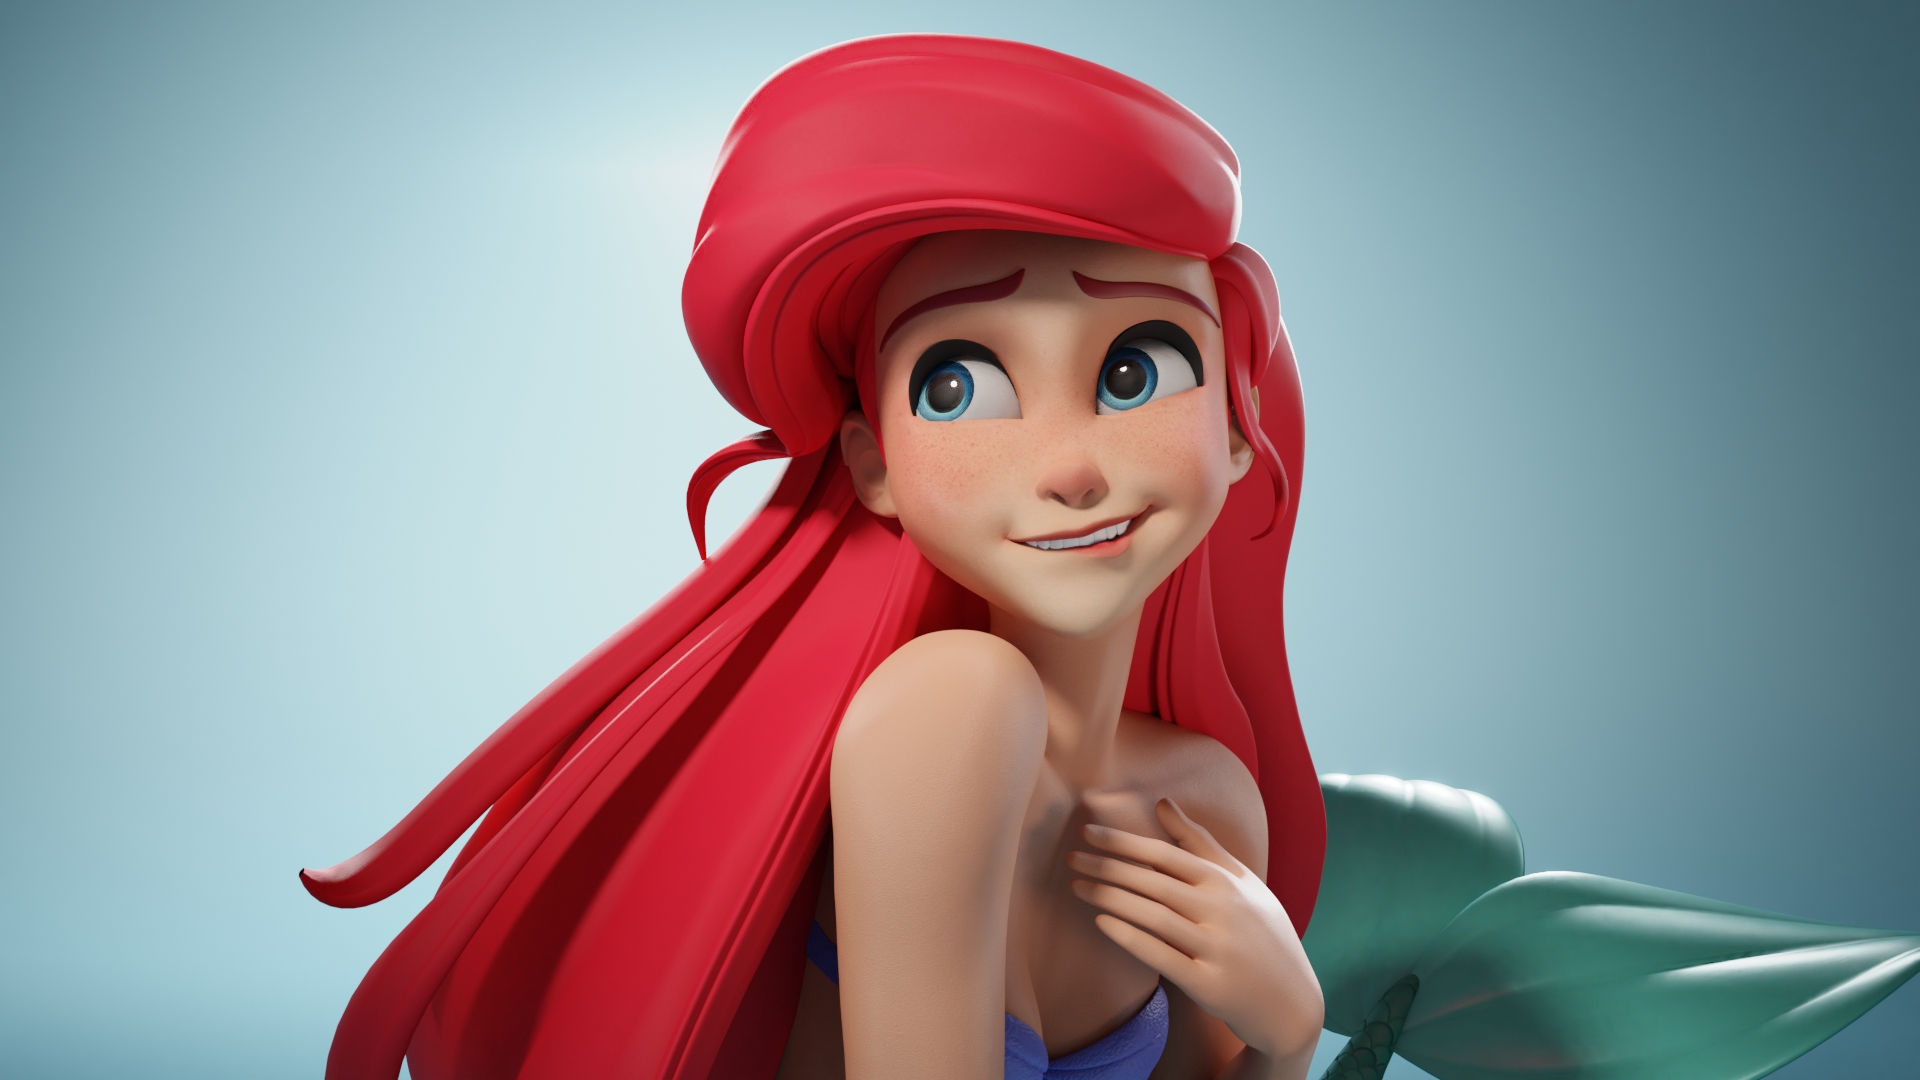
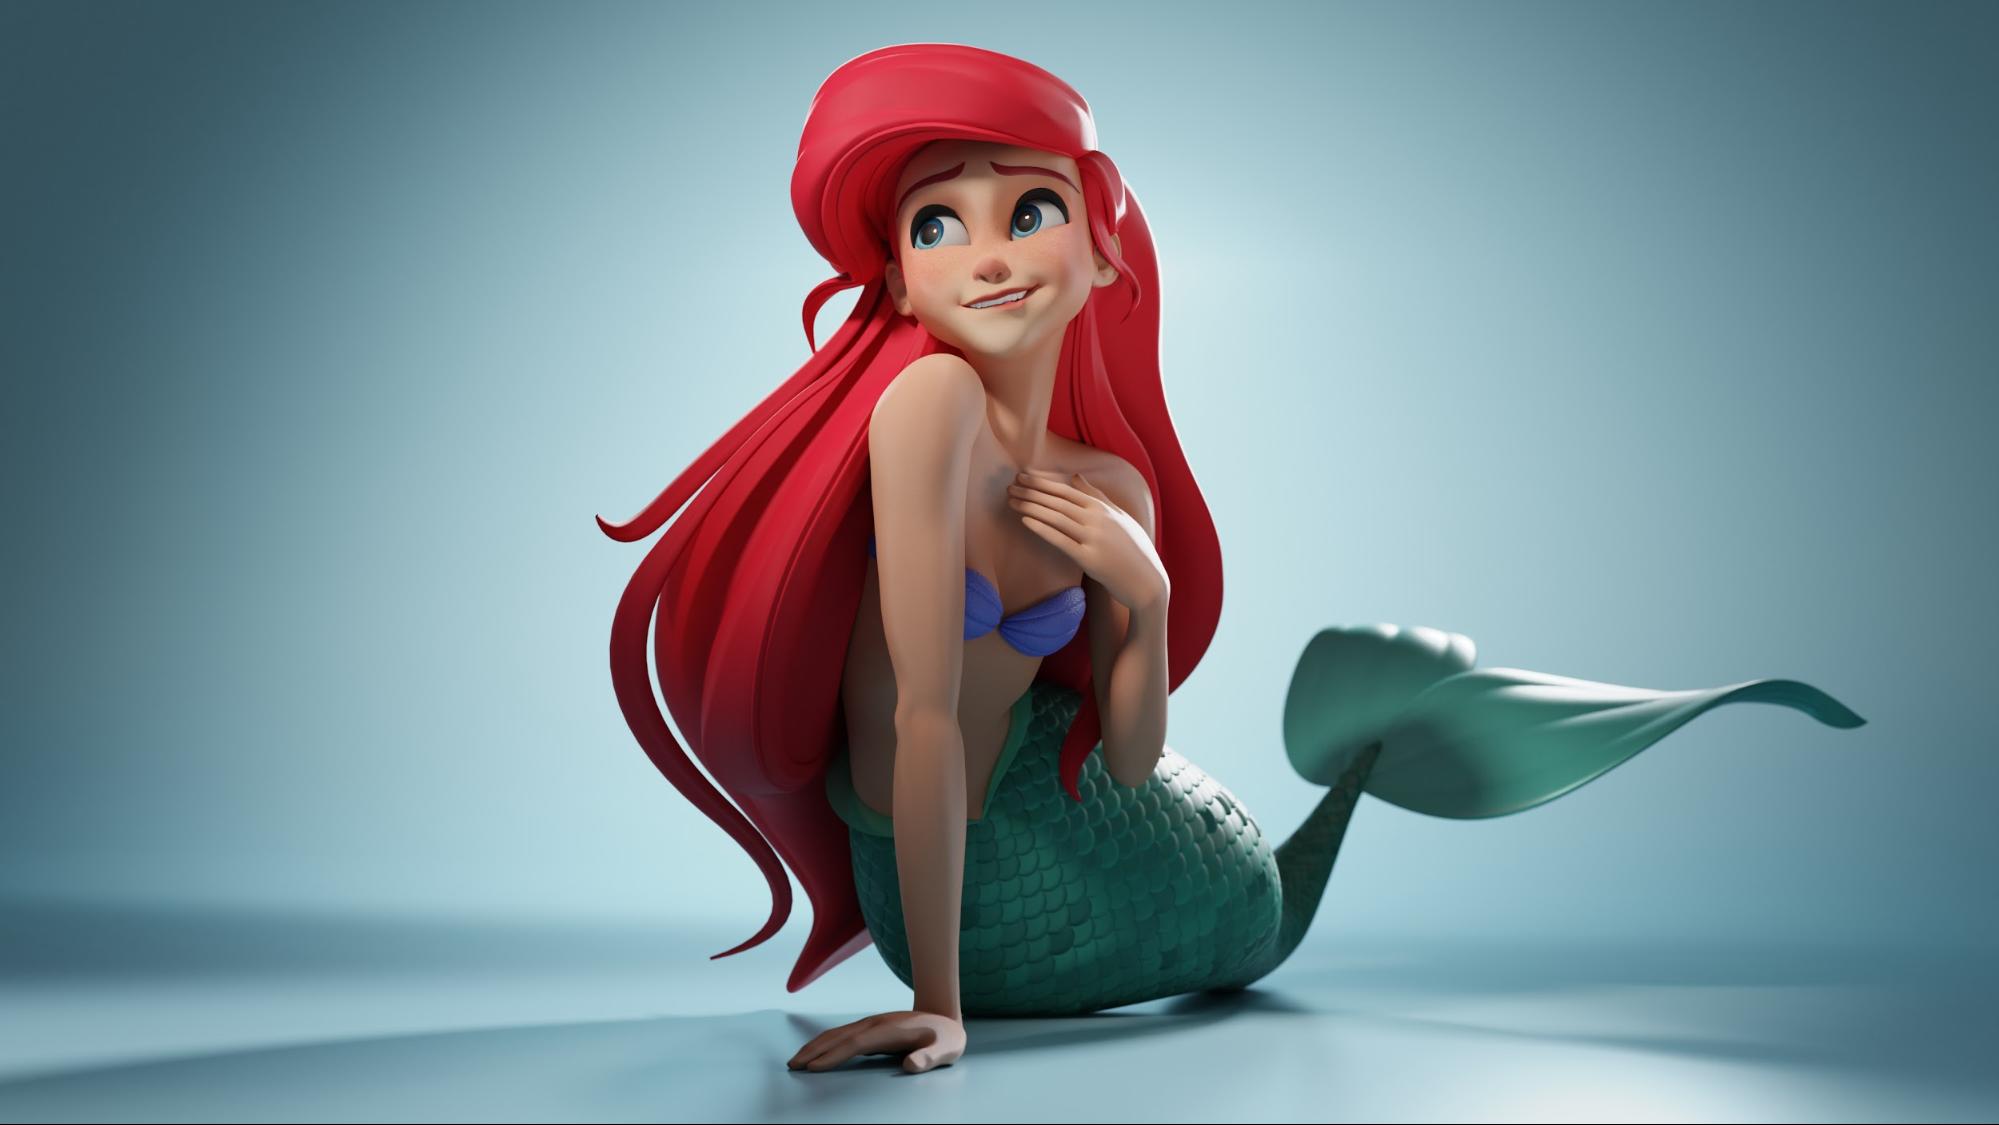
Now I will try to explain my process when I made Princess Ariel from The Little Mermaid Disney 2D animated movie. For this project, I mainly used Blender 2.79 because it includes a feature called delay updates while sculpting.
When I started making Princess Ariel, my goal was to translate from 2D characters to 3D as accurately and appealingly as possible. I also learned many things when using Blender from several video tutorials and timelapses on YouTube, such as from Yansculpts and Julien Kaspar’s channel. I make sure to start with gathering the references.
Gathering some references
Before I started sculpting, I tried to find various references on Pinterest and Google, such as poses and expressions that would later help me during sculpting. I didn’t sketch the concept first because I was a little lazy and decided to start sculpting immediately (lol).
Still, it’s a better idea to draw a sketch first before sculpting so you get the big picture of what the character’s pose and expression will look like, which could save a lot of time. PureRef has been a huge help in arranging and compiling all the references that I collected. I really recommend it.
Sculpting
My main brushes for sculpting are Clay Strips, Grab Brush, and Basic Brush. For Basic brush, I use it to smooth the mesh by turning the brush strength to 0 and auto smooth to 100-200.
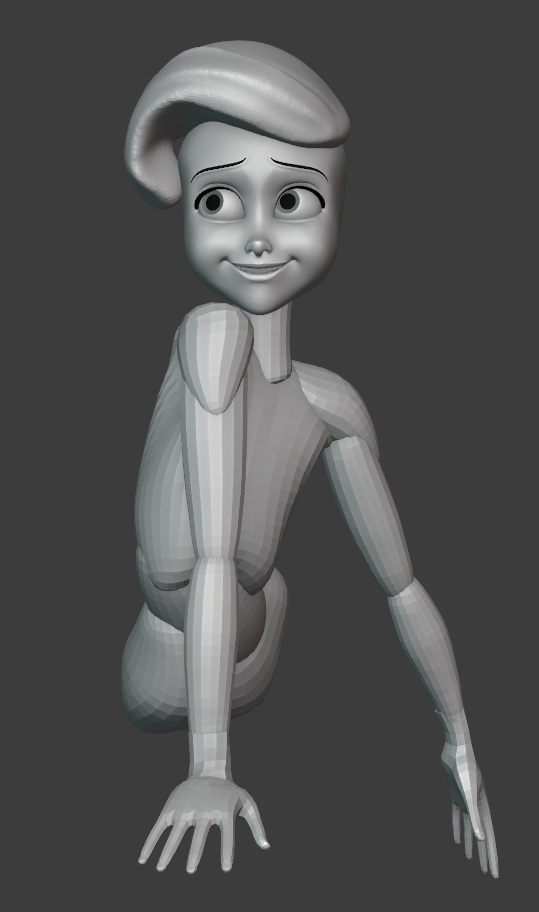
I started, as I always do, by sculpting the head first before blocking out the other parts. After that, I started blocking with simple shapes into a t-pose and then I posed the character from the simple mesh. These simple shapes are usually very low poly meshes; I always prepare the t-pose model for women’s and men’s body types to help me streamline the process. This kind of workflow gives me a good idea for her gesture and proportions with a simple character design.
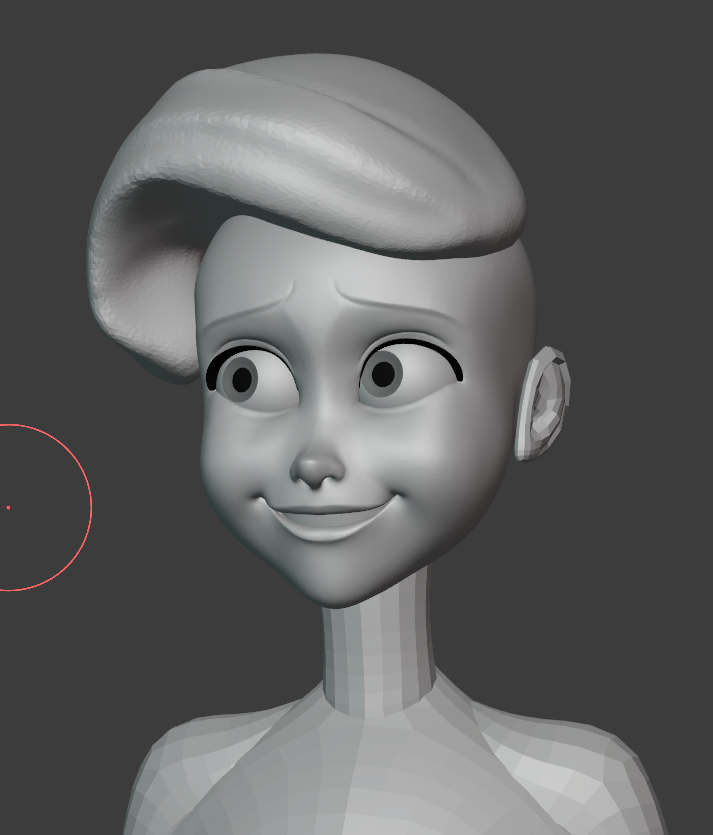
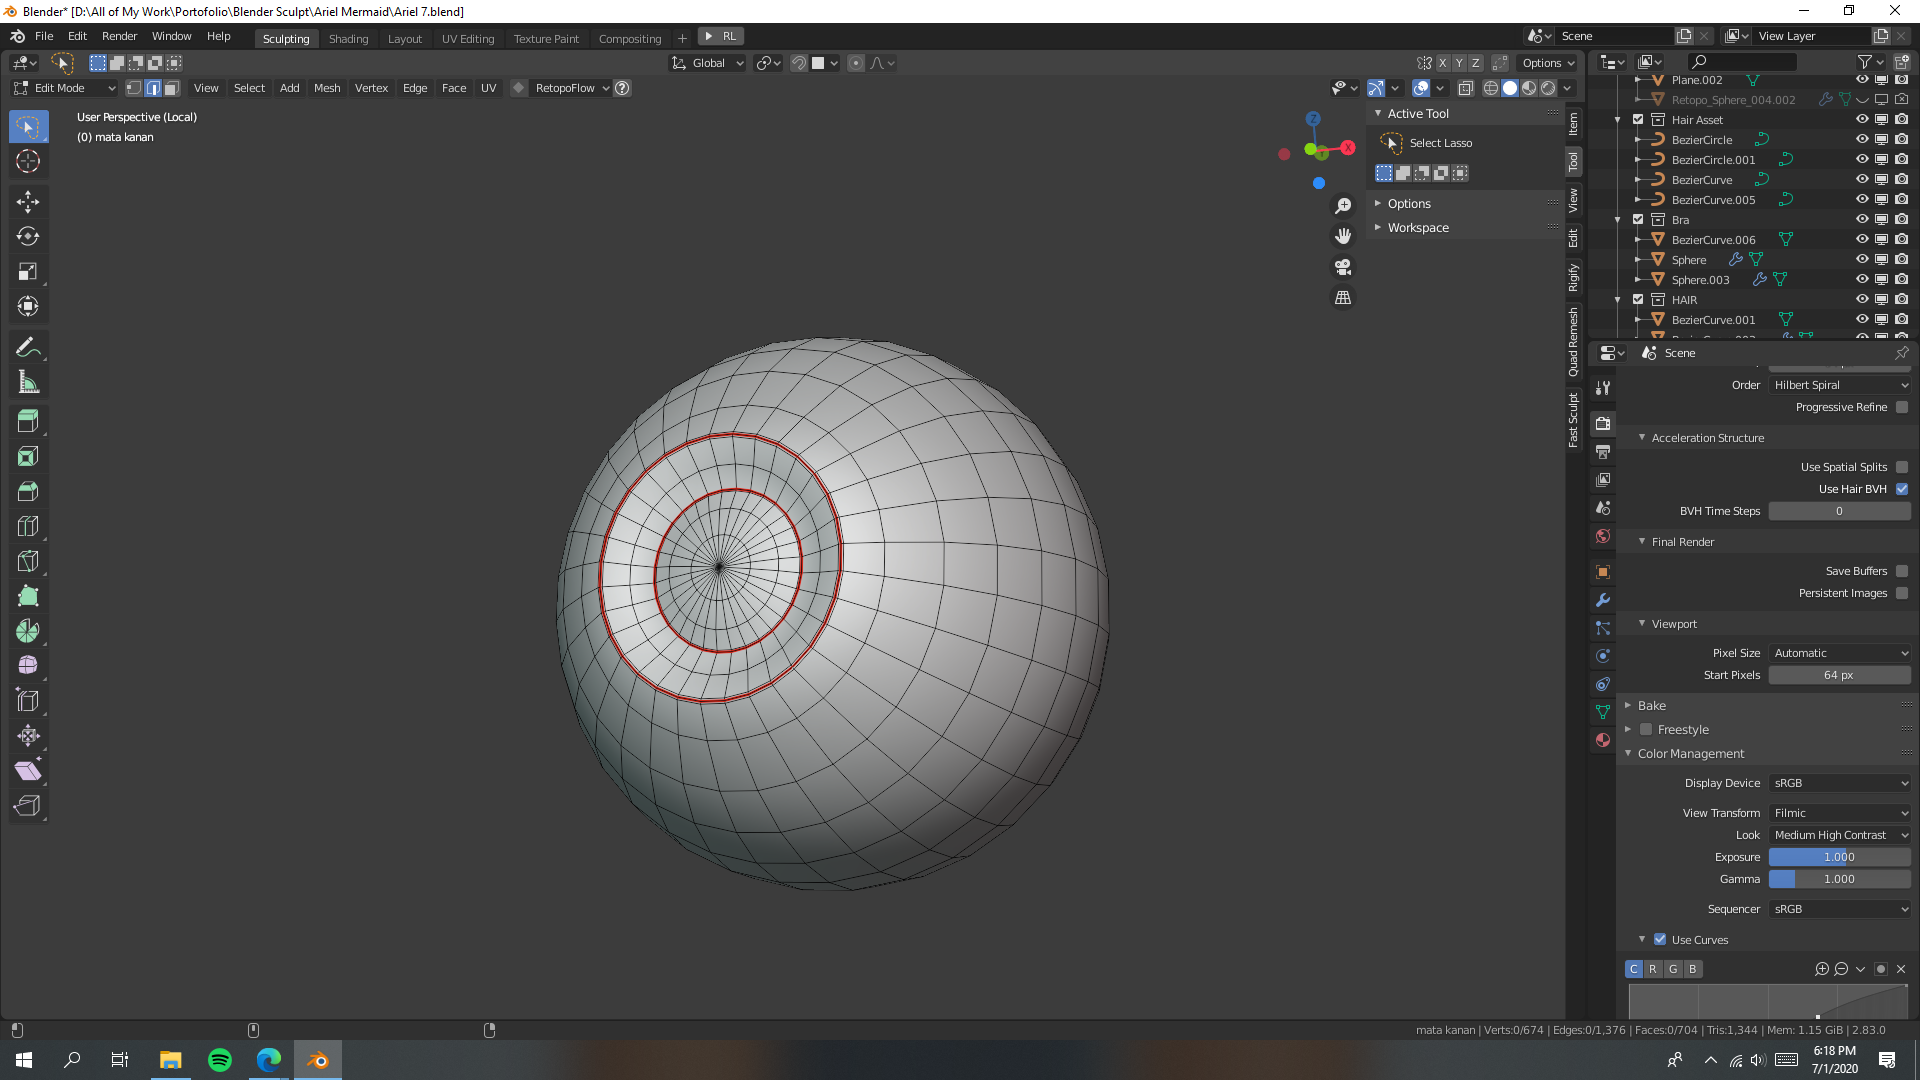
I kept the ears separated from the head meshes so that I could be more focused on her head or her ears separately. I used a simple plane with a shrinkwrap modifier to stick her eyelashes and eyebrows to the head mesh and a solidify modifier to add thickness. Her eyeballs are made from a UV Sphere that I altered in edit mode.

After the rough blocking, I went back to work on her expression because her face is the essential point of interest. It took me around one day to get a decent result. For the hair, there is no secret technique to make it because I only used a UV Sphere and a grab brush to move the mesh for blocking. After that, I started sculpting with the dyntopo toggle on.
Sometimes I added a texture color for her face and simple lighting just to see if the sculpt was similar enough to the concept. If I was still not happy with the result, I would go back to work on her face again until it got better.
Character Polishing and Details
I left some elements of the character, such as the hair and teeth, as separate objects. I merged other elements into one mesh by using a boolean modifier. For example, if I wanted to merge Ariel’s top body part into her waist, I added a boolean modifier while her top body was selected and changed the Operation from Difference to Union. Then I could select her waist mesh to merge it into one mesh and apply it. I used a boolean modifier to merge parts if I wanted to sculpt the details after doing the blocking part.
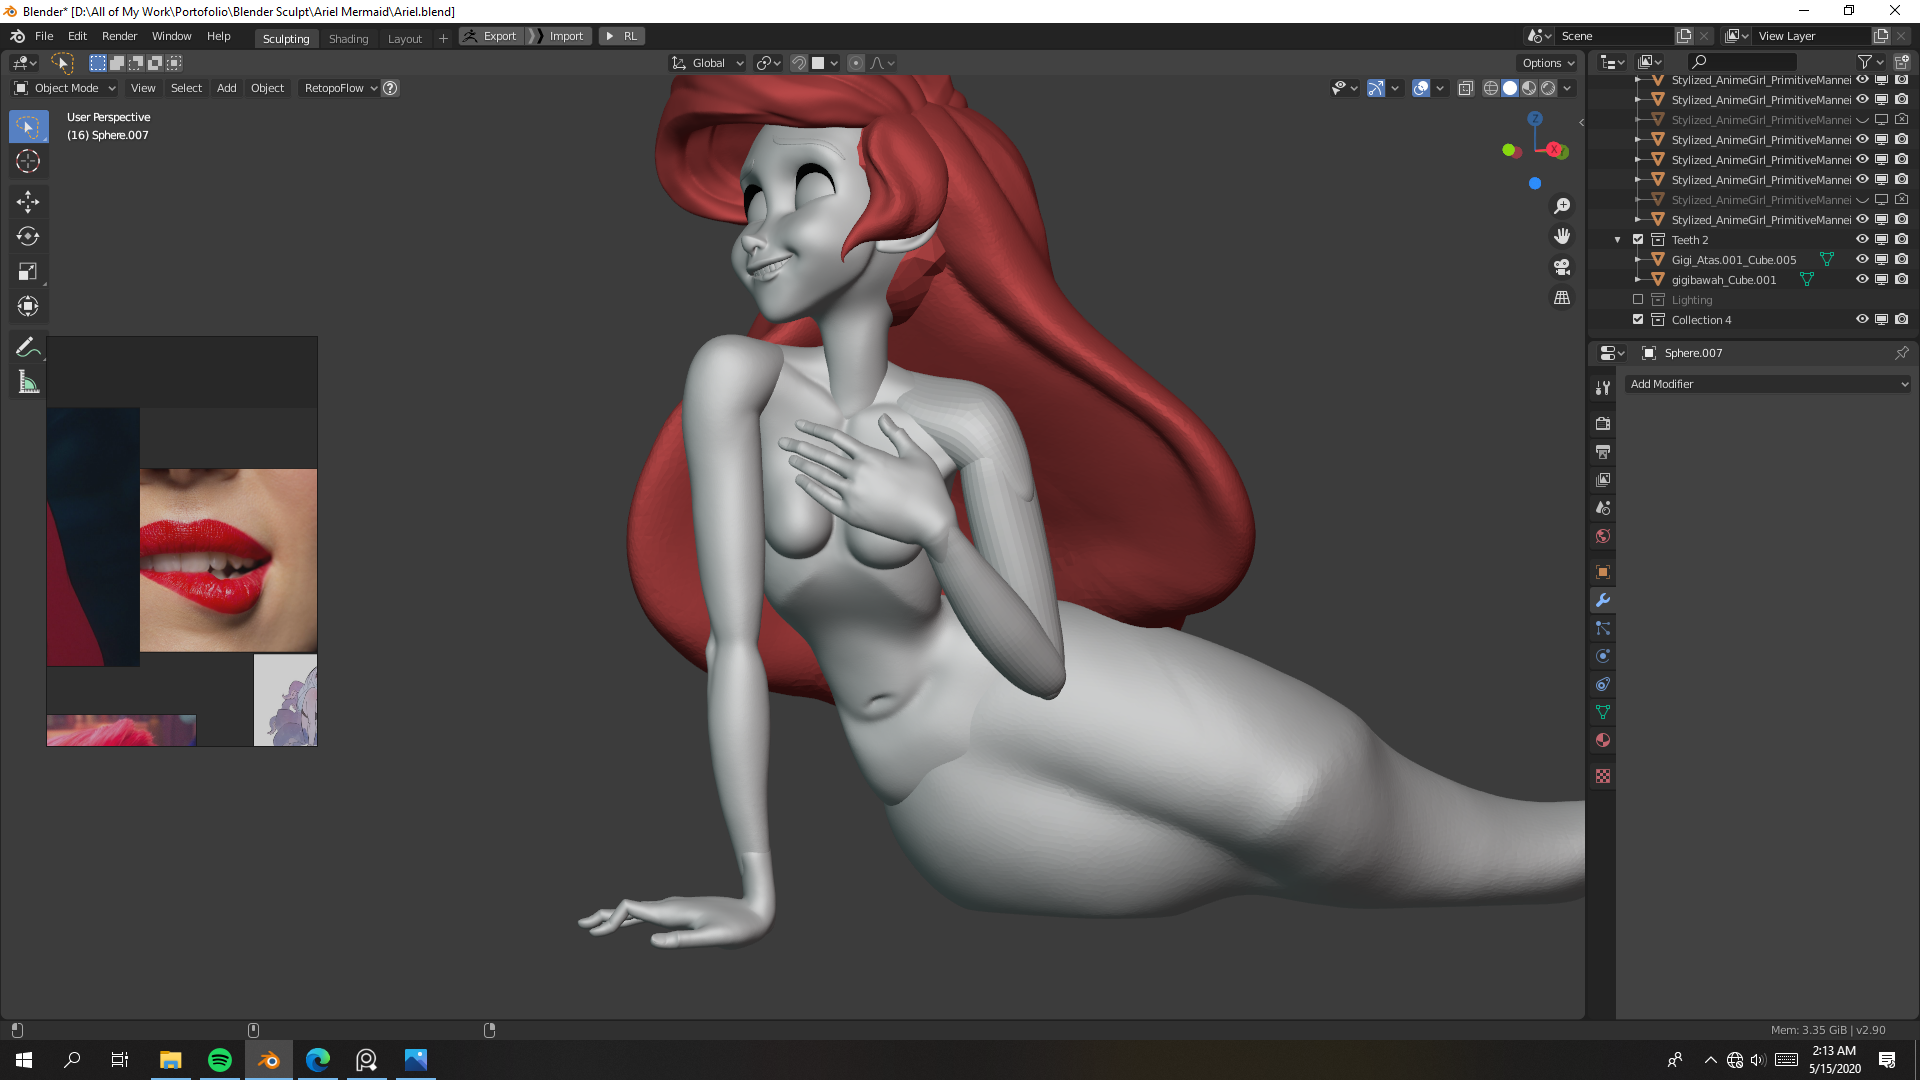
The hard thing while sculpting the features was that I needed to sculpt them while the whole figure was already posed. At this point, because I hadn’t sculpted while the character was in T-pose, I needed to pay more attention to how the anatomy works. I used an anatomy reference, but because it’s a stylized character, I needed to simplify some of the anatomy. Once I was almost finished with her face, I could start to focus more on her body.
I used curves to make the details of the hair look incredible and more exaggerated. I also made hair assets from the curves.
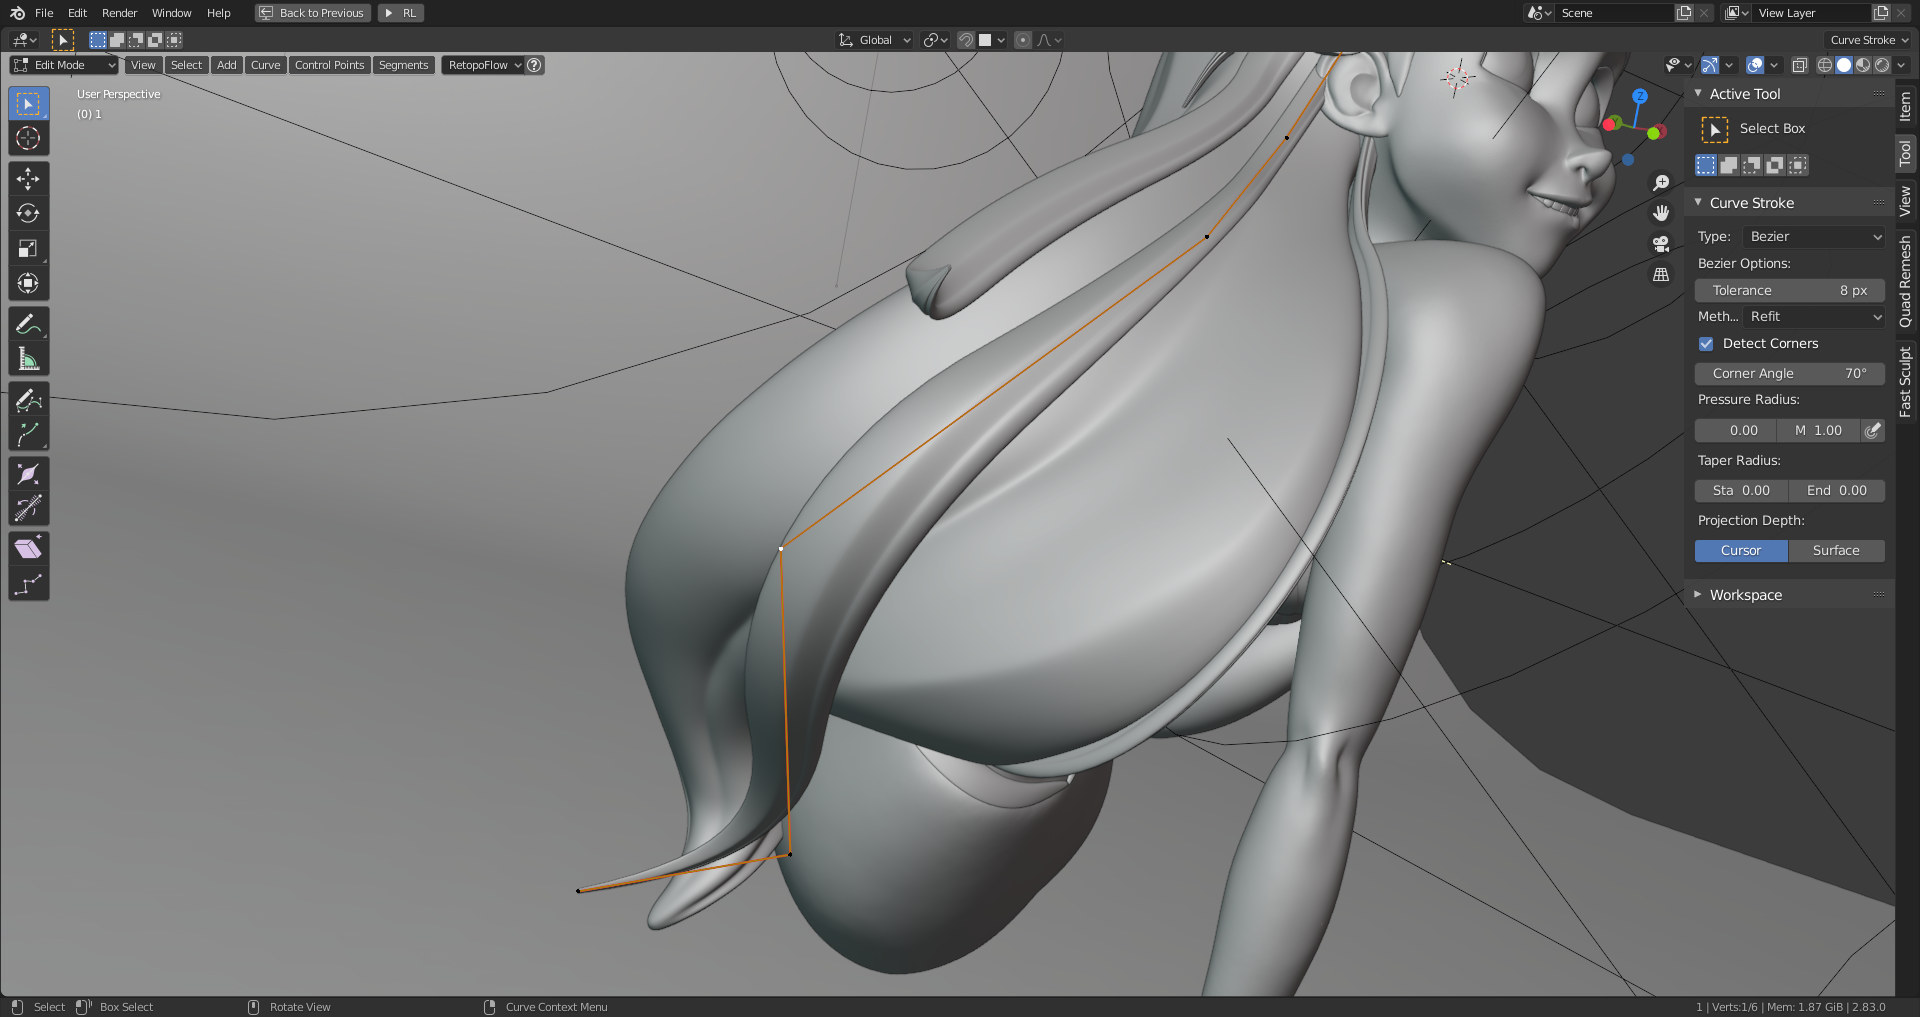

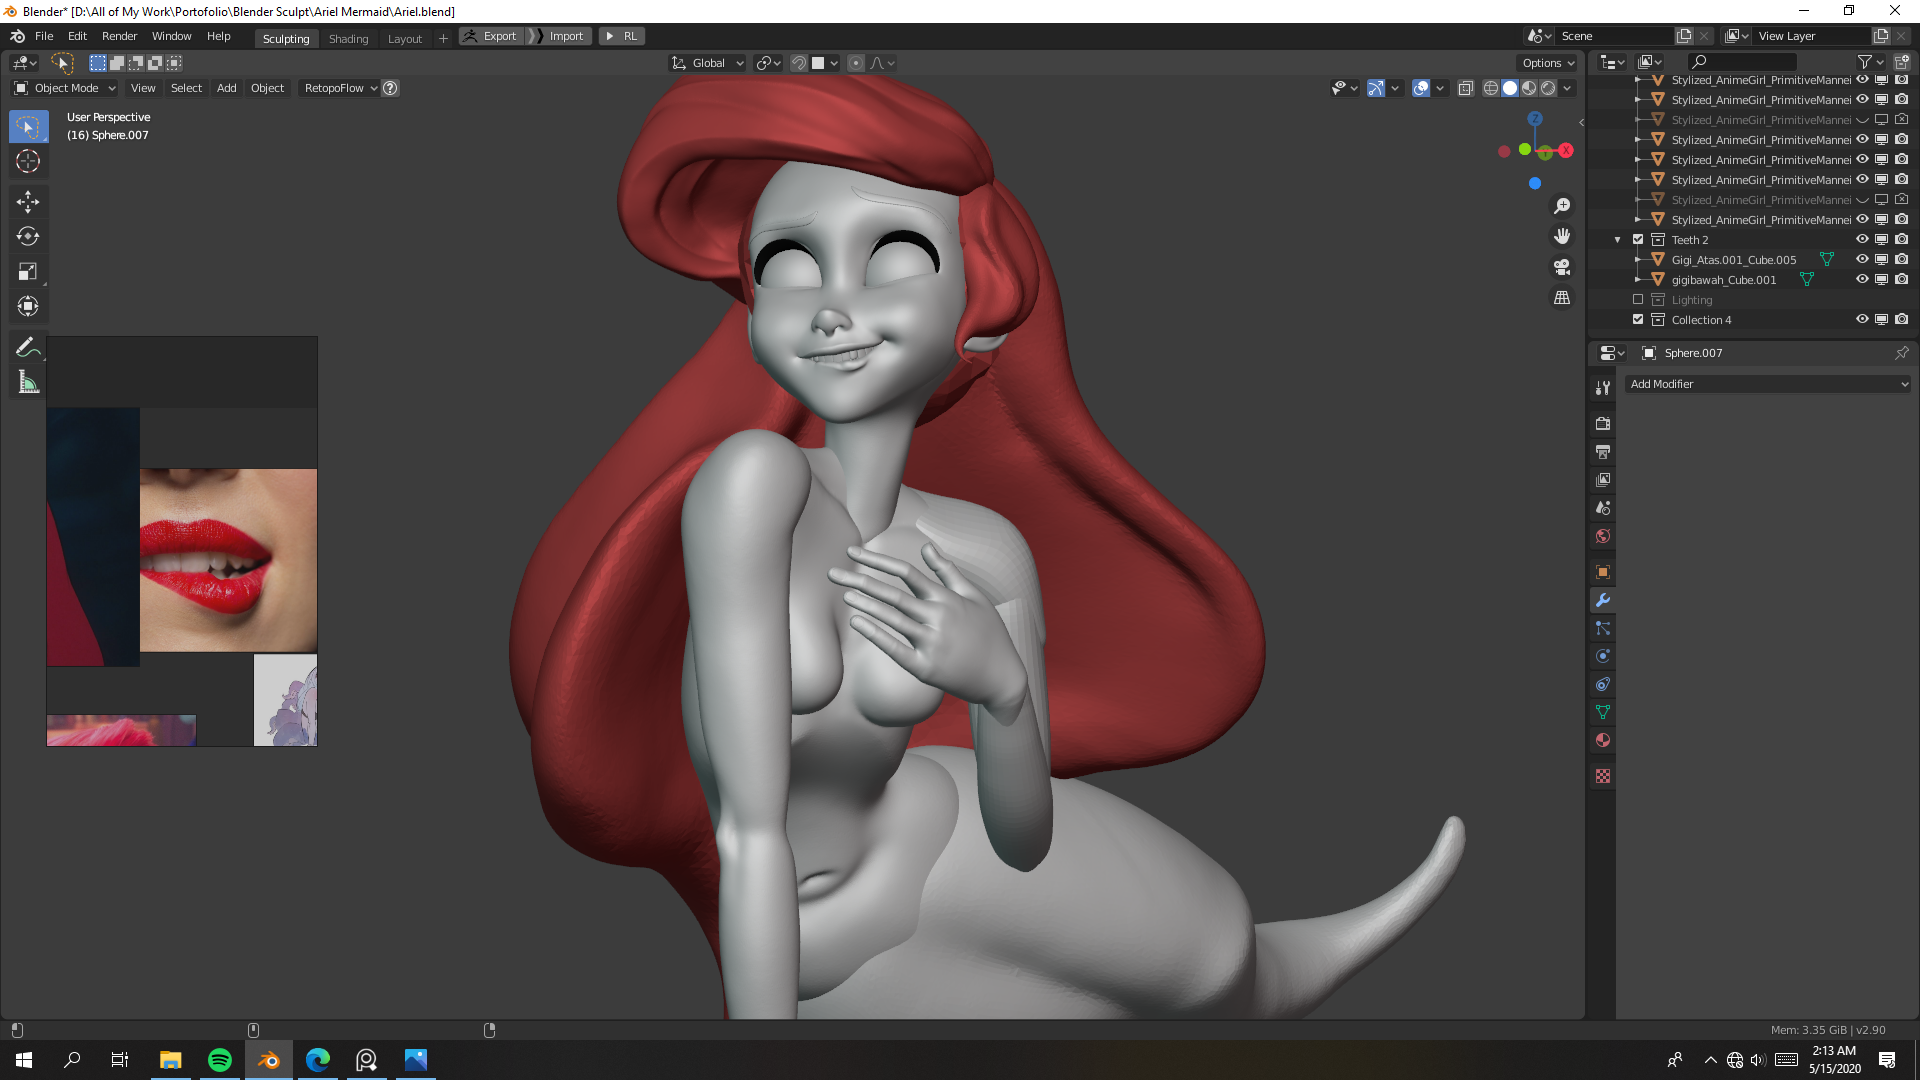
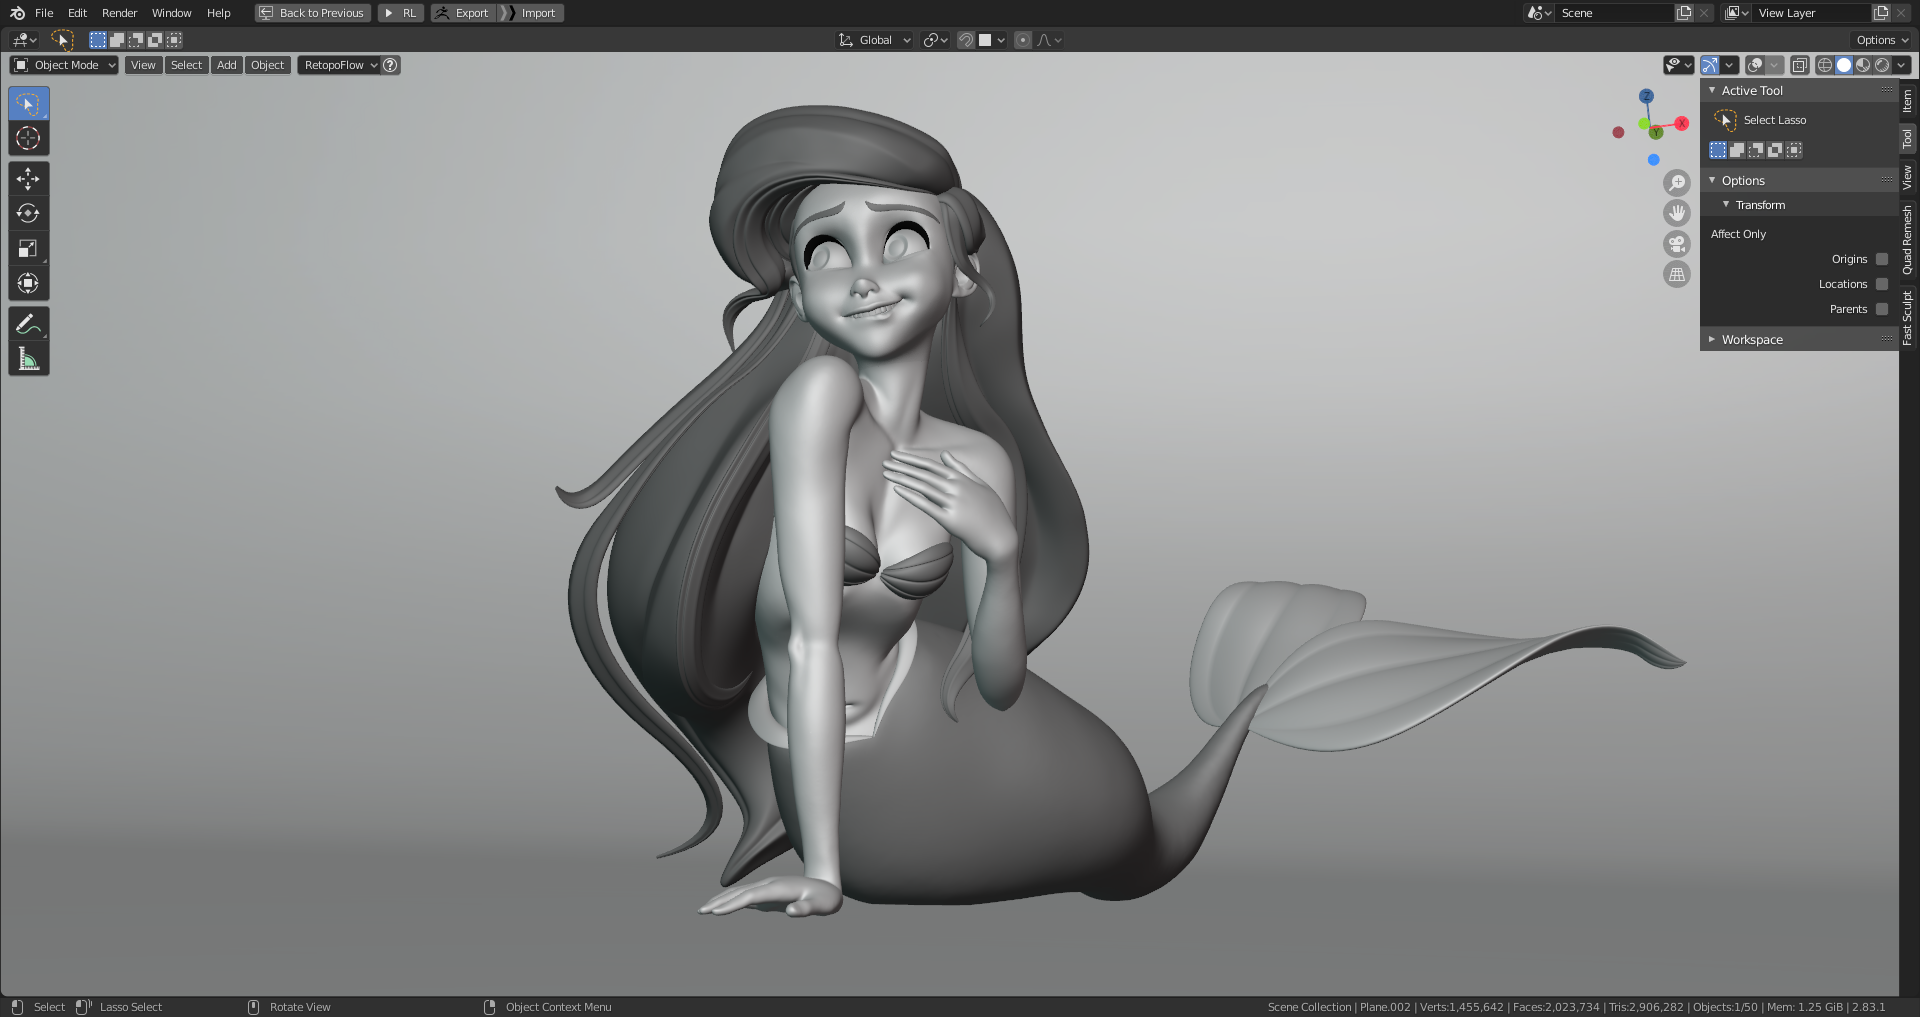
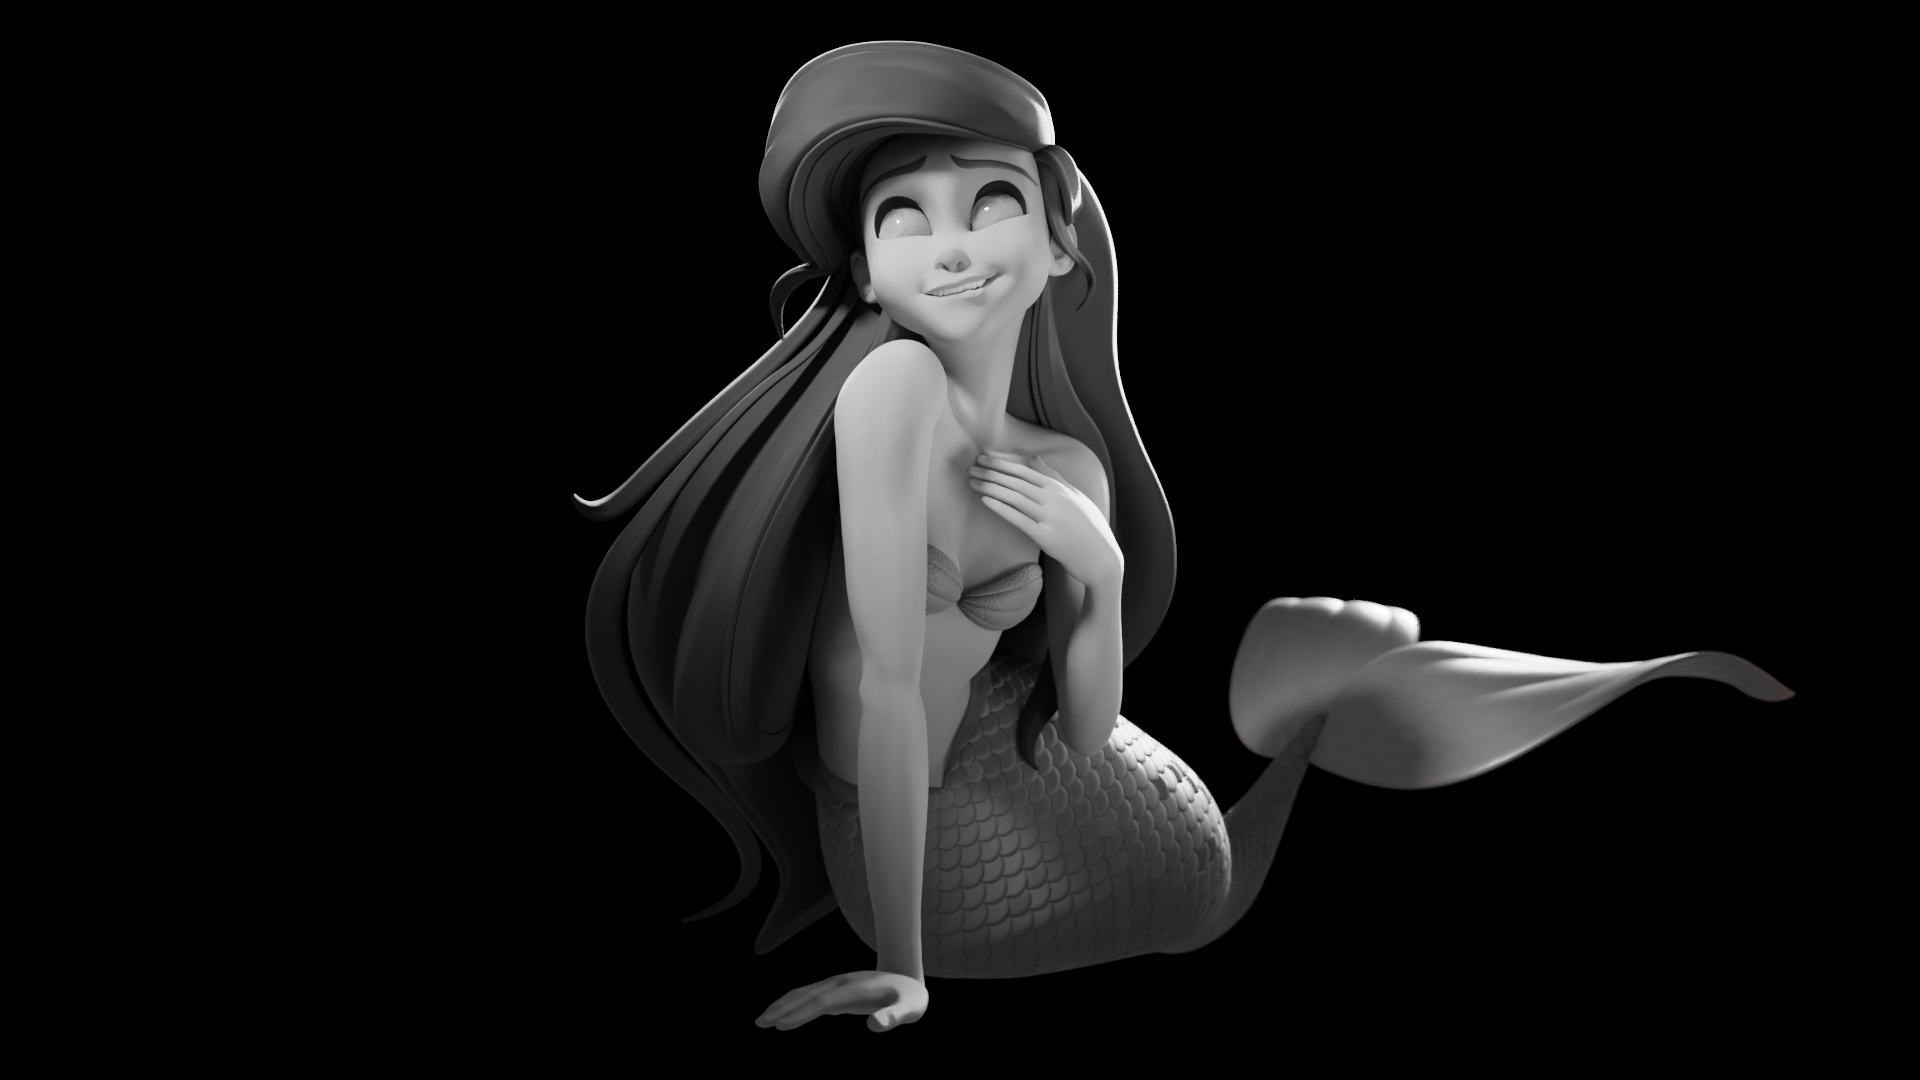
Here’s how my final sculpt looked.
Texturing
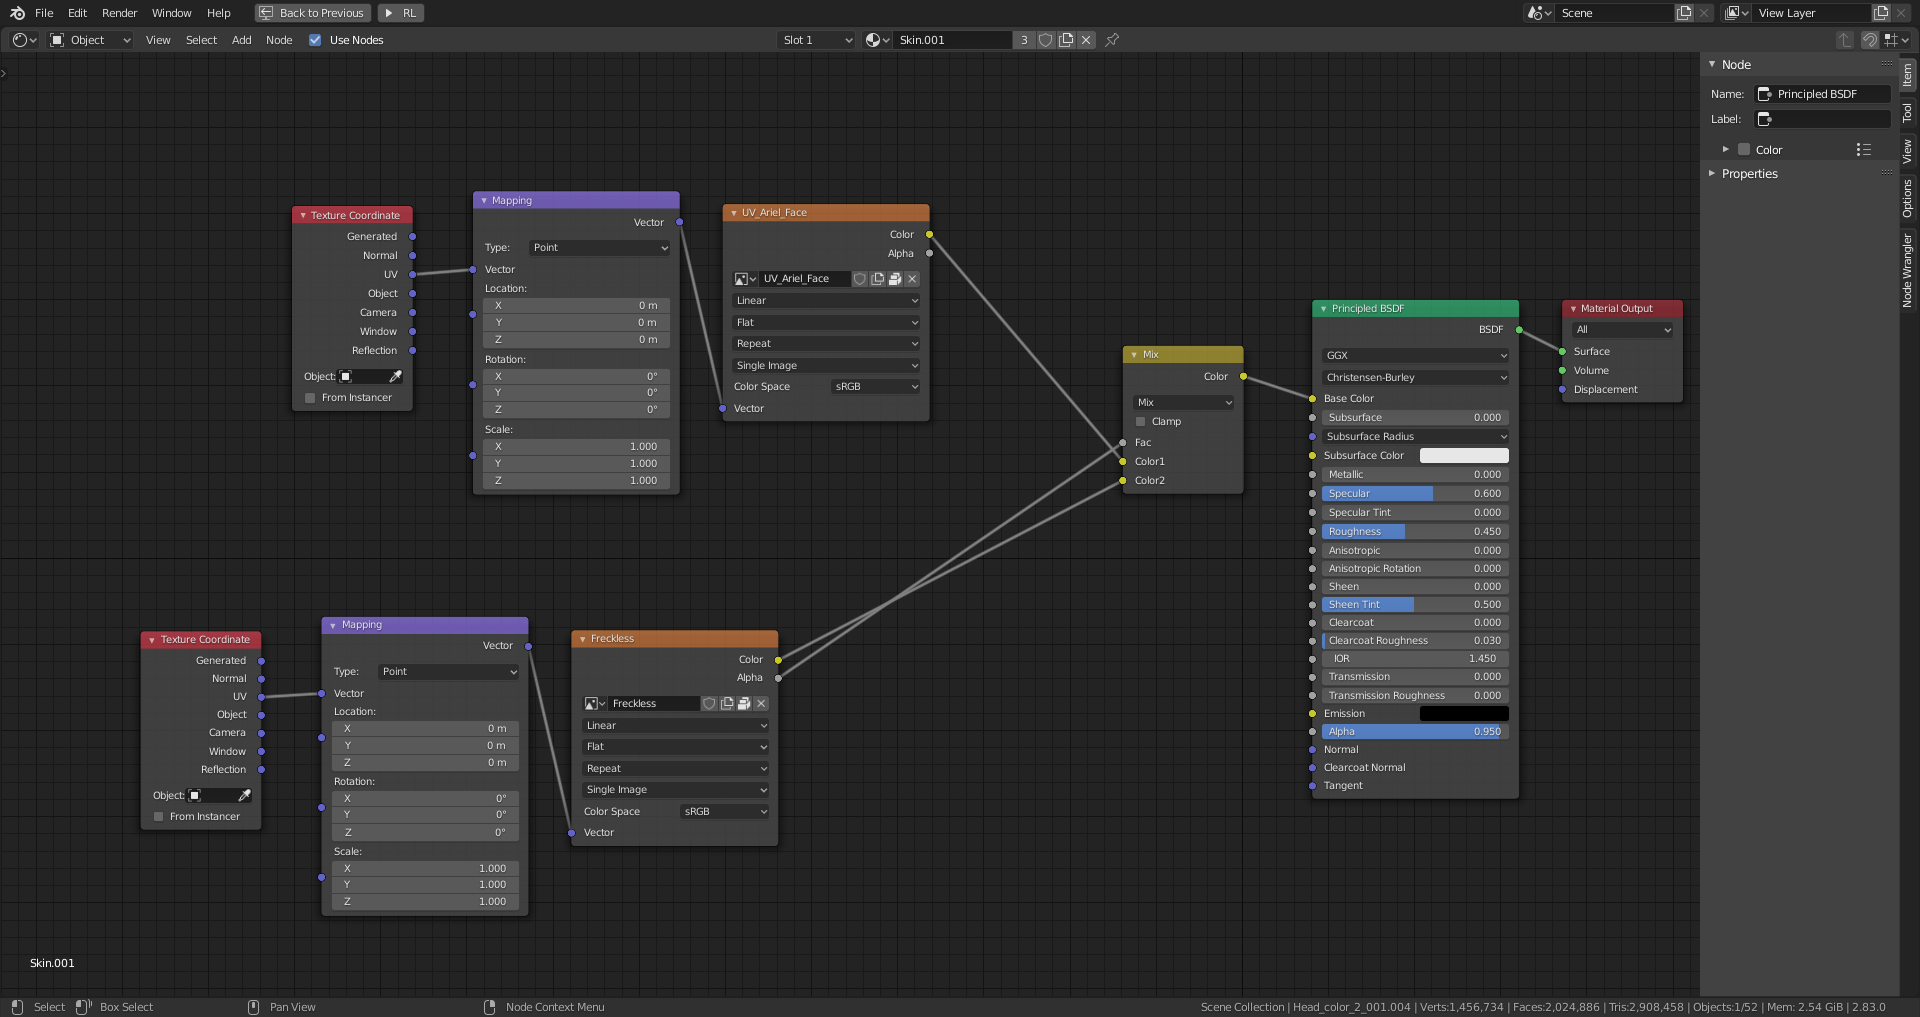
Shading the character was quite simple, I used Principled BSDF, and then I UV unwrapped her face to start painting in texture paint mode. To color her face, I needed to understand the color study of human anatomy. Usually, the forehead has a yellow tint, red for cheeks, and blue for the chin.
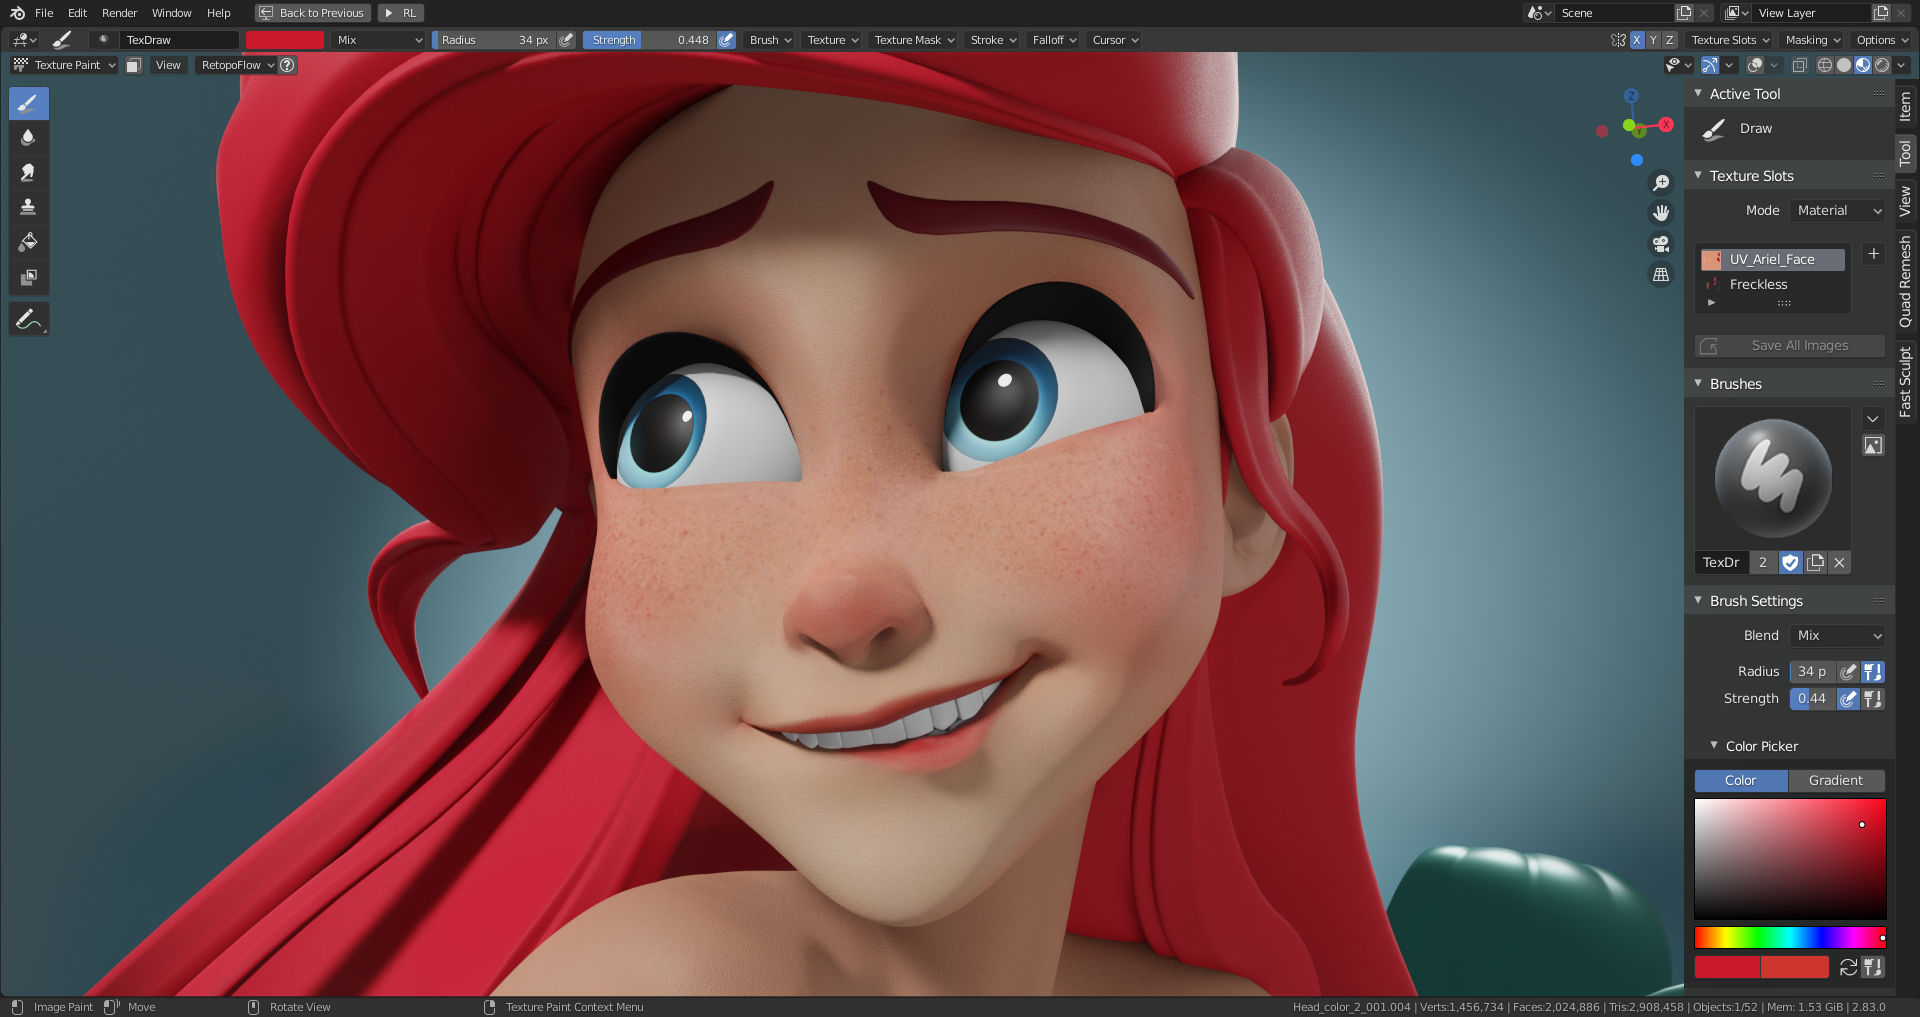
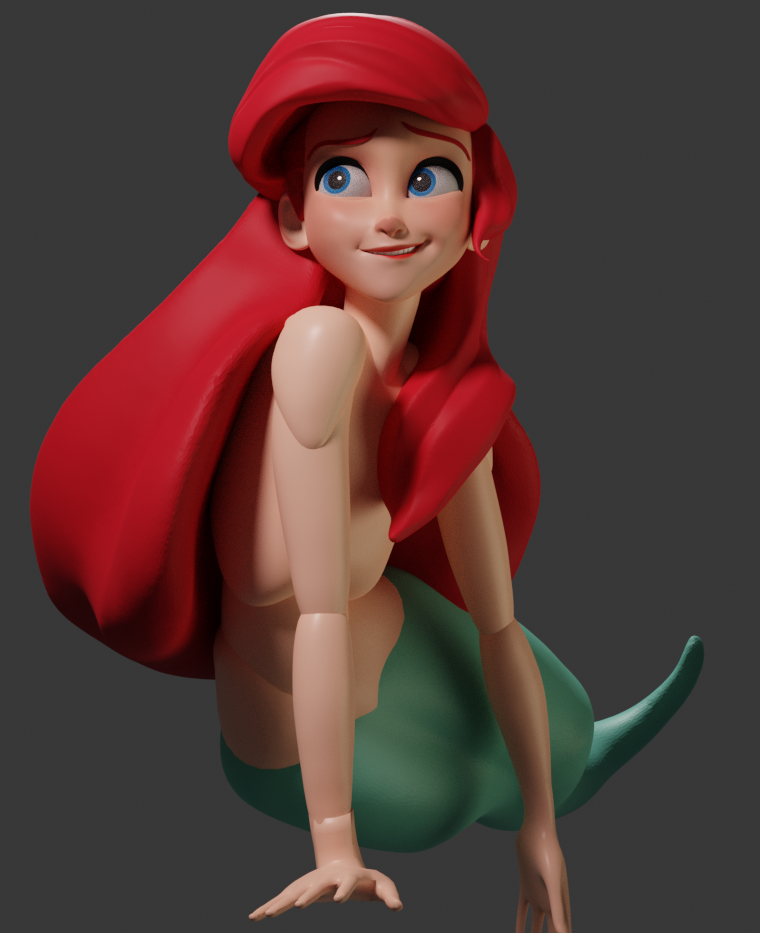
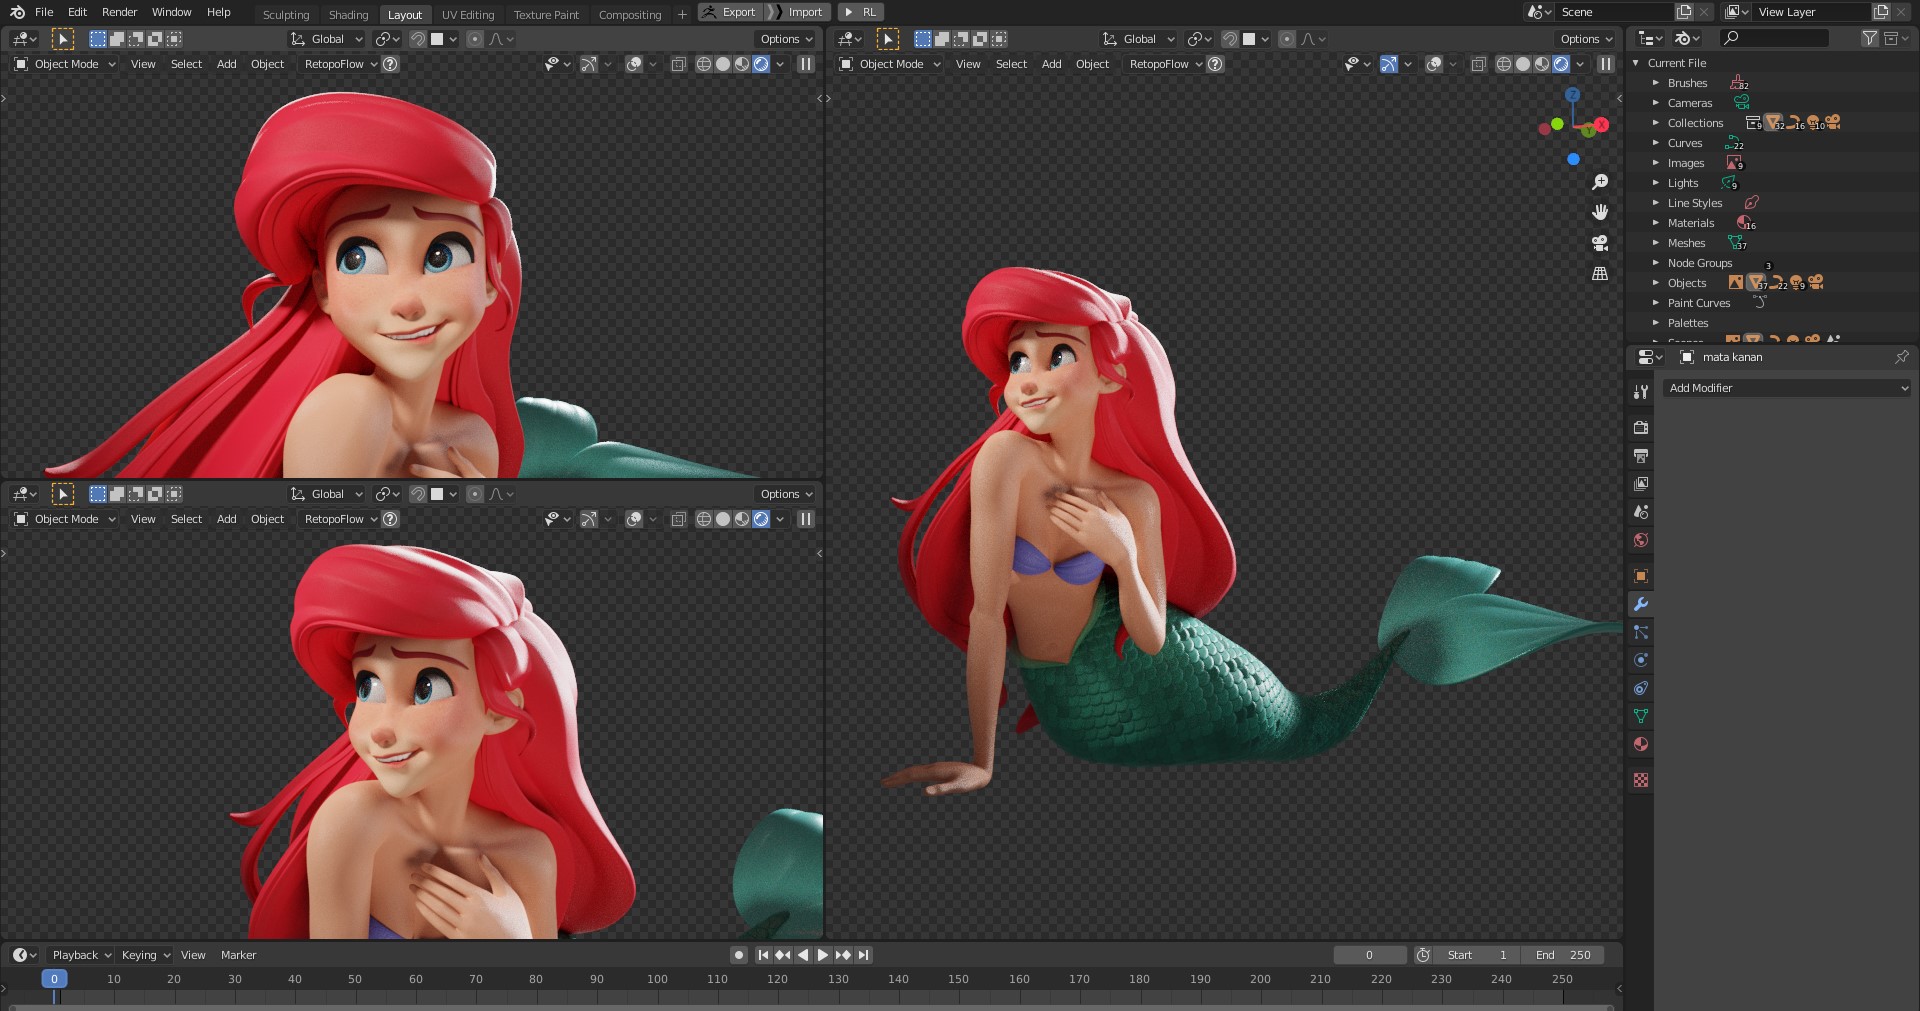
I painted with an orange color initially and then added some reds for her cheeks and nose. I also added a bit of greyish blue color for her chin. I then added another layer on her face to make freckles for the details. I also painted the texture for her eyes with a UV map, and I only used the base color from Principled BSDF for the other parts, like her hair, eyebrows, and body—nothing special. I always paint in the material preview viewport shading with my lighting setup.
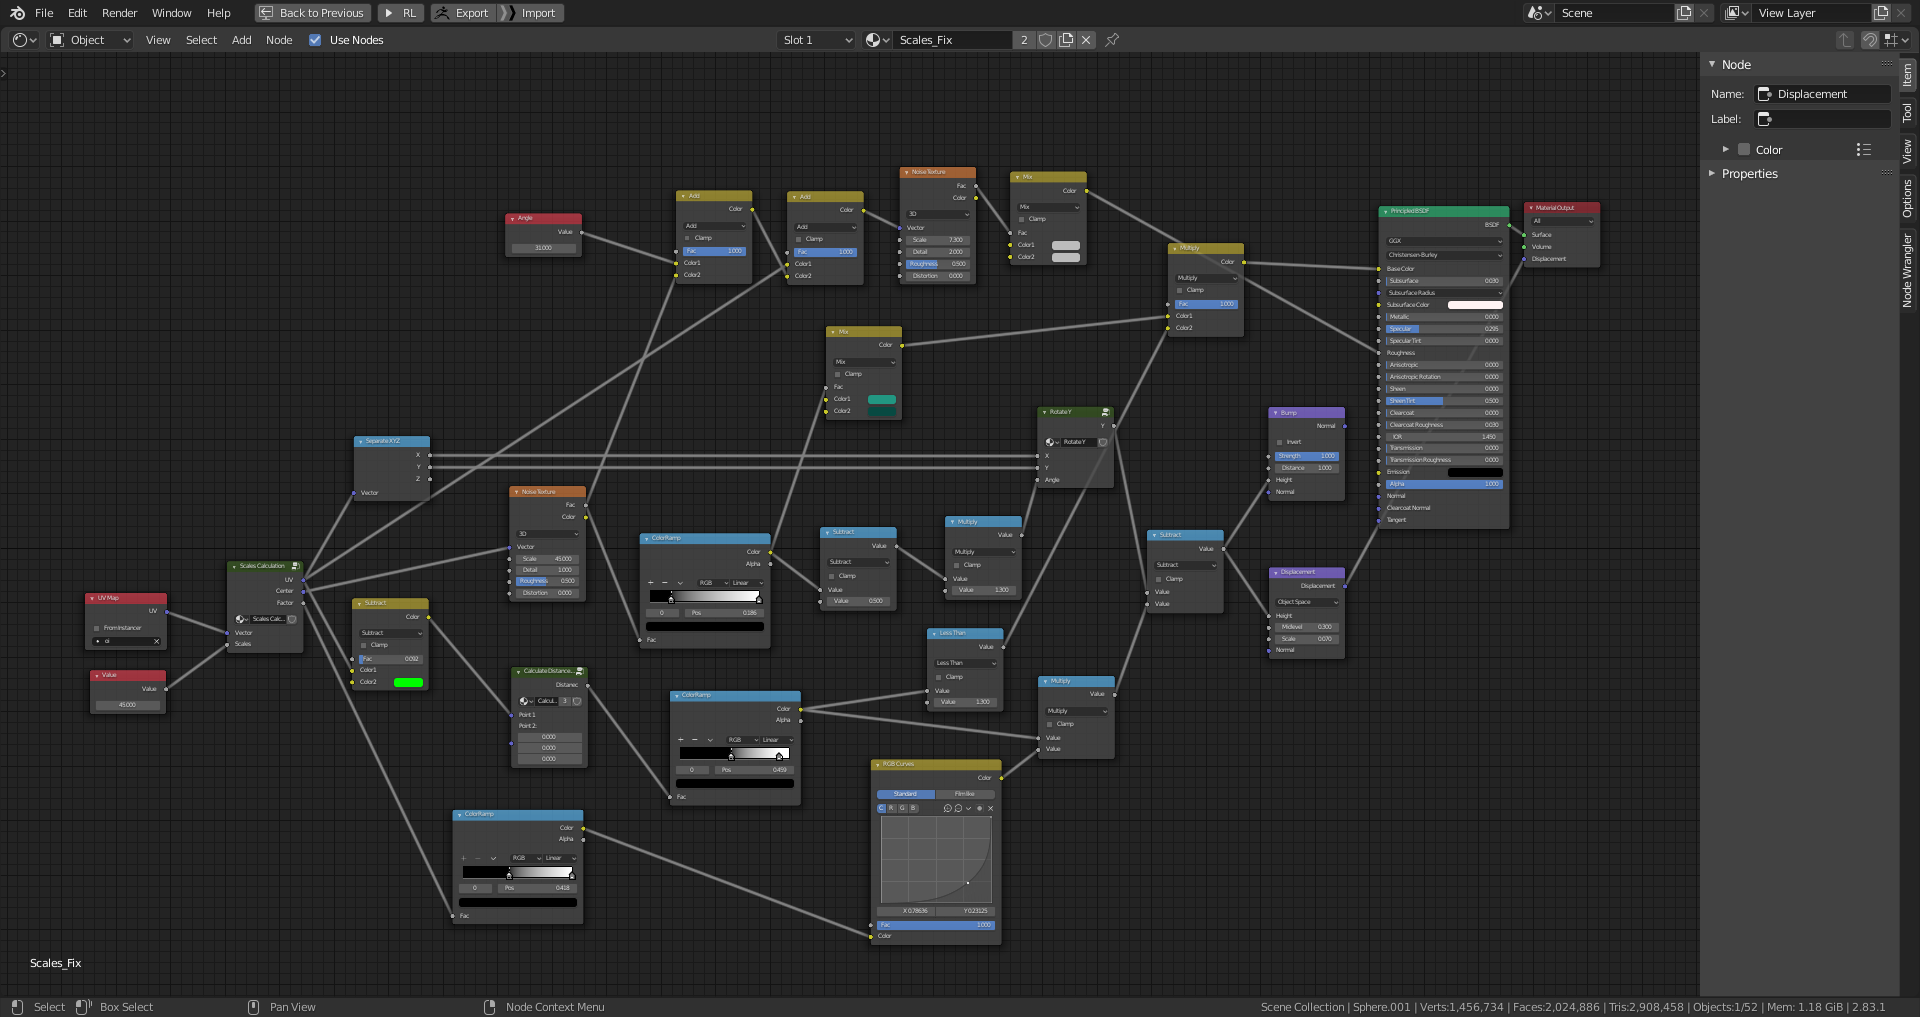
For her scales, I used procedural texturing inside Blender by following Lance Phan’s tutorial. I learned a lot of things while working on this.
Lighting
The lighting setup is quite simple—basically I used three-point lighting—but this is the hardest step for me. The first thing I did was watch some professional photography lighting setups on YouTube so that I could achieve the lighting setup better. I didn’t use HDRI for this scene so everything was done with my own lighting. Even with three points of light, I used another two rim lights on the back because I find it looks better than just one rim light.

Rendering
I rendered the final image at 3840×2160 Pixels, with Cycles render samples set to 1000 and 1000 samples. Render time was about 30 minutes on my Nvidia GTX 1060. I used a camera setting with a 50° field of view.
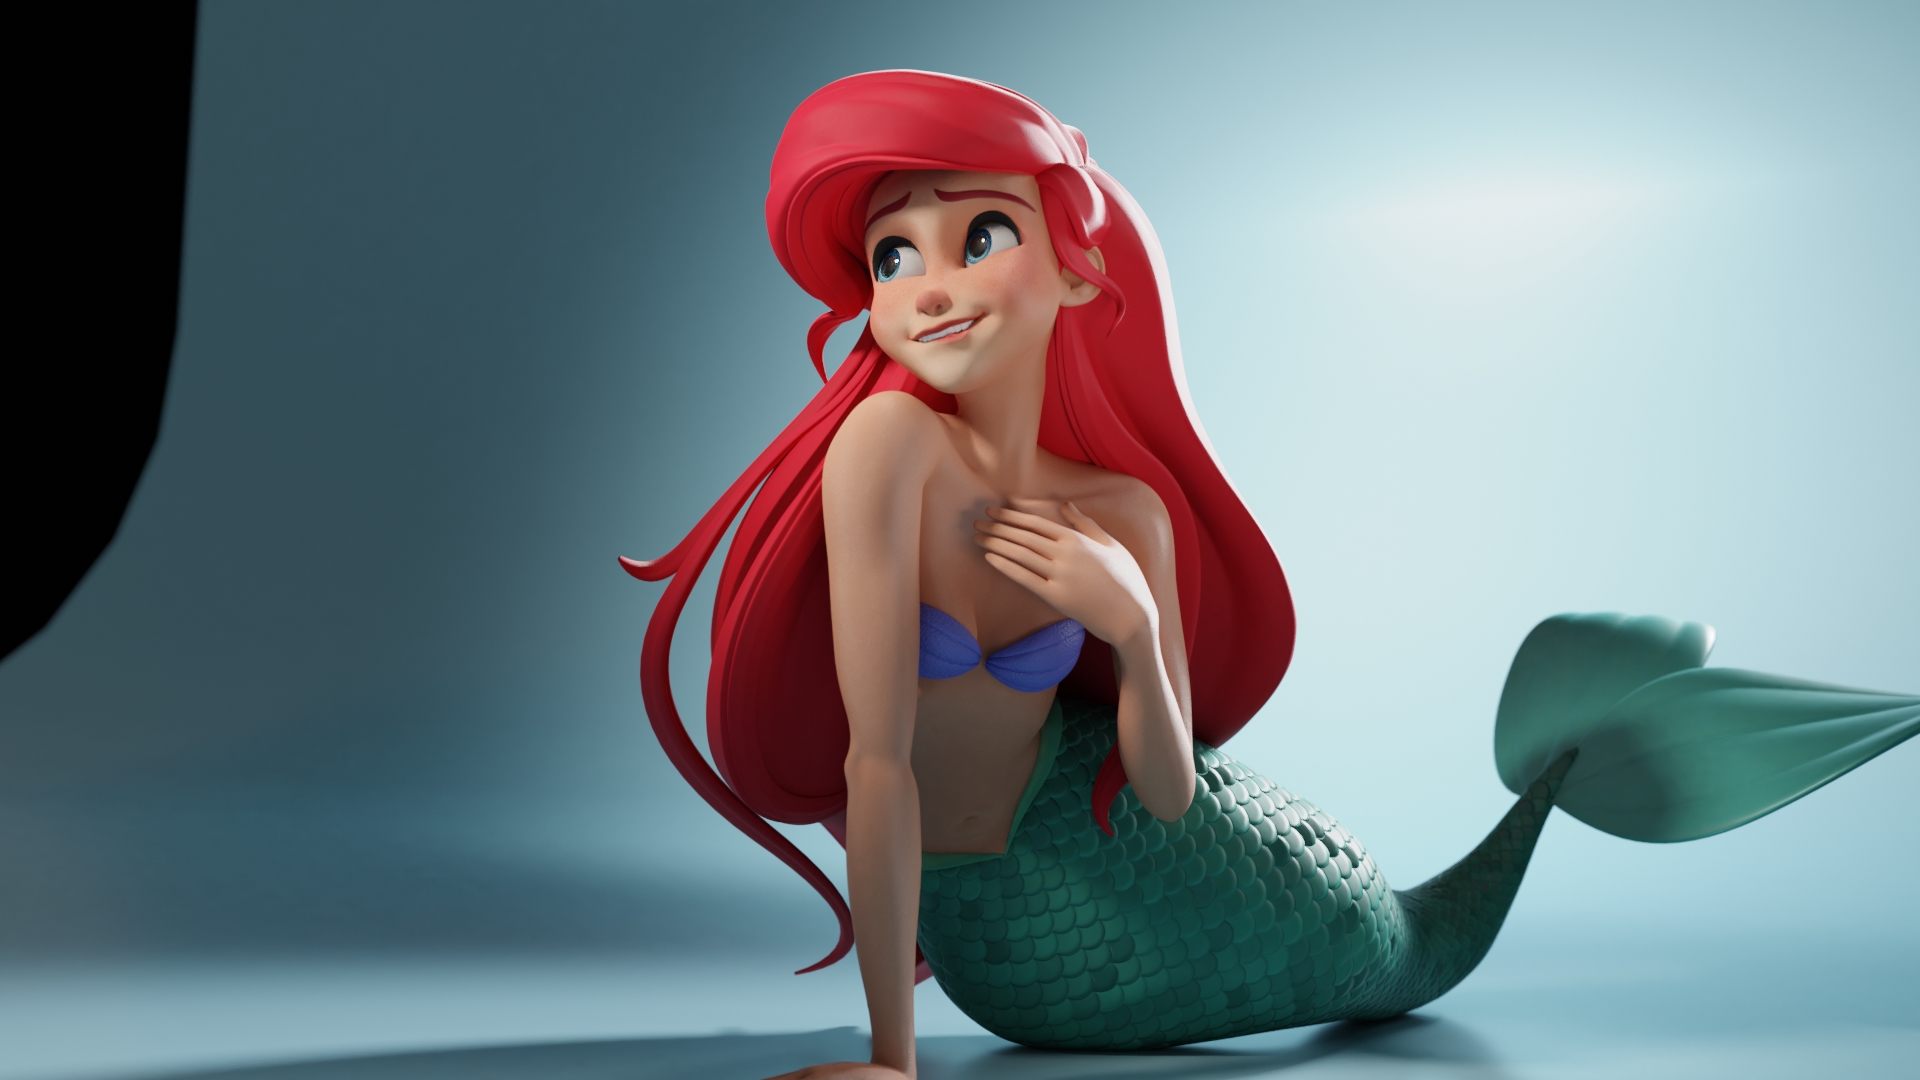
If you want to see the full images, you can find them here.
Also, you can follow my works on Instagram.
Anyway, thank you so much for your time! I hope you find this information useful. I learned a lot while making this character. See ya!
About the Author
 Kevin Christian Muljadi, I am a concept artist and 3D sculptor at UMN Pictures. I love to sculpt appealing characters :)


