Behind the Scenes: Tuggin’

About
Hello! My name is Brad Tyler. I have recently graduated with a master’s degree in Architecture, I work at a restaurant design firm in Boston, MA, and I’ve been a 3D hobbyist since I first discovered it in college.
Architecture school taught me a lot about ideating concepts and learning how to think and speak in the language of design. My favorite tools to use were 3D modeling and visualization software because they offer an infinite range of possibilities; I learned pretty much all I know from tutorials and forums on the internet.
I just want to take this opportunity to shout out the Blender development team, and those who create tutorials and learning opportunities on the internet. I wouldn’t have gotten anywhere in 3D without you, you all are incredible.
Inspiration
To be honest, the inspiration behind this scene is mostly attributed to the fact that I find tugboats hilarious! To me, they are like the caricature of a boat and I thought it would be a fun exercise to create my own.
First, I had to learn a basic understanding of tugboats because I have no idea what makes a tugboat a tugboat. Typically, when I look for references before starting a project, I like to try and learn the basics about whatever I’m creating. I look at real-world examples and try to figure out what elements are the most common, unique, funny, interesting—just whatever defines the character of the subject I’m modeling. For example: What are the main elements of a tugboat? What’s the typical layout of spaces in a tugboat? Are there any features that are common throughout all the references? Are there any elements that are especially unique?

I try to uncover the elements that represent the reality of the object for believability, and the elements that I can exaggerate or highlight to give the object some individuality, or character.
I find the best part about tugboats to be:
- Their comical shape
- Tire bumpers
- The chimney
- The mast
Modeling
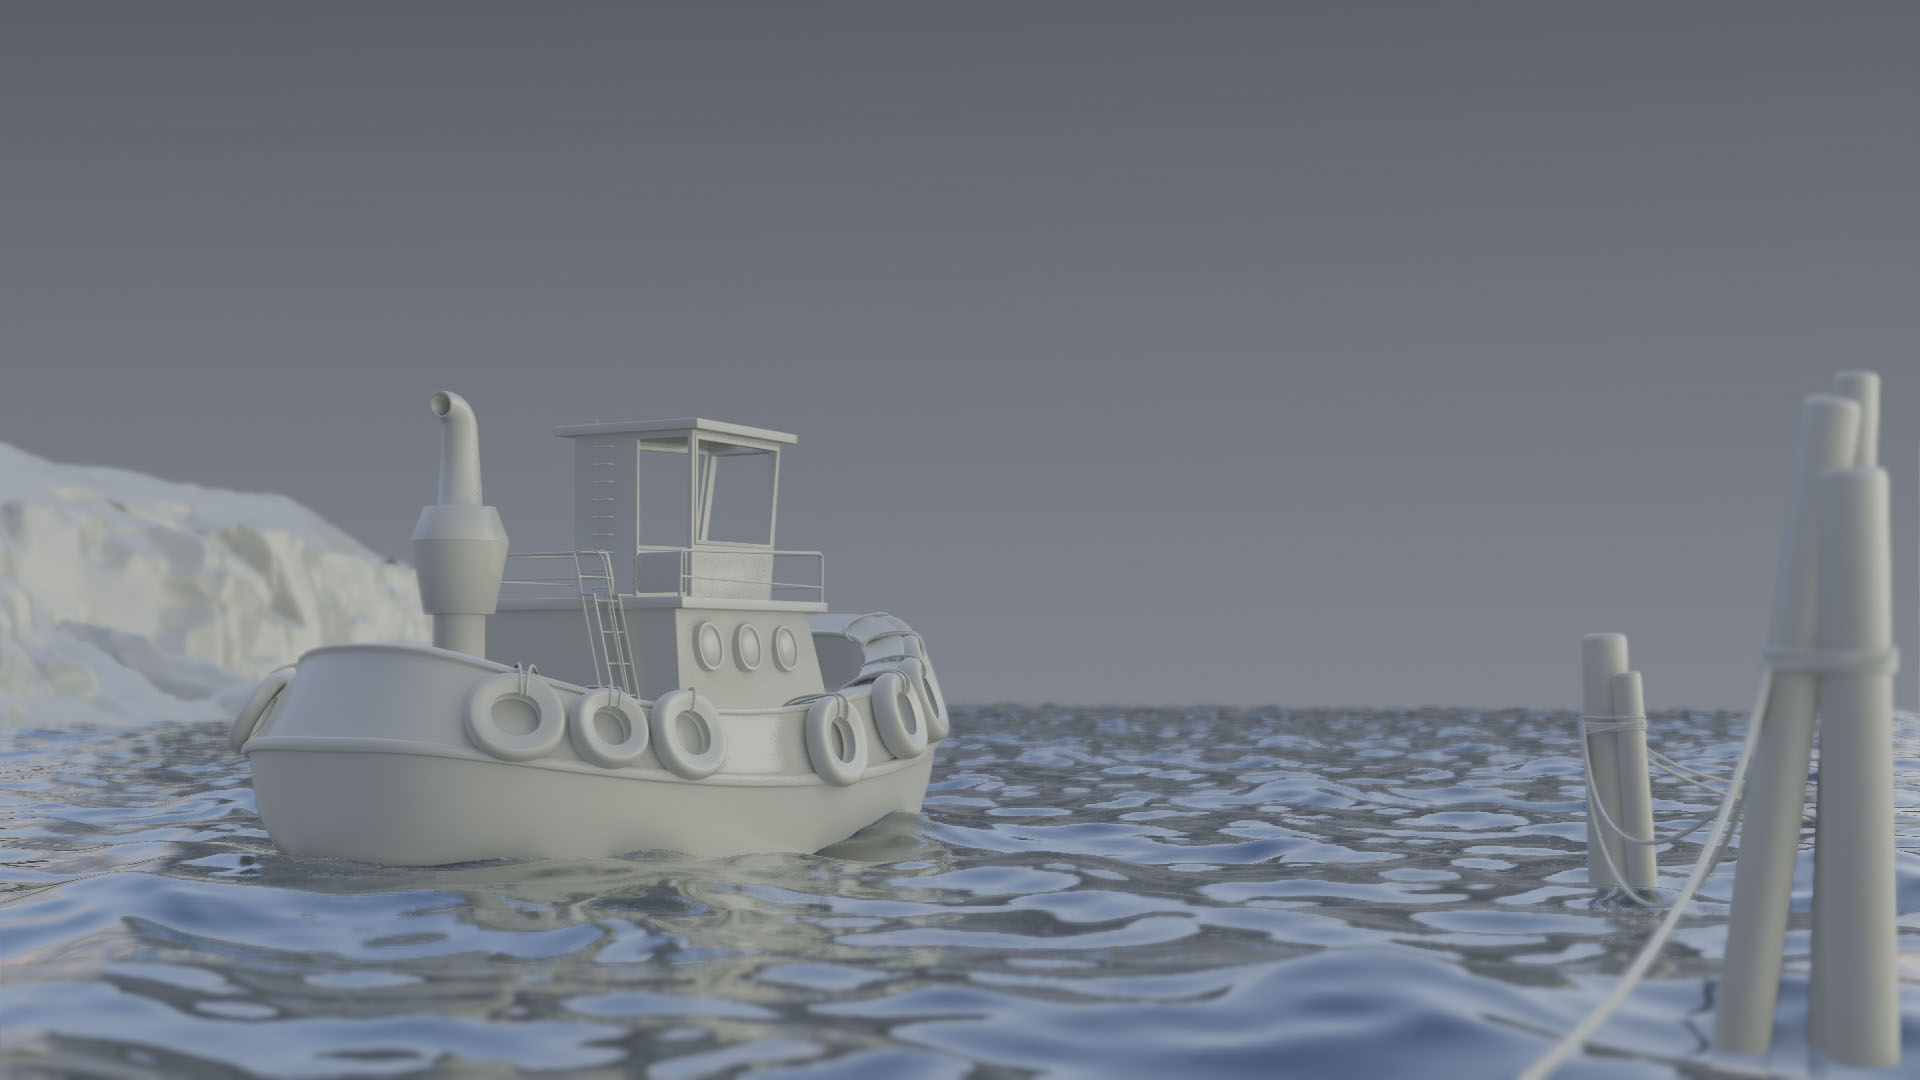
Once I have all my references and a general direction of where to focus, I start modeling the basic blockout of the scene. For the tugboat, it was important to get the proportions right before moving onto the details.

I used the Subdivision Surface modifier for the body, which allowed me to create the curves and proportions of a real tugboat while providing me the freedom to exaggerate some areas. I wanted the boat to look squat and close to the water, with the main cabin and mast popping upwards to create some verticality.

After finding the desired proportions, it was time to place the boat in a proper setting.
When I lay out out a scene, I follow the basic foreground, middle ground, background approach. I like to incorporate a foreground and background to provide context for the subject to live in between. It’s also a good opportunity to create view lines that direct the audience’s eye to the image’s focal point.

For the foreground, I modeled simple posts and rope, and for the background, I used Quixel Megascans for cliff geometry.
Once my scene is mostly set up, I try to choose a camera angle to help identify where I need detail and how to enhance the overall composition.
When the camera is set, it’s time to add some detail. This is when the reference images really come into play. Going back to my strategy from the beginning, I like to pick interesting things out of multiple references and create a sort of Frankenstein-esque combination of them all. It’s a good exercise to not completely copy a reference scene, but interpret little things from multiple references. For example, on the mast, I chose the best structure that fit my scene and my favorite gadgets that were on the mast of my reference photos. I liked the radar scanners, horns (a boat needs a good horn), and a couple of lights.

I repeated this process for the rest of the boat, the tires, and the posts. When modeling details like this, it’s very easy to get lost in a modeling rabbit hole with an asset that can barely be seen in the final composition. I find it very helpful to periodically zoom out, checking my models from a distance, and comparing them to my overall composition. Not every model has to be perfect. I prioritize details according to their location, size, and, most importantly, their contribution to the scene’s narrative.

Shading
For the shaders in this scene, I wanted them to follow a tone of grunge, weather, and texture. I try to create shaders that have realism with a stroke of style. Again, I like to use various references to create something fresh and interesting.
For the boat, I used a mix of grunge nodes I’ve acquired over the last year. I typically set up a material with diffuse, roughness, and height maps. The roughness map is the most important, in my opinion, and the most versatile. I have a handful of grunge, dirt, and scratch maps that I cycle through and combine in all of my textures.


Once I have a basic material setup, I’ll tweak them all with mix nodes, and the color ramp tool to create diversity and draw attention to specific details within the model.
One of those details is the colored strip of trim that wraps around the exterior of the boat. I imagine that the tires rubbing up against it would end up scuffing up the paint and eventually rusting. So, I adjusted the diffuse to a reddish/brown color and tweaked the roughness and bump values. It ended up working great because it broke up the color scheme and added some story/character to the scene.

Whenever I make decisions for materiality and color, I like to imagine a reason for those decisions; it builds a narrative around the scene.
Another element that follows this same thought process is the wood posts. I thought the gunky, slimy algae that builds up on them over time would add some character to the scene, and also some color variation. The shader is a simple gradient texture with a color ramp node over some blobs that I scattered over the posts. If you haven’t already, become best friends with the color ramp node—it’s incredibly powerful!


Lighting
An exterior scene like this is pretty easy to light with amazing HDRI resources that can be found online. I grab a variety of them from HDRIHaven and cycle through them until I find one that has good contrast and color. I do this in the very early stages when I’m setting up the composition as it informs the rest of the scene’s tone and direction.

The best part about fog is the opportunity to create light beams/bloom. And boats have a variety of lights to capitalize on this opportunity. This also adds interest in parts of the scene that were a little boring or underutilized. The main spotlight broke up the dense, grey fog in the background, and the red light on the mast helped draw attention to the mast, which had some cool features that I wanted people to see. Through all aspects of my process, I’m constantly asking myself: “How do I make someone look here?”

Rendering and Post-Processing
My render settings are fairly simple. I make sure I’m on filmic, Medium-High Contrast, and up the samples to about 300-500 depending on the scene. For this scene, the volumetrics required more samples than usual but 500 managed to do the trick.
To tie it all together, I always post-process my renders in Adobe Photoshop. It helps harmonize the colors, tone, and contrast into a finished product. To start, I adjusted the curves and color temperature to achieve a contrasted, cool, foggy tone.
I then added shadow and highlights with the paintbrush tool to make certain areas pop. Wherever I have artificial lights I like to paint some bloom/glare to enhance the atmosphere.
Finally, to give the lighting an extra boost, I always add a vignette. I’ll lighten the side or corner of the image where the main light source is coming from while darkening the opposite side. In this image, I lighted the top-right and darkened the bottom left. It really accentuates the lighting and creates a more dramatic image.

Thank you all for reading and thank you BlenderNation for the opportunity to share my work!
Tools
Blender2.81
Adobe Photoshop
About the Author
 Brad Tyler, 3D artist with a background in architecture and design


Amazing effects…well thought out project. Makes me want to be on that tugboat for a ride…