About me
Hello everyone! My name is Jamie and I work as a Blender artist based in the UK. I’ve been using Blender for about three years now. My progression with the software hasn’t been linear as it’s been an interwoven part of my life throughout my mid- to late teenage years. Over the last few years, Blender, and the amazing community surrounding it, has sparked a creativity in me that I haven’t truly felt since I was a child. I have been learning how to use the program—with still so much more to learn—I feel like I’ve found my artistic outlet: similar to a singer finding their voice, or a musician learning the instrument they connect with.
Currently, I am 19 and still very much finding my own path and where I fit in with the people around me. Blender is a part-time thing as I’m also a practicing personal trainer and avid exercise fanatic. I’ve often found it difficult to balance these two separate things; I’m passionate about both. Day to day, my life consists of working on a wide array of personal art projects, working out, training clients, working on commissioned work, meeting with friends, and learning more about Blender!
Here is a breakdown of my Spirited Away train scene.
Concept
I had the idea for this scene, obviously, while watching the film Spirited Away by Studio Ghibli. Spirited Away is one of my favorite films. I wanted to try and recreate the peaceful tranquility of riding the spirit train through the ocean. I also wanted to pay my respects to the team that worked on this beautiful film in my own small way.
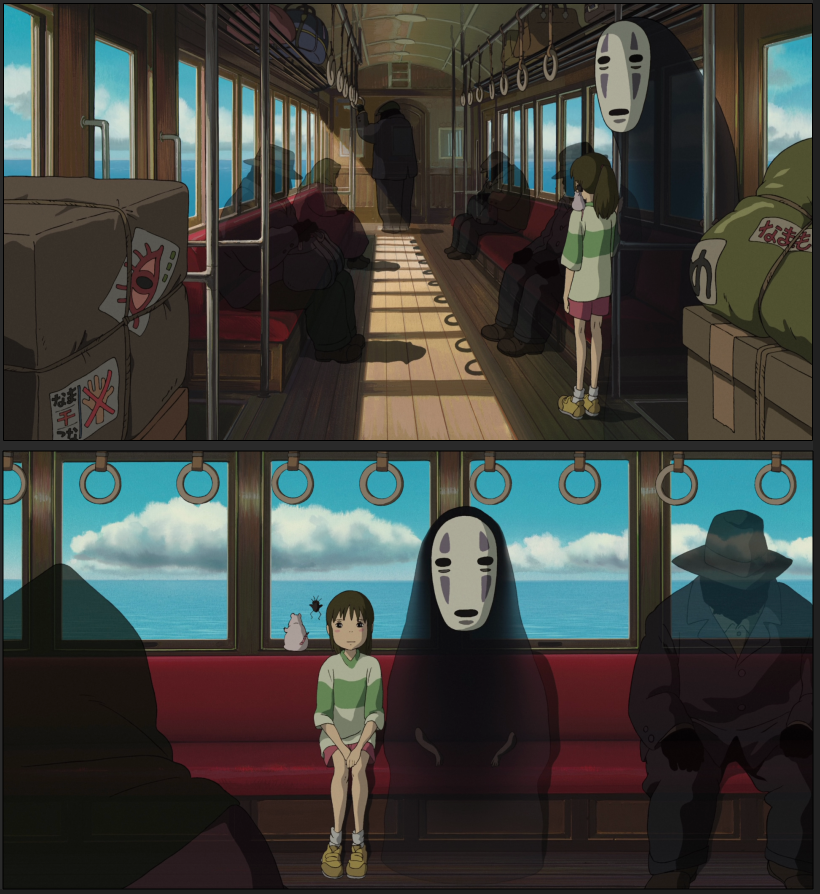
Spirited Away—Sixth Station (train scene)—Vimeo
Making a start
I started off by building a rough concept of where I wanted the characters to be placed and what I wanted the camera to see: just lining up some basic compositional elements. I knew I wanted the main characters in the scene but, knowing my strengths and weaknesses, I wanted to put the focus on the characters inhabiting the scene, instead of focusing specifically on the characters themselves.
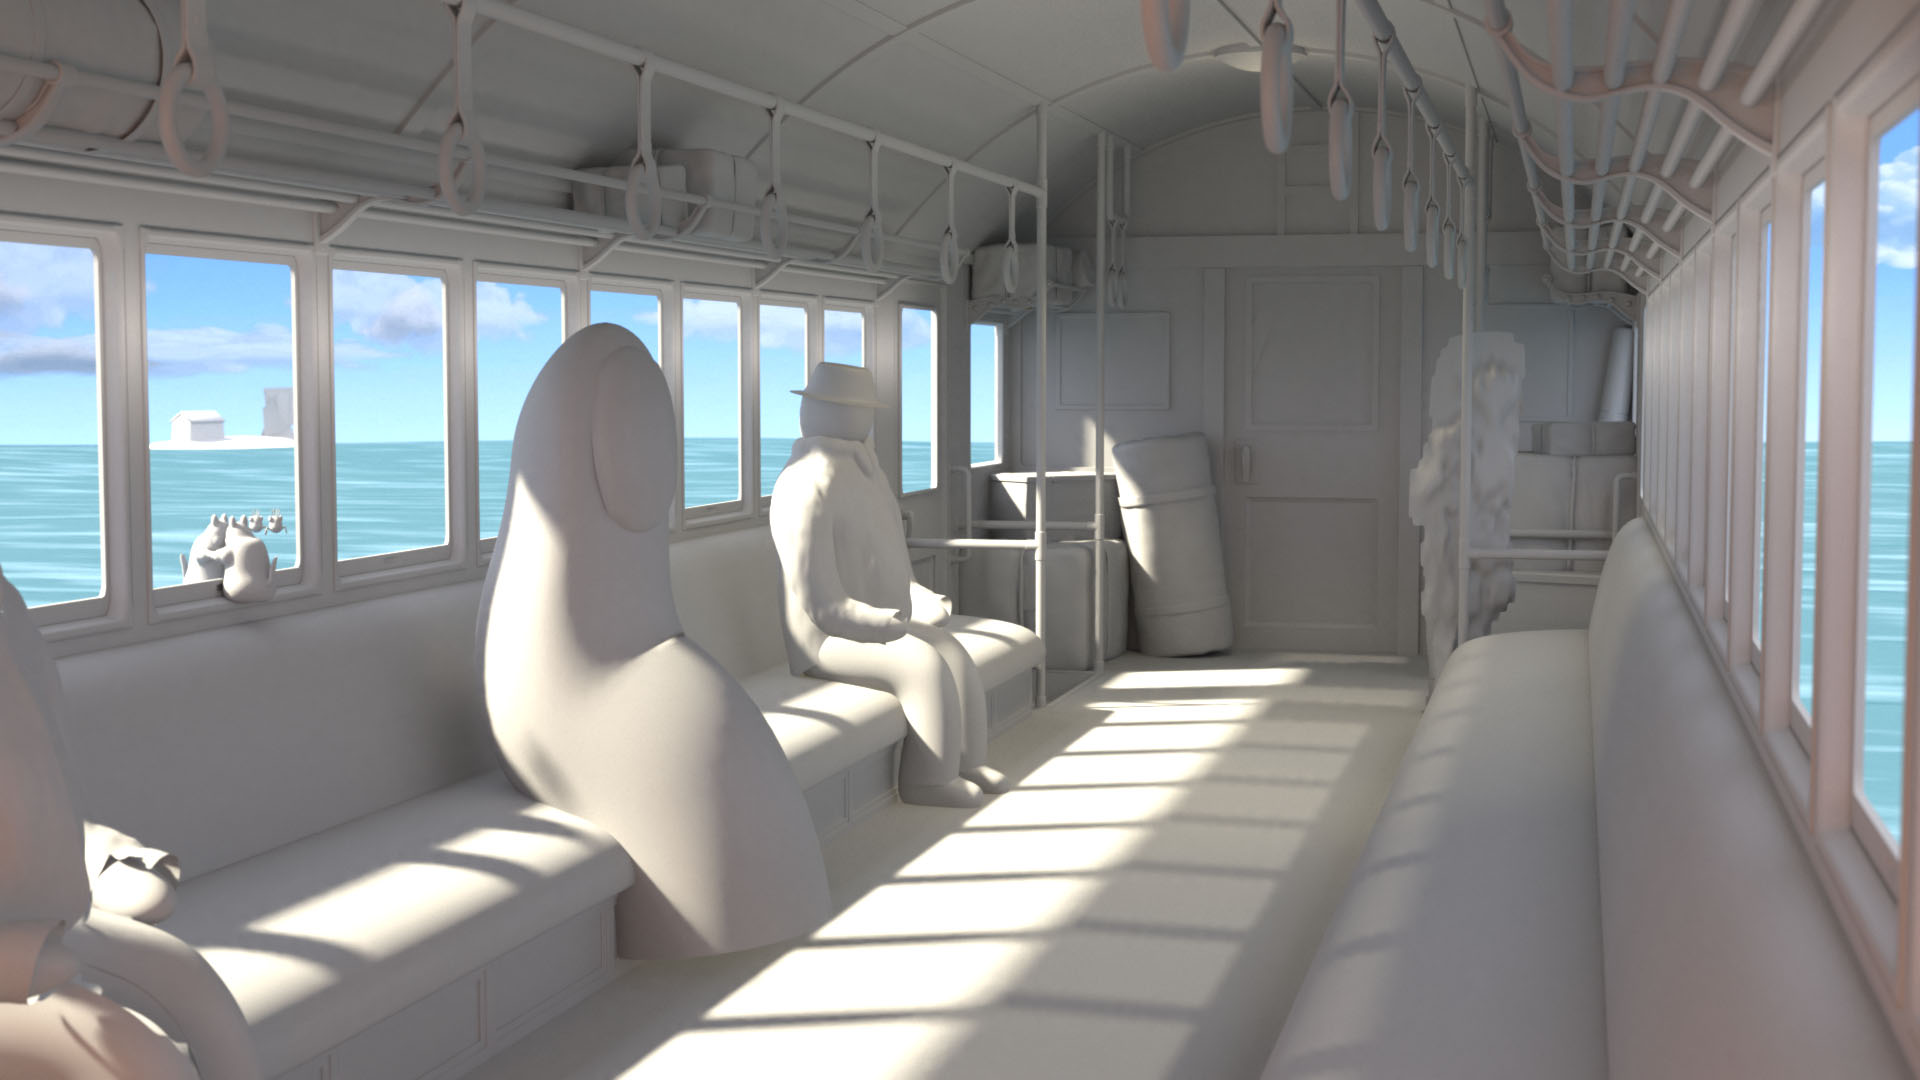
I don’t have a picture of this stage of the process, but if you can imagine No-Face on a primitively modeled red train seat, Chihiro in the background standing by the train door, and the train—a very angular toilet roll tube with cutouts for windows spilling some light down to the seats and the floor.
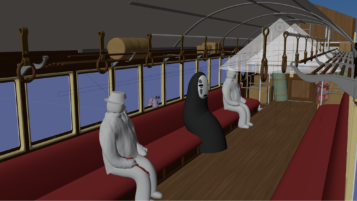
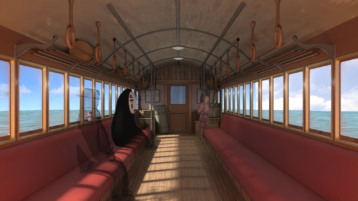
I set up the scene and finished fleshing out the idea. Then began the fun part! I iterated upon that, improving all the elements one-by-one and applying some basic “placeholder” textures to each of the surfaces. I added gold trim to the windows and modeled some rails for the luggage. Throughout this whole process, I used stills from the film as a reference, making sure I molded everything closely to match the interior of the train and the textures of the floor, roof, and walls.
This stage took just a few late evenings. As you can see, just with a little bit of work we are much of the way there. It seems to be that, when I’m working on something, it takes a few days to get it looking good and takes a further few weeks to the point where I’m happy to call it finished.
Modeling
Modeling this scene was perhaps the easiest part of the process. Everything is quite easy to model as much of it can be made from just a cube stretched out and extruded in different ways. I used modifiers heavily in the modeling process. All the windows were cut out using booleans that were then arrayed along the length of the train and mirrored to the other side. I then copied this same cube and punched through the middle to make the gold around the windows, subdividing to give it a curved edge, then adding loop cuts to tighten it up where necessary. The seats, rails, and poles were made in a very similar way.
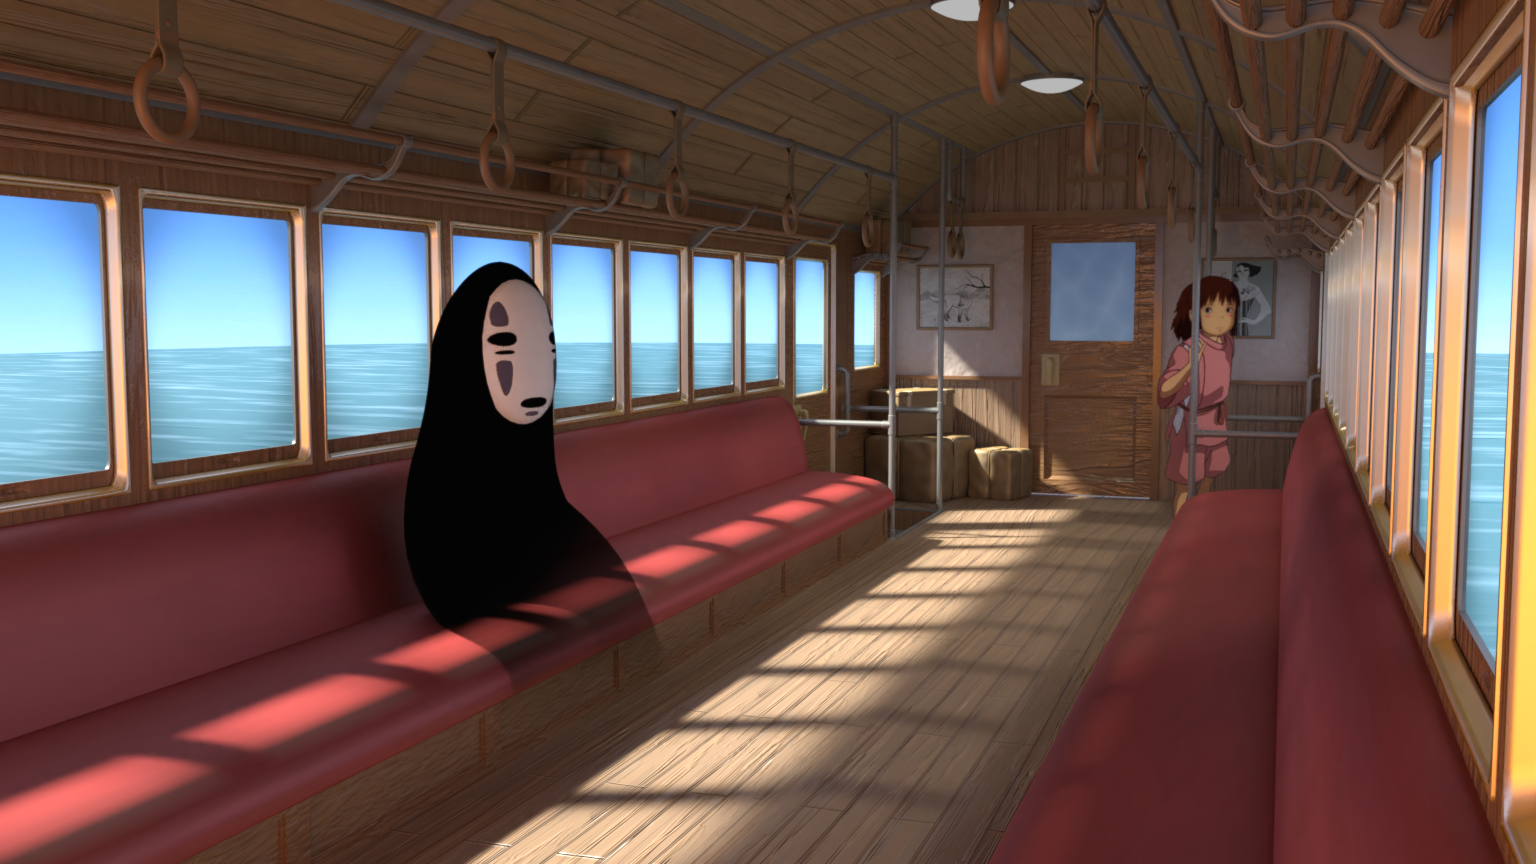
No-Face and Chihiro were a bit different... No-Face was modeled using references from the film in a standing, or floating, position. I added his mask to his body by tracing a texture of the mask with a plane and adding some depth to it. This was then added to his body and the whole mesh was rigged and posed in a sitting position with a texture mixing from diffuse to transparent as you go down his body.
For Chihiro, I found an image of her online that I subdivided many times and cut away the faces tracing around her body. I then used an external program to generate a normal map. Just a subtle use of the normal map and some slight color tweaking and she seemed to fit in the scene quite nicely. Something I’ll tell you that surprisingly, nobody noticed—Chihiro in my recreation isn’t even wearing the right thing! In the film, she’s wearing a green and white t-shirt while she’s on the train and in my render she’s wearing her pink work clothes. In an effort to match and remain true with the story, I did try to model her, to begin with. That went downhill very fast! My skills just weren't up to the task.
Texturing and materials
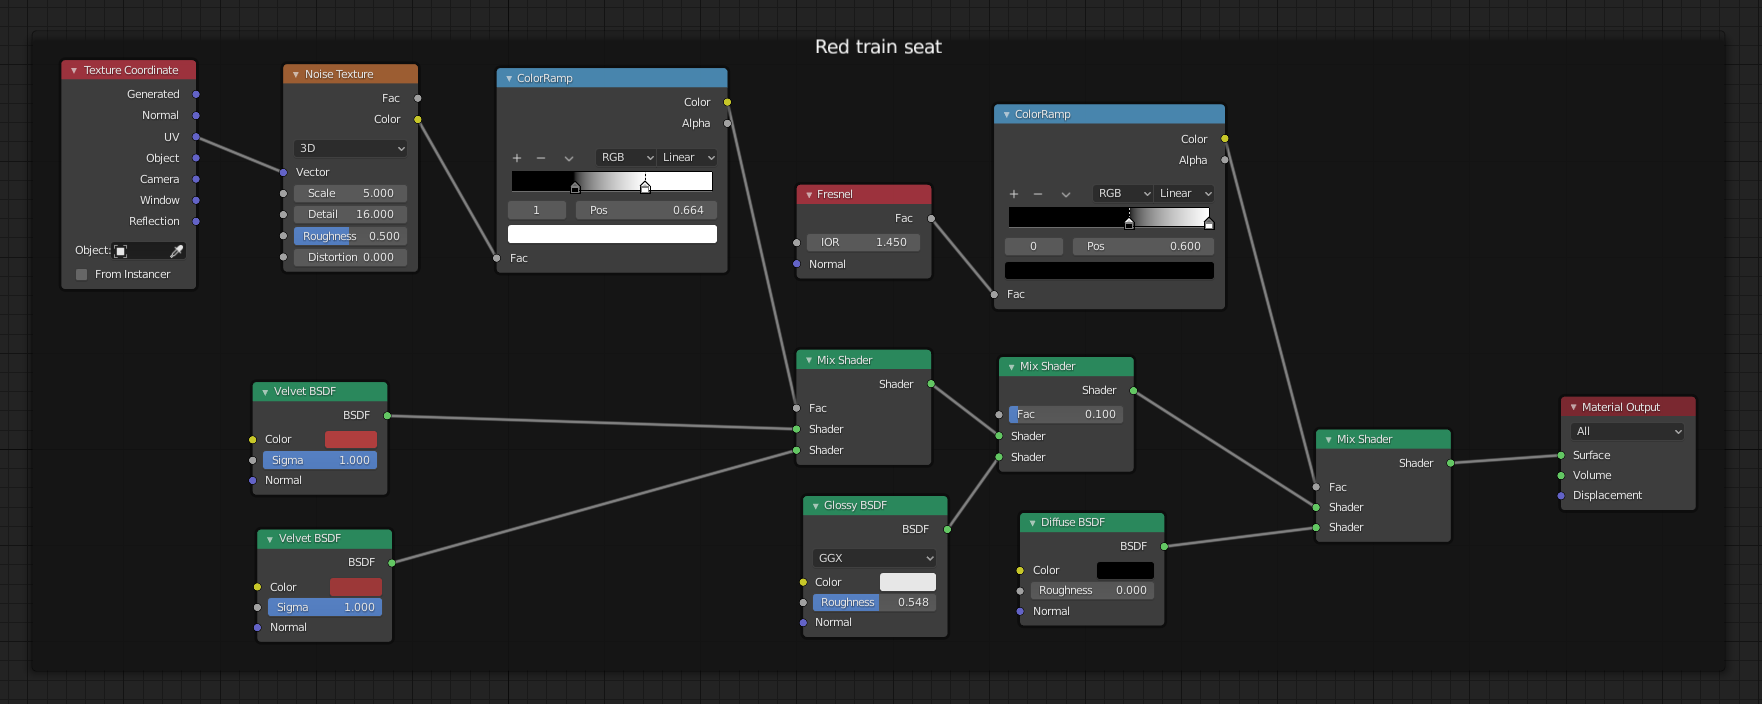
I feel as though the materials are the main feature of this scene. This was made back in the 2.78 days and the famous Principled BSDF was not yet on the main stage. So, unsurprisingly, this is all far from physically accurate. Pretty much all the materials were made from a basic collection of nodes. It was a 50/50 mix of the diffuse and the toon shader. On top of this, I mixed in a little bit of gloss then I gave it a thin dark border using fresnel sharpened with a color ramp. I plugged in a texture where necessary and added some bump through the normal to create the wood grain.
Here’s an example of the basic setup I’m talking about. We have some velvet BSDF mixed in here, using a texture for a more smooth material look. This is the simple node tree used for the red seats on the train.
This is how almost all the shaders were made with the exception of:
- The windows—which were two alphas, one for a subtle vignette and another for an even more subtle smudged window texture.
- And the clouds—you guessed it! More alpha images!
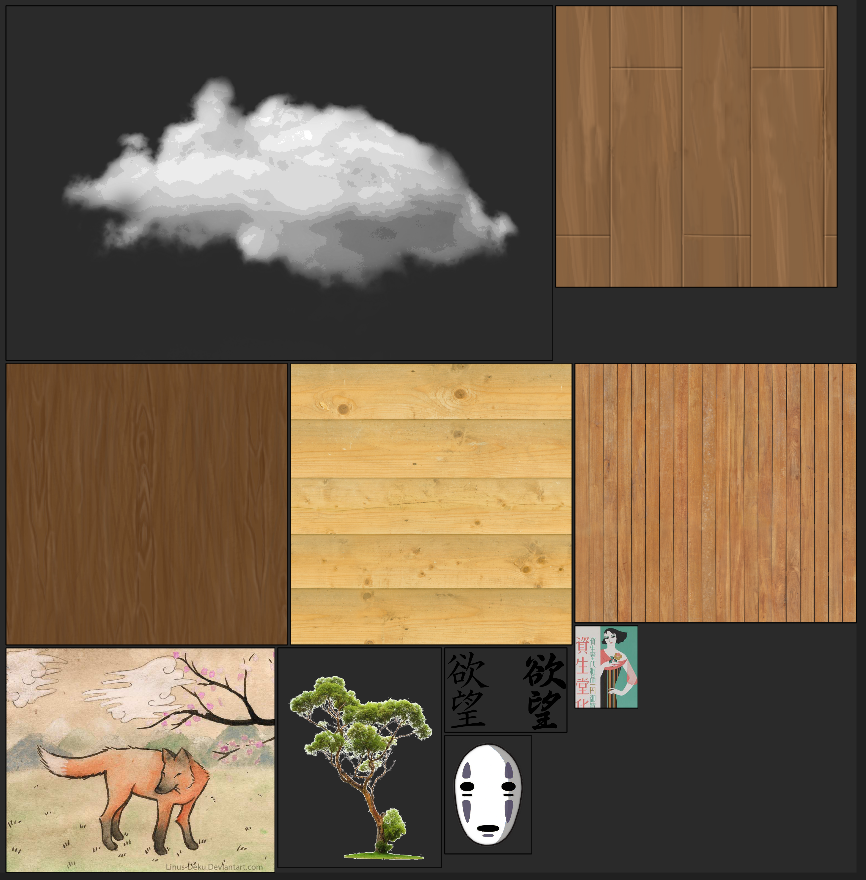
As for the non-procedural textures I have chosen, I stuck to basic shapes and simplistic images. The pictures on the back wall were chosen for their simplicity and ease to be read from a distance, similar to the labels on the parcels and boxes. The wood grains were also chosen to match the rest of the scene; I made sure that they looked vaguely hand-drawn and not too realistic. These were then plugged into my 50/50 toon-diffuse mix to blend in with the materials without image textures. The colors of the textures were also tweaked and hue corrected where necessary.
Lighting
The lighting was not too complex to do and on this specific project seemed to take its final form early on in the creation process. I used just two different sun lamps, one to get the main light shining through all the left windows and the second used as a key light to fill in the right-hand side. Additionally, I used a bright world background light to act like the sky and the sea reflecting it. This was a difficult balance that did take some fiddling around at the start as the whole scene is rendered in a glorified box with not too much space for light to come in. Later on, I added a light facing the ceiling to brighten it up, a point light and a spot light to act as the dim lights in the train, and some very minor dim lights to bring up the highlights in just a few areas. Once I had chosen the main lighting elements that I liked and that matched the reference, it pretty much stayed the same until I called it finished.
Finishing touches
To finish off, I went over everything and made sure there were no edges poking out and there was just enough detail but not so much as to be overwhelming. Making sure I dotted the i’s and crossed all the t’s, in a sense.
At this stage I added things like:
- The sheen to the back window simply made from differently shaped subdivided planes.
- The island in the background with the house and the tree.
- Some wearing down to the plaster on the ceiling of the train.
- Some clouds in the sky in the background.
- The mouse and the fly companions looking out of the window, along with faking their reflections. I did this by copying the mesh, flipping one to face the other, then using a texture to merge between the diffuse and the transparent. I thought this was very clever and I was proud of myself at the time.
- And finally, I added highlights to some of the surfaces using extra lights, most notably in between the windows on the left-hand wall and underneath the overhead luggage rack on the right-hand side.
Rendering and compositing
Some depth of field was used very subtly, just to give it some extra spice and act as a natural lead to bring your eyes into the middle. You also probably guessed it by now, but a huge factor of bringing the image as close as possible to a 2D still from the film is Freestyle! Freestyle, if you didn’t already know, adds a nice outline to the objects you choose in your render. This was used subtly but effectively around the edges of all the objects in the train. This really helps to sell the diffuse-and-toon shader I was going on about earlier.
In the compositor, some AO was added to the darkest areas to bring up that contrast between the highs and the lows. I also added just a little bit of film grain and a soften node. I can’t put my finger on why these work, but they help bring the image together and help it look less like it came from a rendering engine and give it that more human analog feel.
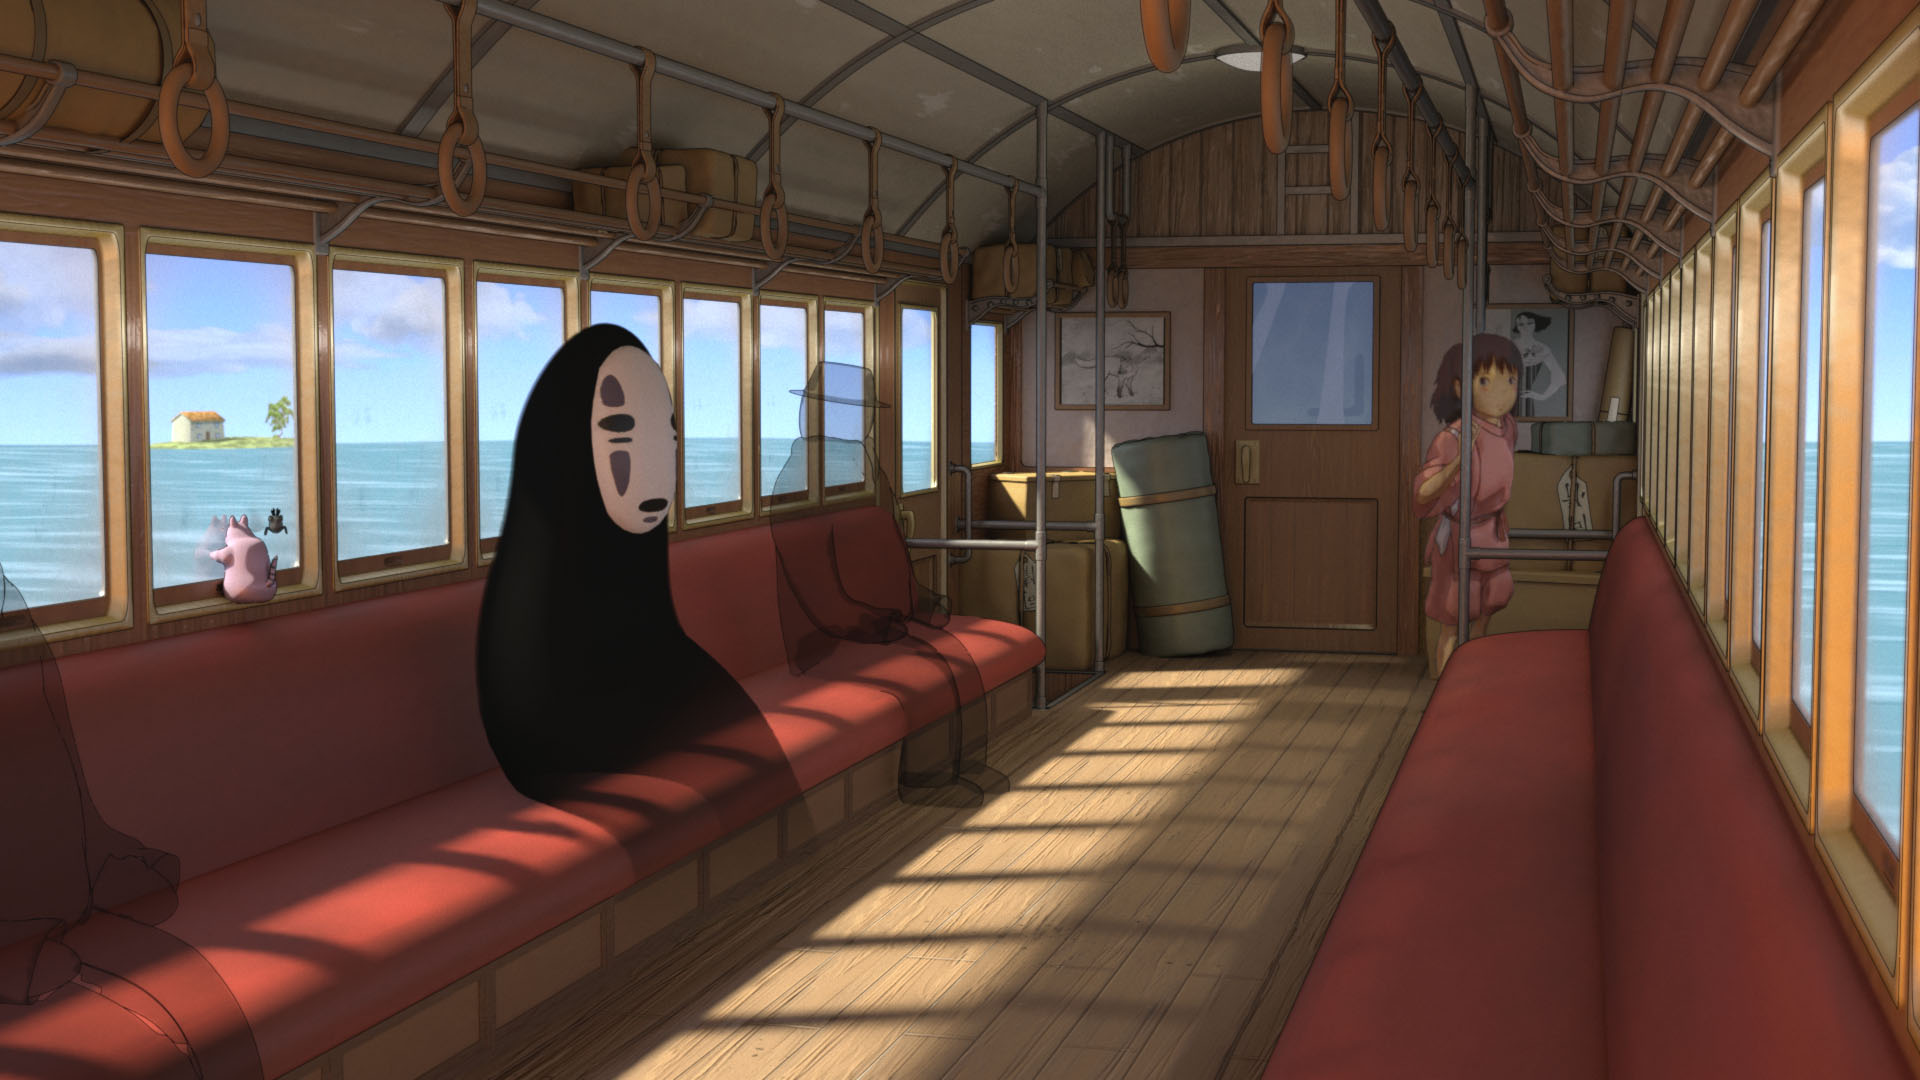
This is my final result:
Thank you for reading!
I hope you found my process useful, insightful, or, at least, mildly thought-provoking.
You can keep up with me and my current and future works over on my Instagram, which is linked below.
About the Author
 Jamie Farrar Goldstein, Self-taught Blender artist.


3 Comments
Awesome work! :)
Congratulations on your art, it looks great! And thank you so much for sharing this process with us! We are always in search for improvement!
As every artist we start from a knowledge and mix with our soul, our unique way to construct and deconstruct, to show the world our particular view!
well done Jamie. Mim has forwarded this to me it's so fascinating. This art world digital art world that I was never aware of. It's really good art looks like it should be in animated film. Also your use of language is really well done. Very articulate.