Behind the Scenes: Popeye the Sailor
Background
Hi everyone, my name is Tomáš Velický and I am a 3D artist from Bratislava, Slovakia. I work as a freelance 3D artist for an advertising agency, but I also enjoy modeling in my free time. I started editing 10 years ago with the Adobe pack, editing photos, and making a few sketches. After one company didn’t hire me because I had no experience with any 3D modeling software, I decided to learn to work in one. I started learning how to work in Blender, where I created my first donut in March 2018. Thank you, Blender Guru and your awesome tutorials! Gradually I added other programs like Substance, ZBrush, and Marvelous Designer. YouTube is a great source for learning new skills and I learned everything about modelling from it.
Inspiration
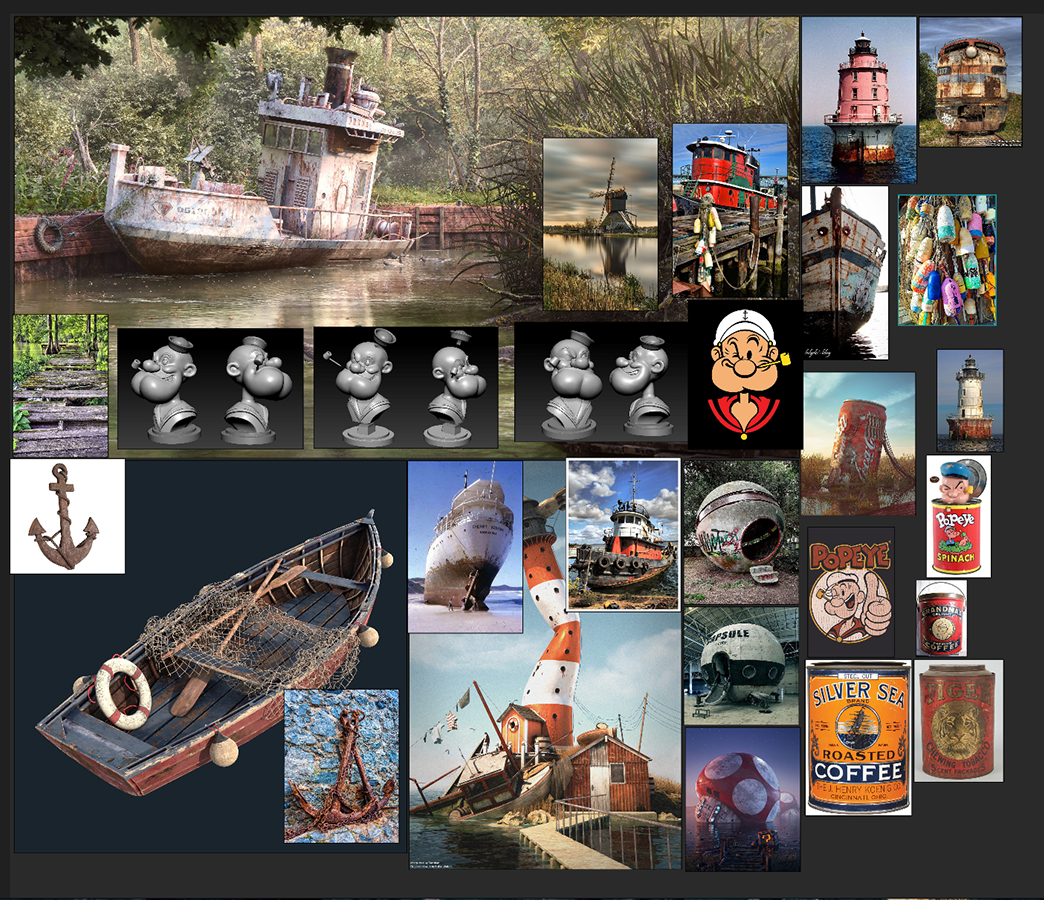
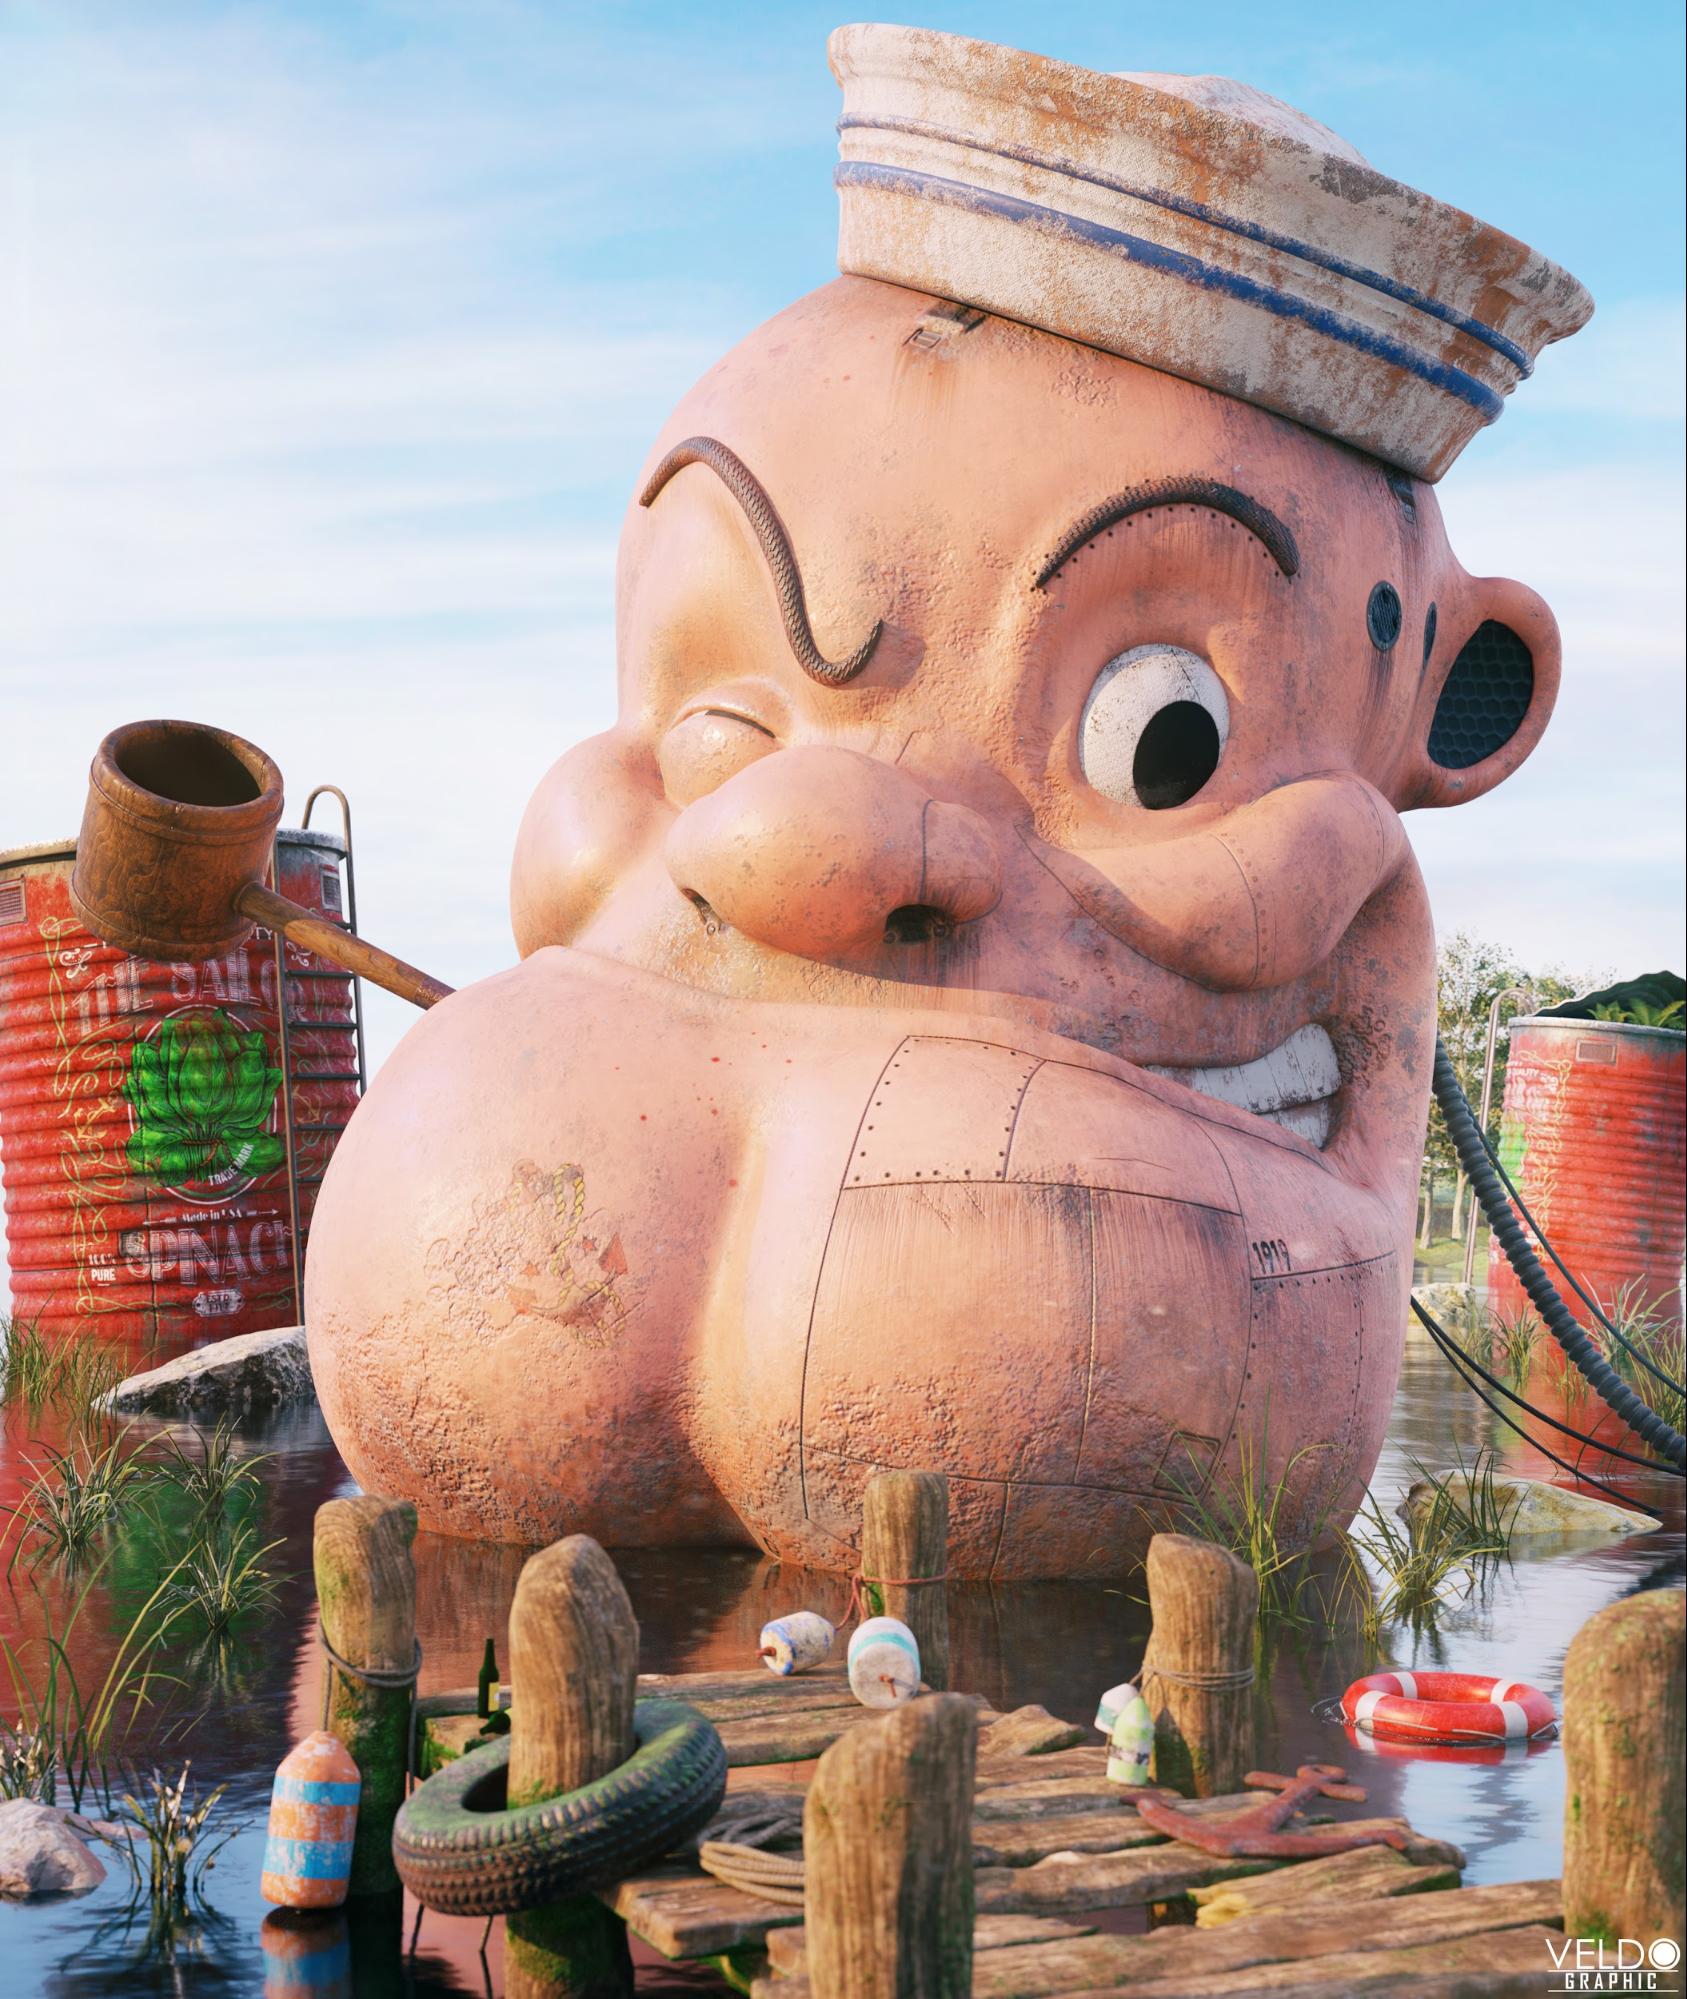
For the last 3-4 months, I have been improving my character sculpting skills. After this period of improvement, I wanted to make a scene in which there would be more modeling of objects and materials. As a child, I watched the Popeye series on TV and was inspired by the amazing pop culture dystopia from Hodas. So I combined these two things and tried to create something similar. I started by looking for references – old boats, fishing stuff, buoys, lighthouses, piers, etc. With good references, it’s easier, so I embarked on the project itself.
Process
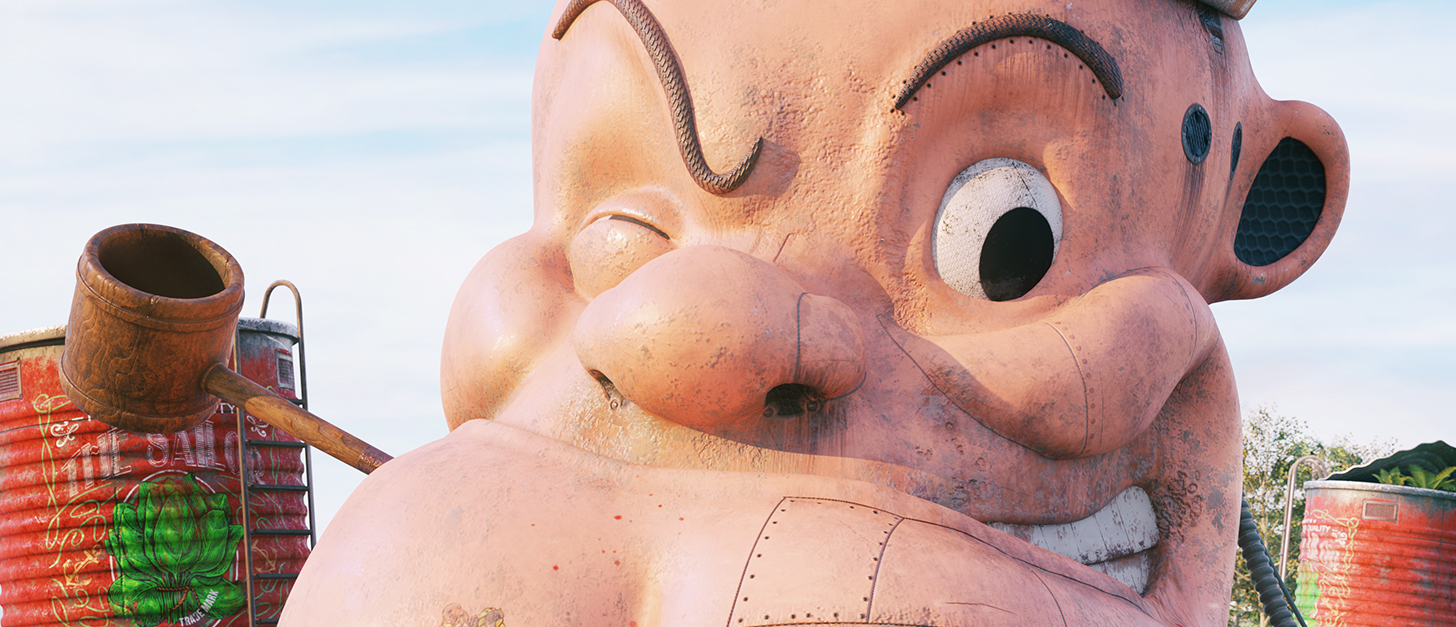
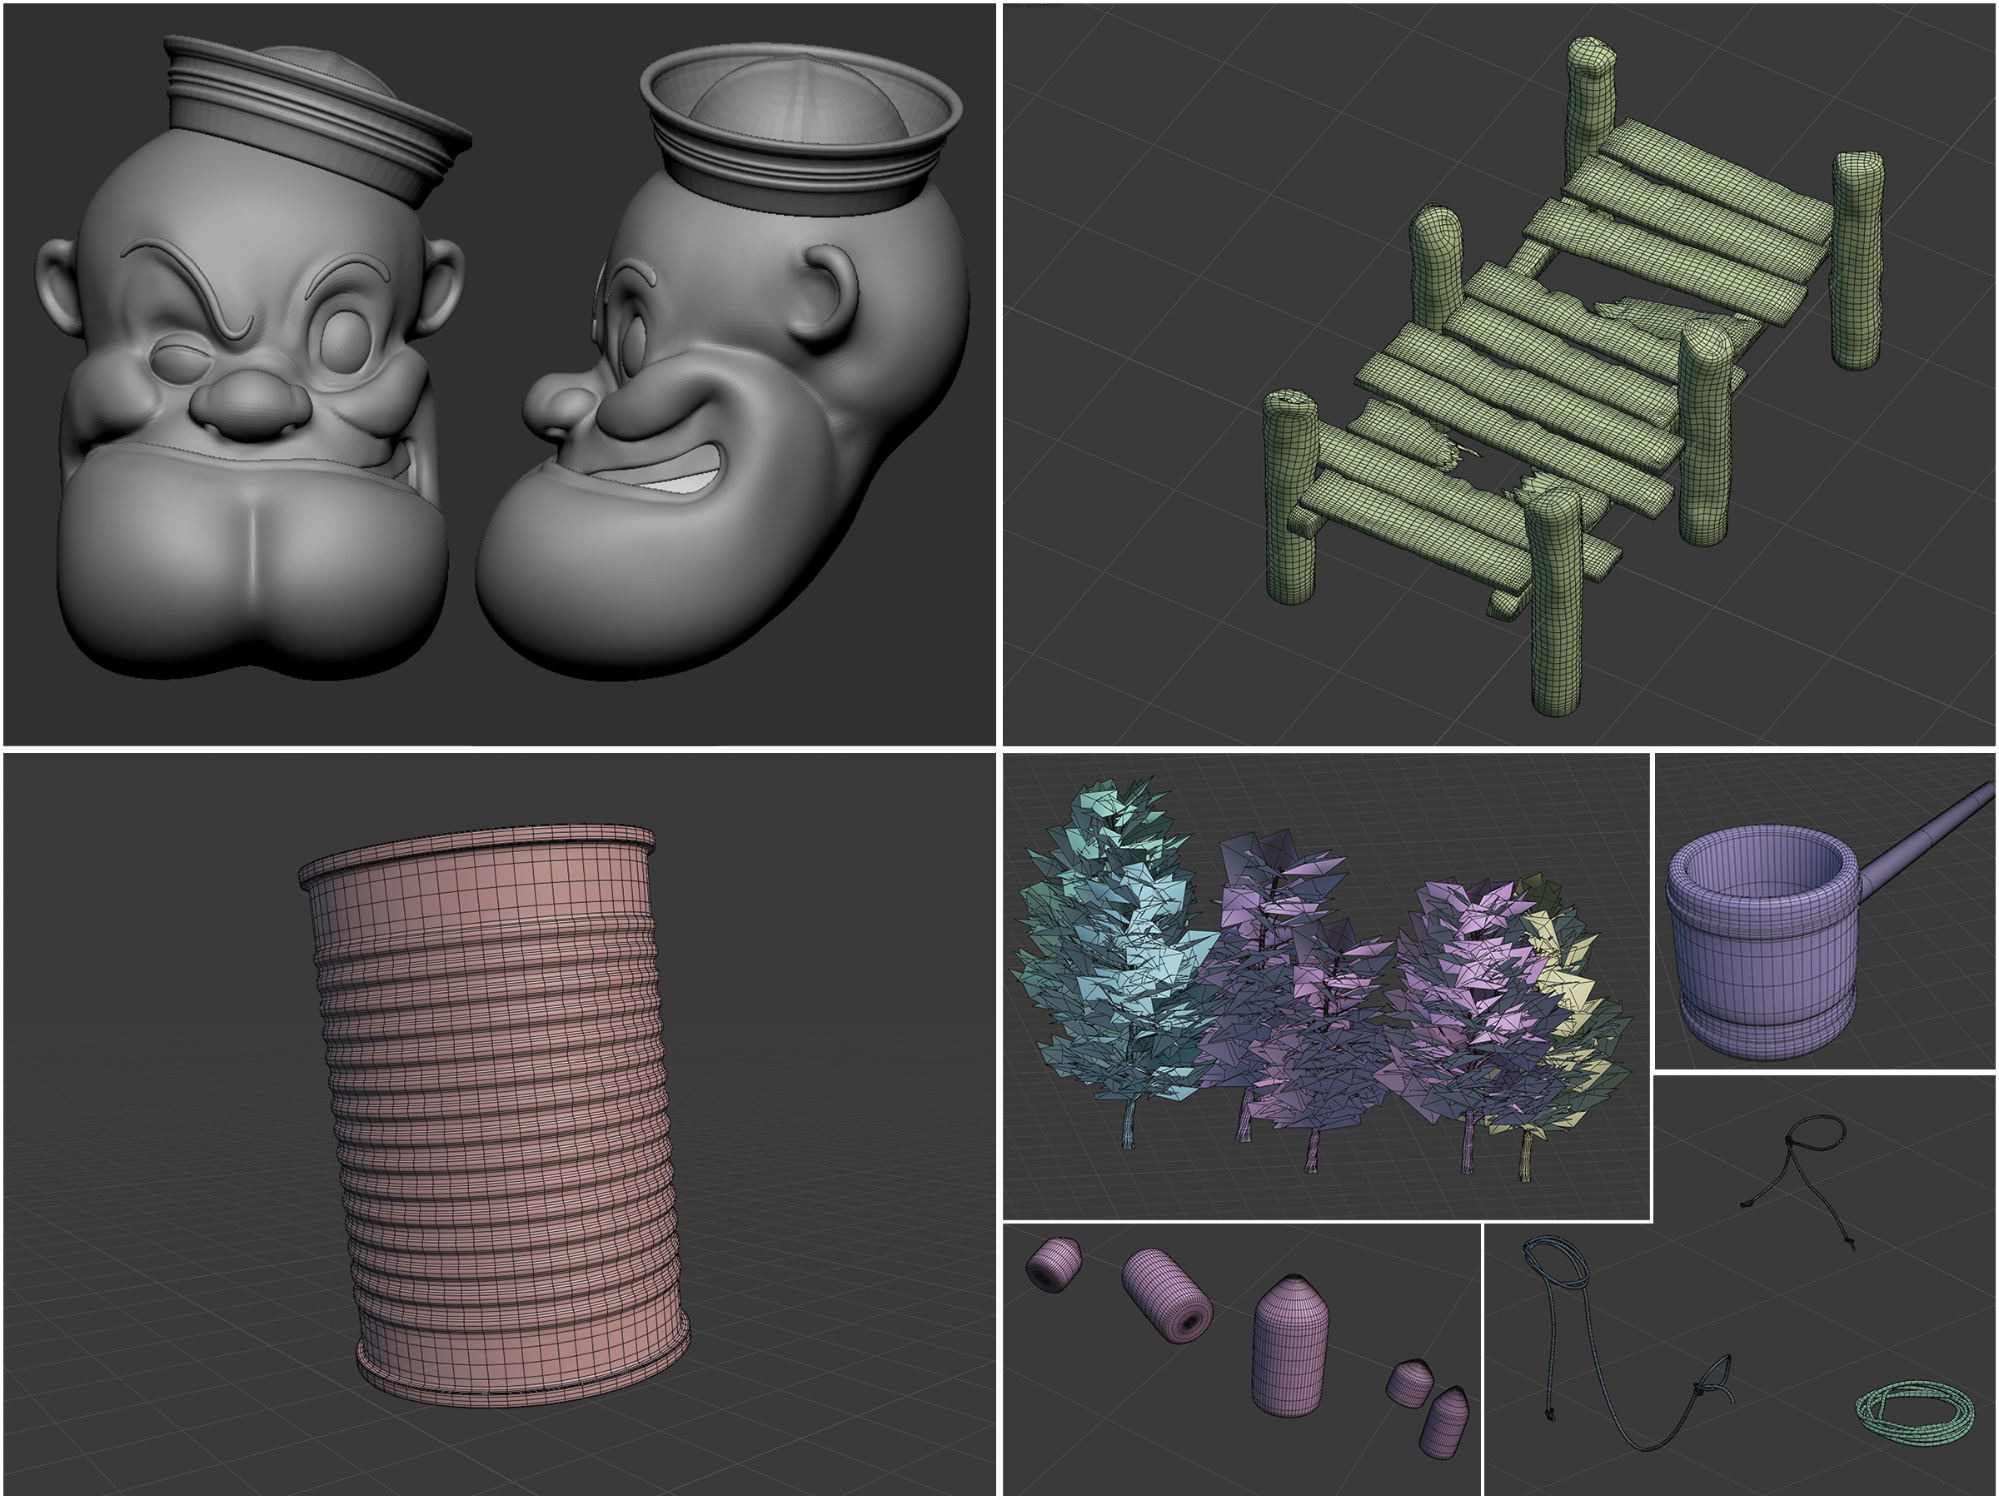
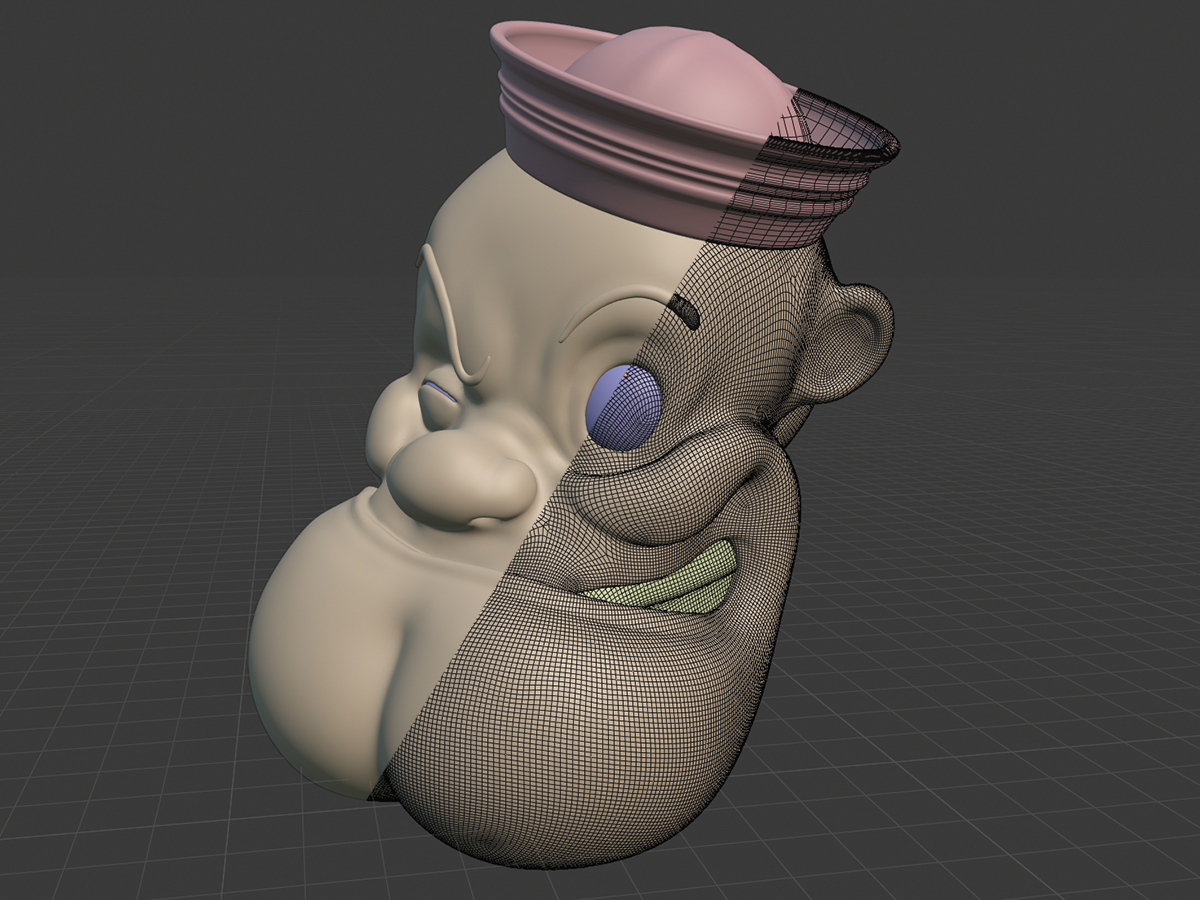
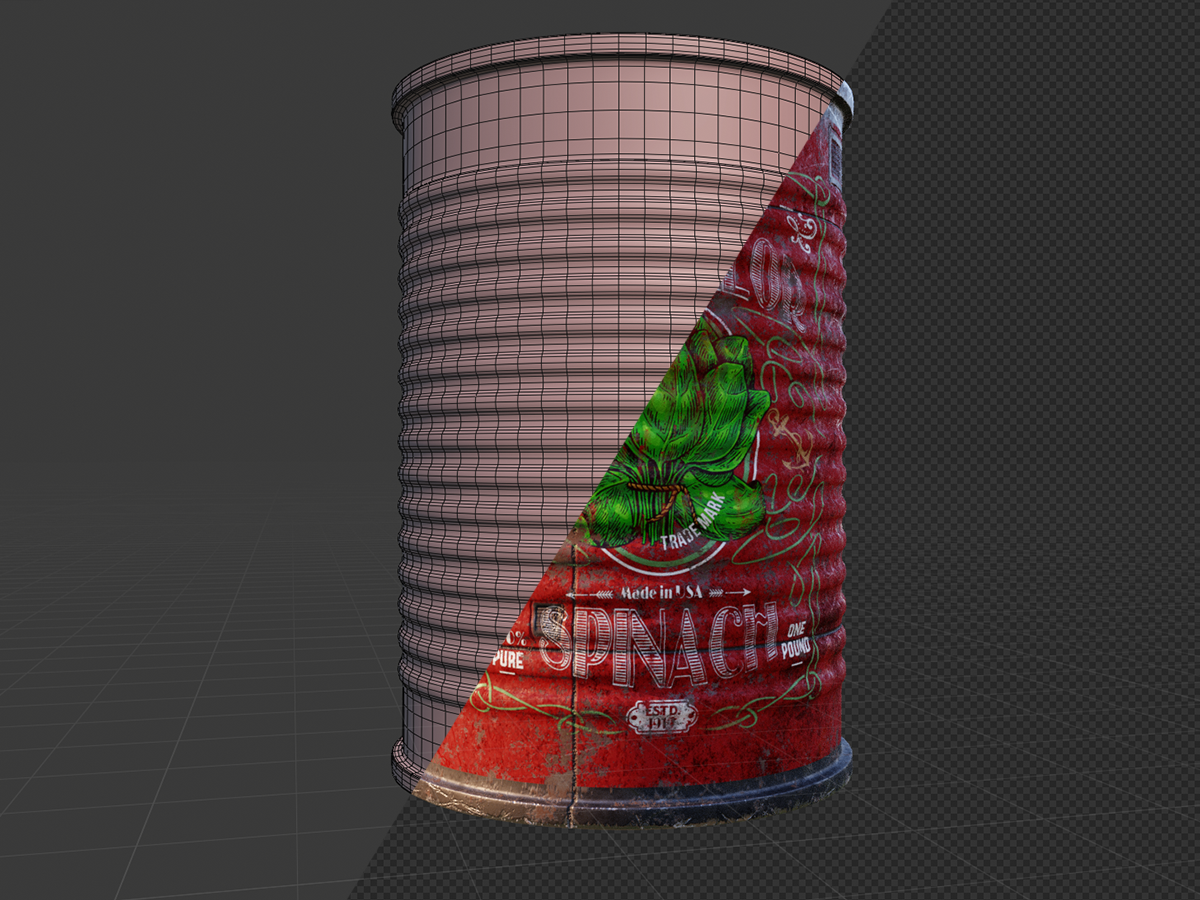
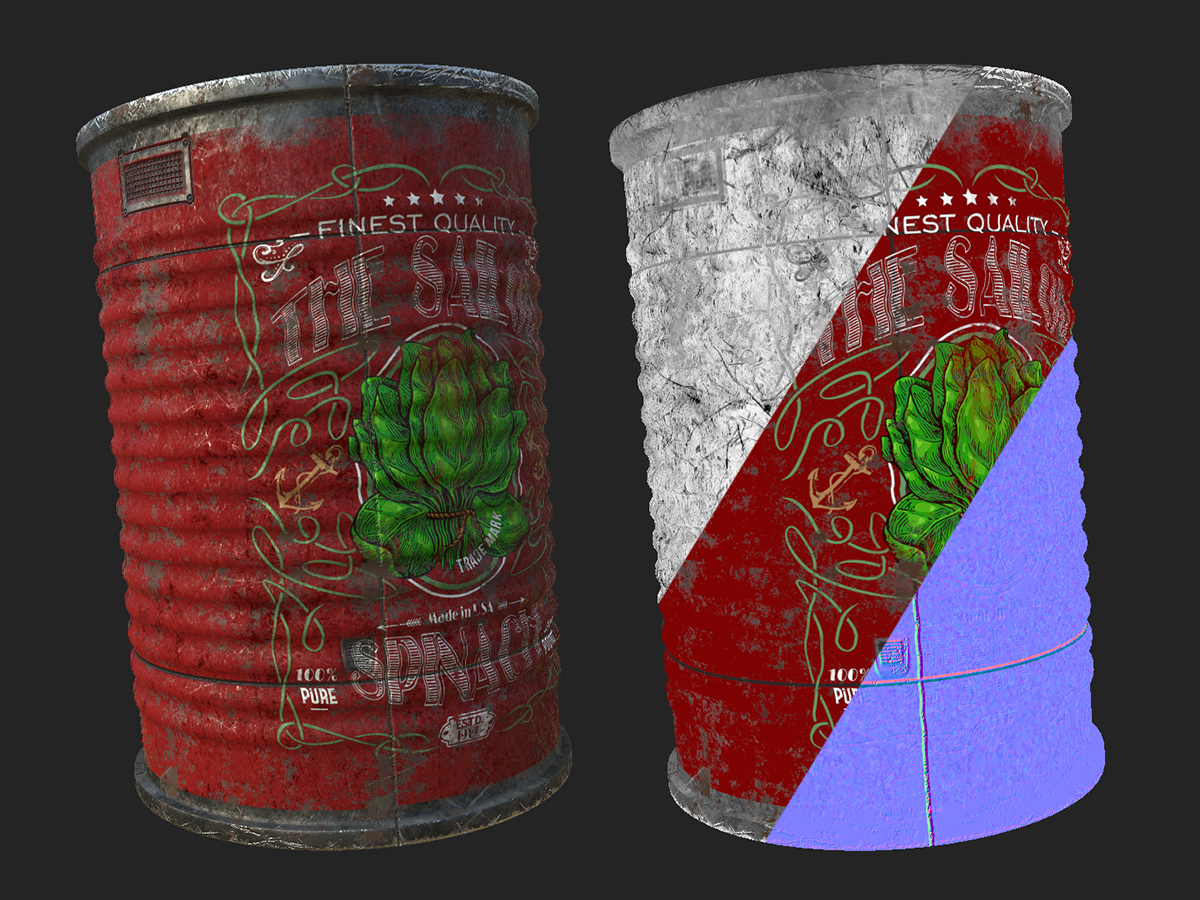
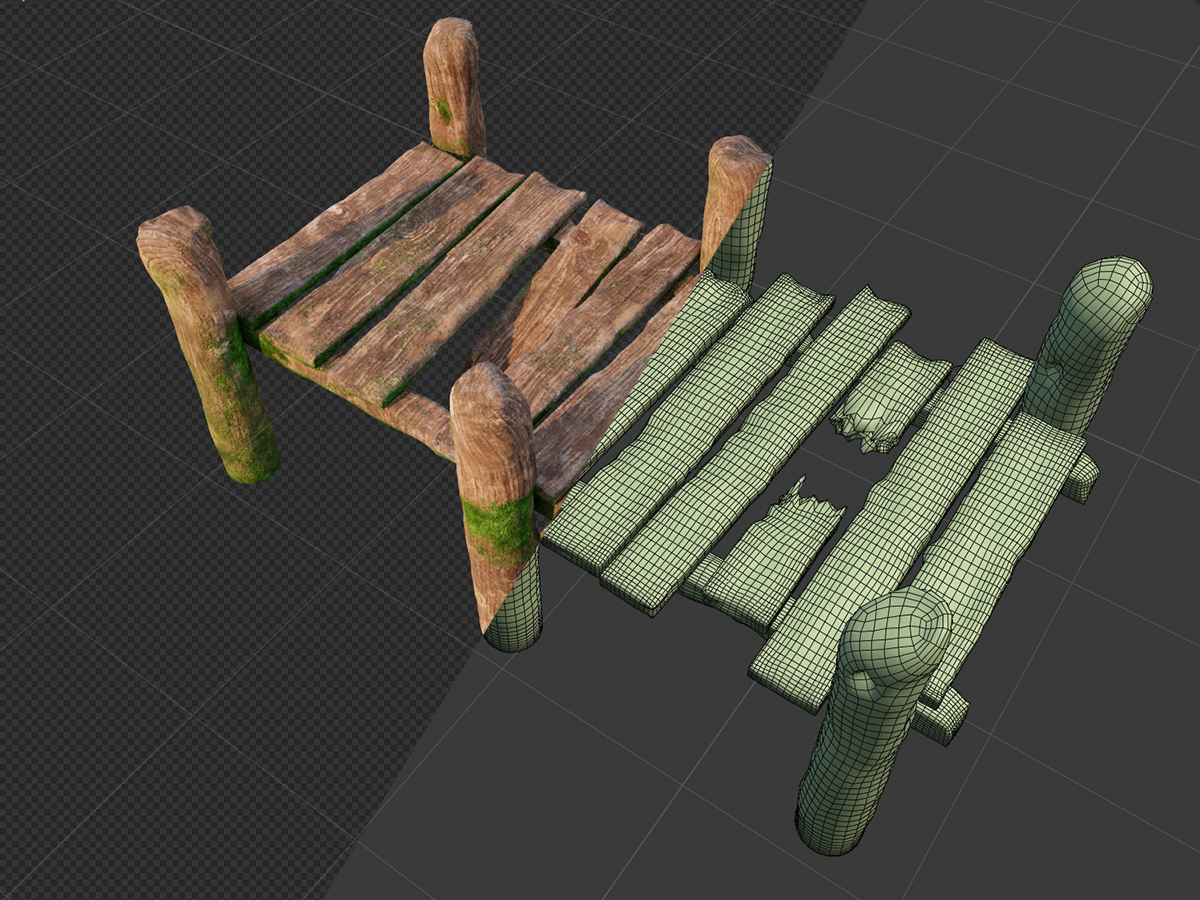
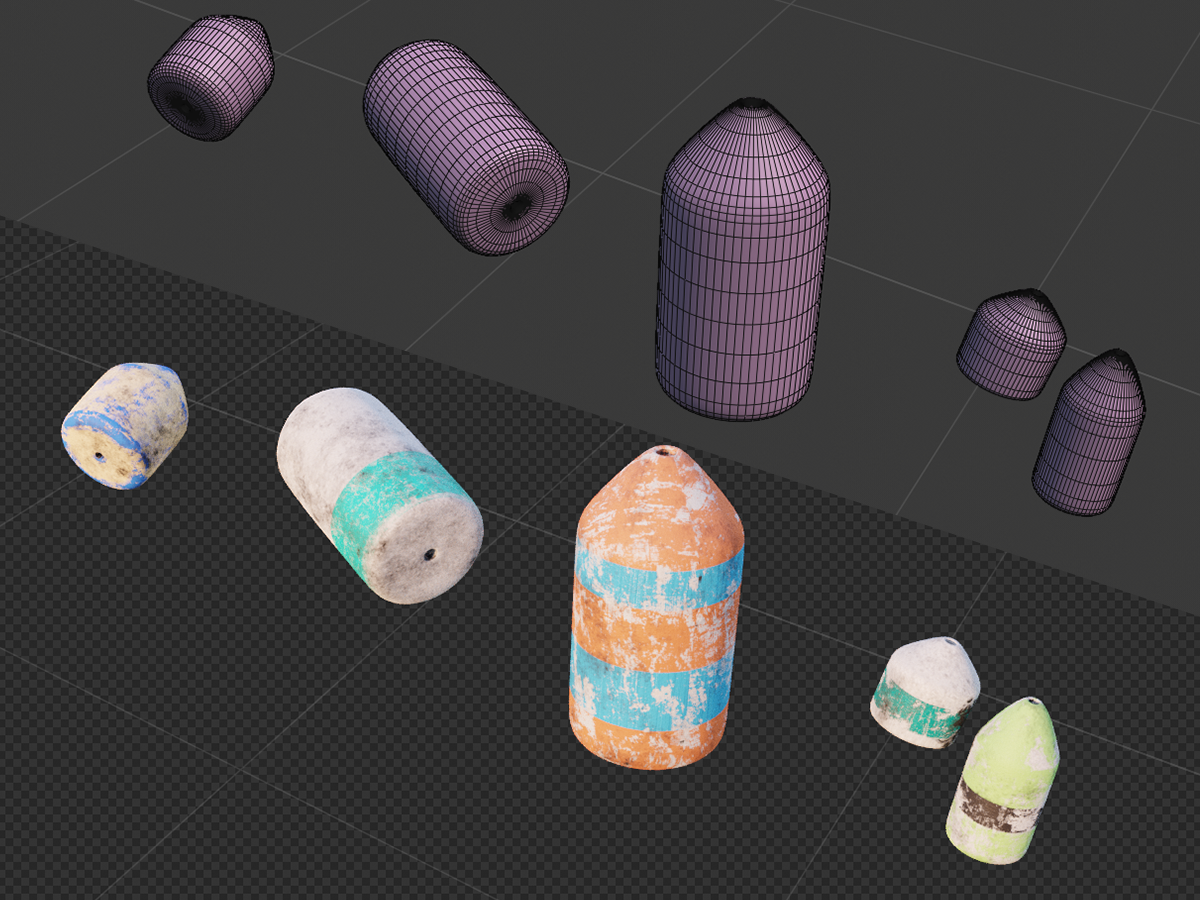
The head, eyes, and teeth were sculpted in ZBrush. I did not perform retopology on this project and that is why the head has a high poly count. The UV map was also generated directly in ZBrush. The pier is composed of basic cubes and cylinders. I used the Scale and Array Modifier to achieve the required size. Then I subdivided by 2x, applied, and then stretched random vertices for the effect of broken wood and deformation of the shape of the boards. All ropes were shaped using the Path Curve and the required Depth. The can is a basic cylinder with a pair of edge loops and stretched to the desired effect of corrugated metal. All buoys are the same cylinder with a pair of bevels on the edges. A hole in the middle of the buoy is connected to LoopTools – Bridge. The trees in the background were generated with Tree It and are quite low poly, but it was enough for this project.
Materials and Texturing
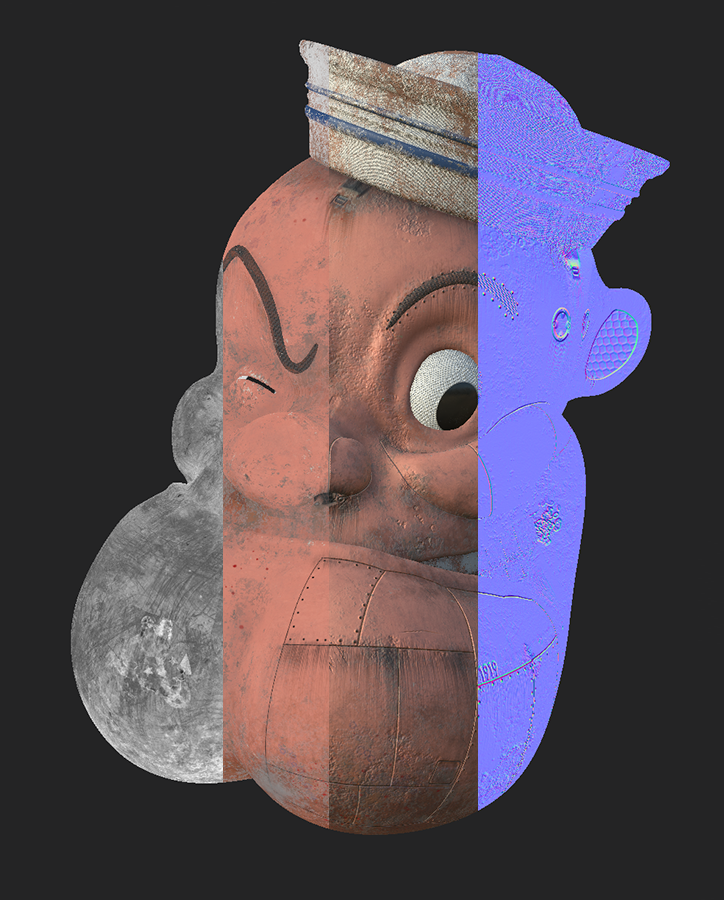
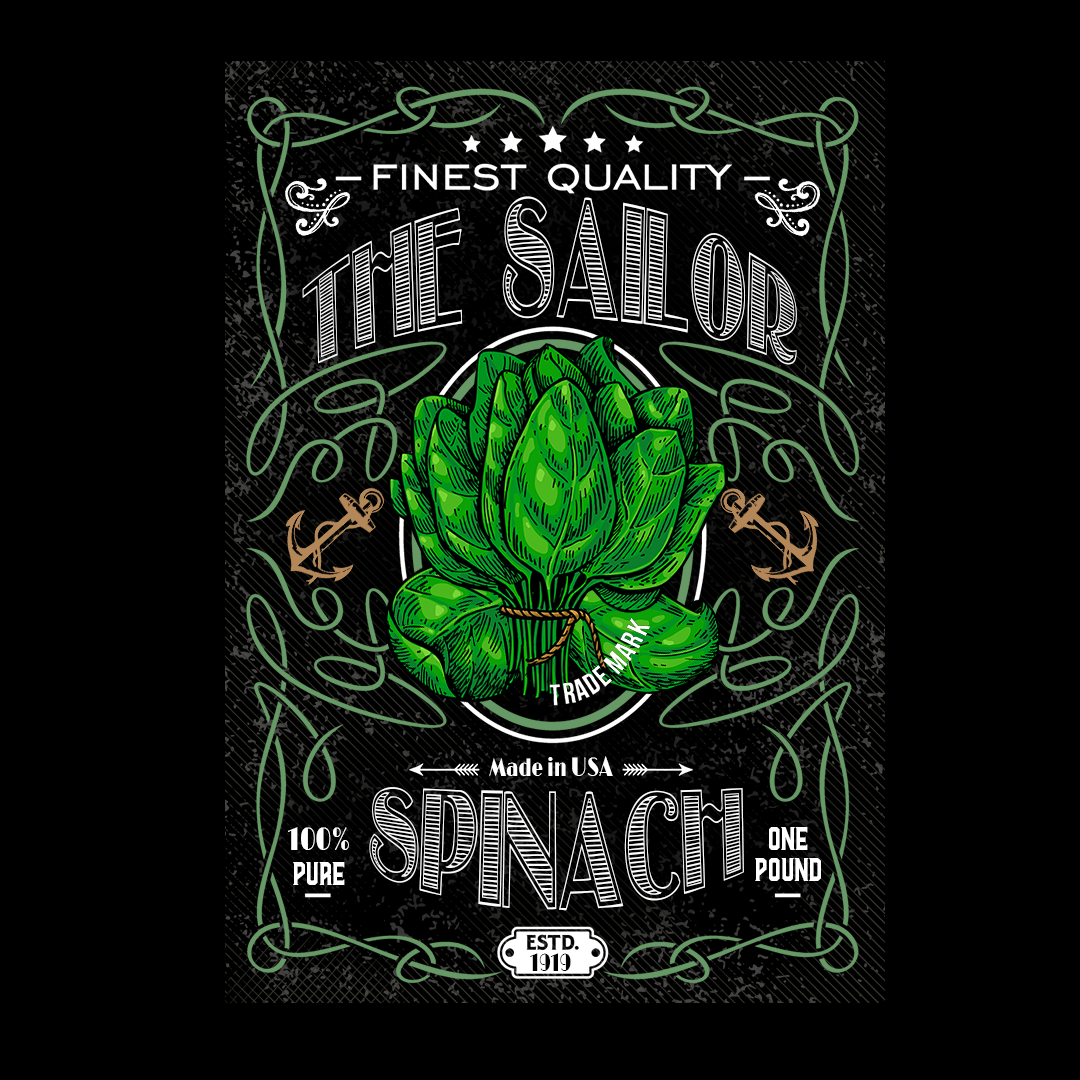
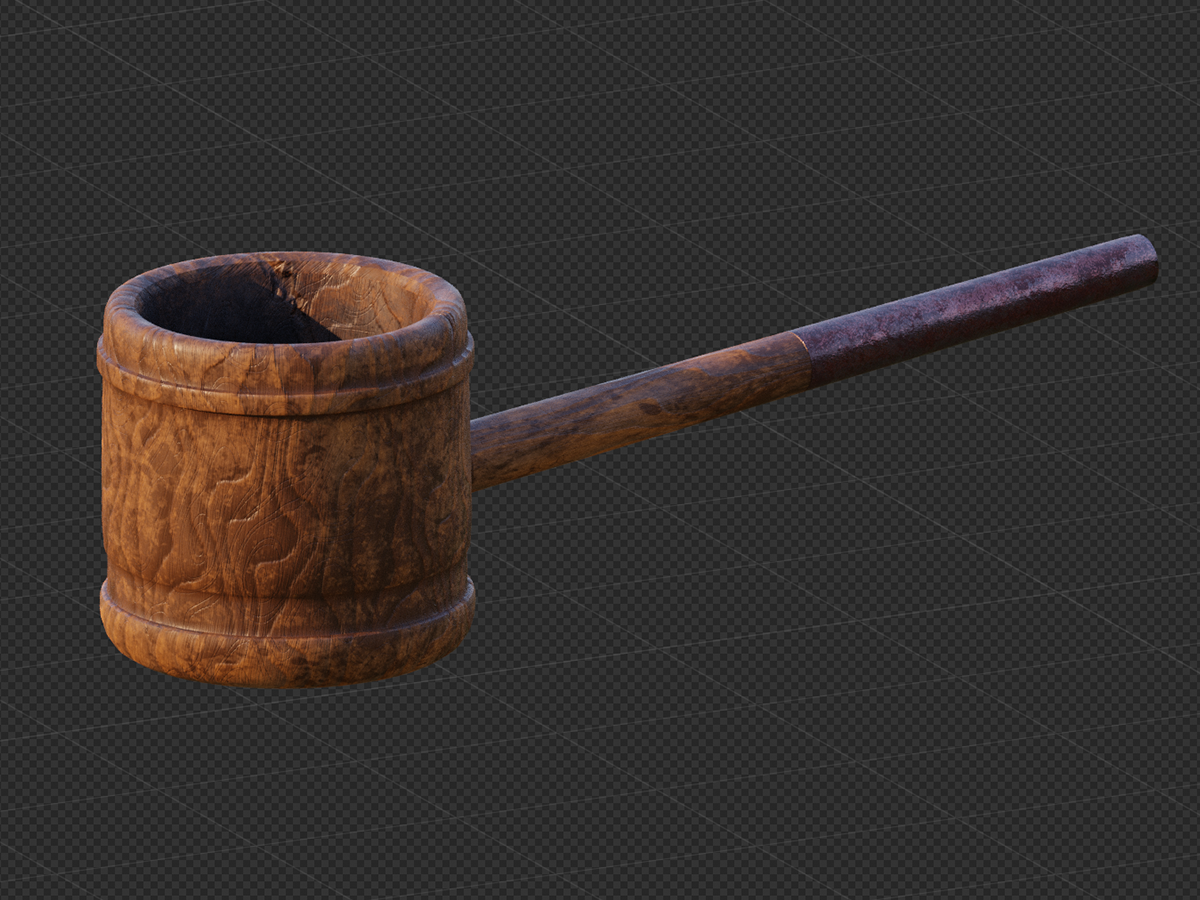
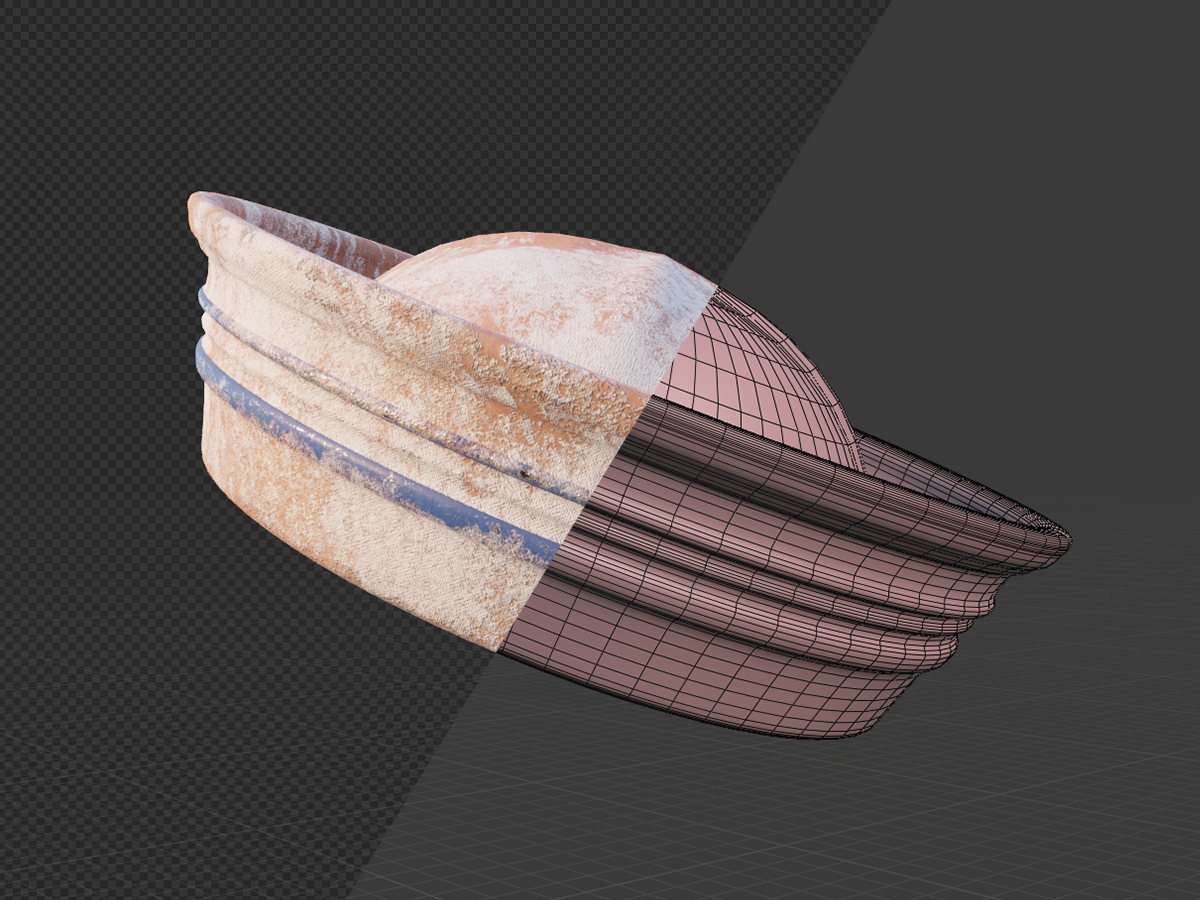
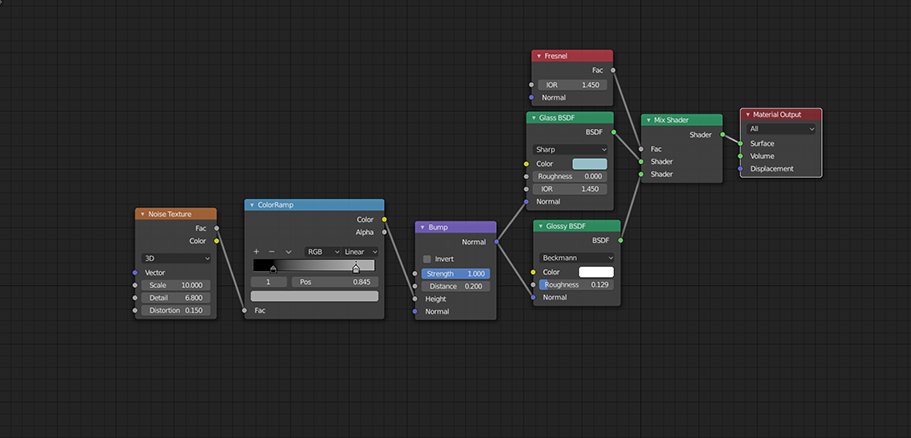
Creating materials and texturing models is my favorite activity in every project. For the texture of the head, I tried to create a skin/rust metal effect. A pair of cool alpha brushes were used for the effect of rust, dirt, and rain drips. I reworked a retro whiskey label, which I found on iStock, for a can in Photoshop. I inserted spinach, anchors, and a few inscriptions. Then all I had to do was make a red metal base, insert the label, and “scratch” it a bit for a retro look. The pipe was a nice pattern that looked to me like it was carved from a single piece of wood. The buoys were really easy, I only needed to have good references and they practically made themselves. The same went for the base of damaged foam, plastic, and different colors. The pier was supposed to look old and damaged + the moss created by the high map was added. I attempted to create the cap with a fabric/metal material and I added a little rust. All these textures were made directly in Substance Painter in 4K resolution. The water surface is a classic shader from Blender, which I still use, just changing the noise.
Lighting and Rendering
For outdoor scenes, I use HDRI and just rotate it to the necessary angle, to get the desired light and shadow. I added two more sun lamps (soft orange, soft blue) to make the lighting look like a sunrise.

Final render setup: Cycles, resolution 2700×3200, 1024 samples, ambient occlusion, denoising.
THANKS & ENJOY
PC setup and software: RTX 2070 S, Intel i7-6770K, 16 GB RAM, Blender 2.82, ZBrush, Substance Painter
Many thanks to my good friends Tomo and Yoshi.
About the Author
 Tomáš Velický, Freelance 3D artist, Slovakia


Thanks for sharing your story. Cool idea and funny result :)