
Create your own 3D-printable face mask using the free My Face Mask Blender add-on

Since the outbreak of the corona / COVID-19 virus, there’s a worldwide need for fitting face masks. Alessandro Zomparelli, the Italian developer of the Tissue addon that comes with Blender, has developed a new free addon called My Face Mask. To realize the project, Alessandro has worked together with the Italian WASP 3D printer manufacturer.
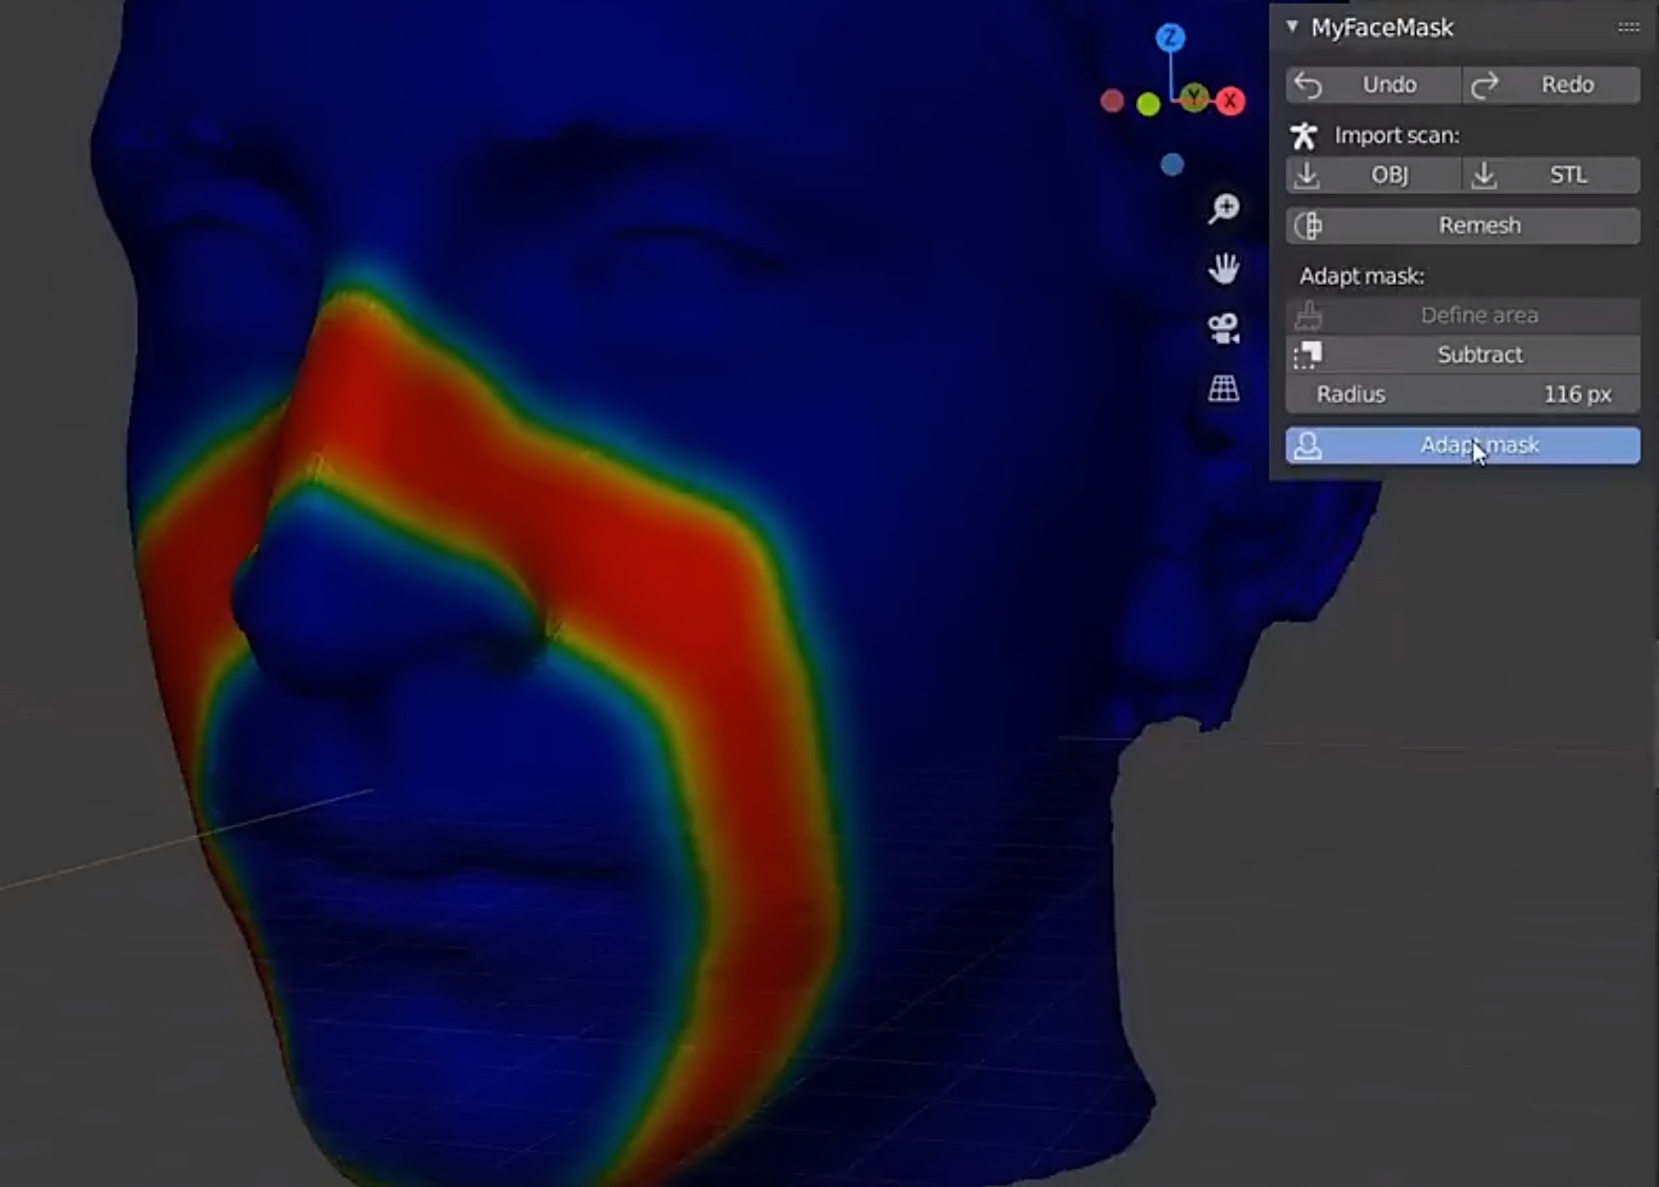
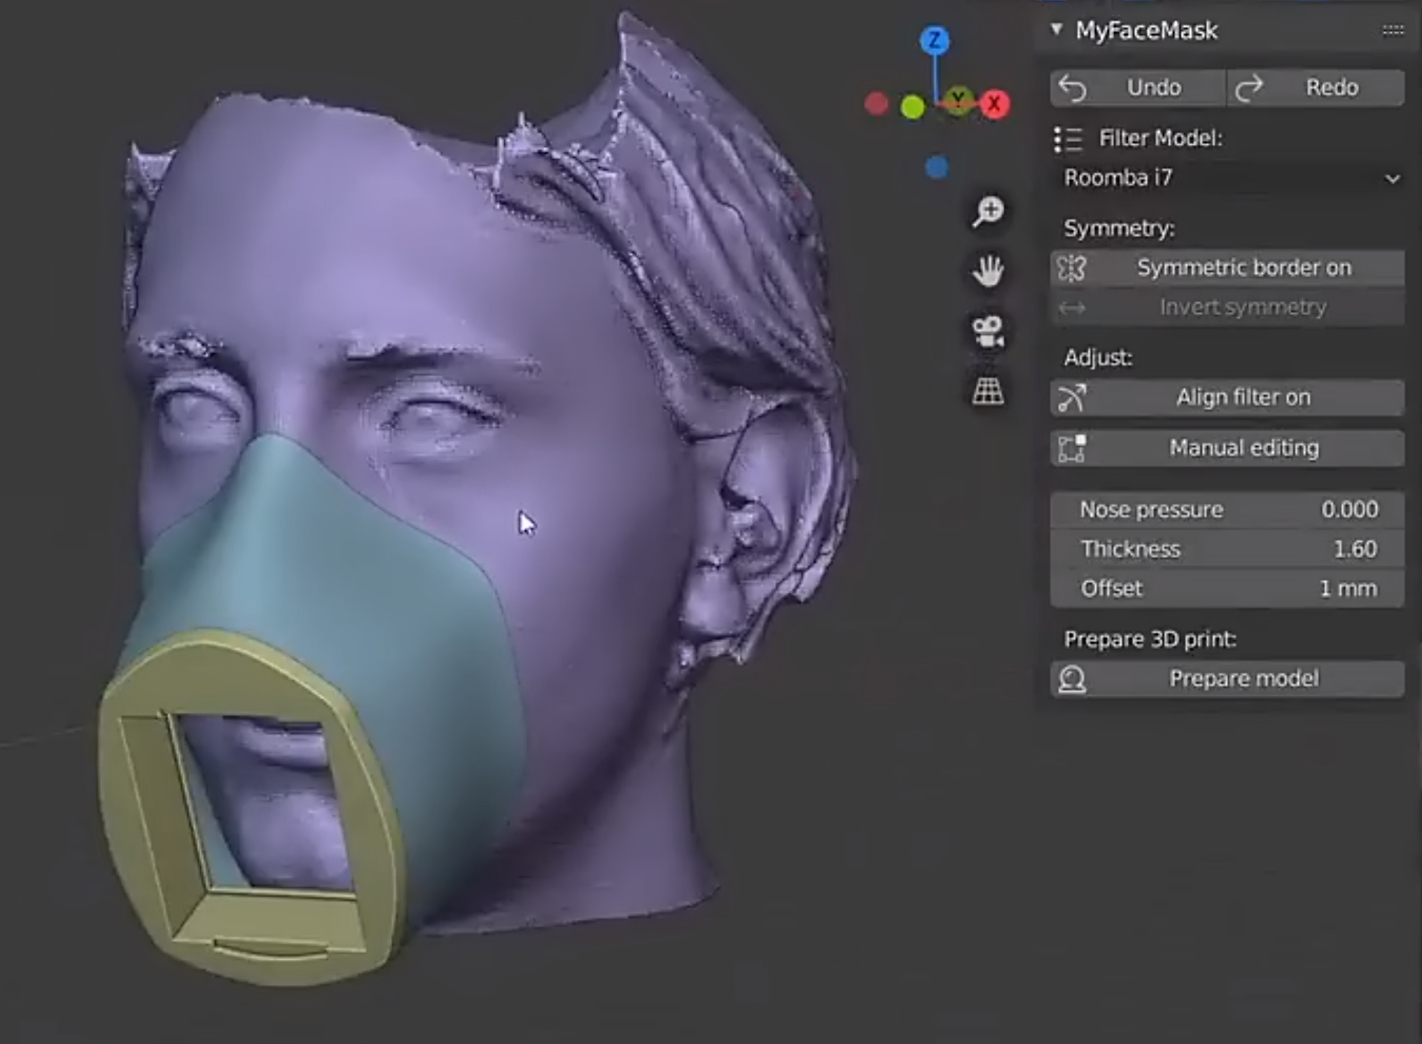
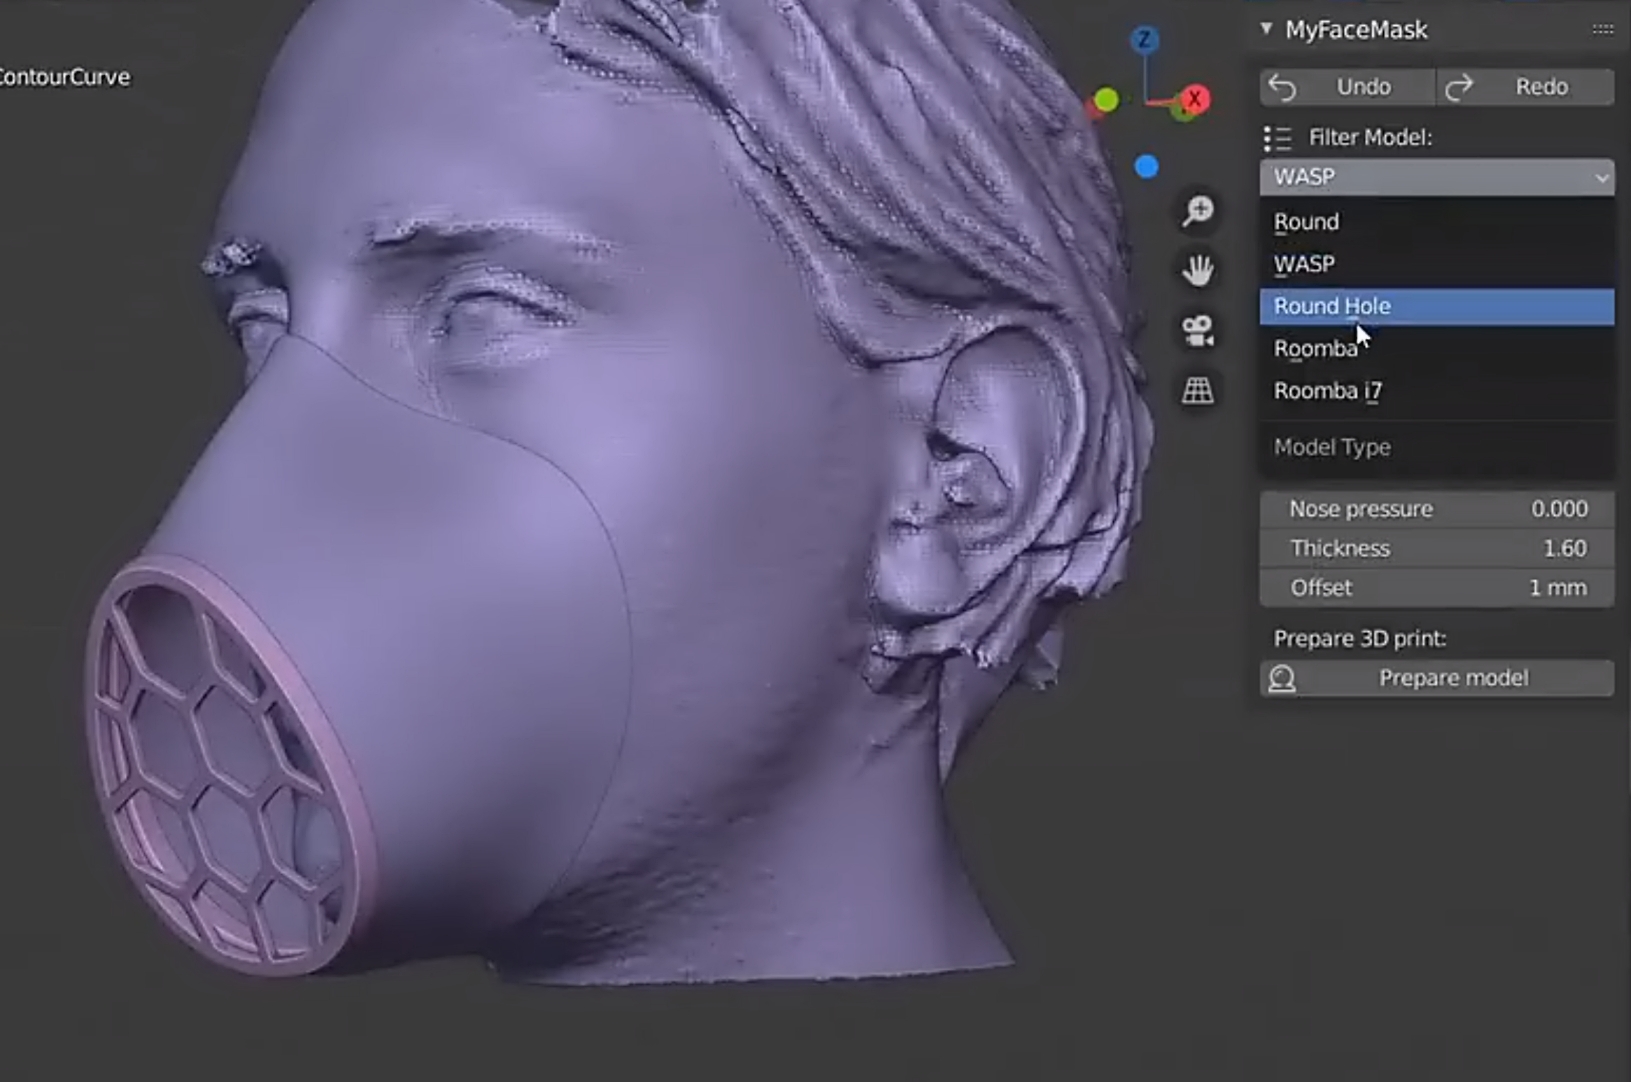
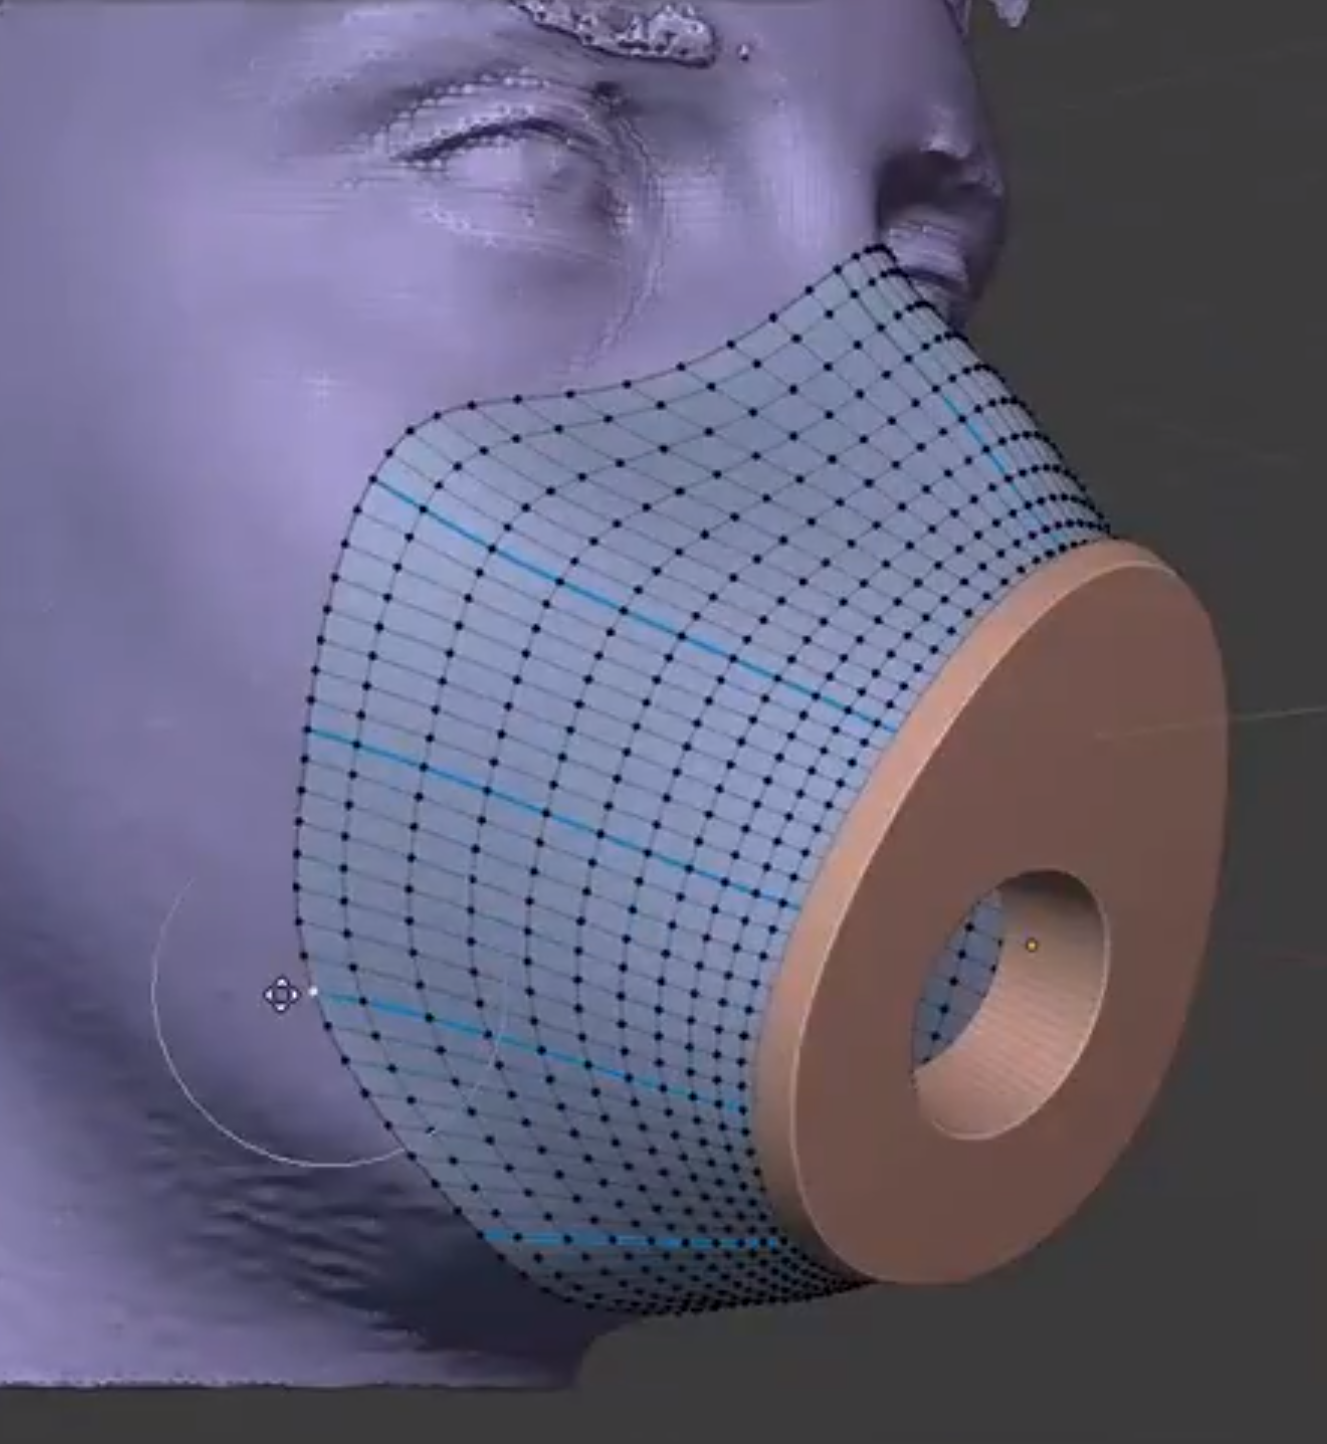
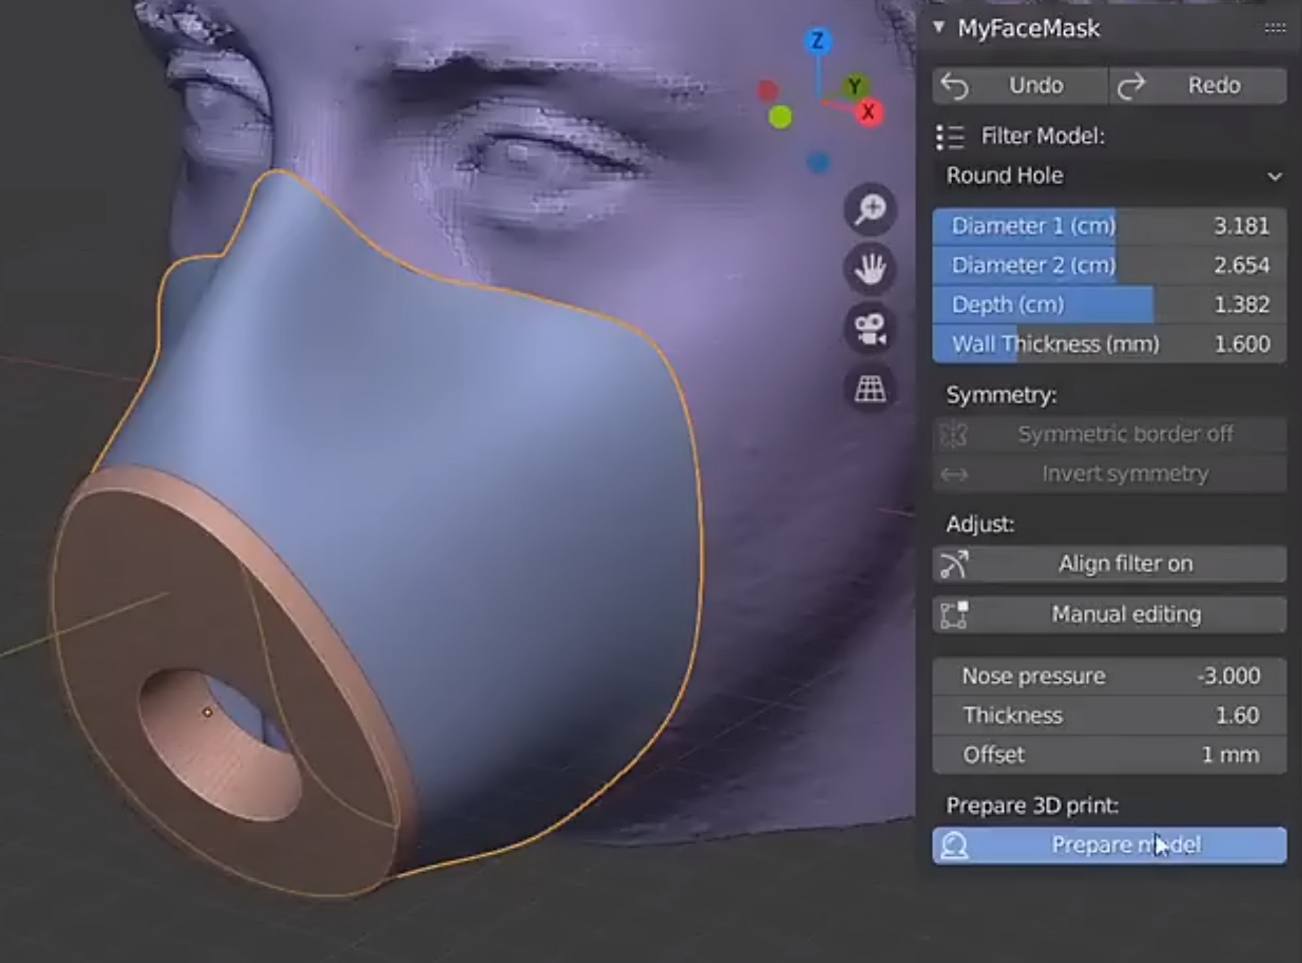
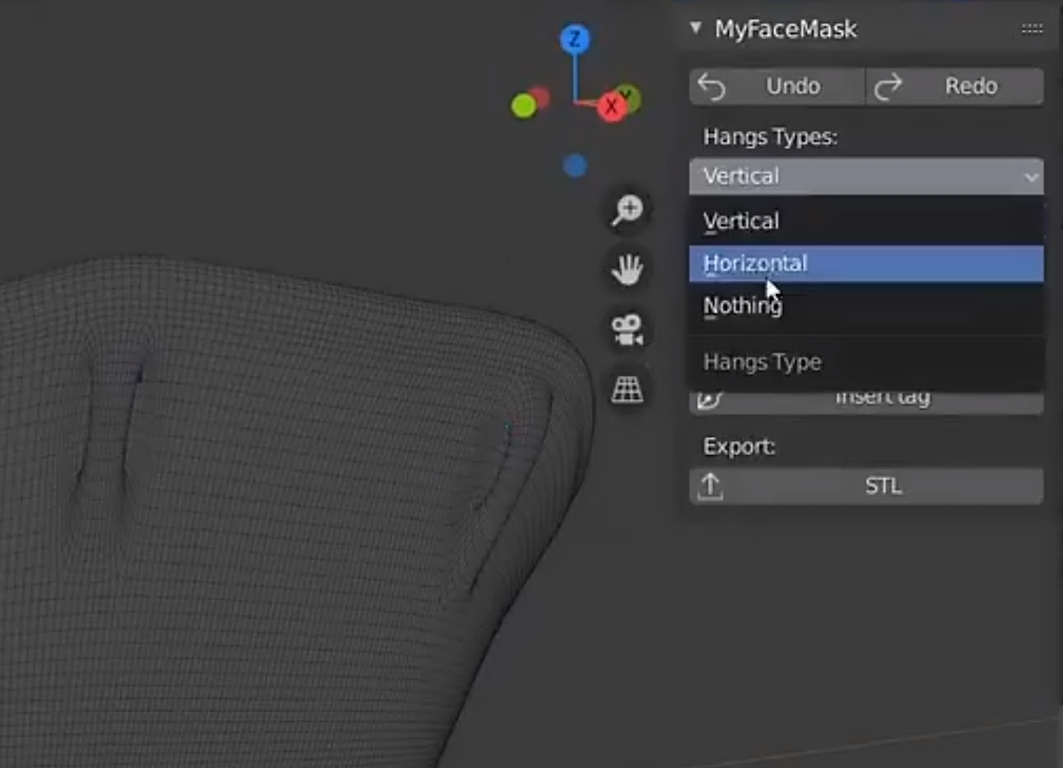
My Face Mask is a Blender addon that assists you in generating a fitting custom face mask. You can choose from a number of presets for several parts of the face mask, adjust multiple parameters like thickness of parts, perform manual fine-tuning, and ultimately export the result as a 3D model that’s ready for 3D printing.
To start, you’ll need a (rough) scan of the face for which the mask will be generated. This can be realized using any modern smartphone. Check the links at the bottom of the article for dedicated Google searches to get you going, and for links to the My Face Mask addon download page and instructions.
Below you can find a quick My Face Mask walkthrough. Please note that the screenshots show the development version of My Face Mask, so some options might have changed in newer versions. Check the video after the screenshots for updated instructions.
Please check this video of a newer version of My Face Mask, for possible minor updates in workflow:
Once the 3D model file is exported, you’ll need (access to) a 3D printer to materialize the 3D model into an actual face mask. Below you can find a number of links to get you started.
Very important footnotes:
- An air filter needs to be added to the 3D-printed mask for it to be become effective.
- A 3D-printed face mask is not a comparably safe substitute for an industrially manufactured face mask, such as an N95 Respirator.
Stay safe!
Links
- My Face Mask addon project page with instructions
- My Face Mask free addon download at Github
- Twitter of My Face Mask developer Alessandro Zomparelli, where he posts updates
- WASP 3D printers, made in Italy
- Google search for mobile 3D scanning apps
- Google search for local 3D print services
- Google search for affordable 3D printers
- Google search for face mask air filters
- Info about the CDC-approved N95 Respirator

There should be a warning that 3D printed masks are not advisable and should never be a substitute of the N95 masks. Please don’t mislead people with lack of information!
Read this thread: https://twitter.com/RealSexyCyborg/status/1242285063095664640
Or this document about a NIH approved mask: https://d2z471btmx6vaz.cloudfront.net/sites/default/files/models/supplemental_documentation/Stopgap%20Face%20Mask%20%28SFM%29%20-%20Instructions%20for%20Use_Rev%204.pdf
Hi Cris,
Thanks. I will add a disclaimer.
It is of course not our intention to mislead anyone, just to help.
Maybe also emphasize that you need to add the air-filter in order for the mask to provide any protection.
Good point, thanks!
Awesome Cris !
Could you tell me which app you used to scan the face please ?
Thank you.
If you have an Xbox Kinect camera I would recommend Skanect. Unfortunately I haven’t found a good app for Android smartphones yet.
Thank you a lot! I´ve tryed to build a mask with an other filter model but I can´t find the point “Filter Model”. Can you please give me a hint?