
Behind the Scenes: Ikaruga Flight
Background
Hello, my name is Wing Wai Sze, I am from New England, US, and I am very excited to be invited here to share my work today!
I have been using Blender 3D for over 6 years and it has come a long way since I started. 3D has always been a passion of mine. I like the idea of creating a world of many possibilities and bringing my wildest imagination to life. It’s always a journey whenever I start a new project.
Inspiration
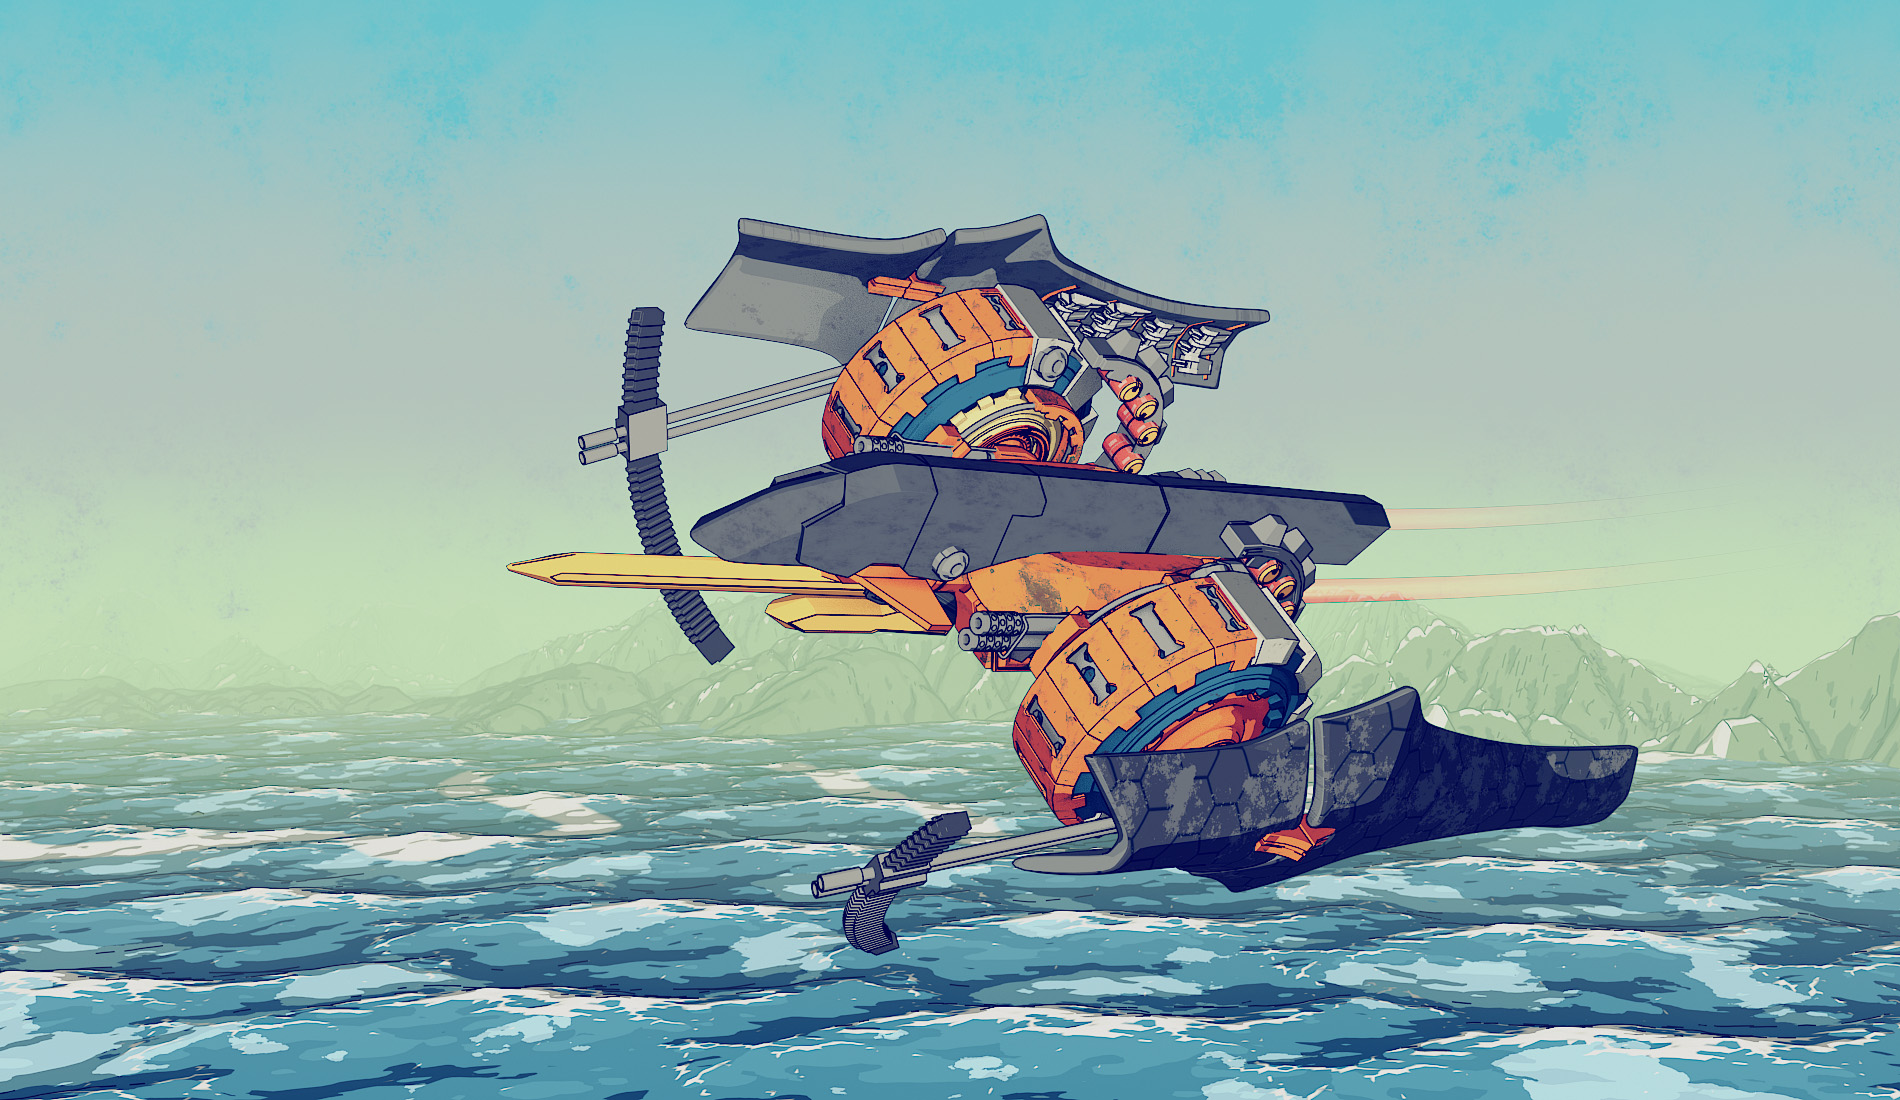
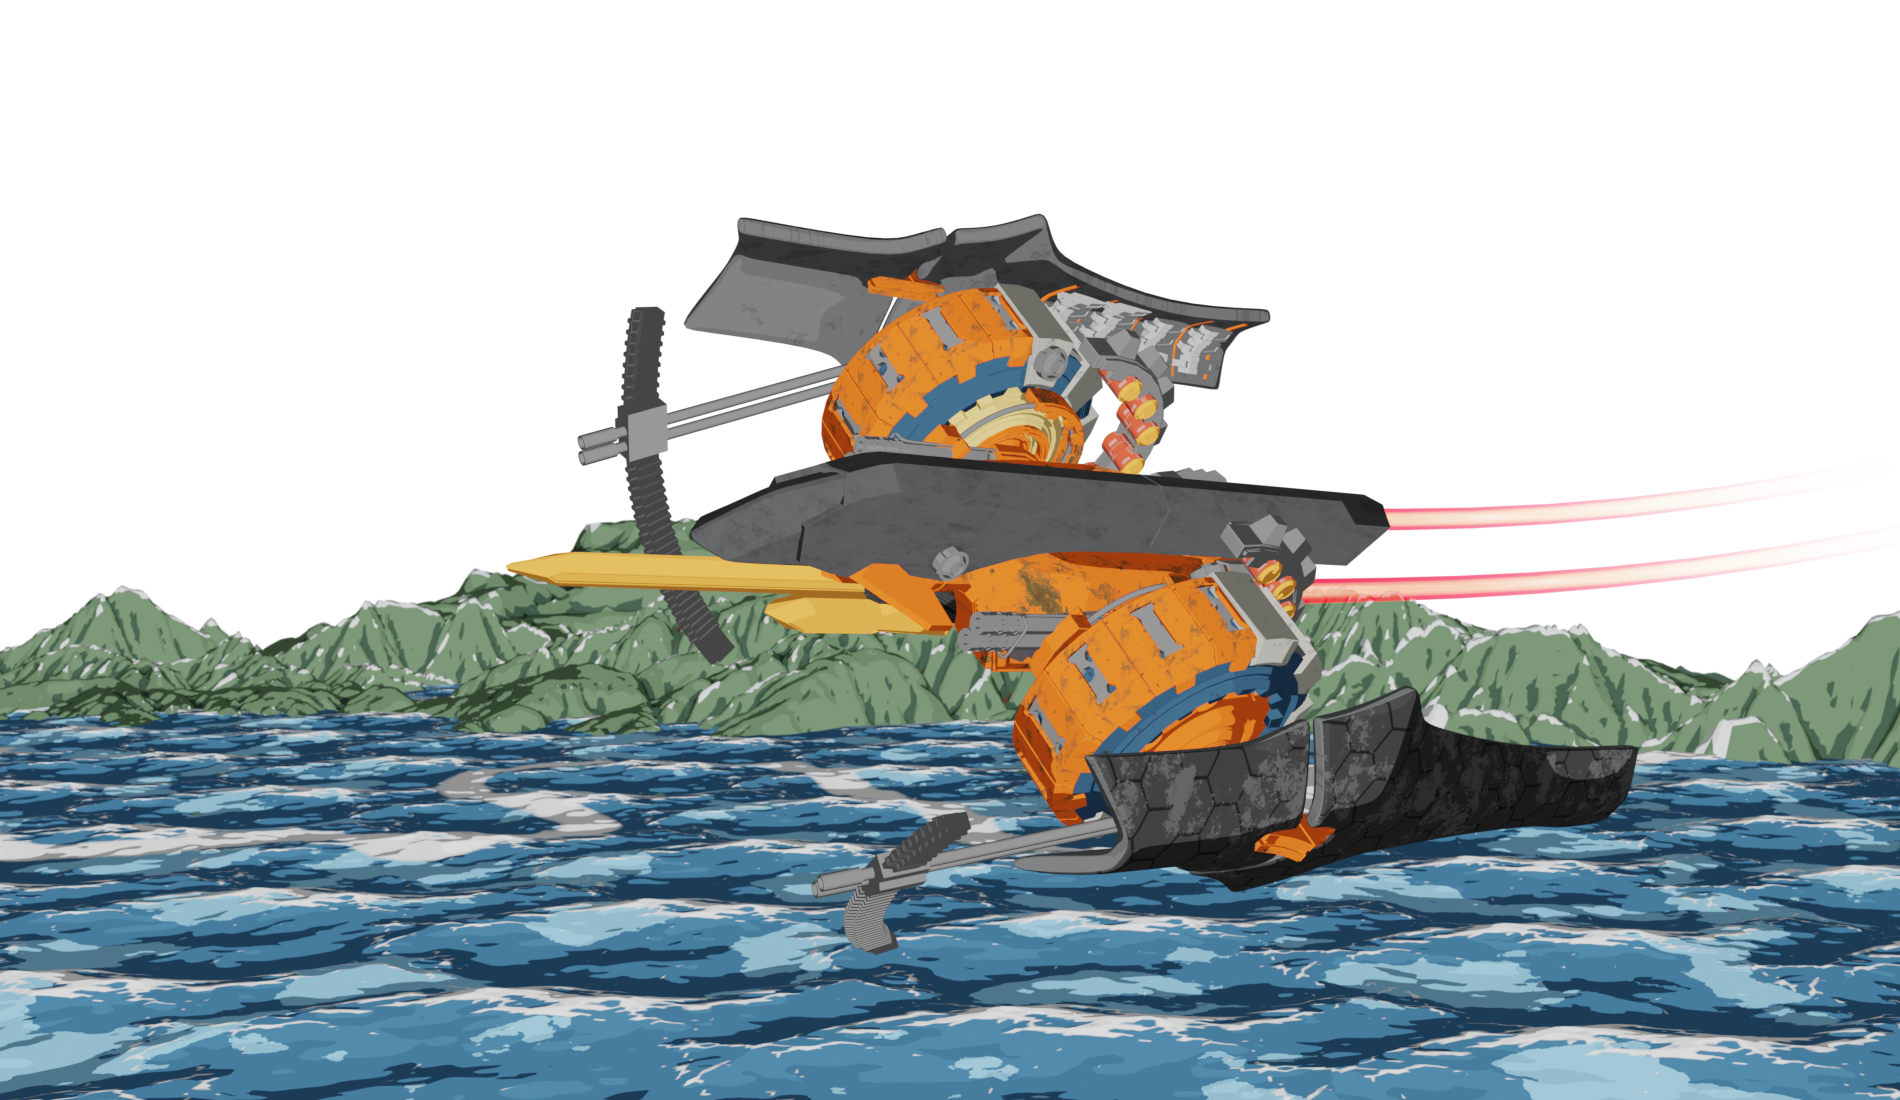
The inspiration for this piece came from the nostalgia of the old top-down bullet hell arcade games such as Radiant, but the overall look and design for the plane was based on another game called Ikaruga. I think its aesthetic fits in well with the comic book look.
The Process
The Material
Instead of planning out the scene and angle of the camera, I start out by making the materials first; they are one of the most important elements of the project and will dictate the outcome. The custom shader consists of three things: the base color, shadow, and a mid-tone in between the shadowed and lit areas. High contrast between the 3 color gradients gives that NPR cell shading look.
Additional textures are used with the base color to give the elements in the scene, such as the ocean and part of armor plate, more interesting surfaces.

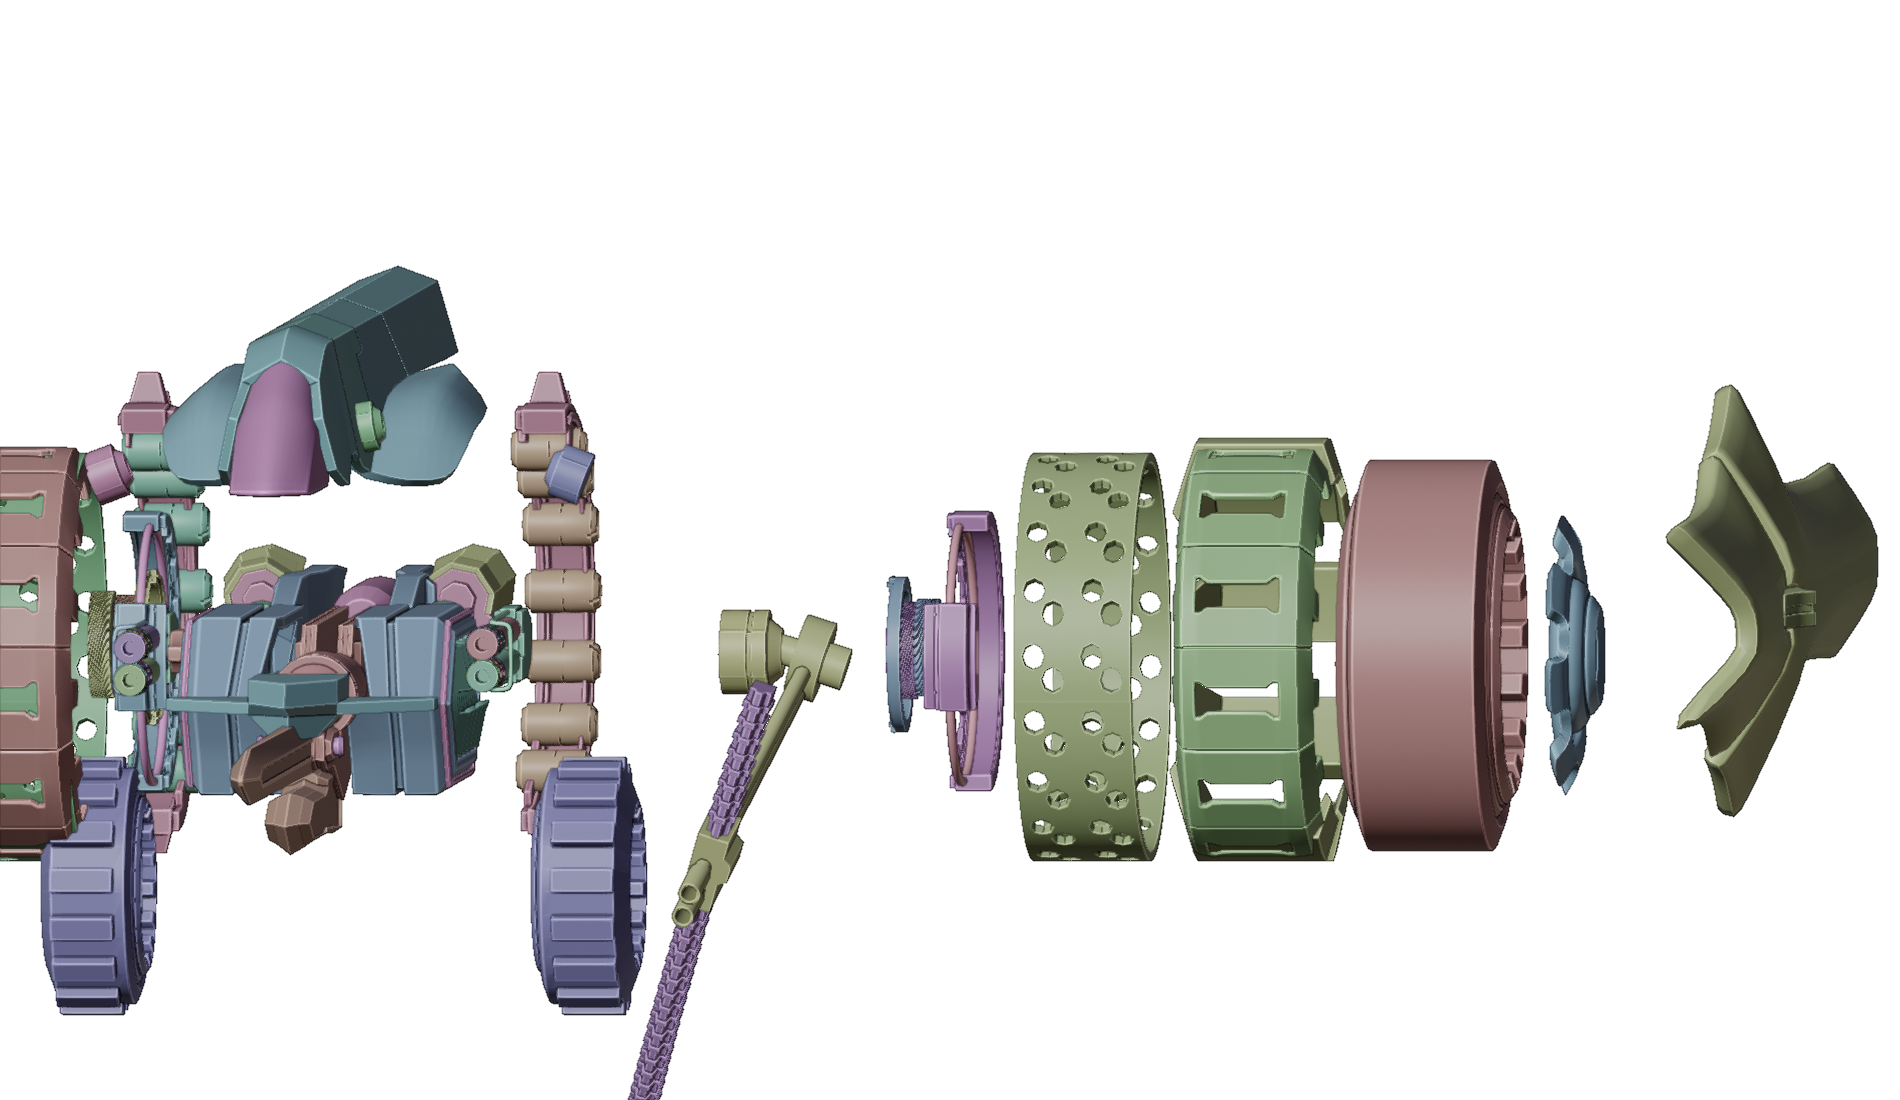
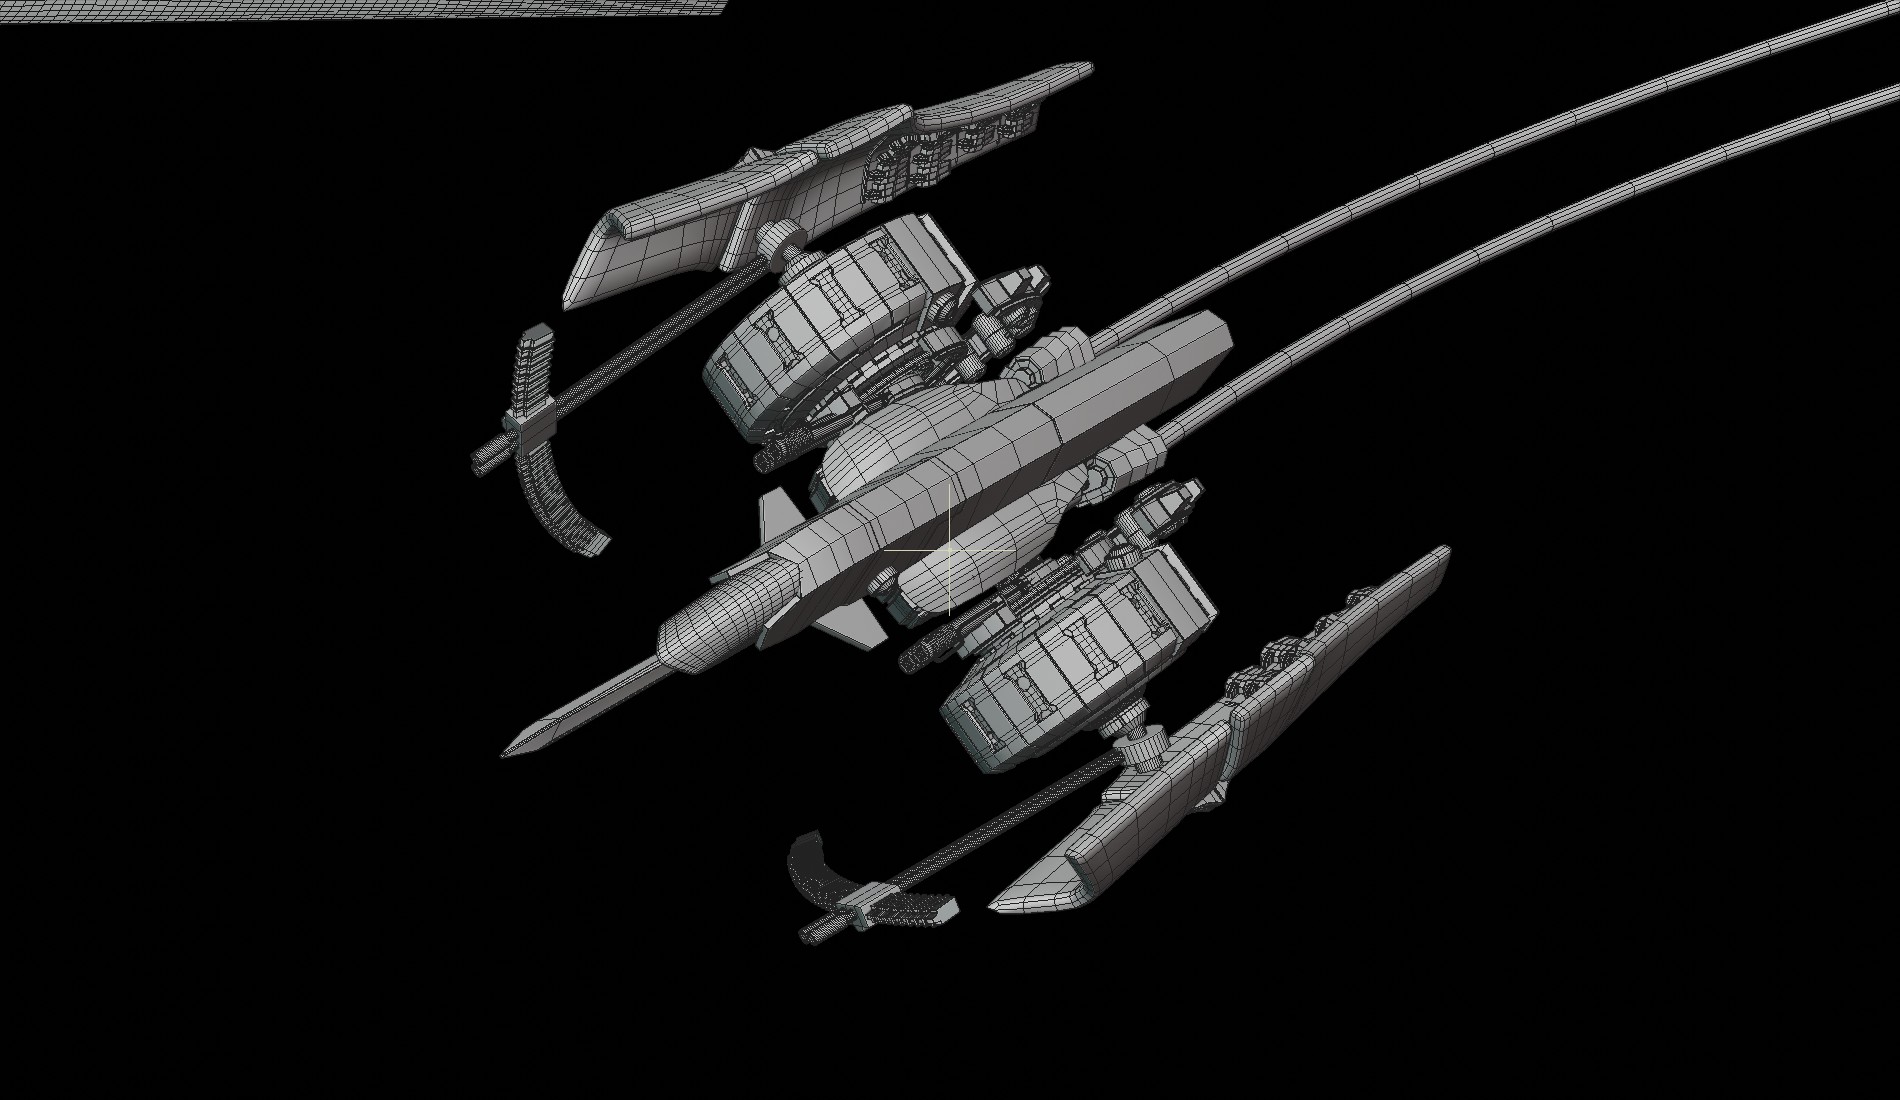
Modeling
Modeling, in general, is pretty easy. Objects are mostly simple shapes, with array modifiers layered together to create a more complex and intricate machine. I also combined bevels and booleans to create complex shapes with ease.
The Background Scene
The background consists only of mountains and ocean; open space and epic vista was the feel that I was going for.
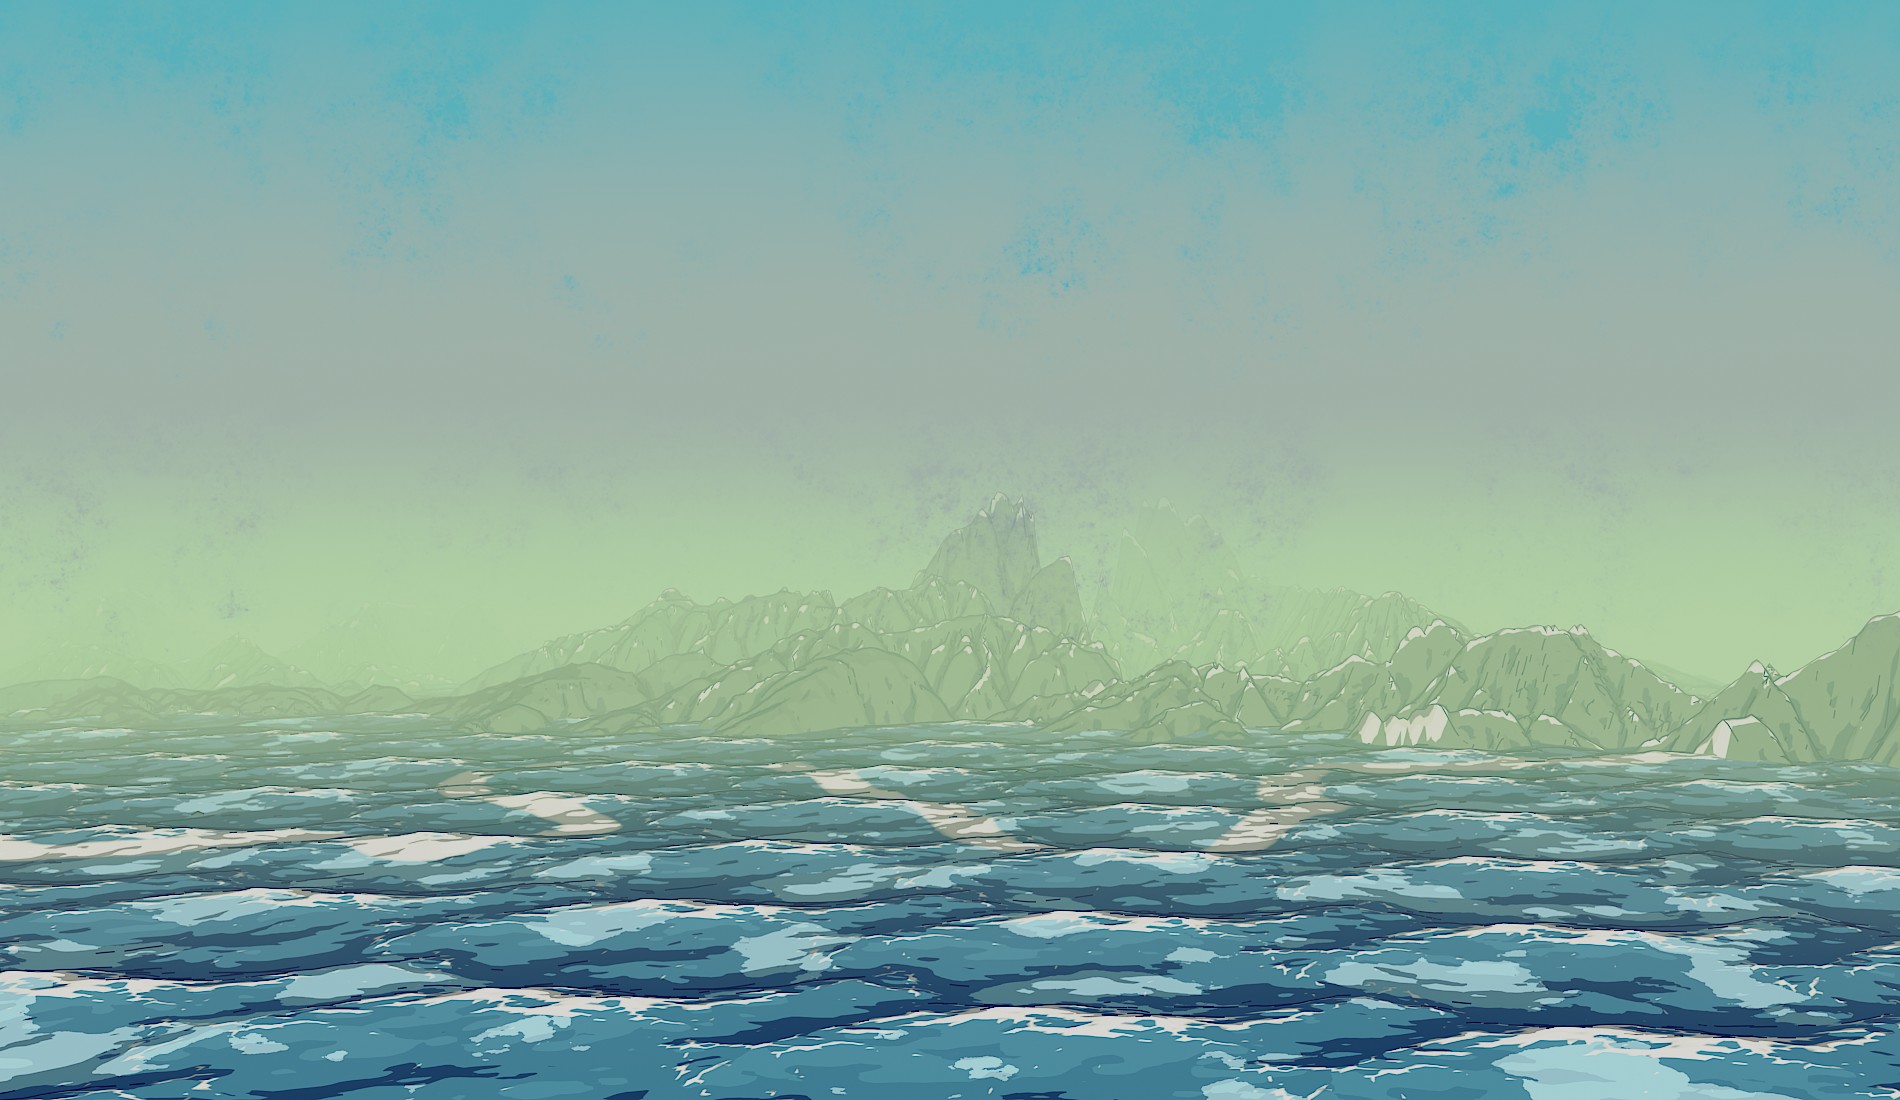
Mountain: The mountain is a displacement map with subdivision around level 5-6 to bring out all the necessary curvature and details. In the distance, there are around 3 of those features overlaying each other to create a complex range of landmass.

Ocean: Making the ocean is much easier; I use Blender’s built-in ocean modifier and play around with the settings. The important part is to have waves big enough to capture the interesting shading from the material.
Before post-production:
Post-Production and Freestyle
The final step is post-production and adding in that final stroke!
I turn on the freestyle option in Render properties then go to layer properties. Not much alteration to the default setting here except for setting the edge to sketchy type.
The most important element in the composition setup is the mist—it gives the overall image a sense of depth. I composite the mist information with a gradient and grunge texture, then feed it through a color ramp node for some interesting color gradation.

Final Render

Thanks again for having me here and have a great day!
About the Author
 Wing Wai Sze, 3D Artist, likes to make sci-fi and landscape art.


