Behind the Scenes: Desert Droid
About
Hello! I’m Julien Deville, aka Yoji, I live in France. I’m a 3D generalist artist and a certified Blender trainer. I started to learn Blender by myself 9 years ago with books and video tutorials online. Now I’m glad to give back what the Blender community gave to me. I work as a trainer for 50 percent of my time. I teach at local companies that want to use Blender and do personal sessions for artists or professionals that want to evolve in their practice with this incredible software.
You can have a look at my work on ArtStation and follow my tutorials on YouTube.
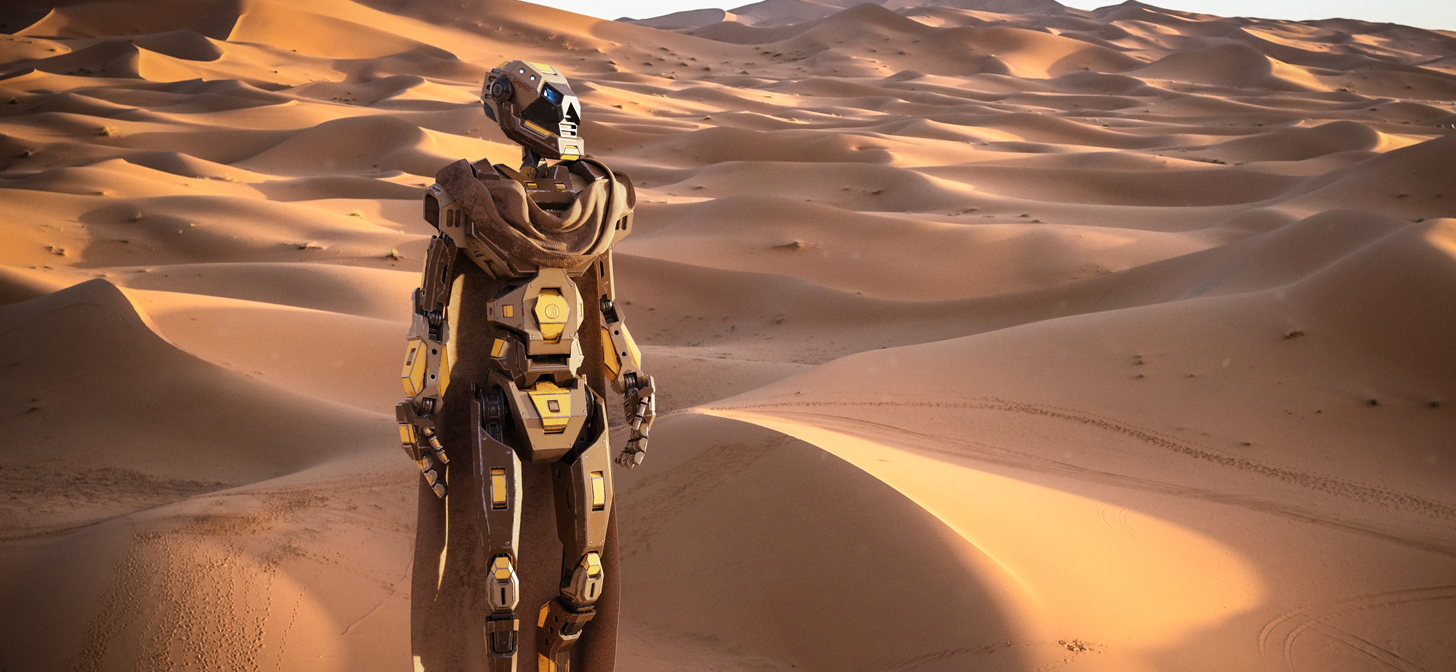
Desert Droid
Recently I did a few experiments for a soon-to-be-released training about sci-fi hard surface style creation. One of these experiments was the desert droid. My goal on this one was to see if it was possible to use Blender tools without extra paid add-ons to create a believable scene.
Modeling
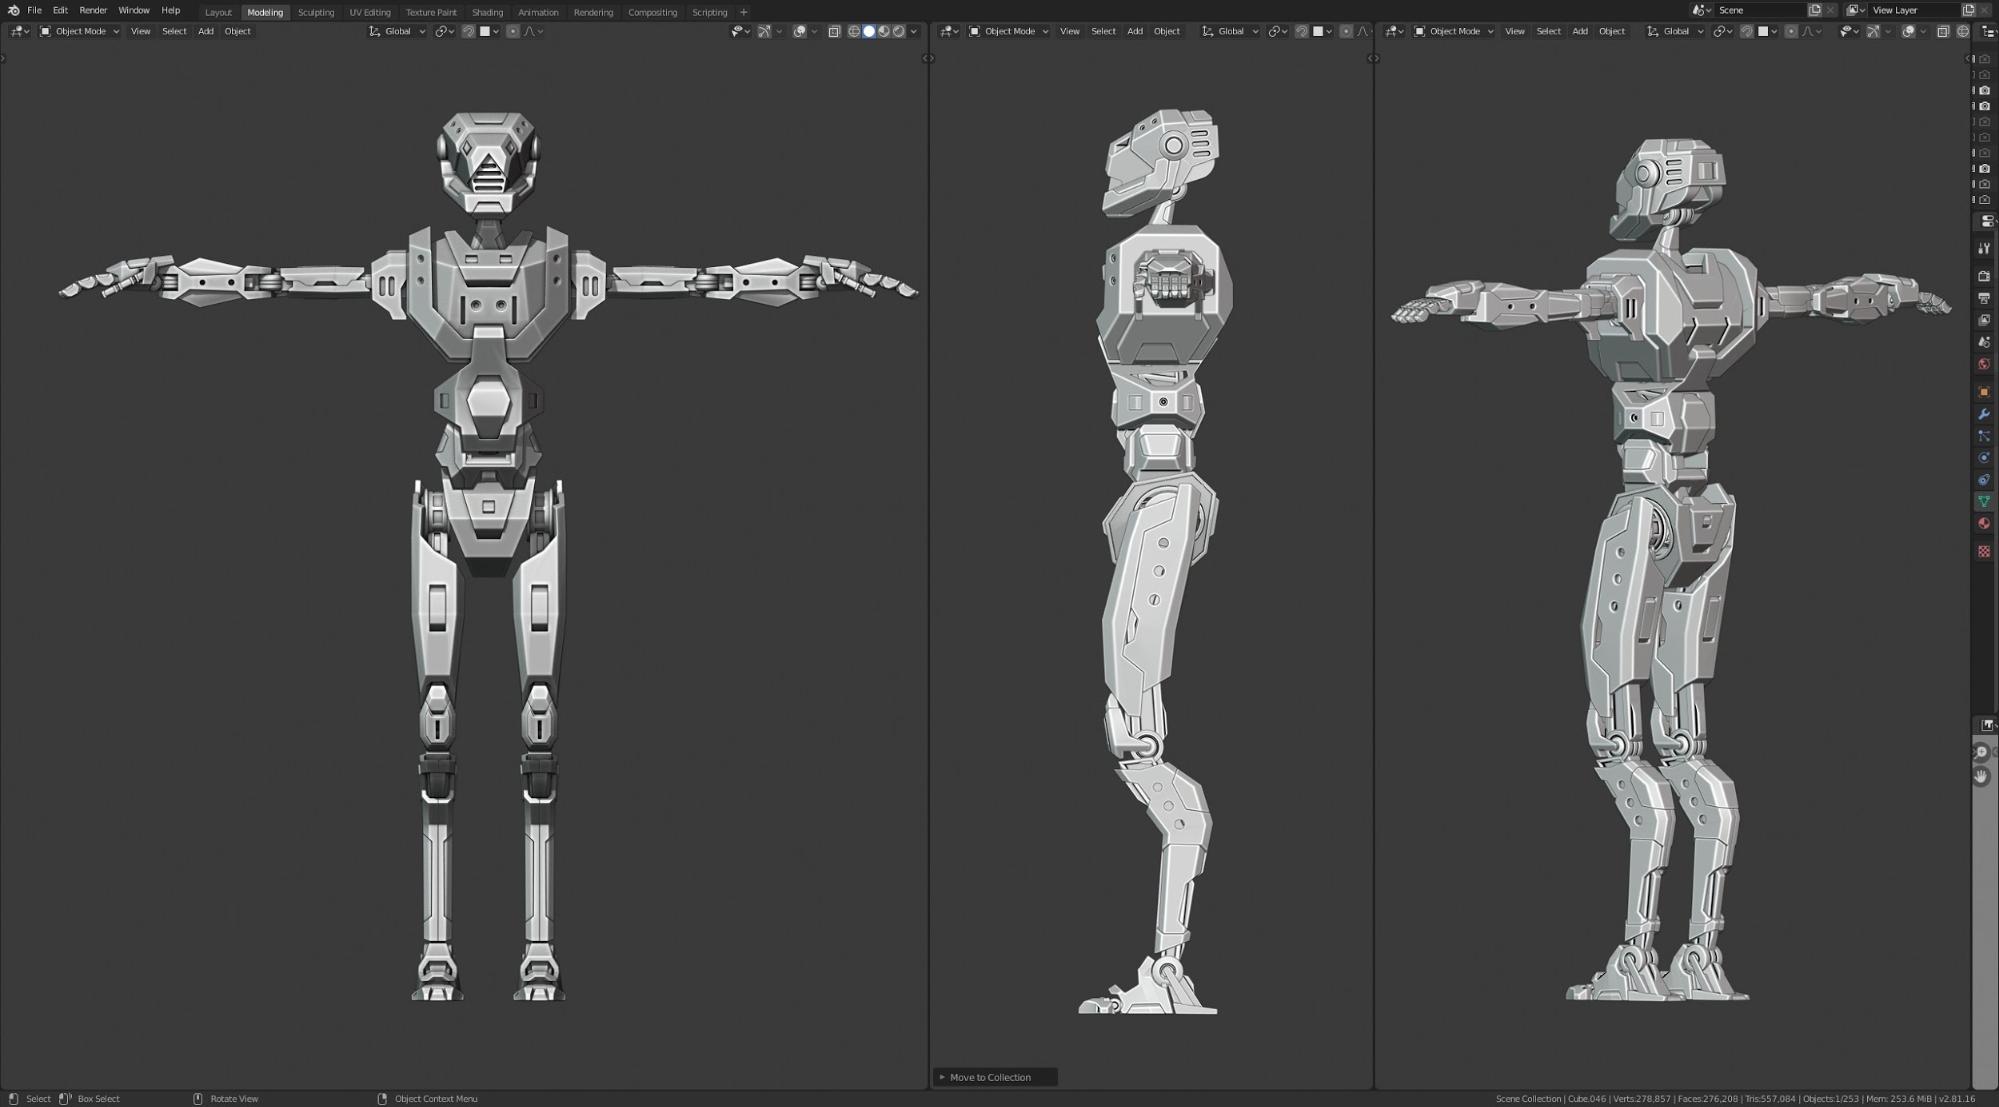
So here is the process. First of all, I modeled a skeleton structure with human proportions with classic modeling techniques. The goal here was to keep the parts thin and robust enough to be able to take the armor.
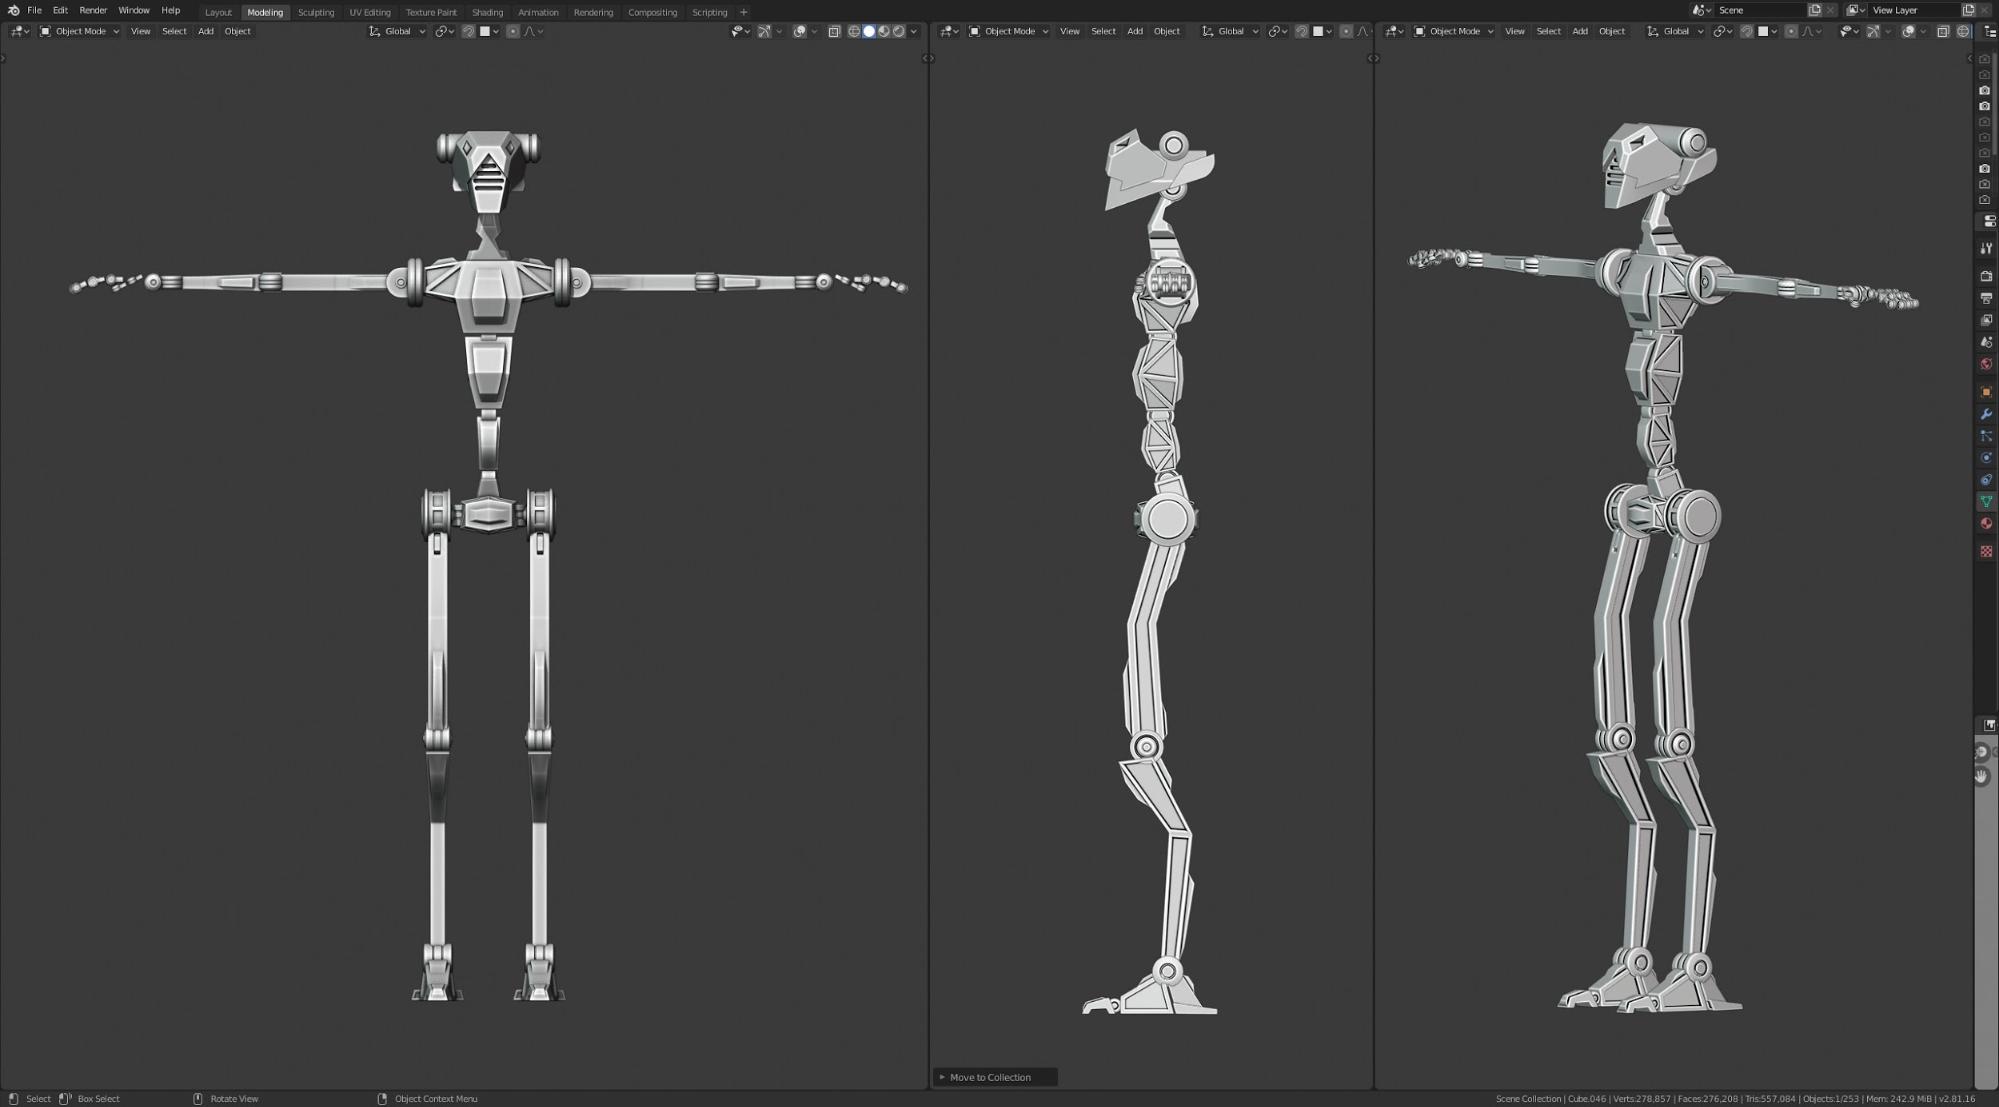
Then I built the armor of the droid by using carver and boolean techniques.
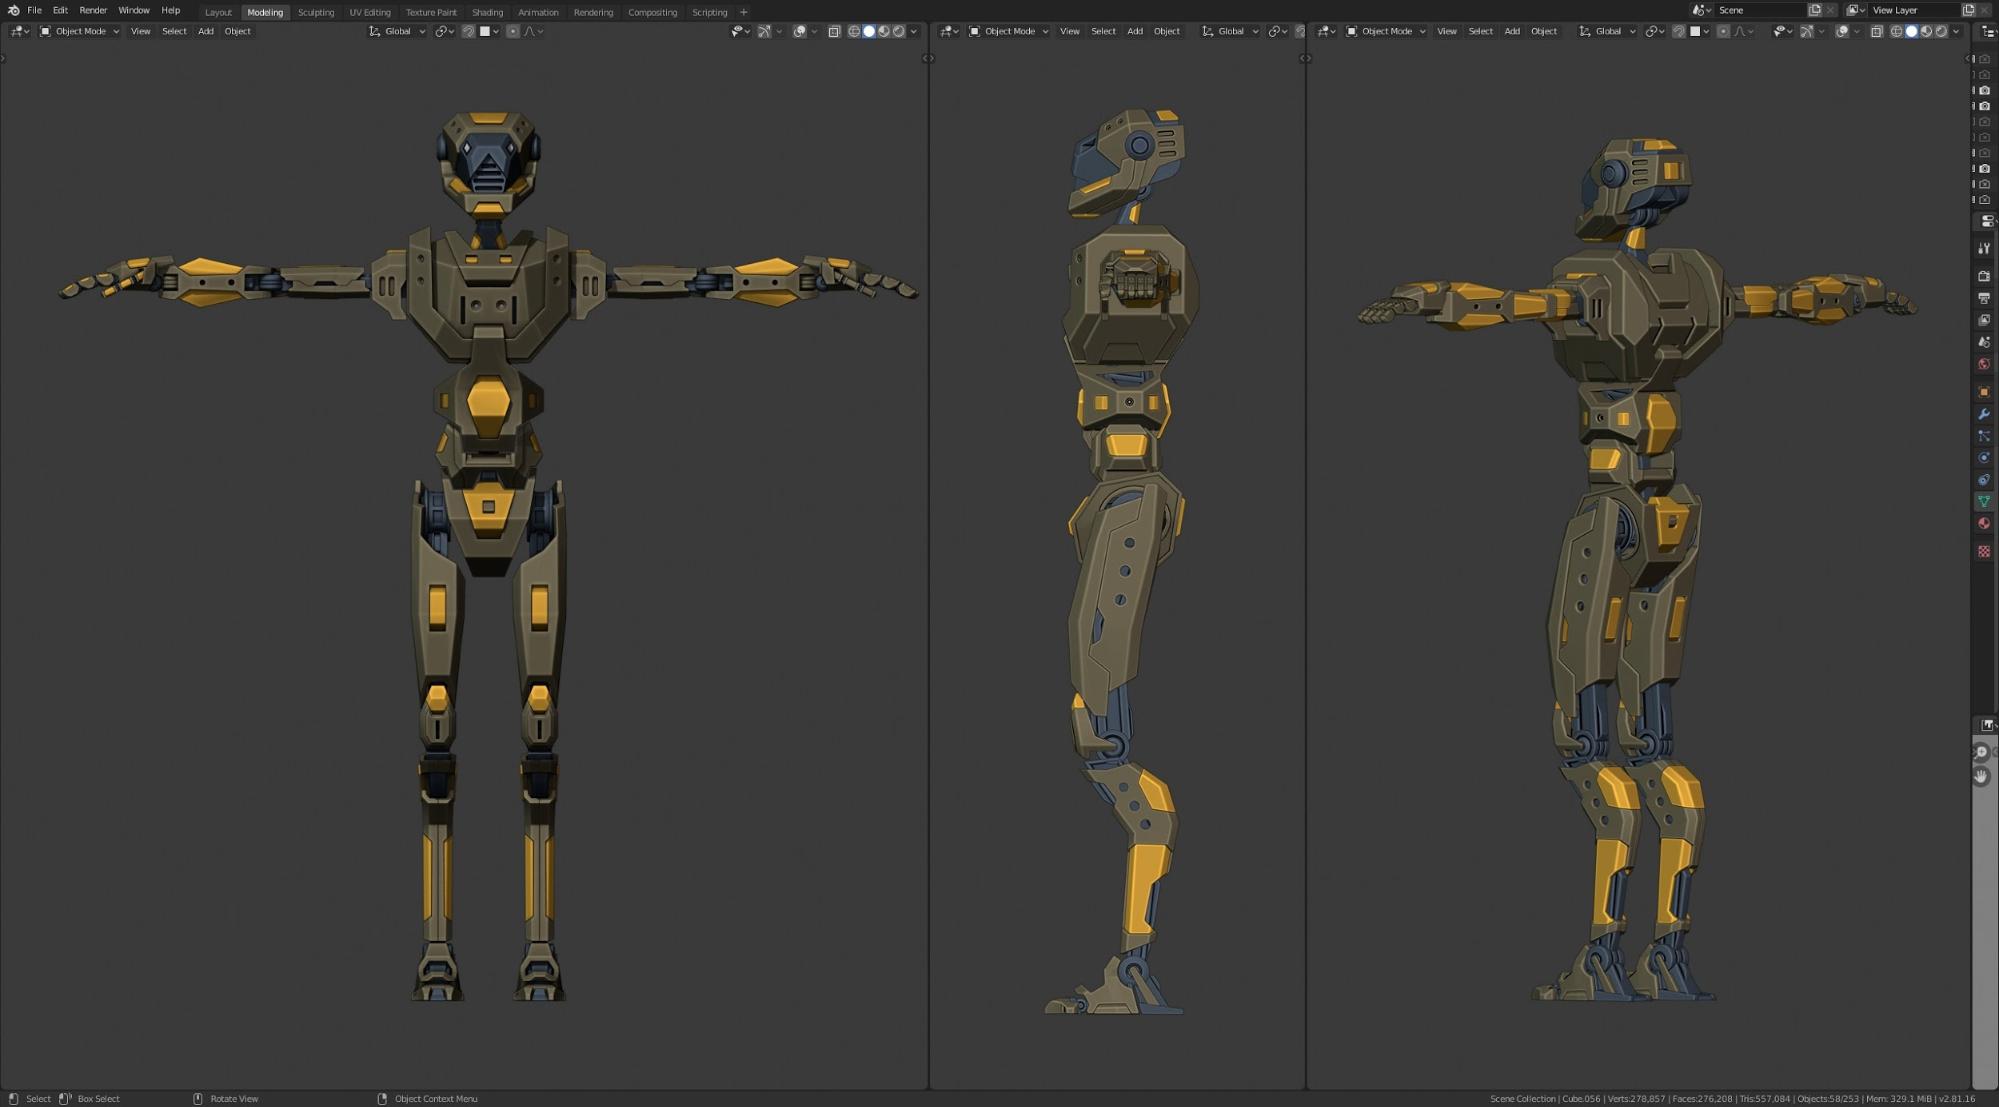
Basic Shaders
I added shaders and assigned them to objects. This step was really important to separate materials before exporting to Substance Painter; it makes the process a lot easier.
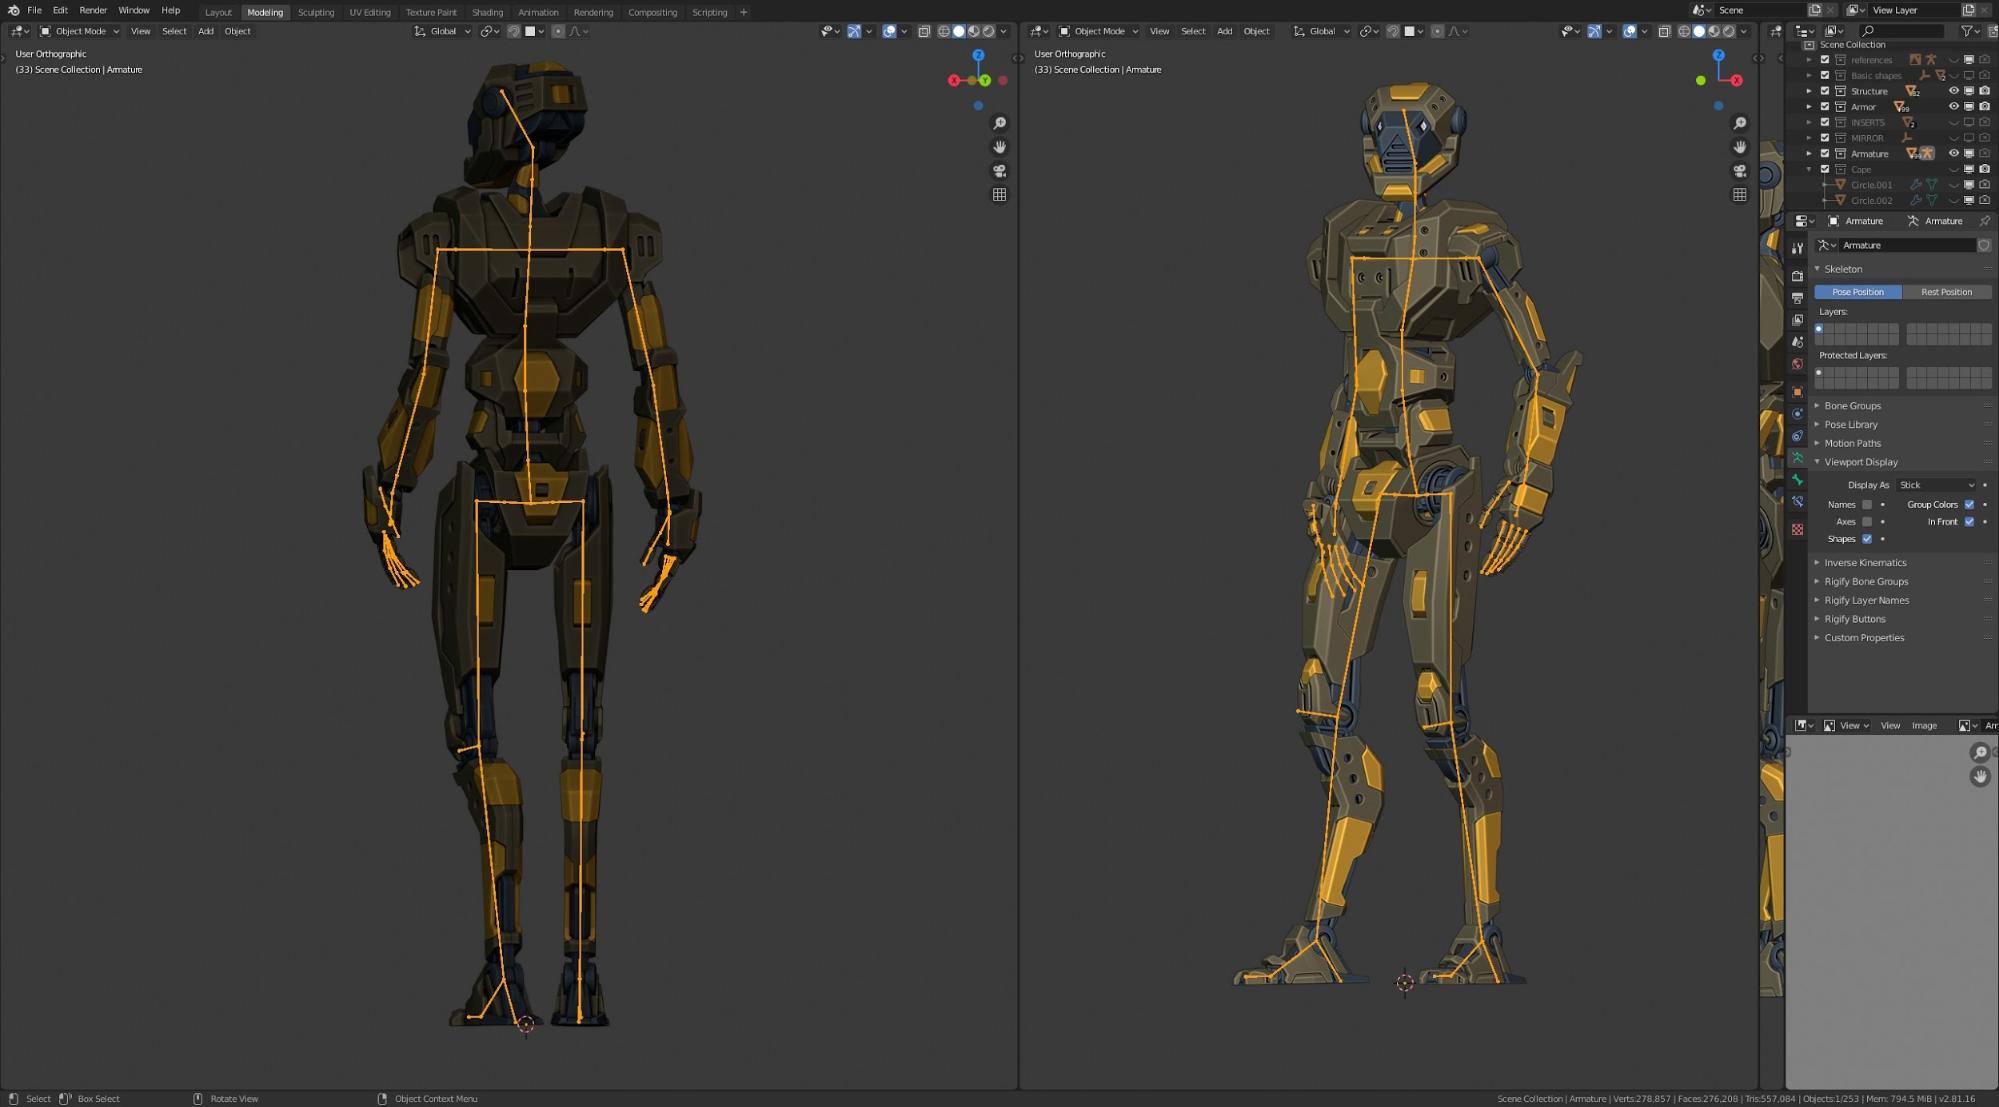
Rigging
I created an armature that fit the joints perfectly—the snap menu with shift+S is very useful at this stage!

And I gave the droid a nice pose.
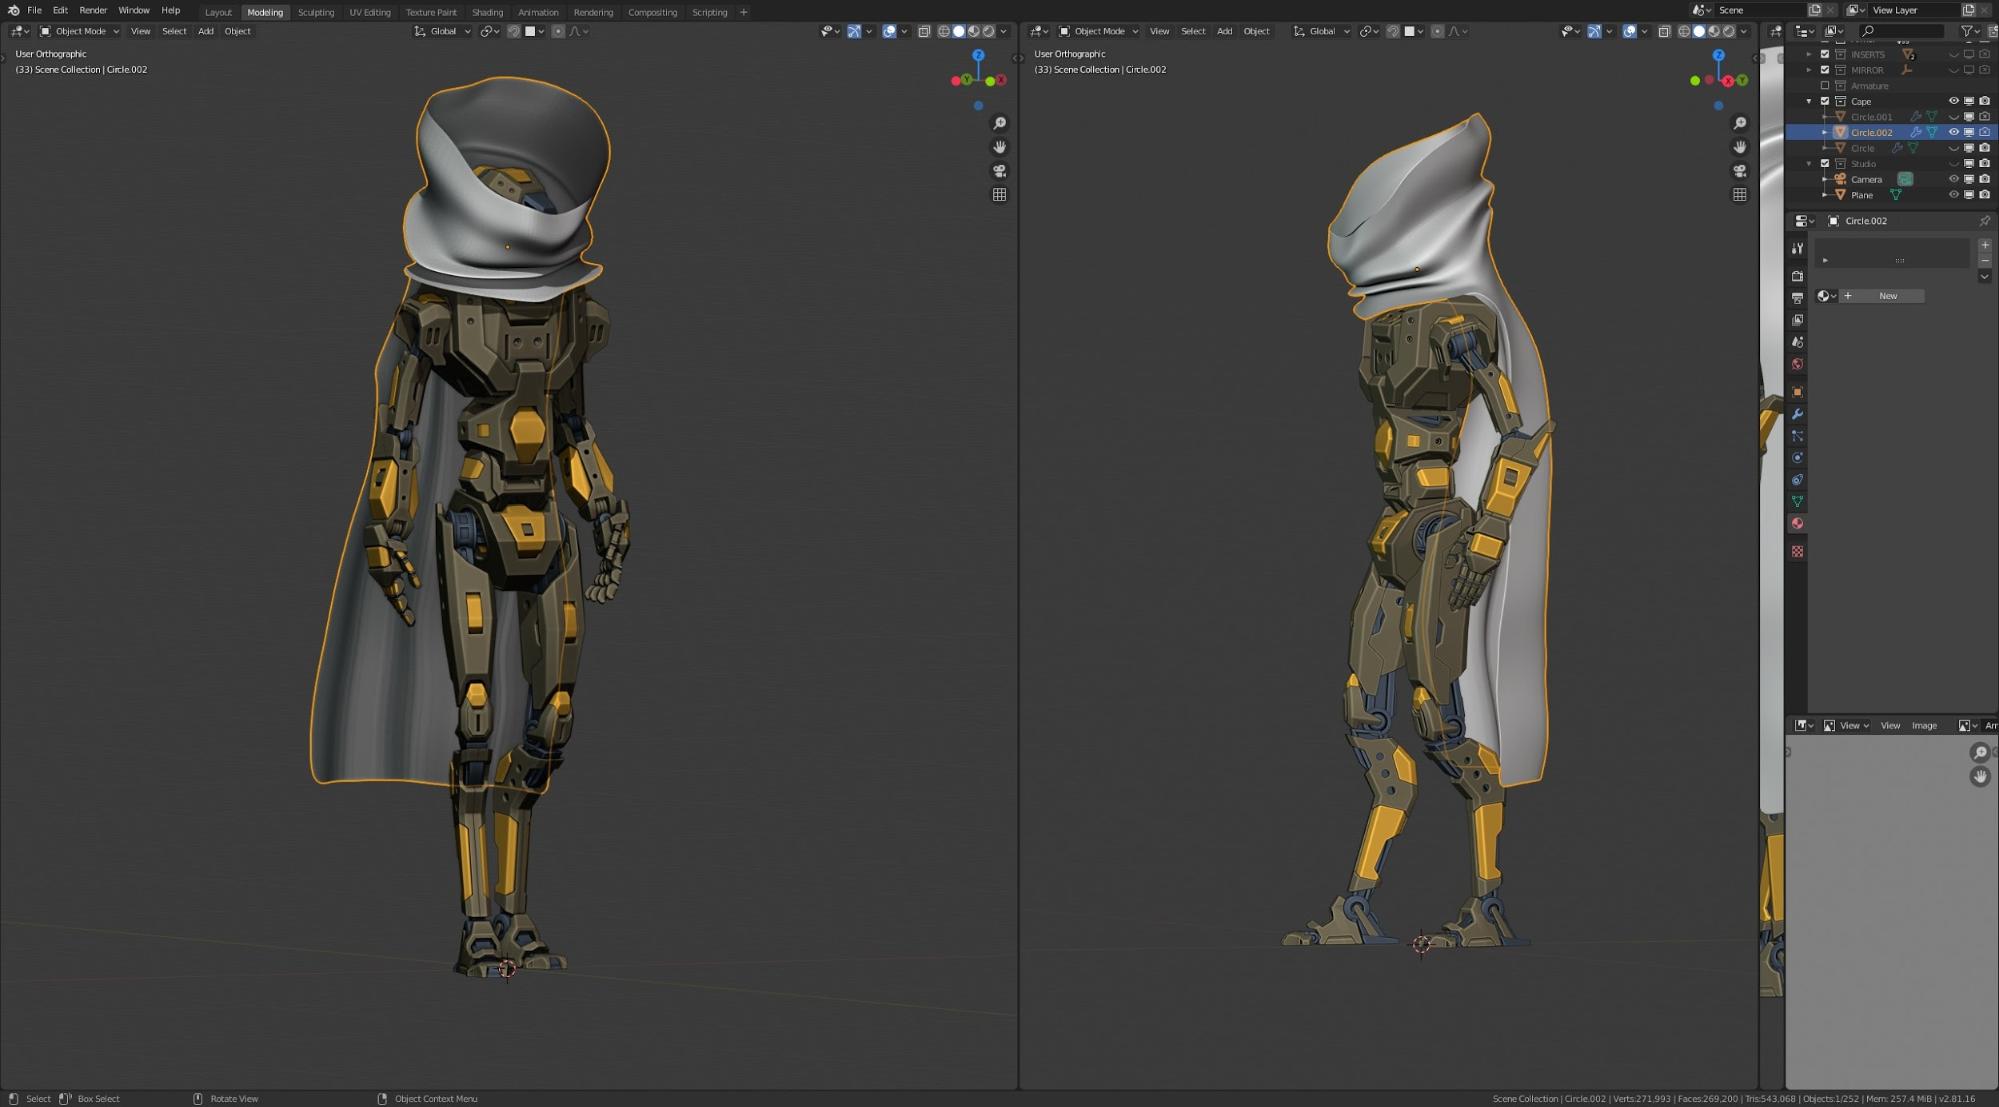
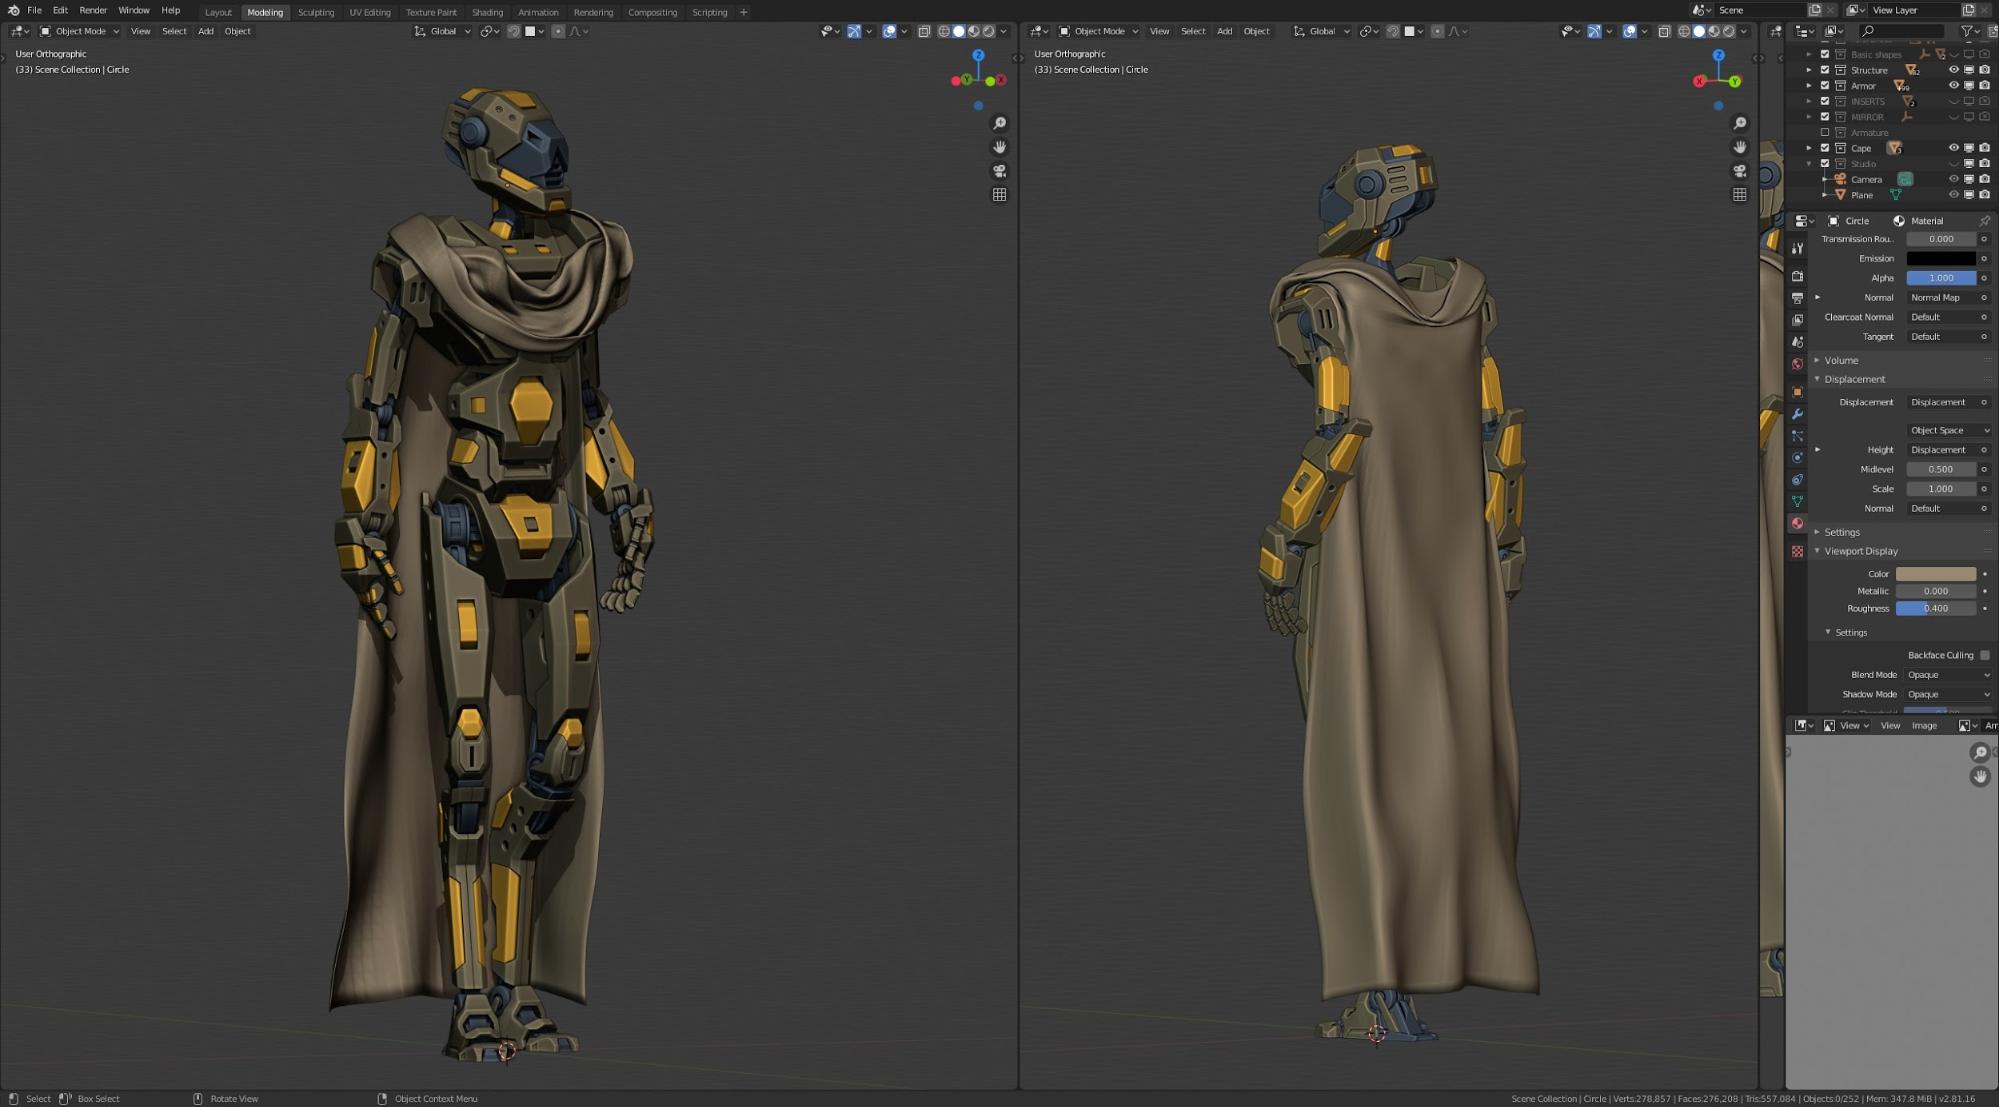
Cloth Simulation
When the final pose was ready, I made a cloth simulation to create the mantle.
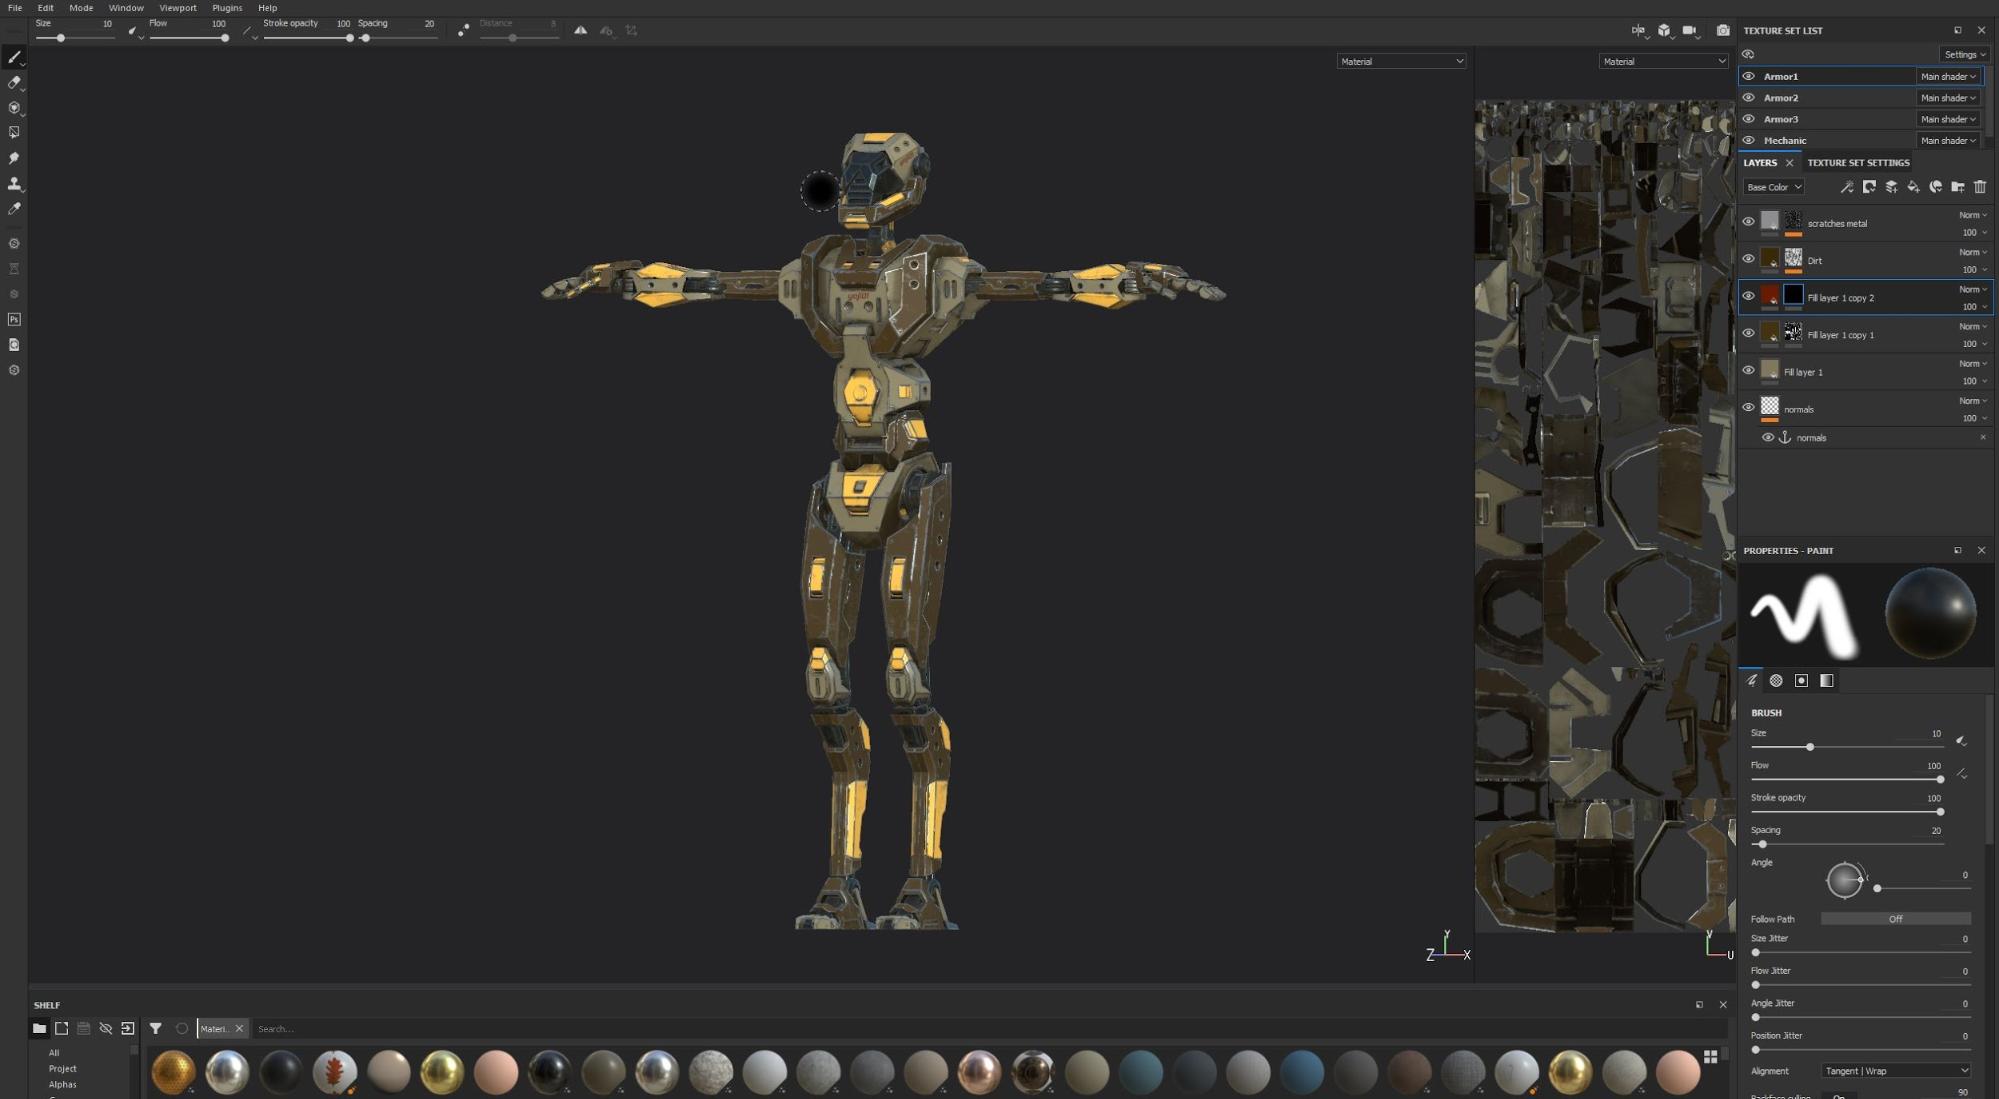
Texturing
I exported and edited the materials in Substance Painter to add details. This software really does miracles for this kind of hard surface project.
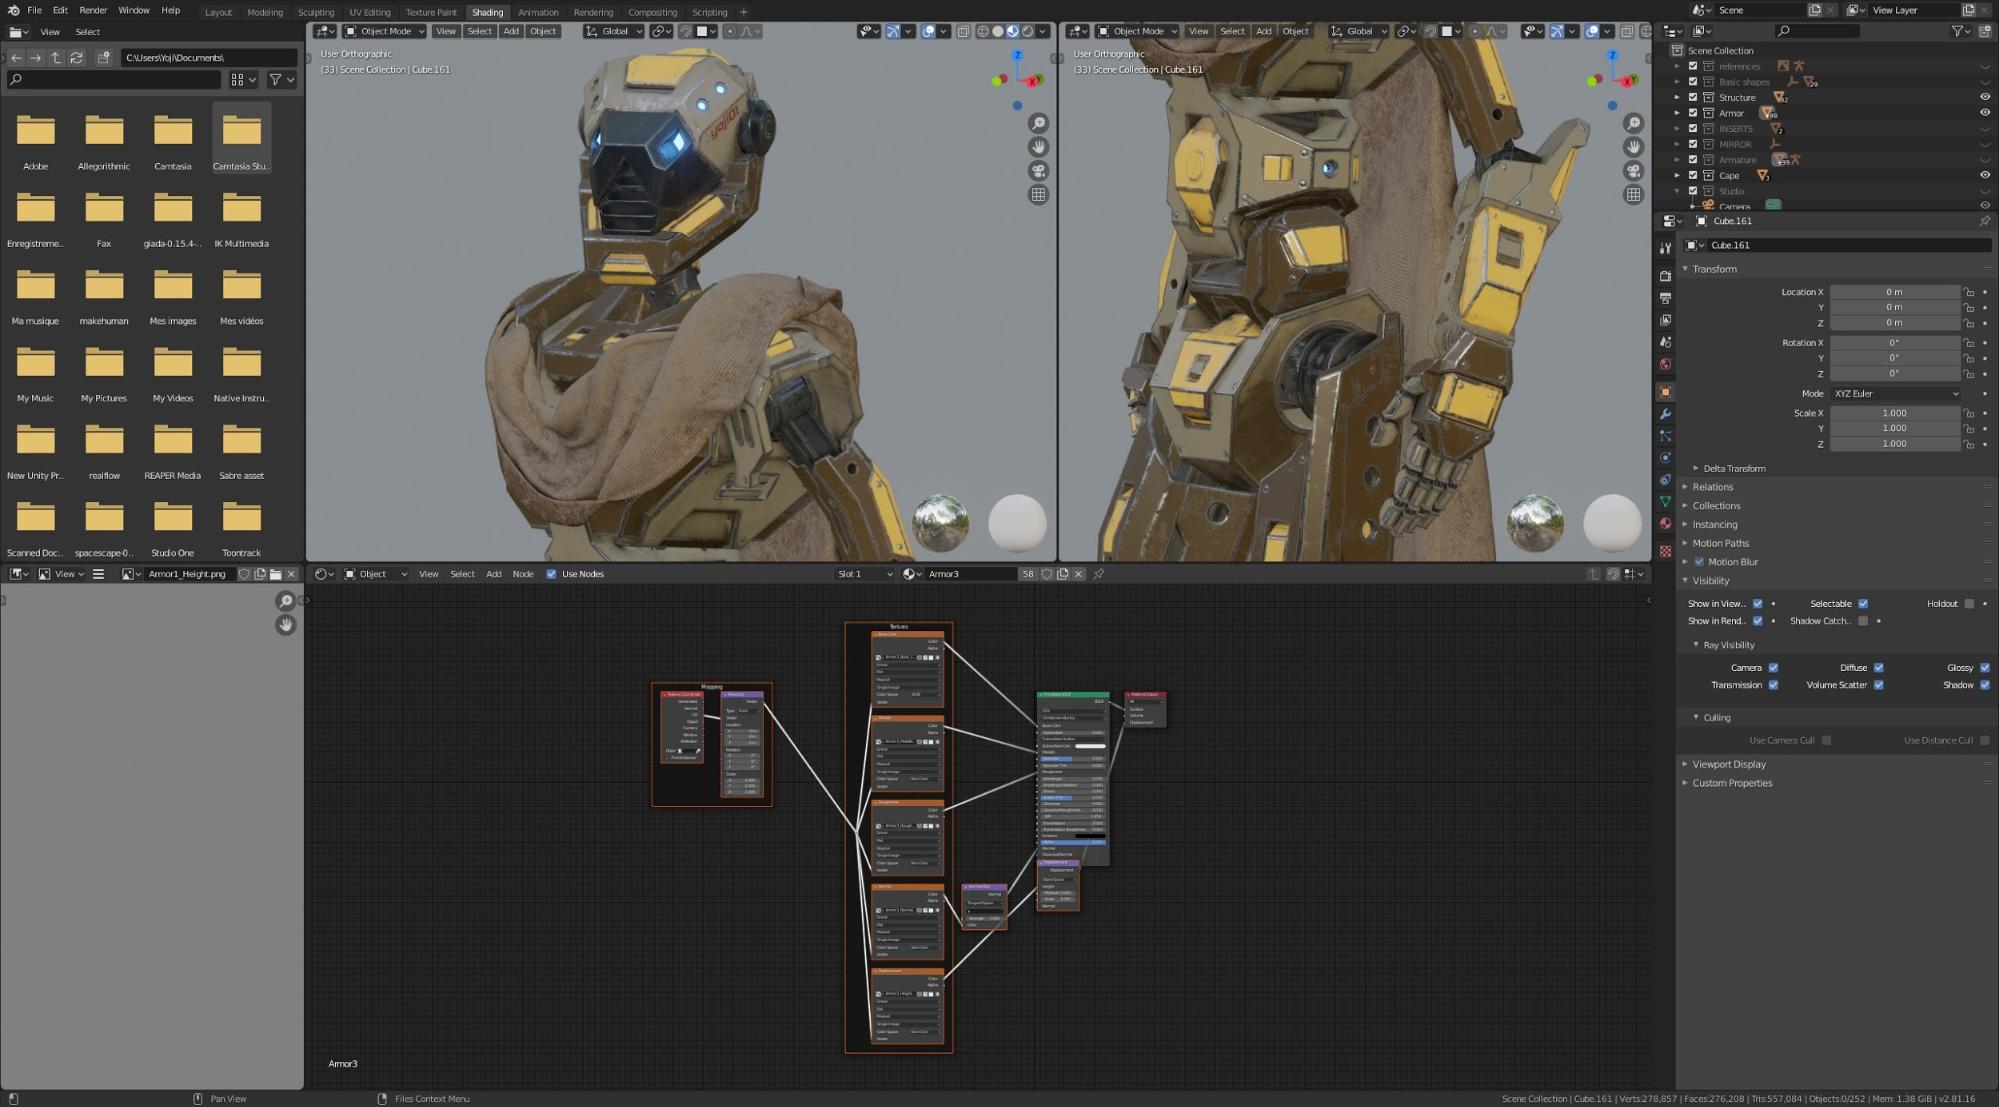
Shader Creation
I jumped back to Blender to create the shaders, thanks to the Node Wrangler add-on and CTRL+SHIFT+T to create a node setup from textures.
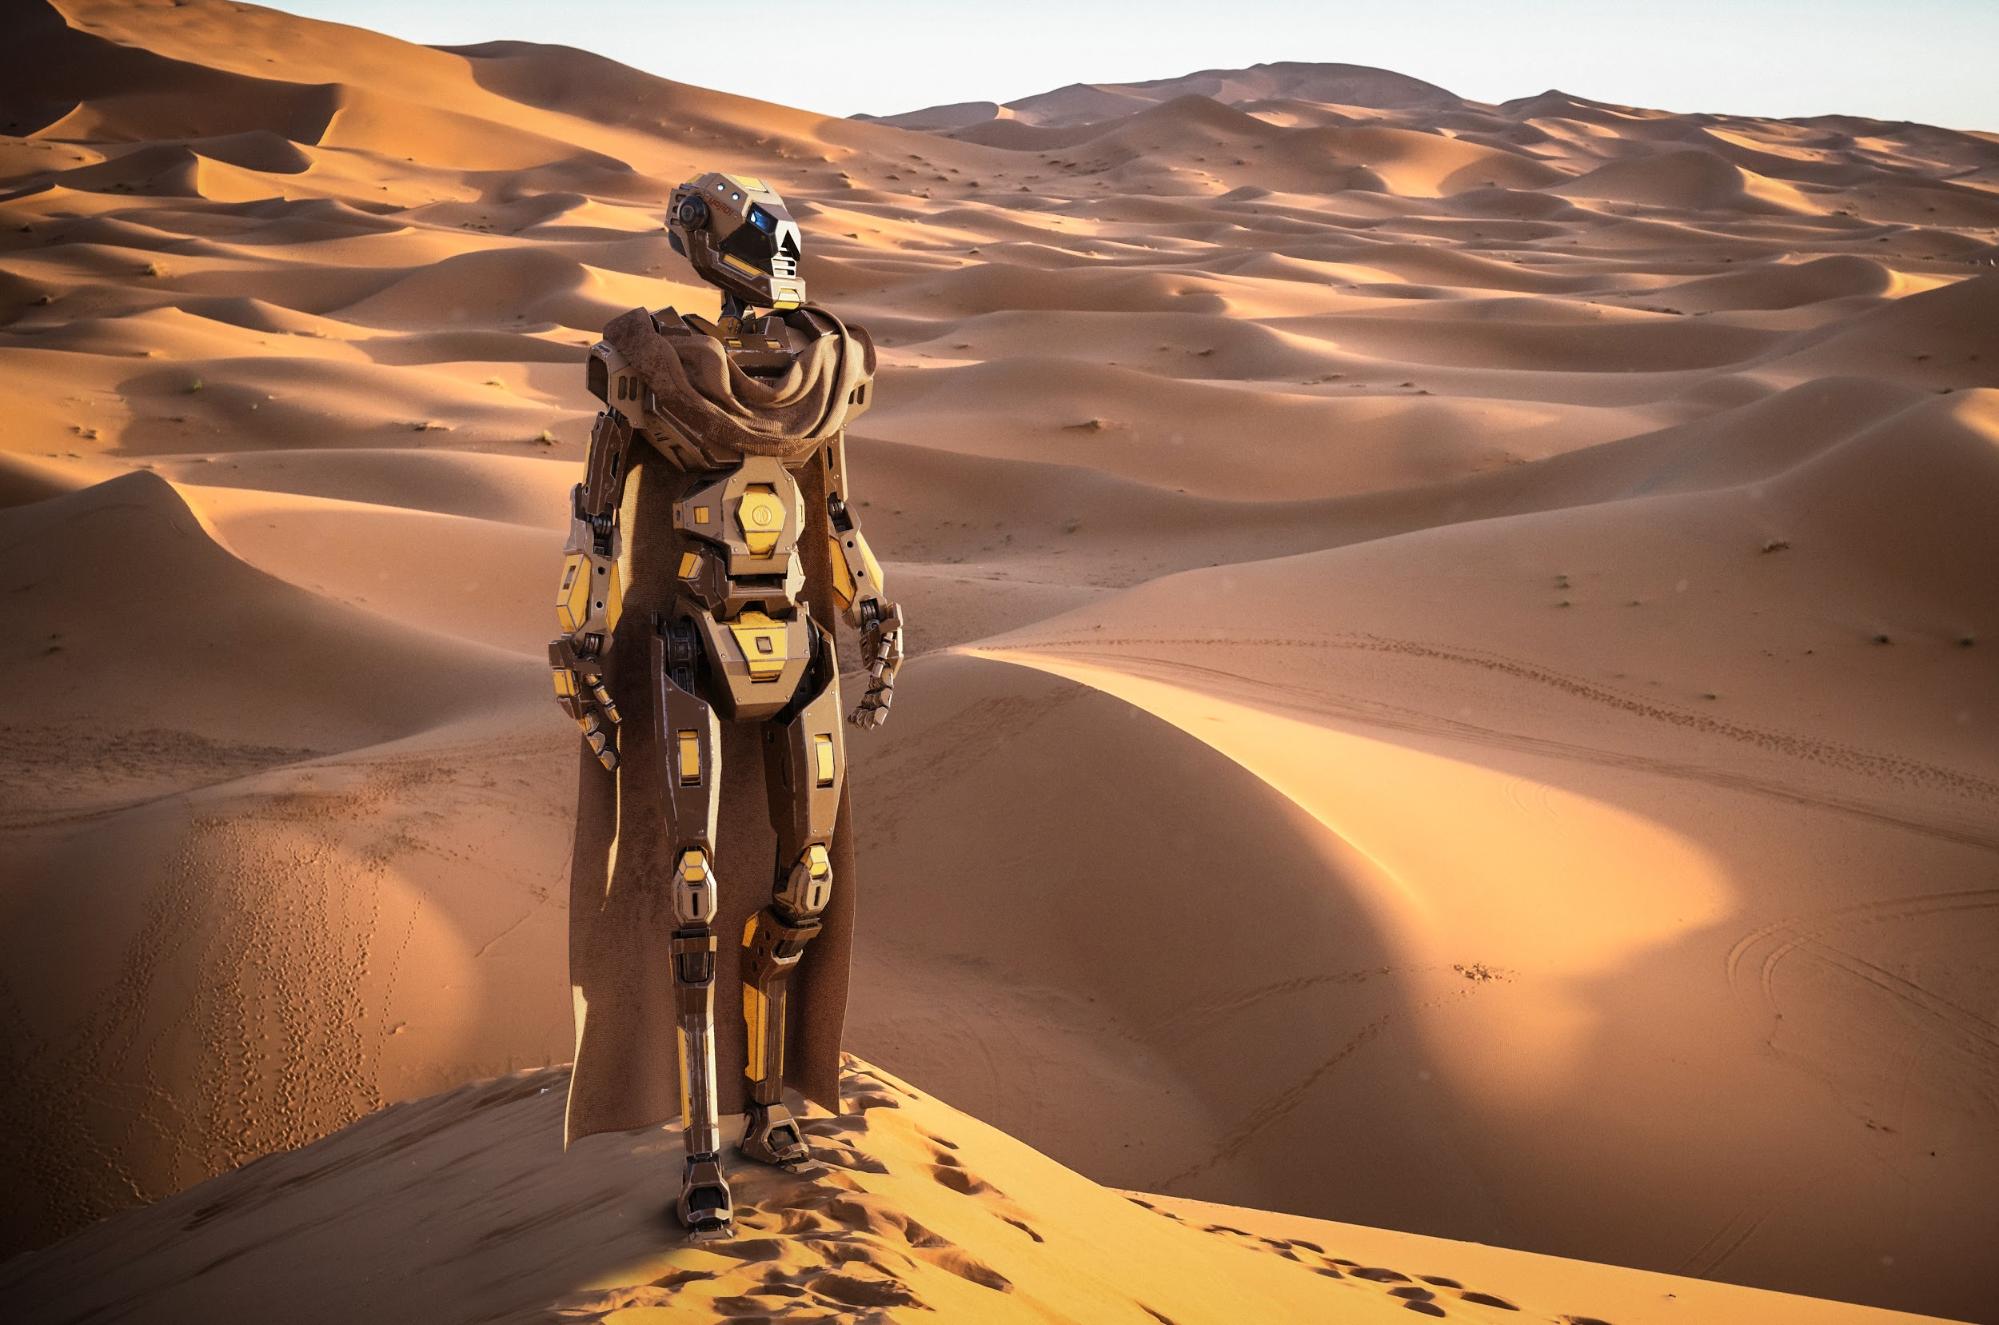
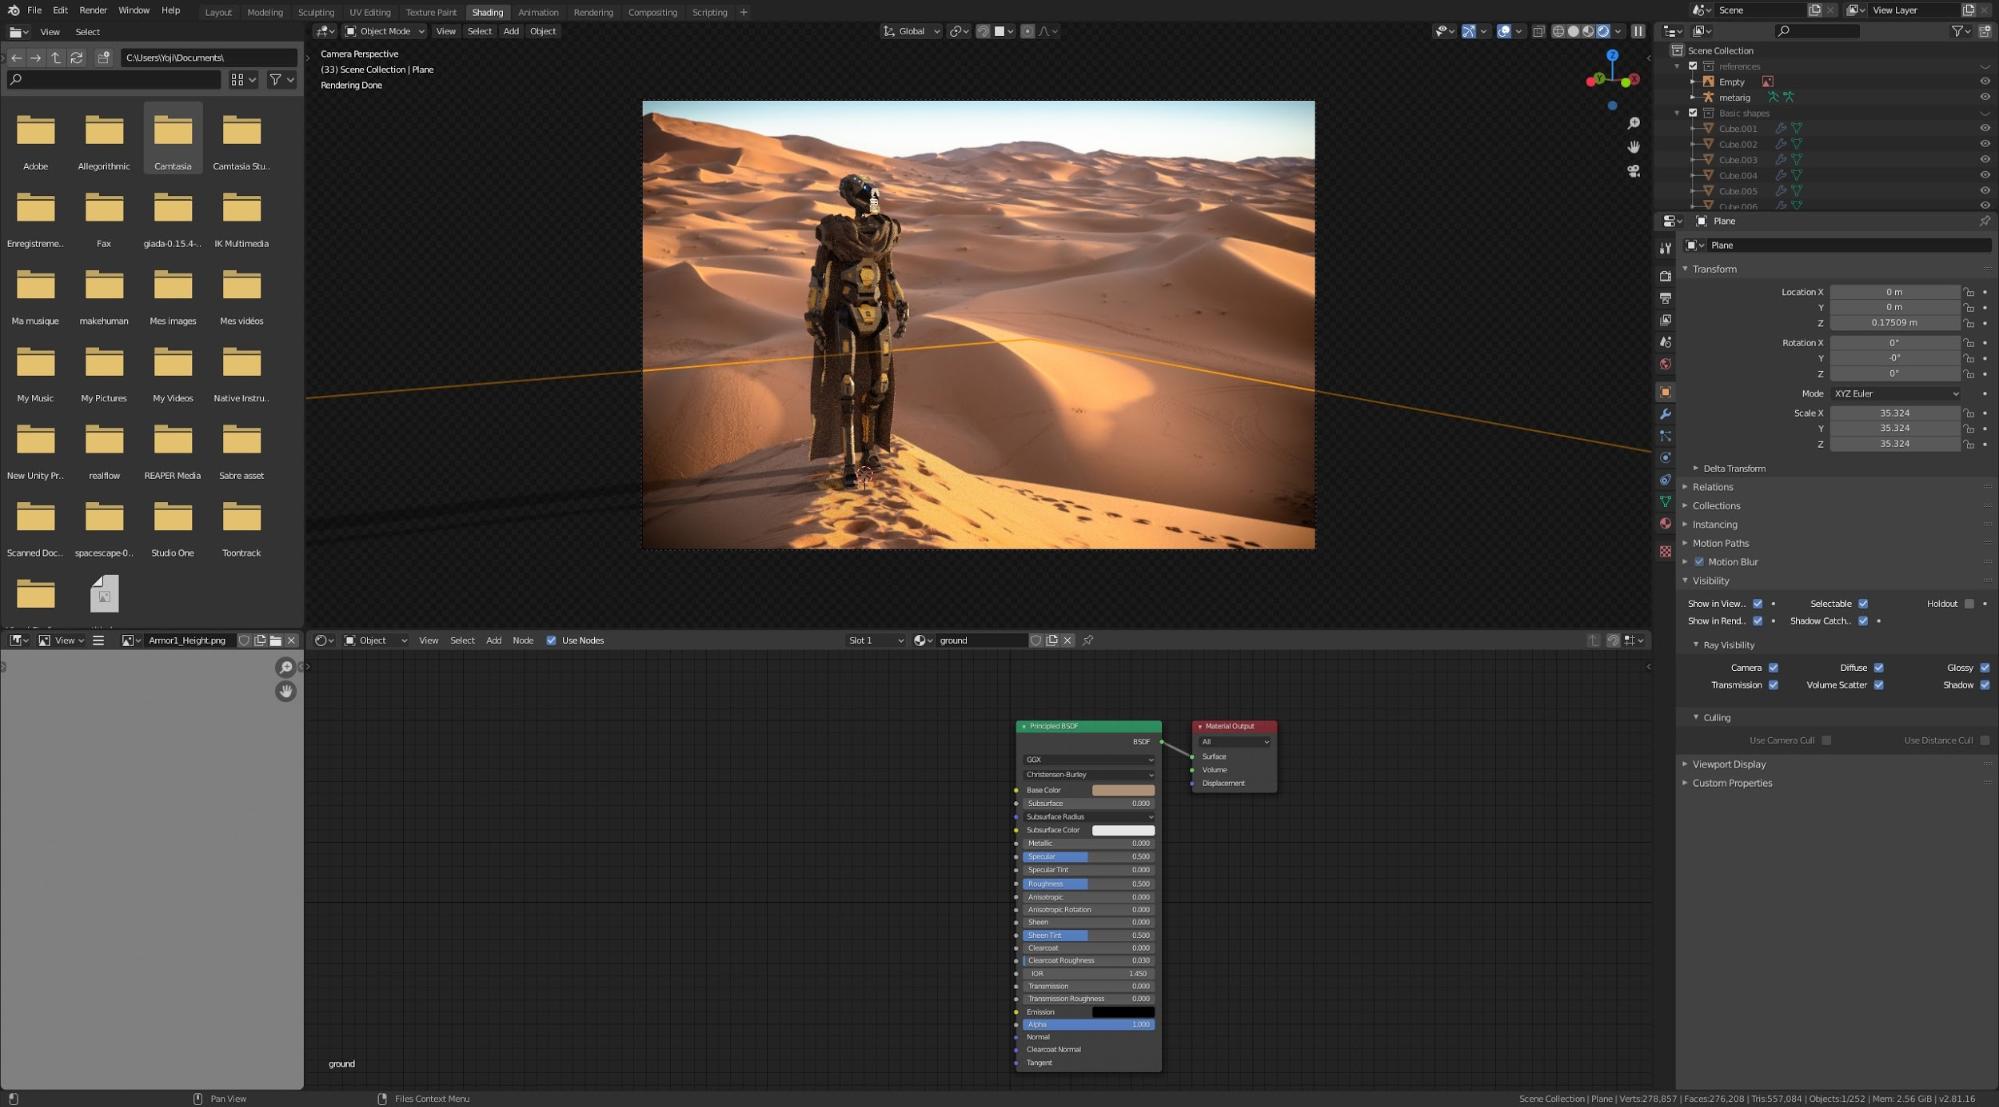
Integration
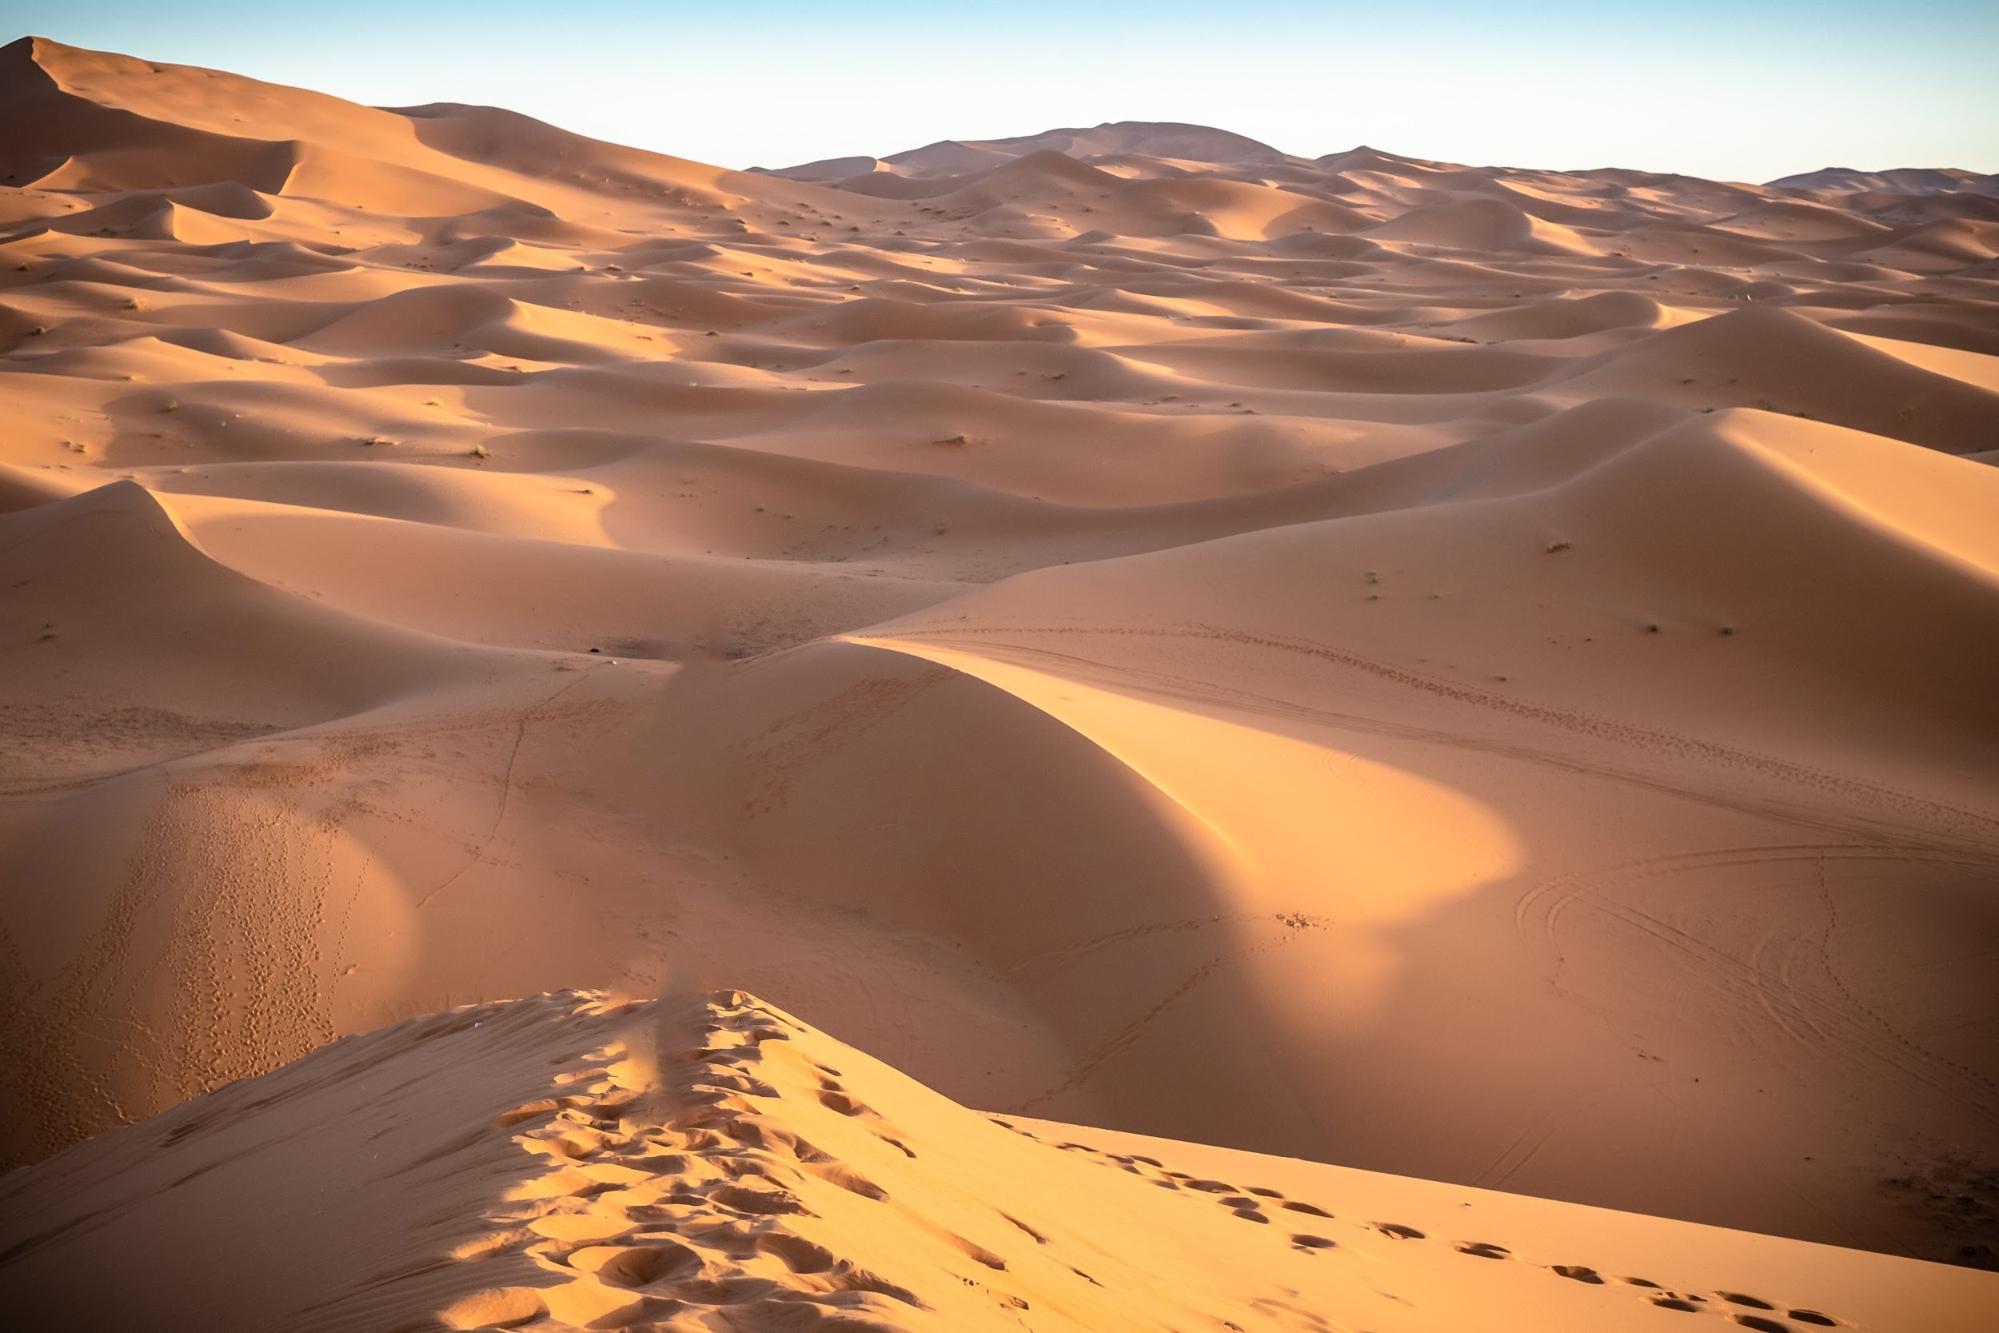
I was ready to insert the background into the scene with a desert CC0 photo by Jeff Jewiss that I found on unsplash.com, thanks to him!
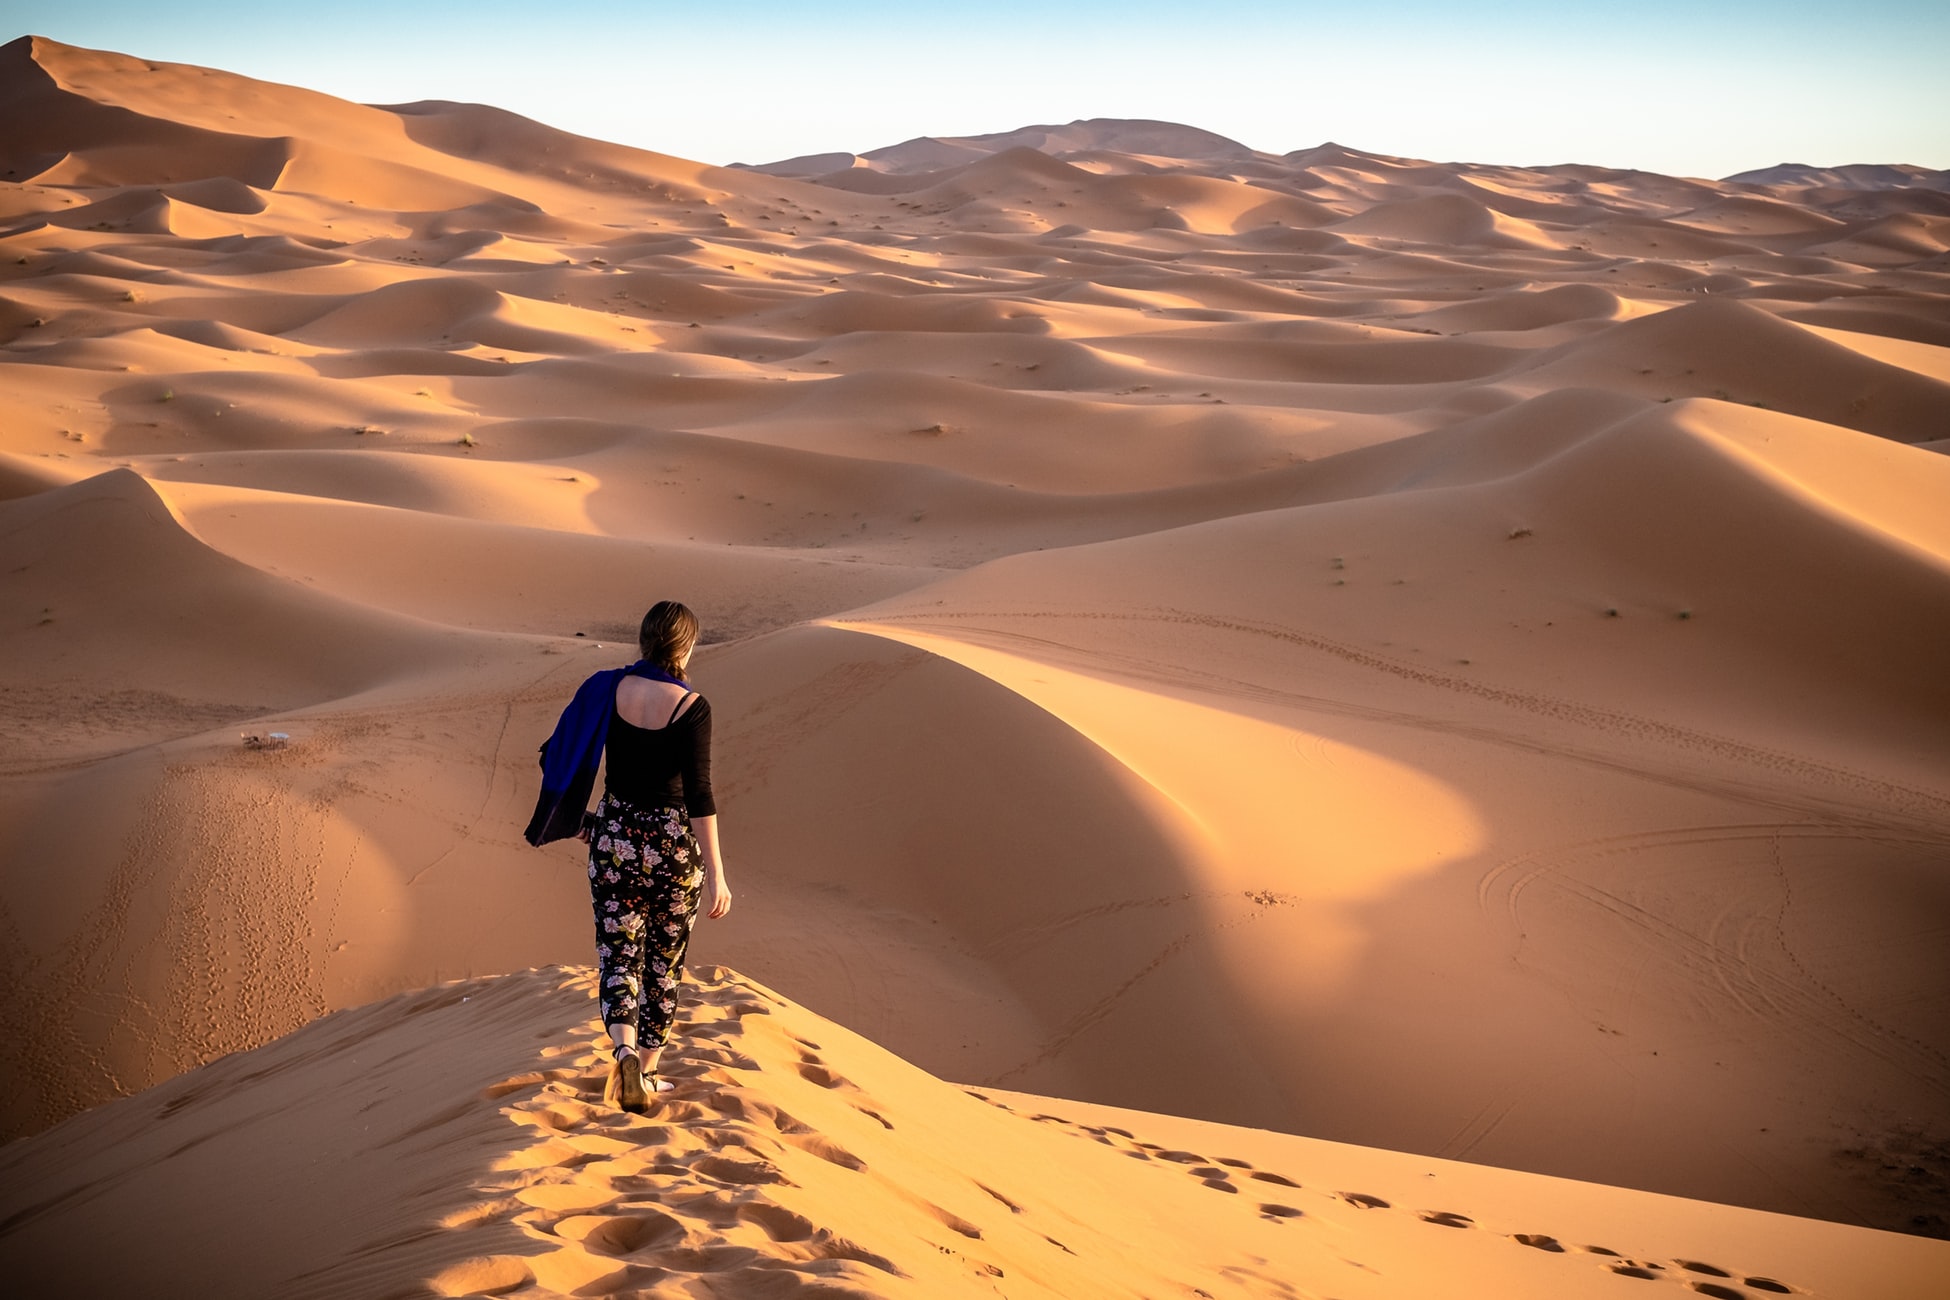
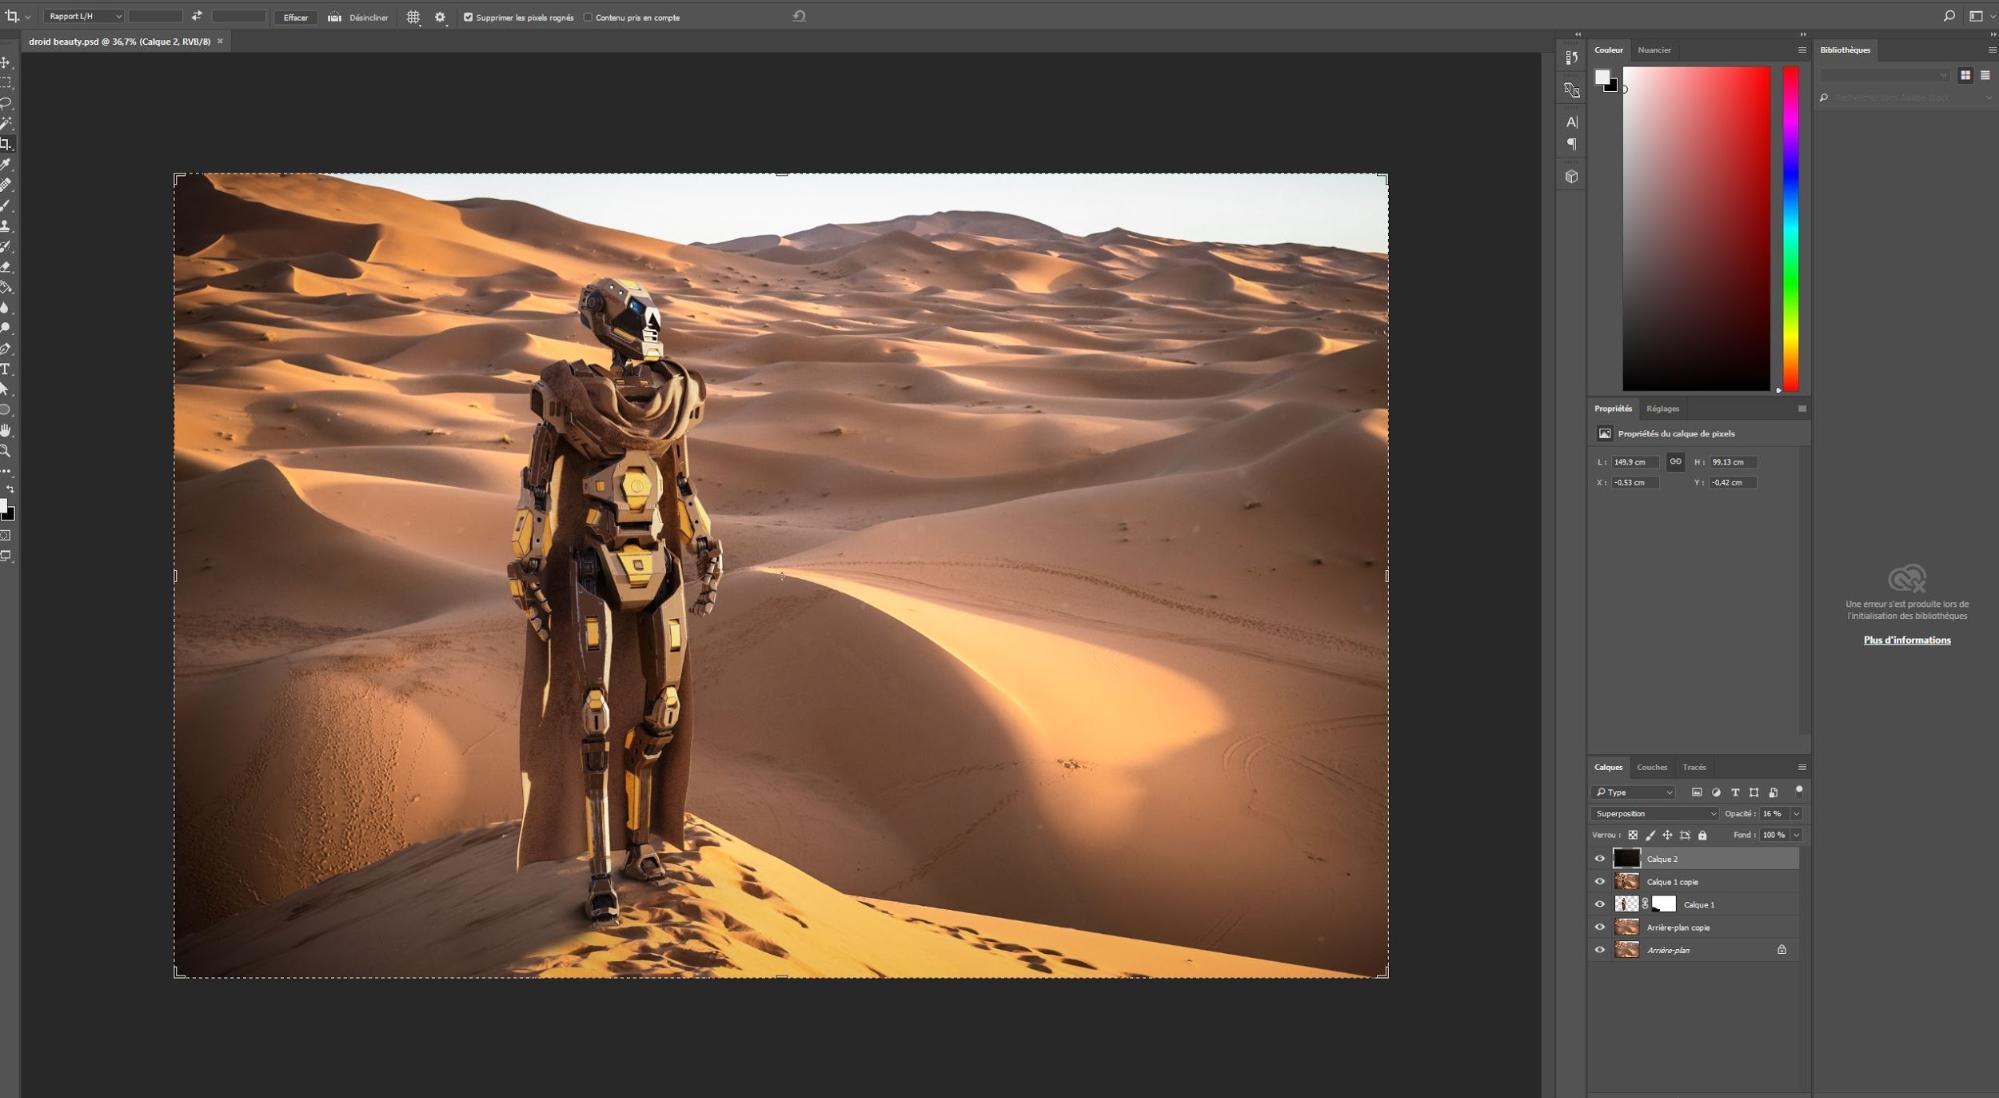
With a few edits in Photoshop I had this:
I adapted the camera frame in Blender to match, as much as possible, the scene. I used the plane shadow catcher and an HDRI light that fit the background.
Compositing
I rendered with Cycles and saved the scene as a .png with alpha. A few edits and compositing on Photoshop to match the shadows and the colors and the job was done.
I hope you enjoyed seeing this workflow.
Happy creation in Blender!
About the Author
 Julien Deville, 3D Generalist Artist and Certified Blender Trainer


