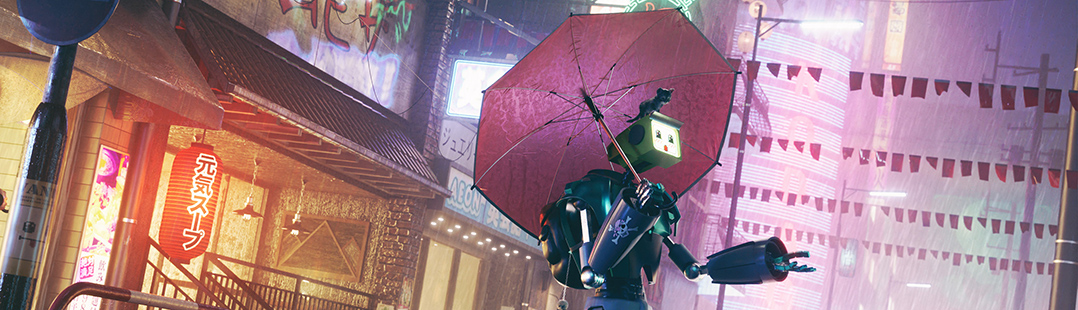
Behind the Scenes: 3D Castle Set Extension

My name is Jasper Schubert. I’m just about to finish my formal studies in 3D Production and VFX in Belgium but I’ve been experimenting with Blender since high school.
The medieval genre has always been very inspiring to me. When I saw a breakdown of the castle of “Snow White and the Huntsman” by BlueBolt, I was really impressed with the style and amount of detail in it because in most movies the castles just get slapped onto a matte painting in the distance.
https://www.youtube.com/watch?v=vQ4Jx056Us8
So I analyzed the breakdown and began figuring out for myself how I could create a castle in that style that would be large in scale and detailed up close, while also being modular and procedural enough to not take ages to set up.
Assets
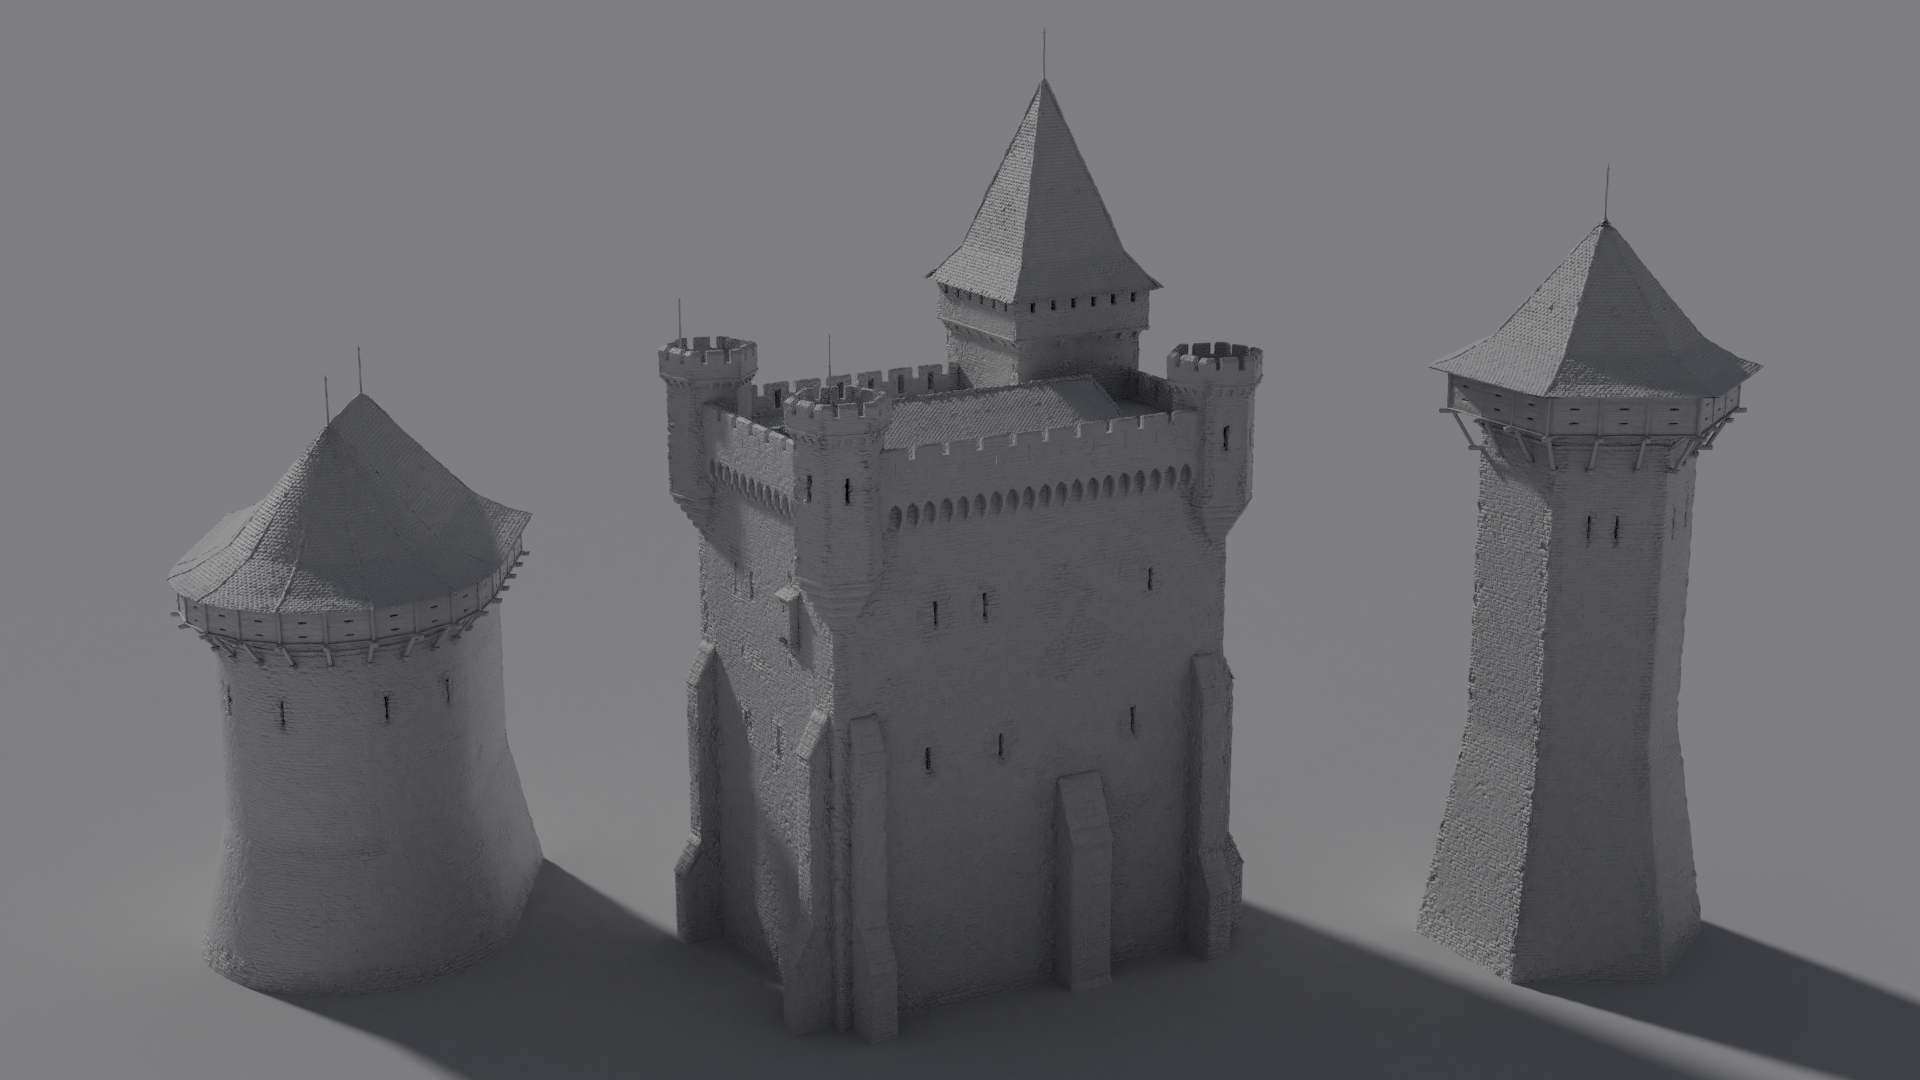
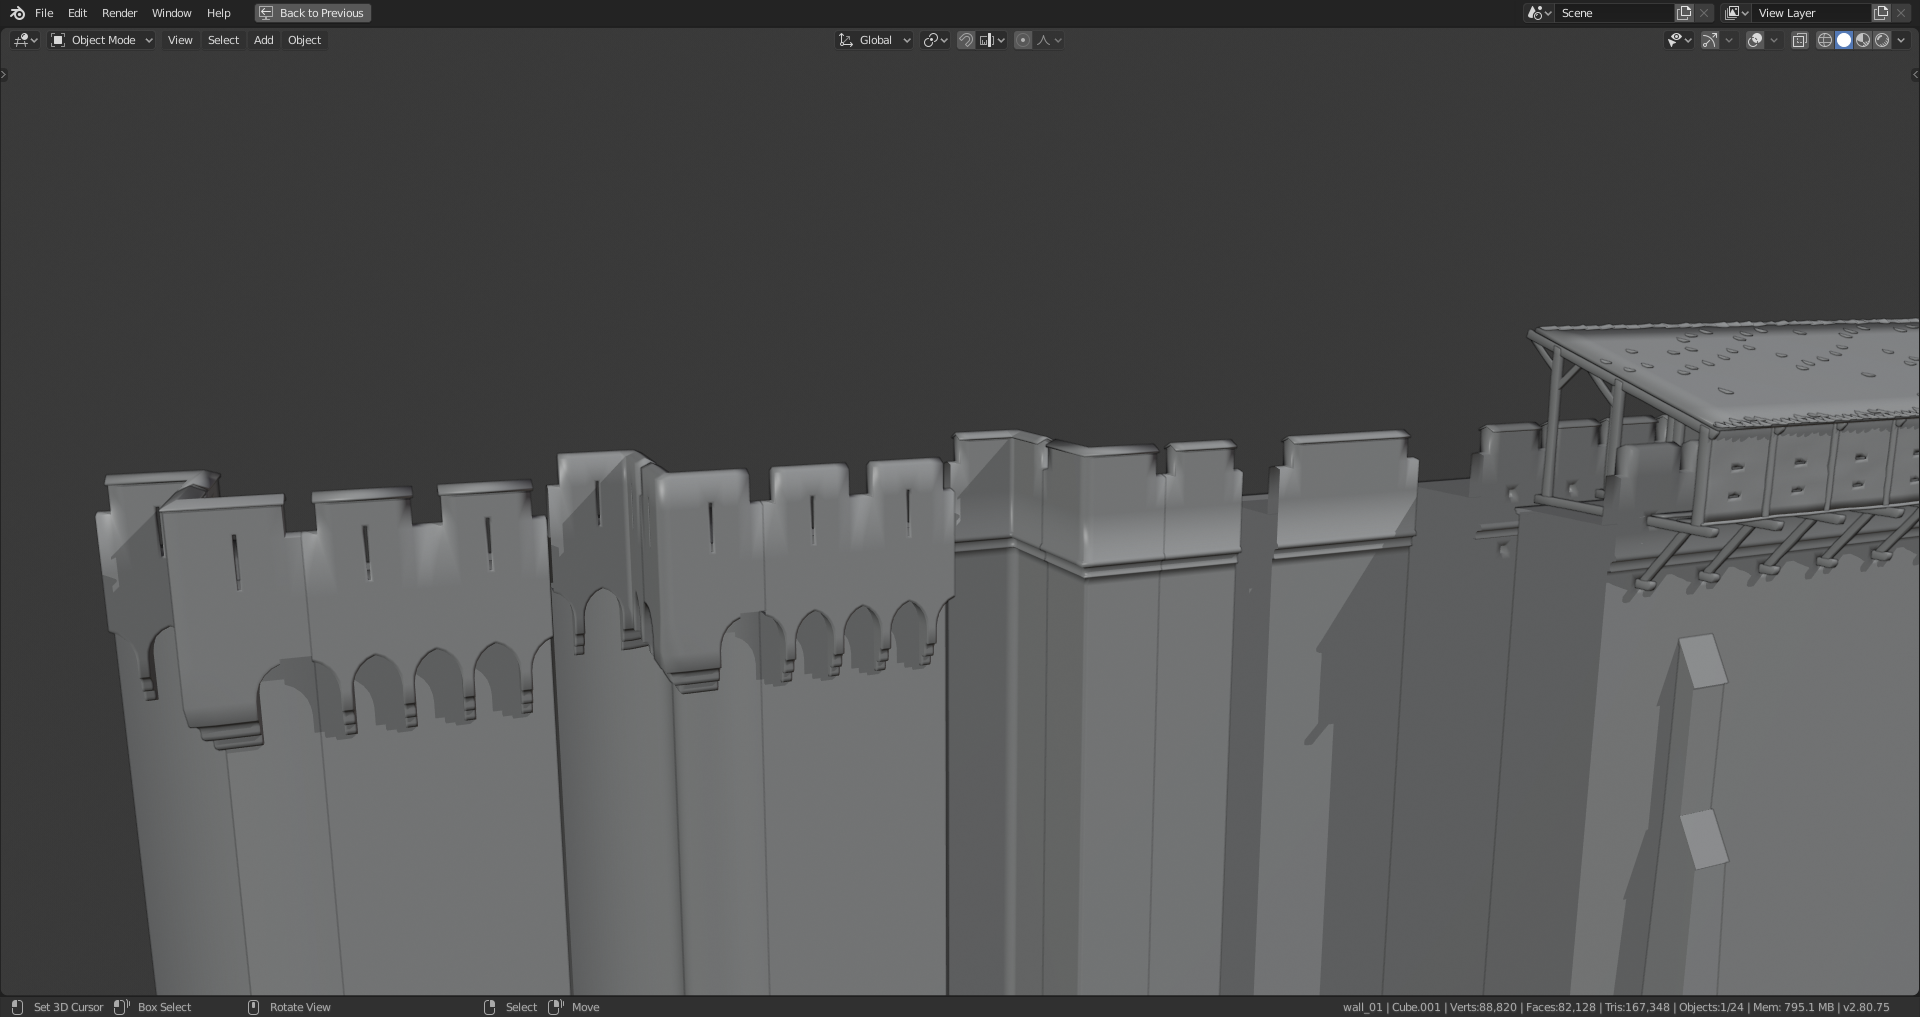
Walls
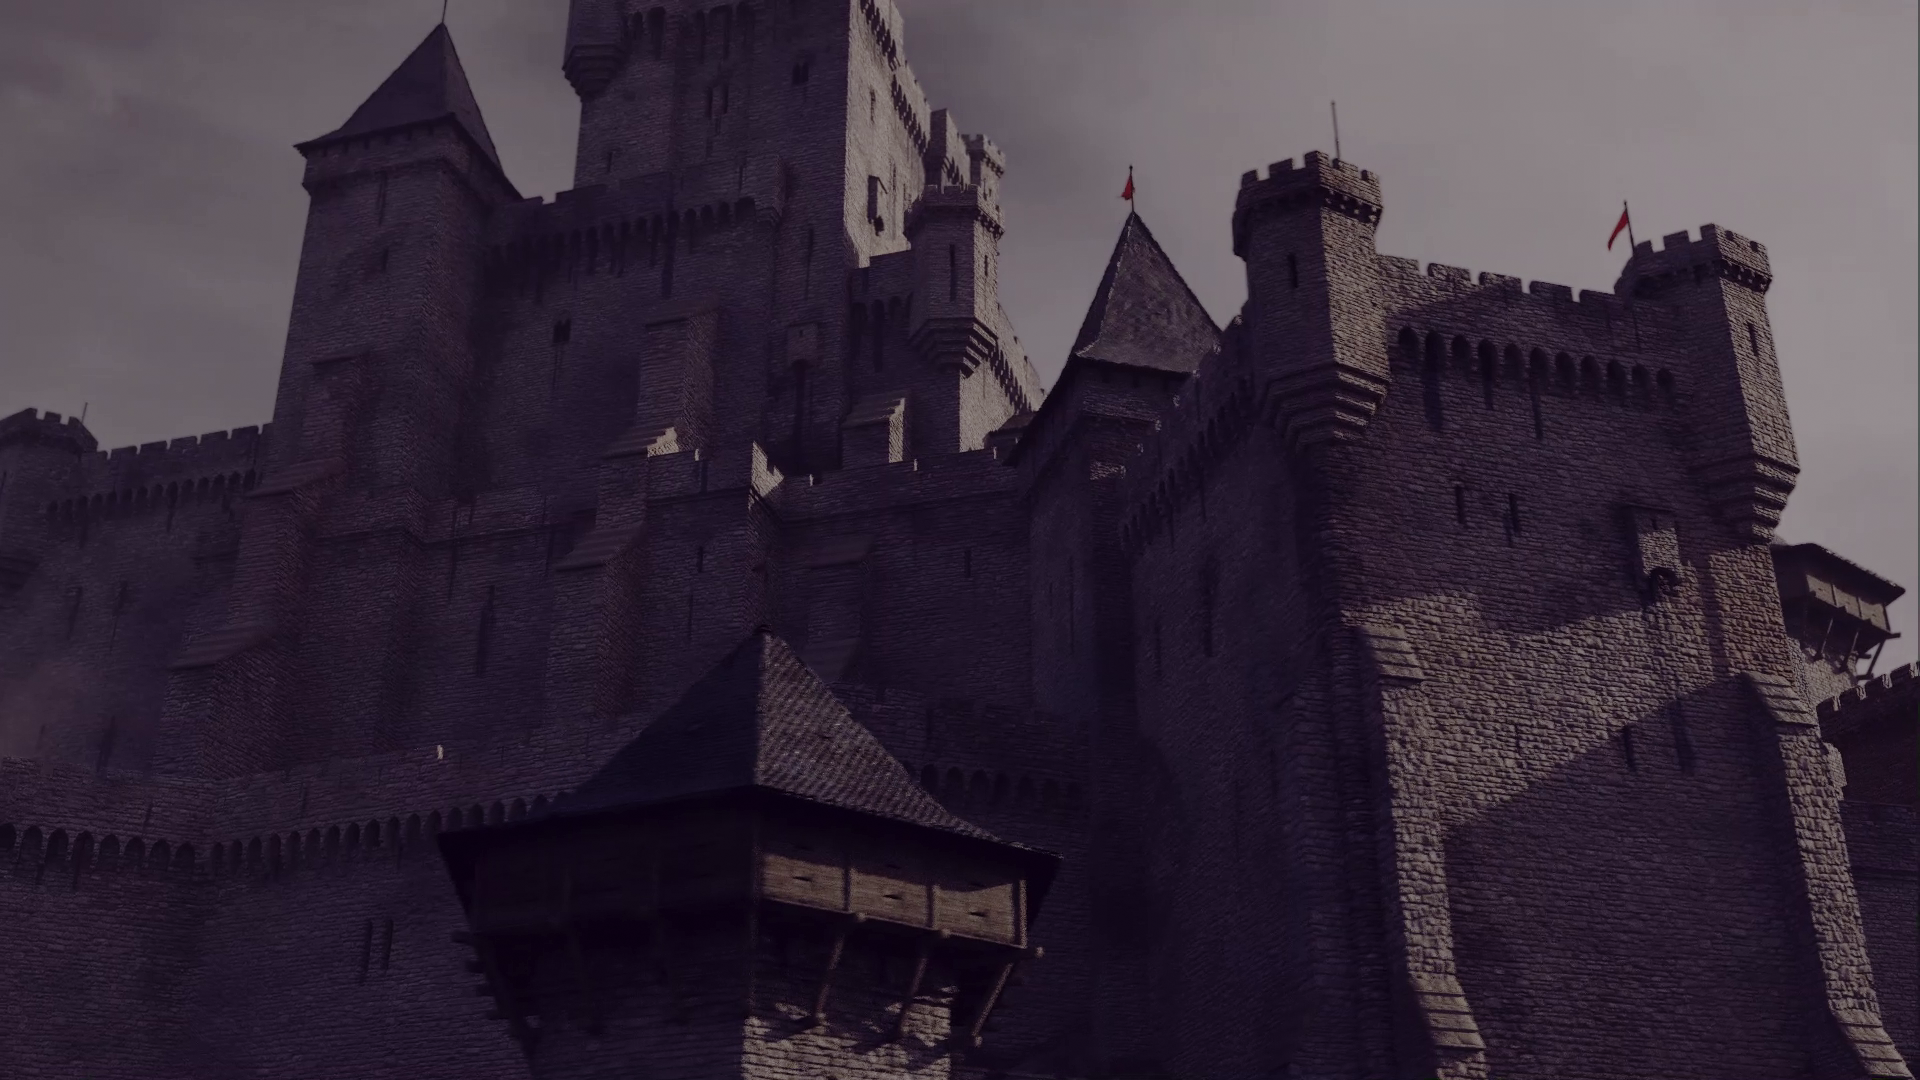
For the walls, I prepared a modular set of different styles of battlements and machicolations, straight and corner pieces. With these, I could quickly put together different buildings and towers.
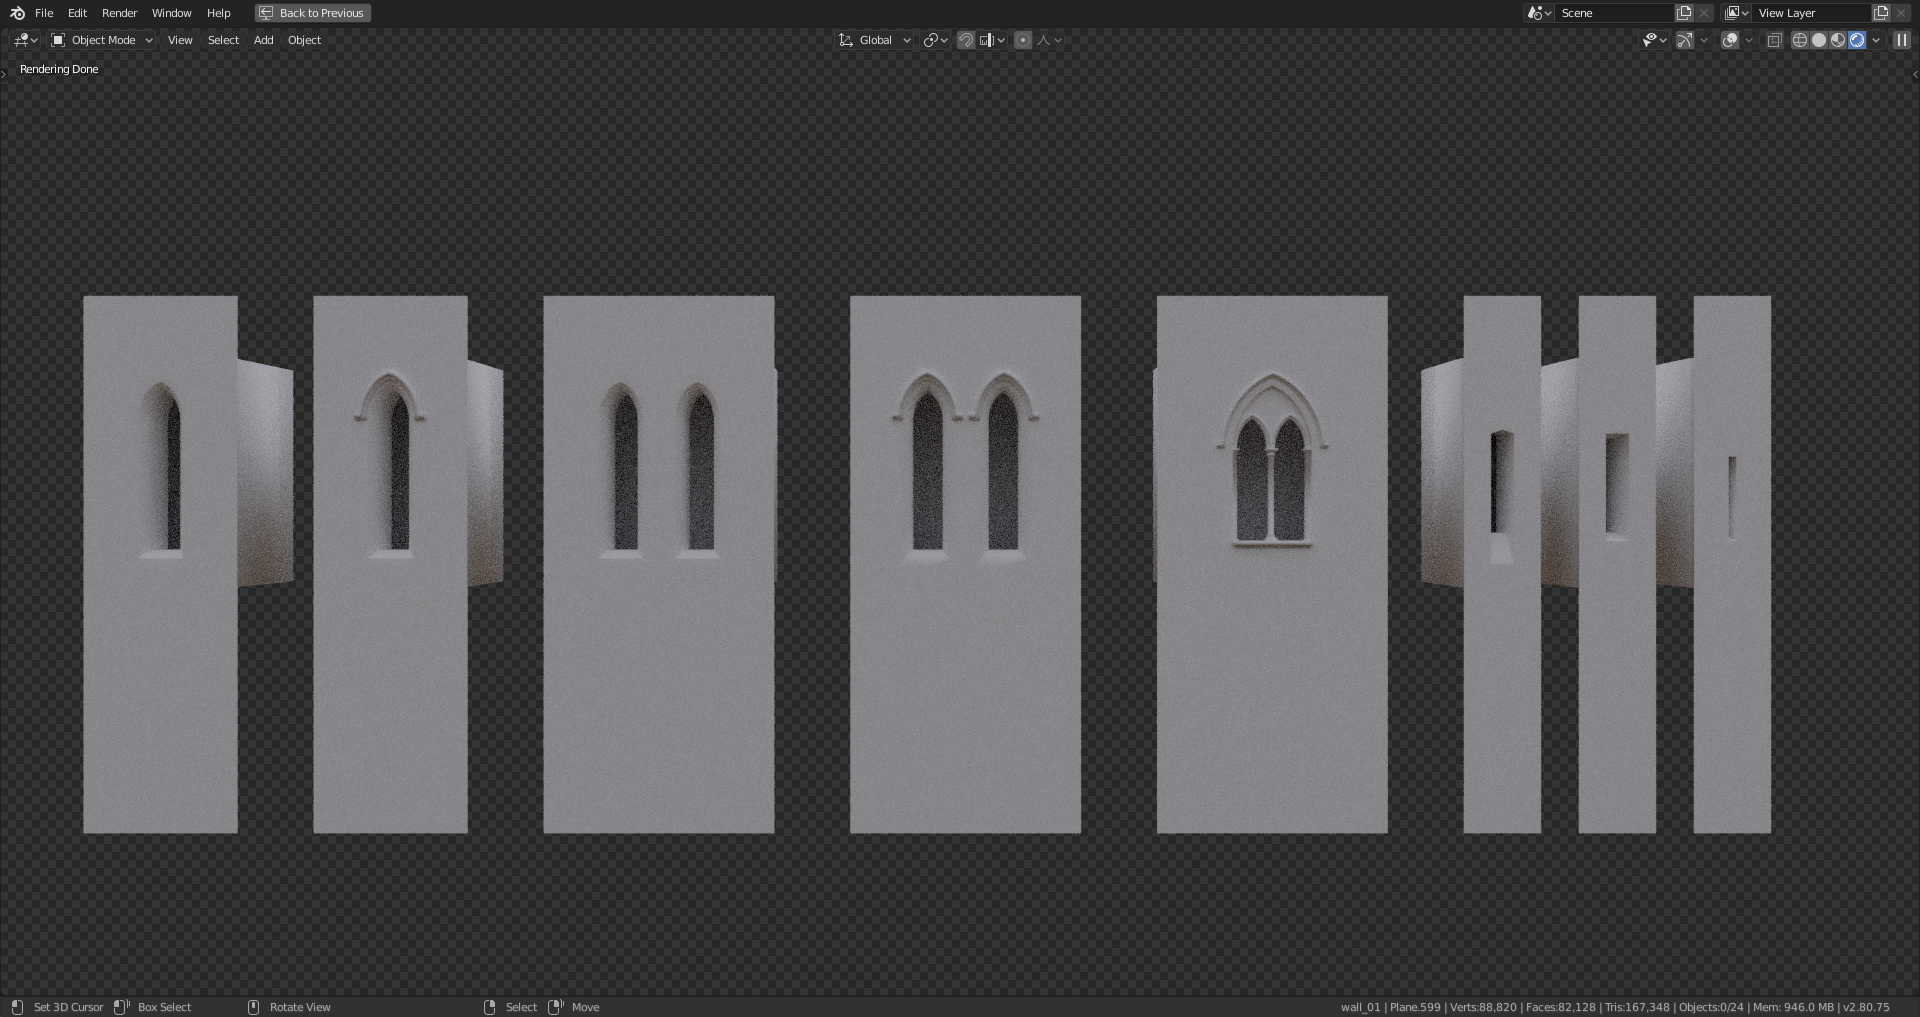
Windows
I wanted to be able to put any kind of window in any place, so I created a few variations, already connected to a grid with even topology so that they could easily be merged into any existing wall. For this purpose I had made sure that the spacing of topology on the walls always followed the same pattern.
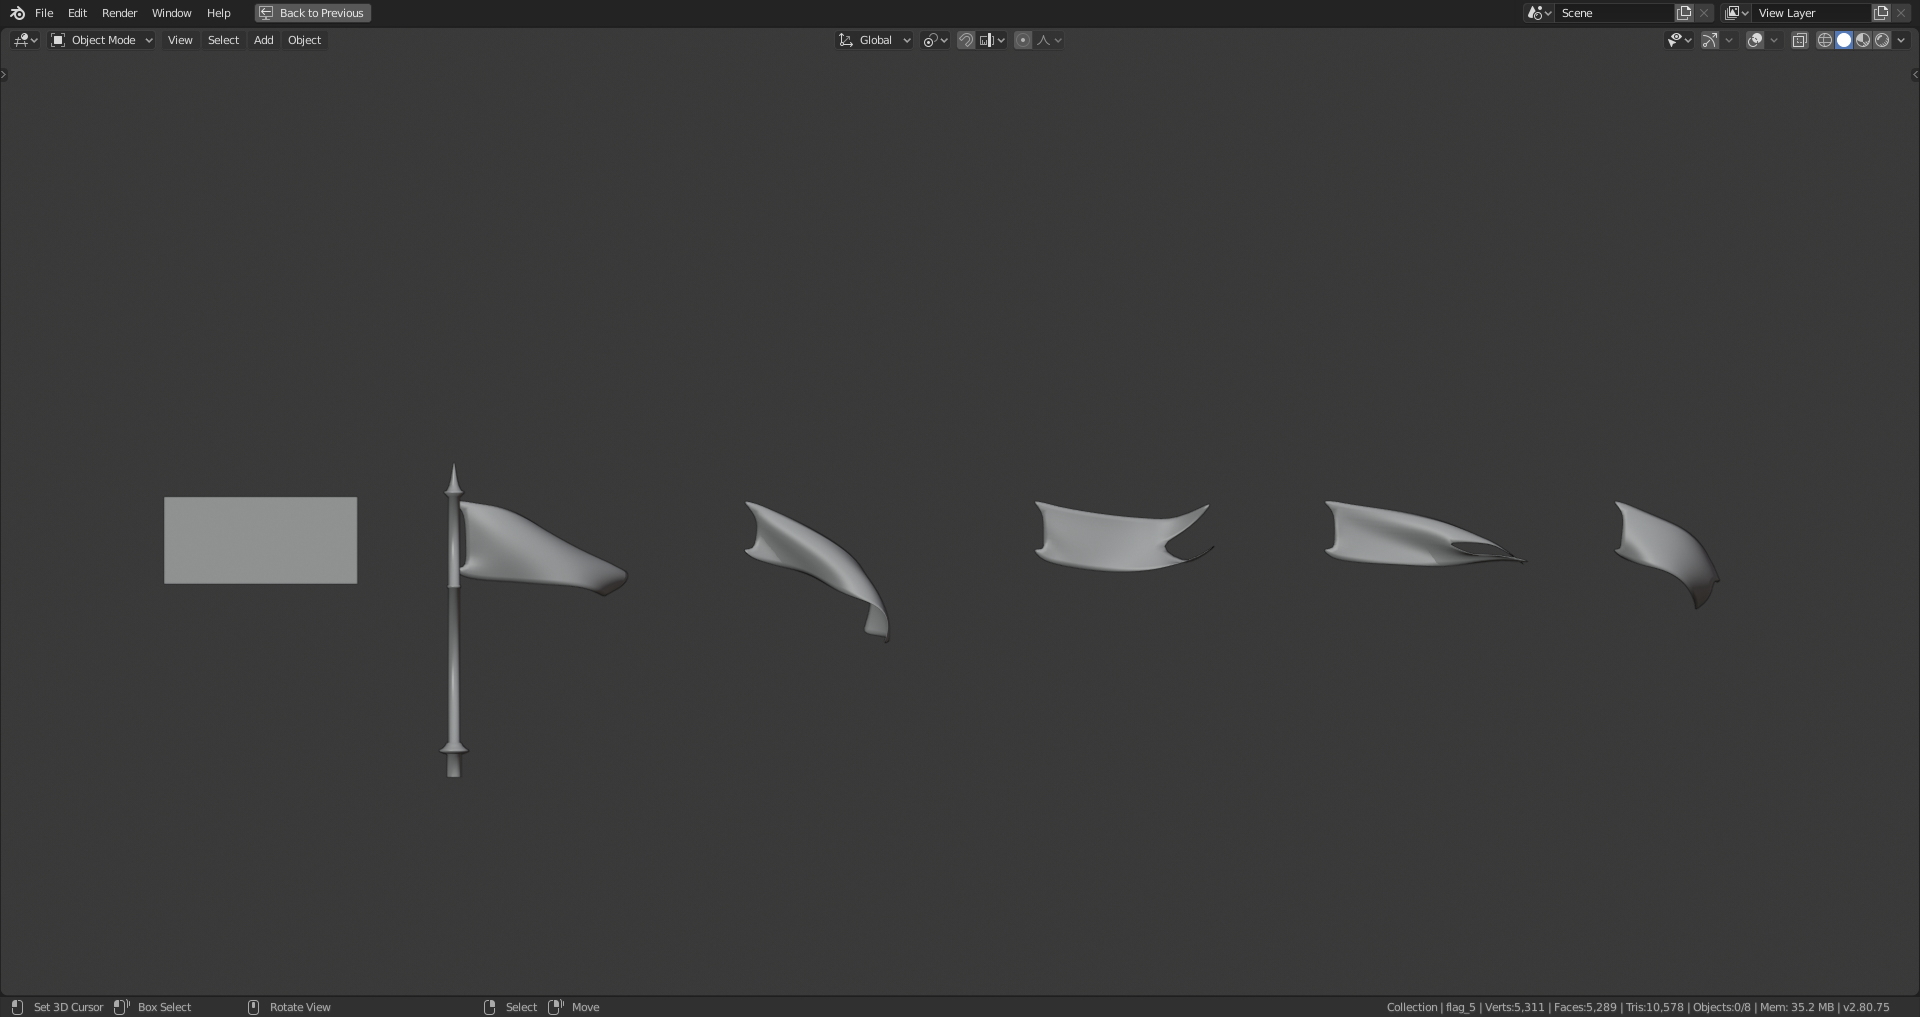
Flags and Smoke
The flags are simple cloth simulations that I baked to alembic so that I could offset their start frame (making each flag unique), and rotate them later on without re-simulating if I wanted to change the direction of the wind.
The smoke adds a lot more life to the empty structures. I couldn’t figure out how to instance it so it took a while to set up all the simulations and to get them to do what I wanted without requiring too high a resolution.
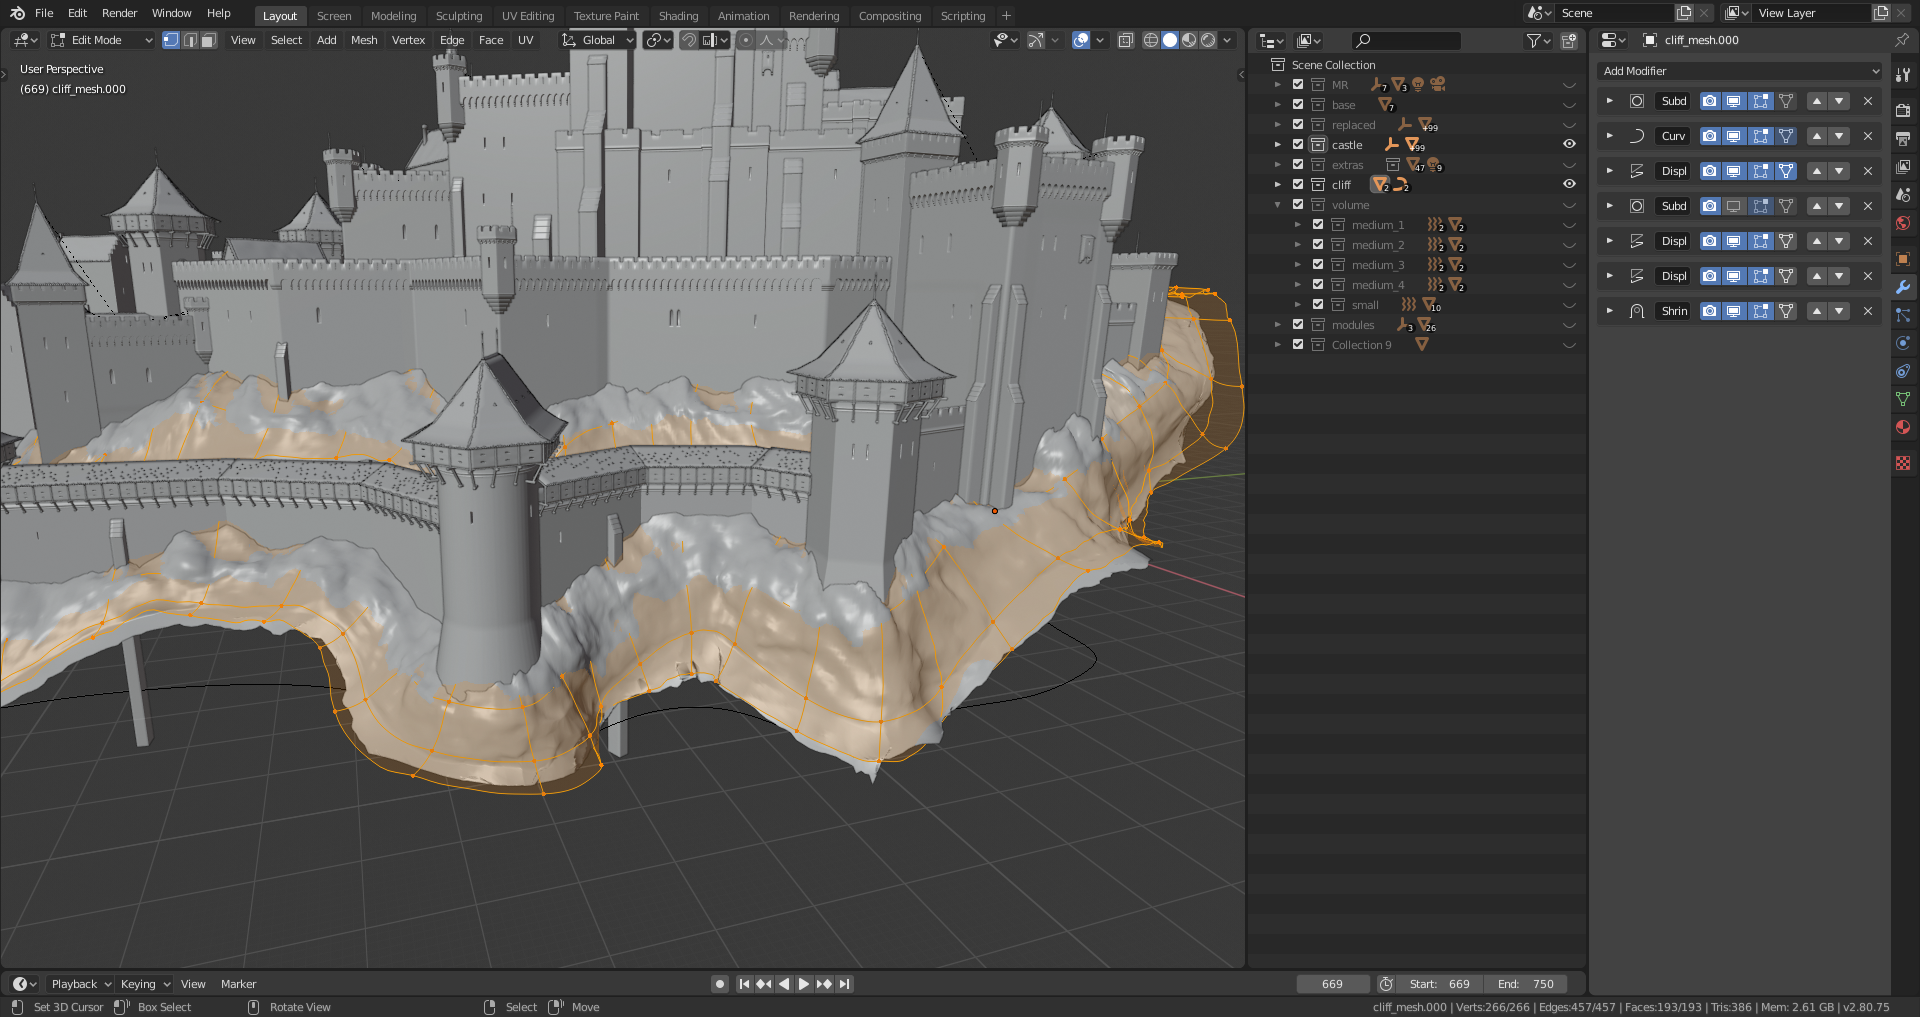
Cliffs
To avoid obvious and unnatural intersections with the floor, I created some cliffs that I could blend with the walls on one side, and with the rock in the video footage on the other. The model is a simple array of connected planes, displaced with different layers of procedural noise and the height map of the cliff texture I used. With the curve modifier I could easily place the cliffs along the castle walls while still working on a clean, straight mesh.
Materials
The textures I used are from textures.com, Substance Source, and Texture Haven. The main challenge with texturing structures of this size is to avoid the common tiling effect and to make the large flat surfaces look somewhat interesting.
I blended multiple materials and color effects with procedural noise as a mask and set up vertex colors so that I could add detail manually wherever I wanted. The dark streaks coming down from the battlements in some parts, for example, are squashed noise textures that only appear in the rough areas that were painted. The manual part is very quick, but procedural patterns give it enough detail to look interesting in most cases.

Structure and Scene
All of this had started as a personal project without a deadline, so I felt that I had the time to make it as large and complex as I wanted, and planned for a full terrain with forests, rocks, foliage, lots of props, birds, crowd simulations, etc.
I researched a lot about the historical structural elements of castles to get somewhere into the sweet spot between full-blown epic fantasy and plain realism. Over time I came up with different layouts that kept evolving.

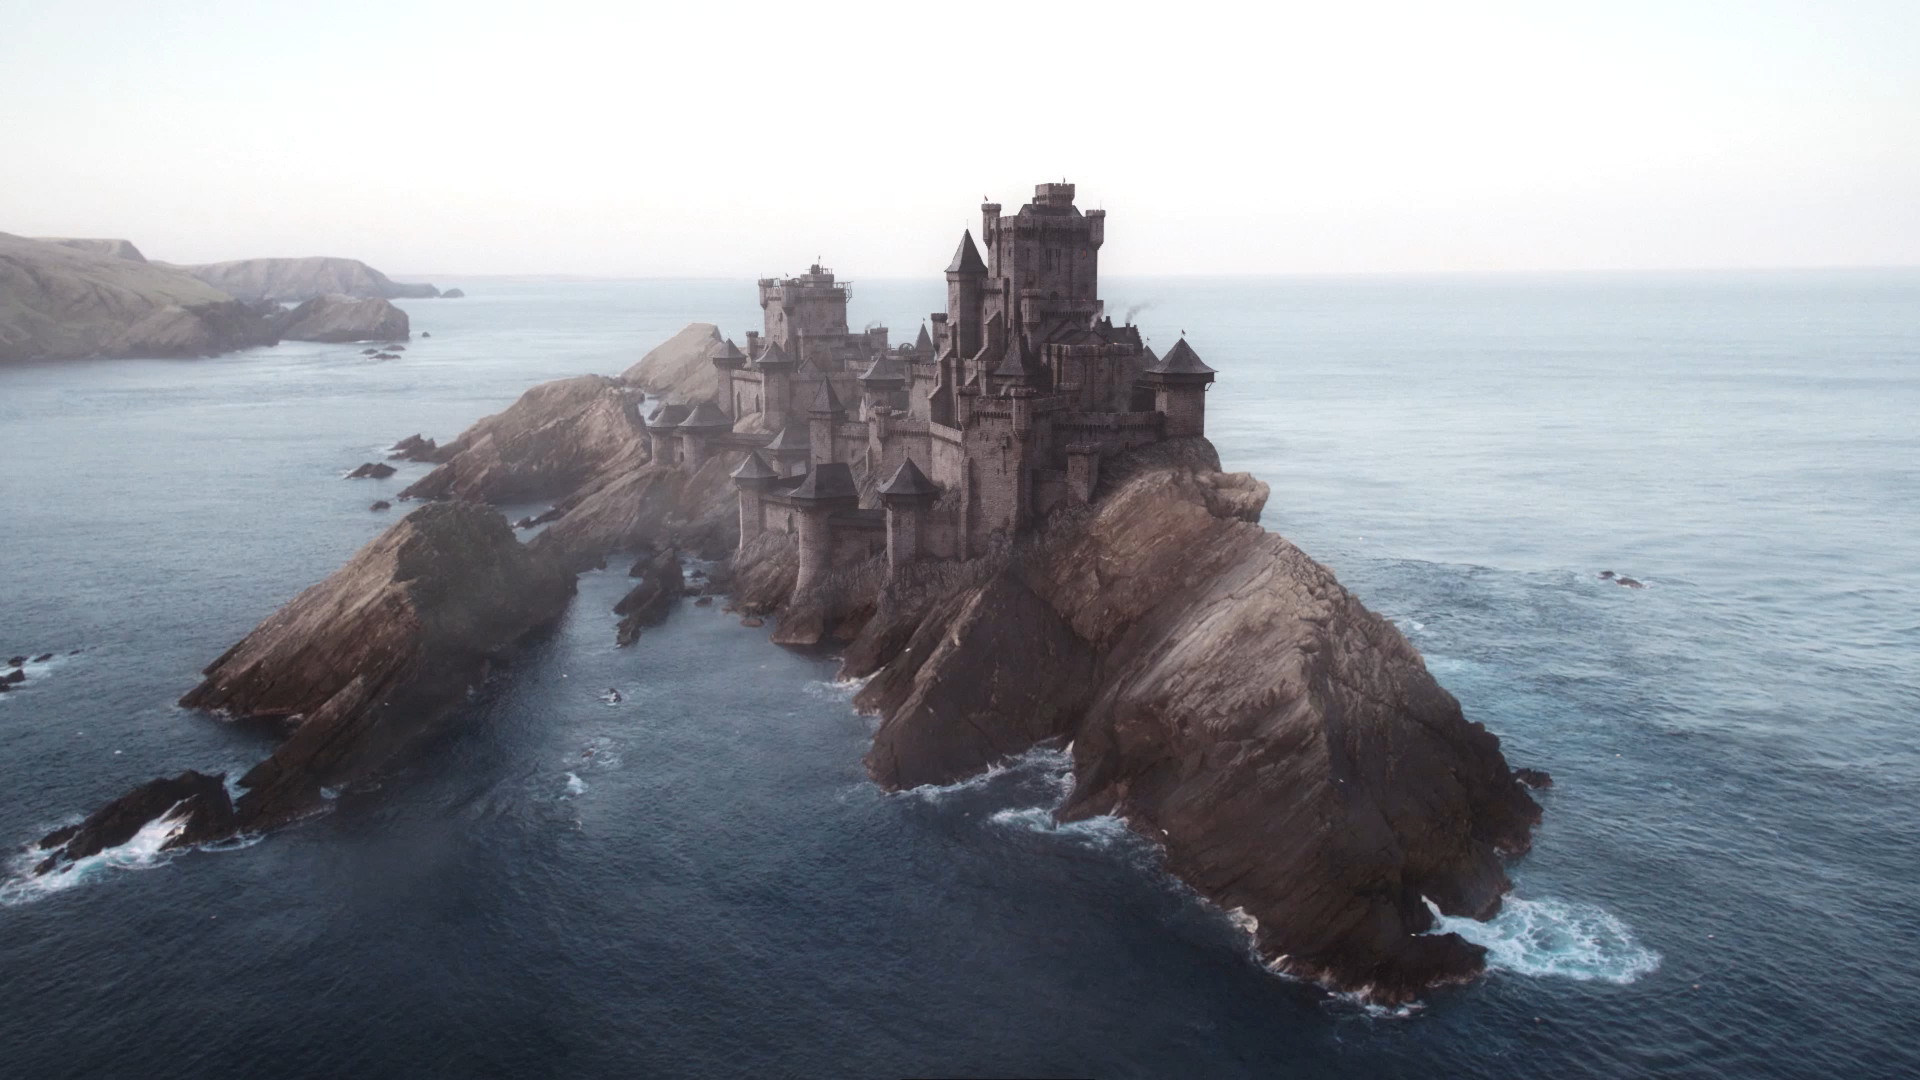
And as I had just settled on a layout, the exam period began at college, and one of the assignments was to simply “create a VFX shot” of any kind that involved tracking. So with all my assets nearly ready, I figured I might just use them for that purpose, and I found a great piece of drone footage of the Muckle Flugga in Scotland by John Duncan to throw a castle on.
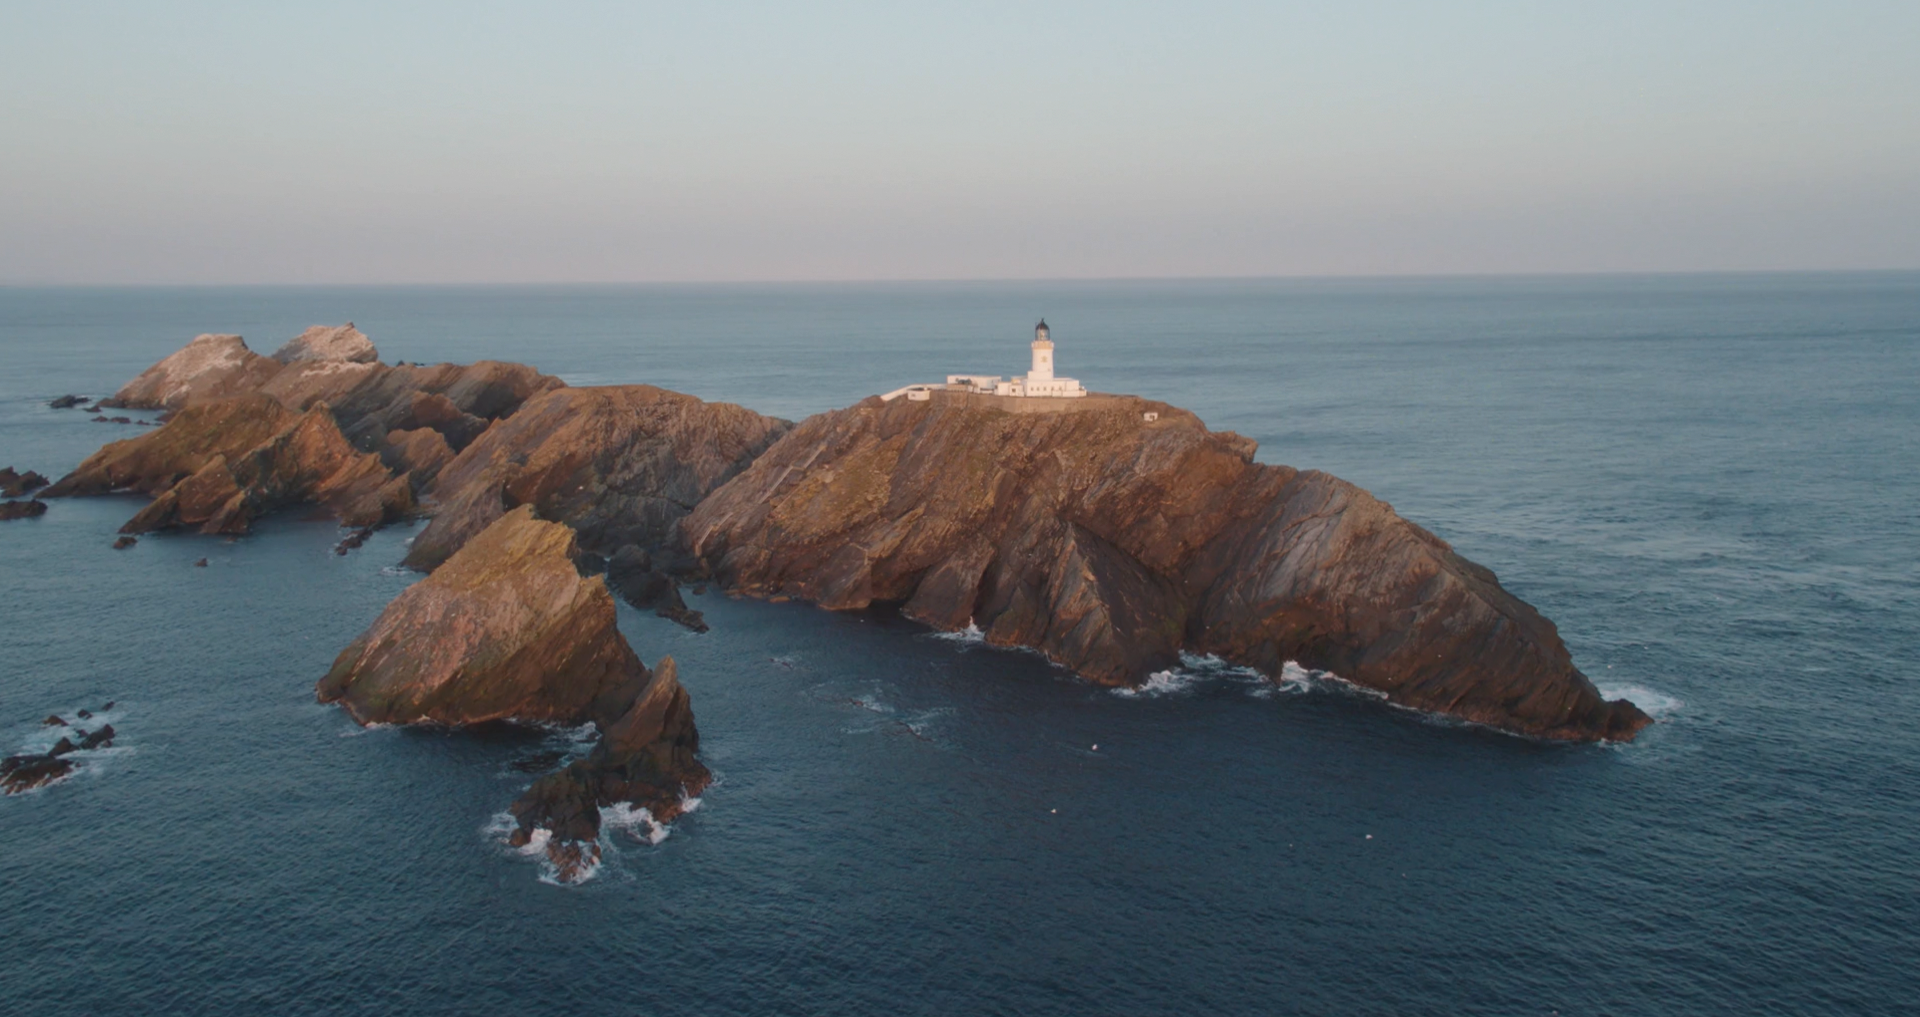
With the shape of this island and time constraints not permitting terrain extension or ships and harbors, all the time spent on coming up with a logical and somewhat plausible layout and setting went out the window. Also, since I wasn’t going to remove the birds flying around the rocks in the footage (they would disappear behind the 3D elements and then reappear), I couldn’t place structures closer to the camera, which would have added much more depth.
Once the final layout was in place and the assets ready, I just placed everything, patched up the corners, painted the detail masks, and went over to integrating it all nicely into the footage.
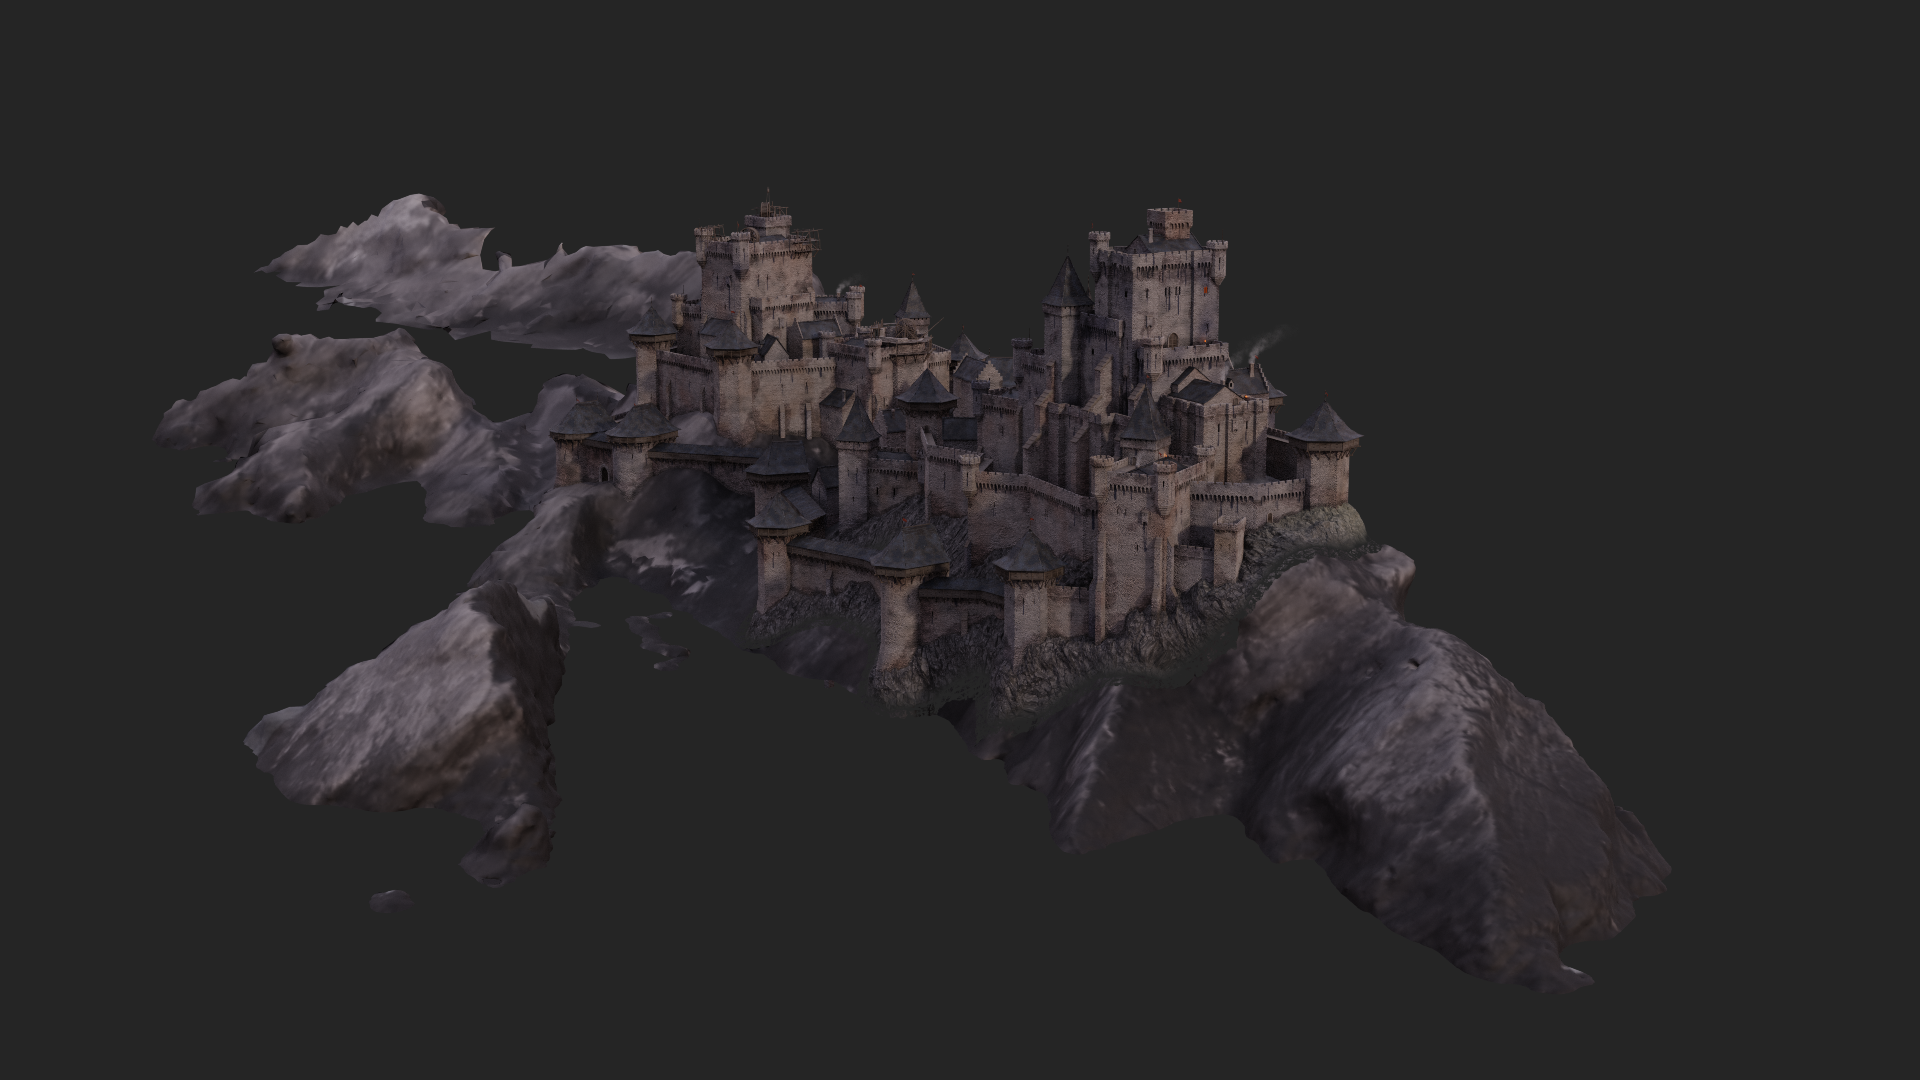
Integration and Compositing
Previously I had been experimenting with photogrammetry. I really liked the idea of being able to make assets without being glued to the monitor all day. And since the photogrammetry programs magically get the position of your cameras, I just dumped the entire footage in Meshroom to see what would happen. It recognized every frame, which meant that I could simply export an alembic file for the perfect tracked camera movement. It also automatically created undistorted footage, AND of course, it gave me a decent scan of the island, which was great for a clean integration at the intersection of the rock and the 3D objects.
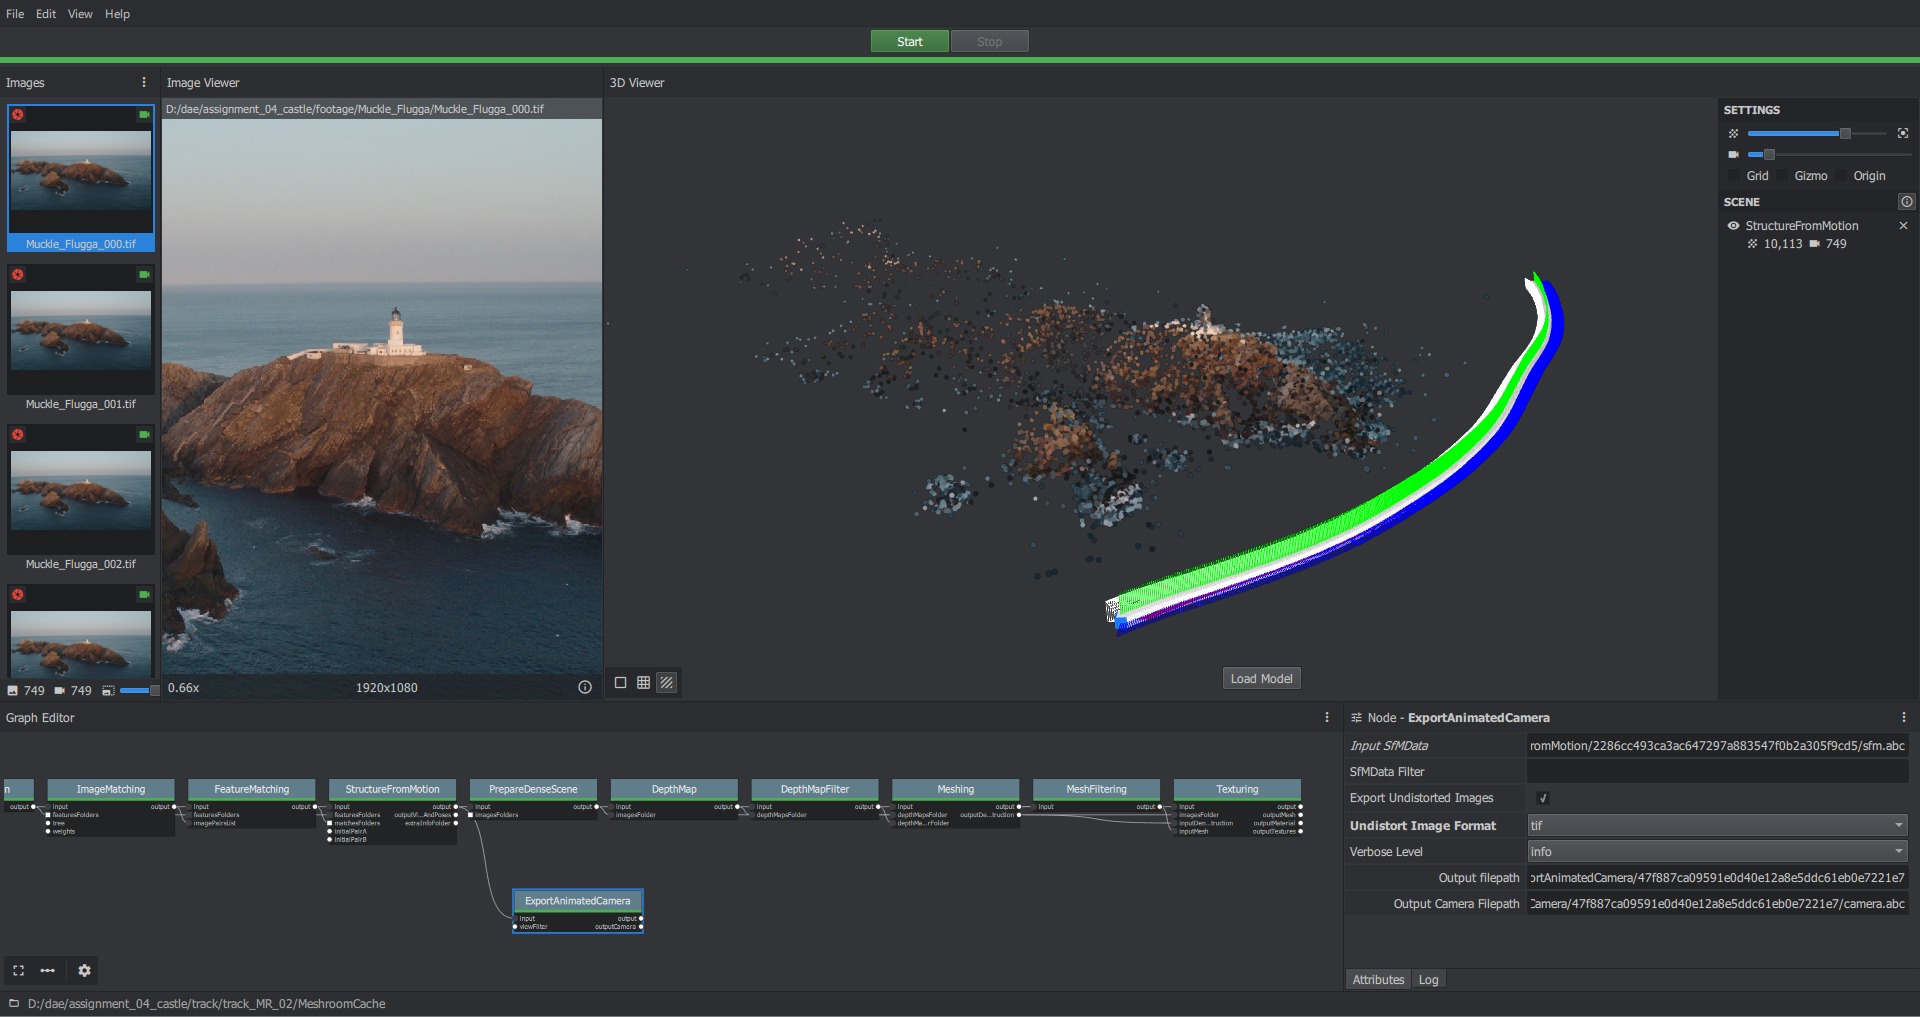
I used the scanned rock and the lower parts of the cliffs as holdout which made for a smooth transition into the footage.
There are some effects like fog/clouds which were super fast to render using the emission shader in the volume output.
Compositing for things like atmospheric depth and final color grading was done in Blackmagic Fusion.
Overall it was a fun project and I’m quite pleased with the result although I now see a lot of areas to improve on. I’ll definitely be doing more environments in the future.


About the Author
 Jasper Schubert, I’m a student in 3D / VFX and a long-time Blender enthusiast.


Very very nice.
Thanks a lot!
This is awesome!! Fantastic work!
Thank You!
Can you explain what you meant when you mentioned vertex colors and painting rough spots?
Yes, I painted very rough masks with vertex colors, and then applied procedural patterns only within those areas. This way you have almost full control on where the detail appears, but you still save a lot of time because the rest is just a simple node setup which you only have to make once. Hope that makes sense