
Who am I?
Hello! My name is Carina Soares and I’m a 3D Artist living in Oporto, Portugal.
I have a Bachelor's degree in Digital Game Design from EsACT-IPB, which is where my love for 3D began.
In my free time, I embrace challenges like #Sculptober, and that’s where this jellyfish was born.
Jellyfish Process
Research
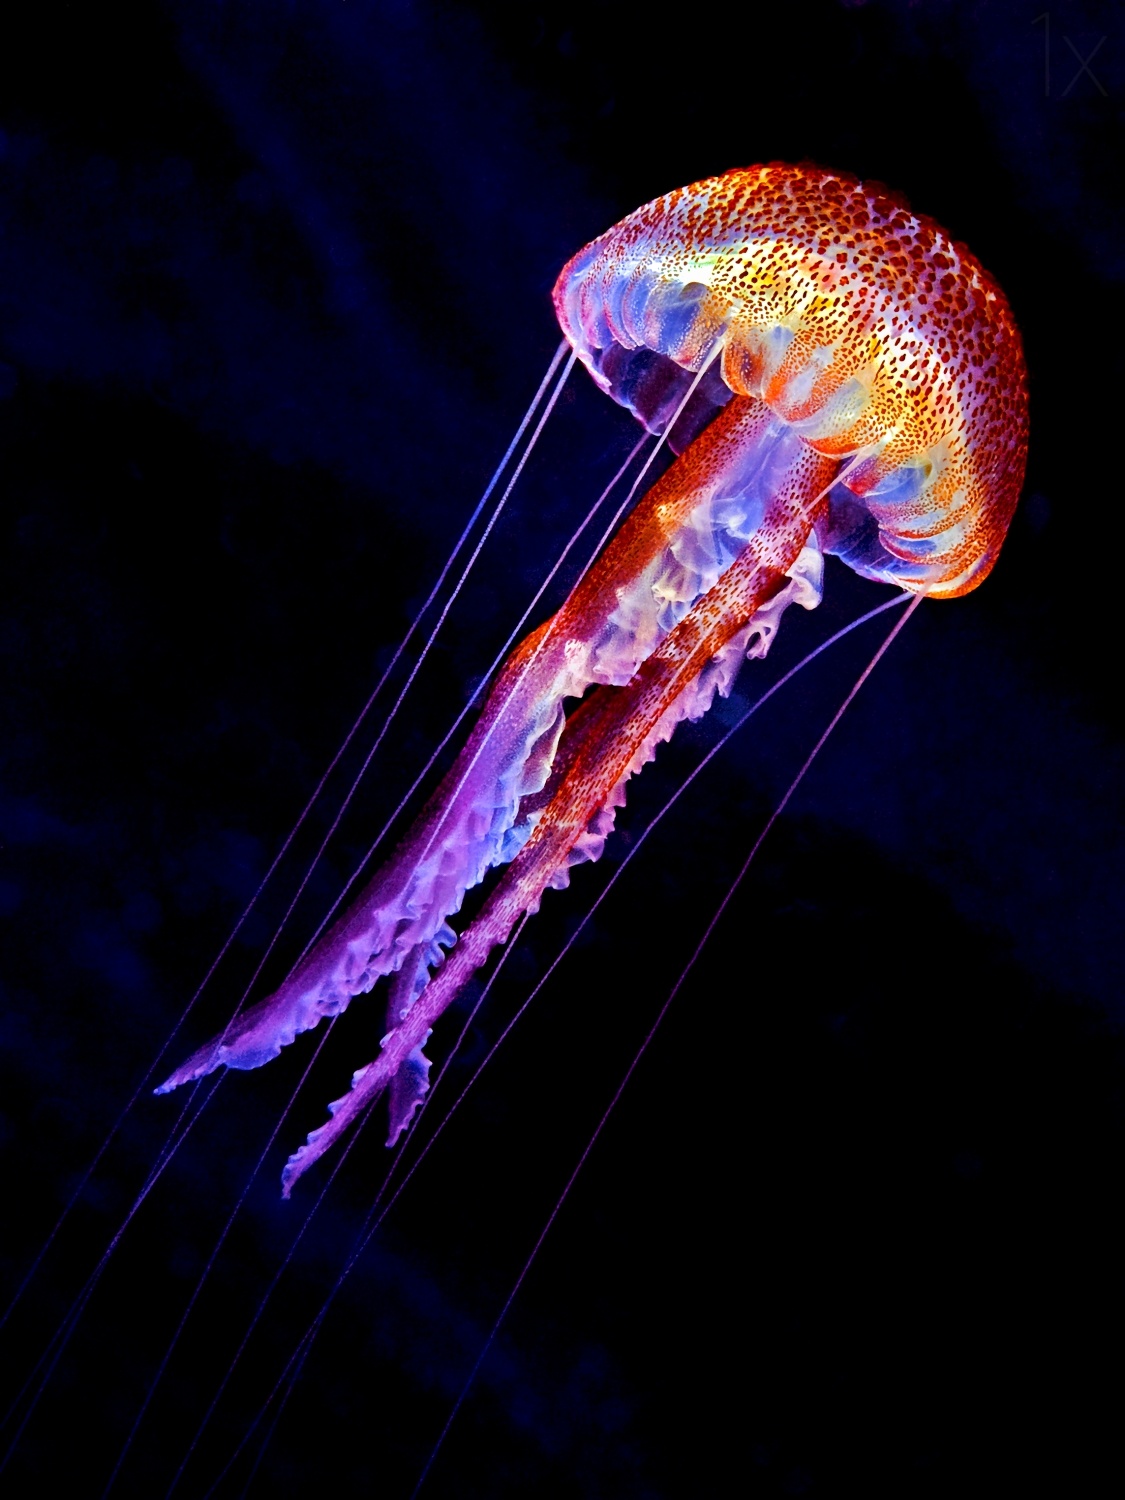
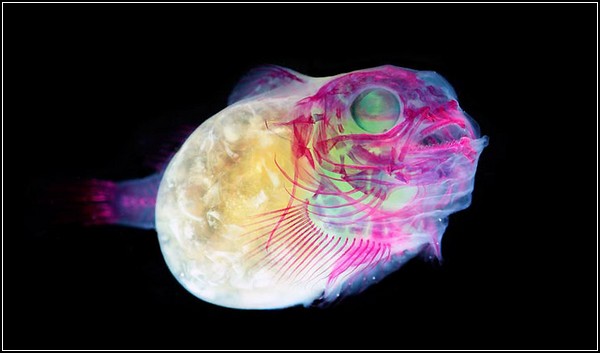
The theme of Day 3 of the Sculptober Challenge was “Deep Sea”.
To me, the theme was fascinating because I’ve often thought about the photoluminescent creatures that live at those depths.


_Luc_Viatour.jpg)
3D Modeling
After doing some research, I had a good idea of the look and shape of the creature I wanted to create. It was pretty straightforward modeling.
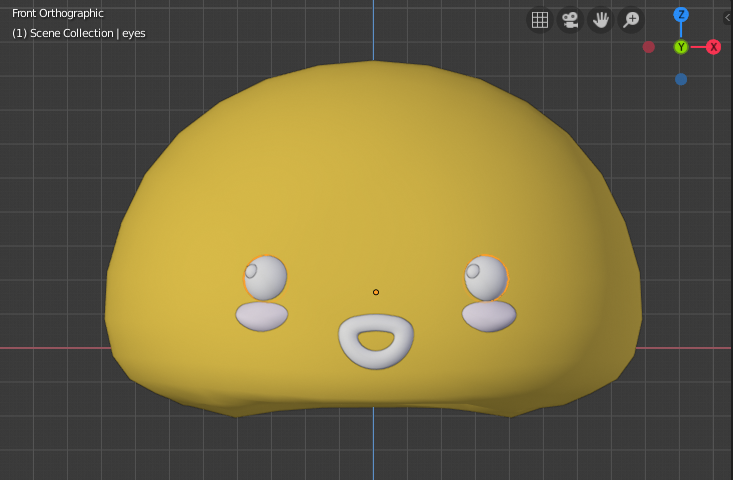
I started with the “inner head”, because of the effect I wanted to create afterward.
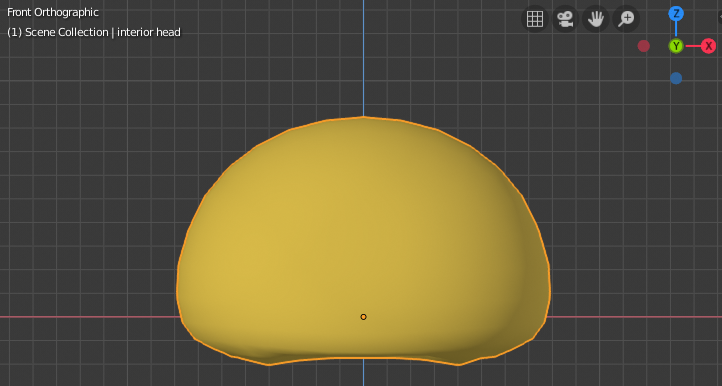
Since I also like stylized and cute characters, I added eyes and cheeks. These facial features added a lot of character and expression to the creature. The eyes, the reflection on the eyes (they are 3D, as well), and the mouth are all separate shapes, ready to have materials of their own.
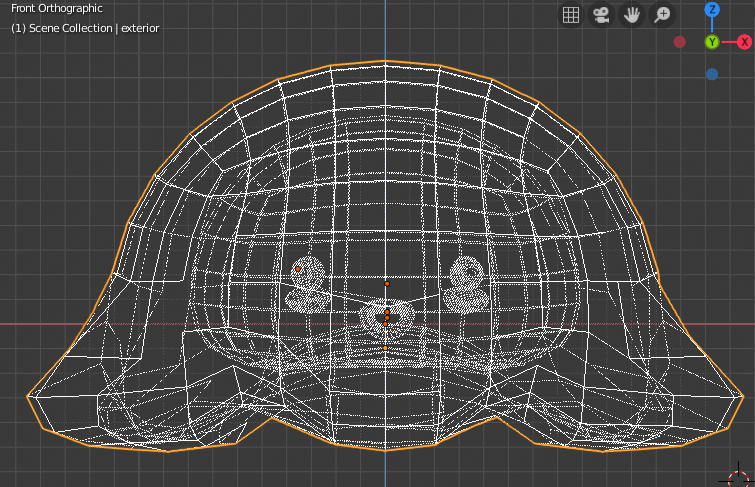
Next, I just duplicated the inner head, scaled it, and adjusted its shape using Sculpt mode in Blender 2.8. In the image below, you can see how the wireframe looks.
The tentacles were pretty straightforward as well. I used a set of bezier curves, and I played with the Geometry and Bevel from the Object Data. I added another bezier curve on the “taper object” option to create the pointy ends of the tentacles.
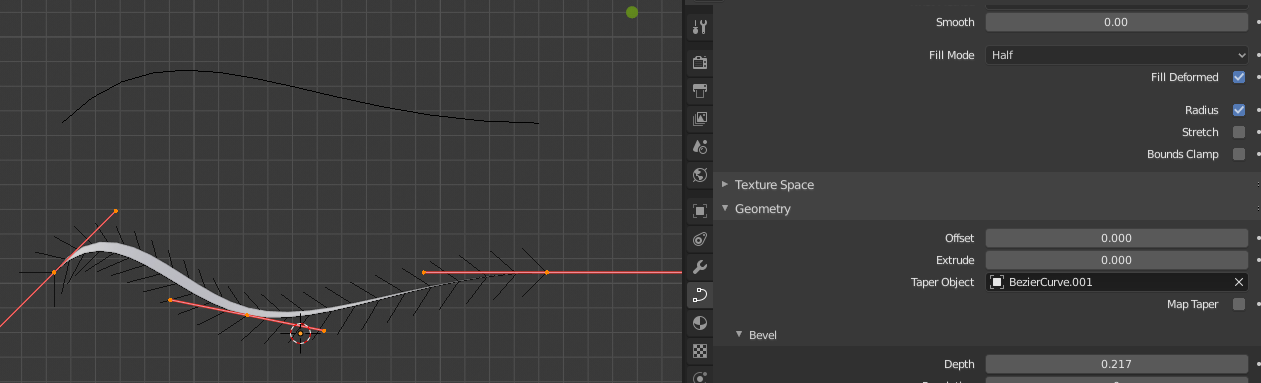
After I had given the right shape to the tentacles by adjusting the points in Edit Mode, I created two sets of tentacles by duplicating and rotating them to create different shapes; one was for interior tentacles that would have the same material as the inner head object (yellow material) and the other for exterior tentacles that would have the same material as the “outer head”.
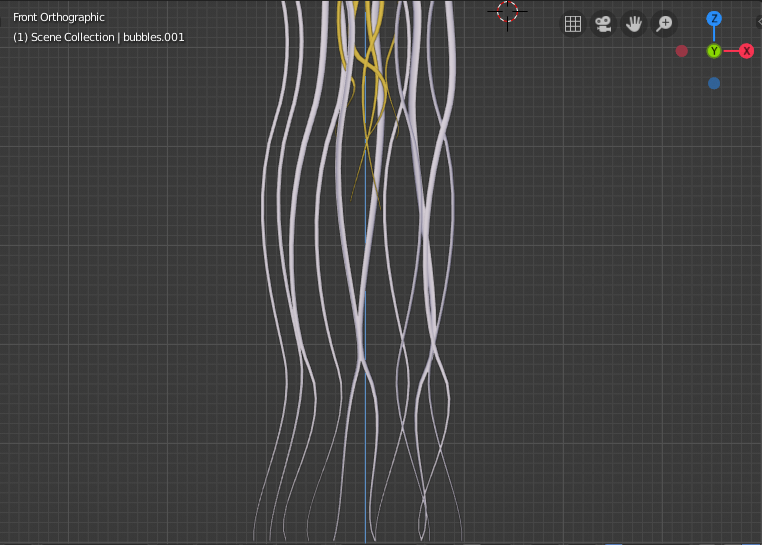
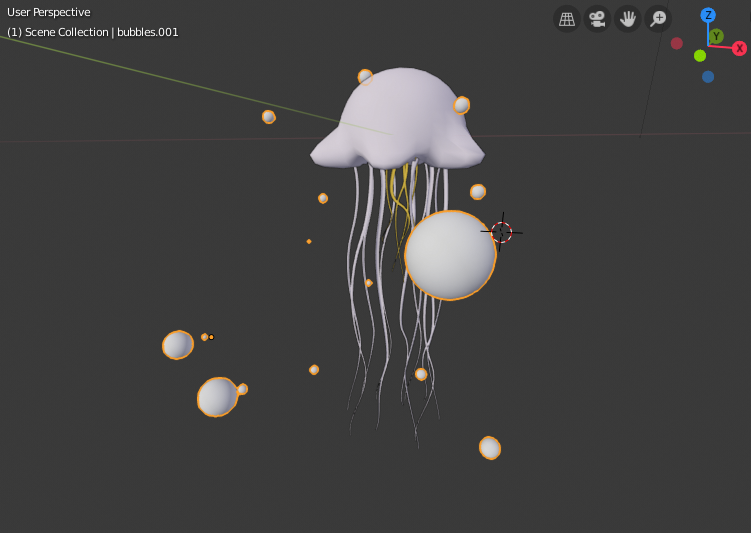
The character was pretty much ready, but I still wanted to add some small details such as bubbles. The bubbles are simple spheres with random placement and sizes to give a more “natural” look. They also helped to add more depth to the scene.
Materials and Shaders
For organizational purposes, I started to work on the objects that shared the same material. I chose EEVEE as the render engine.
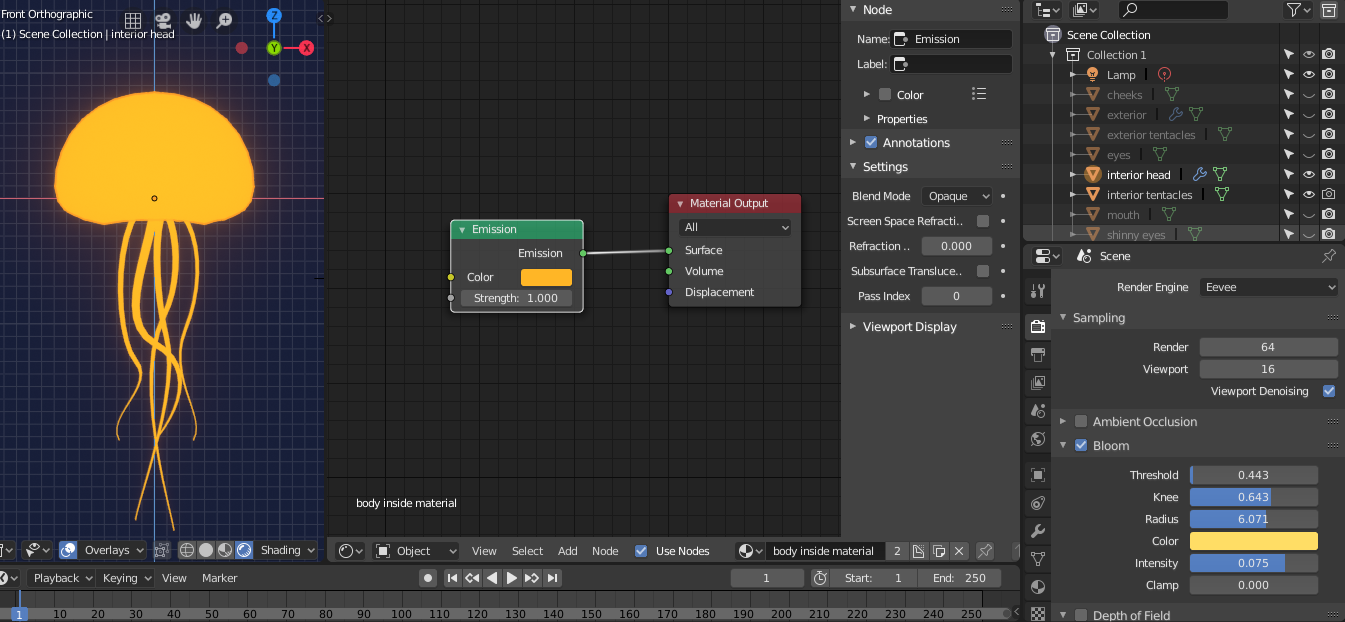
First I worked on the materials for the inner head and inner tentacles. The material has only an Emission node and is linked to a Material Output Surface. I chose a strong yellow to contrast with the background, which is set to be a deep blue.
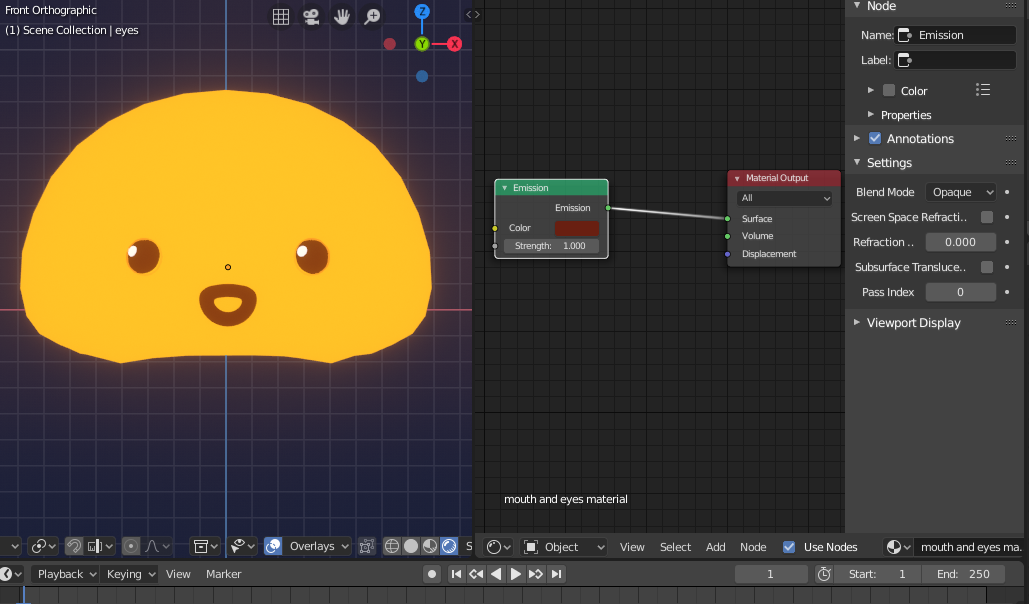
On top of the inner head of the Jellyfish, I added the eyes and mouth material with a similar shader as the inner head, but with a different color. The shine on the eyes is pure white with Emission, and the mouth and eyes are a reddish-brown with Emission, as well.
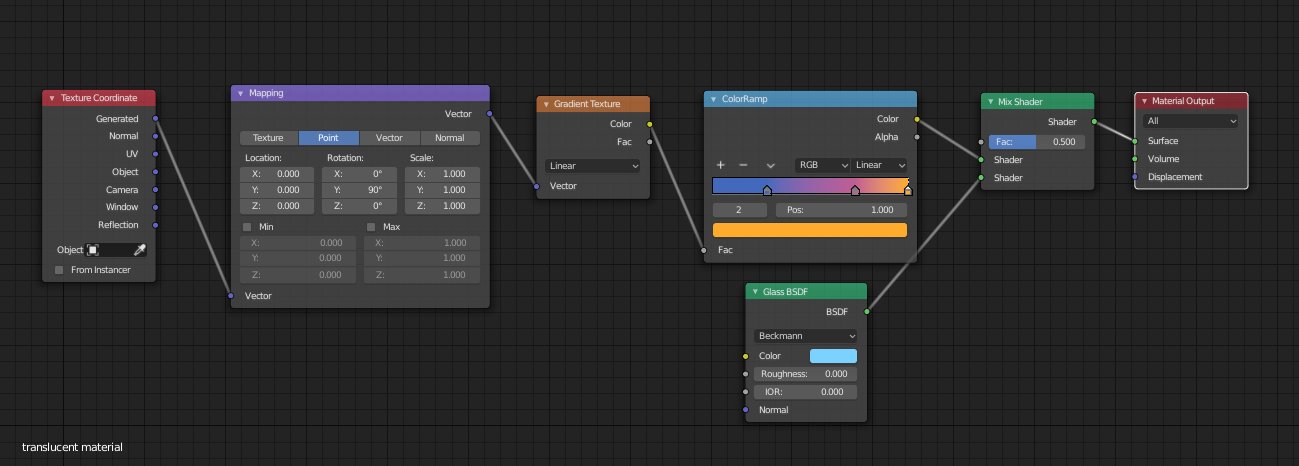
Now comes the best part: the translucent material that uses a ColorRamp and Glass nodes to give it its flair. This shader is shared by the cheeks, the outer head and outer tentacles.


Above are the values I played with to get the right feel. Also notice that in “Settings”on the Texture Coordinate node, I’ve used the Additive blend mode, which was the one that helped me to create the almost glassy feel that the other modes did not create.

After setting up the Texture Coordinate as I mentioned above, I added a Mapping node because I wanted to define a “direction” for the gradient to work in the way I wanted. I played with the Point, setting the Y at 90º.
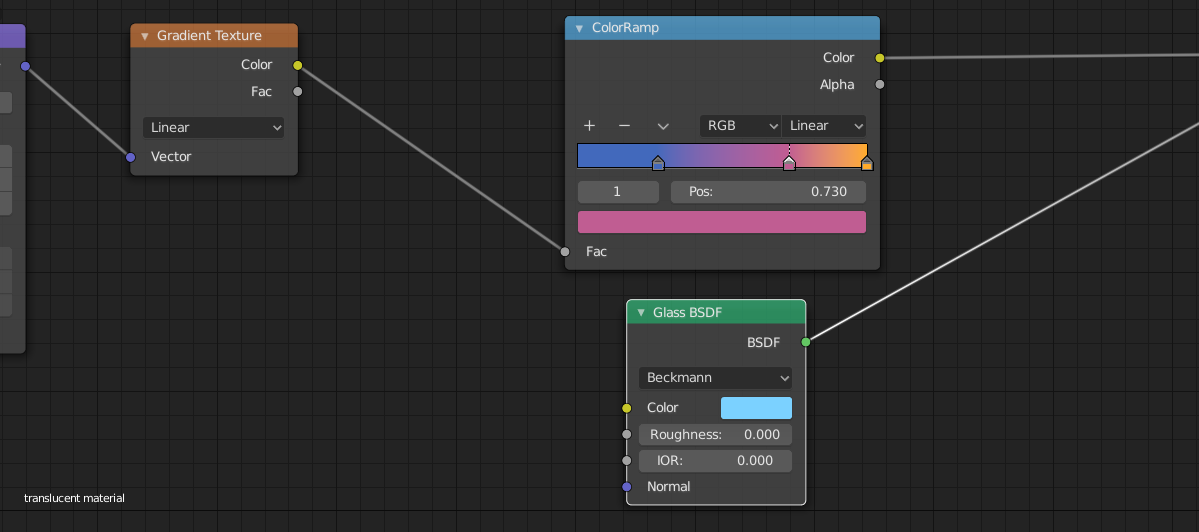
In order to create the colorful gradient, I added a Gradient Texture node, linked by vector with the Mapping node and by color with the ColorRamp node. I also added the Glass BSDFnode, but it is linked with Mix Shader like the ColorRamp is.
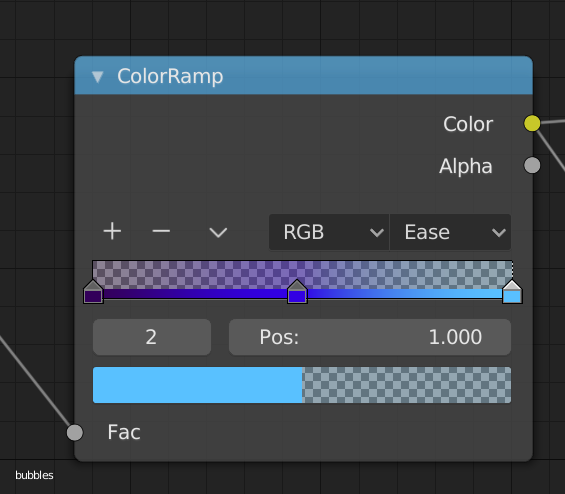
This one is really special because it is where I defined the 3 colors (blue, pink and yellow) that will give that dreamy feel to the image.


Notice that the yellow color is at the far right position of the ColorRamp. This is intentional because I wanted to create a connection with the yellow objects above.
To wrap this all up, the final nodes are the Mix Shader that blends the ColorRamp and the Glass BSDF, and the Material Output linked to the Surface.
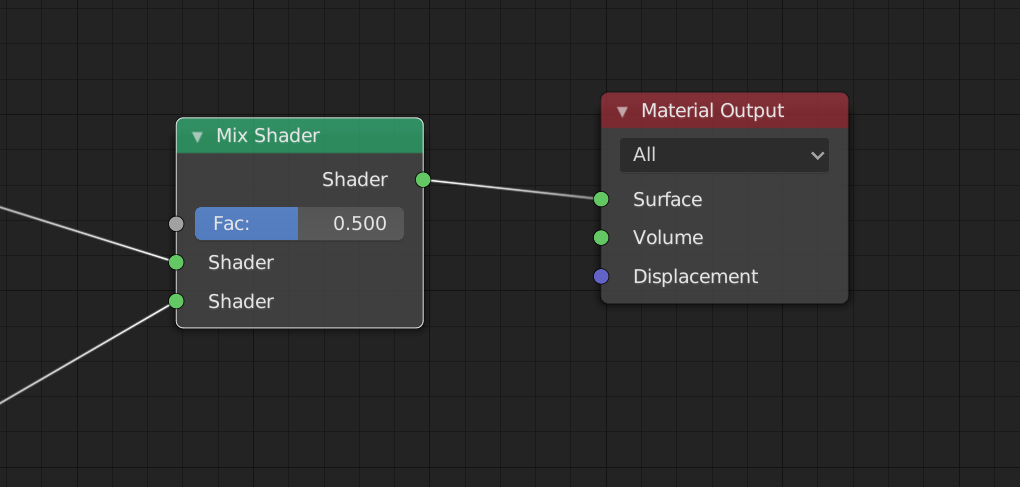
In the end, the Translucent Material Shader should look like this:
The bubbles’ material is pretty much similar, only with a few changes in the ColorRamp node.
Renders
In the last part, I have to set up a camera to be able to render some images. The size of the images is width: 1080px, height: 720px.
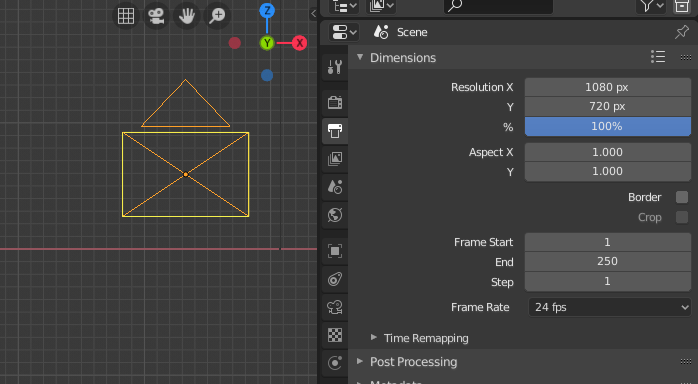
After the camera is set up, I press F12 and let Blender do its magic.


Epilogue
The goal was to have a cute character, with an almost 2D feel, using 3D modeling and shaders.
You can see more renders of the artwork here.
And here is a small GIF:
A small render of the Cute Jellyfish <3 pic.twitter.com/tZDCRUrTbZ
— Carina Sofia Soares (@EtaCarinaGD) October 24, 2019
I am honored to have been contacted to write this article about the “Jellyfish” process.
I was just starting to learn Blender 2.8 when I was featured, and this inspires me to do much more for the program and the community.
About the Author
 Carina Soares, 3D Artist, proud Portuguese and Oporto citizen. Creating dreams with a creative mind.
2 Comments
Excellent!!!, thanks for sharing.
Thank you so much :D
Feel free to ask any questions ^^