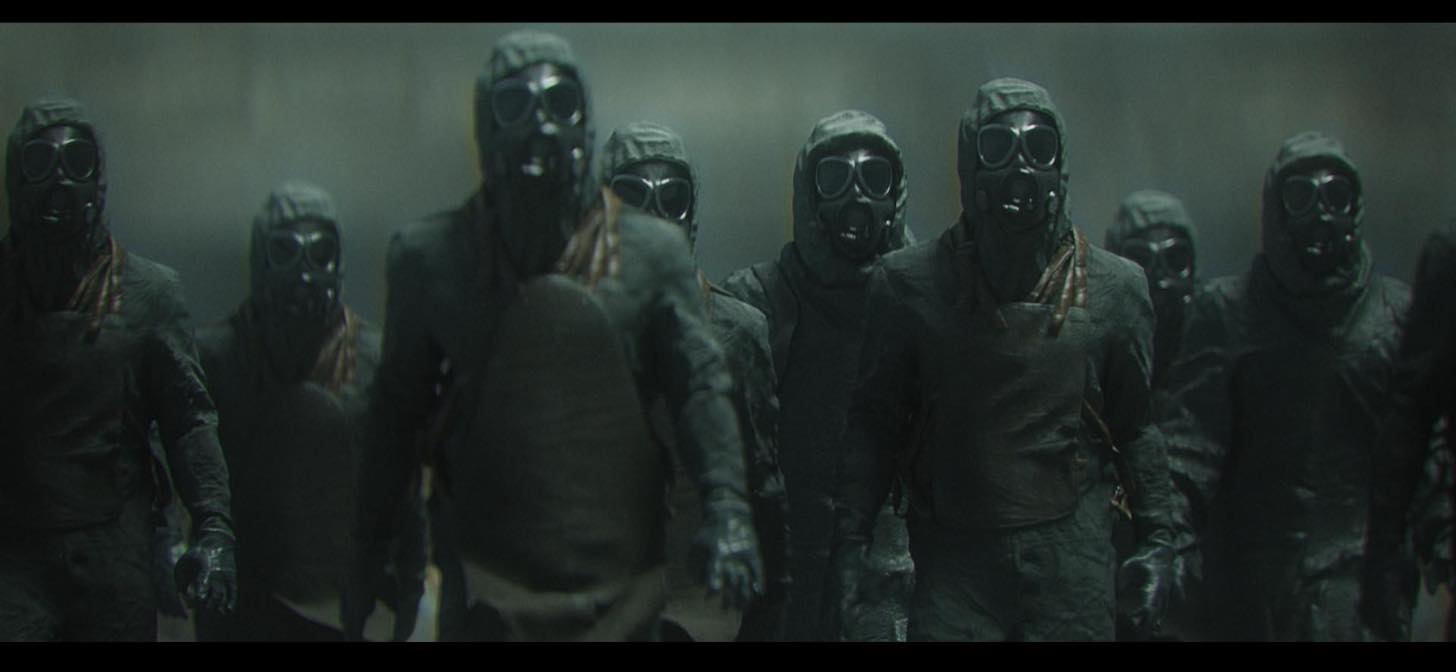
Behind the Scenes: Chernobyl Liquidator Fan Film
My name is Albin MERLE, I am working in the VFX industry in France and I am a Blender enthusiast. Most of my personal works are uploaded on my YouTube channel and I work with Blender daily on professional projects.
As I was learning the recent release of Blender 2.8, I was watching the HBO show “Chernobyl”.
To me learning all this new UI and all these new features and shortcuts wasn’t fun at all since I was completely familiar with the old 2.79 style, and that version had used pretty much the same shortcuts since 2.3.

Watching the show gave me a very deep inspiration to work on some shots that could cover all the main tools I had to work on.
Animation
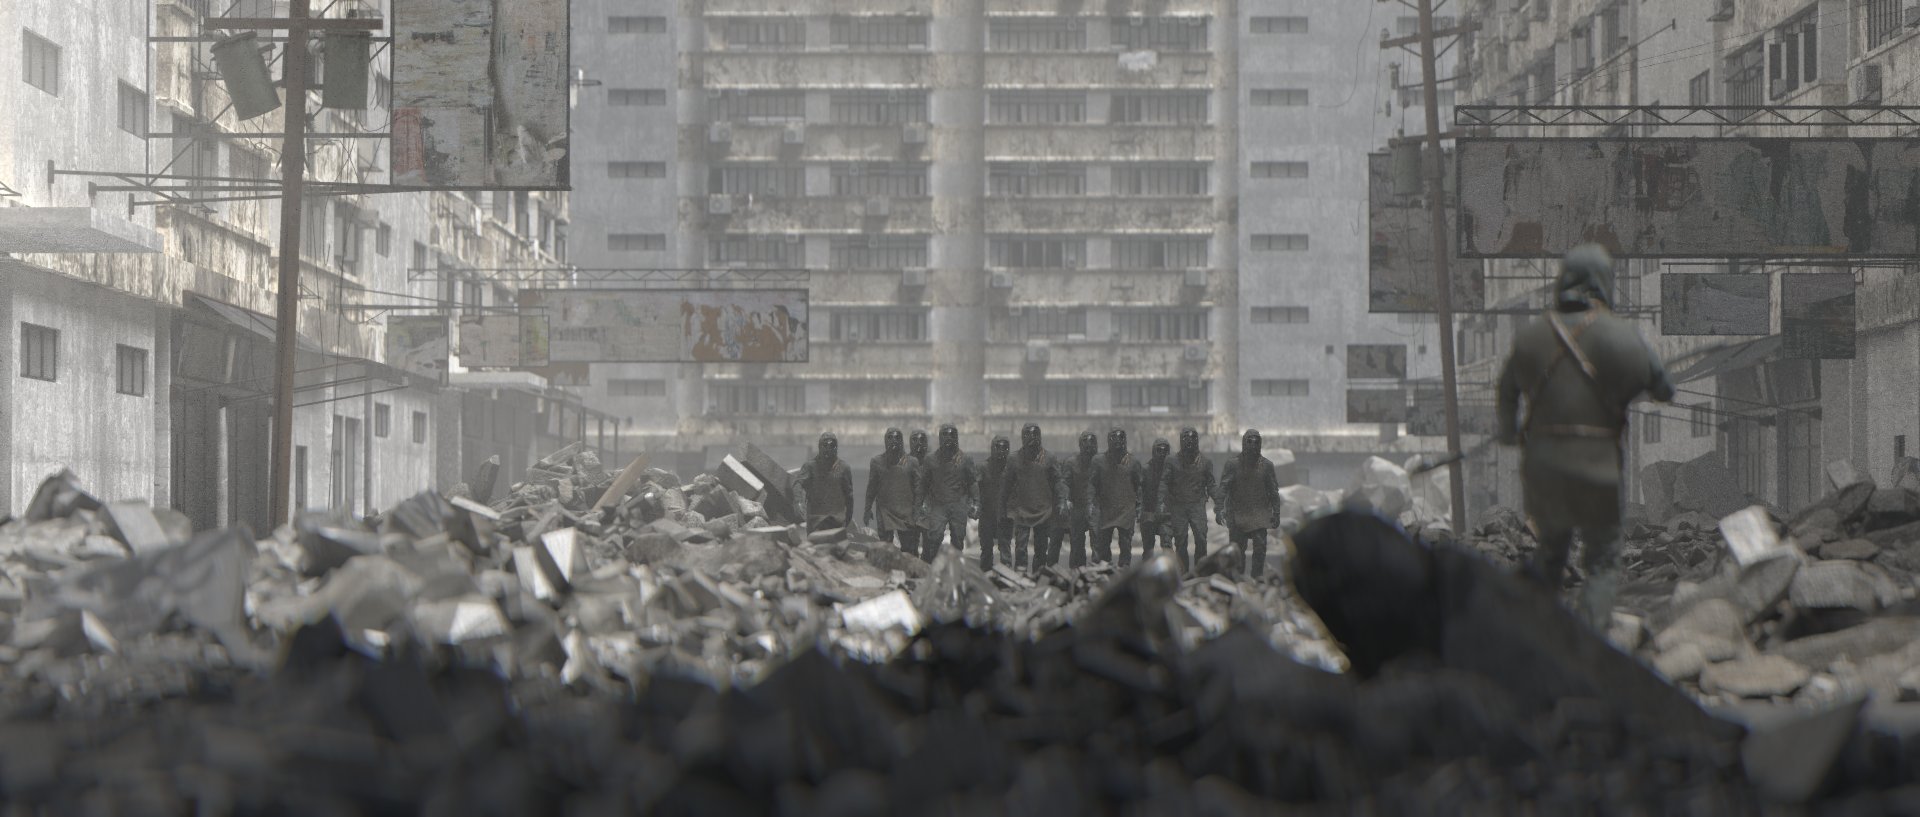
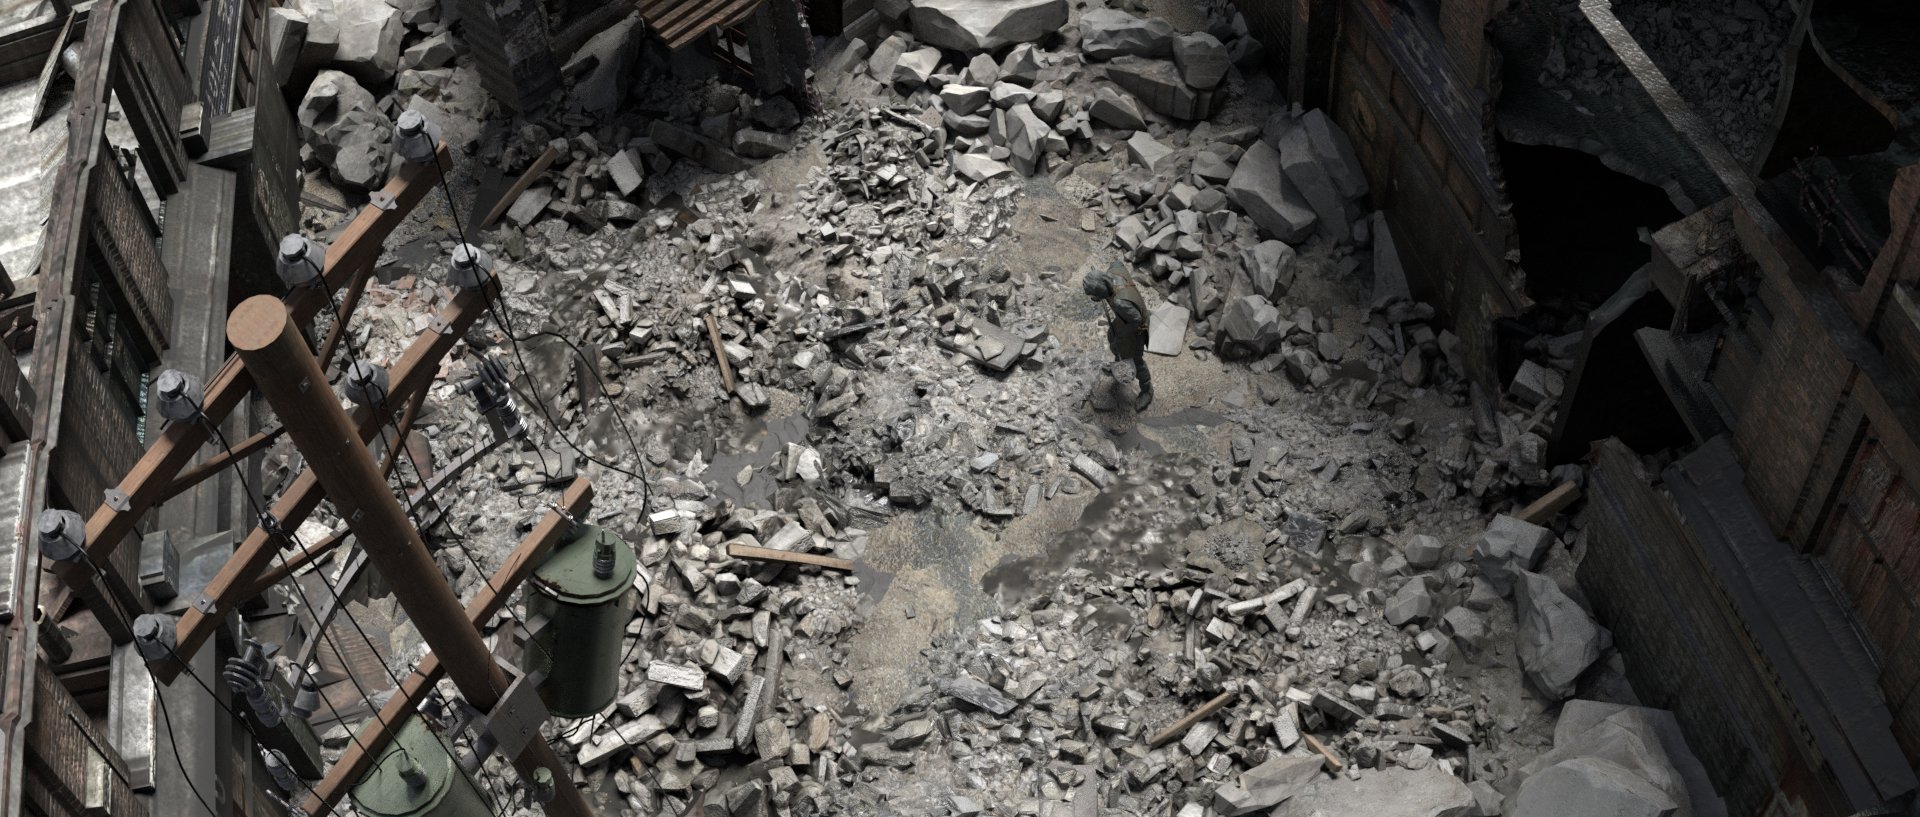
So I first began to animate the guy measuring radiation amounts on the ground (image above) and, when I was done with his behavior, I continued to work on other animations and different camera shots without really and honestly knowing where I wanted to go with this project.
So for the animation on the character model I worked with MIXAMO motion capture based animations.
I imported the model, as low poly as possible, to make sure the Mixamo Autorig would be able to handle it. I would later skin the high poly model onto this rig.
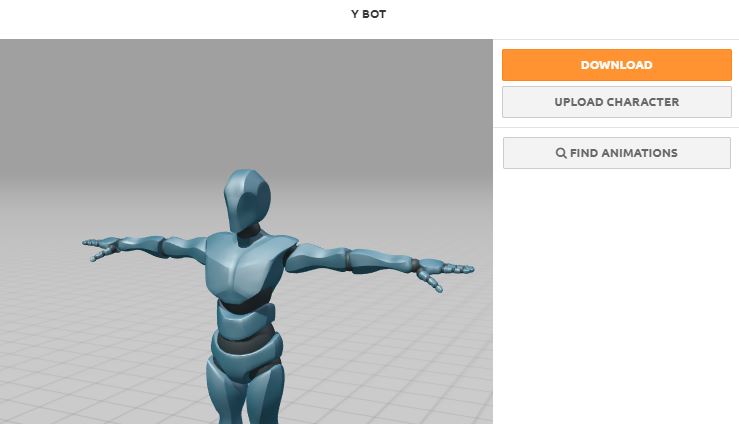
After I uploaded the model, it automatically appeared facing the way it should.
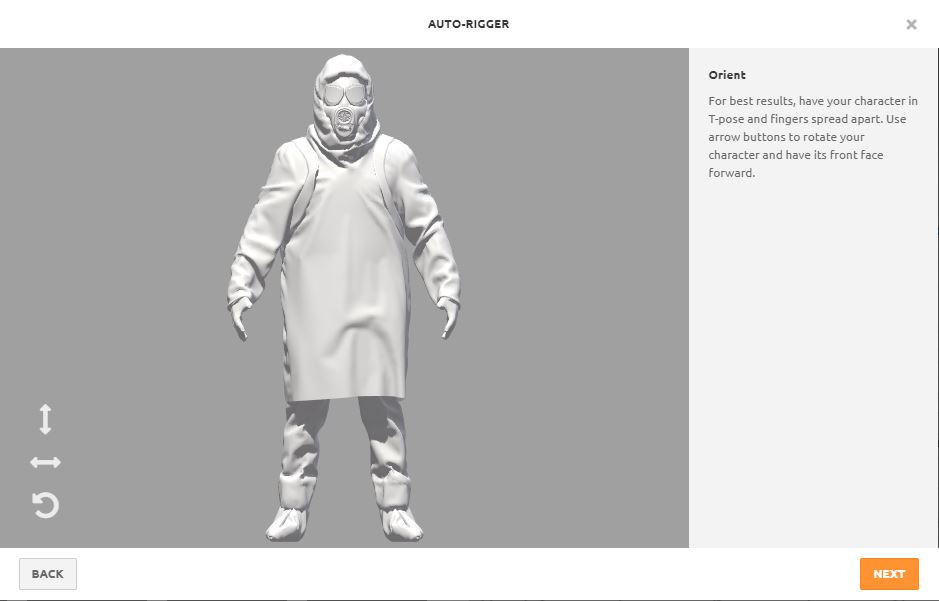
I let the autorig understand the model and I carefully placed all markers and selected next. It could take some time to generate the rig, depending on the complexity of the model.
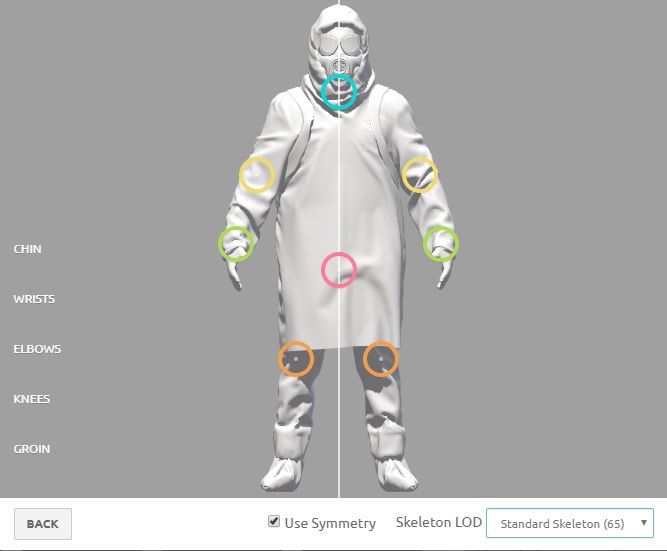
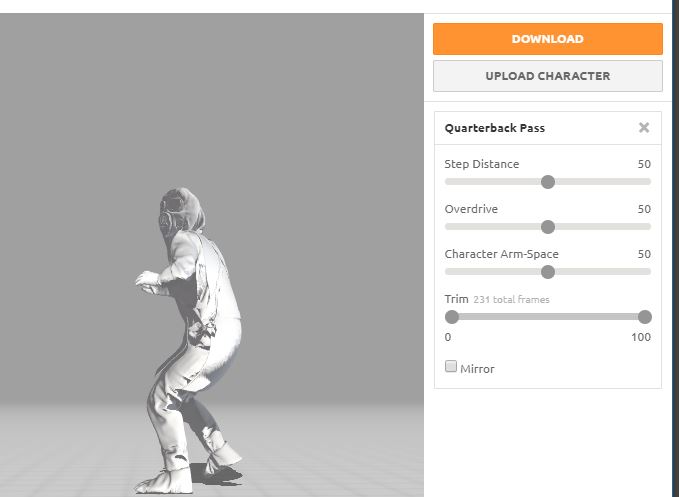
I selected the animation sequence that fit my project, making sure all settings were good and then selected “download”, again selecting the settings that suited the project.
Back in Blender
As the autorig had generated auto skin on the low poly model, I needed to improve the skin to make sure the high poly model would deform correctly.
After Importing the FBX file, I could now skin the high poly model on the rig by selecting the model and then the rig object, hitting “ctrl P” and “automatic envelope”.
Now I could edit and refine the skin of the high poly model.
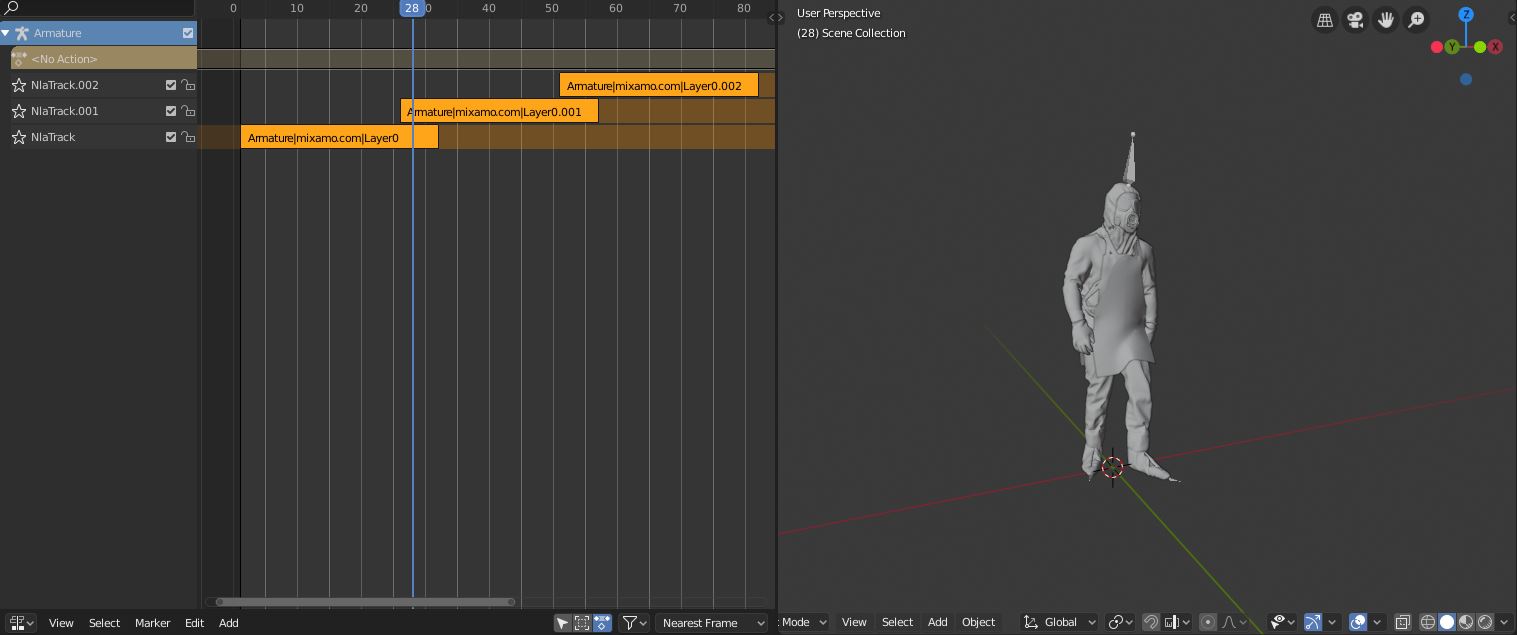
What I did after that was find several Mixamo animations and imported them as I needed them for one shot or another, and played with the nonlinear animation panel.
With the nonlinear animation tool you can add, offset or even transition different animation tracks.
For instance, if you add more FBX animation, you’ll find the tracks stored into the .blend file even if you delete the rig that they belong to. You can then add them into your animation timeline.
Once I had my animation done, I created a specific vertex weight paint to indicate where the model should deform with soft bodies dynamic.
I found that soft body simulation helps a lot when it comes to simulating fine jiggling parts. It requires less time to compute and doesn’t need an inside collision model to be driven. So for the suit, I went with a soft body simulation.
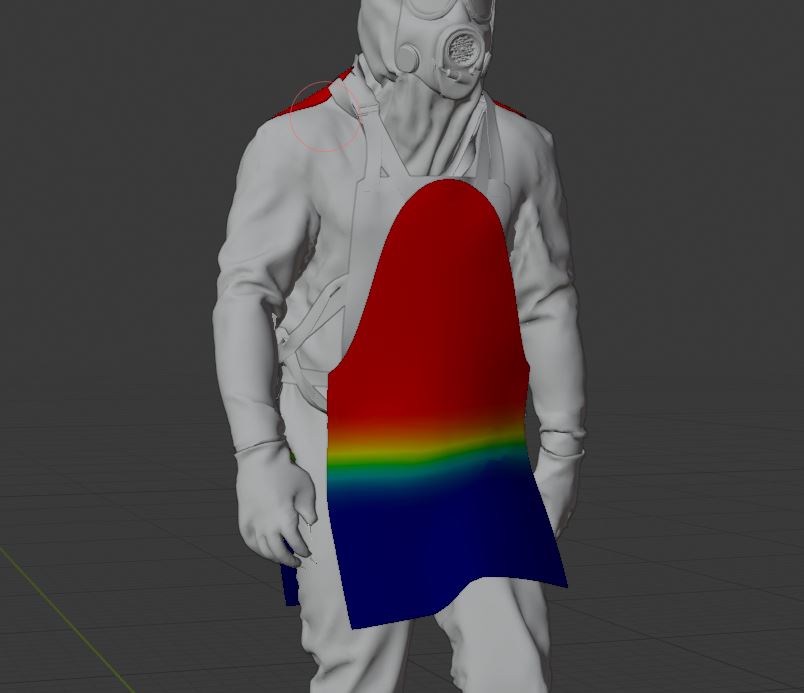
I used the Tissue addon to create a vertex weight value based on curvature and refined it by hand to make sure jiggling parts only moved where I wanted them to.
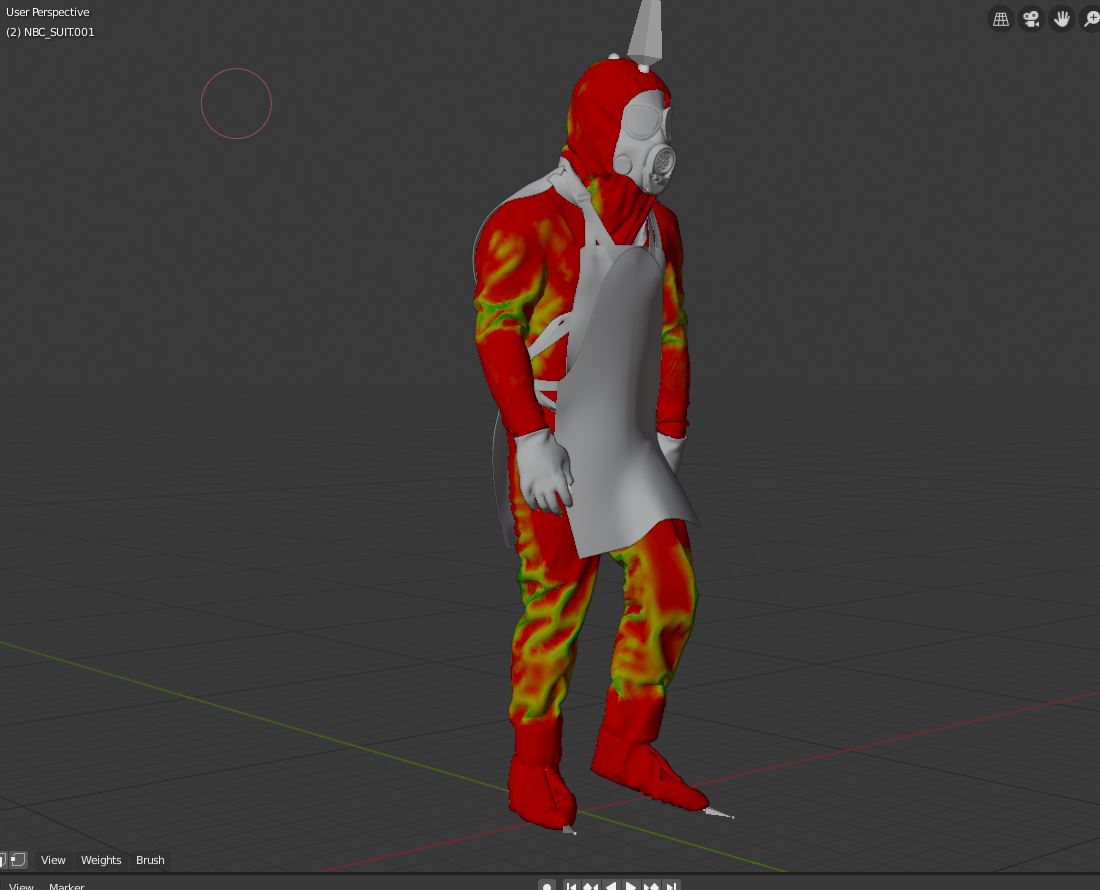
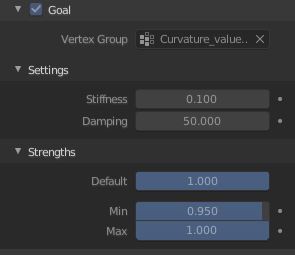
To get the most effective and not time- or power-consuming effect with soft bodies, I used the goal value to specify where the bodies could deform and made sure that they would not behave like jelly.
For the apron, I used cloth simulation, of course; I couldn’t cheat the result with soft body for this kind of deformation. So I did almost the same thing, painted a vertex weight group and told the cloth to simulate only where there was blue.
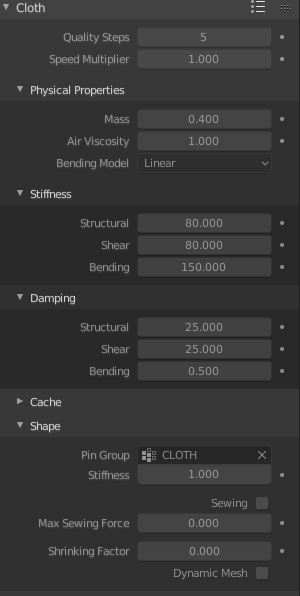
For this cloth simulation, I had to make sure my suit model under the apron had a collision physics attribute.
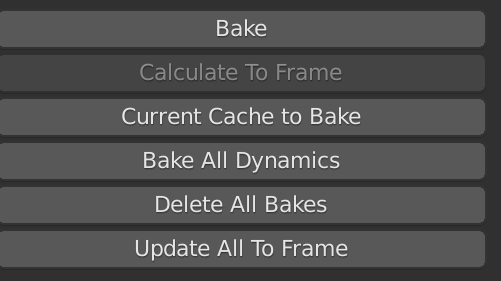
When it comes to changing the animation, thanks to the nonlinear panel, I was able to quickly redesign my animation and placement and all of my characters and simply hit “bake all dynamics” again to run all those jiggle and cloth simulations on this new animation. Baking all dynamics was very helpful especially for these kind of shots.
Once one character was animated and character FX was done, I exported it in an Alembic animation.
I did this for several walk behaviors to get more variation and then imported everything into the environment scene, where I had set up lights and drawn paths for the characters to walk along.
The value of alembic is that it’s very easily understood by several softwares and it can be offset in time.
For instance, here, there are duplicated alembic geometry cache files, with or without accessories (apron, overalls, backpack) and offset animation. It looks like many different characters, but, in fact, they are 2 or 3 files instanced with variations.

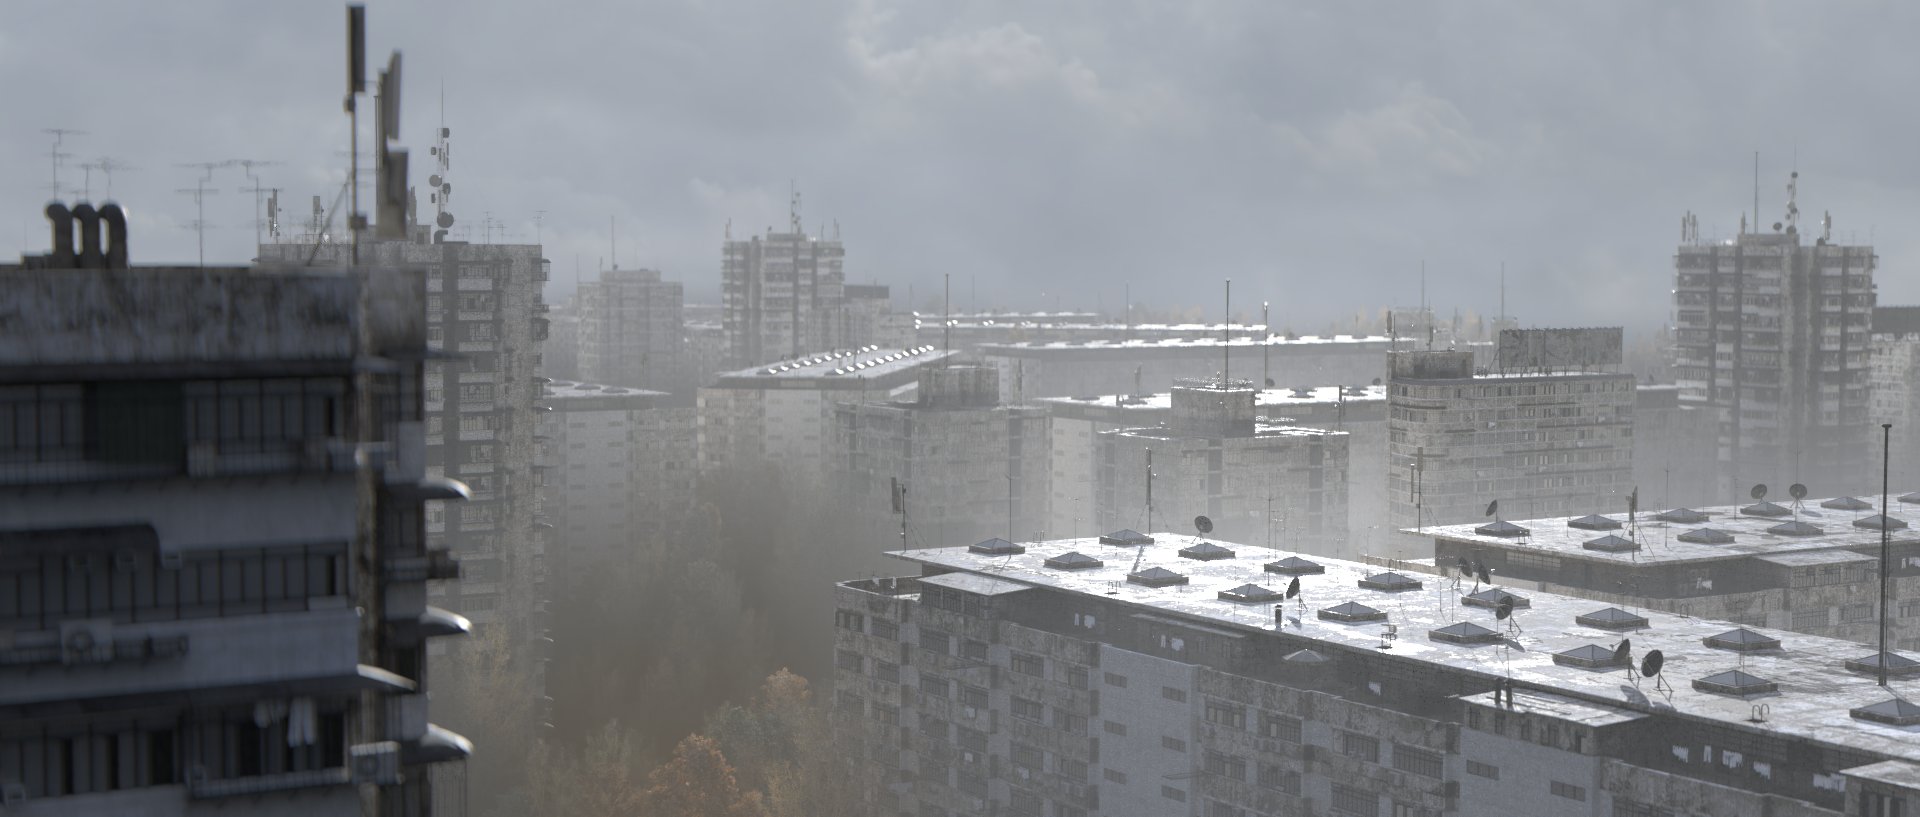
Environment
Now a few words about the environment creation.
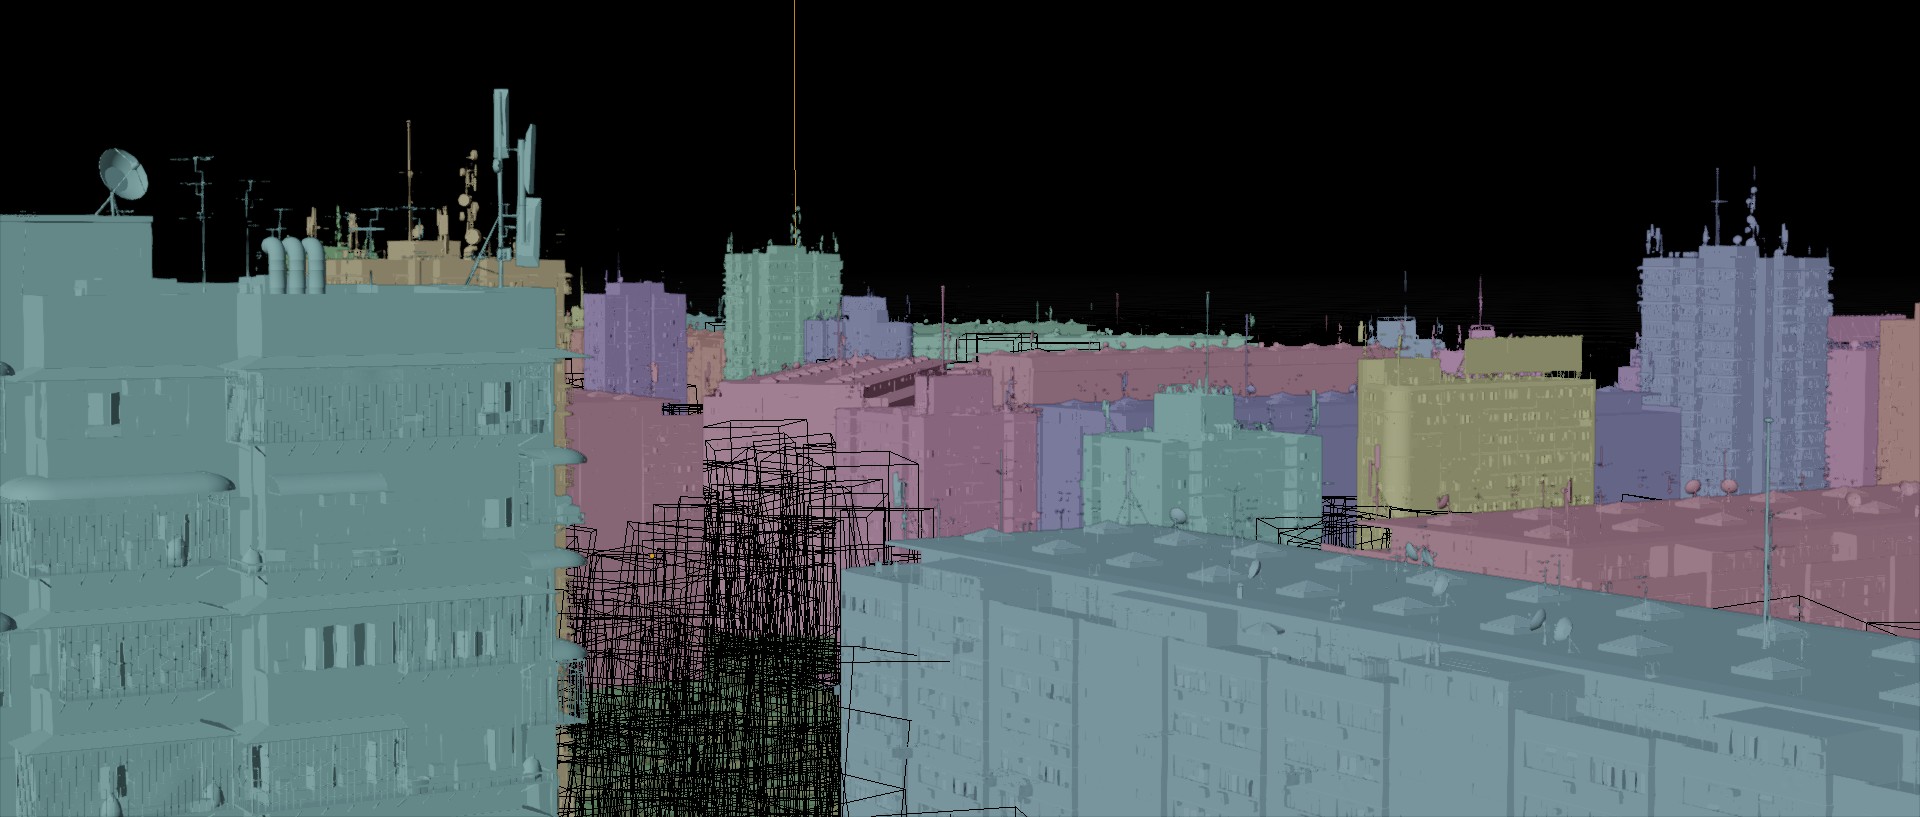
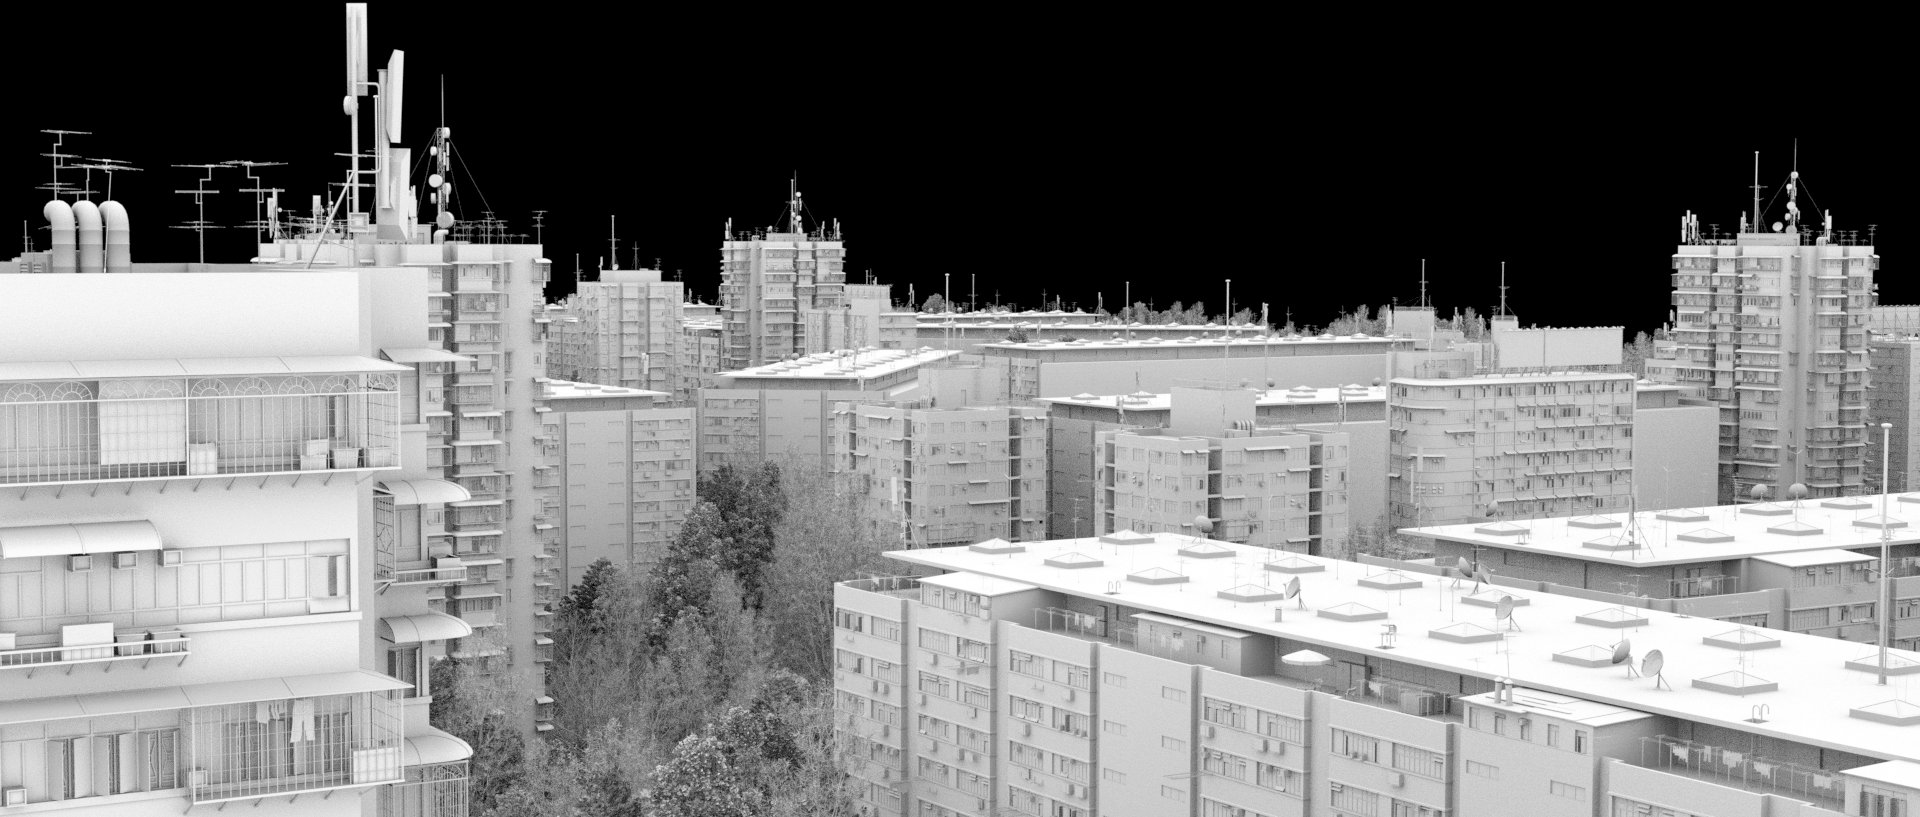
As I was too lazy to model everything, and since I was mainly getting up to date on new tools and new features in 2.8, I almost exclusively used 3D paid resources from Evermotion and KitBash3D.
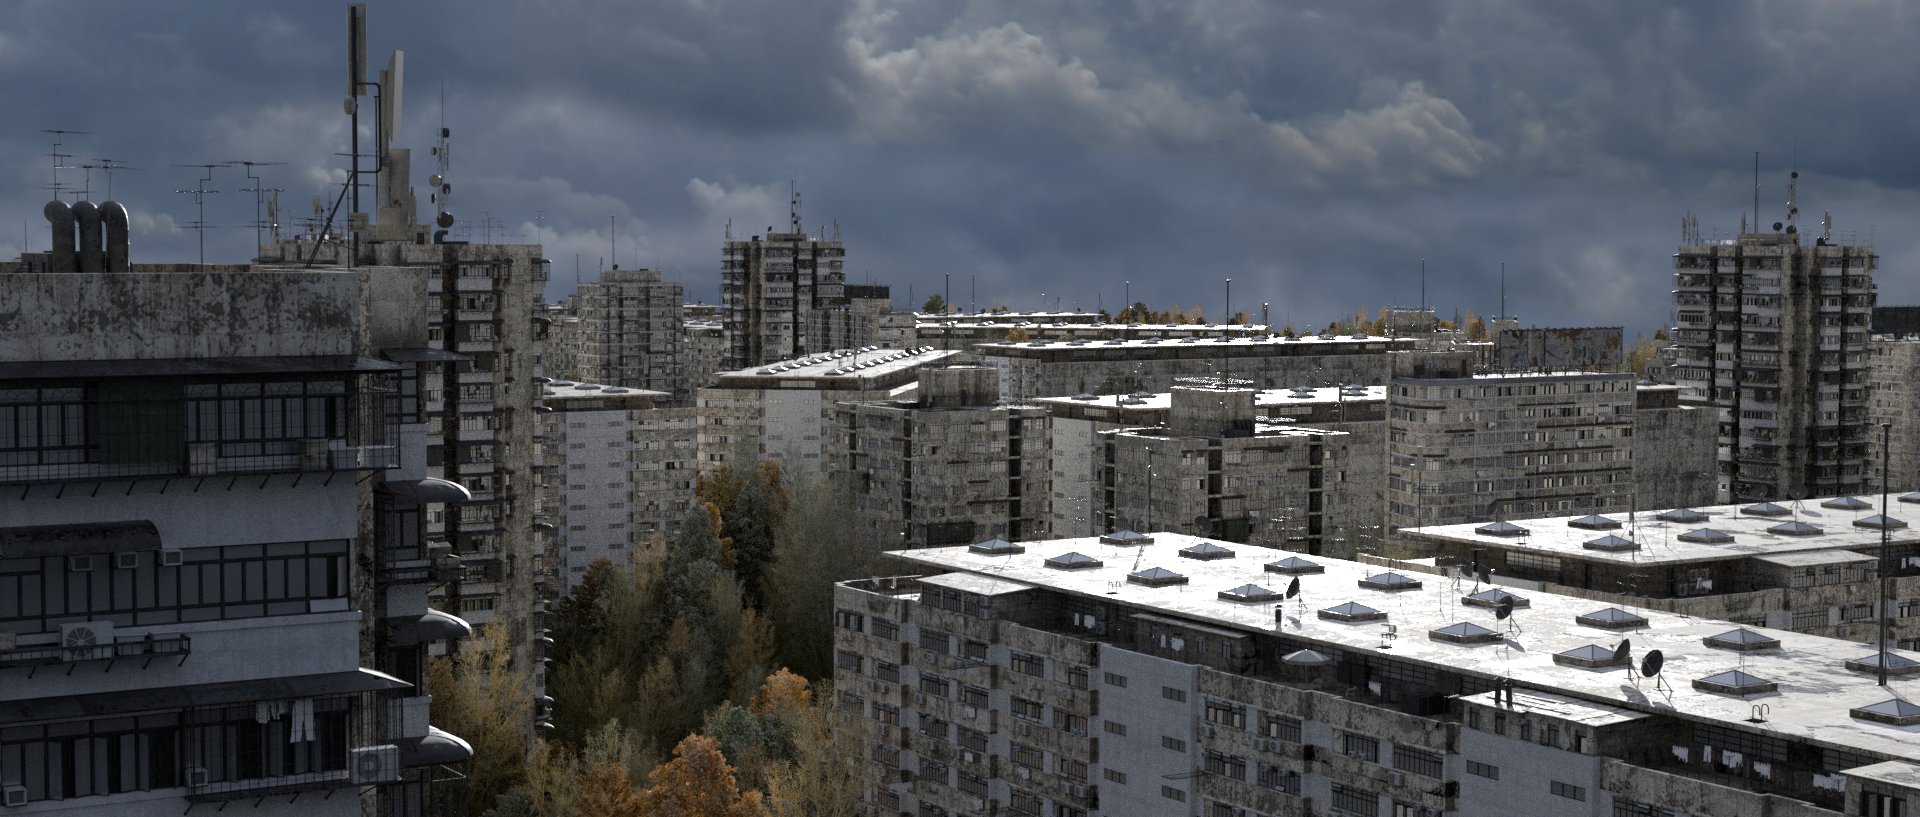
You may recognize the Archmodels Vol. 165 (Evermotion) and the Future Slums (KitBash3D), which were populated in the scene to compose and go along with the animation. I used assets sometimes to get a dramatic look, and sometimes just to provide a more balanced shot in terms of lighting, animation and camera action.
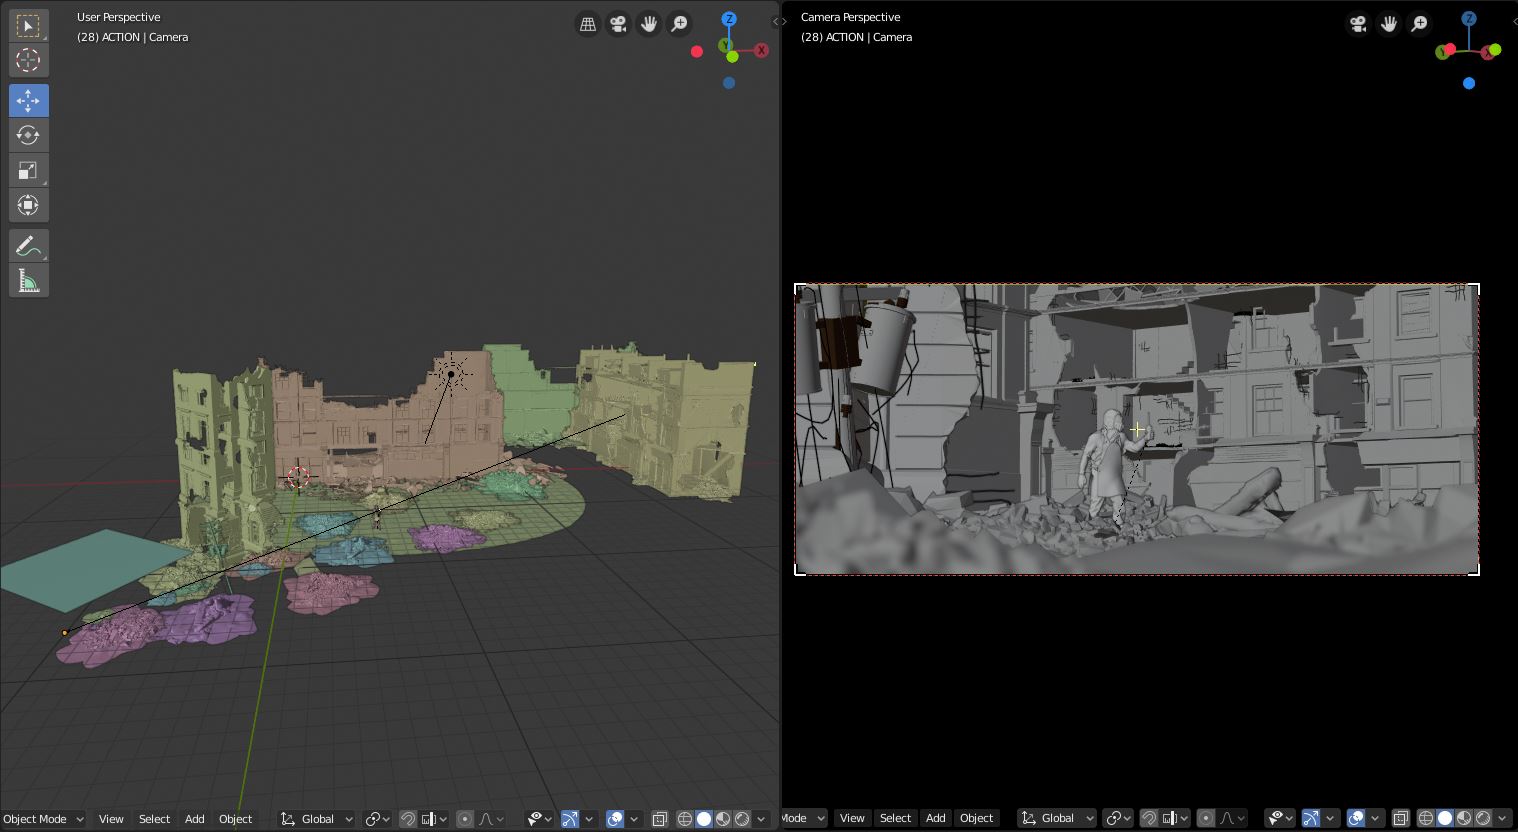
Sometimes I created a large plane (you can see it on the bottom left) to isolate the scene where the action was going on from lighting, just to make sure the look was going in the right direction, to the centre of my shot and nowhere else.
All assets were mostly placed and duplicated by hand.


Now I want to talk about the trees, because they took up a large place in this project. I wanted to try a simplified version of hair instanced to make sure Cycles would run it smoothly and quickly.
I used four models of trees, three fully leafy and one without any leaves to achieve more variation.
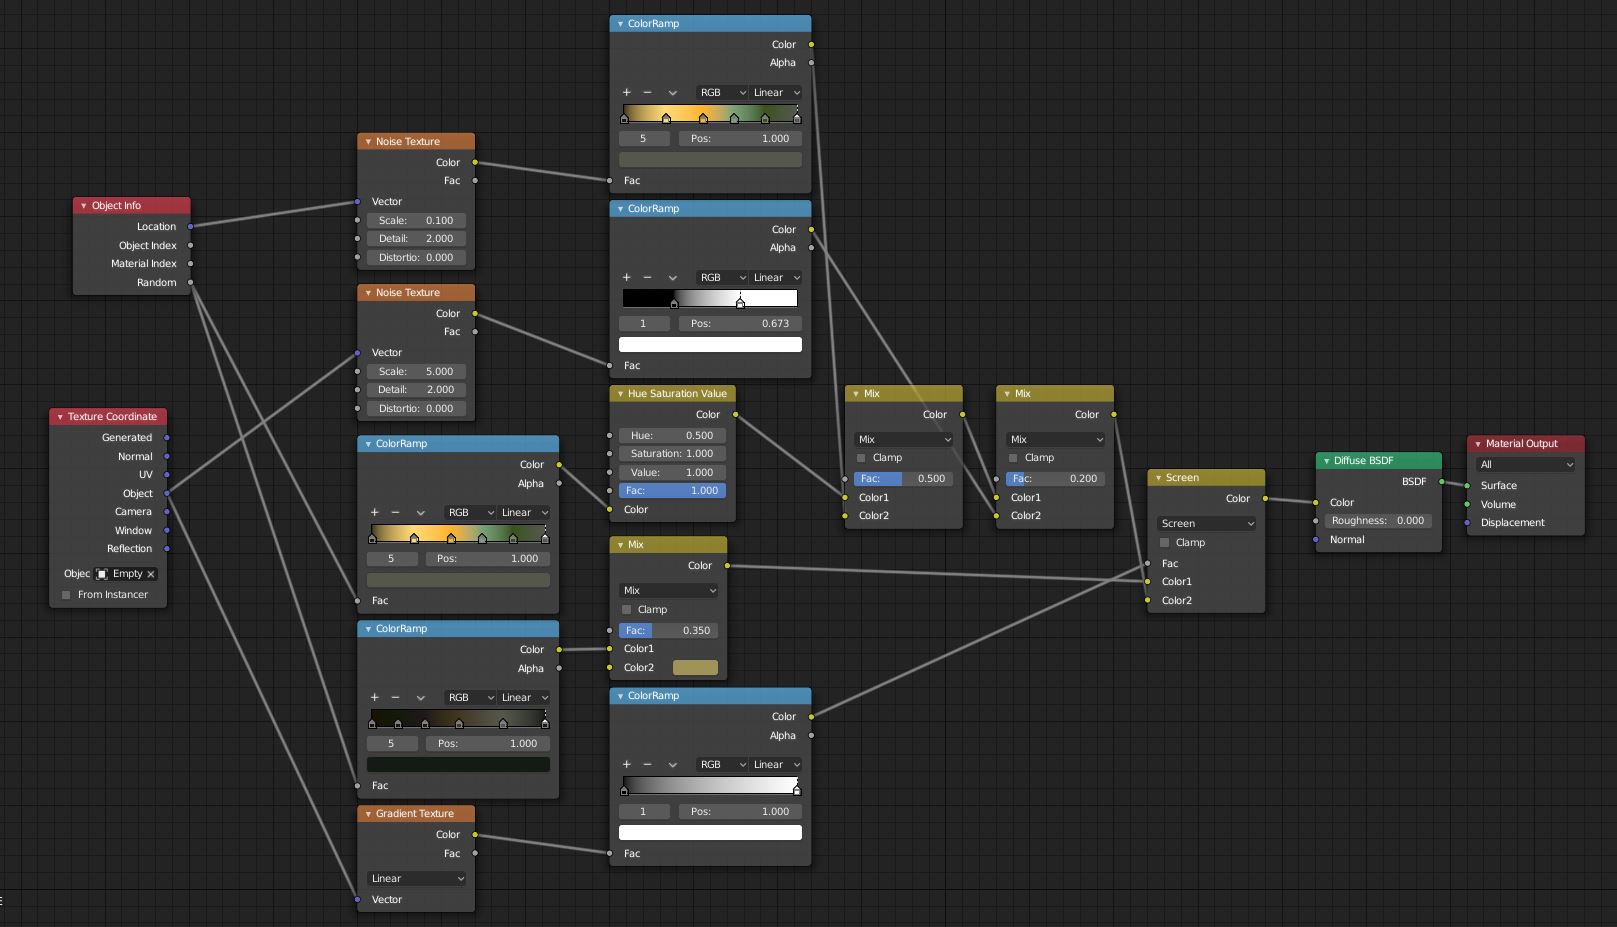
To preserve RAM use and computing time when the scene was fired to render, a special shader was created around only those four trees. Size and rotation variation were not enough, so I added more color variation according to the size and the placement of each instanced tree.
Here we can see how the colors are varying and fading from light to darker shades according the size. (Diffuse Color render layer)
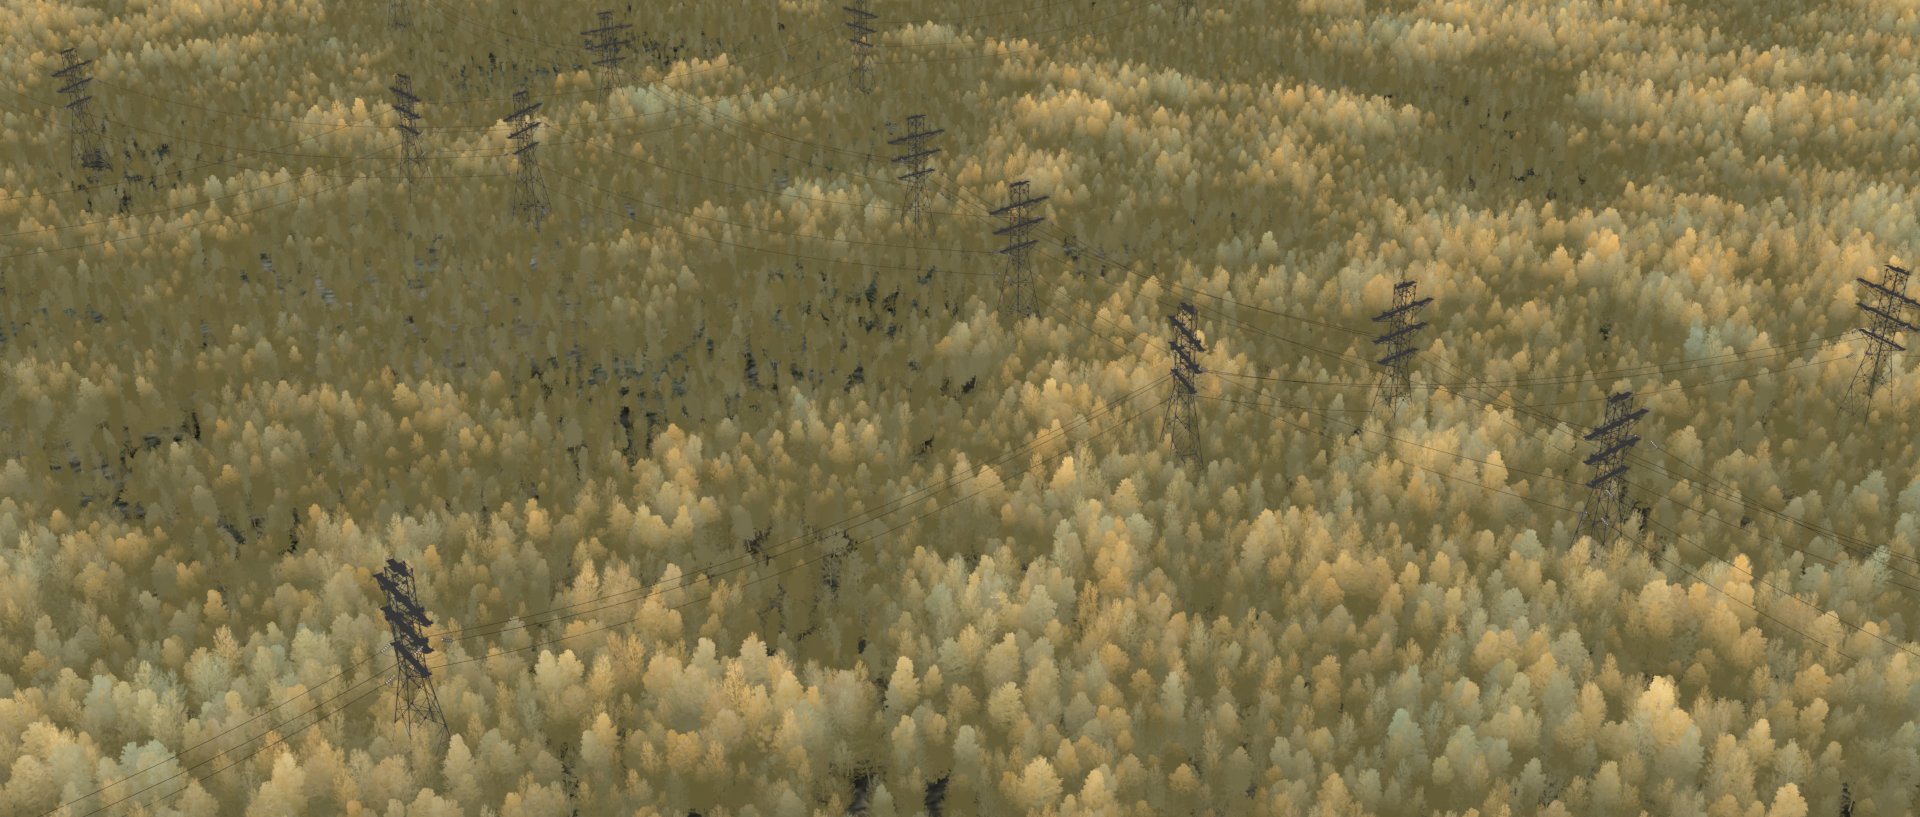

A big plane for the ground supported all hair instanced trees with procedural driven size, and kitbashed buildings and debris. And the scene was done in a couple of hours (render not included). It was a very fun, nice, and quick way to lay out and direct the scene. It was easy to make changes and I was able to jump from a ground camera to a very high and aerial shot with the same scene.

Final Project
Hope you like it, and if you have any questions, I’ll be happy to try to answer them in a comment.
About the Author
 Albin Merle, I am a French VFX supervisor and Blender enthusiast.


Aye bro, you the truth! Keep it up man!
An excellent result !
Your work show what is possible in blender.
Thx a lot for sharing that….
Great job !!!
Very interesting explanation too!
Thanks.
Good job man. What kind of Hardware you used for this?