
Behind the Scenes: Canon AV-1 35mm Film SLR

My name is Jesse, I am an engineering student from Australia. I started using Blender around 6 years ago with the internal engine, and like most people, started with watching a lot of tutorial videos.
I began with a strong interest in architectural design, which is still a focal point of my work, but I’ve also always had an interest in technology from the 1970s-1990s. Recently I have been working on some digital old-school electronics.
I have always liked how the old film SLR cameras felt; they’re bold, heavy, and all metal. They feel nice to hold, and I wanted to try and capture this.”
Inspiration
My first step in creating most projects is to gather inspiration. This is done with various web images detailing certain aspects I’d like to include. Usually I create several sketches and finalise the design, but since this object already exists as a product, I already knew how I wanted it to turn out.
Modelling
Firstly, I used Autodesk Inventor for some of the hard surface modelling. Using reference images, it can be difficult to get it right the first time, so a parametric, or non-destructive software that allows me to go back and make changes was crucial to some of the aspects of the modeling process.
Lighting and Textures
I continued the modelling process in Blender and then began working on the lighting and materials.
Most of my product renders utilise a simple HDRI and a ‘fishbowl’ (bowl shaped background surface).
One of the more challenging parts of the project was creating the textures for the emblems on the camera. This involved creating 3 textures, a colour, an alpha, and a normal map.
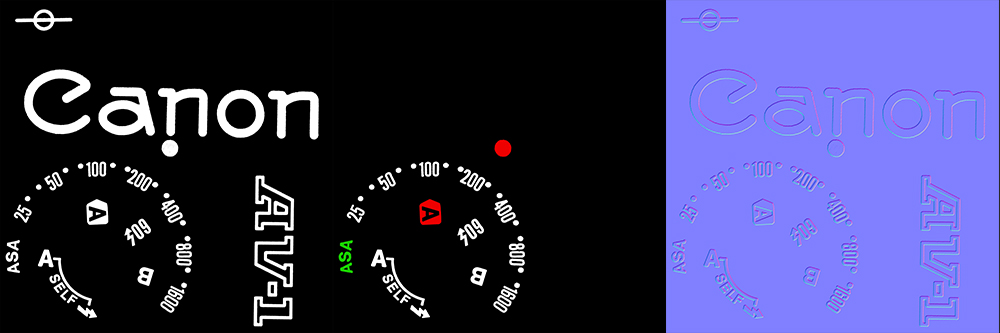
I then used these textures along with a noise-y jpg image to create the camera’s metal surface.
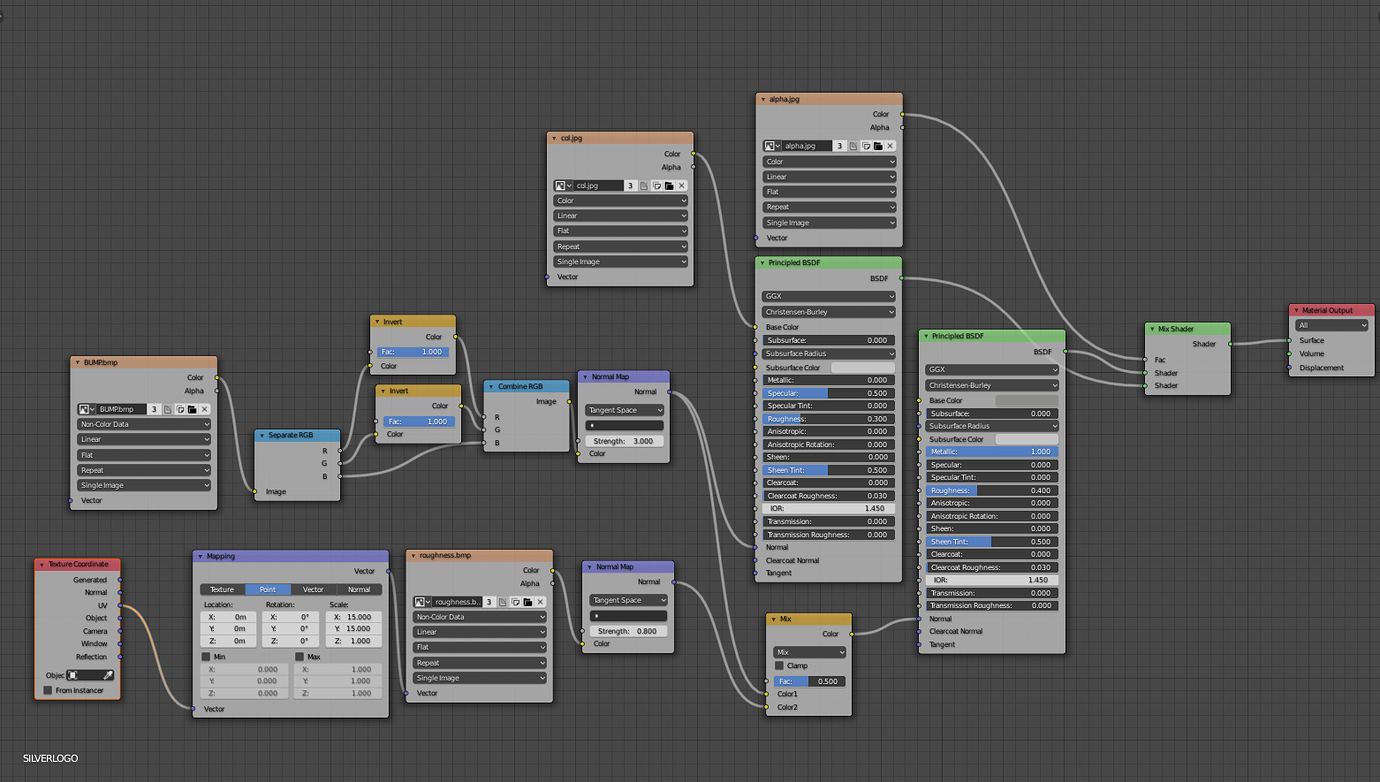
For the main body material, I used the noise-y texture to create the roughness in the metal. This is input to the normal setup (I made sure to select ‘non-color data’), and then it’s just into a principled shader with 100% metallic and a static roughness level.
For the shader with the decals, I chose to use a difference setup rather than laying a plane and projecting it with an alpha, which enabled the normal map to be applied onto both materials.
This used a combination of two materials, one of which is the metal material listed previously, and one is the material with the decals. I then used the alpha image of the decals and plugged that into the factor as the difference between the two materials.
The normal map for the decals was then mixed with the noise-y texture for the metal side of the alpha map, and then used the decal normal alone for the decal side of the map.
Rendering
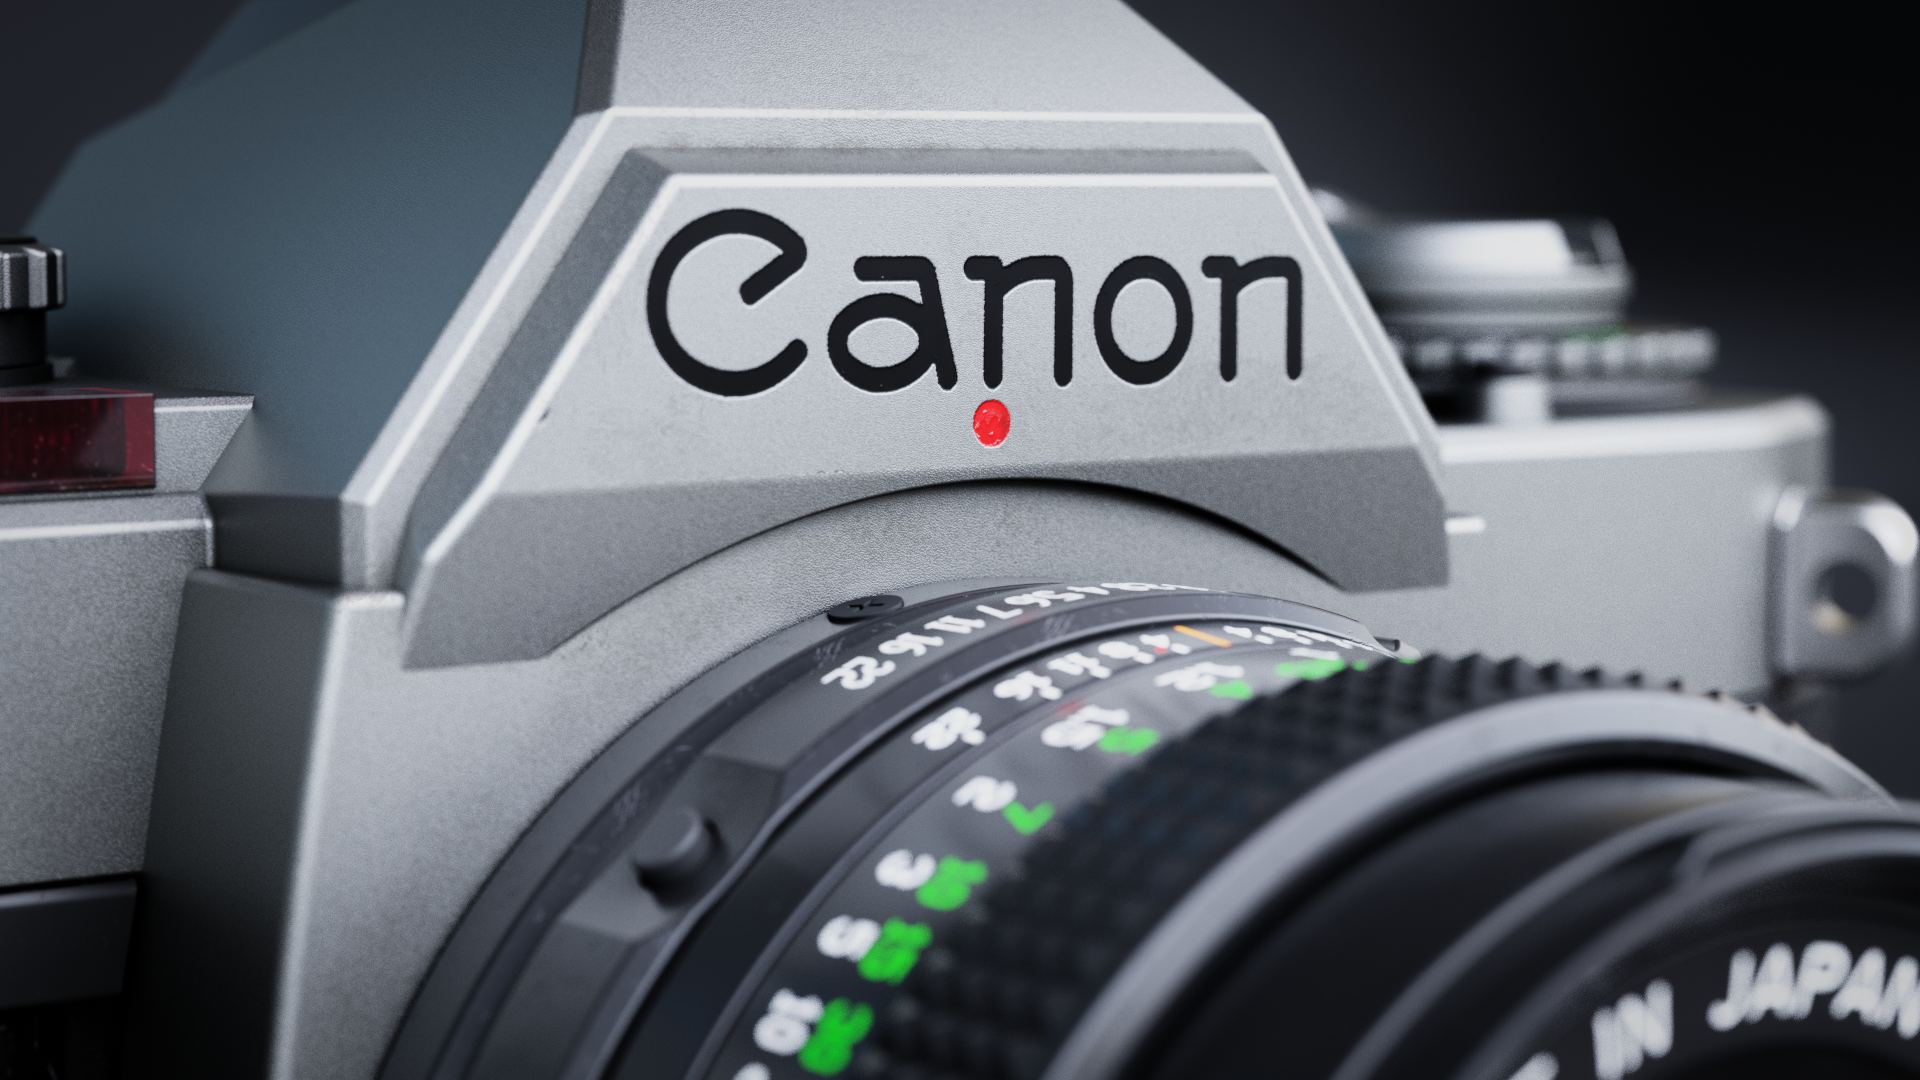
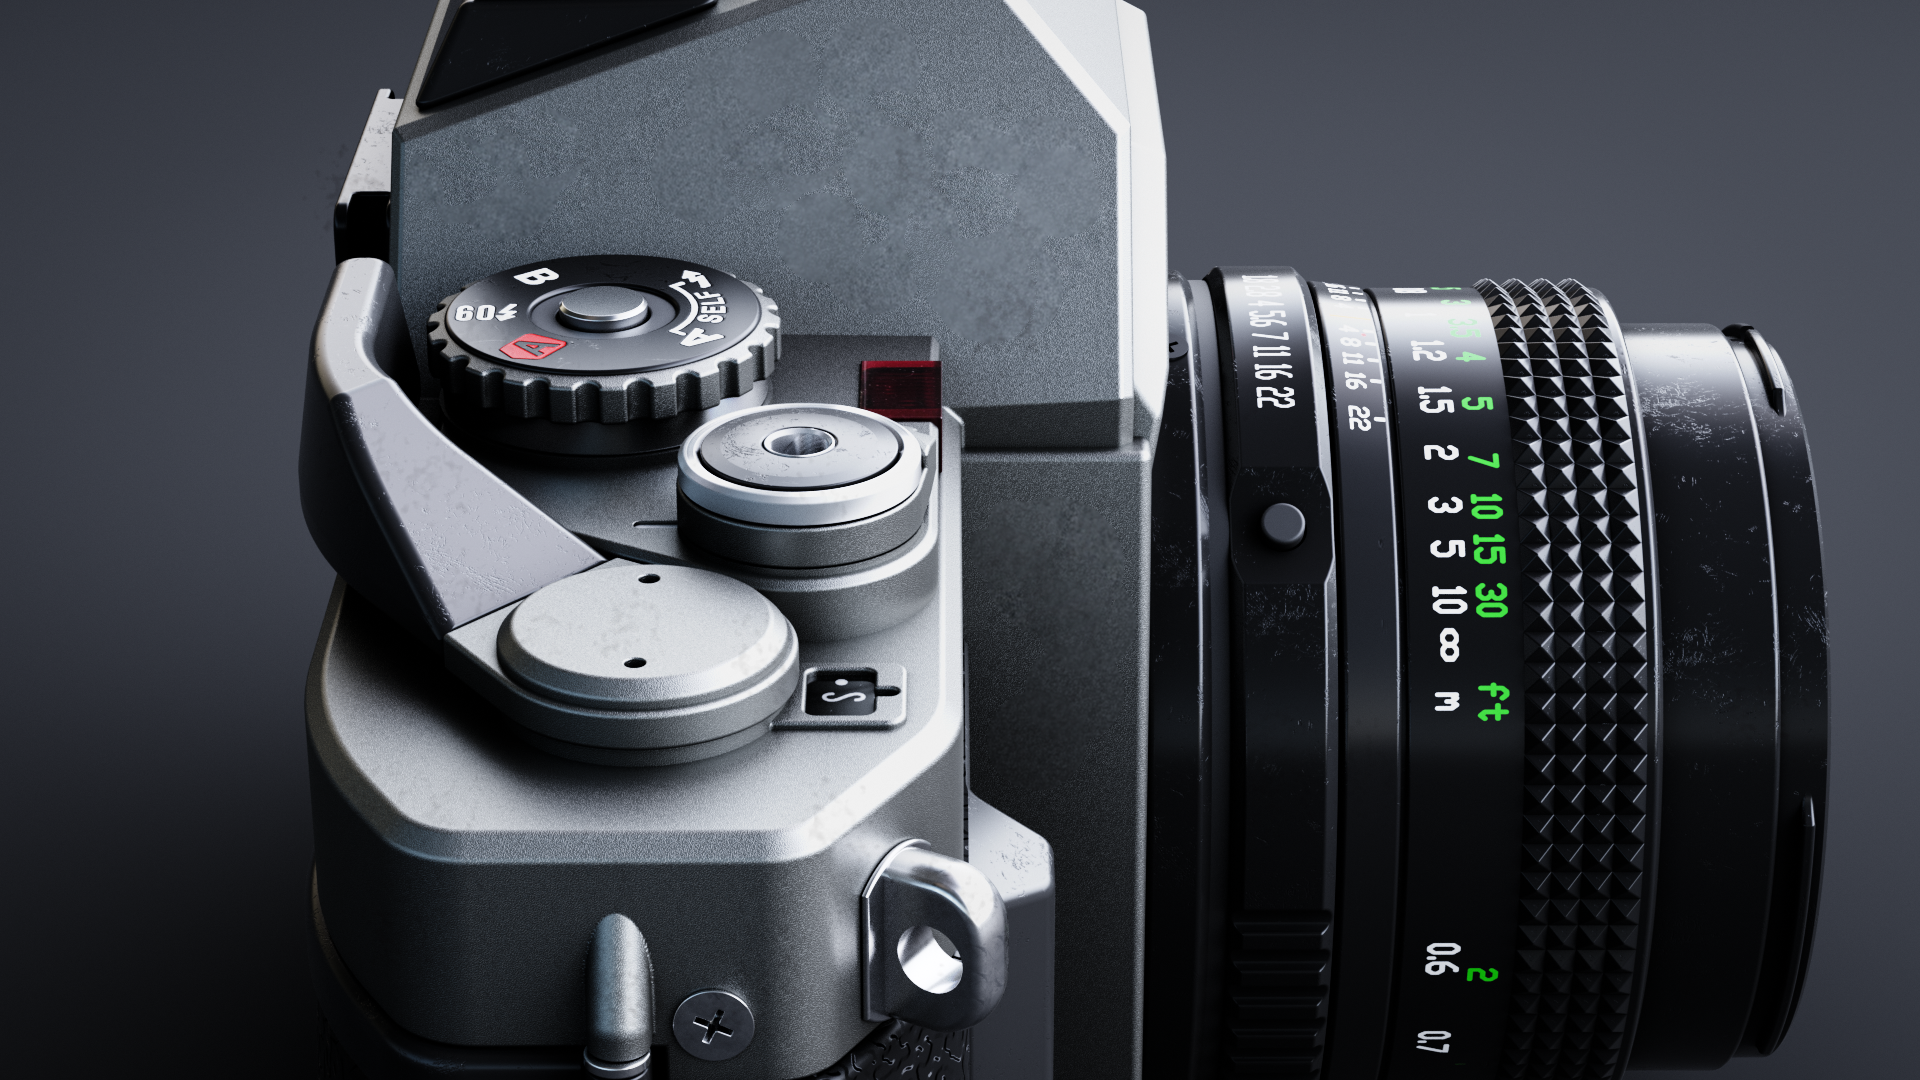
Once all the materials were completed, I created a render.
Rarely is the first render the final, so various tweaks were made to achieve the best looking result; these tweaks included colour changes, normal strengths, and lighting.
Finally the images were exported to Photoshop, where I applied some surface imperfections, including some of the slight damage seen on the sharp corners of the camera.

About the Author
 Jesse Groves, 3D artist specializing in product design.


I can’t believe no one has commented on this. Seriously good work with the modelling and surfacing.