

Background
Hi! My name is Peter Sandbacka, and I make 3D art as a hobby. Being able to make anything in 3D has always interested me but the steep learning curve and the difficult GUI in any 3D modeling program made it hard to get started. It wasn’t until Blender 2.5 beta came along with its new GUI when things started to happen. Struggling to build even a small part of a model was a daily task but I found it to be a lot of fun and from that point on I was hooked.
Inspiration
In 2007 a game called Bioshock was to be released and I had no idea what impact that would have on me. Never before had I been so immersed into a game. The overall game experience felt very very right and it pushed the right buttons for an immersive game: the 1960’s art and music style, game play, sound, and atmospheric effects and how things were broken and leaking everywhere. You were constantly reminded of where you were: in the underwater city of Rapture.
Last year I had to take a long break from 3D modeling but when I came back I wanted to start from something new and that became the Big Sister from Bioshock 2. As I looked for references I found some detailed renderings made by Blur Studios that showed some incredible details of this character.
First Steps
What followed was a lot of trial and error modeling to get the anatomy somewhat right as she has some unusually long legs and a very short torso. But I did not want to copy everything from the references so I made some small changes here and there. Other than that I tried to get as close to the references as possible.
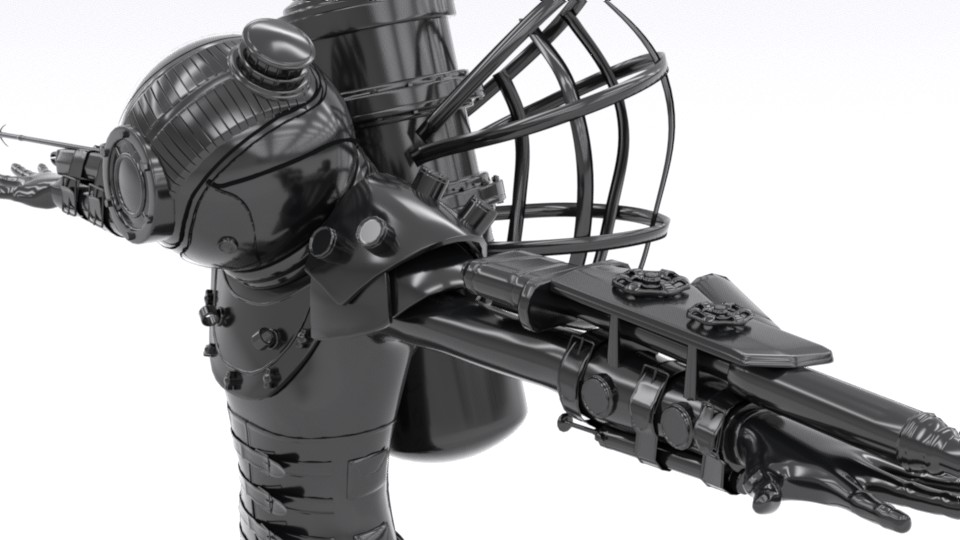
Hard surface modeling is what I have most experience with, so modeling the helmet, armor, weapons, oxygen tank and leg braces came along nicely and the Big Sister-look started to take shape.
Adding Details
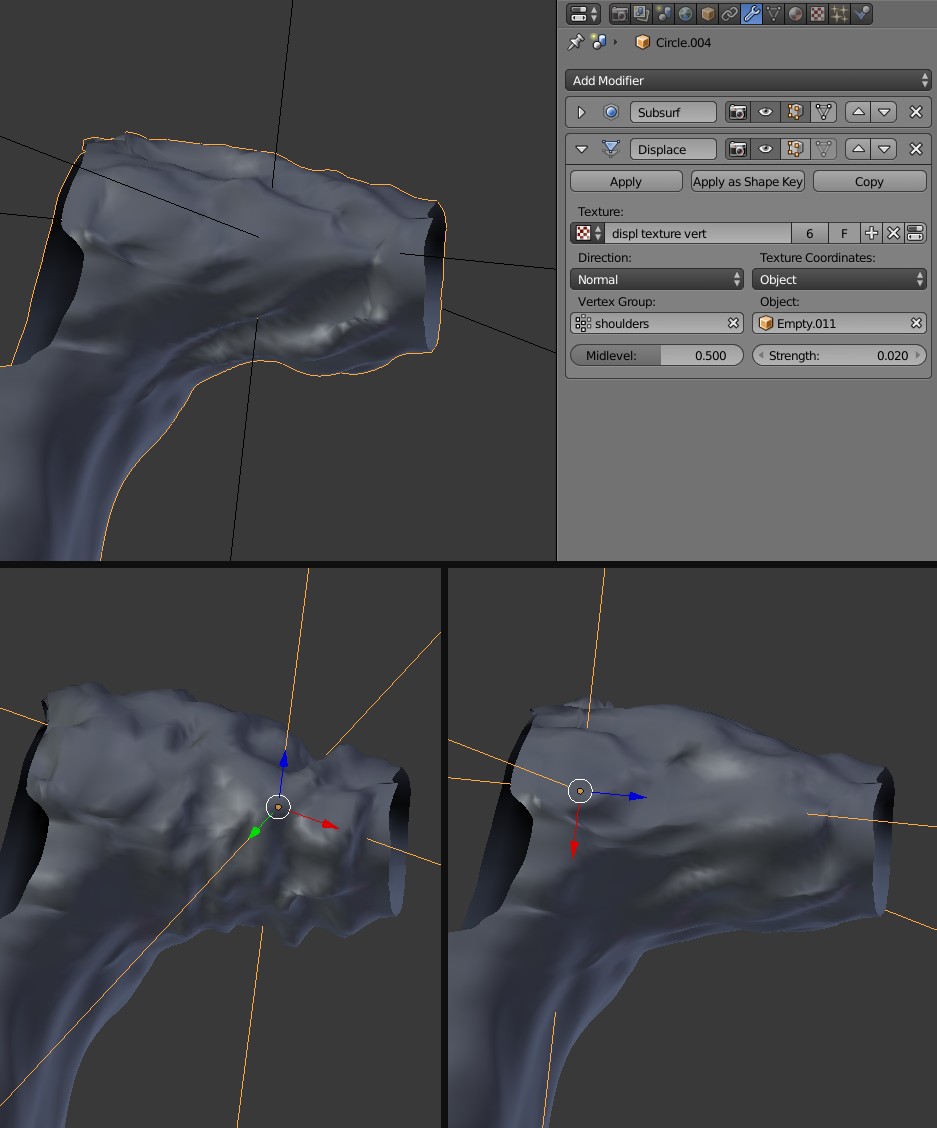
Clothes were simple to add once the metal and leather straps were in place. Parts of the body were duplicated, subdivided and shrink-wrapped. I added some bumps by hand but most were achieved with high subdivision and displacement. I used vertex groups to control the area where I wanted to add bumps and displacement using an empty to control how much. Blender’s wood procedural texture provided a good bumpy base and then I moved the empty around and scaled it in either X, Y or Z directions and rotated pretty much randomly until I got a nice result. This procedure was repeated on several parts of the shirt alone as well as on the rest of the clothing to get bumps that looked natural.
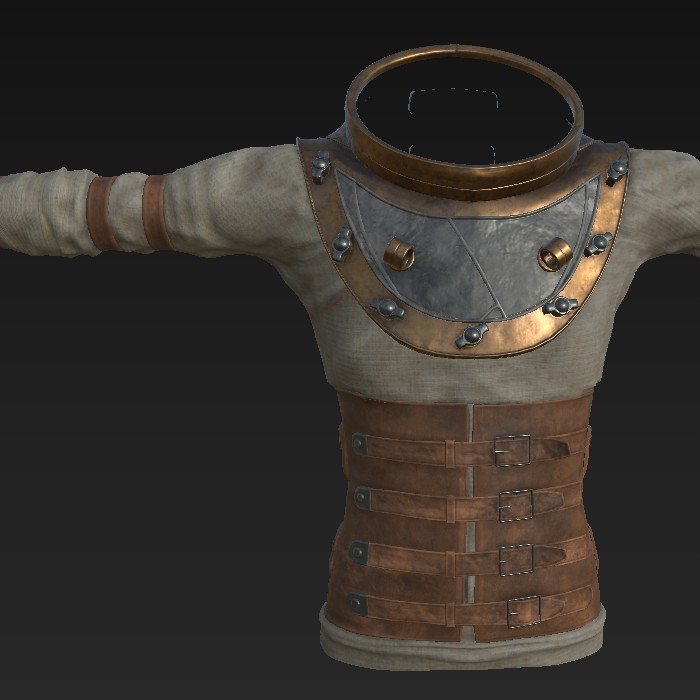
Texturing
Texturing was done in Substance Painter using the PBR Metal Rough shader. When exporting the mesh for texturing, I split it up into five separate meshes to make the texturing phase easier to handle. This way I could work on the pieces one at a time and Substance Painter did not need to have that many textures loaded, making it more responsive. A more responsive system means I can increase texture resolution while painting, as it is easy to scale the textures down afterwards if the details are overkill.
I set Substance Painter to export the four textures I need for LuxCoreRender: Base color(diffuse), roughness, normal and metallic(mix). Metallic is a texture that is used when mixing two materials, metal and glossy, to get a metal surface that is dirty.
I used a similar mix method for the glass on the helmet and the gauges and the tubes to mix in some dirt on the glass. Here I could use the diffuse texture instead of a separate mix texture. Black would be glass and grey would be semi-transparent dirt or vise versa. Which one did not matter as they can be switched easily later with the texture nodes when rendering. I tried different noise generators until I got something I liked.

The bullet impact tool proved useful on the leather straps.

Selecting which faces should get the metal, cloth, or leather material was easy as long as the UV islands did not connect. Some parts of the leather corset had some faces that needed to be set to metal but they were connected to the leather, and that required some manual selecting of faces.
Rendering
LuxCoreRender supports changing the light spread angle for area lights and that was used numerous times to get a more focused light beam to just certain parts of the character that needed more light.

You can change the brightness of the lamps while rendering and this is a feature of LuxCoreRender that I use on every single project. On the Big Sister I also used some of the Arbitrary Output Variables. The AOV’s are saved as image textures and they contain different information about the rendering which you can use later to modify the rendering in post production.
I saved each of the light groups as well as the selected AOV’s to files. Some of these I used later in GIMP to improve the overall image or to adjust colors or brightness of certain parts of the rendering.

In the collection of images below, the top row and bottom left image are some of the individual light groups without brightness scaling. On the bottom row the last three are Direct Diffuse, Direct Shadow Mask, and Material ID Color AOV’s. Material ID was very useful as a selection mask in GIMP when I needed to select the entire oxygen tank to perform some color correction on it. Using the Direct Shadow Mask and some blending modes in GIMP resulted in some nice improvements on certain parts of the character.

Final Thoughts
Modeling the details was time-consuming but also a lot of fun. The weirdness of the design of this character made modeling and texturing very interesting and I will absolutely attempt to model another weird character later on. My interest in the Bioshock universe only grew as the Big Sister got finished. I do hope that the Bioshock franchise and the underwater city of Rapture will return in a new game in the future.
About the Author
Peter Sandbacka, Blender + LuxCoreRender hobbyist
12 Comments
This is very pretty! Good job!
Thanks so much!
Very Nice, Kind of reminds me of BIOSHOCK , something that can exist in the BIOSHOCK world
Thanks!
Wow, great texturing job! And brilliant solution for the displacement for clothes. I'll have to remember that (although as a VFX artist, I won't need need it very much :/ ).
I don't have a Sketchfab to follow you there. Would you happen to have an active Artstation or social network that I could follow your work?
Thanks so much!
Texturing in Substance Painter is an absolute joy. When it was early beta on Steam I took a chance and jumped on it and I never regretted that. It is a brilliant piece of texturing software.
I don't have Artstation but I do have my wordpress blog: https://piitas.blog
Oh yah, LuxCore coming in clutch!! Awesome work
Thank you!
One detail :) It's called "Big Sister", yet its kinda thin and has no chest.... :) Perhaps Little Big Sister
Yep, but I really love the different design of this character. Bioshock 2 is great and I hope there will be a Bioshock 3 some day
I got triggered by this post and check whats going on with that game. There could be a new Bioshock Infinite coming. Its said perhaps next year :) Dang did i love that game
i'm practicing modeling and your model helped me with some details that i can't find anywhere, tyvm